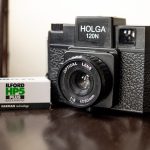
You know the one. It looks like a toy, feels like a toy, and it’s made of plastic. People probably look at you like you’ve wandered out of a school art project when you’re shooting with it.
But let’s get real. For me, this thing is a proper weapon in the arsenal. It’s a completely different headspace compared to shooting my other medium format cameras. And honestly? It’s addictive.
Here is my take on the pitfalls, the perils, and the magnificent promise of the Holga 120N.
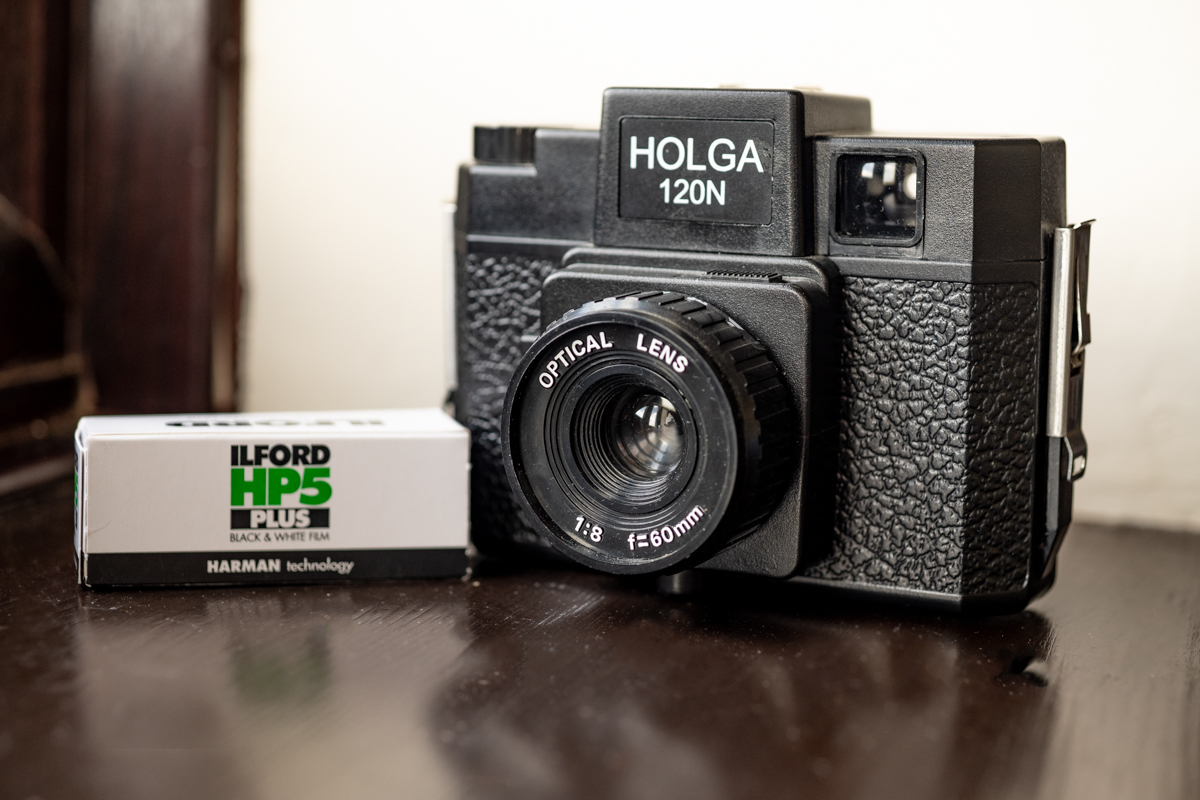
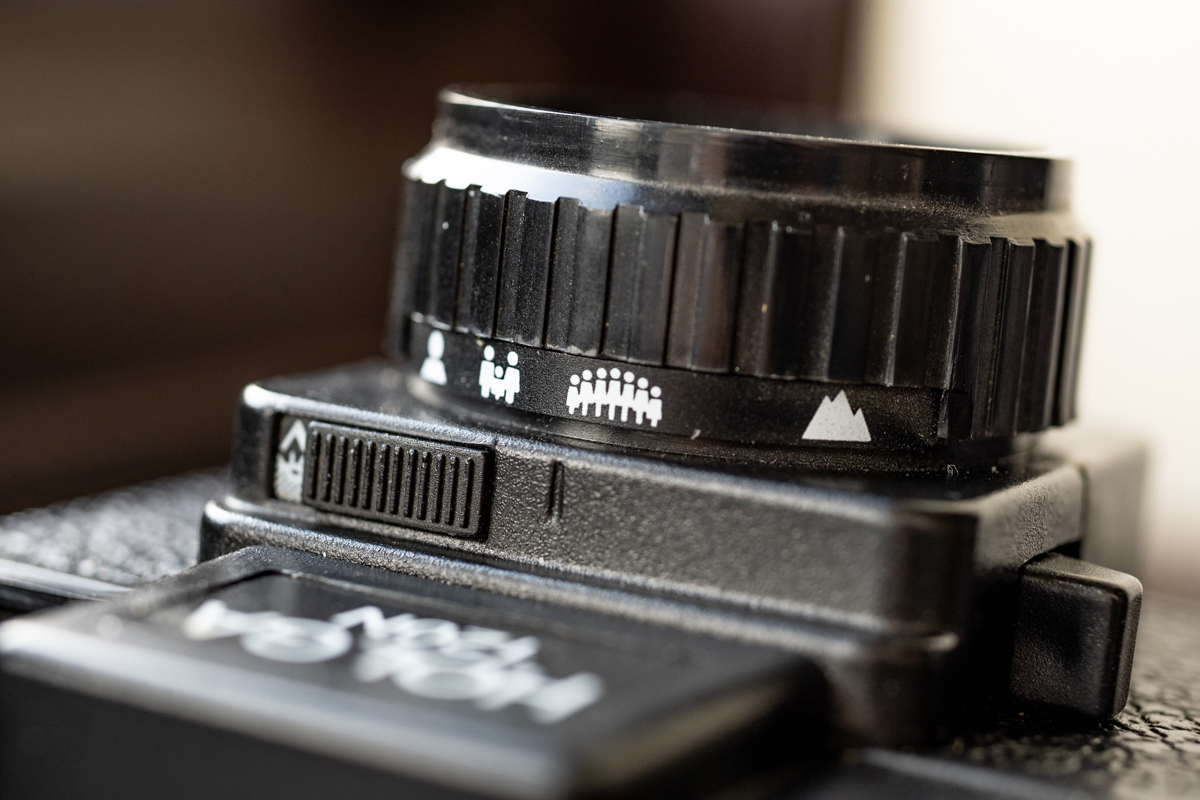
For the uninitiated, the Holga isn’t a precision instrument. It was introduced in the early 80s in China as a cheap, consumer camera. The design is simple: fixed shutter speed (about 1/100s if you’re lucky), fixed aperture (kind of f/8 or f/11), and a plastic zone-focus lens. You get two options for the image size: a square 6×6 frame (12 shots per roll) or a panoramic-ish 6×4.5 (16 shots). That’s it.
It’s rudimentary. It’s crude. And that’s exactly why it works.
The Pitfalls & Perils (Or: Why It’s Properly Annoying)
Let’s be honest, shooting a Holga can be a right pain in the neck.
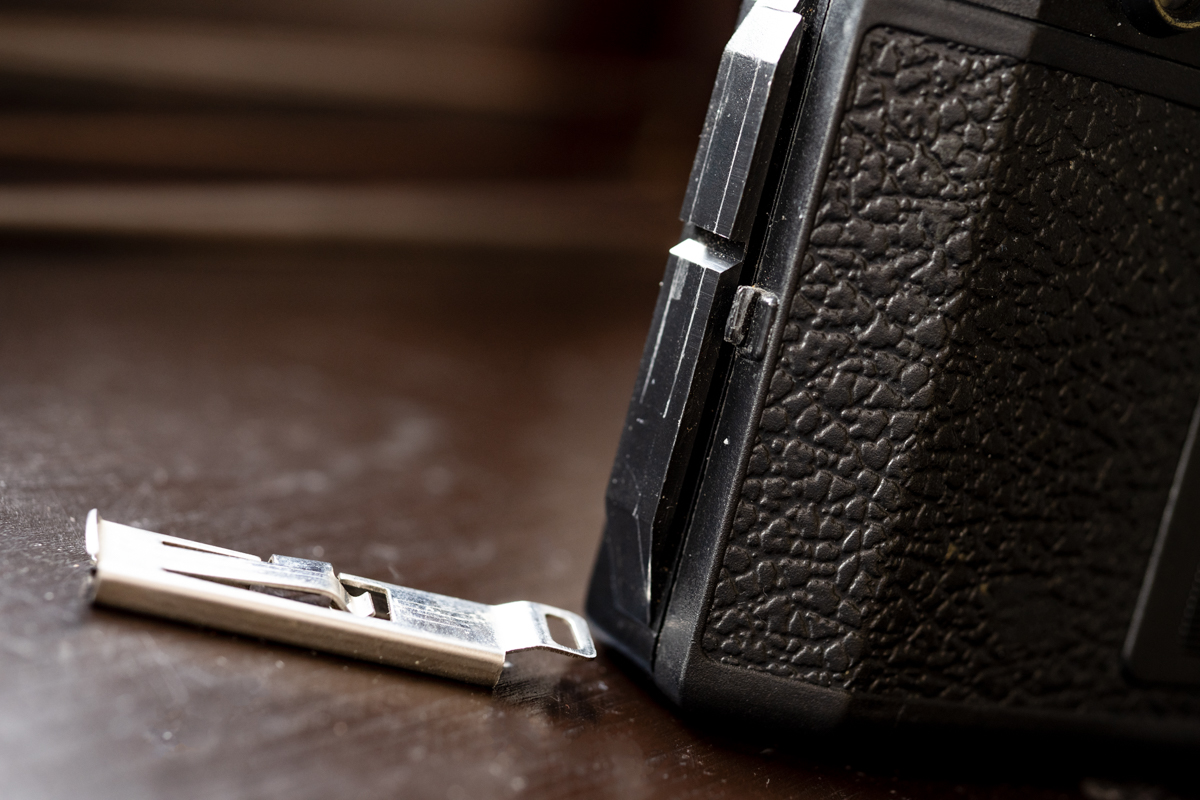
First, The Build. We’re talking cheap plastic. The back has been known to pop open mid-roll. Always use electric tape (gaffer tape is better) to seal the seams. I once lost an entire roll of FP4 because I was too lazy to tape it up. Never again.
Second, The Unknown. Every Holga is slightly different. They all have their own specific quirks. Light leaks are almost guaranteed at some point in time. Vignetting (that dark shading around the corners) is intense. Sometimes the shutter doesn’t fire properly. Your film winding might skip.
Third, The “Quality.” Let’s not mince words: it’s soft. The edges of your frame are going to be a blurry mess. There is no such thing as critically sharp focus on a Holga.
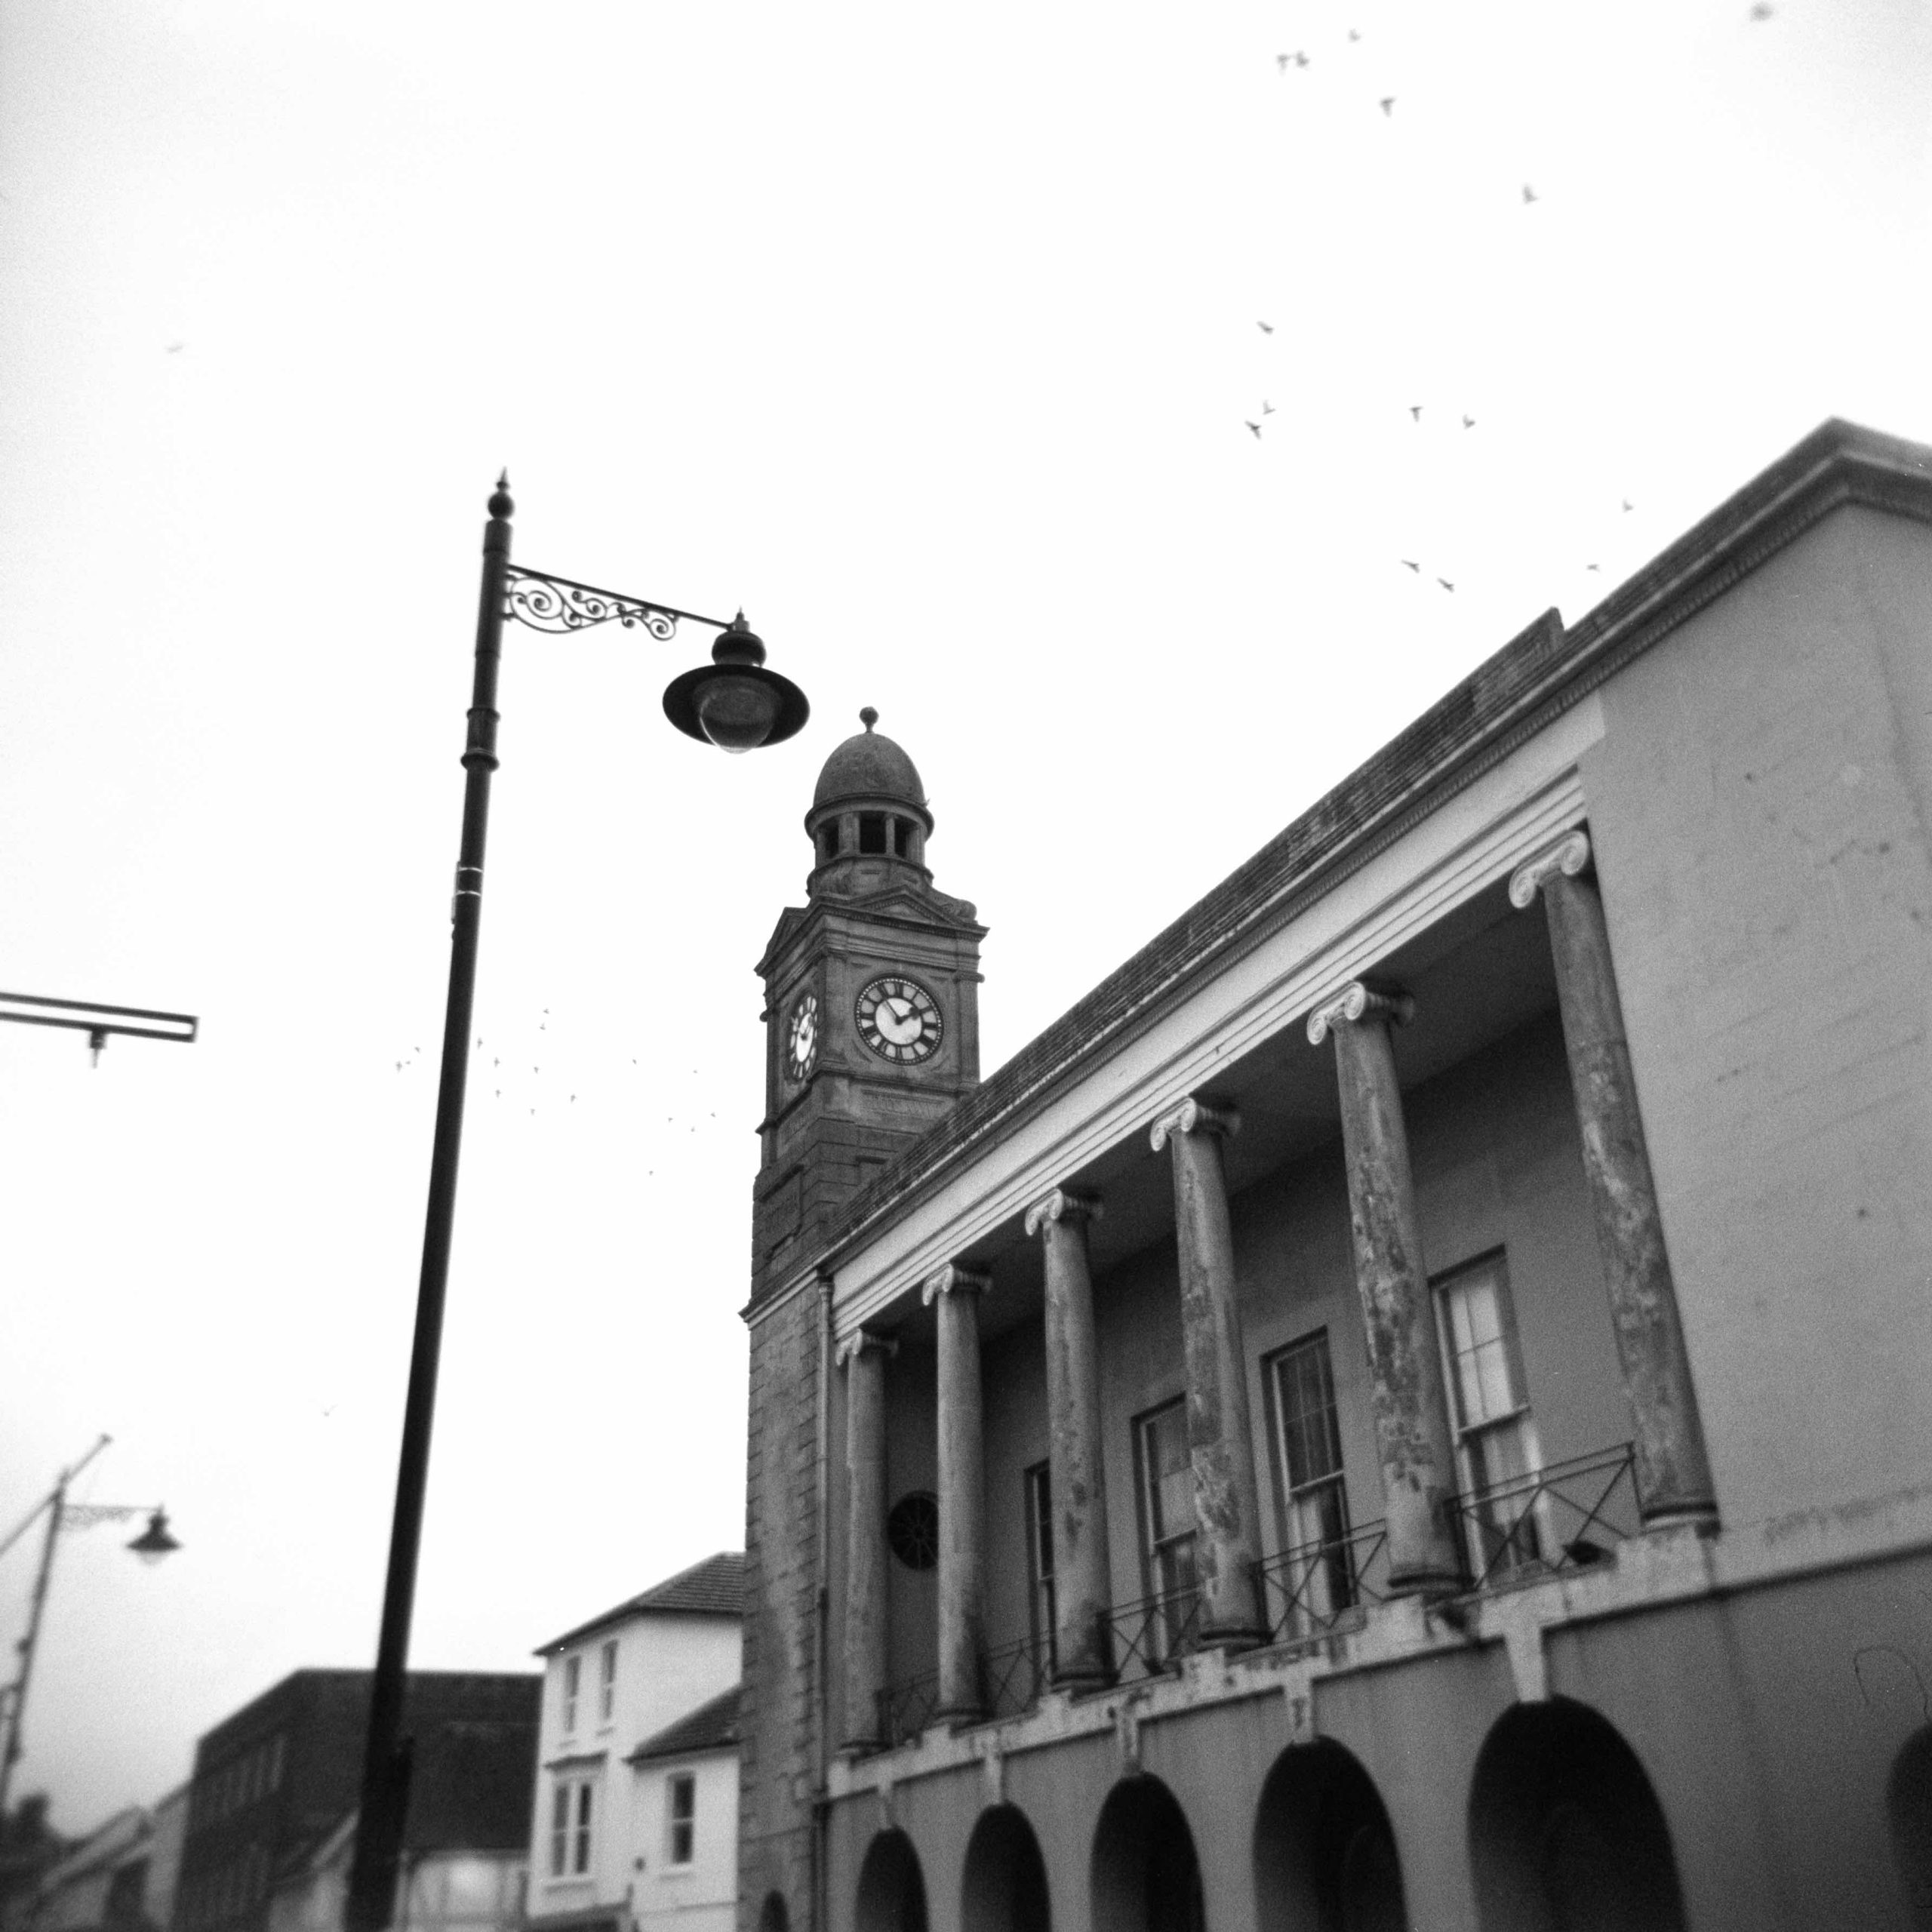
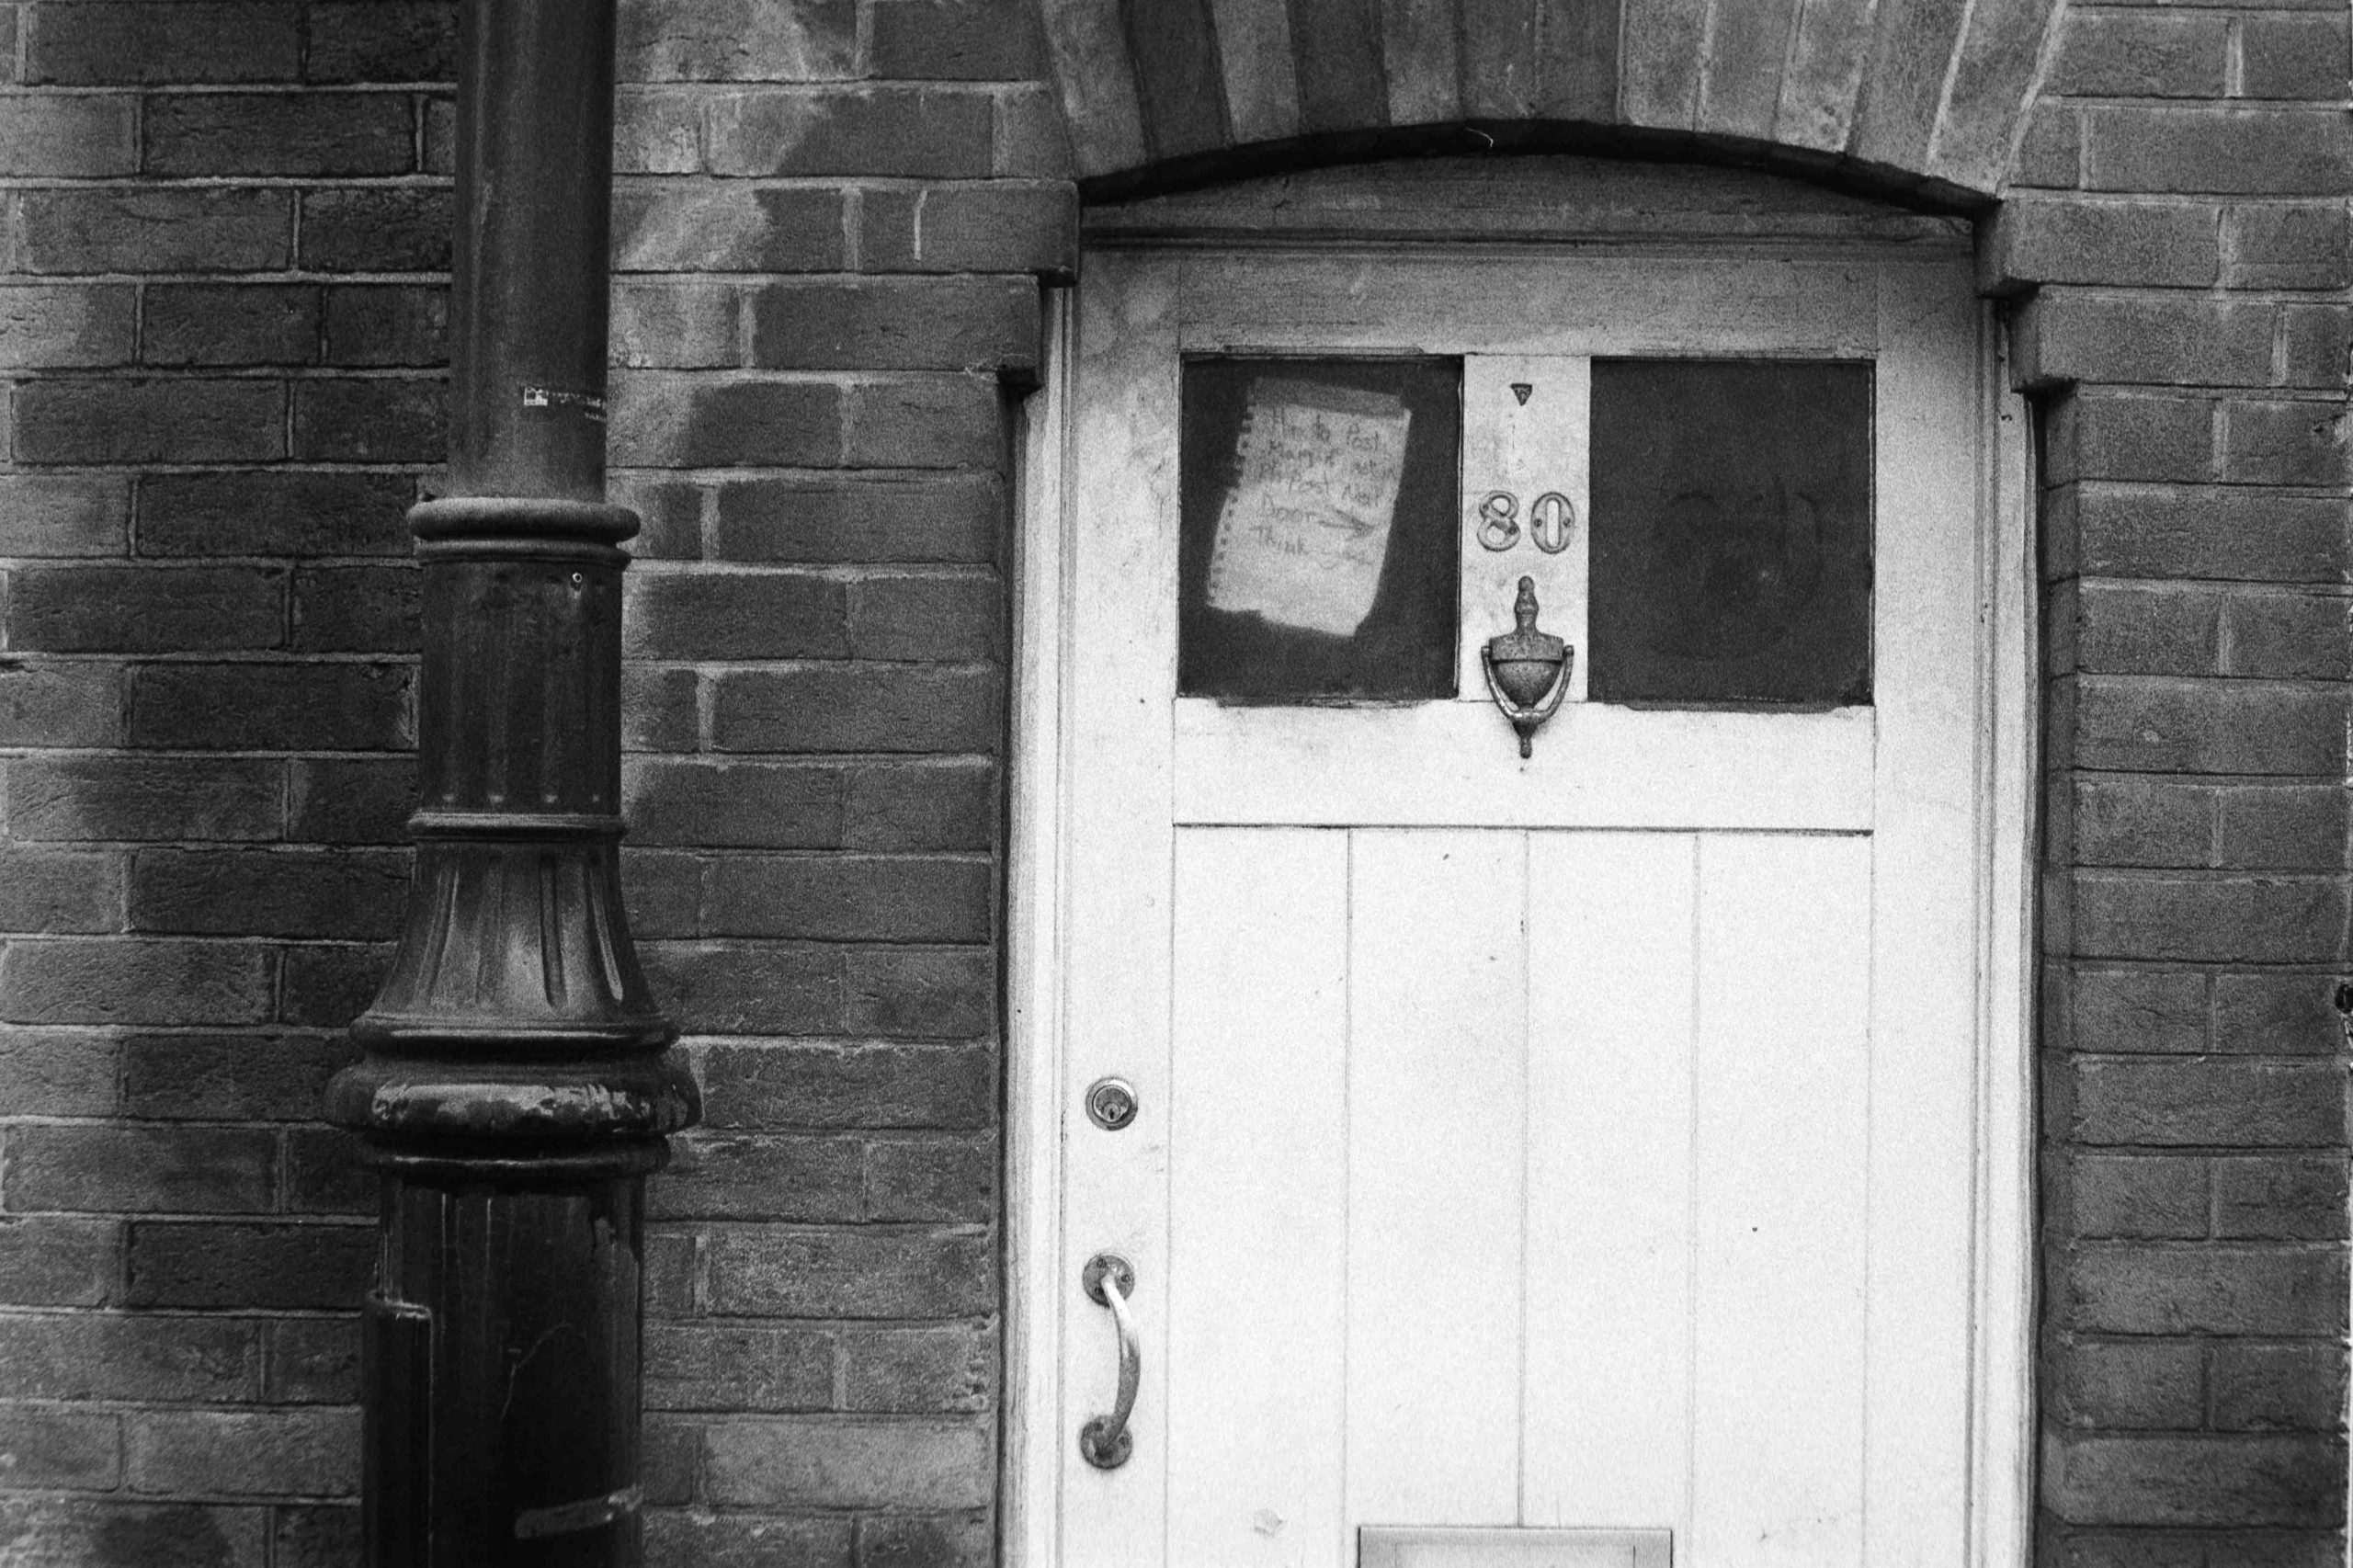
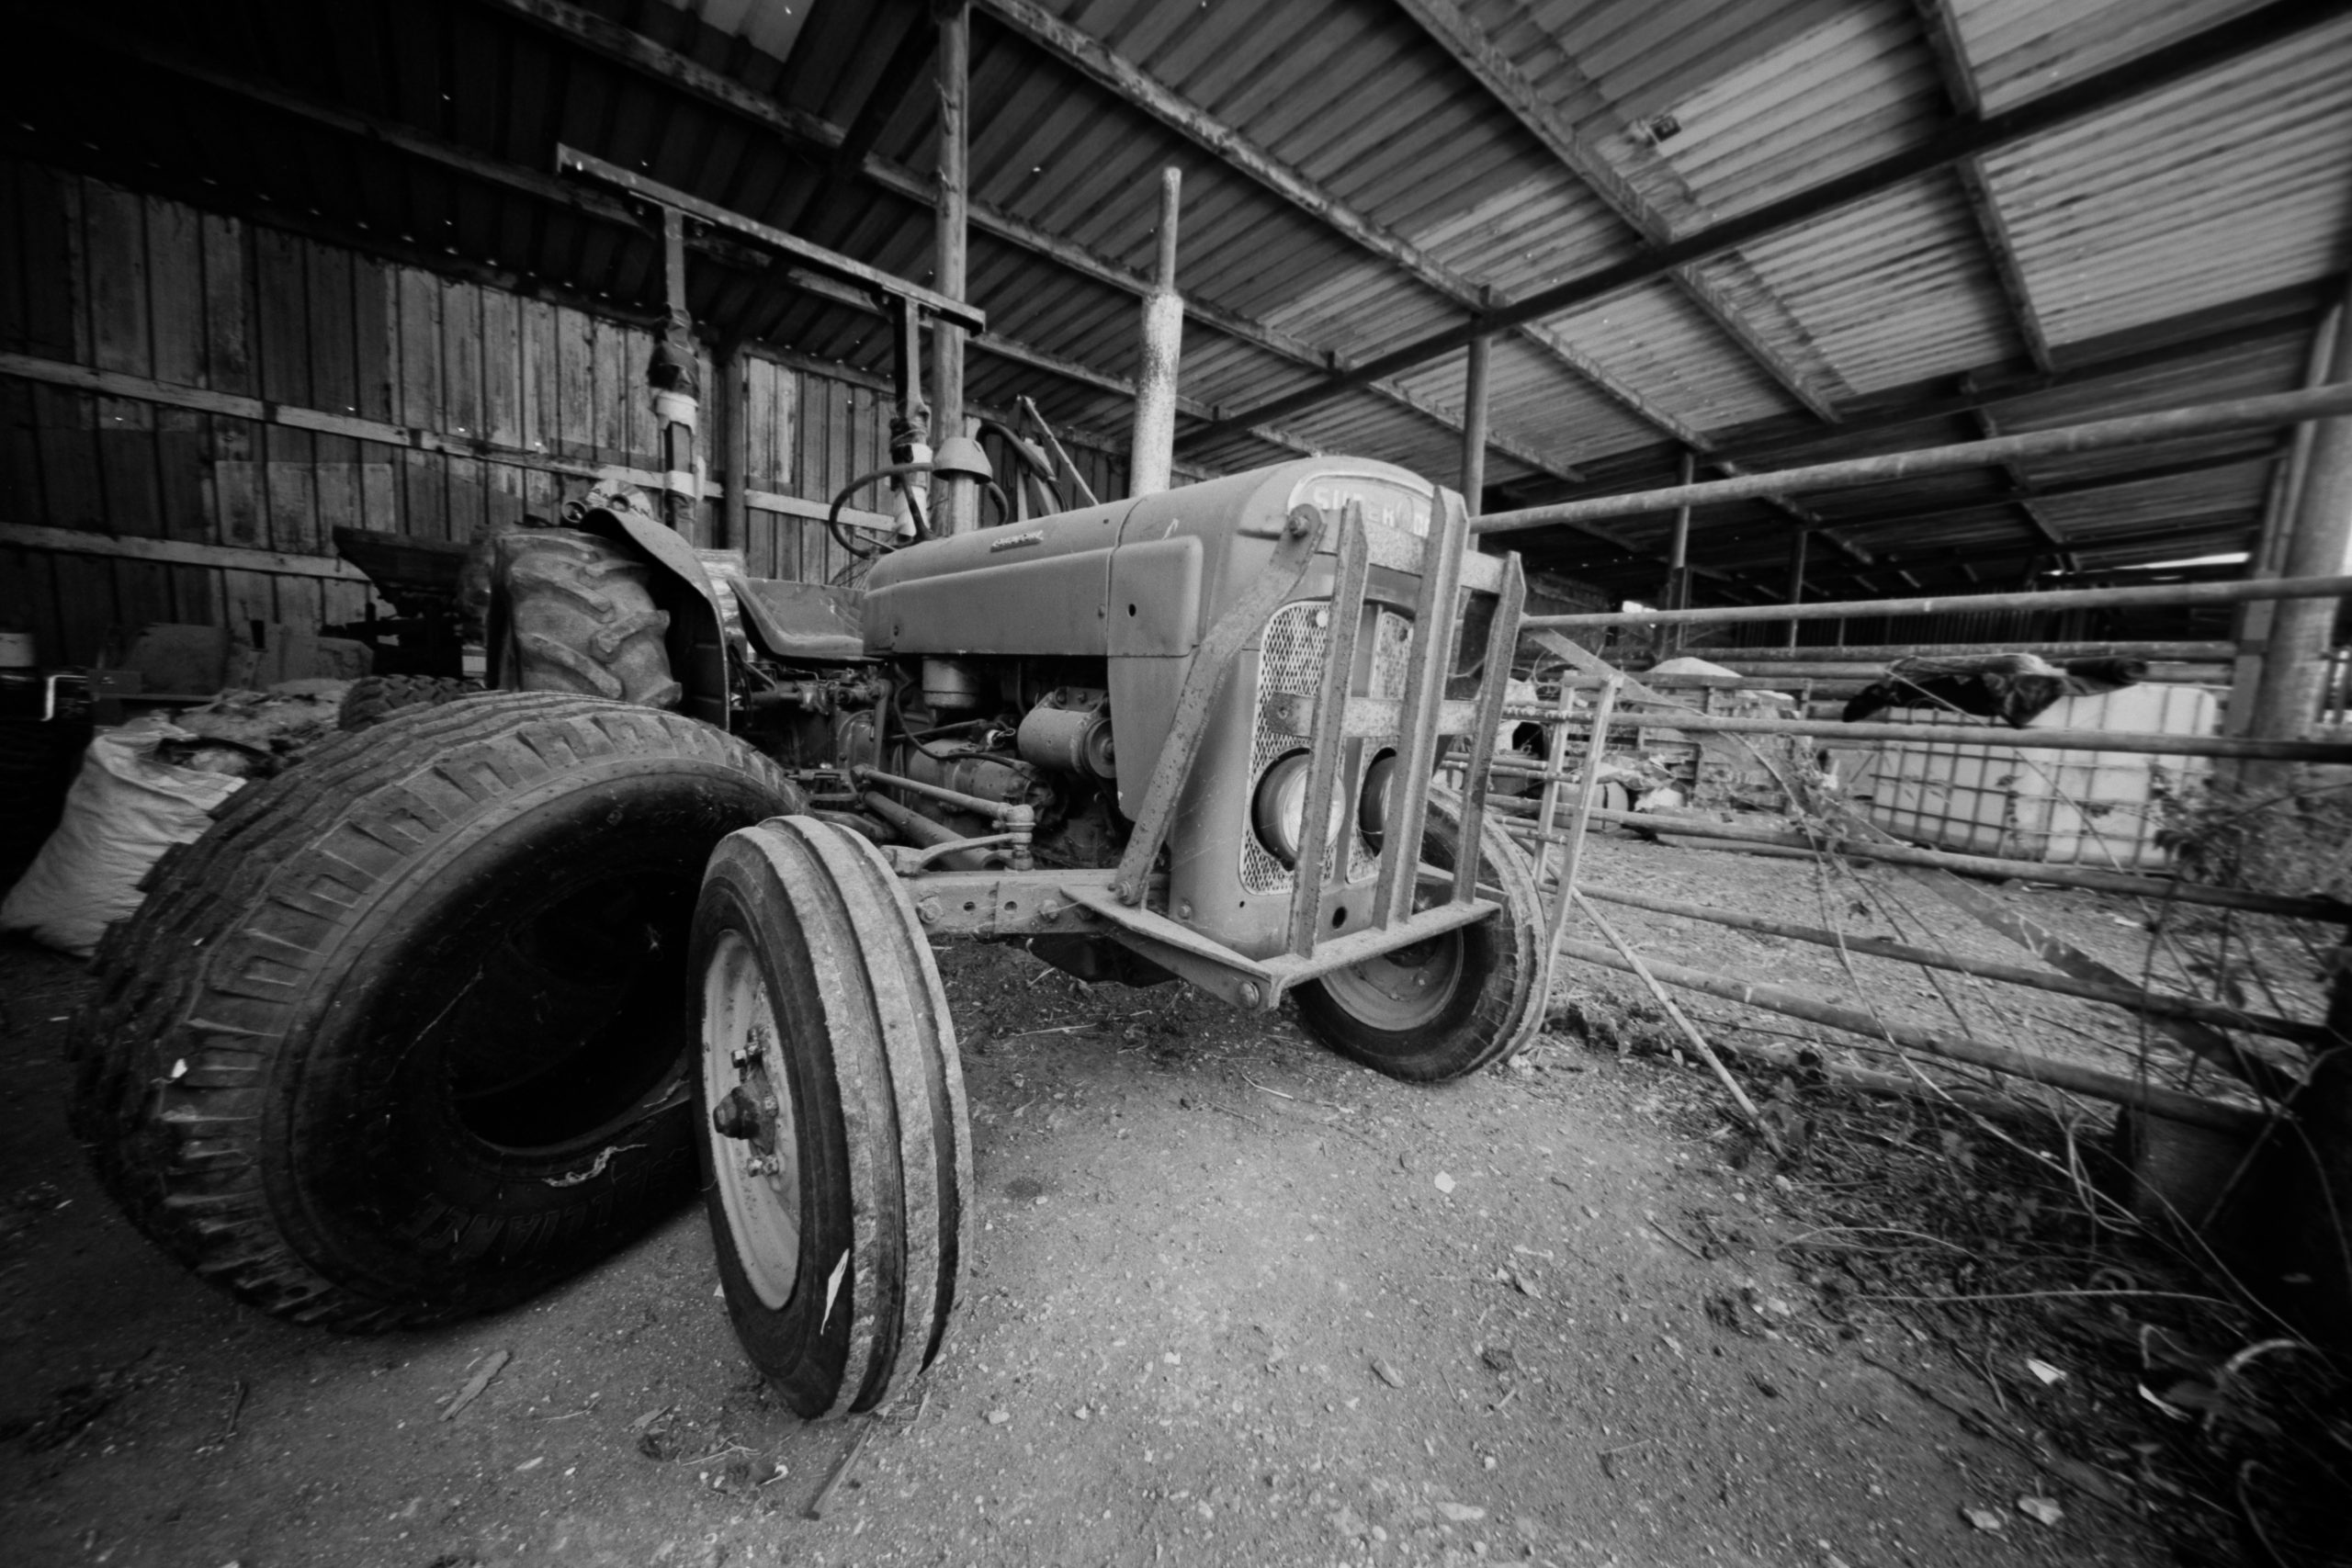
Kodak TMAX 400 in 510 PYRO – Dull overcast day. I can already hear you say “Why on earth would anyone want that crap on a negative”. I’ve often wondered the same about famous painters and a blank canvas! On this day I had half hour to fill so I went for a walk with the Holga around town.
The Promise (Or: Why It’s Brilliant)
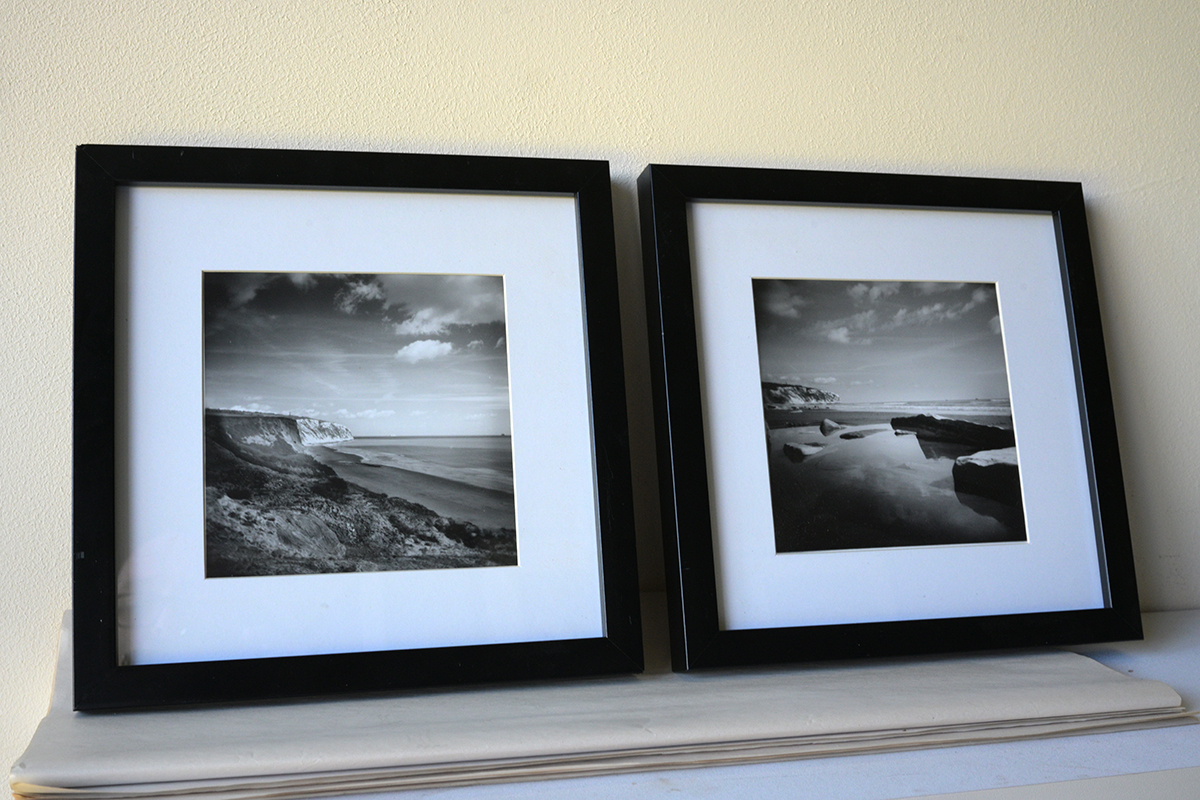
This is where the magic happens. Despite all its ridiculous flaws, the Holga delivers something nothing else can: Pure, unfiltered character.
That softness? It’s dreamy. The vignettes? They frame your subject perfectly. The light leaks? Sometimes they ruin a shot, but sometimes they create this unbelievable, ethereal flare that you couldn’t replicate in a darkroom or a computer if you tried.
The real promise of the Holga is Freedom. There is zero faff. No aperture to check. No shutter speed to set. No light meter to second-guess. You load the film, tape it up, aim, and shoot. What you have is what you get.
It forces you to focus entirely on composition the mood and hunt for appropriately lit scenes. It’s liberating. It reminds you that the camera isn’t the artist—you are.
Why I Like Using It
I’m the first to admit I don’t use my Holga often. Usually, I want the edge-to-edge sharpness that my medium format or high-end 35mm gear provides. But the Holga is in a world of its own. It’s a palette cleanser. It’s what I reach for when I want to get back to the basics and just play with light. Or, just fancy something different from my photography.
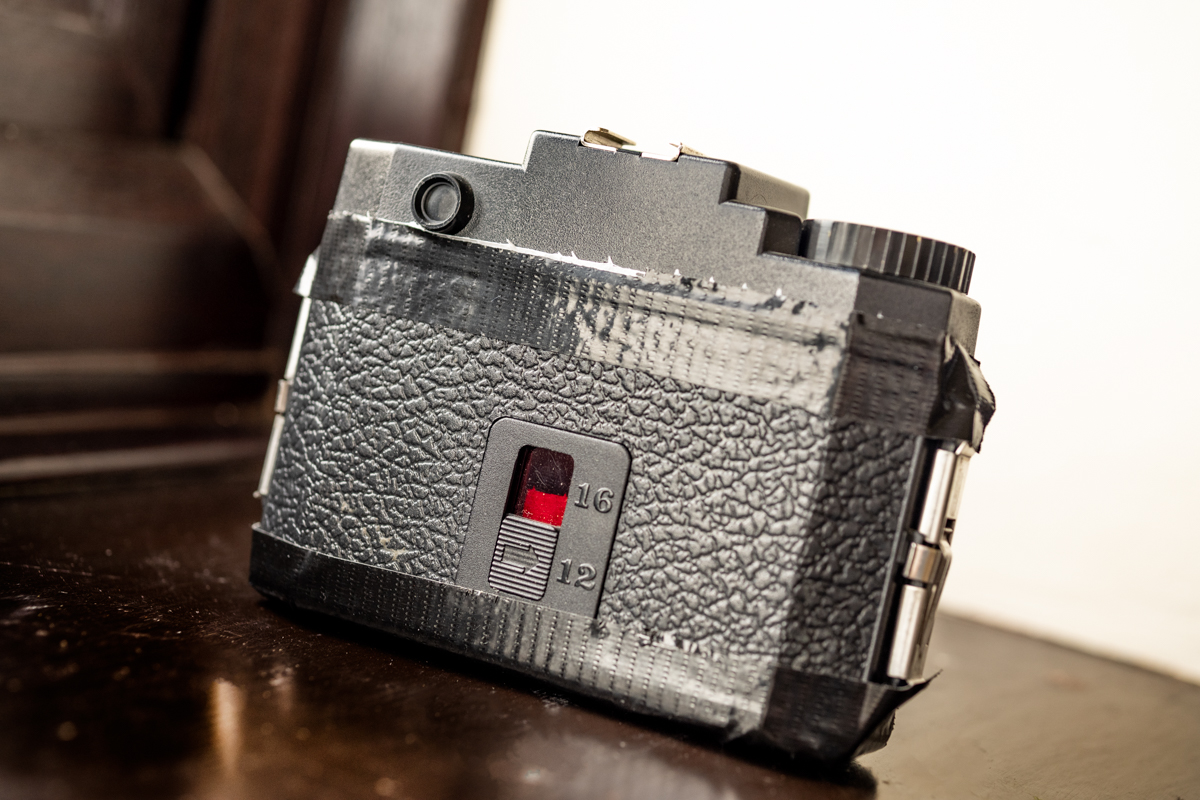
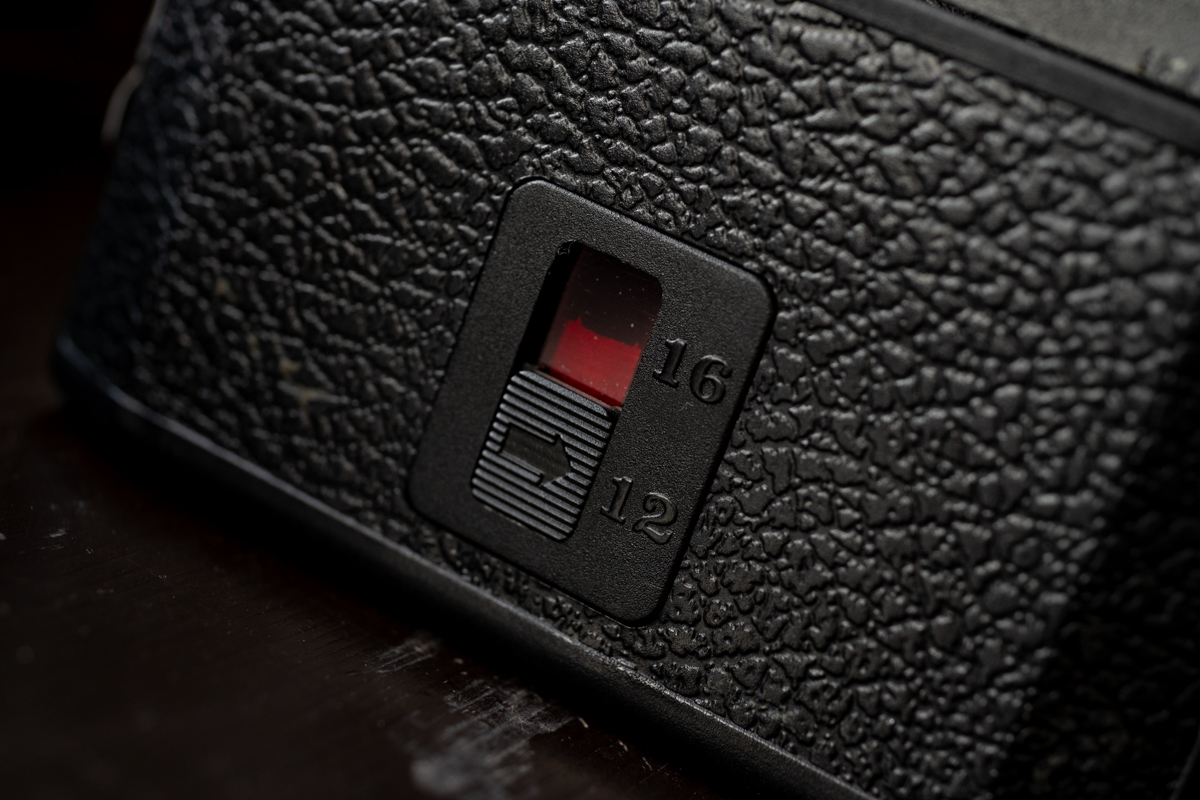
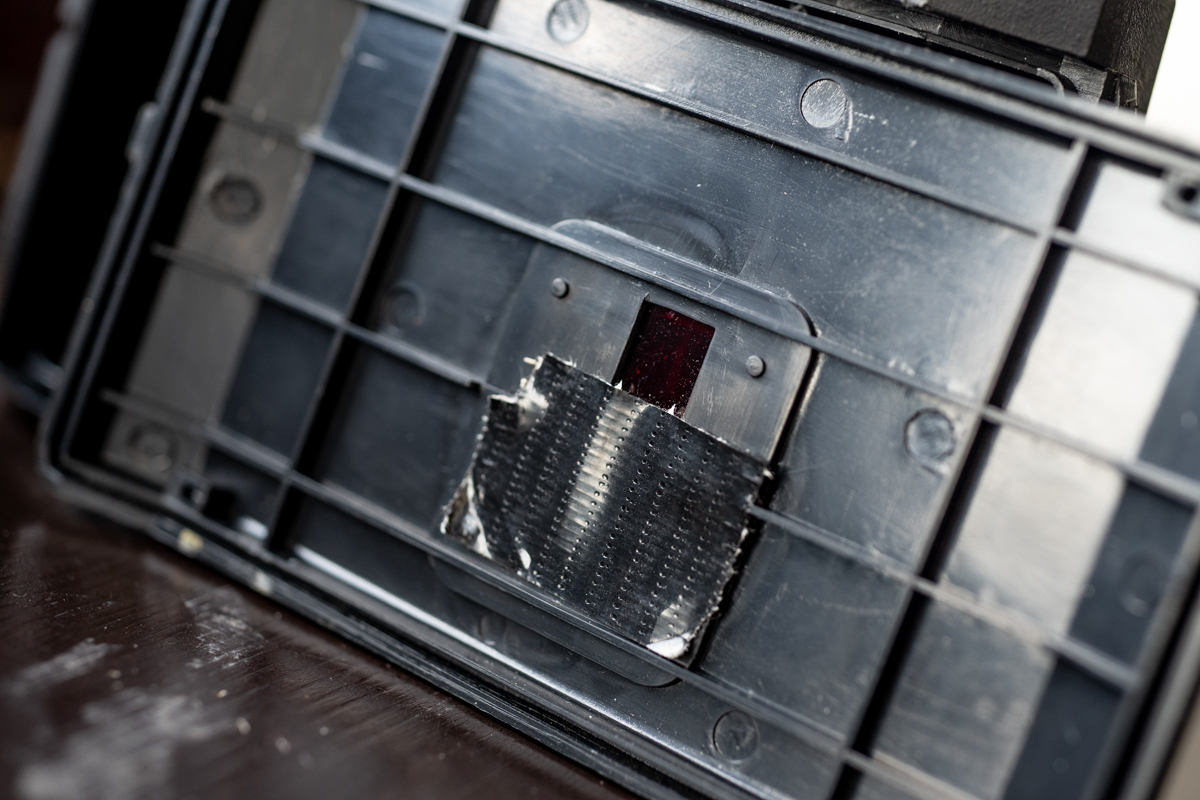
I said earlier “panoramic-ish 6×4.5 (16 shots)”. On the back of the camera is the classic red window for choosing your format and advancing your frame numbers. I only ever use mine for 6×6 because for me personally it is the best format compositional and framing wise. So, I have mine set to 12 shots. And just to double make sure I get no leaks I even tape the rear of the window! Oh the joys!
But you know what’s mad? I could easily shoot only the Holga for a whole year and I’d have enough truly wonderful, unique photographs by the end of it to fill a stunning book. That plastic lens somehow makes everyday life look… well, different!
What film to use?
This is what catches most people out. They get confused because you’ve only got two apertures (Sunny/Cloudy) and one shutter speed (around 1/100th).
I don’t overcomplicate it. I just see what’s going on up in the sky on the day I plan to shoot and go with the Sunny 16 rule. Here is the SFLAB cheat sheet I adhere to:
Bright Sunny: 100 Speed Film (f/11 – 1/100th)
Dull Overcast: 400 Speed Film (f/8 – 1/100th)
That’s it. That easy. In both cases, there’s a chance of the film overexposing, but that’s fine. I won’t even compensate in development. I’ll just embrace what I get—warts and all.
A waste of film?
100%. It’s a total waste of plastic and silver… if you’re a film snob. But I’m not here for that. I’m here for the buzz of the unexpected and the love of taking pictures.
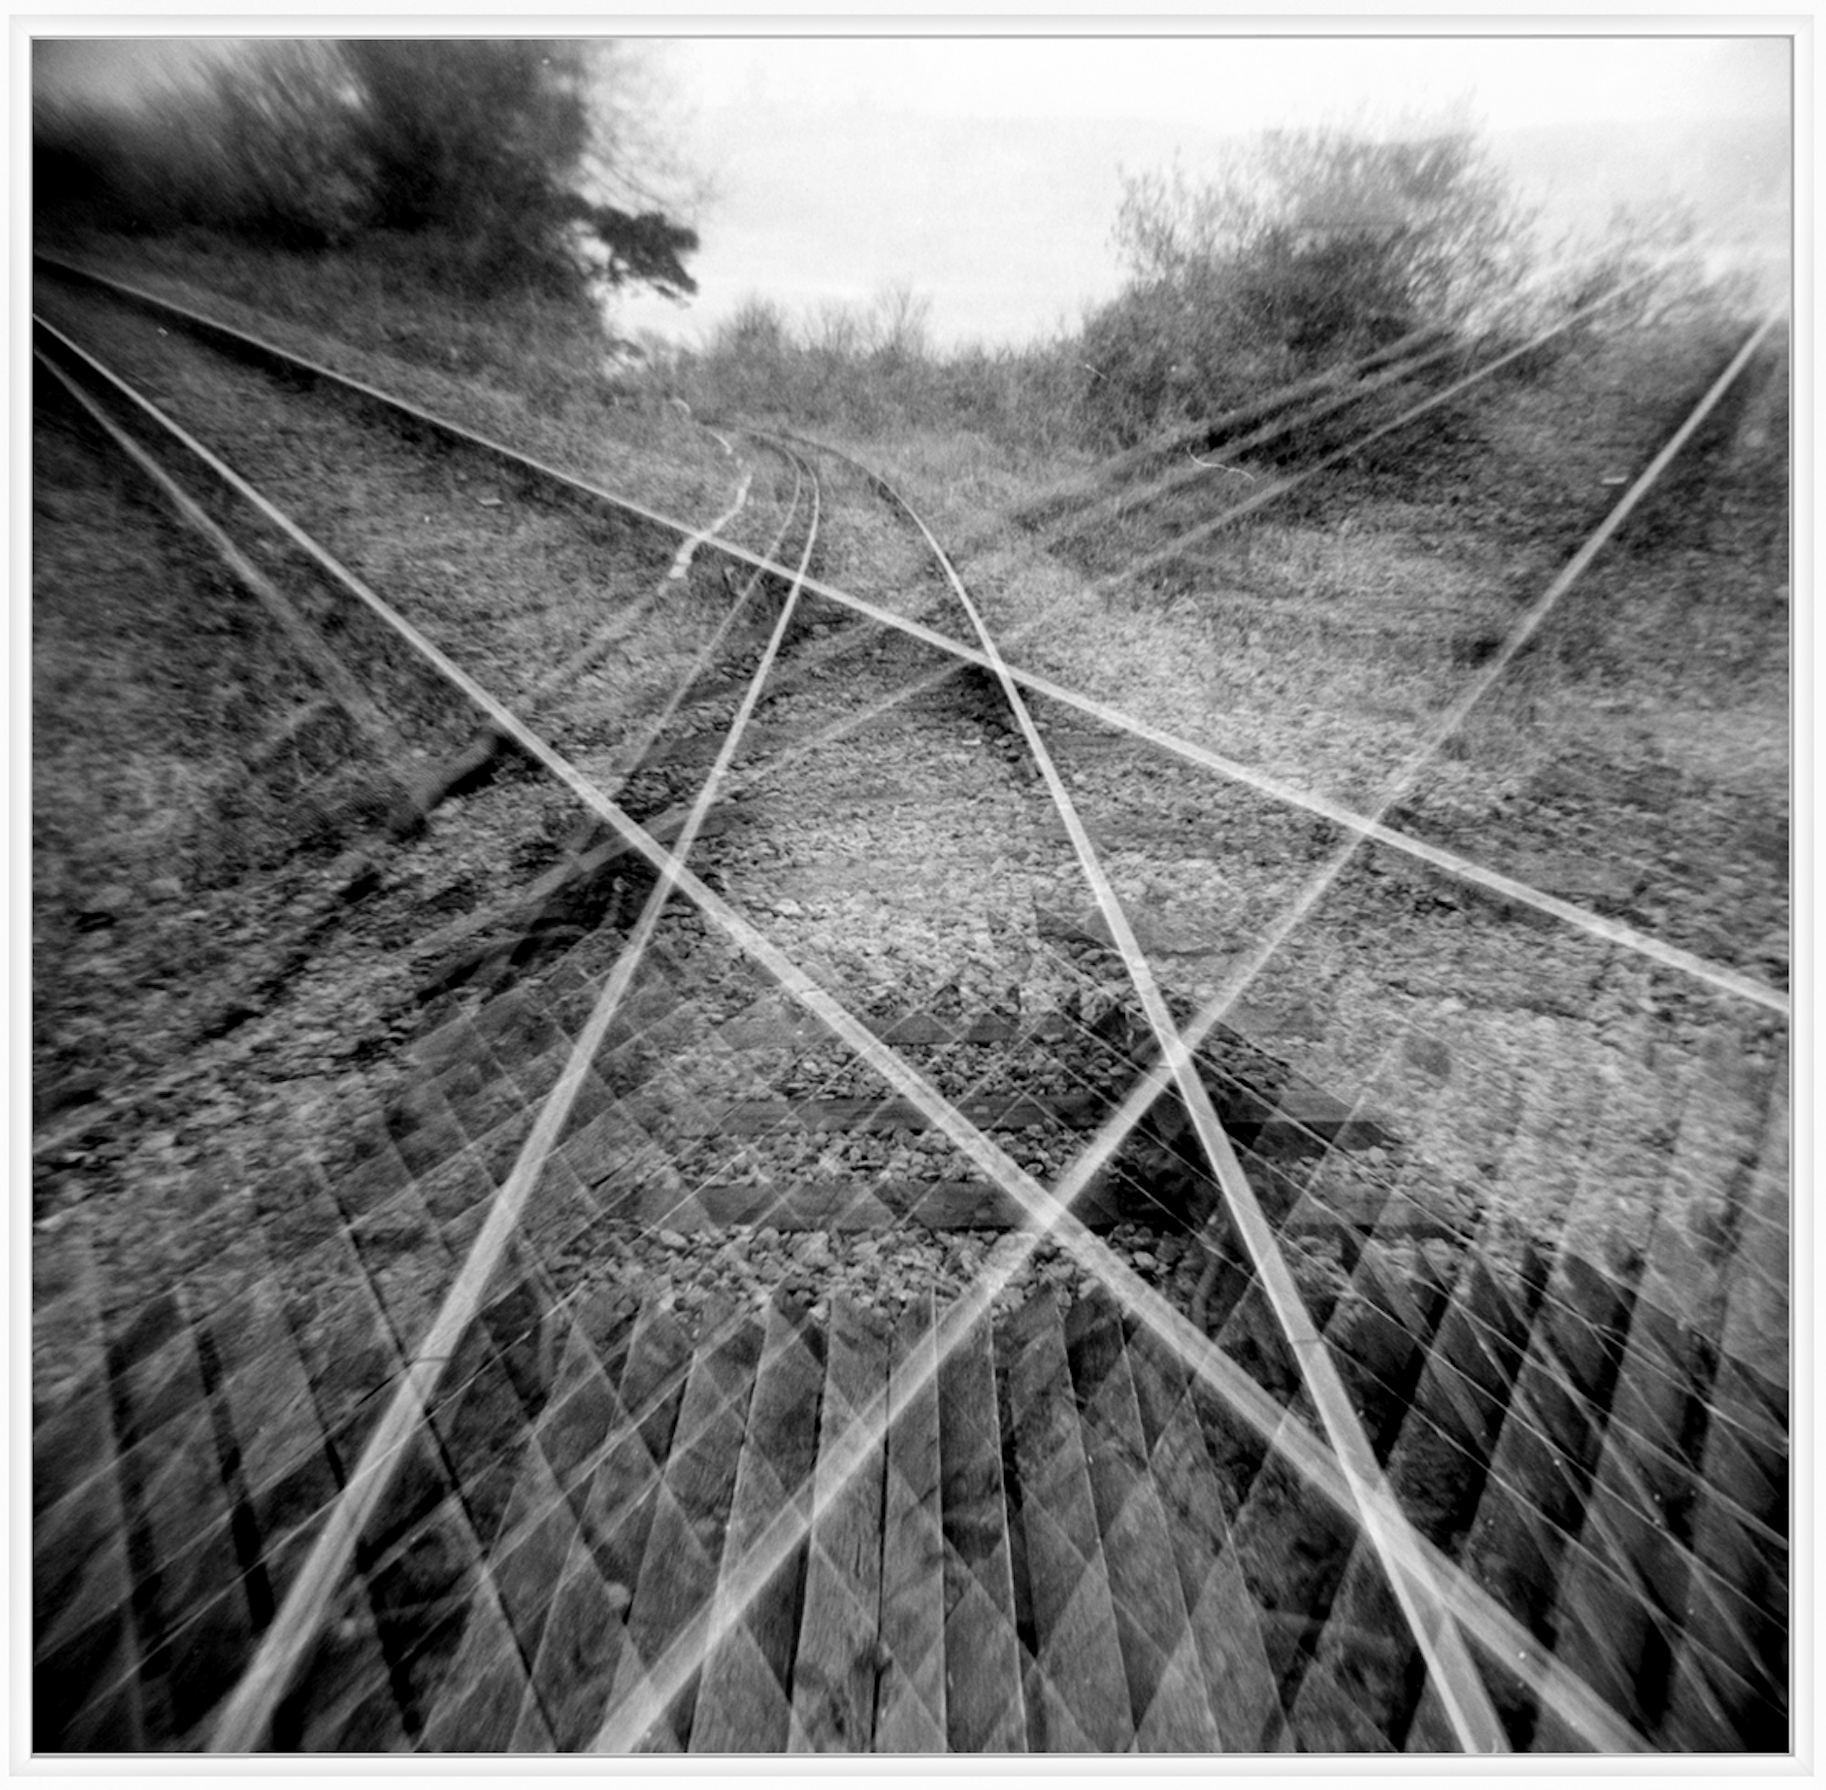
If I load a roll of Fuji Acros II into the Holga, I know I’m lucky if I get three “keepers.” But those three? They’ll have a soul that my most of my other gear couldn’t touch. It’s about that rush when you pull the reel out and see one frame that’s absolutely mental—something no other camera could’ve caught. Quality isn’t always about the tonality, fine grain or perfect rendition of highlights, it’s about the feeling.
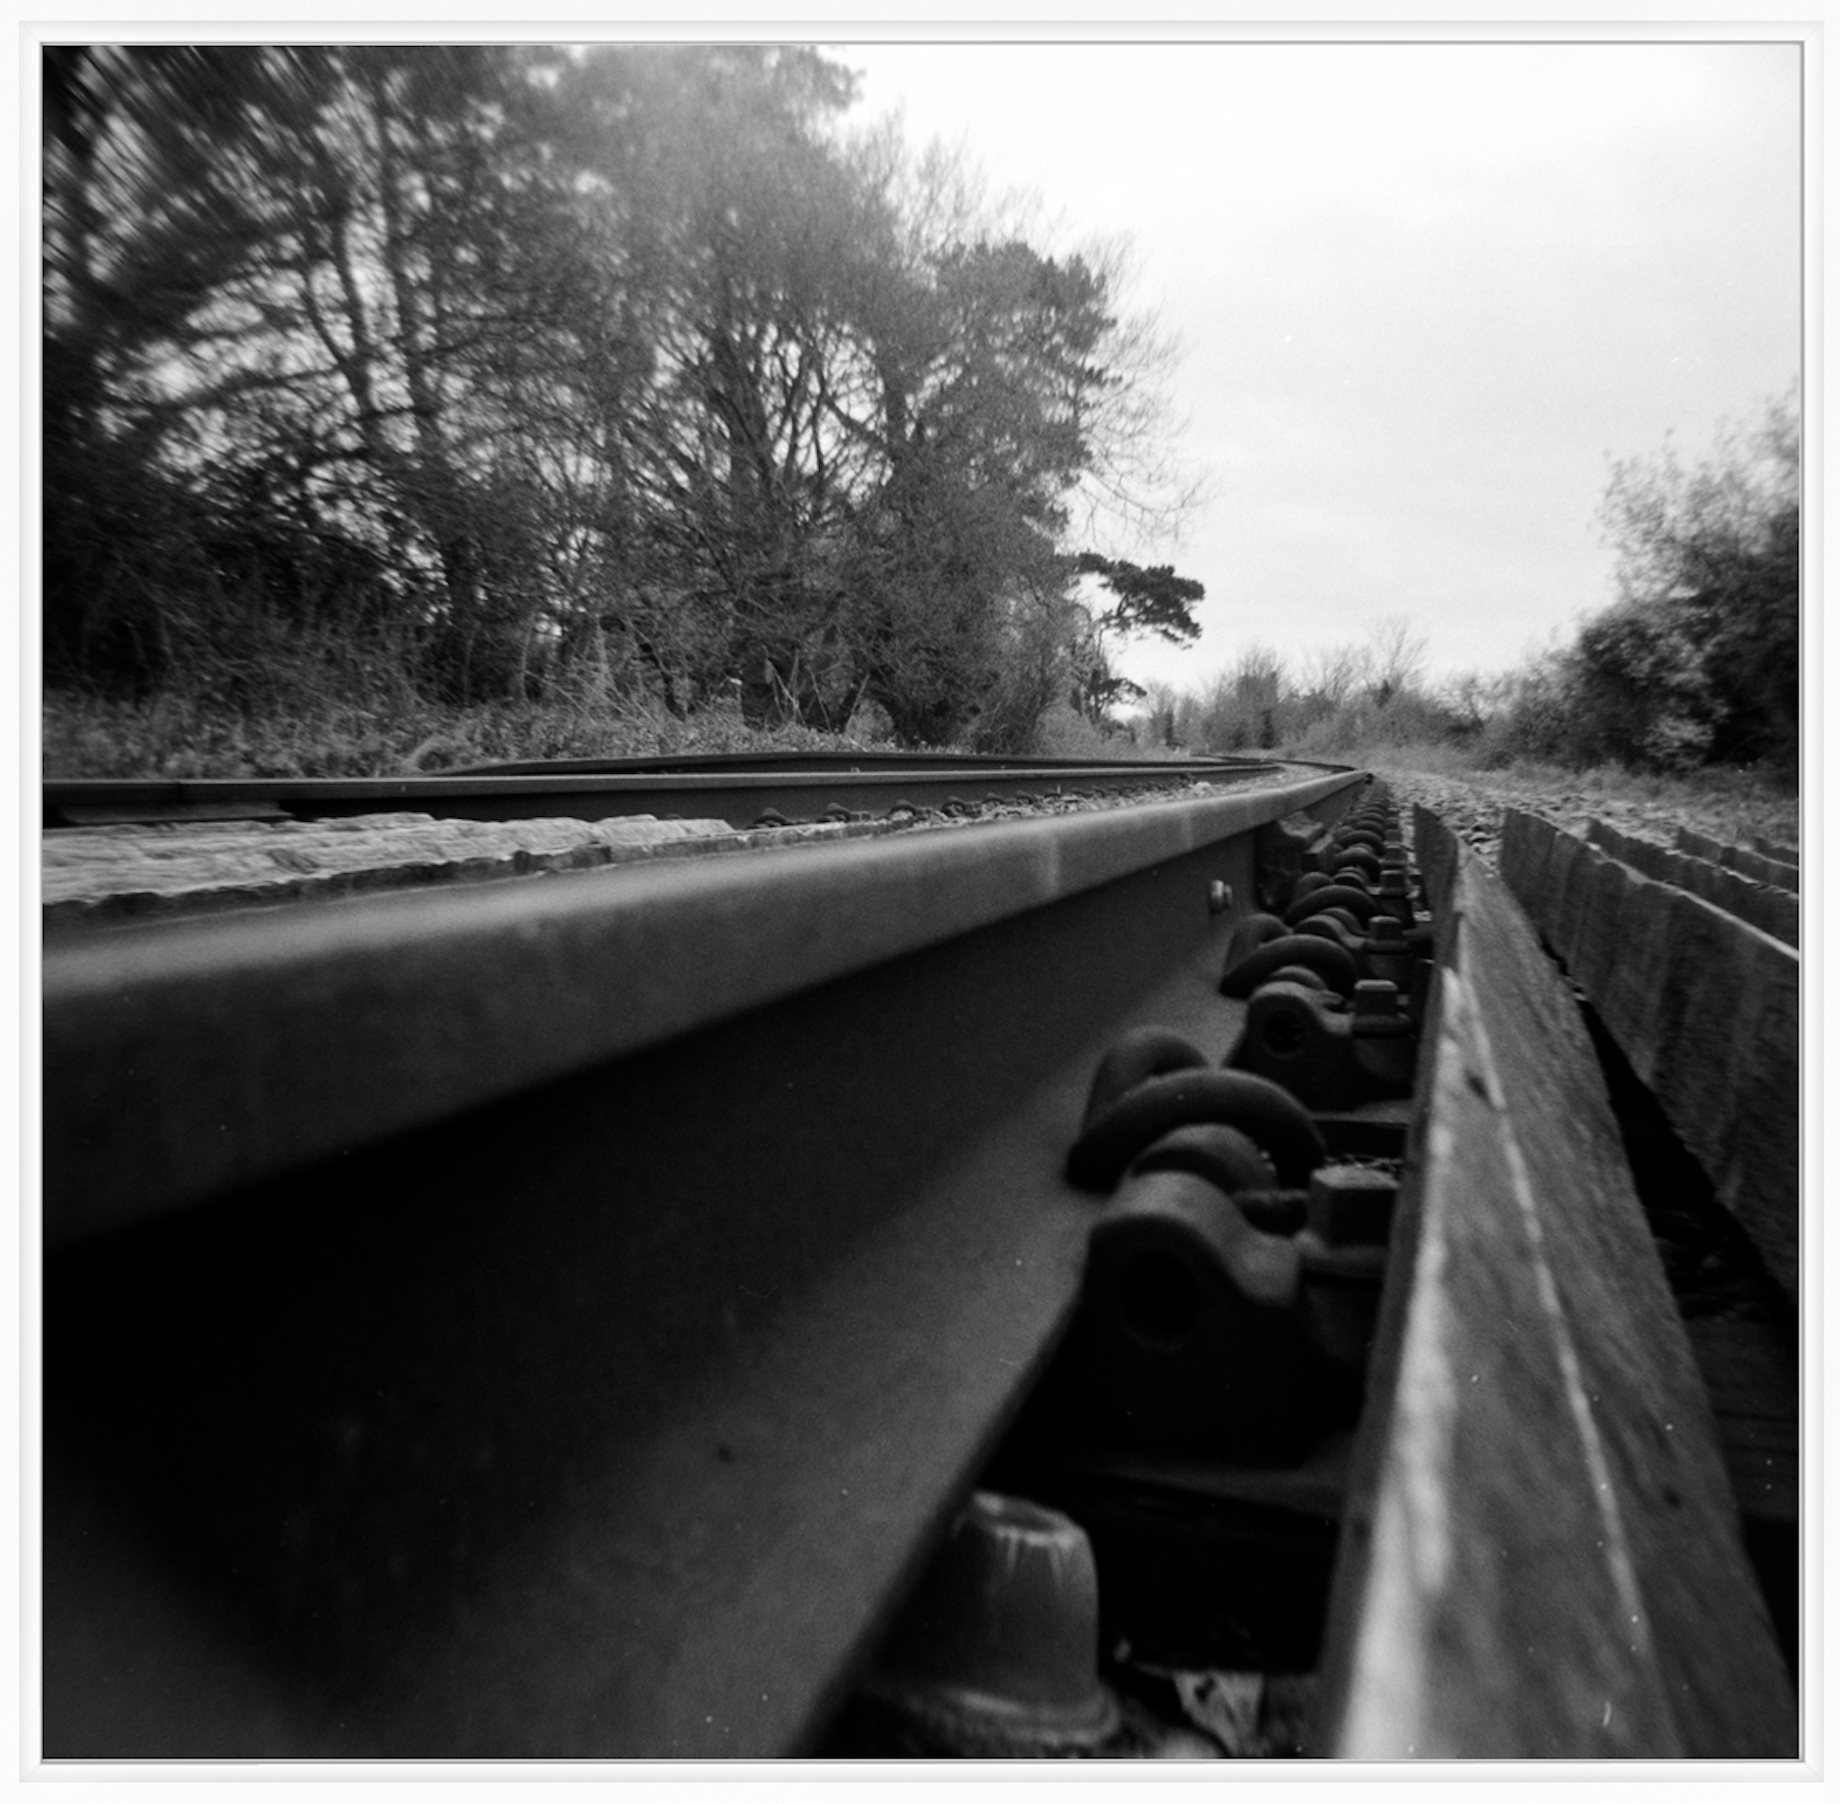
A triple exposure on a railway track.Same railway track up close
So, thats the Holga 120n and my view on the camera. Personally for the price, around £30, it’s well worth grabbing one and shooting a few rolls. You never know – you may end up enjoying the simple no fuss shooting experience as I have. A reminder that sometimes, the “wrong” tool is exactly right.
Thanks for reading and I hope it has inspired anyone looking at the Holga.
The lab boffins at Harman have clearly been spiking the water cooler with something interesting lately. Their latest creation isn’t just a new film recipe; it’s a total chemical rebellion they’ve dubbed “Switch.” Personally, I imagine the Harman team cackling over bubbling beakers as they cooked up this color-shifting sorcery.
Harman calls it “creative.” I call it a high-stakes game of color roulette.
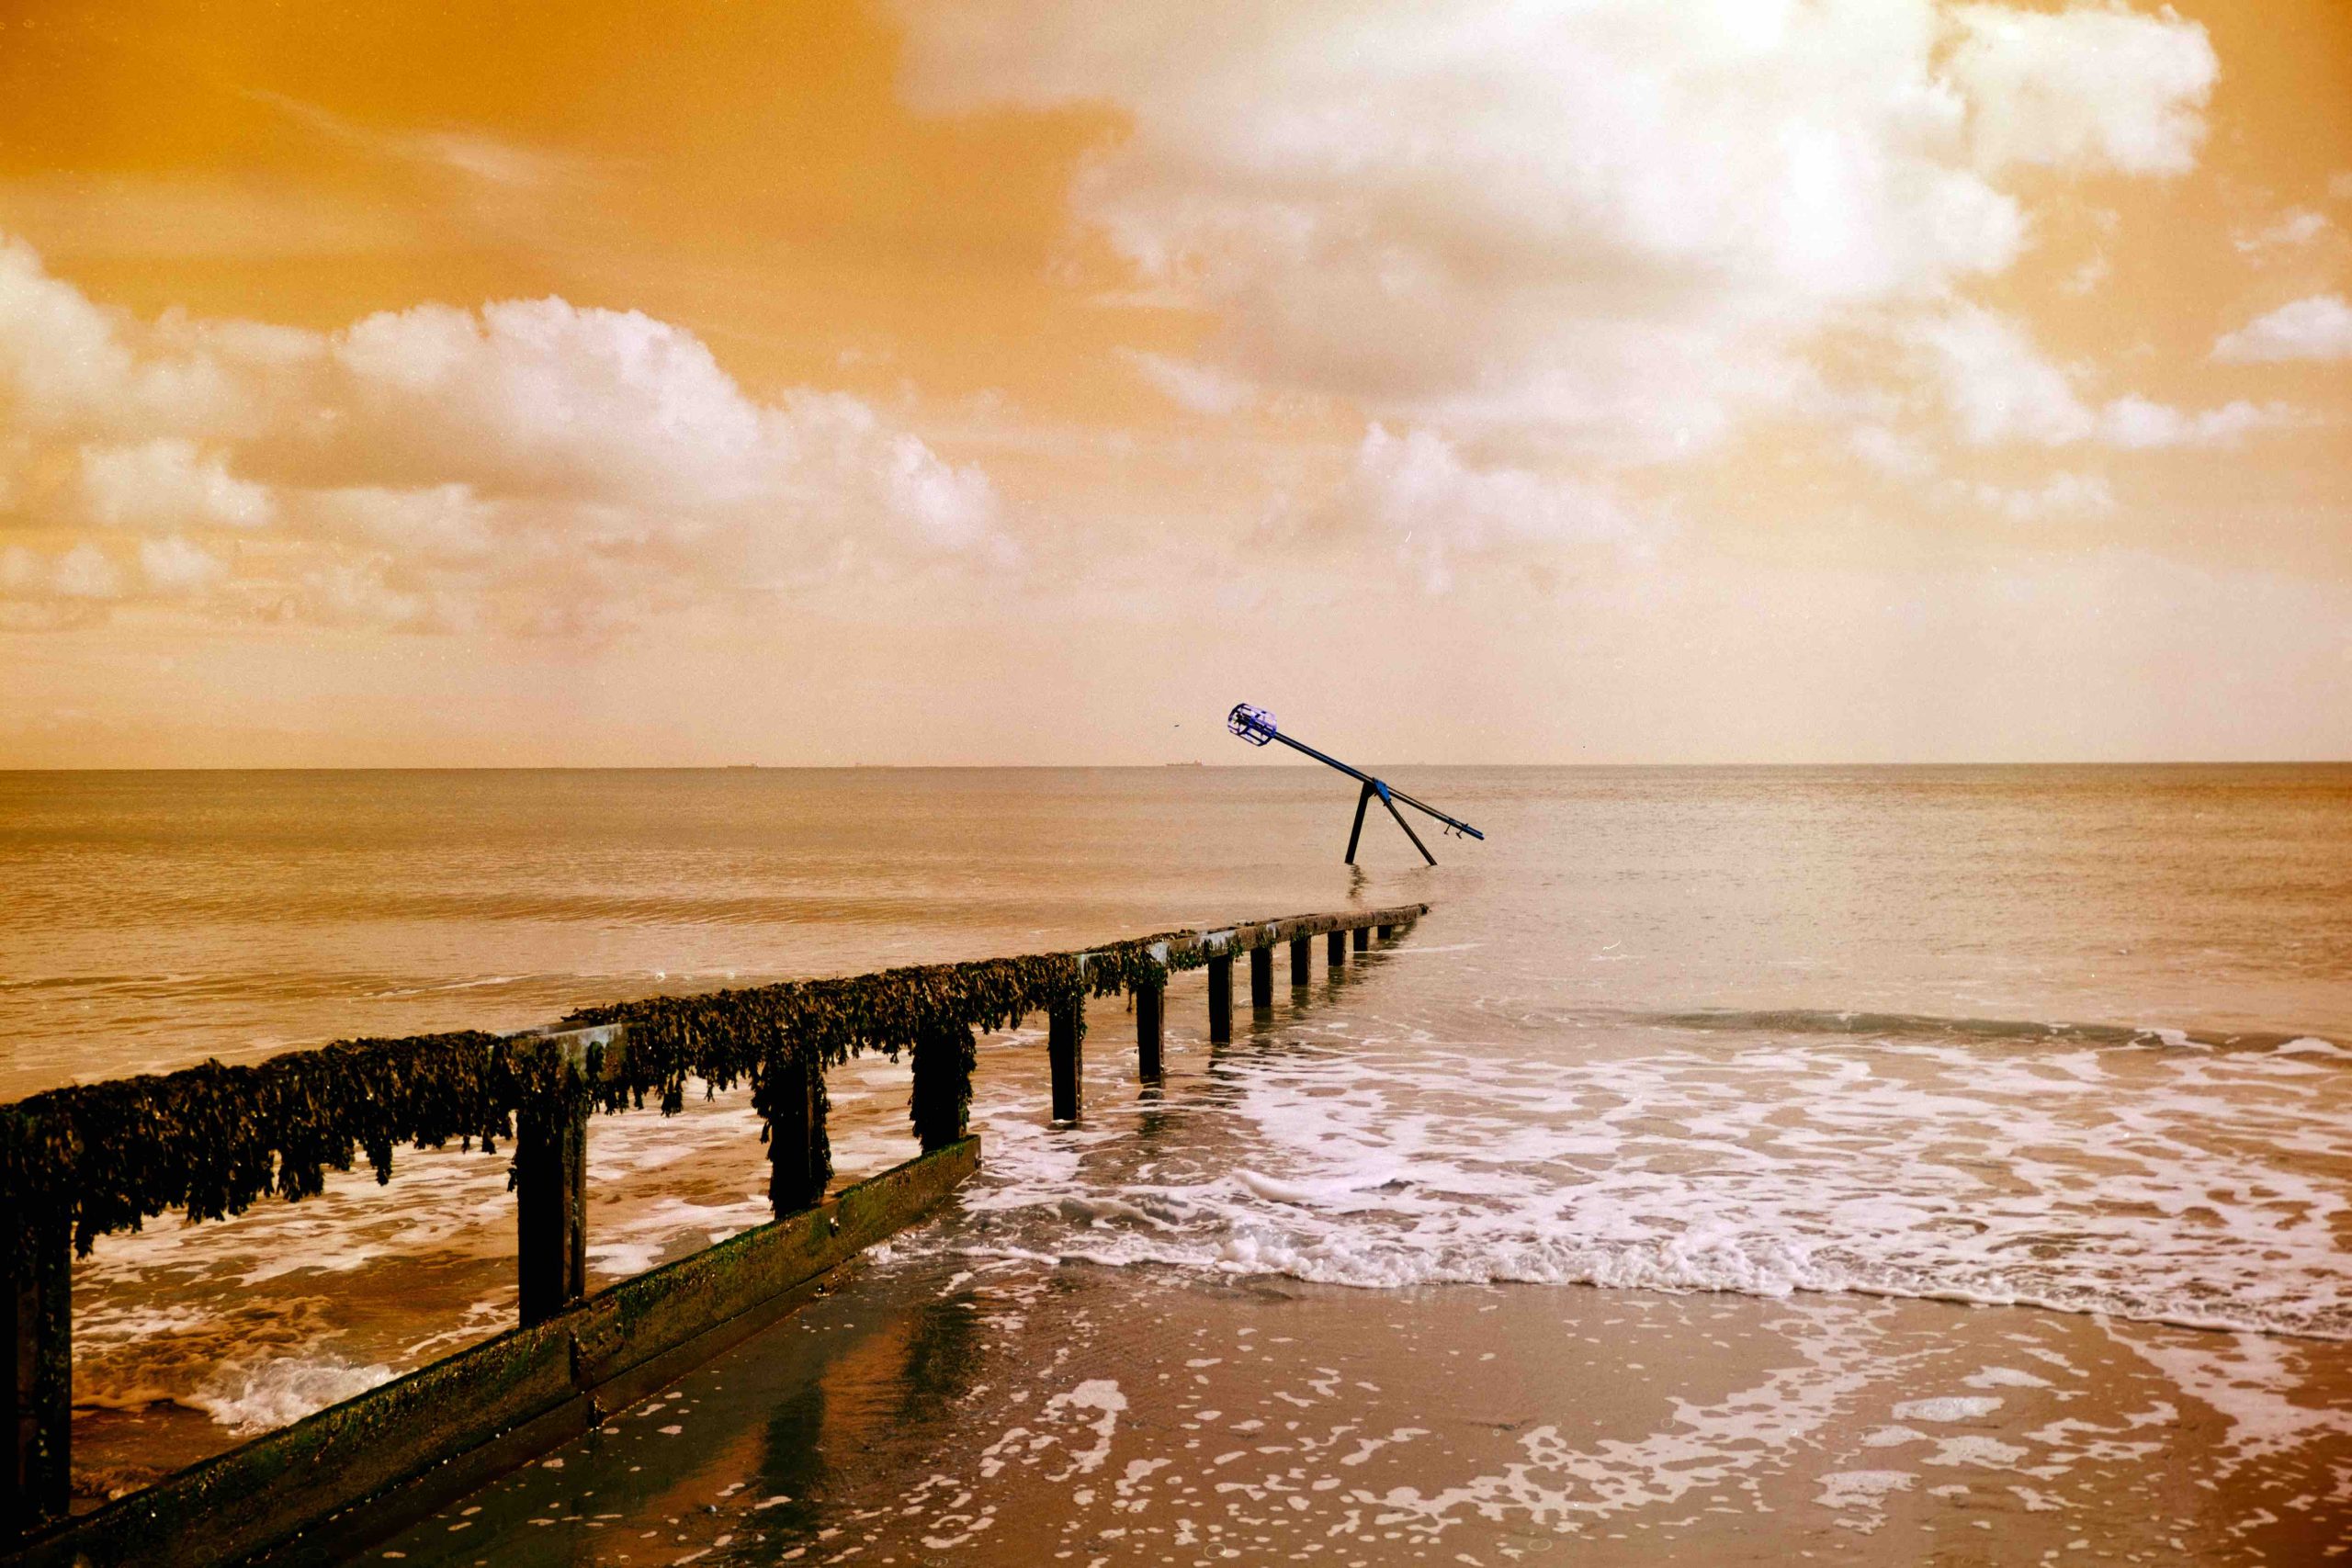
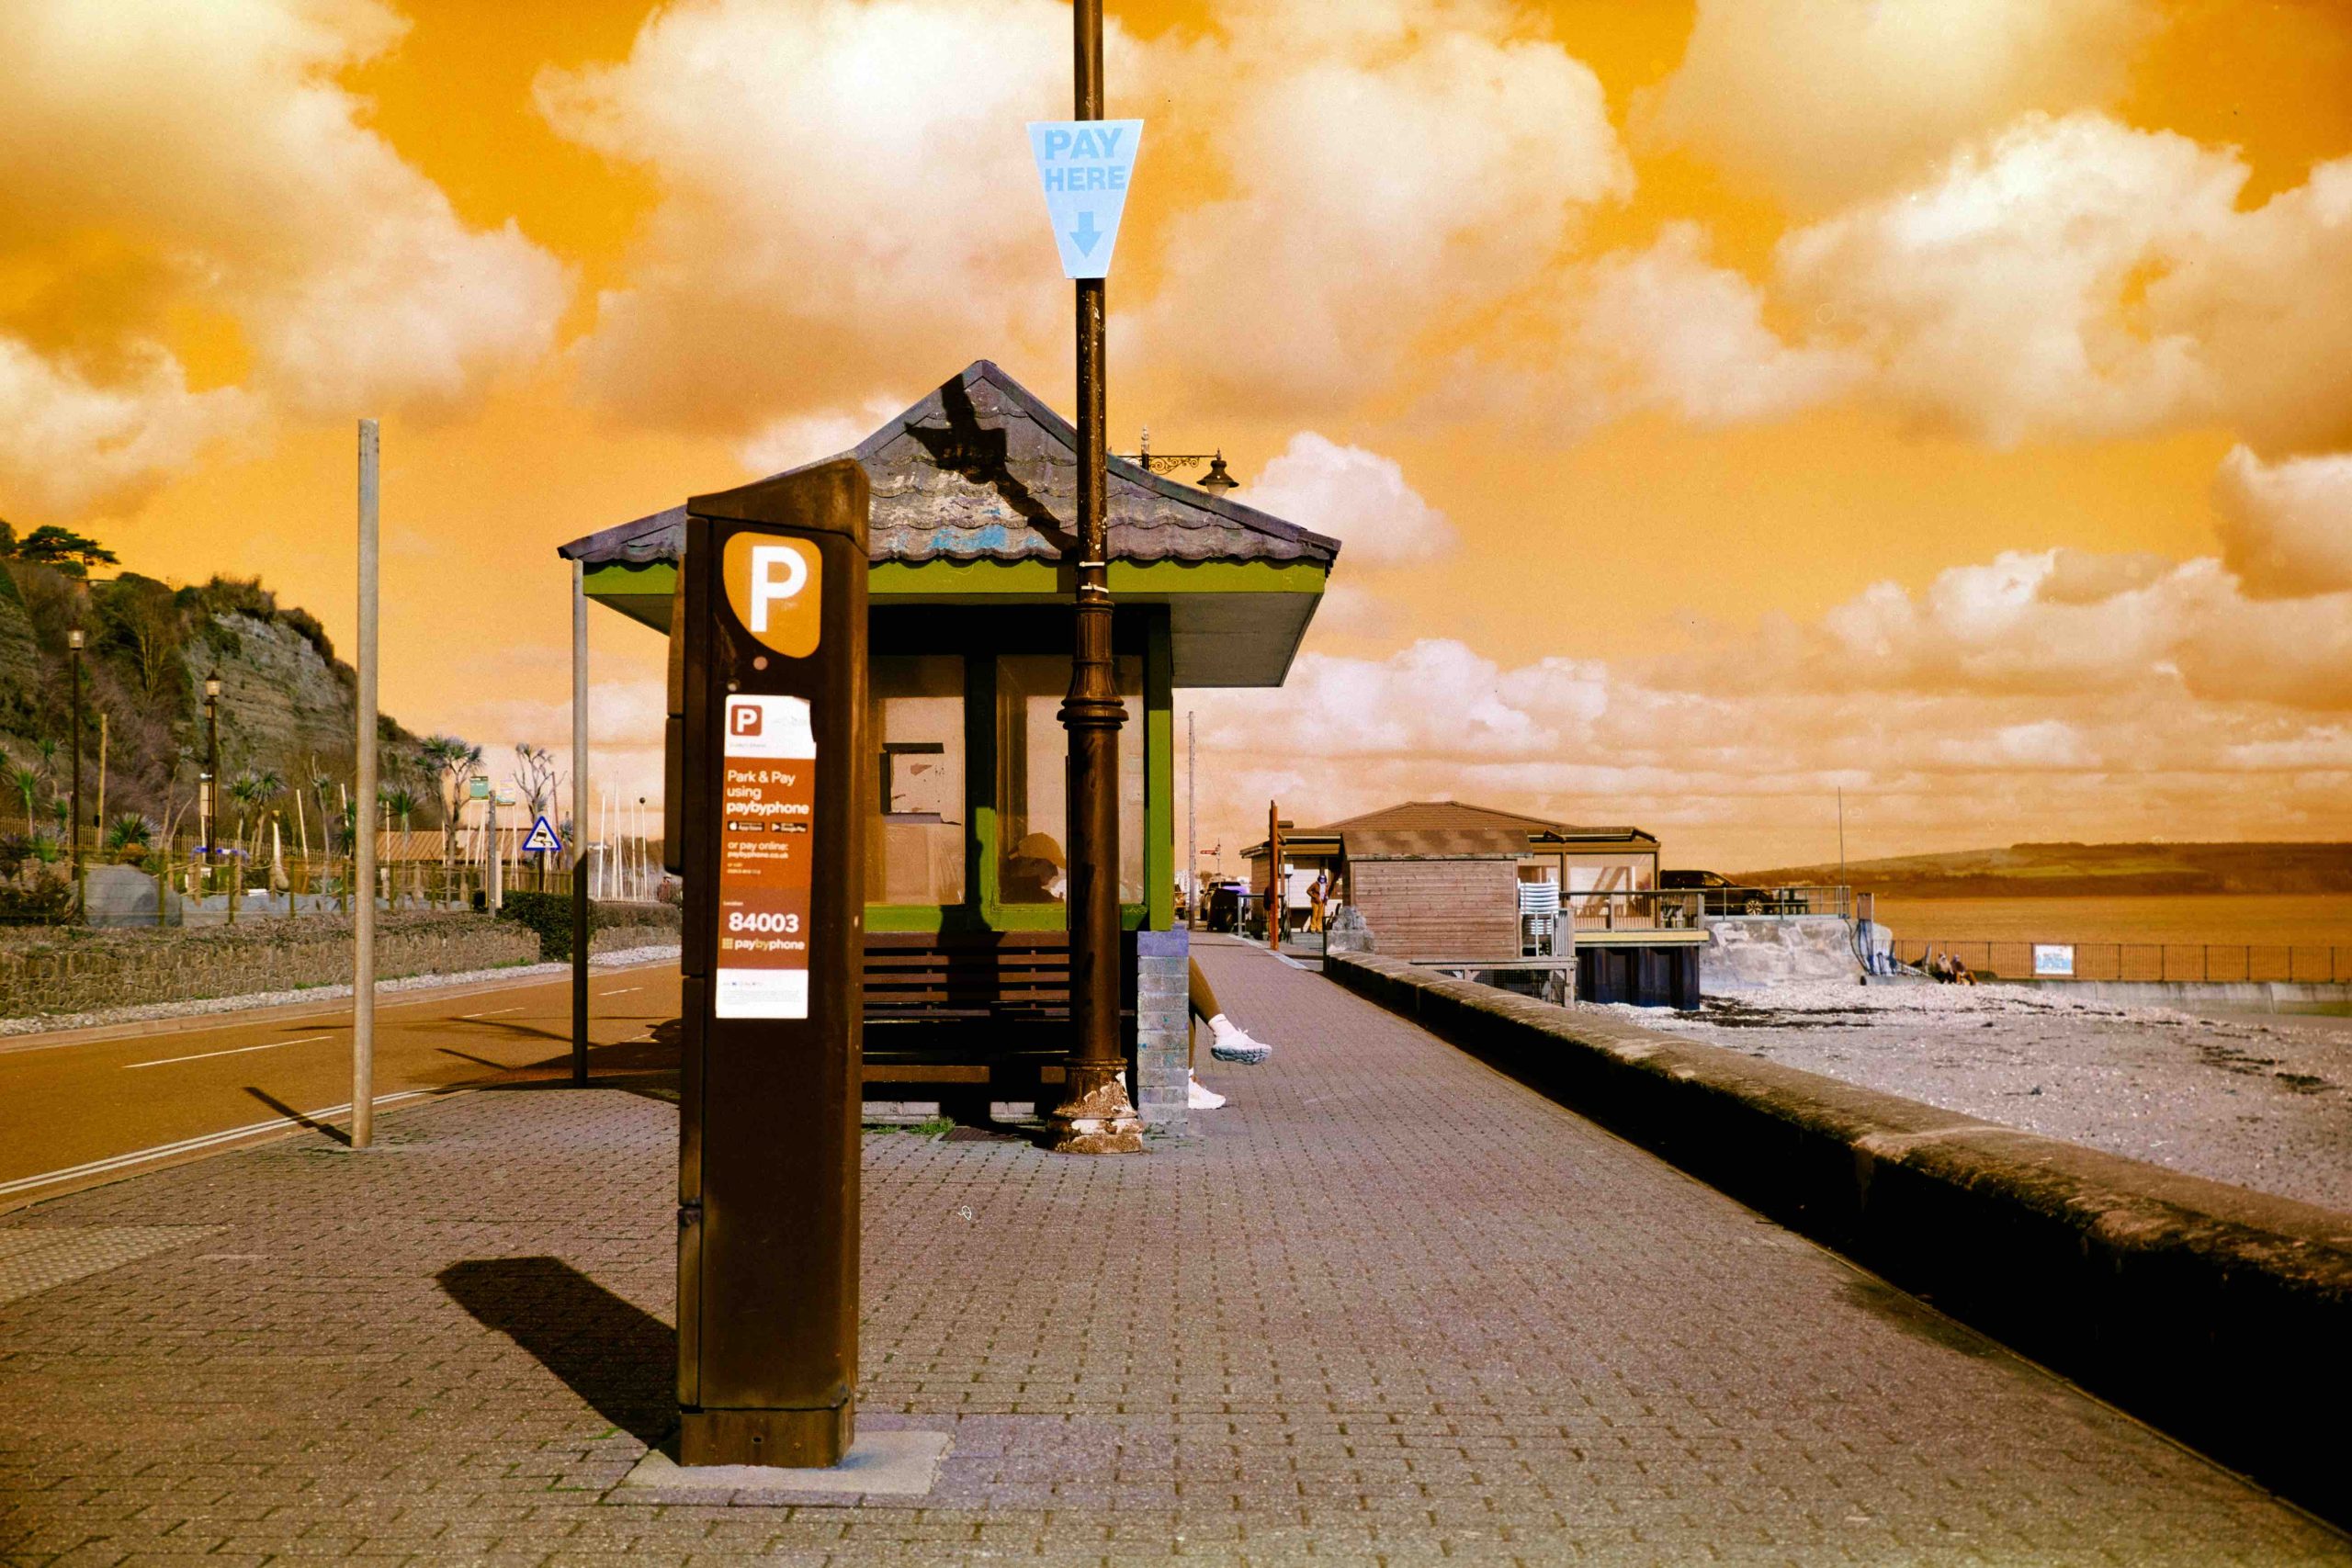
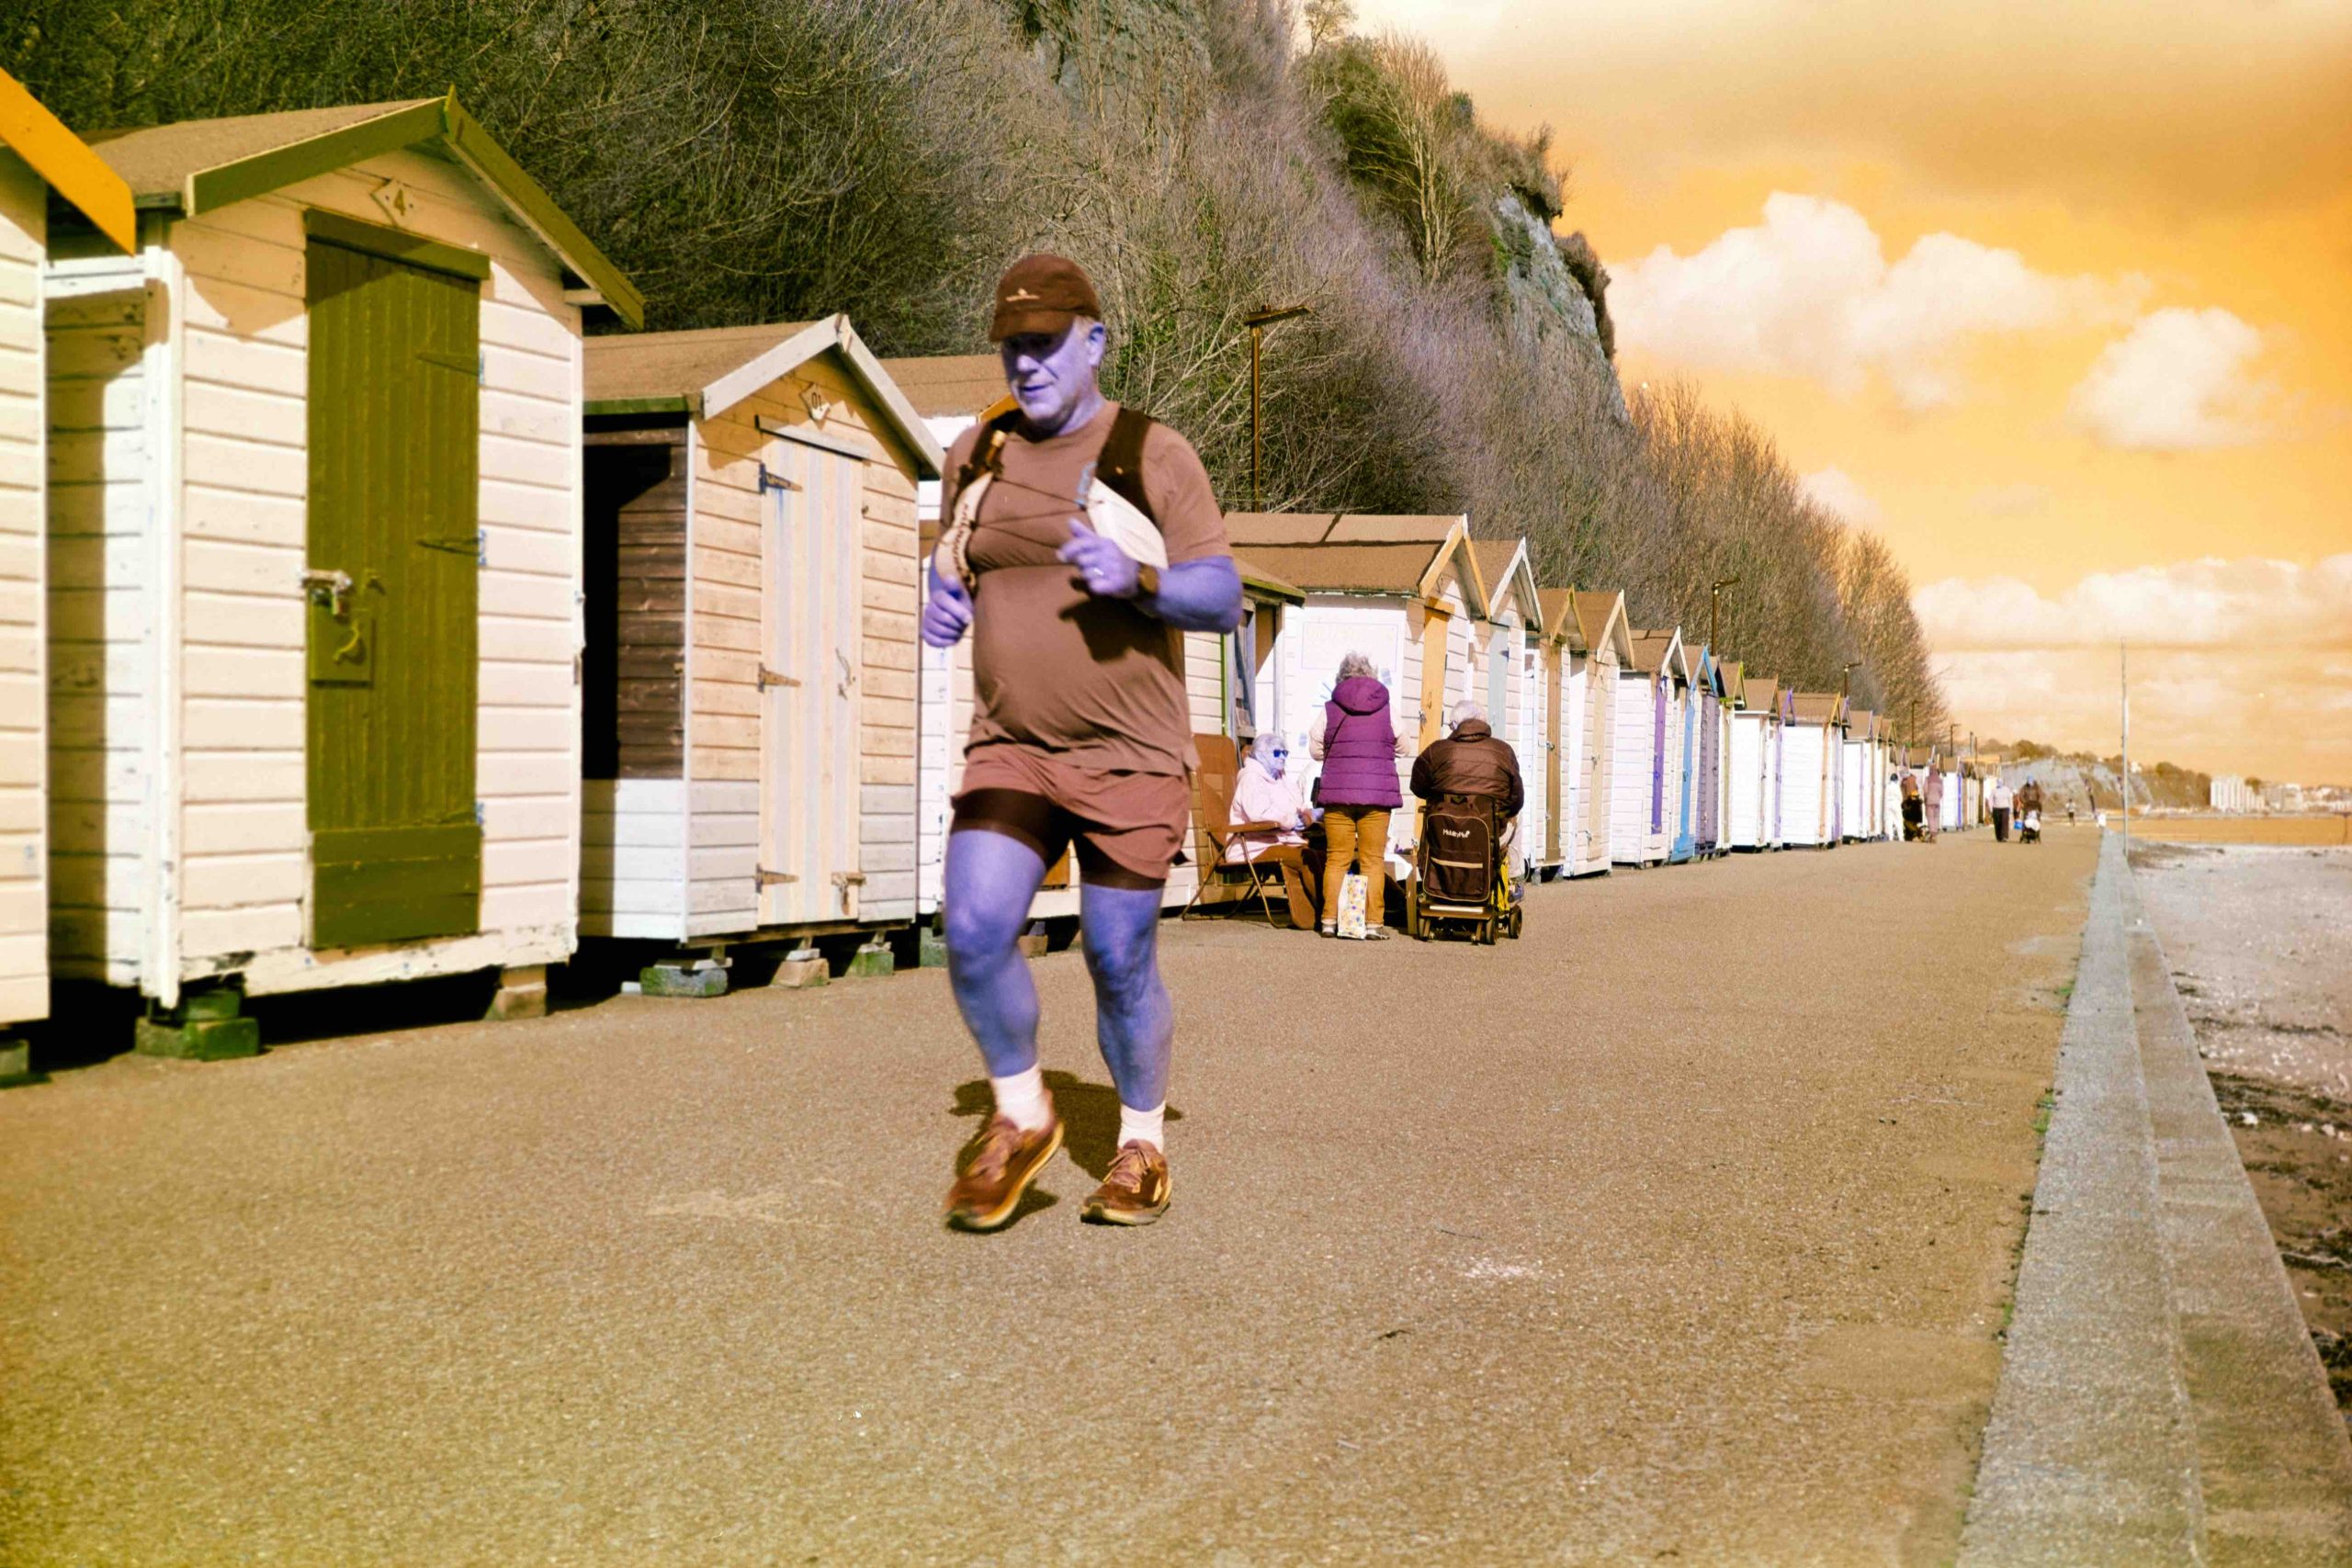
According to the official brief, HARMAN SWITCH AZURE is “fun, playful, and experimental.” Translation: physics is taking a nap. Blues flip to orange, yellows morph into a vibrant azure, and reds decide they’d rather be purple-blue. It’s the kind of film that looks at a landscape and says, “I can do crazy.”
Naturally, I had to see if my brain could handle the shift. Armed with a Fuji GW690III , a fresh batch of Bellini C41 chemistry, and a roll of the secret sauce, I headed to the beach to hunt for unsuspecting colours.
With a GoPro strapped around my neck bobbing about I walked our local seaside town for colour and here is a screen shot from the GoPro against what the new film gave me.
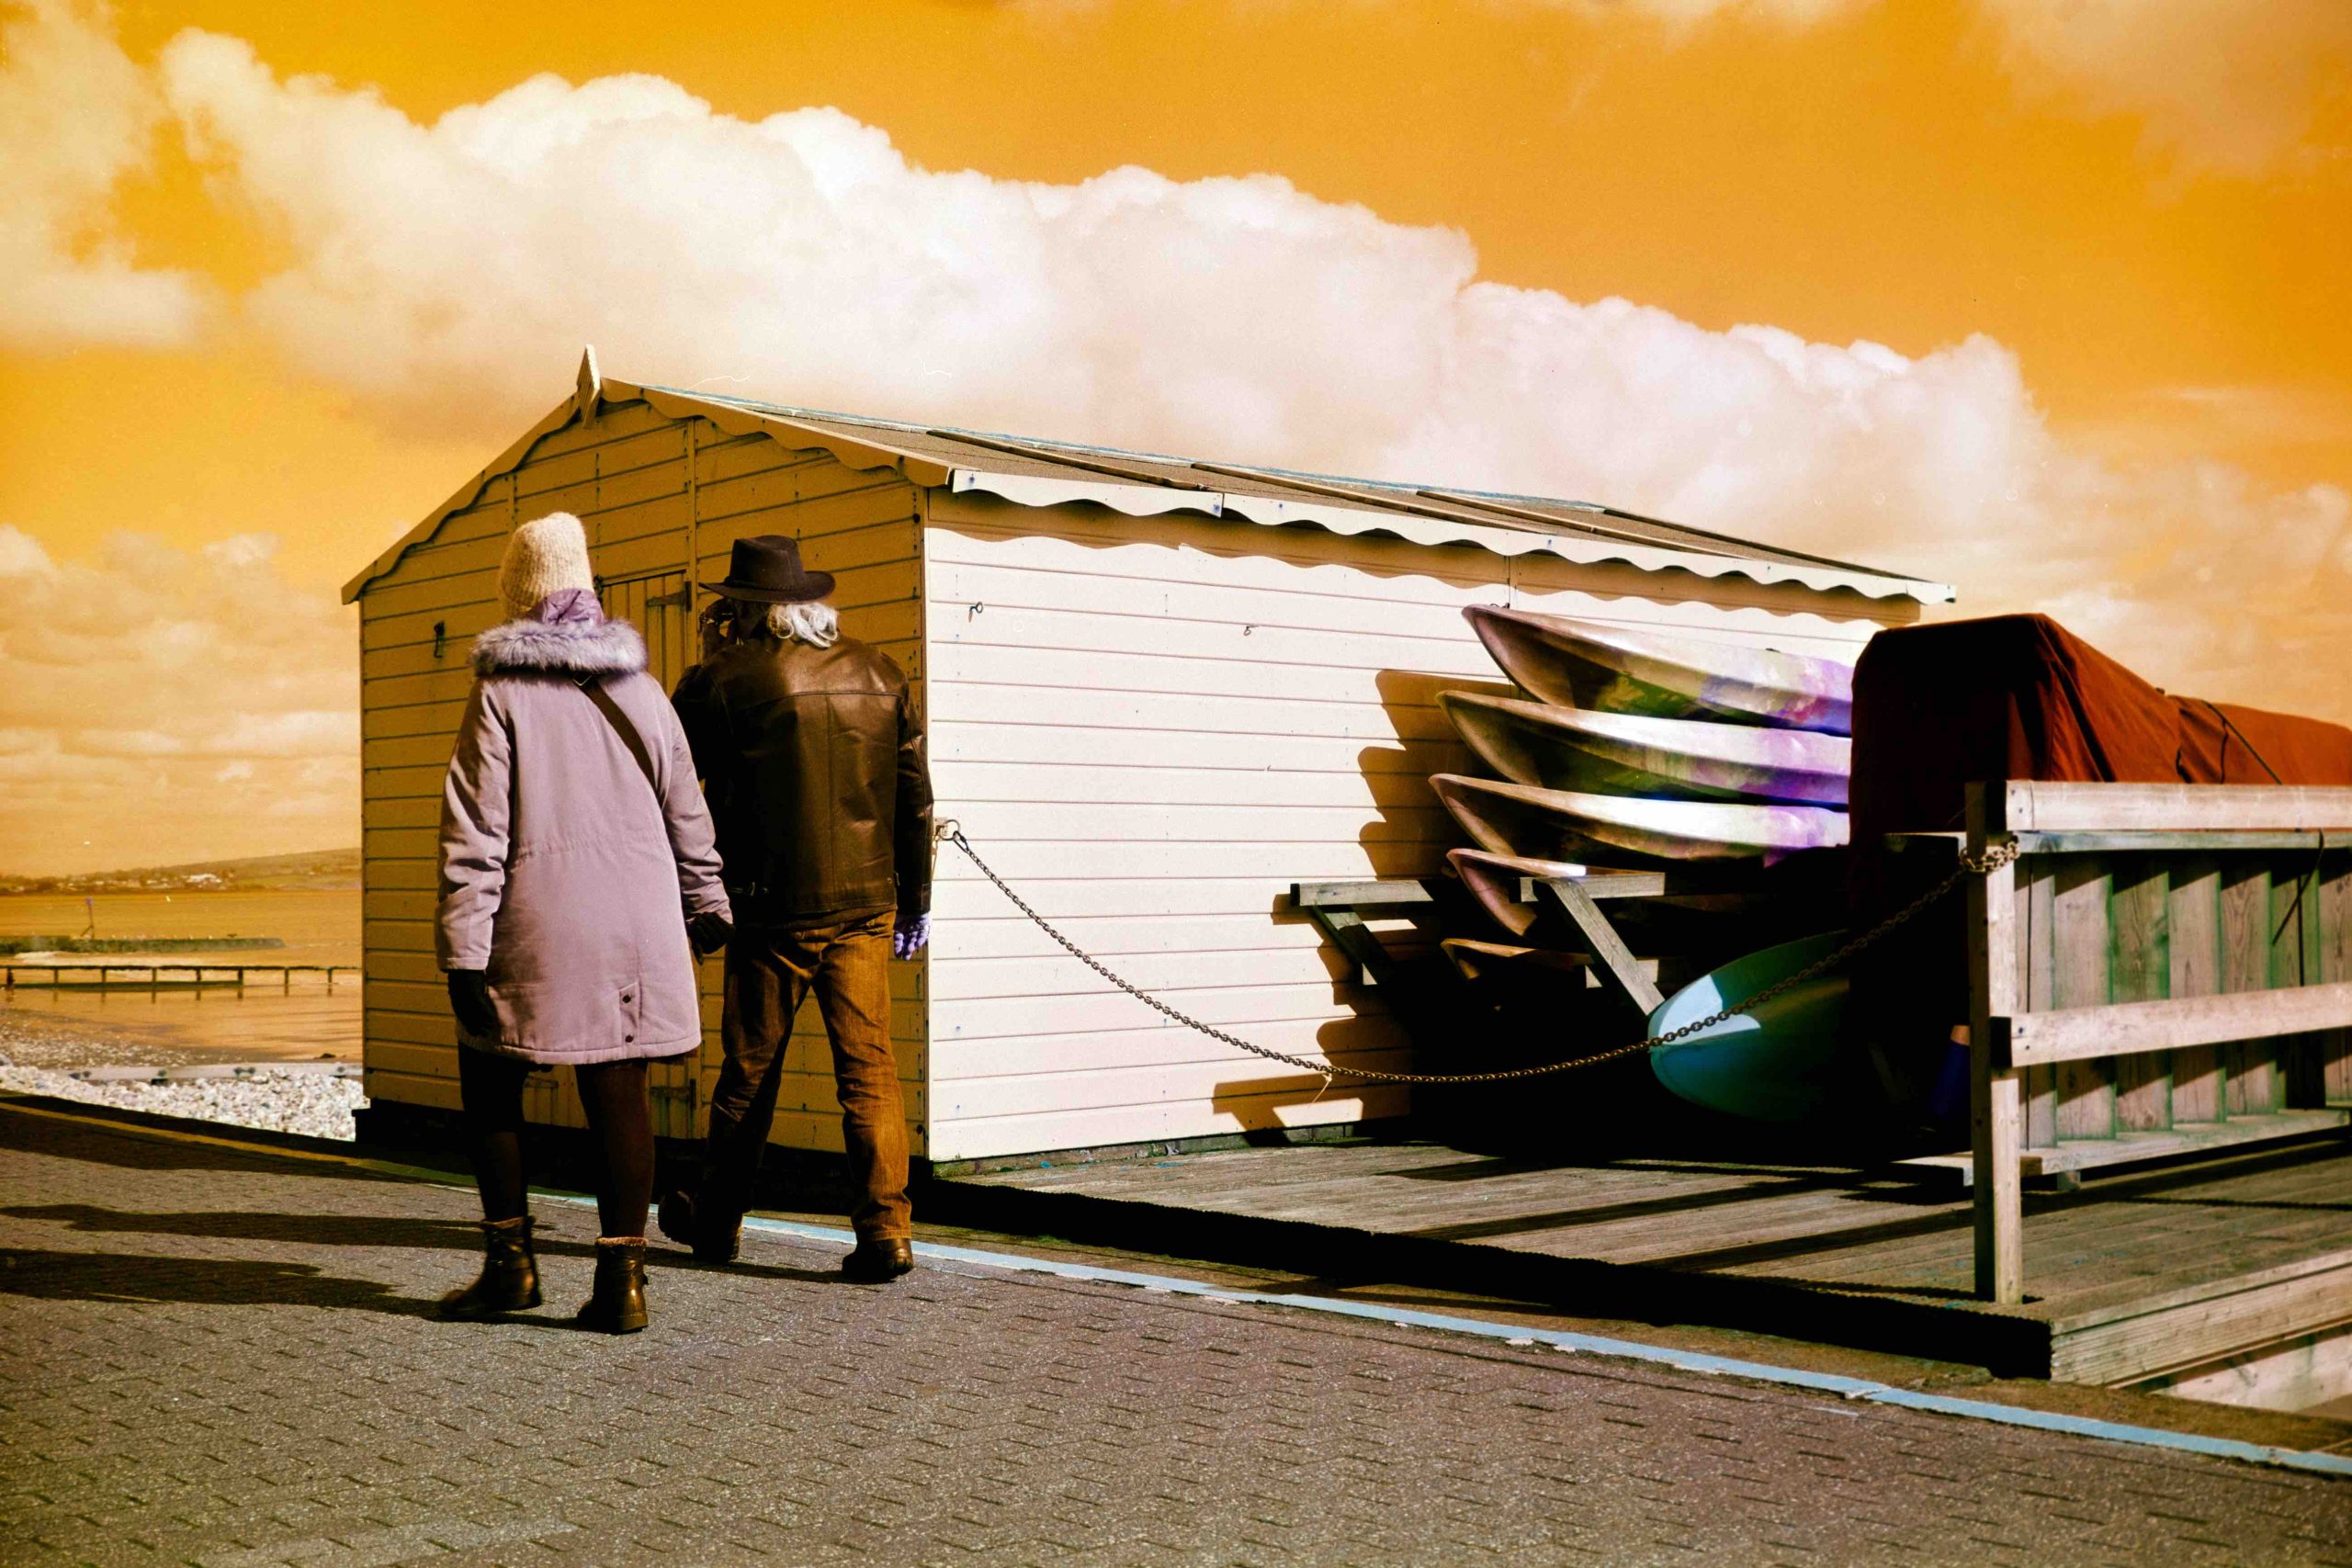
Here are the remaining photographs I took. I chose a 6×9 camera as it gave me only 8 shots and I wanted to be selective rather than pepper spray the whole area. To be honest there was not much colour about as it’s winter here and many of the shops that sell colourful tourist gifts are closed.
What do I think?
It’s certainly different! Just watch out for tanned skin tones. They could end up looking like a Smurf!
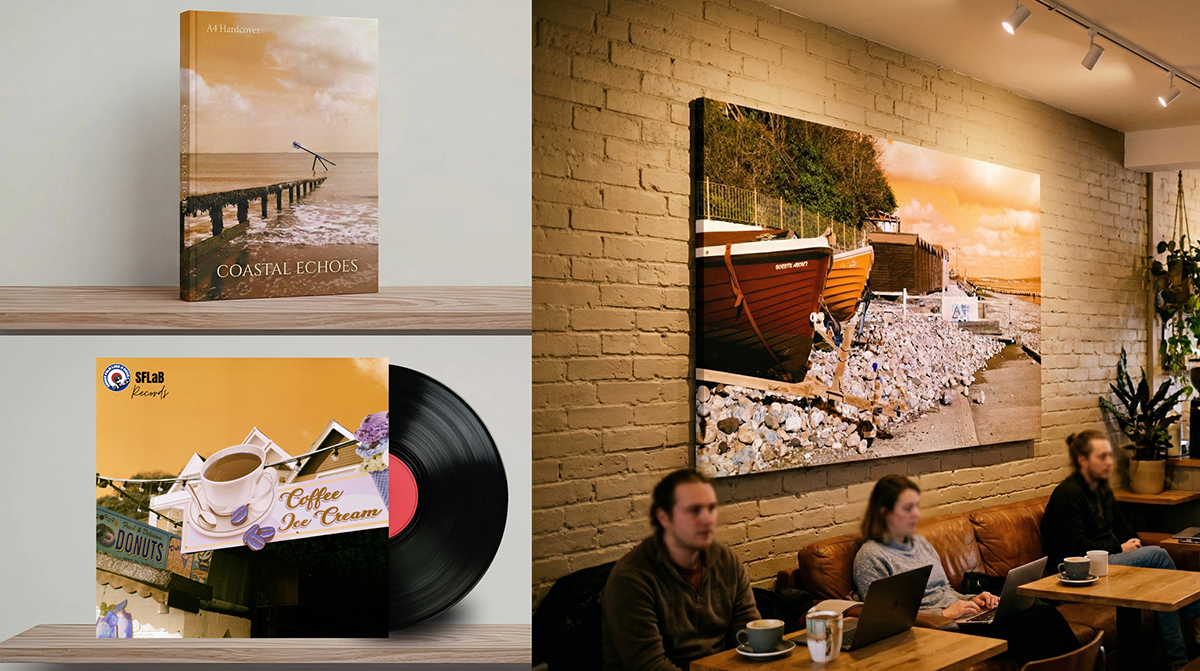
I’m not sure if there are any other films similar to this. I wasn’t keen at all to be honest until I opened my mind and wondered why, if any reason, I would buy this film. I jumped into photoshop to see if I could replicate the look and even with my many years of photoshop experience, I couldn’t. Close, but not exact. I was thinking along the lines of book covers, record sleeves and also large canvas wall art in coffee shops and other public places. Maybe even indoors!
I actually wouldn’t mind sending one of my negatives off for a quality canvas to be made and gift one of my friends business premises. Or maybe for home. But I do think for impact the canvas would need to be large as a 16 inch canvas I feel would have little impact for this kind of whacky look.
When you open your mind as a creative photographer I think this film has many applications to present to a client or even for personal projects such as your own book of Switch photographs. It offers something different from the norm and I think that is where Harman is coming from with this film. Sort of saying “Here you go film community. Here is something for you to play with. Go out and get creative”
So, there you have it. Another colour creative film from Harman. Switch Azure. Grab a roll and see what you think.
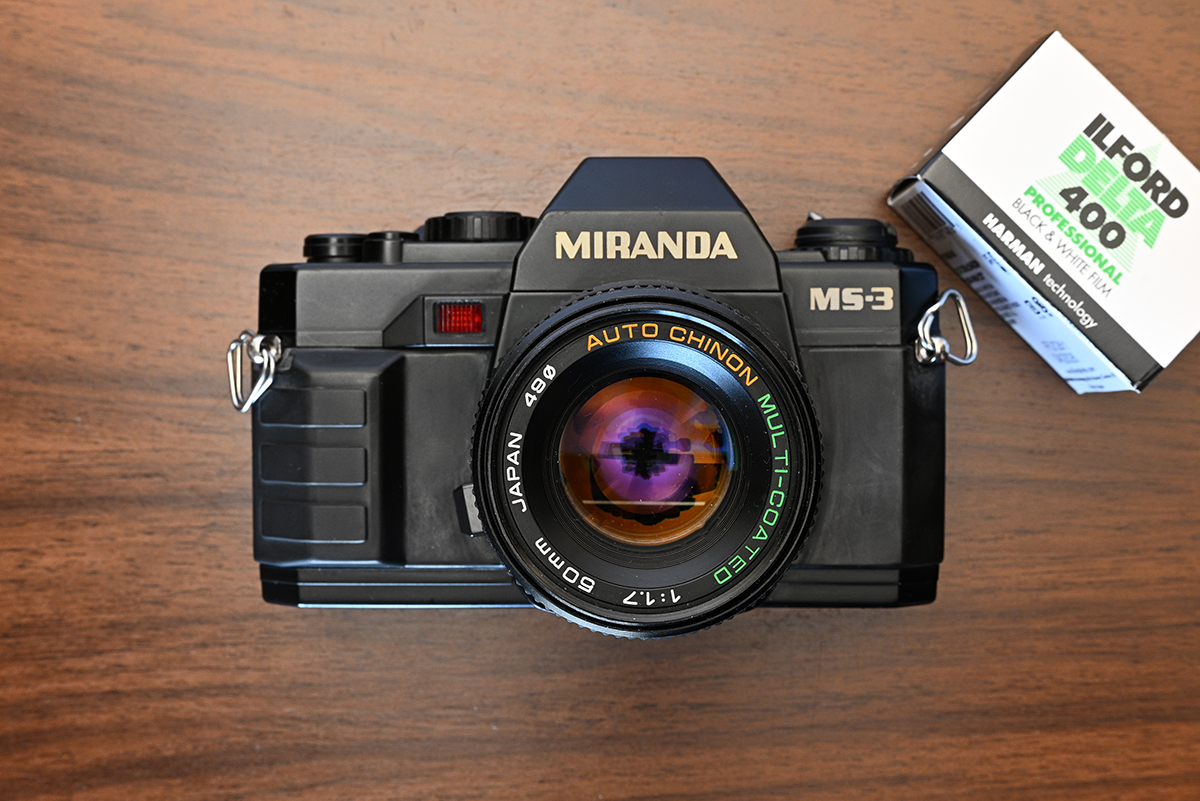
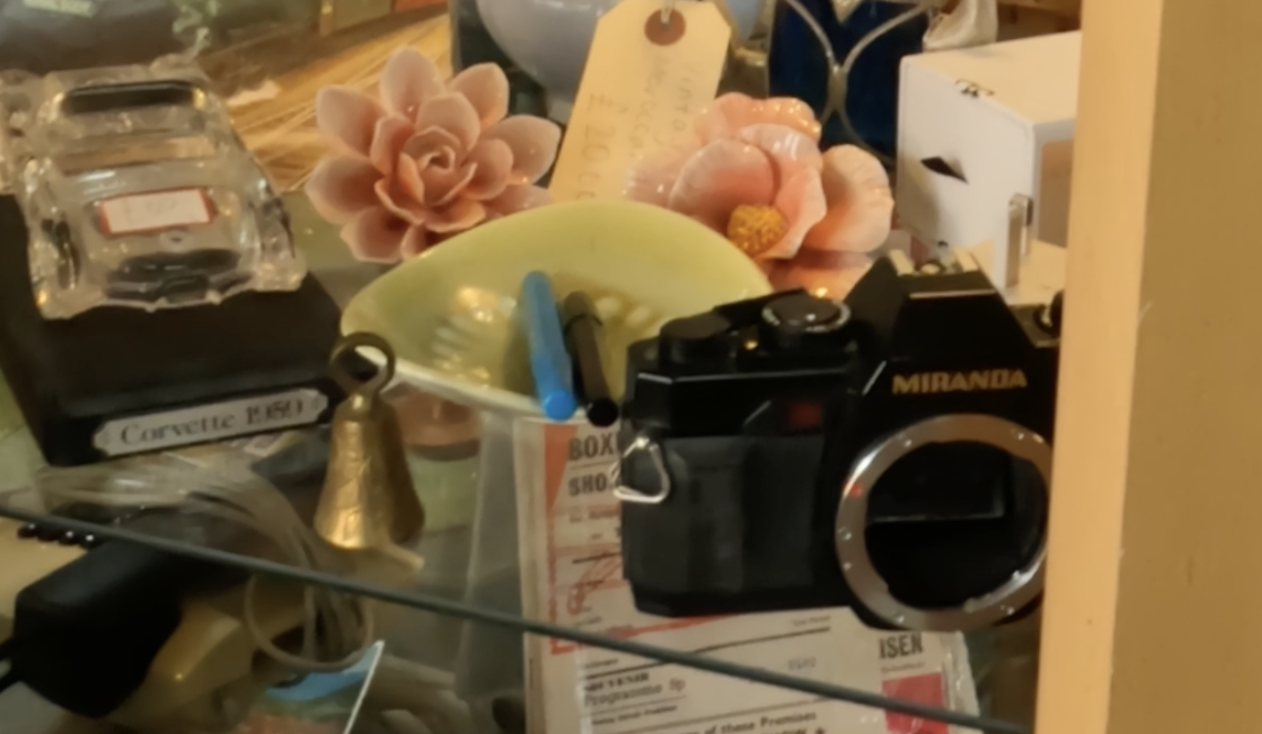
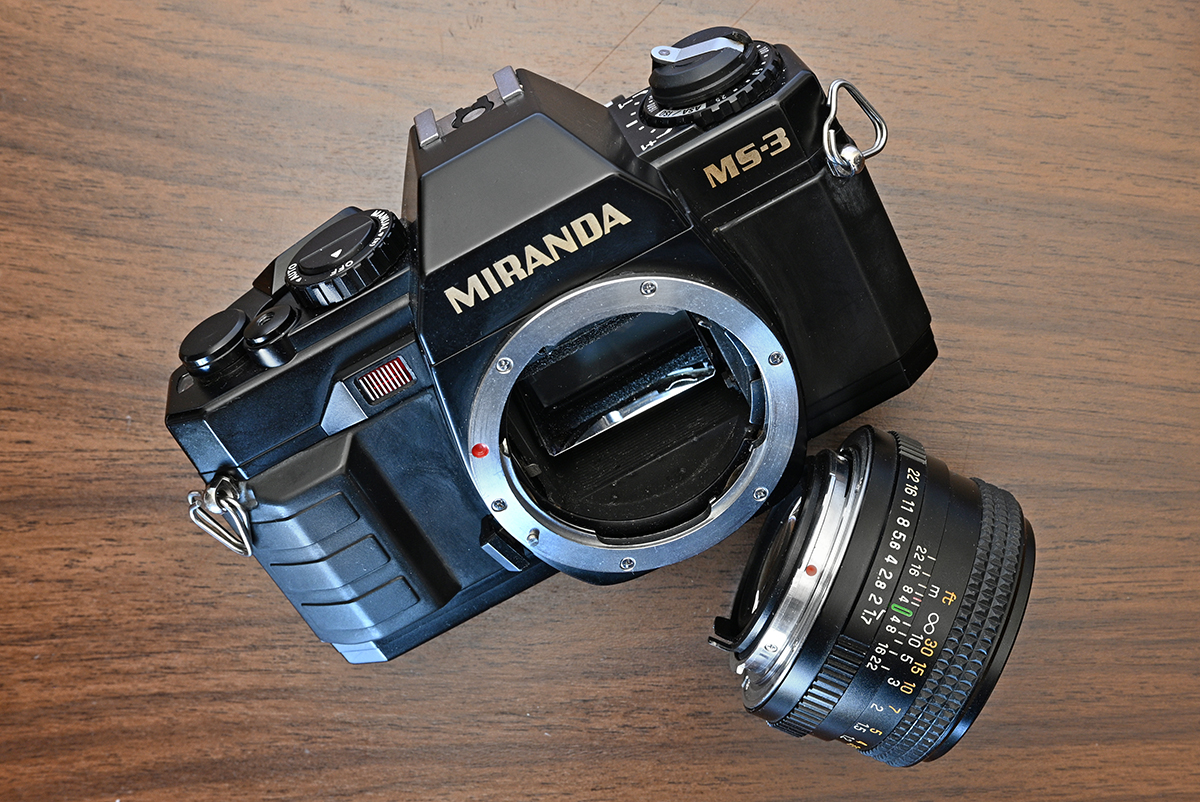
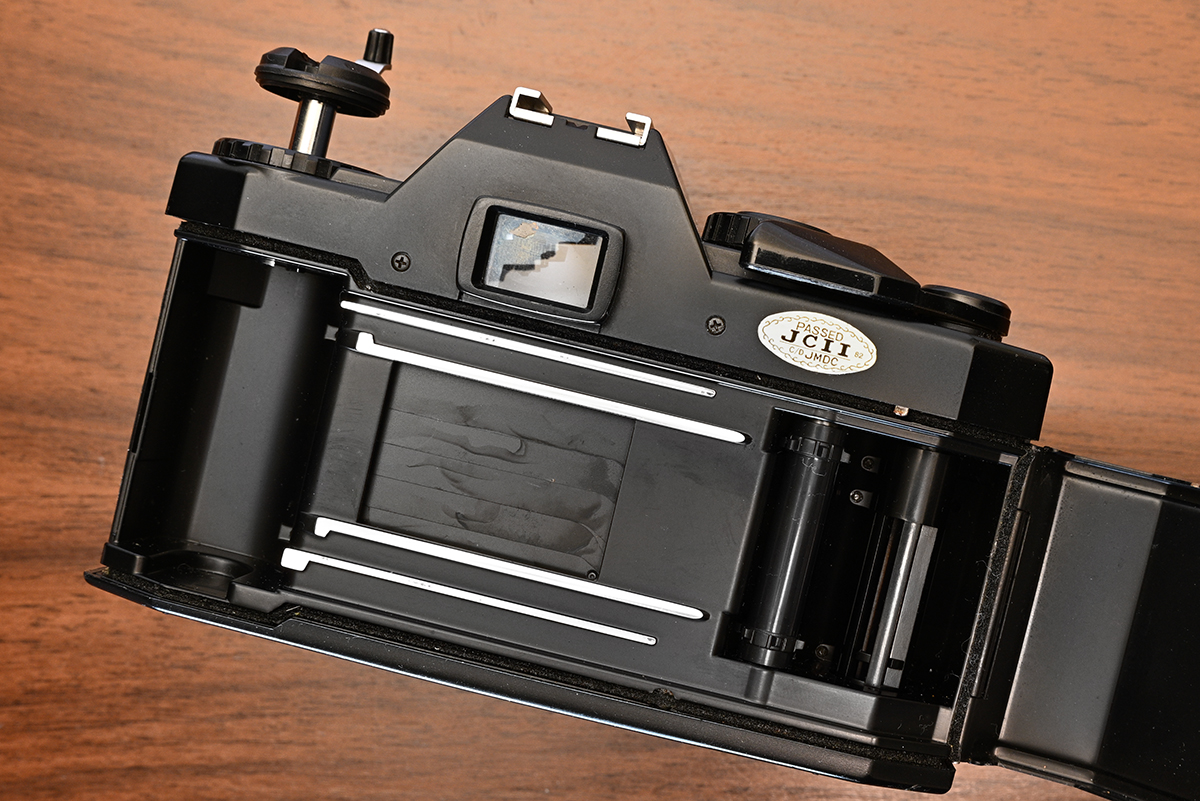
Few things beat a weekend “camera crawl” through local charity shops, searching for disregarded treasures. During my last outing, I stumbled upon this Miranda MS-3. It looked a little worse for wear sitting on the shelf, so I decided to give it a second life (and filmed a vlog about it in the process). As you can see from this screen grab, it was looking pretty sad when I first found it.
Initially, I wasn’t sold. Did I really need another electronic plastic body from the ’80s? This one was caked in dust, missing a lens, and looked dead on arrival. I walked away without a second thought. But that night, curiosity got the better of me. Miranda used to be a heavyweight in the industry, so I started digging. That search sent me down a massive rabbit hole involving Miranda, Cosina, and the king of the 1980s high street: Dixons.
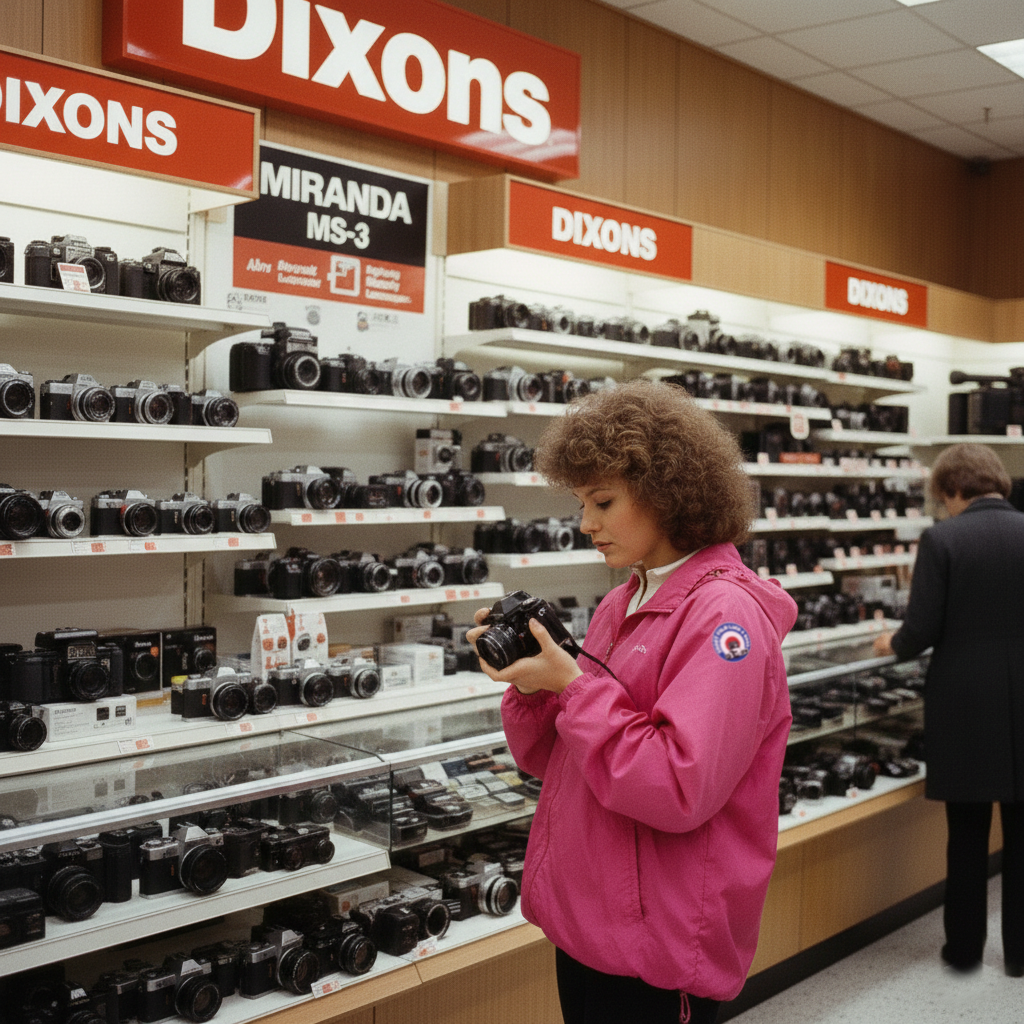
It turns out my nostalgia for the Miranda name was exactly what Dixons was banking on. After the original Miranda Camera Company went bankrupt in the late ’70s, the UK high-street giant snatched up the naming rights. It was a genius, if slightly cynical, move: Dixons could buy budget gear in bulk, slap a “prestigious” logo on it, and watch unsuspecting enthusiasts—like myself—associate it with vintage quality.
Under the Hood: The Cosina Connection
The rabbit hole went deeper. I discovered that this MS-3 is actually a Cosina CT-9 in disguise. Dixons simply approached Cosina and commissioned them to rebrand the body. It wasn’t the first, either; the MS-1 and MS-2 had already paved the way for this “imposter” lineup.
As it turns out, Cosina was the ultimate ghost-writer of the 1980s camera world. While they were seen as a budget brand, they were busy stamping different names on the CT-9 chassis and shipping them all over the globe. And one of the main attractions of this camera was it had a Pentax K-Mount which meant there were a ton of quality lenses to fit from Pentax turning this budget plastic camera into serious picture taking machine once you took the “Miranda” kit lens off (which was also a Cosina lens).
The Ultimate Plot Twist: Cosina Today
As I dug deeper, the story took a sharp turn. Far from being a forgotten budget brand, Cosina has transformed into a modern-day optics powerhouse. They’ve moved away from the “budget-friendly” label and now design and manufacture high-end glass for the likes of Nikon and Sony.
The real shocker? Since the early 2000s, Cosina has been the force behind Voigtlander. If you own a high-end Leica M-mount Voigtlander lens—like my own APO-Lanthar 50mm—it was actually born in a Cosina factory.
Back to the camera
Armed with fresh knowledge and a heavy dose of curiosity, I headed back to the charity shop. I wasn’t going in empty-handed; I brought along some batteries and a Chinon 50mm f/1.7 K-mount lens to see if this “Miranda” had any life left in it.
Things didn’t start well. The battery compartment was cross-threaded and just spun in place. Luckily, the shop assistant had a tiny screwdriver, allowing me to pull the entire bottom plate to get the door open. I popped the batteries in… and nothing. The camera was stone-dead.
A £5 Victory
I wasn’t ready to give up. Noticing the battery contacts were tarnished, I gave them a quick scrape with a pair of scissors to clear the corrosion. I tried the batteries again, and suddenly—click. The shutter fired!
I was elated. I handed over my £5 asking price, stepped out onto the street, and immediately started shooting. There is a unique thrill in taking photos with a camera that costs less than a fancy sandwich—especially one with such a bizarre, secret history. And the camera works just fine as you can see from one of the many photos I took on Ilford Delta 400.
Miranda MS-3
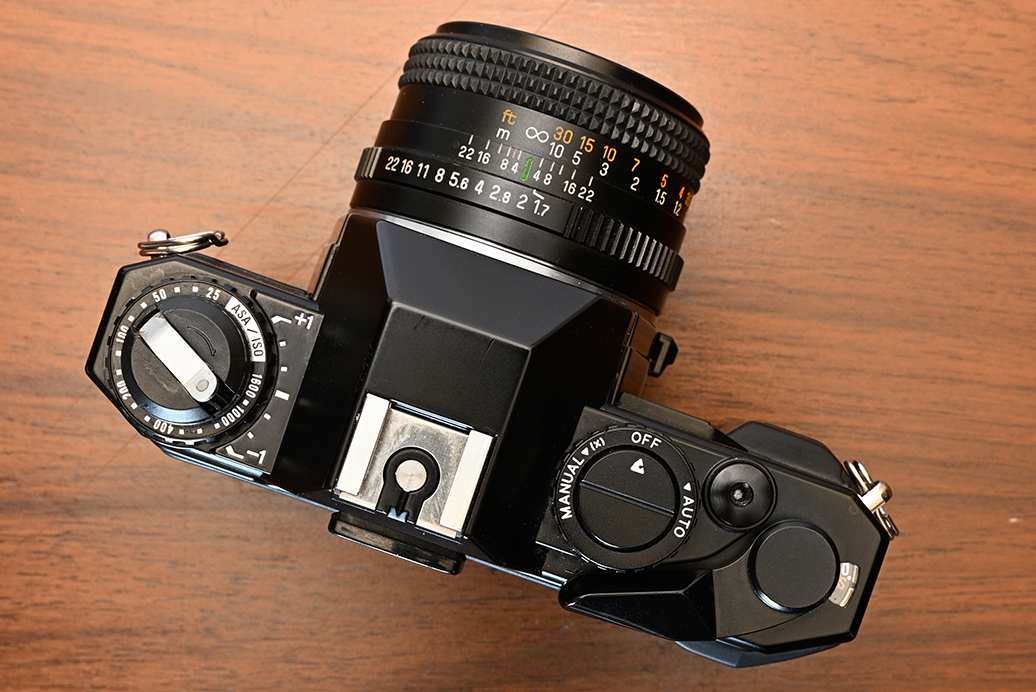
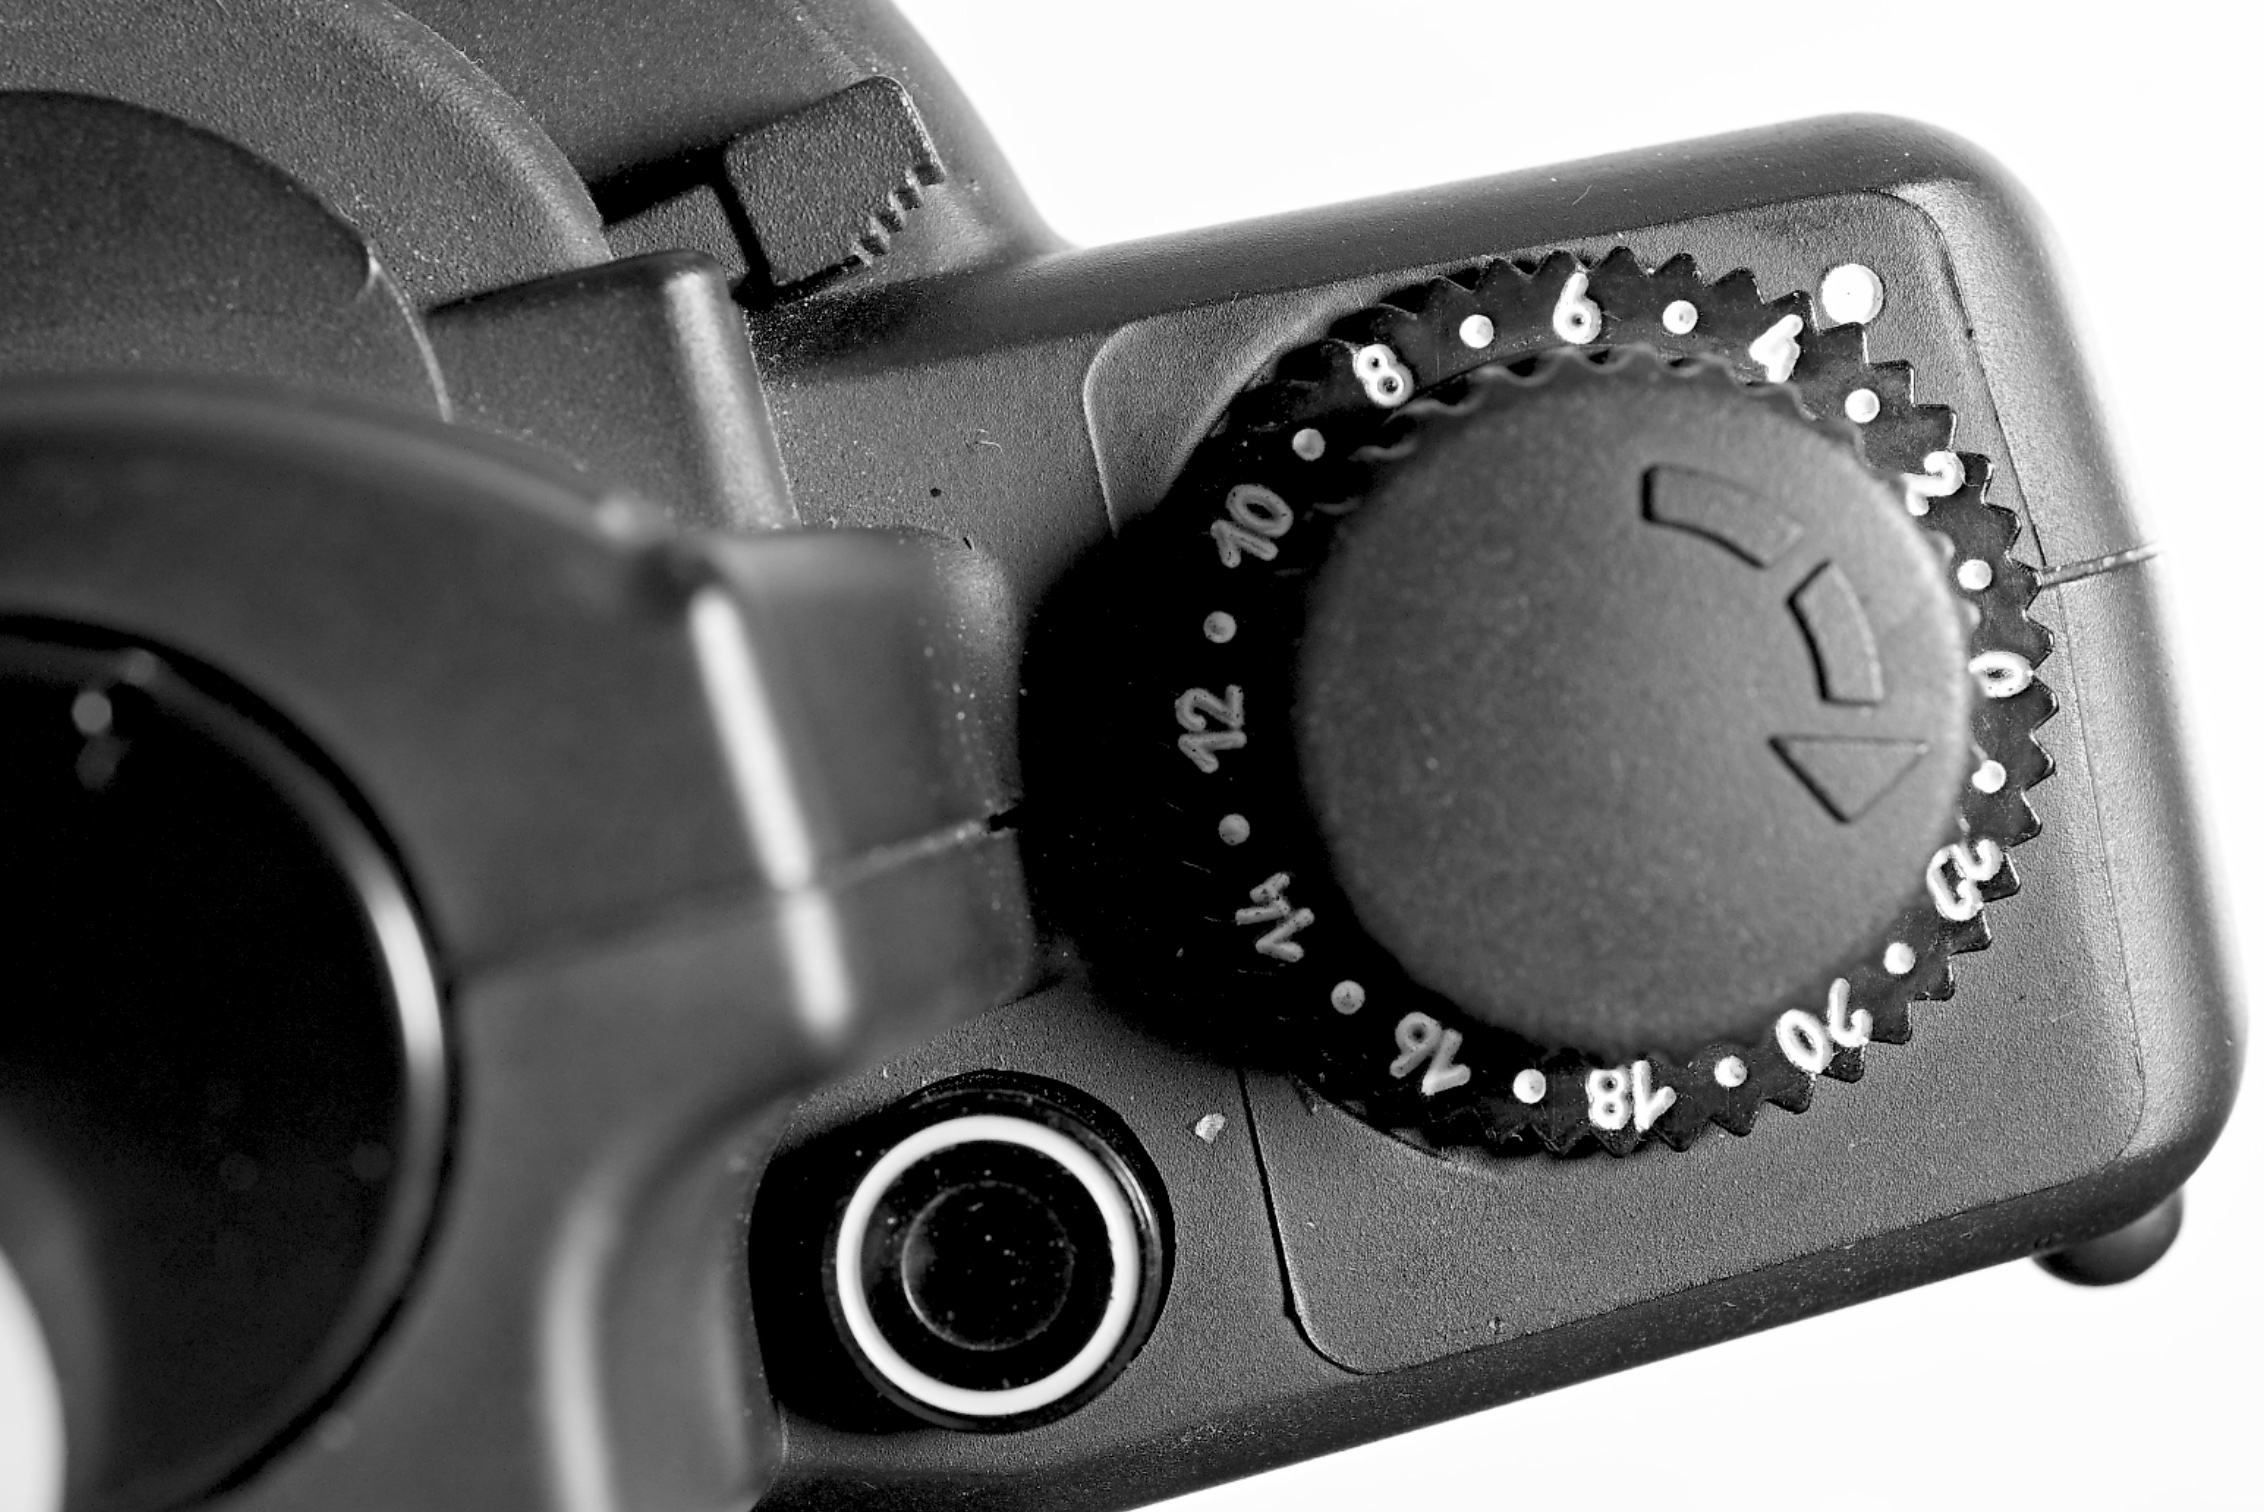
Quirky Controls: The Missing Shutter Dial
The MS-3 has a surprising trick up its sleeve: it offers both Aperture Priority and Full Manual modes, but you won’t find a shutter speed dial anywhere on the body.
The top dial is deceptively simple. From the “Off” position, a twist to the left engages Manual mode, while a twist to the right shifts it into Aperture Priority. But how do you actually change your shutter speed in manual?
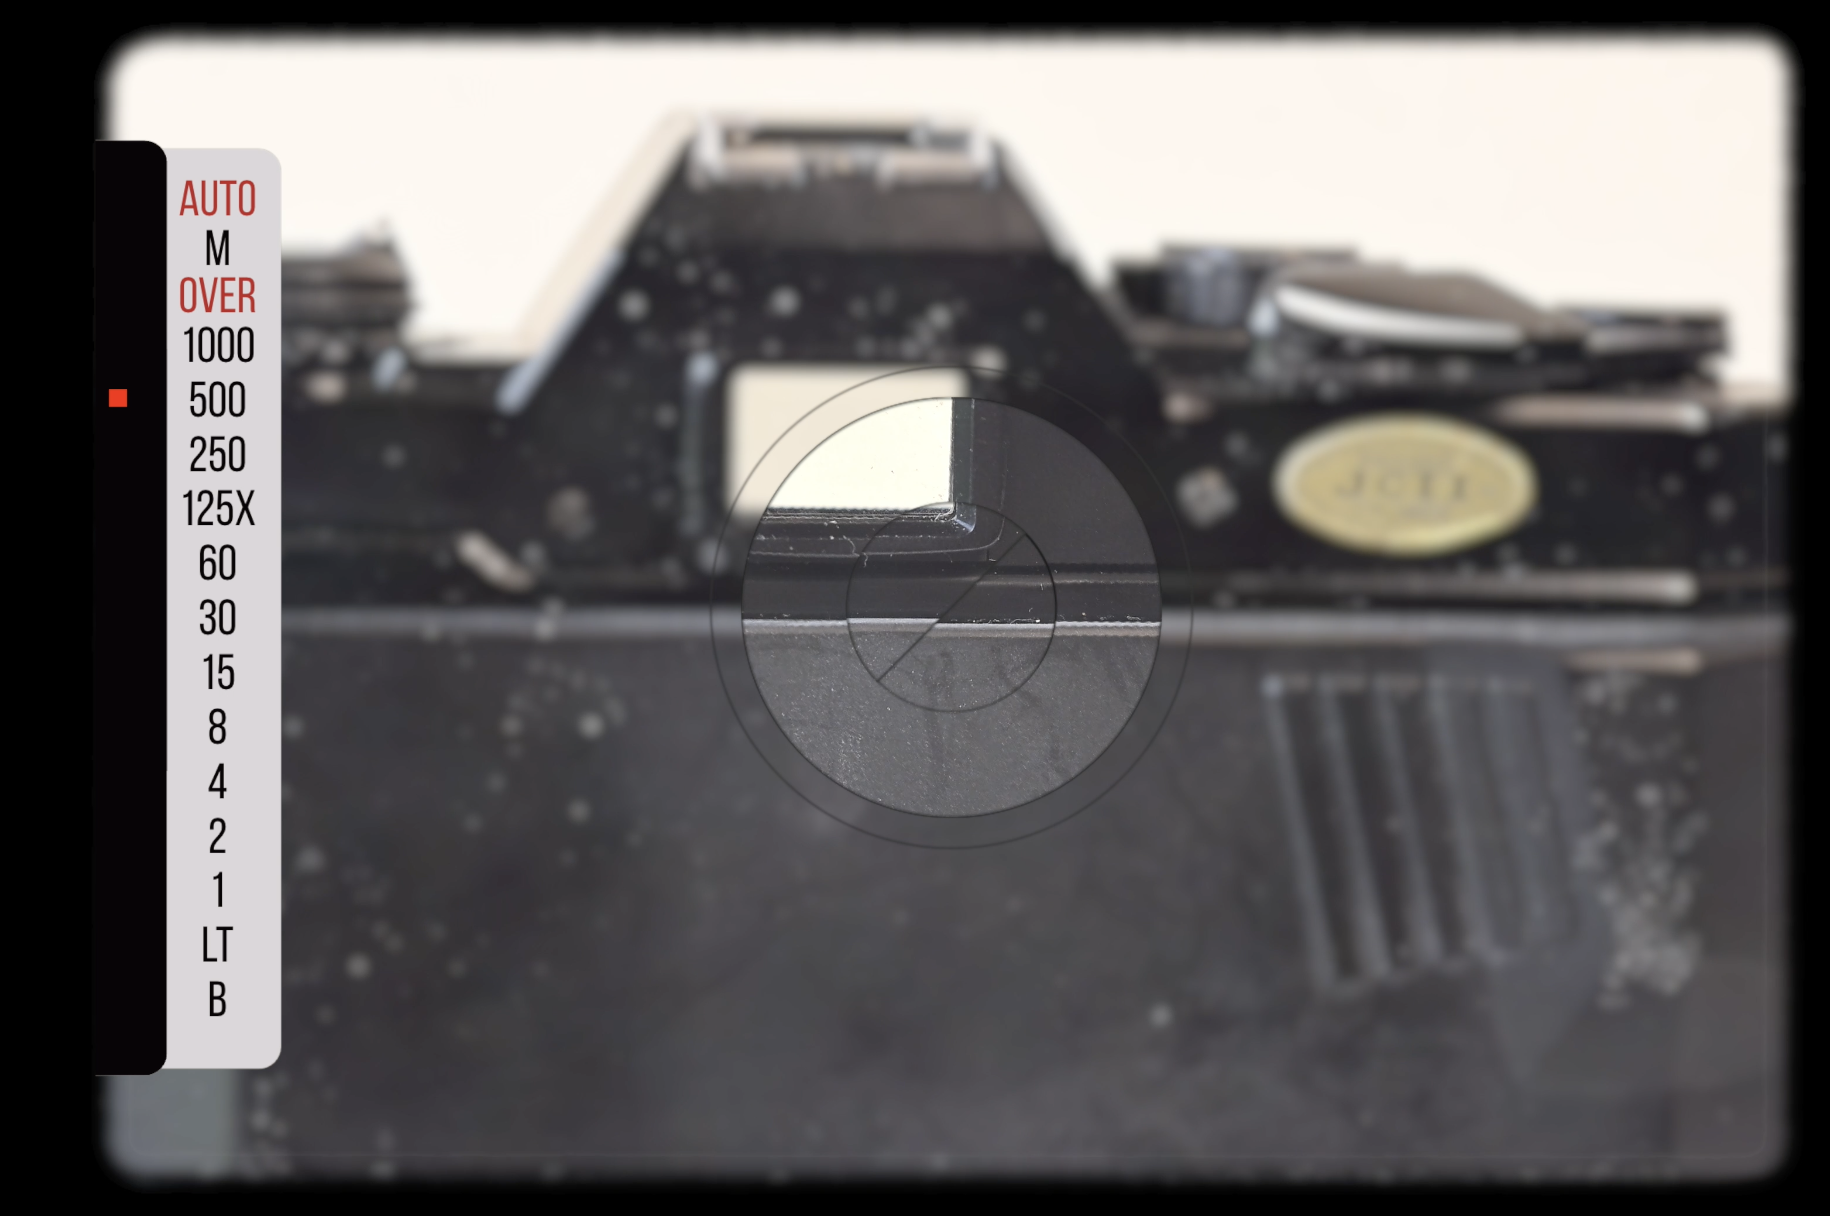
The “Hidden” Interface
The answer lies tucked away inside the viewfinder. To adjust your speeds, you use a “rocker” button:
Press Up: Increases the shutter speed.
Press Down: Decreases the shutter speed.
As shown in the illustration below, your selection is confirmed by a glowing red square LED next to the corresponding speed in the viewfinder. It’s an unusual, tactile experience—very “high-tech” for the mid-80s—and it definitely takes a minute to get used to!
The “LT” Factor: Long Exposure Secrets
Another hidden gem on the MS-3 is the “LT” (Long Time) function. When you’re shooting in Aperture Priority mode and the light levels drop, the camera doesn’t just give up. If the required shutter speed exceeds one second, it automatically enters “LT” mode.
In this mode, the shutter stays open for the full duration needed to get a correct exposure—typically anywhere from 5 to 7 seconds. It’s an incredibly useful feature for tripod-mounted night photography or capturing motion blur, and not something you’d necessarily expect from a £5 charity shop find!
ISO – 25 – 1600
Shutter 1/1000 – 1s (plus LT and BULB)
Lens Fitment – Pentax K-Mount
Self Timer
Fully Electronic Shutter
Split Microprism ViewFinder
Counter Window
Exposure Compensation
2 x LR44 Batteries
After shooting an entire roll of Ilford Delta 400 as a test I was pleased to see no light leaks and the exposures were consistent with the various lighting I was shooting in on the street.
There is only one issue I noticed which was inconsistent frame separation. I will have to watch this as it could lead to overlapped frames! Maybe I just need to be less heavy handed on advancing the camera! I hope so!
A few of my photographs
Here are a few examples from the Ilford Delta 400 developed in Rodinal using the Chinon 50mm f1.7 lens. A cracking little multi-coated lens.
Final Thoughts: A £5 Gamble That Paid Off
It’s rare to walk into a shop today and walk out with a working film camera for a fiver—especially with the analogue world driving prices sky-high. While a standard MS-3 usually fetches around £30 on eBay, I’ve seen versions branded as the “Cosina MS-3” listed for over £100! It seems the MS-3 was such a hit in the UK that Cosina decided to take it international. Since they didn’t own the “Miranda” name outside of Dixons’ territory, they simply slapped their own logo on it and kept the model number.
The Verdict: Should You Buy One?
If you can find one that works, absolutely. Just remember: these are 40-year-old electronic cameras. They aren’t as bulletproof as a mechanical Nikon FM, so ask the right questions before you buy.
But if you snag a working copy, you’re opening the door to the massive world of Pentax K-Mount and Chinon glass—some of the best value-for-money lenses on the market. For the price of a sandwich, I got a piece of history and a capable shooter. Not a bad day at the charity shop!
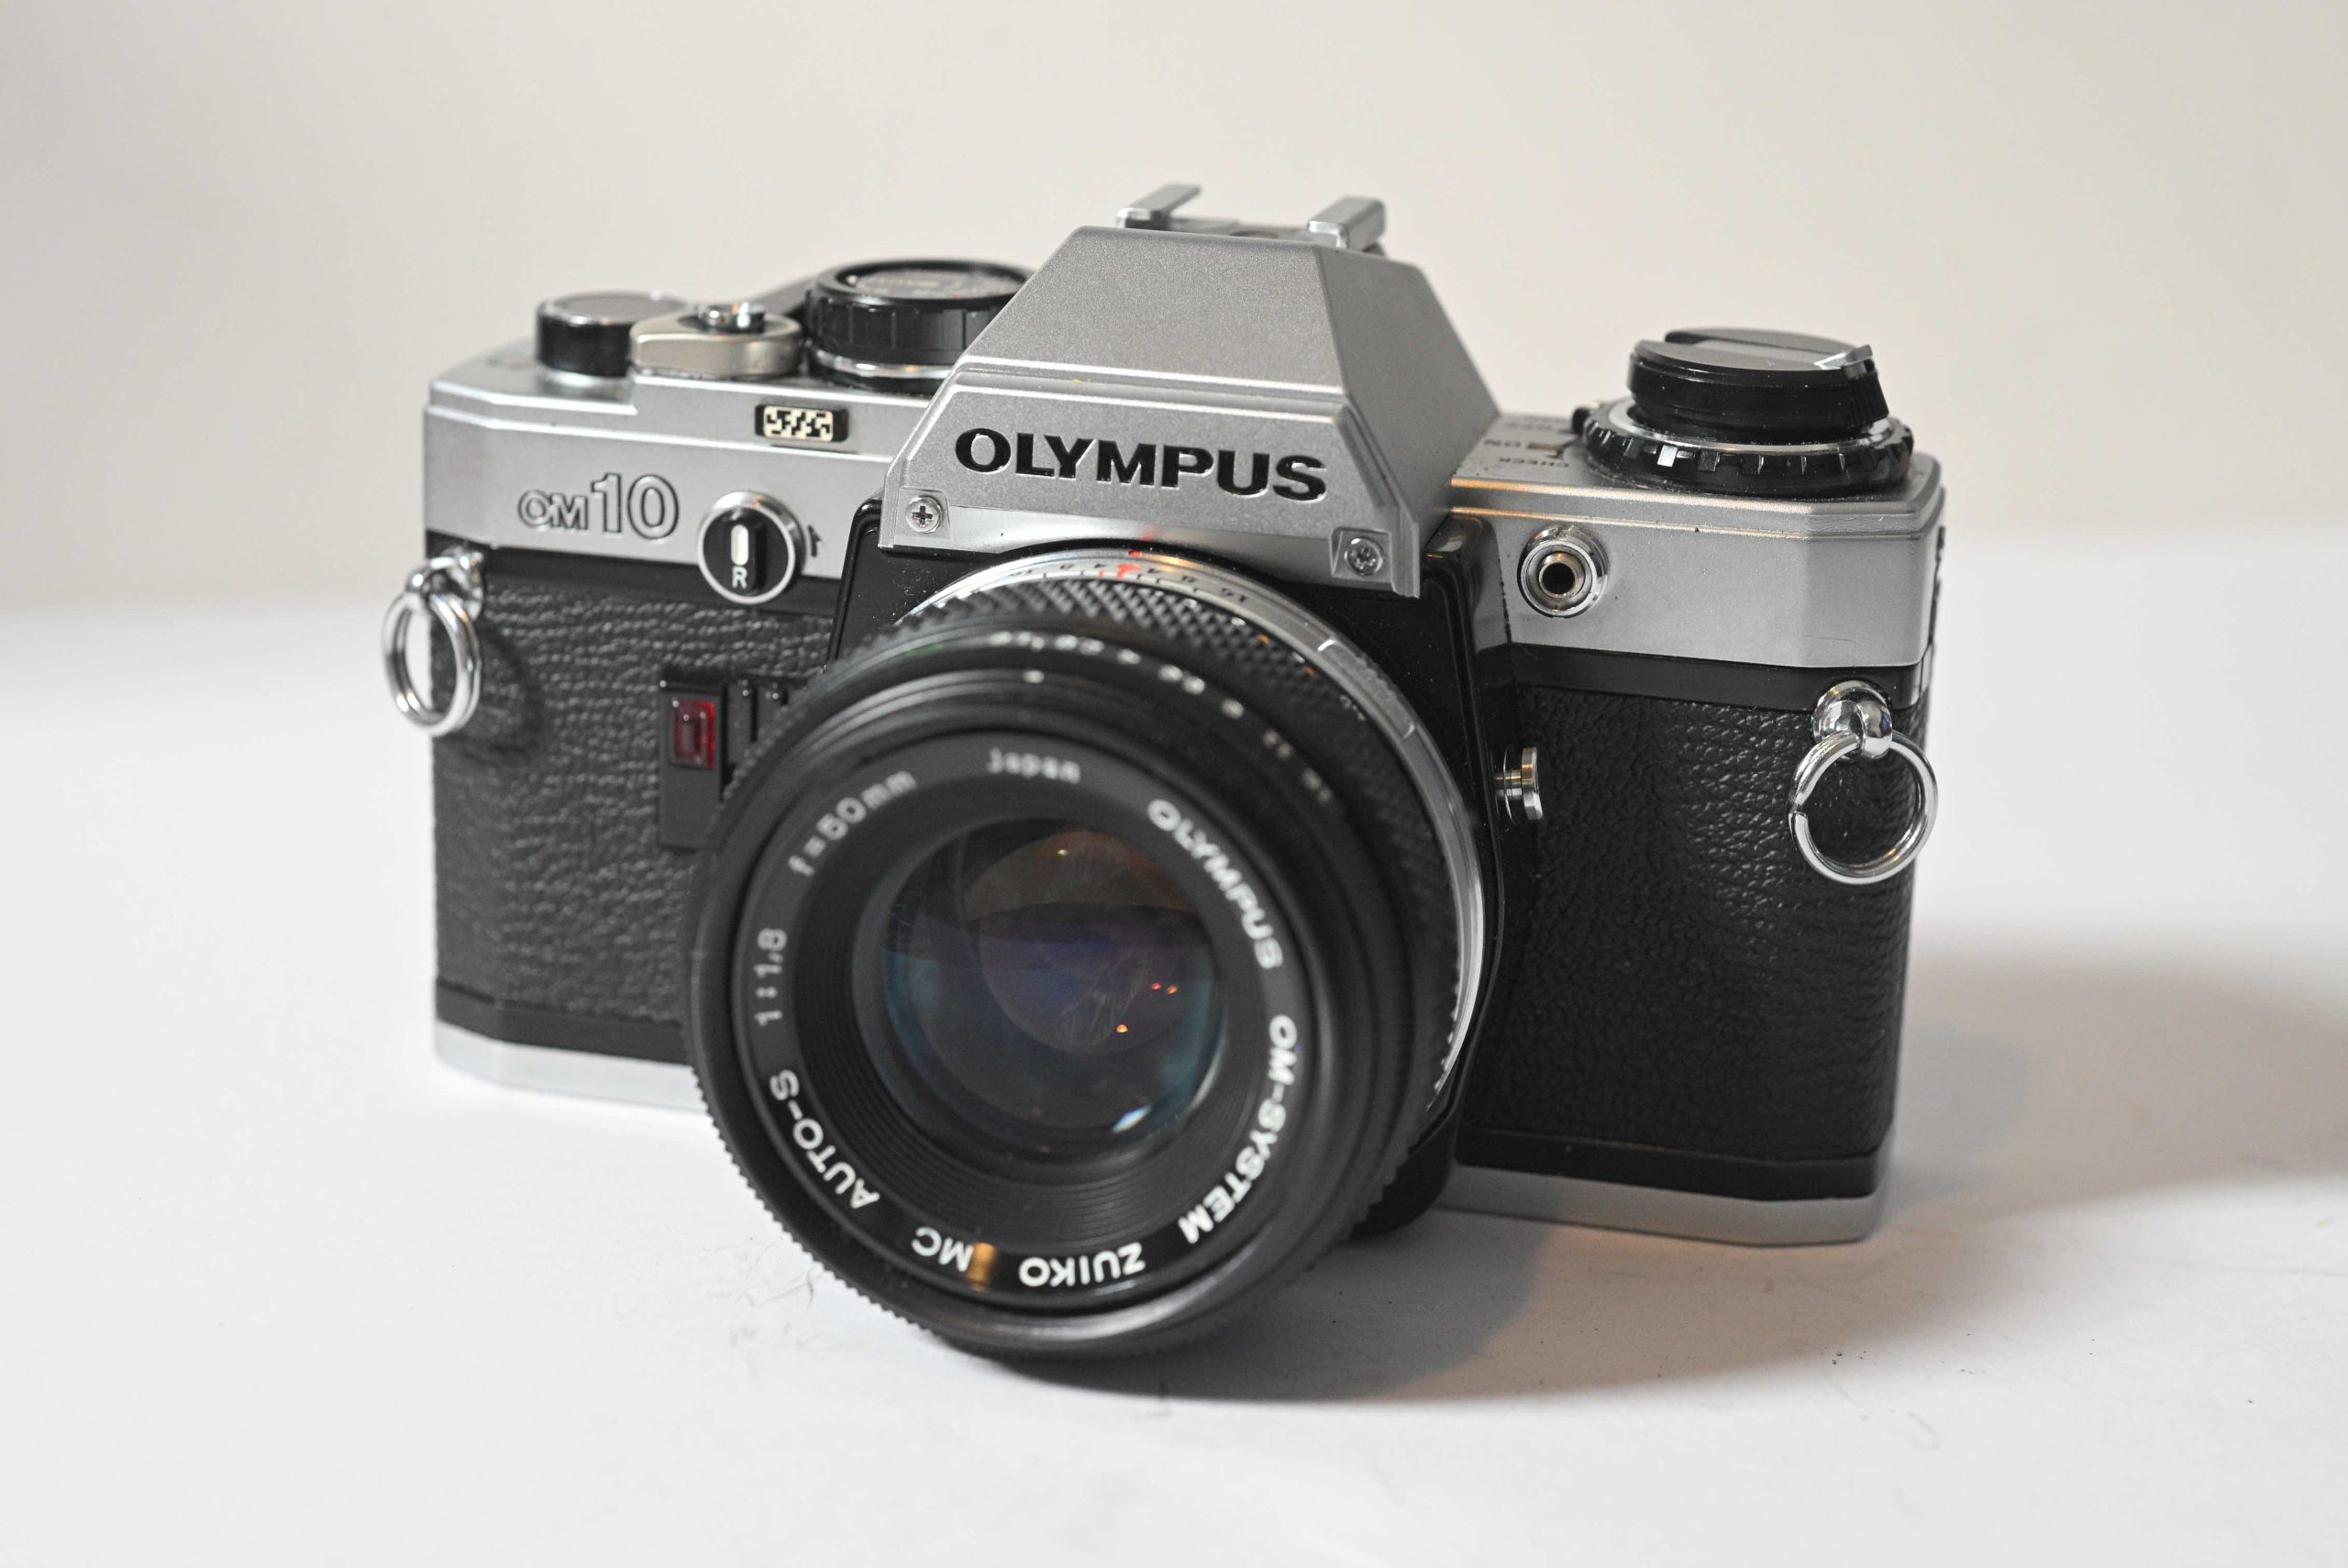
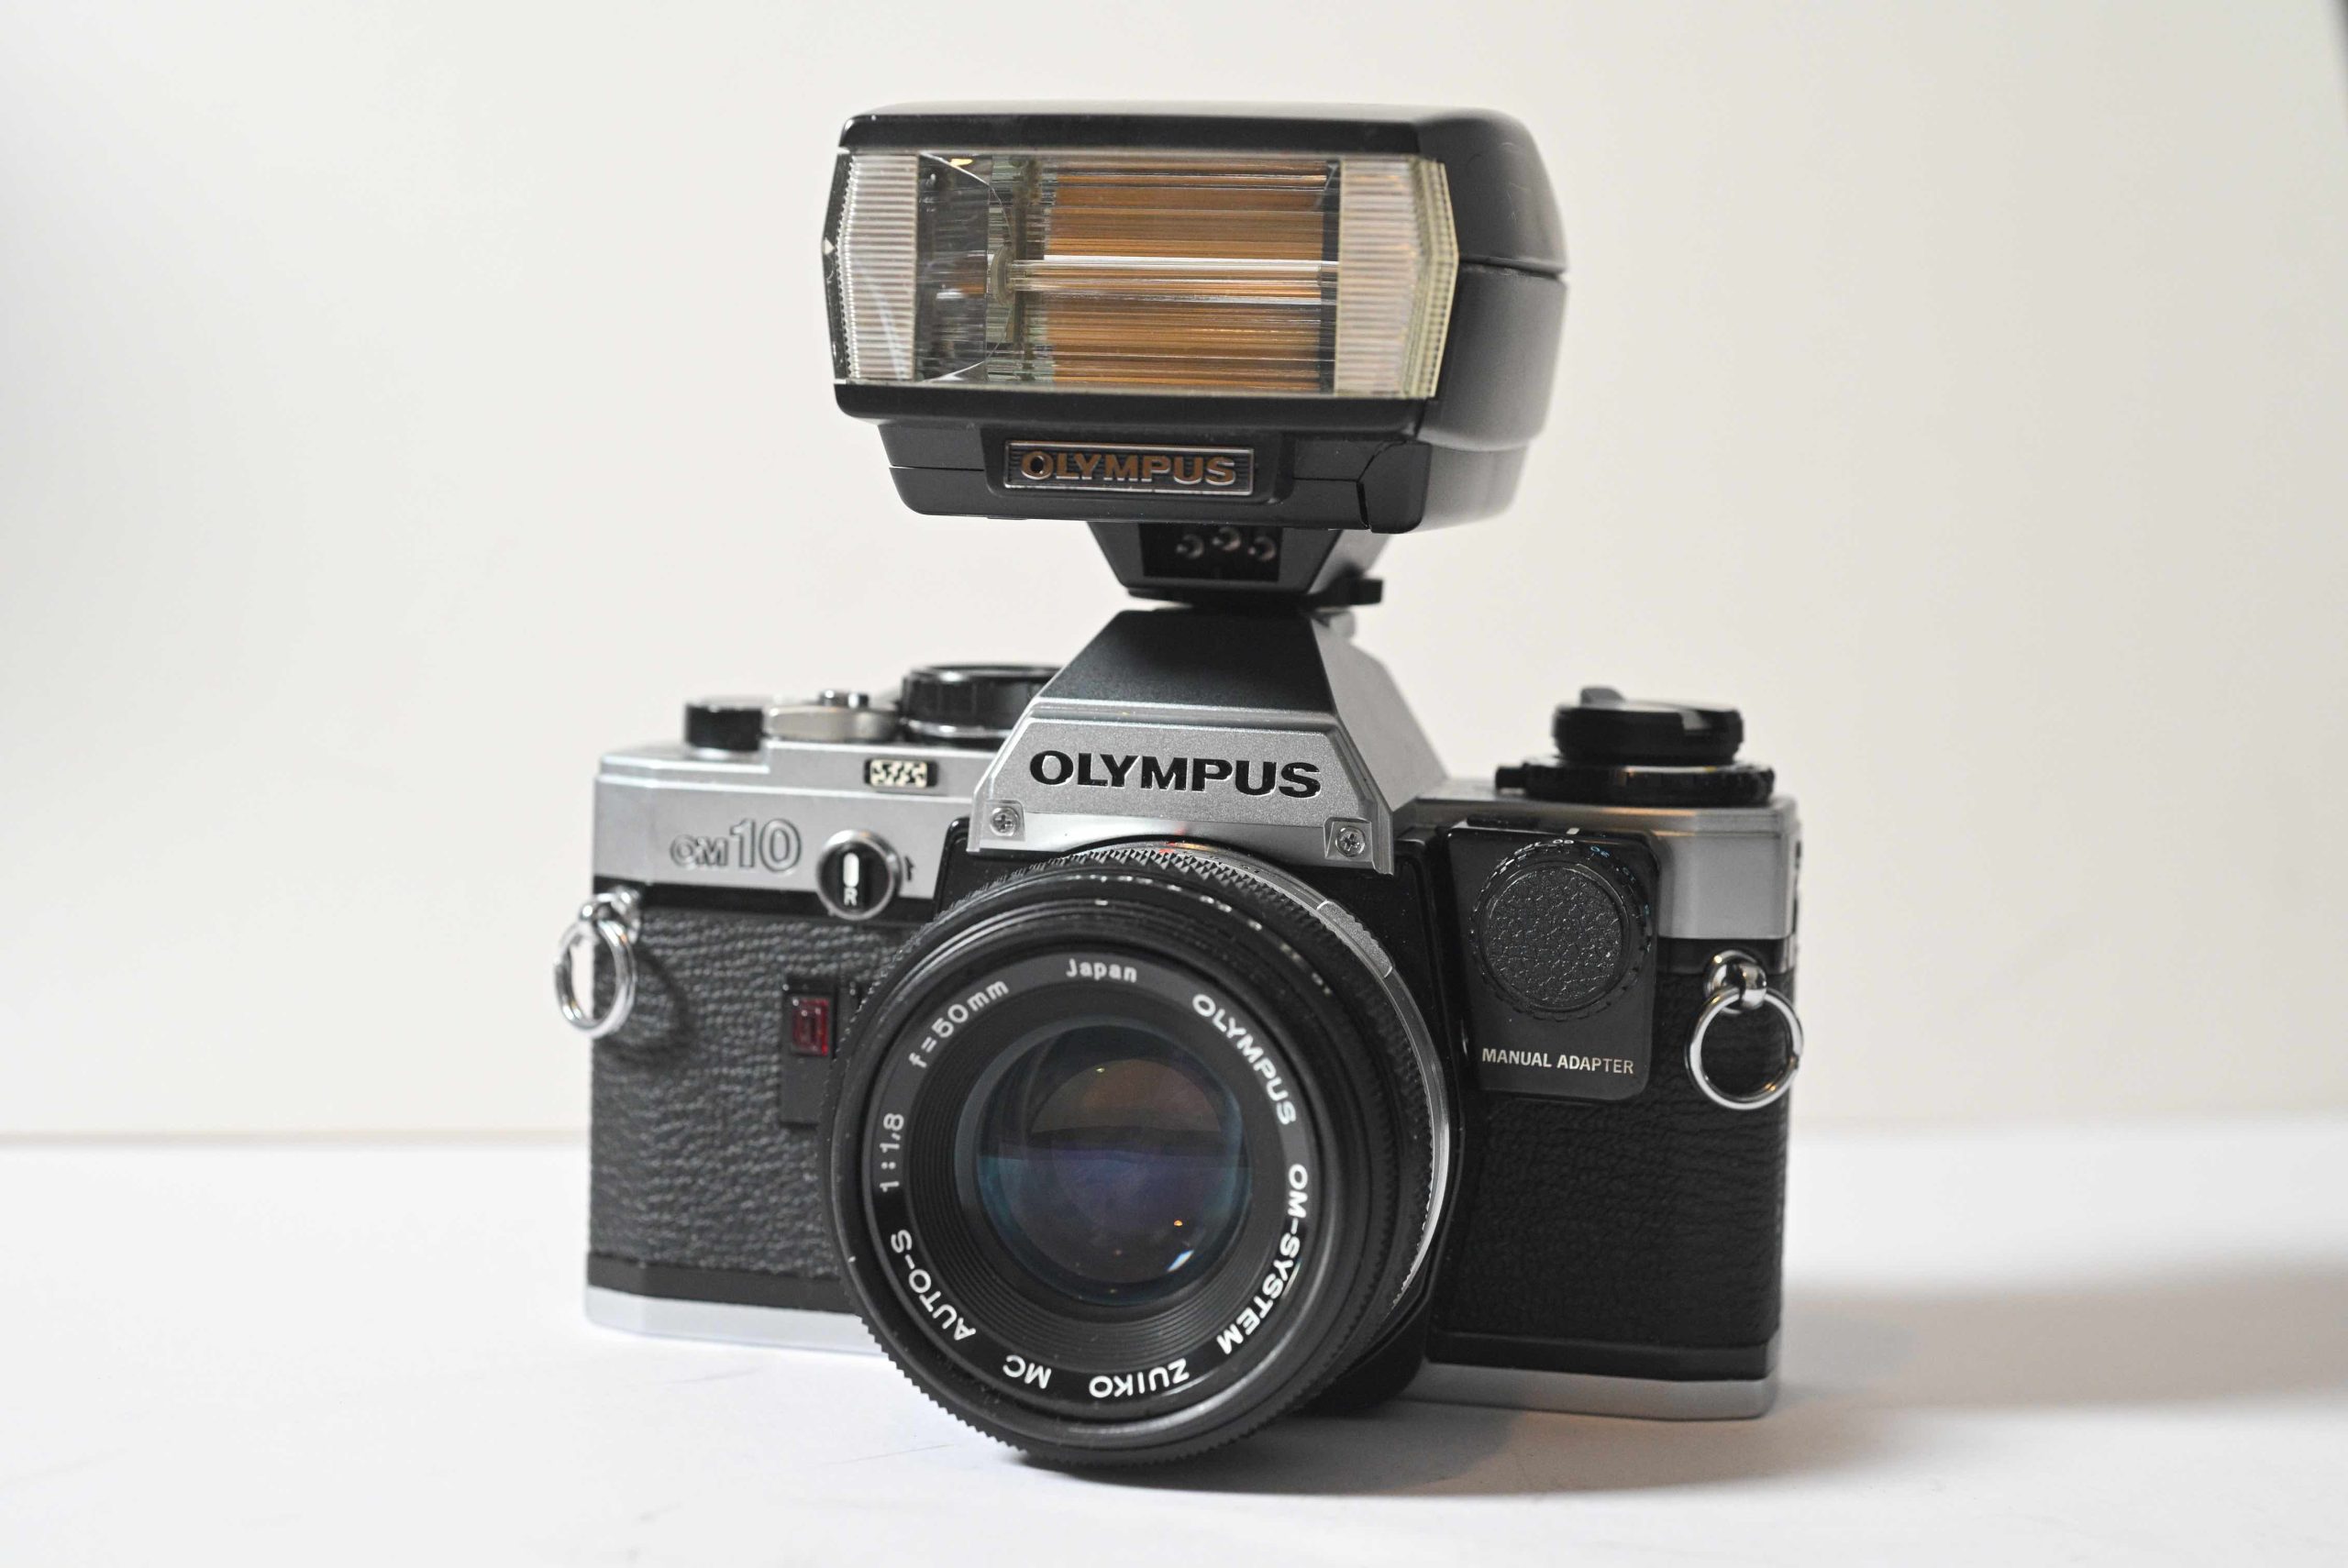
In the world of vintage SLRs, the Olympus OM series is legendary for shrinking the bulky 35mm camera into something sleek, pocketable, and beautiful. While the single-digit models (like the OM-1) were for the pros, the two-digit series brought that magic to the masses.
Released in 1979, the OM-10 was Olympus’s camera for the entry-level market. It was designed for people who wanted the prestige and lens quality of the OM system without the professional price tag or the steep learning curve.
Features of the OM-10
Aperture Priority by Default: The OM-10 was designed to be easy. In its standard form, you choose the aperture, and the camera’s computer selects the shutter speed.
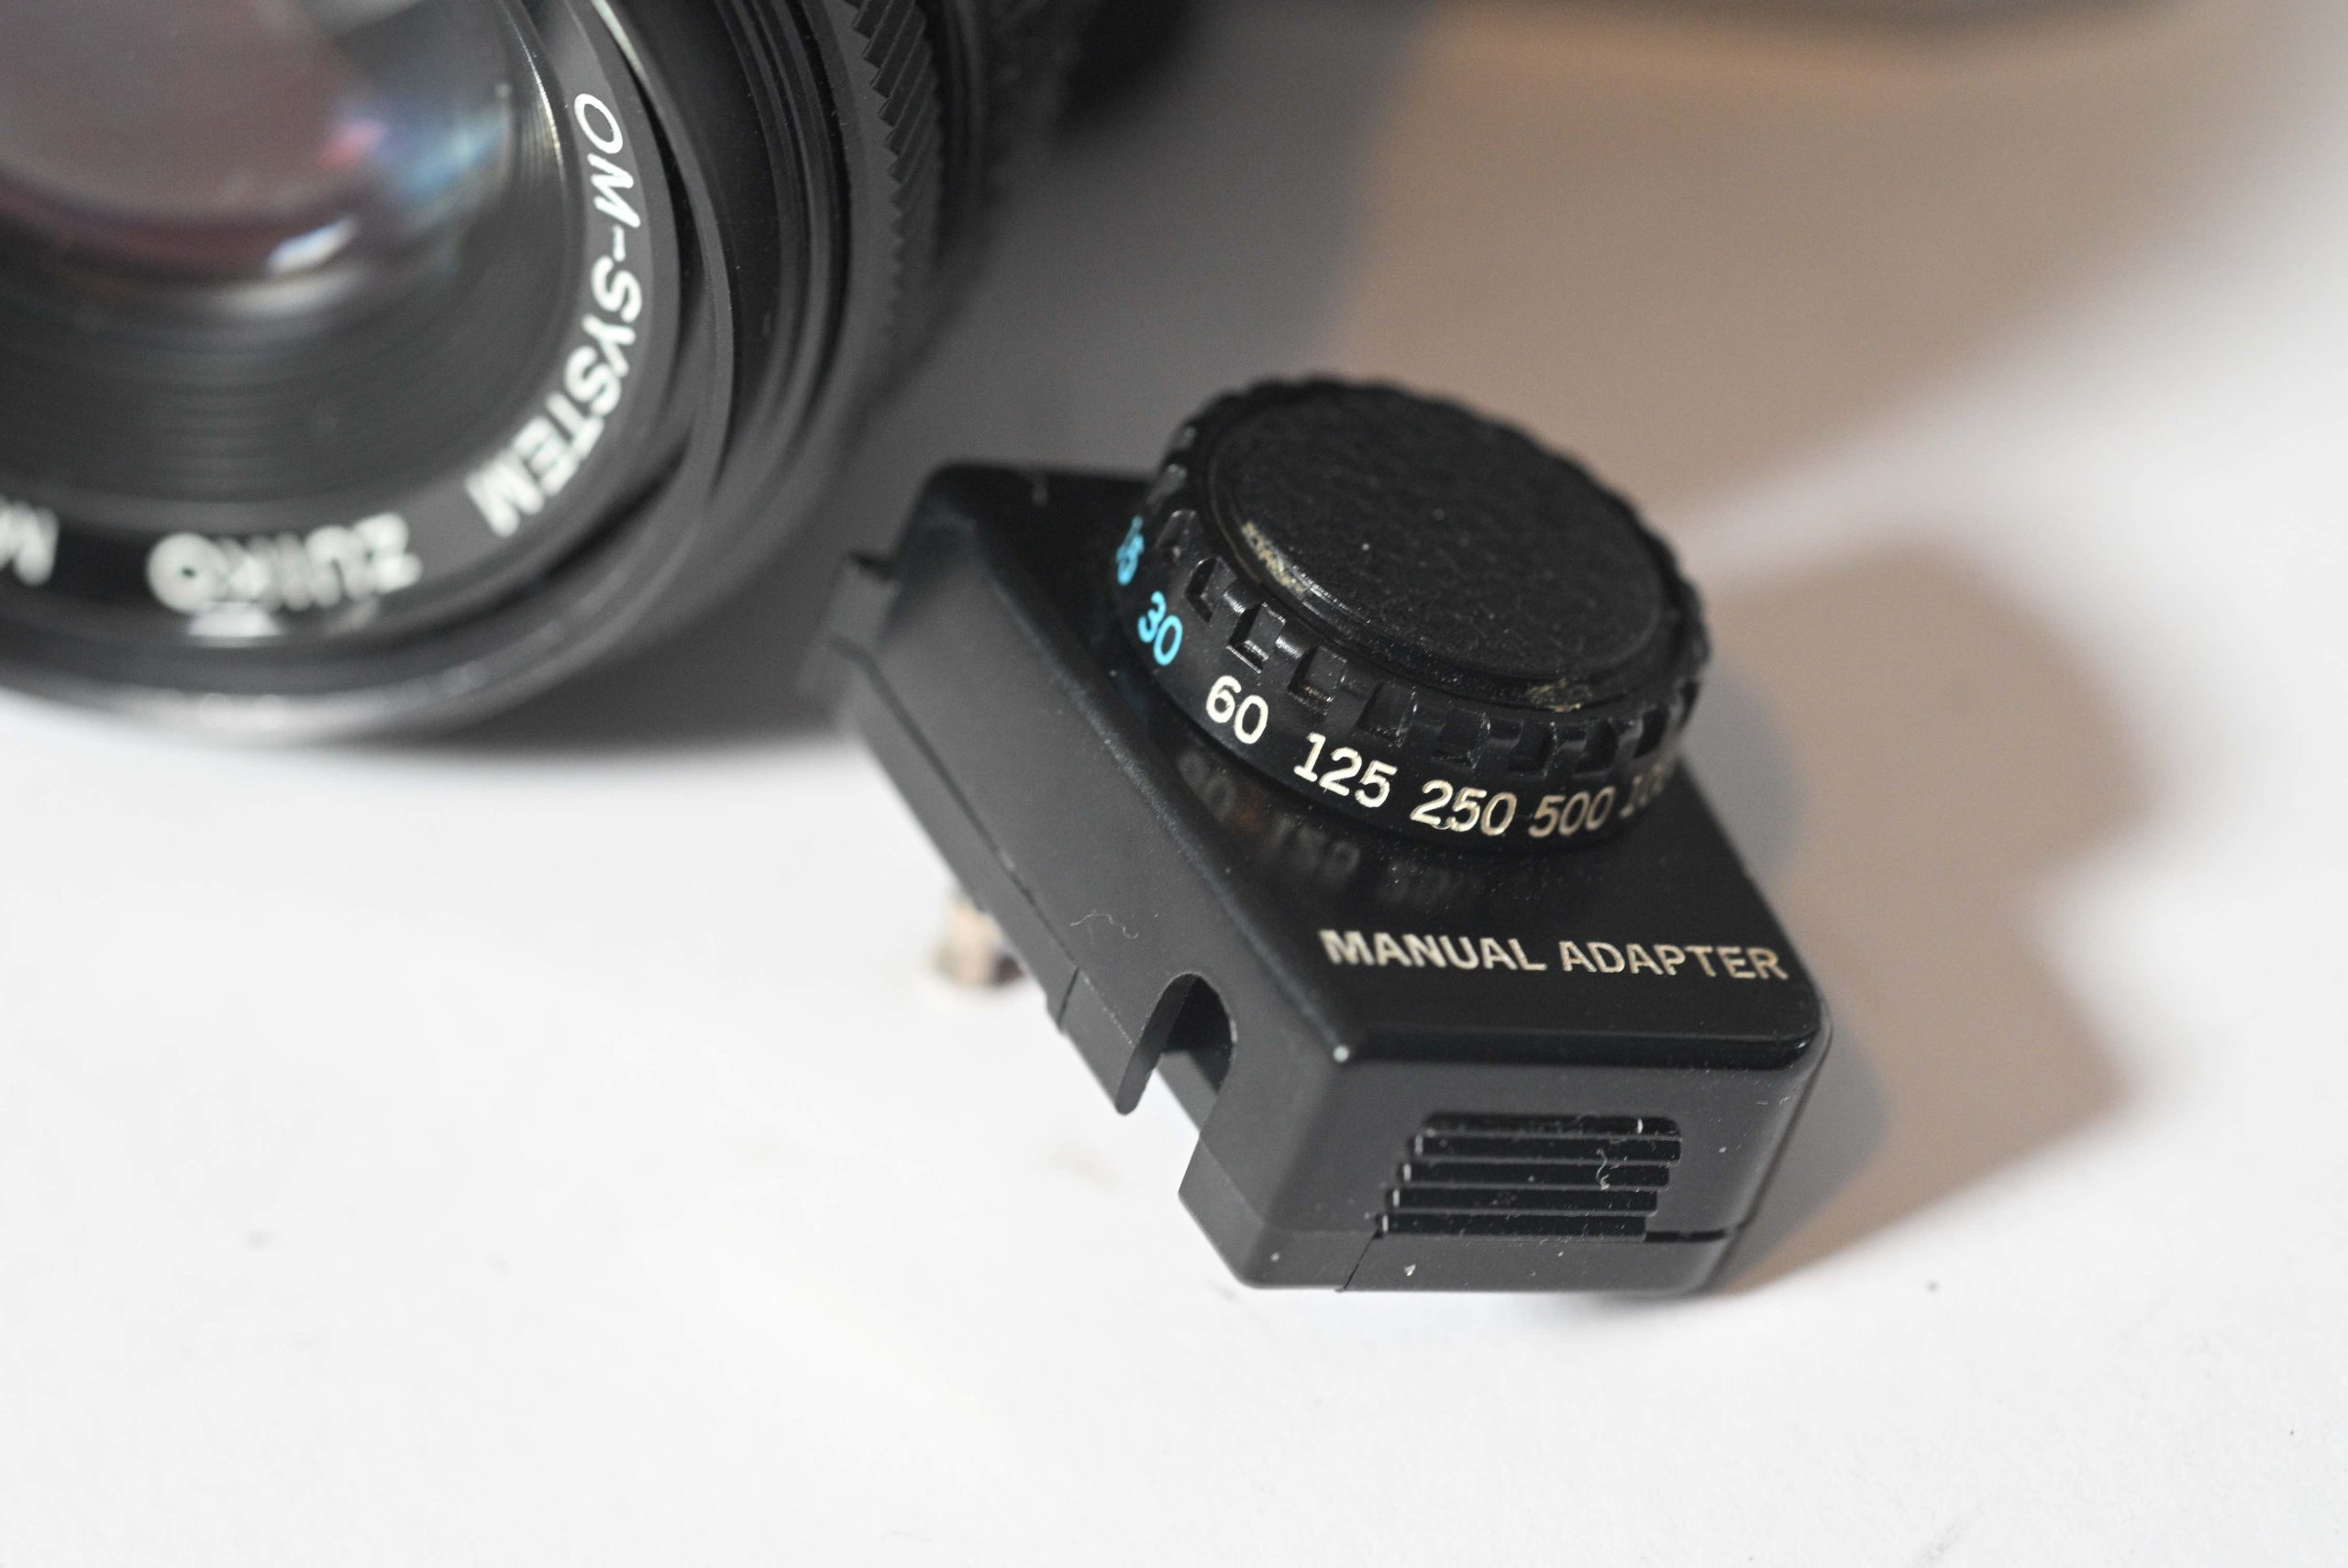
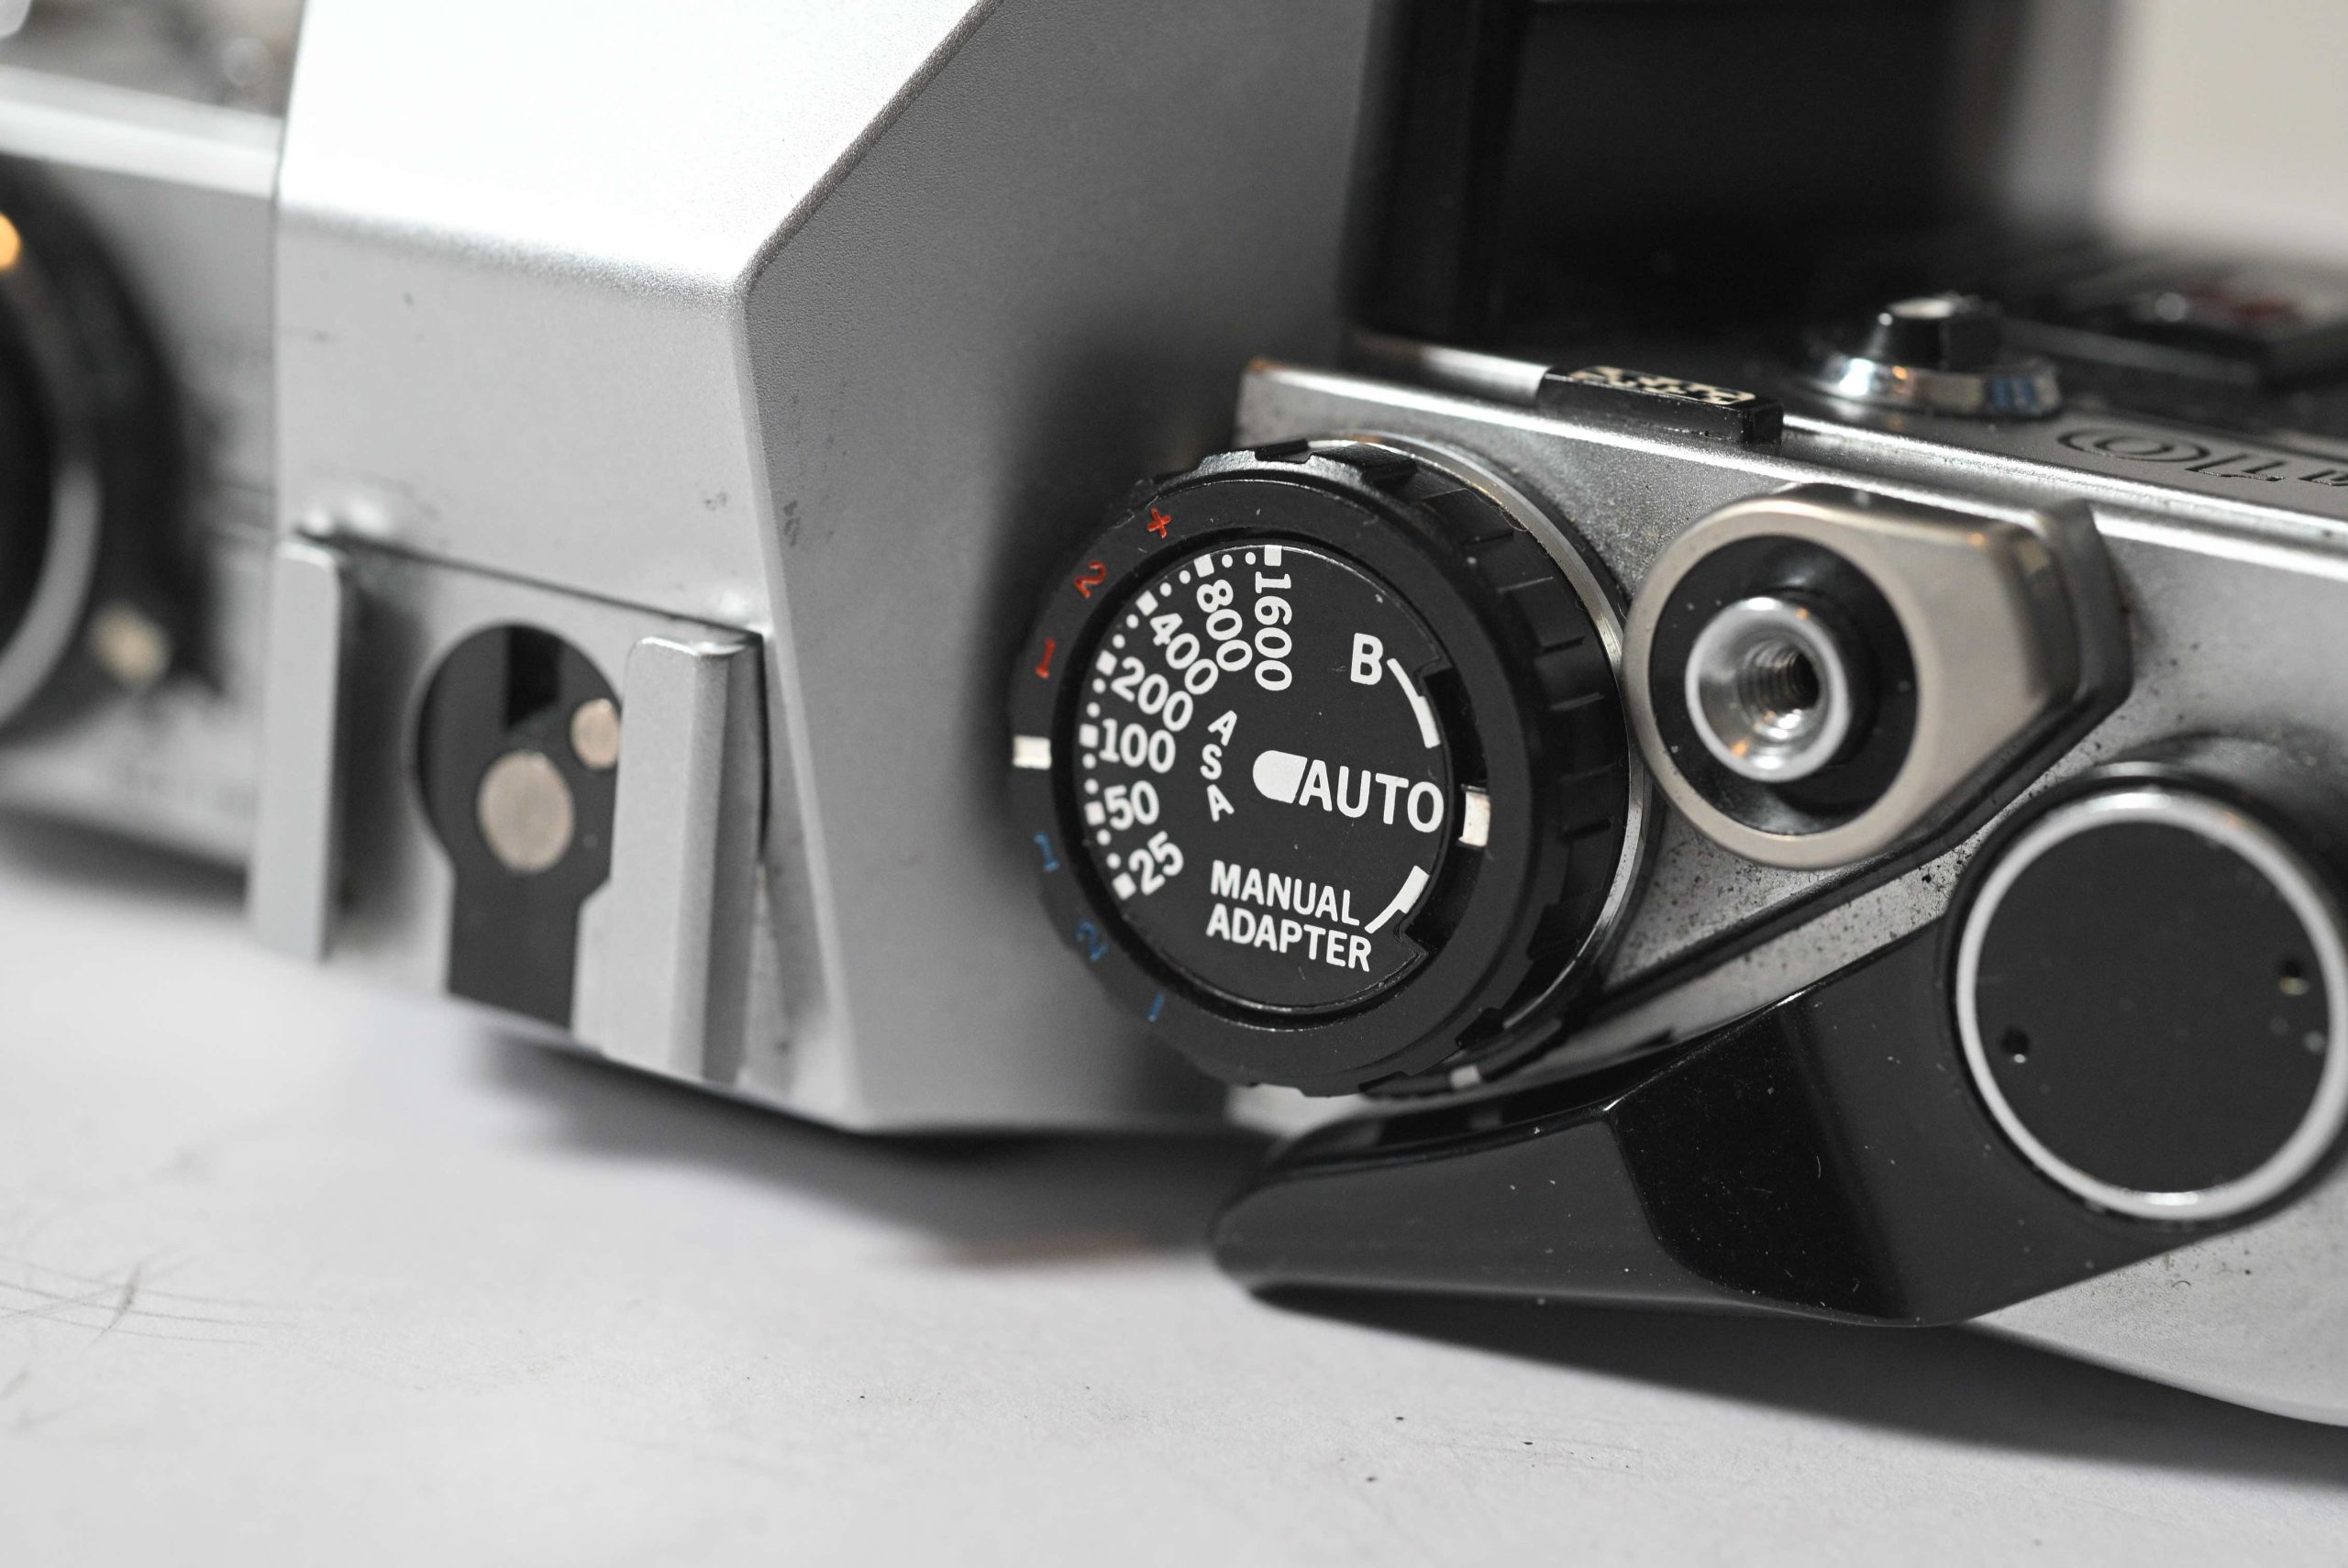
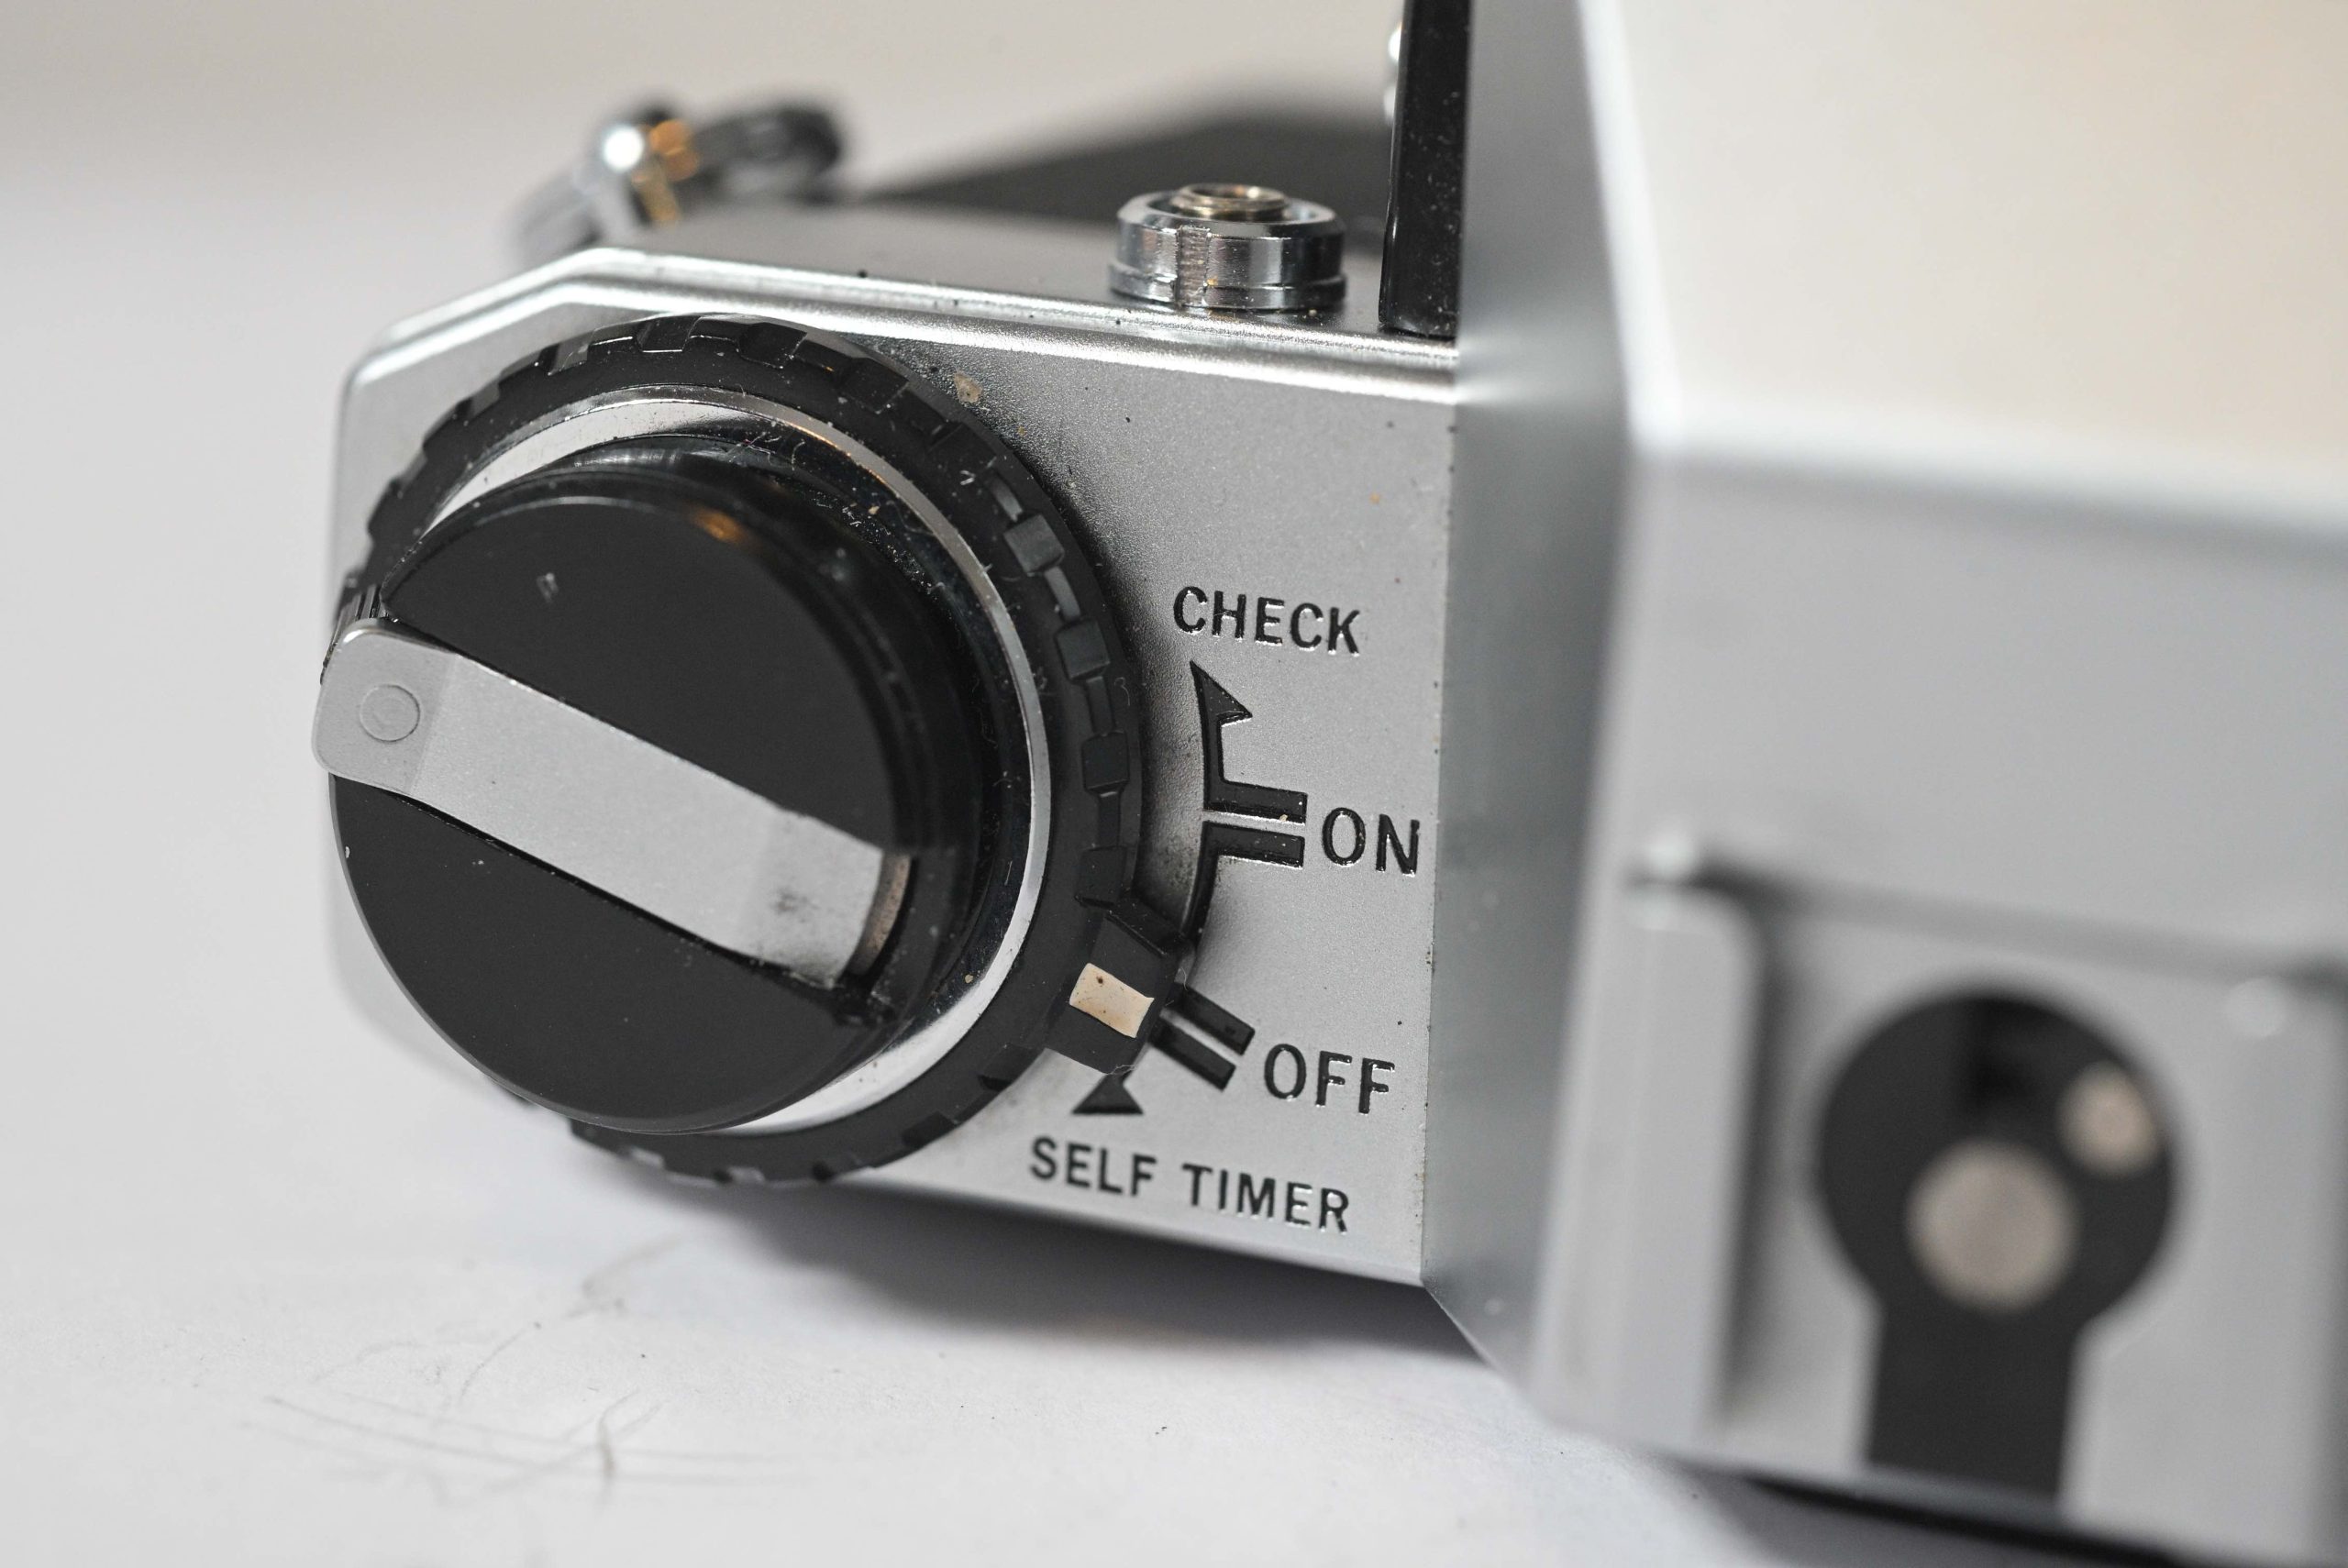
The “Manual Adapter” Quirk: Unlike most SLRs, the OM-10 did not have a shutter speed dial. To shoot manually, you had to buy a small, plug-in “Manual Adapter” that sat on the front of the body.
Light and Compact: It is incredibly light (approx. 430g), making it a favourite for travellers and students.
OTF (Off-The-Film) Metering: It shared the sophisticated light metering of its big brothers, measuring light reflecting off the film itself during the exposure for incredible accuracy.
Speeds: 1s – 1/1000th. And Bulb.
ISO: 25 – 1600
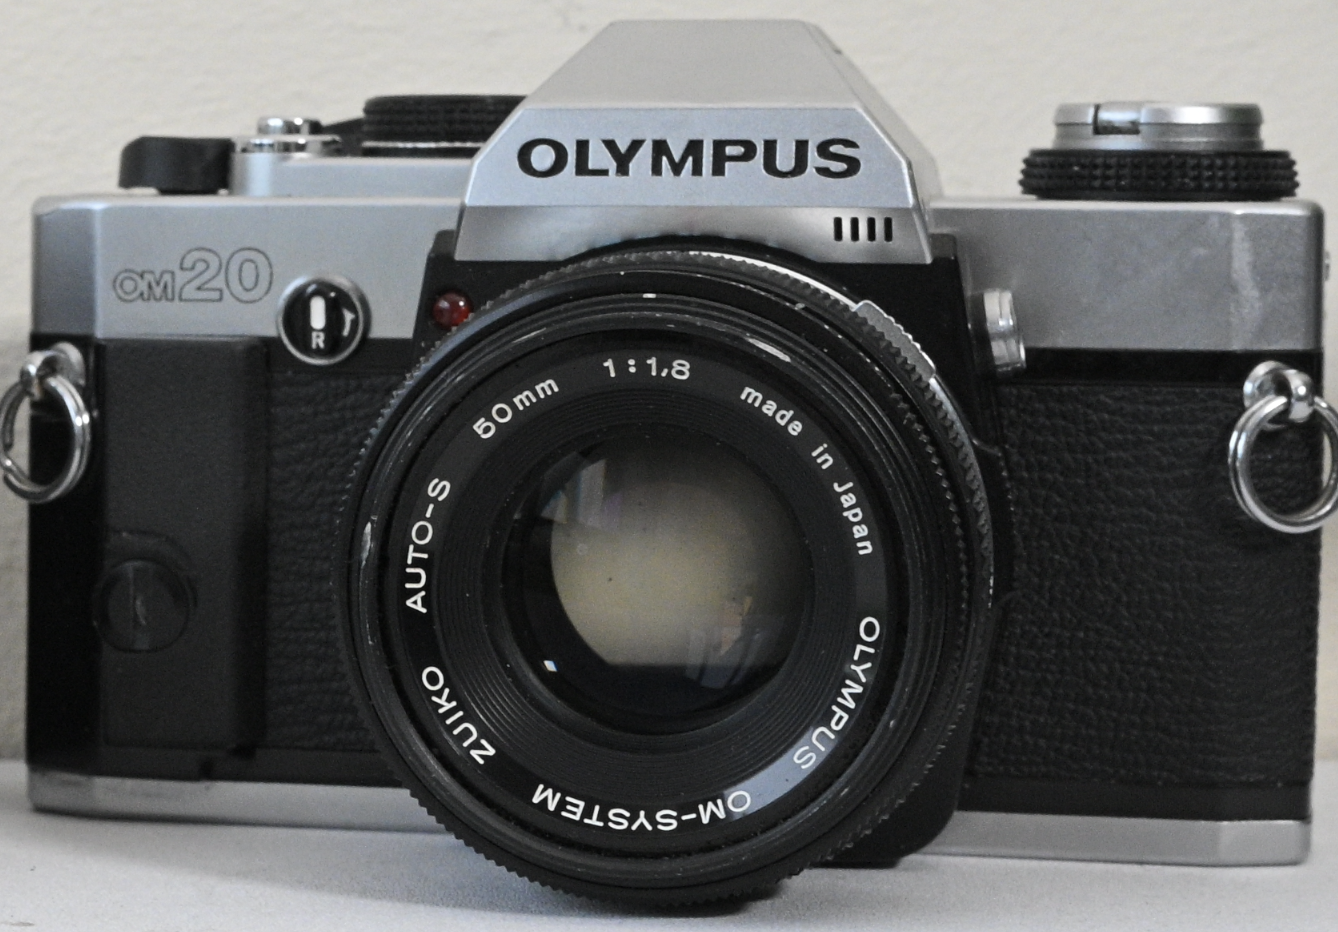
It was a massive success, but the lack of native manual control and the “fiddly” nature of the external adapter left enthusiasts wanting more. The OM-20 in 1983 answered those prayers!
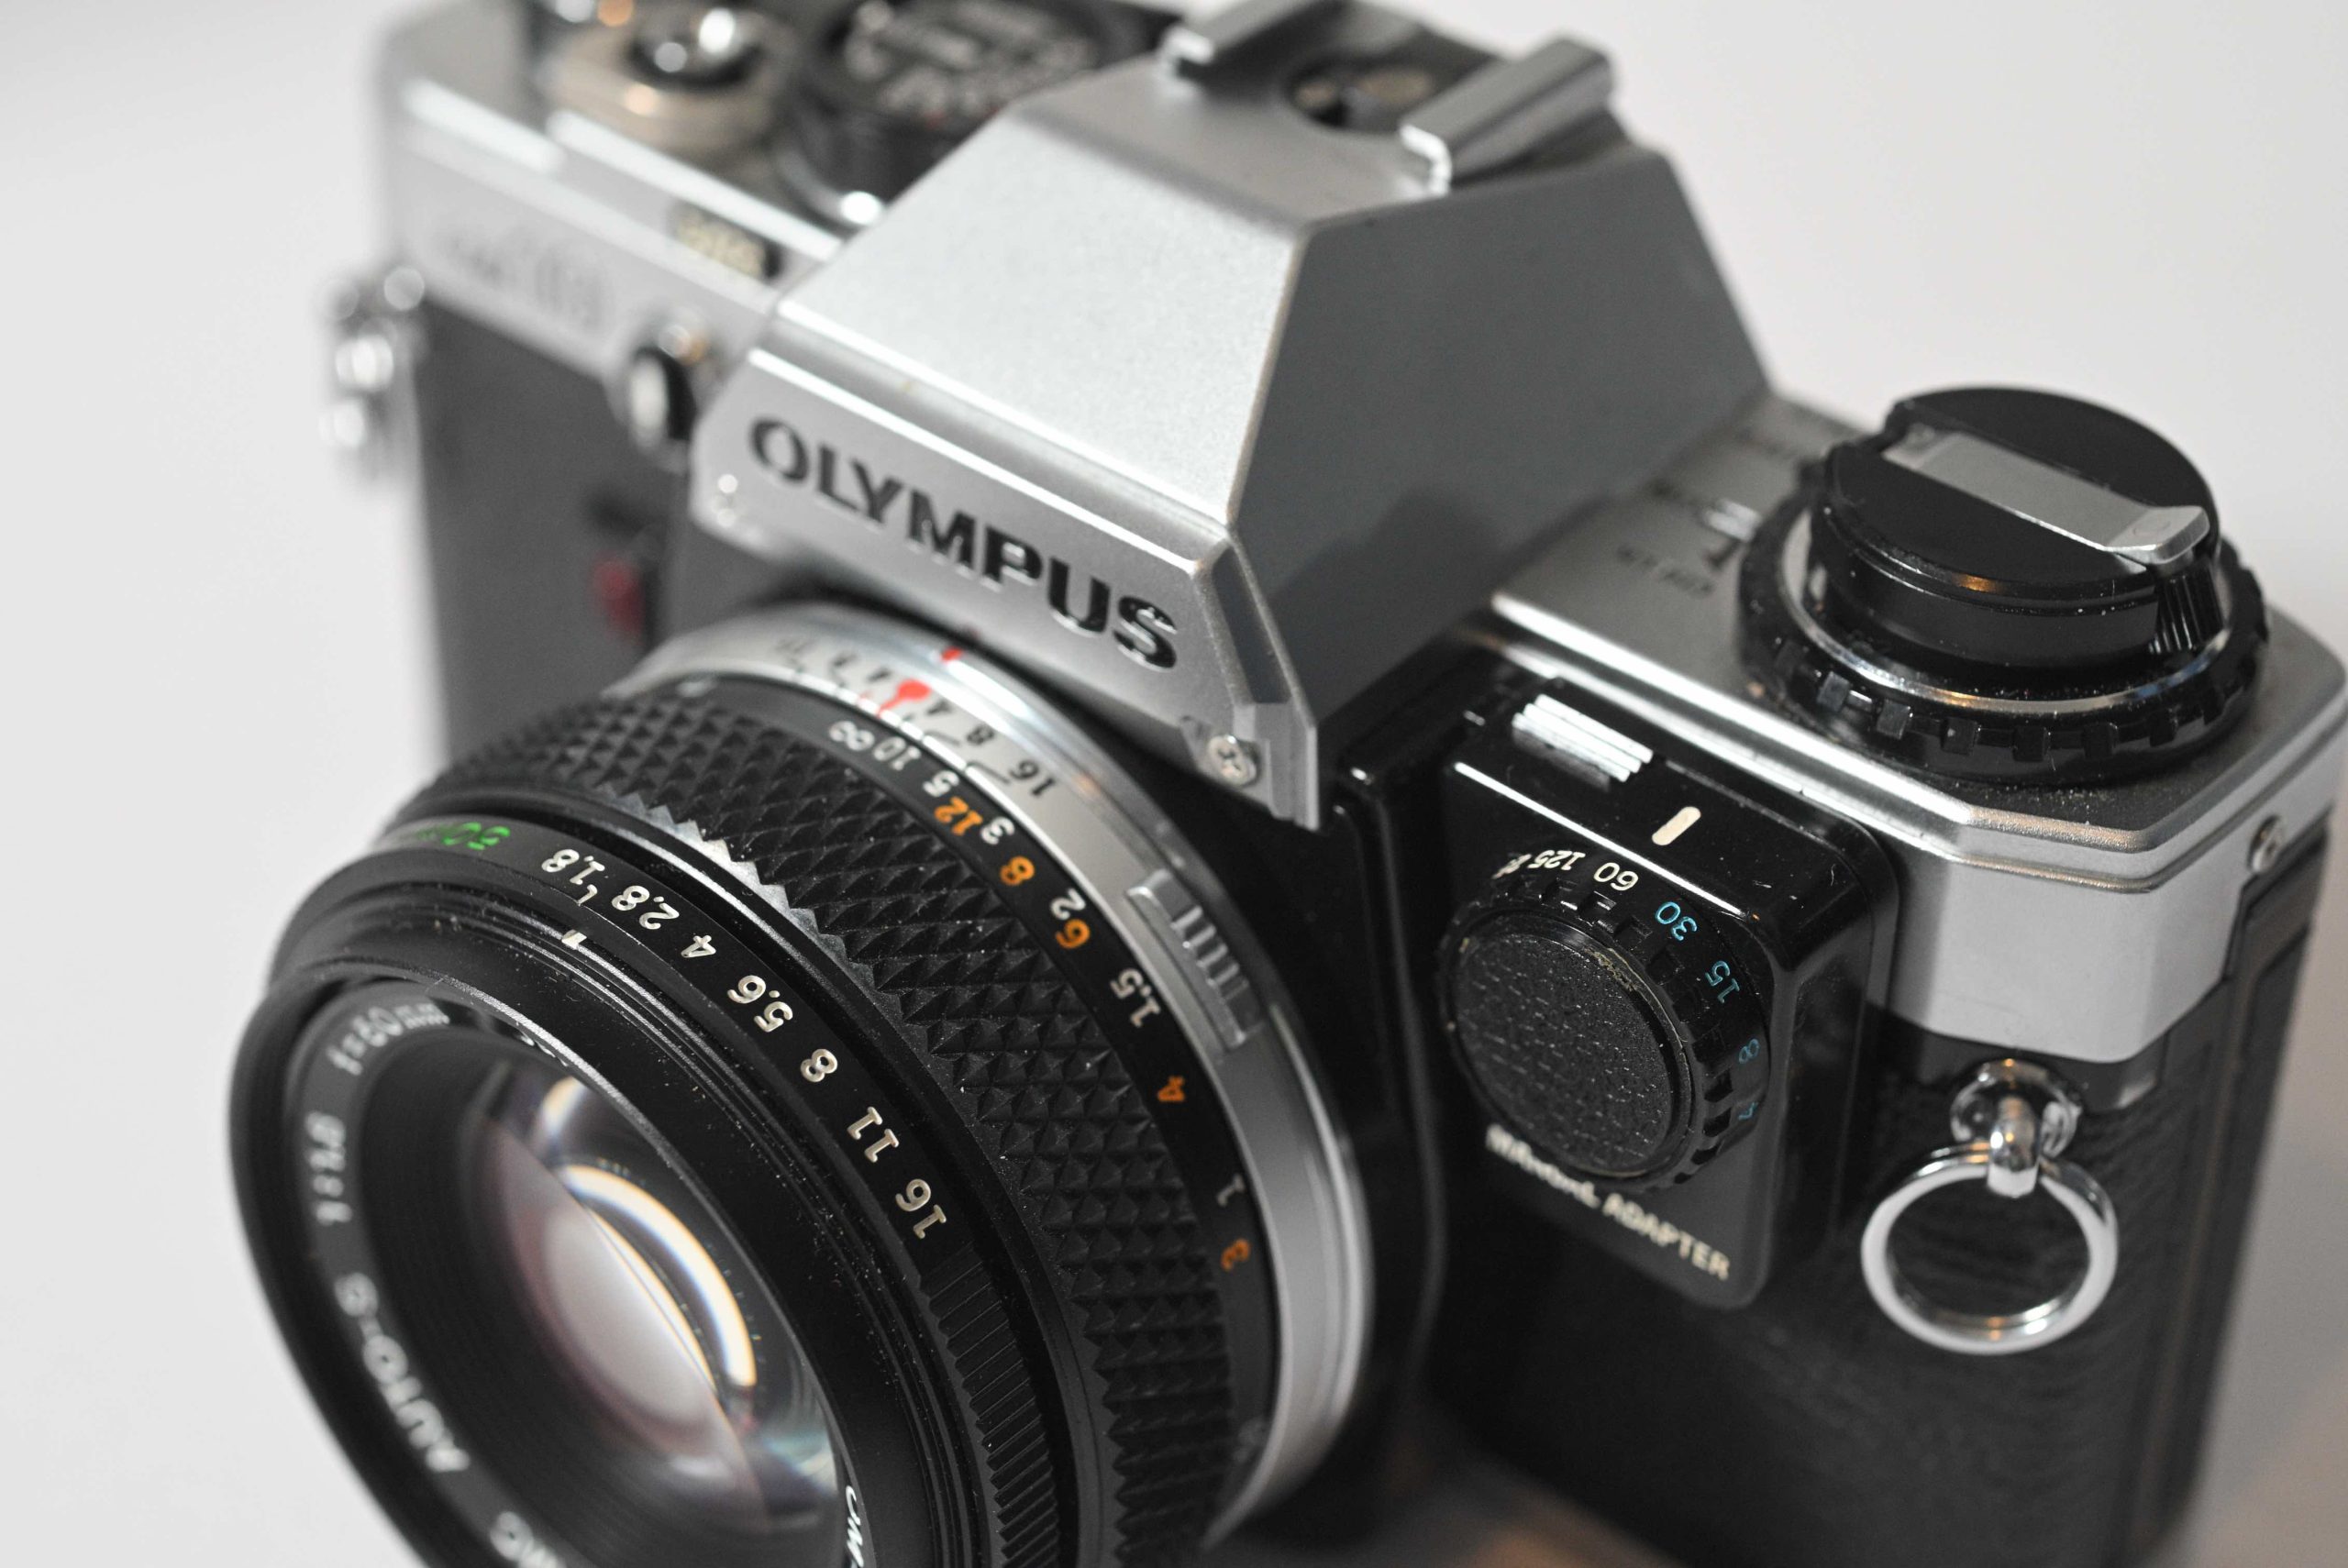
Classic Look
The OM-10 screams 1980s! Olympus brought this compact SLR camera to the party and all eyes were on it. It didn’t look like your regular SLR camera and certainly didn’t weigh in the same either. Its beautiful sleek design, either black or silver, ease of use and solid build quality was attracting the masses!
It was designed with ease of use in mind. You change the aperture and the camera will do the rest. An aperture priority camera. But Olympus had a trick up their sleeve to greet those amateurs that wanted to experiment with streaky night time traffic photos or fast exposed crashing waves. They gave the option of a speed adapter which you plugged into the front of the camera. It certainly wasn’t an afterthought. More of a clever marketing ploy. An up-sale maybe! The OM-10’s main function dial has the words “Manual Adapter” on it. So the user could choose to shoot Auto or Manual. Manual If they invested in the adapter. Which sat neatly on the front of the camera via a sort of mini jack pin.
Now, the OM-10 is fully complete! A camera any enthusiast would love to take on holiday sporting that large “OLYMPUS” strap just to show others around the safari trip that they meant business. A camera that any wedding photographer would happily use as a compact addition and back-up to the medium format already in their bag.
Capture the Light!
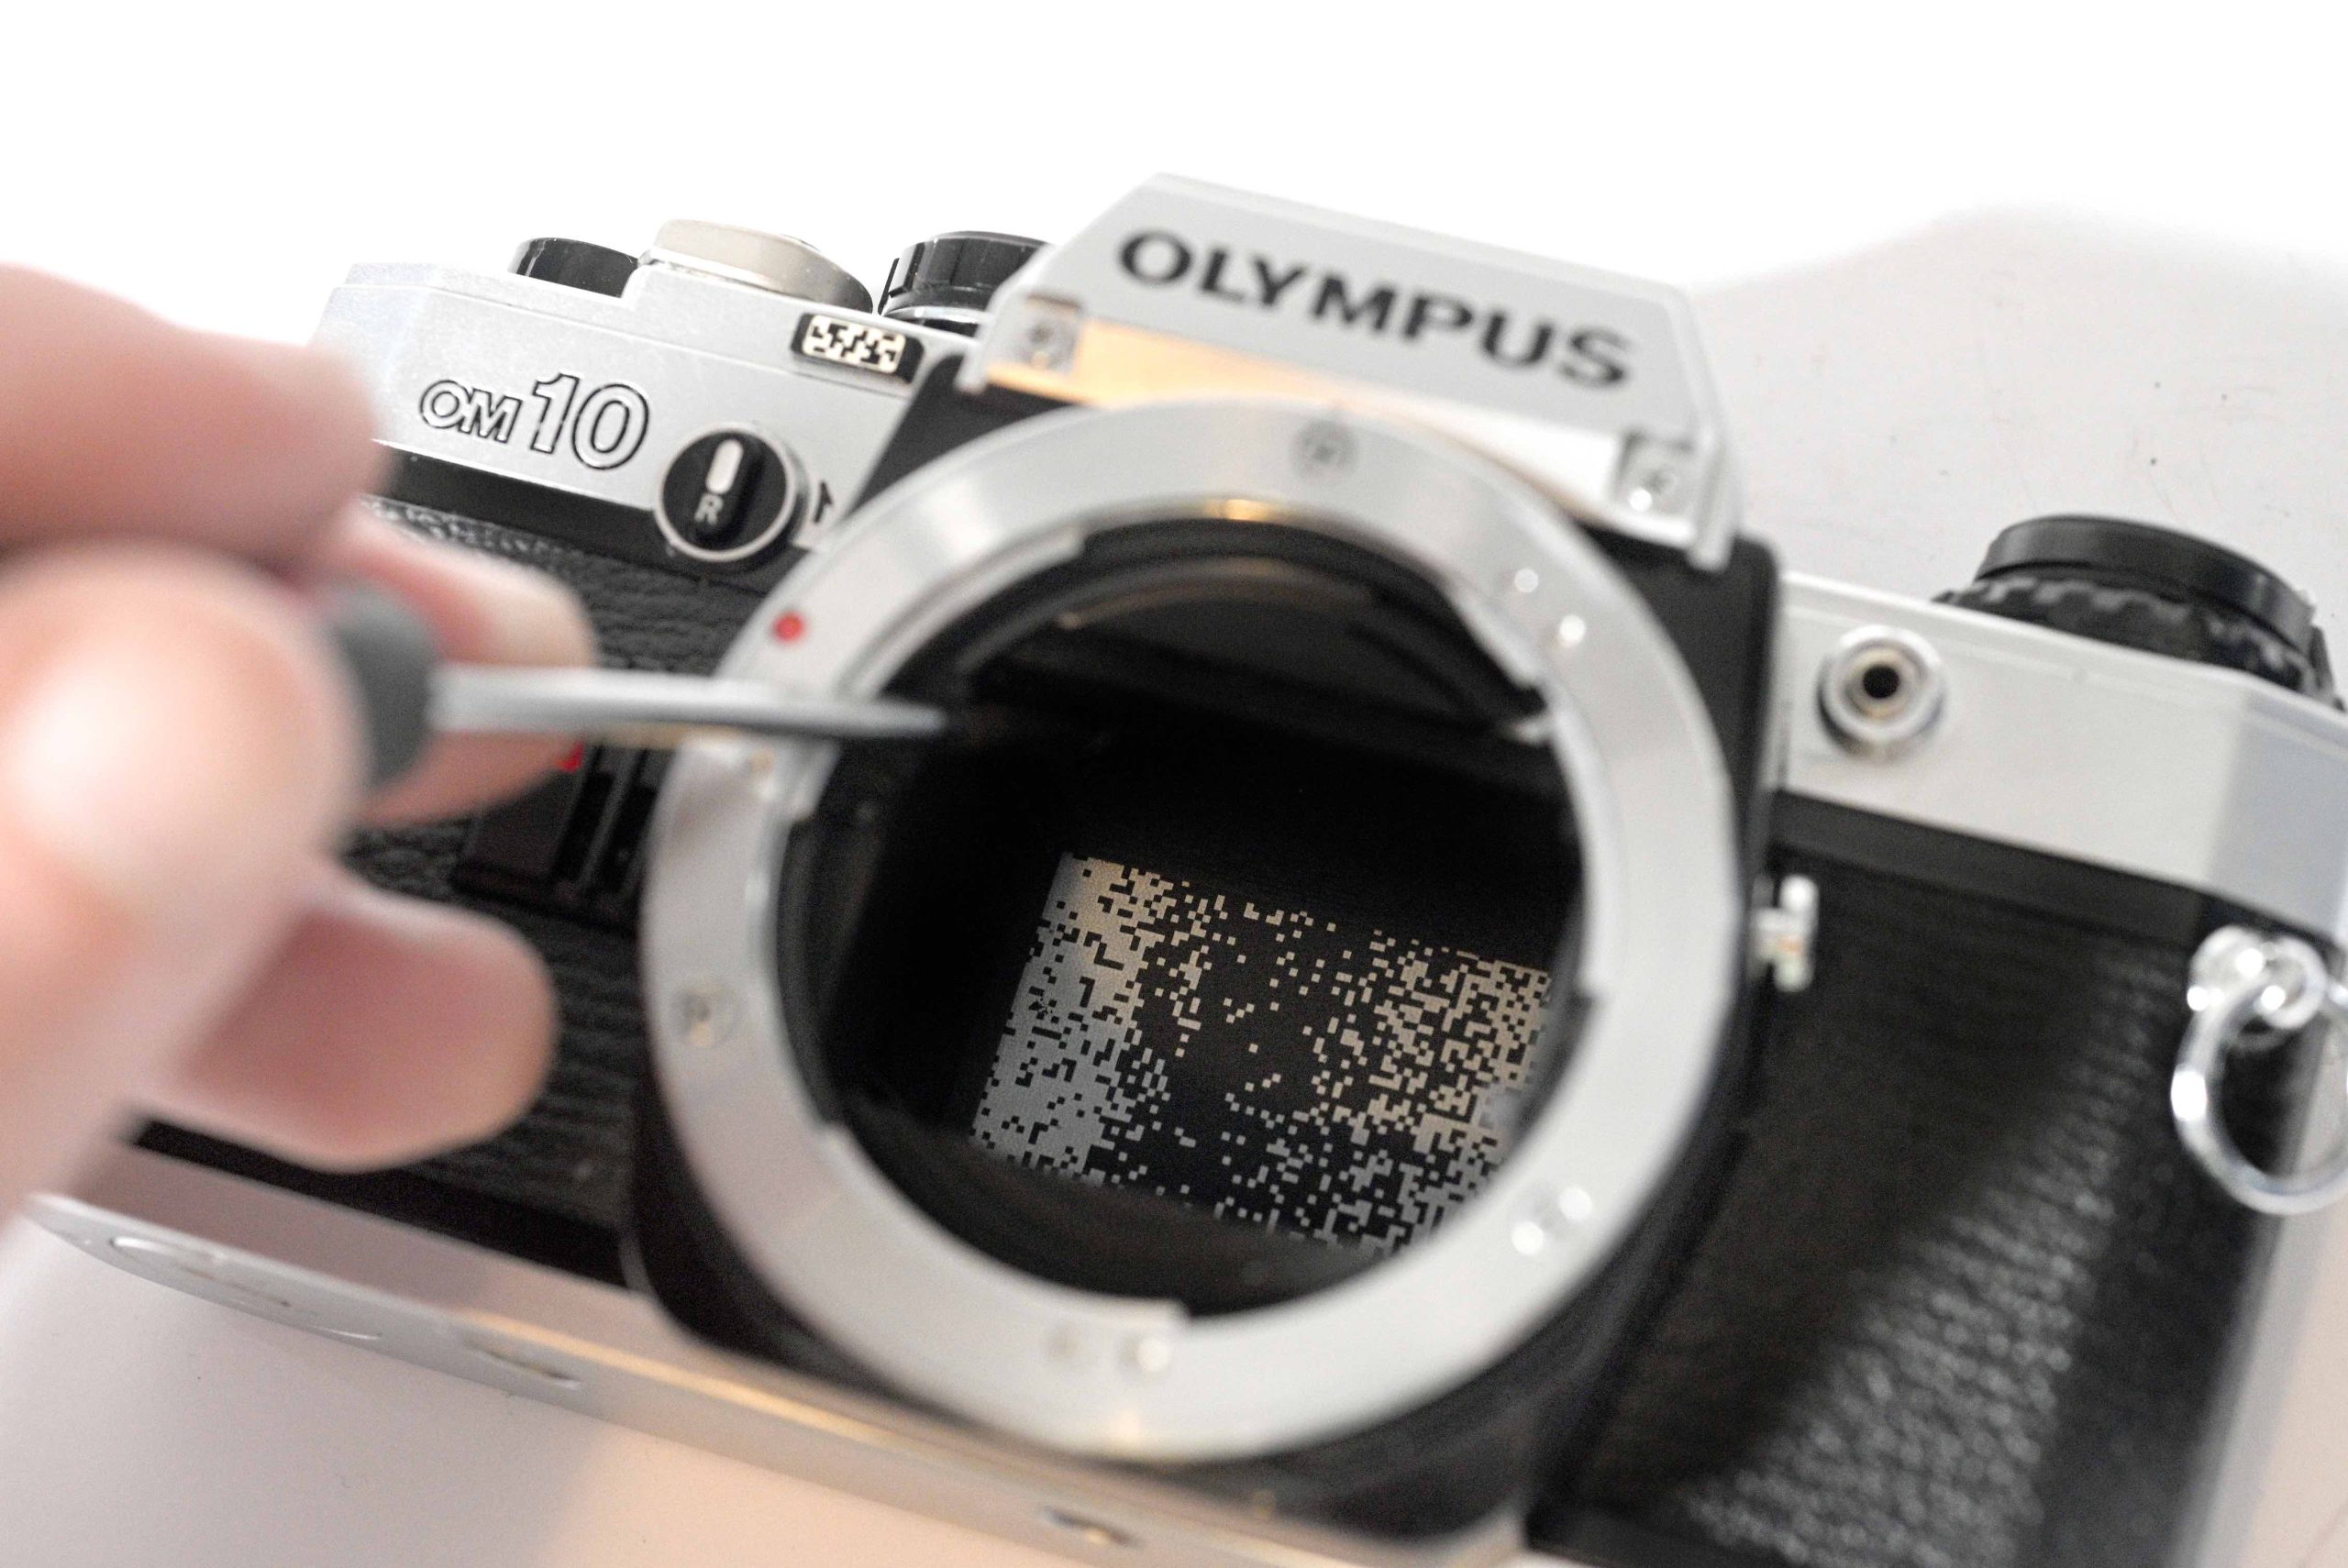
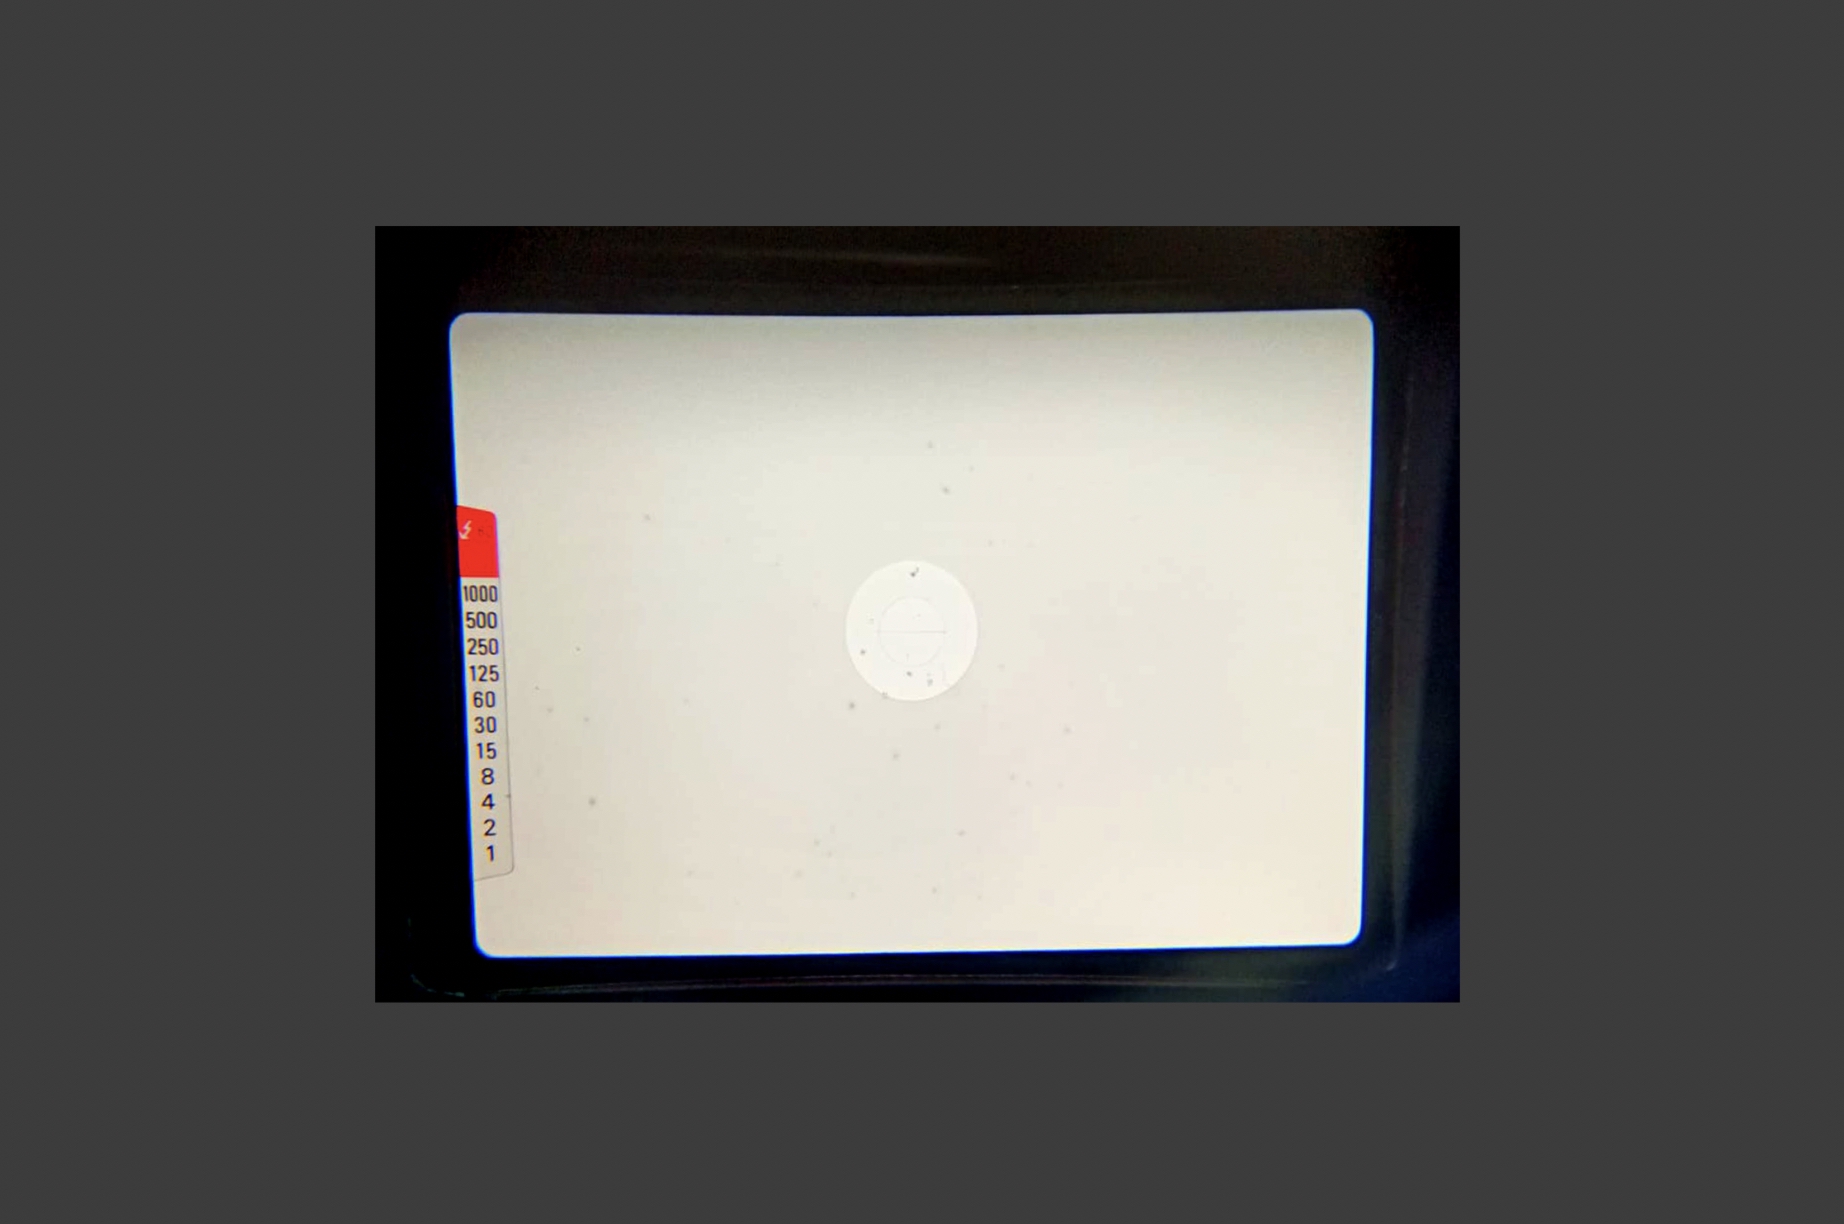
While other manufacturers had already mastered “Through-The-Lens” (TTL) metering by the 1960s, Olympus revolutionised the industry in 1975 with the Olympus OM-2, which introduced the world’s first OTF (Off The Film) metering system. And that is what the bar code emblem is on the front of the OM-10. It’s just a reminder emblem. The real bar code sits within the shutter curtain.
Warning! Be very careful lifting the mirror!
And there it is.
How does it work? Before Olympus, all SLR light meters measured the light before you took the picture. The sensors are usually located in the viewfinder (pentaprism). This has a potential flaw. The Blackout Problem. The moment you press the shutter, the mirror flips up to let light hit the film. This blocks the viewfinder sensors, meaning the camera is “blind” during the actual exposure. If the sun comes out or a flash goes off during that fraction of a second, the camera wouldn’t know.
Olympus placed the light sensors in the bottom of the camera, facing backward toward the film. For fast shutter speeds, the sensors read the light reflecting off the shutter curtain. For long exposures (where the curtain is open), the sensors read the light reflecting directly off the film while the exposure was happening.
Because film is reflective, Olympus printed a unique “computer-generated” pattern of white blocks on the shutter curtain.
Cameraphone looking into the OM-10 viewfinder showing the metering.
Power
The camera is powered by two LR44/SR44 batteries. Can you shoot the camera without them? NO. If you cock the shutter, remove the batteries, the camera will fire but the mirror will get stuck half way. So always carry a spare pair of LR44/SR44 batteries in your camera bag. If your OM-10 suddenly stops clicking, 99% of the time, it’s just hungry for new cells!
Since these cameras are entirely dependent on electricity, the type of battery you use matters:
LR44 (Alkaline): Cheap and common, but their voltage drops steadily as they die. This can cause your light meter to become less accurate over time before the camera finally quits.
SR44 (Silver Oxide): These are slightly more expensive but highly recommended. They maintain a constant voltage until the very end of their life, ensuring your OM-10 or OM-20 stays accurate until the moment the batteries go flat.
But to be fair I use LR44 batteries in mine and have never had any problems, or at least not that I know of.
Lenses
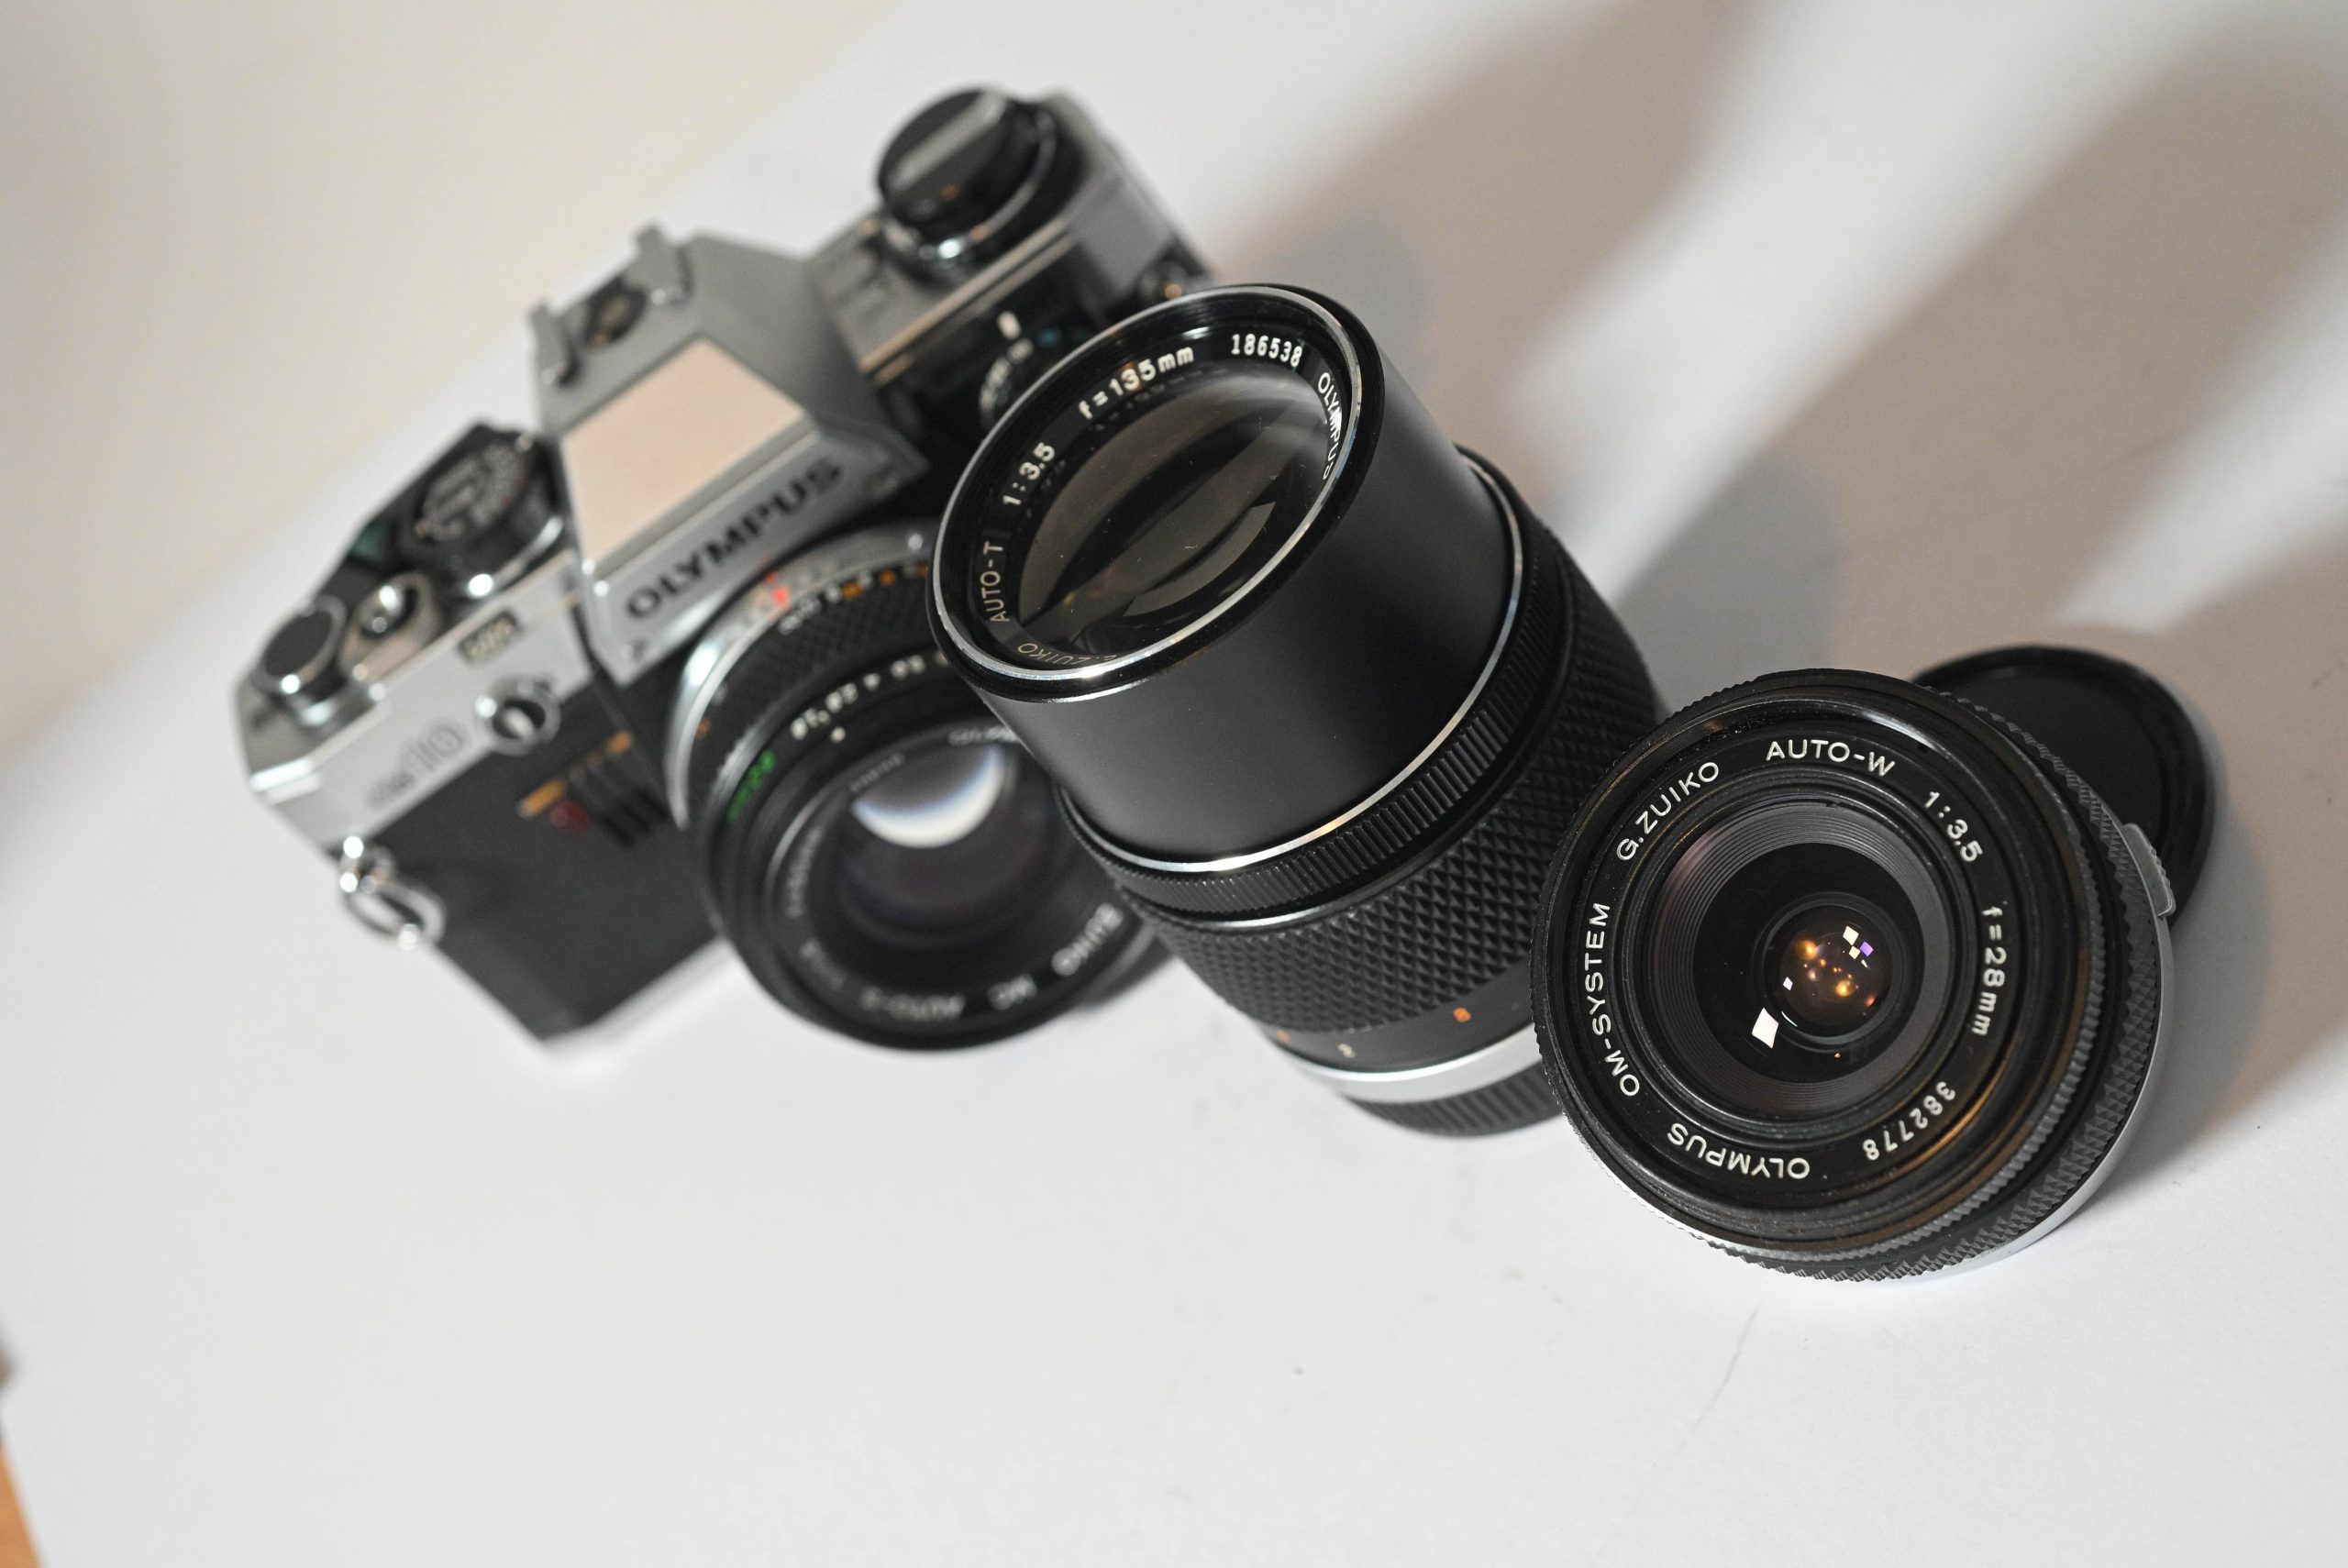
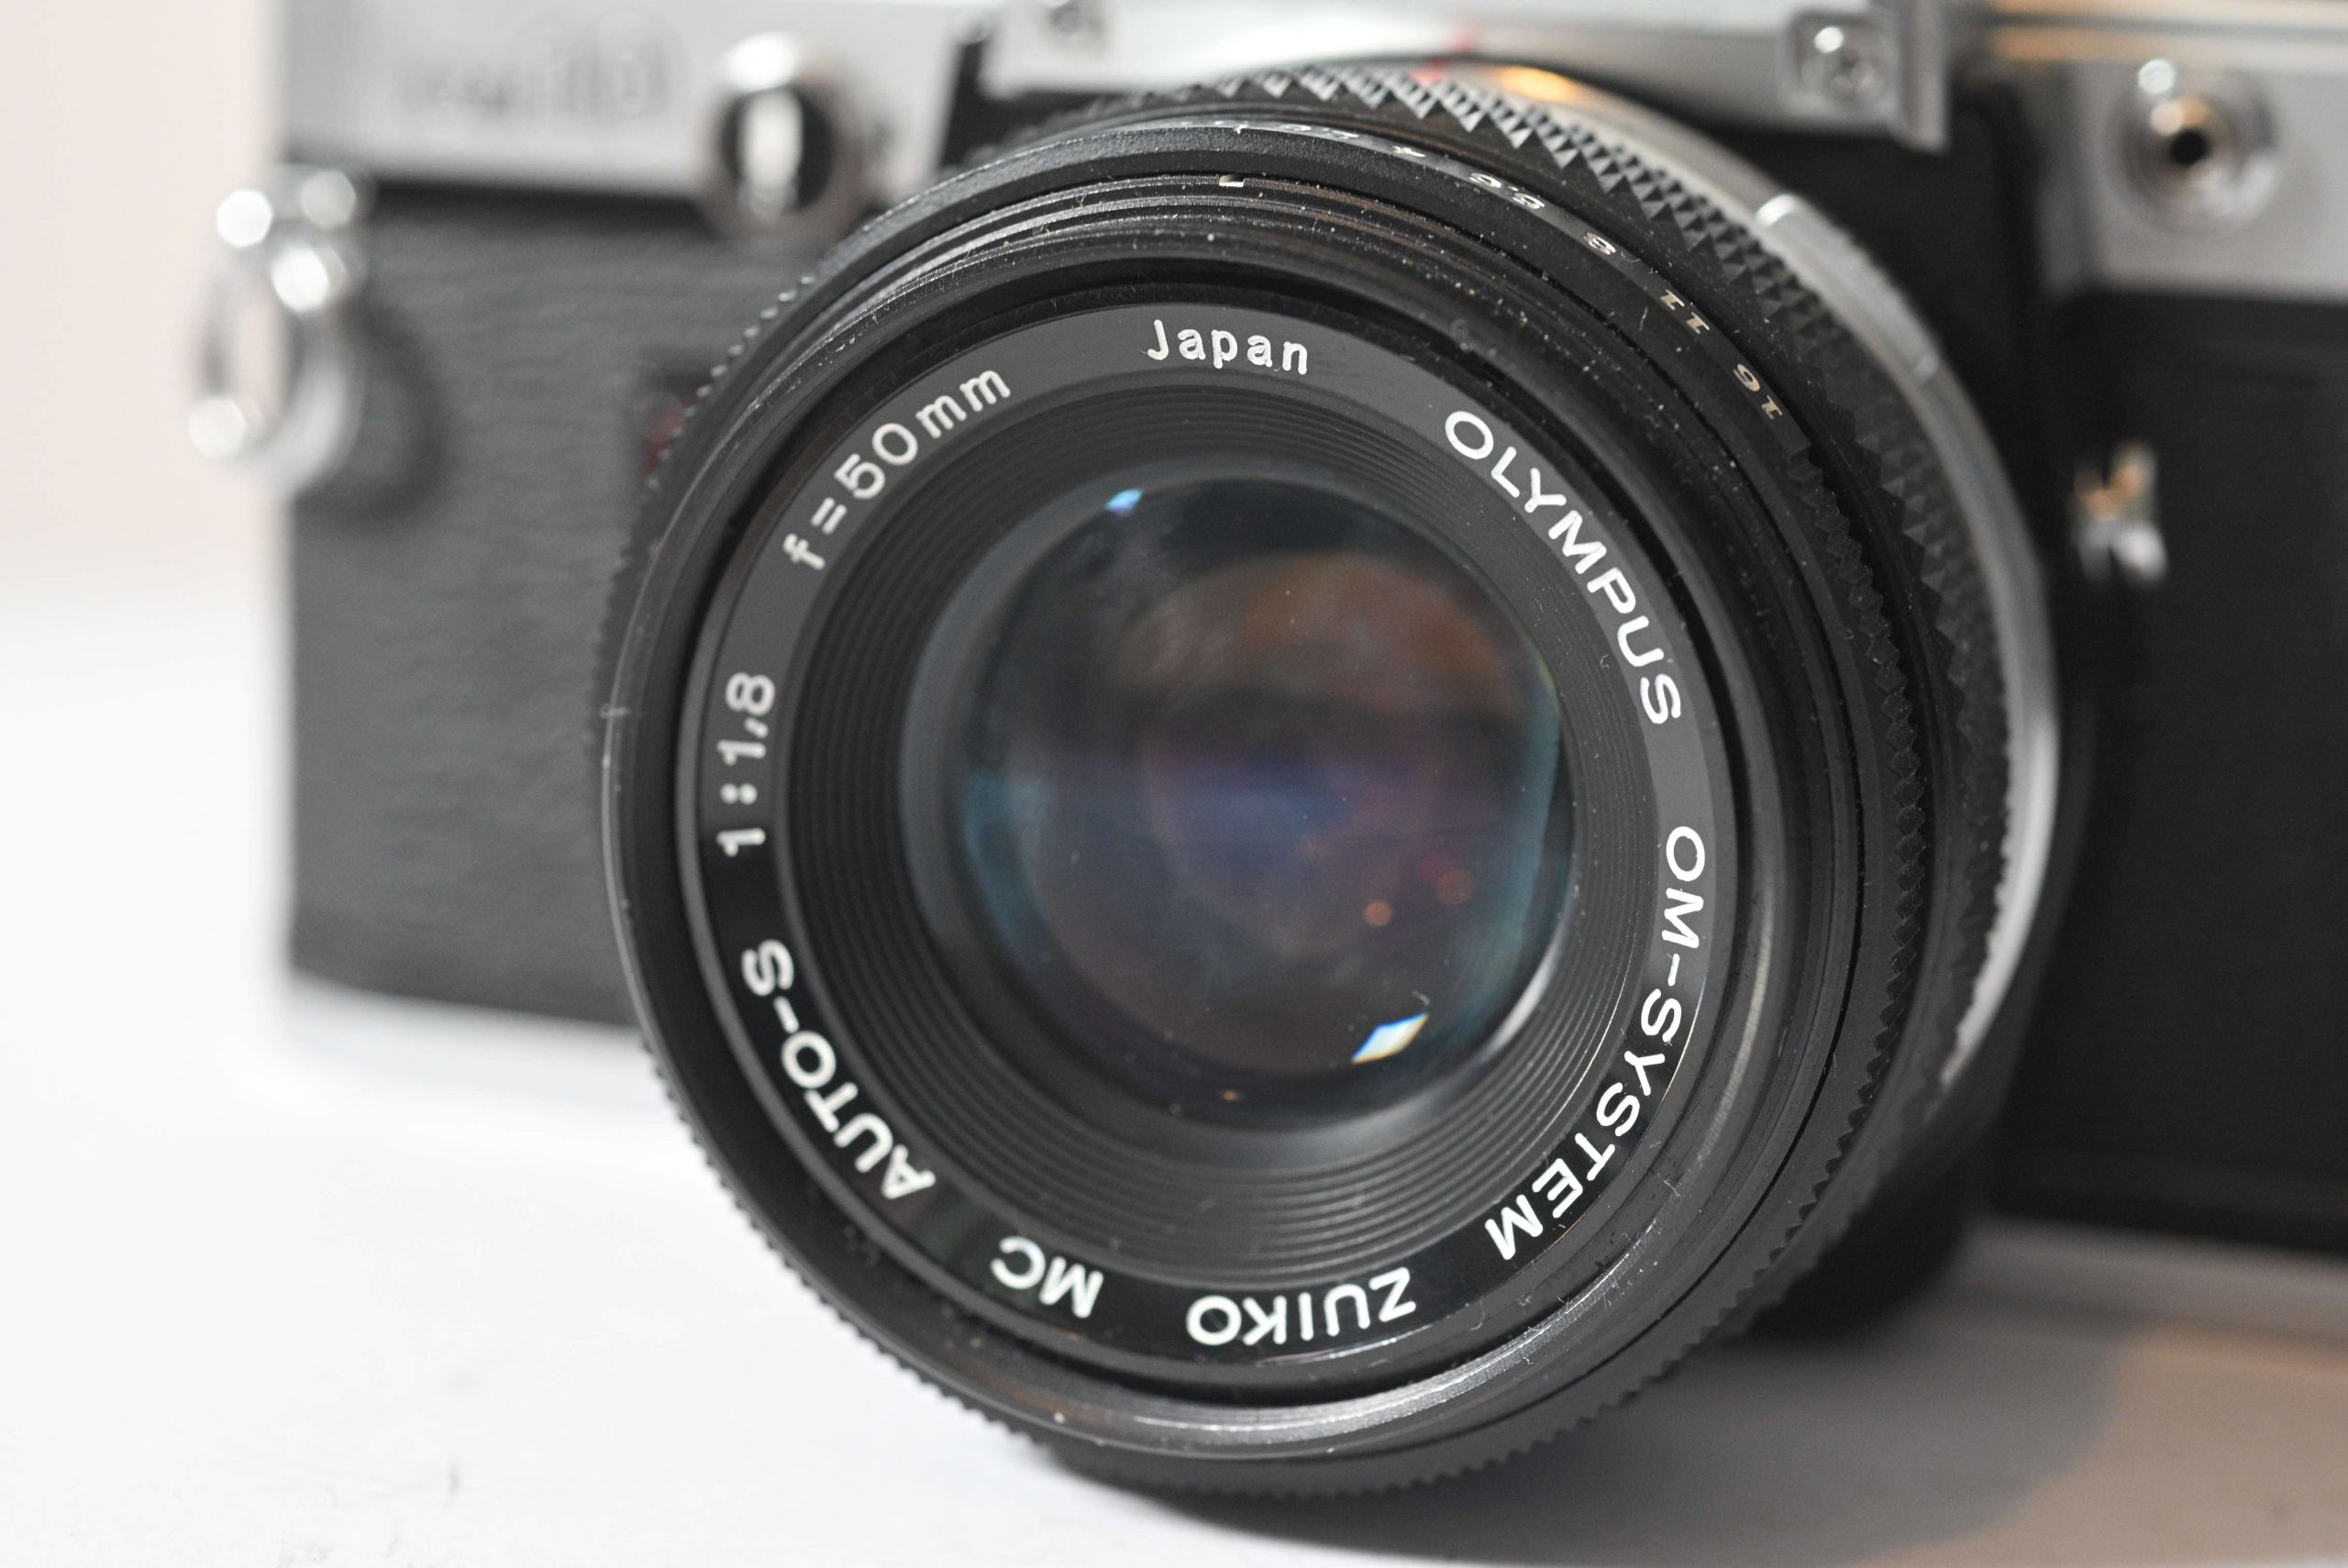
The OM System has a beautiful range of lenses and the lenses I have are the 50mm, 28mm and 135mm. My 50mm was produced after 1981/82.
How do I know? And is this important?
The “Front Ring” Era Test
Look at the text around the glass. This tells you which “generation” it belongs to:
If it says “G.Zuiko” or “E.Zuiko” and only says “Japan”, it was likely made in the 1970s. These are usually single-coated and were the original partners for the OM-1 and early OM-10s.
The letter in front of the ZUIKO name corresponds to the number of elements in the lens.
E = 5th letter = 5 elements
F = 6th letter = 6 elements
G = 7th letter = 7 elements
H = 8th letter = 8 elements
If it explicitly says “Zuiko MC” and “Japan“, it was made in the late 70s or very early 80s.
If the letter prefix is gone (just says “Zuiko”) and it says “Made in Japan” in full, you have a late-model lens from 1982 or later. These were the primary lenses sold alongside the OM-20 and were multicoated.
It’s important to know this if you are looking for Olympus glass. You may really want a multicoated lens and because it does not say “MC” on the lens you may let it go. So if the lens you are looking at says just “ZUIKO” and “Made in Japan” it’s likely to be the later lenses which were all multicoated.
You will also see AUTO-S on a 50mm lens. The S means Standard. T means telephoto and W means wide.
It’s also possible you will see a serial number on the lens. Usually the higher serial numbers, 300’000 and upwards are the more modern lenses.
Accessories
1. The Manual Adapter (The “Must-Have”)
As mentioned, the OM-10 is an aperture-priority camera by default. To unlock shutter speeds from 1s to 1/1000s, you need this tiny plastic dial that plugs into the jack on the front of the body.
Why buy it? It turns your “auto” camera into a full manual learning tool.
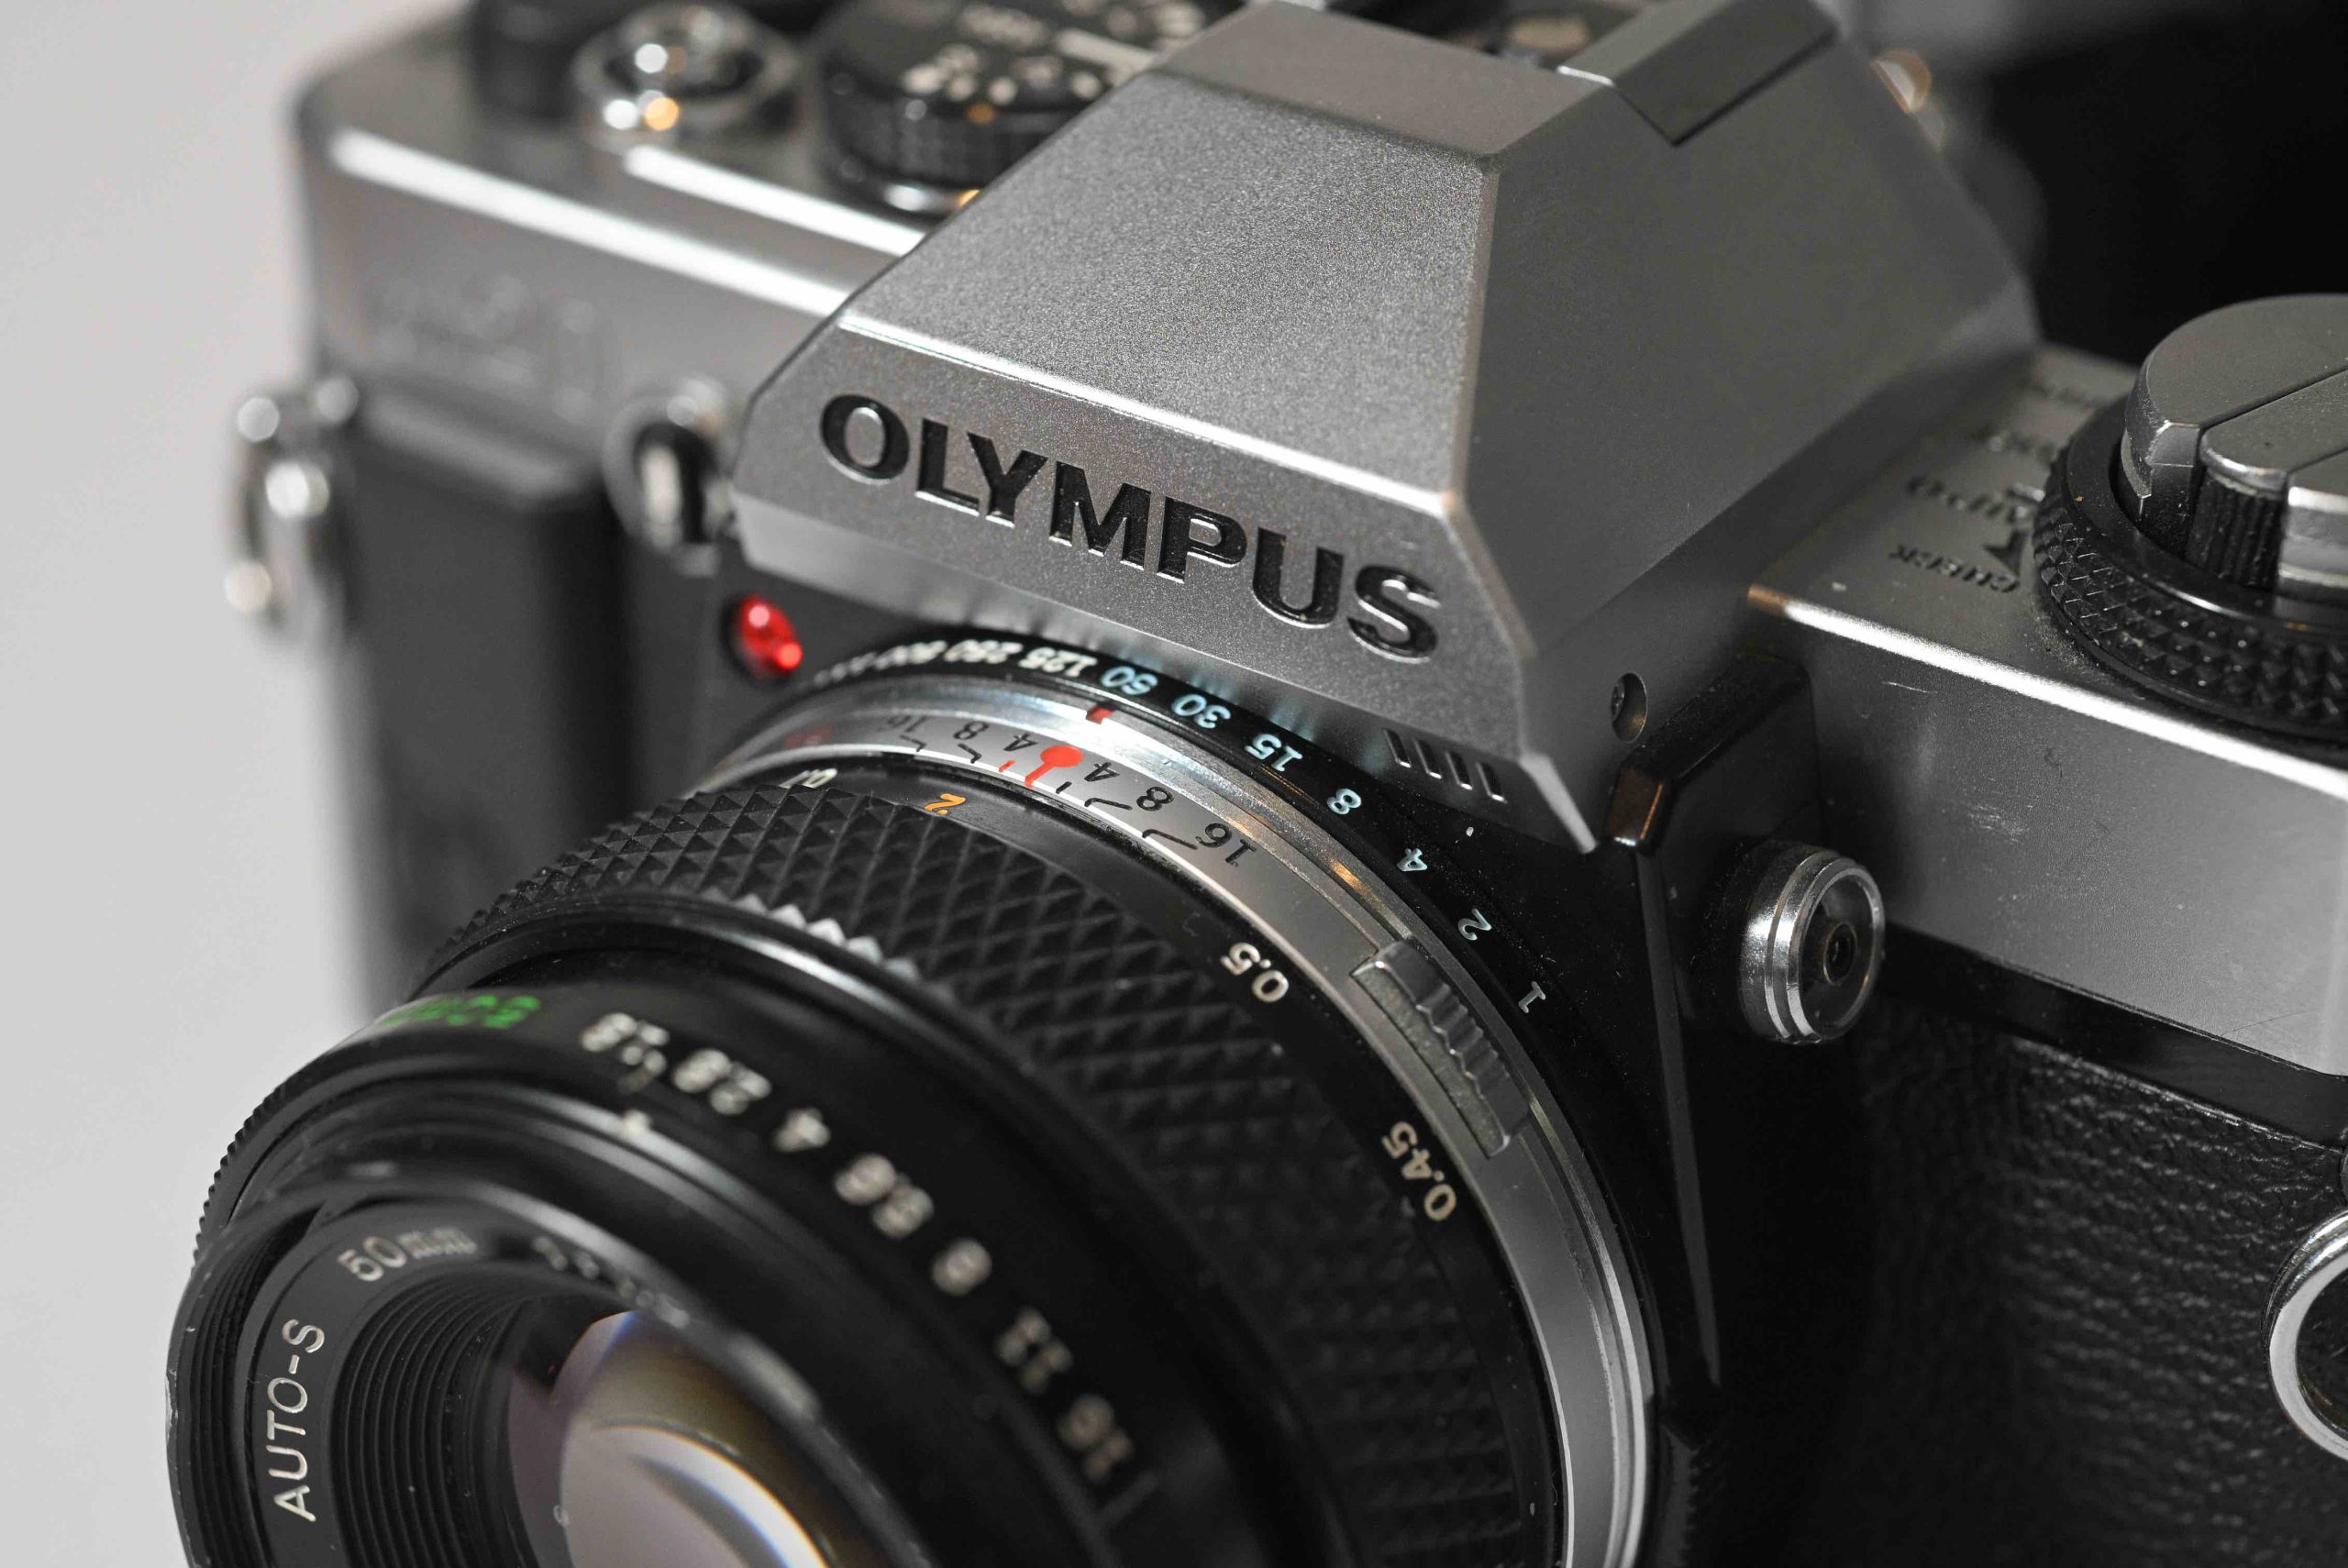
OM-20 Note: You don’t need this for the OM-20/OM-G, as the control is built into a ring around the lens mount as seen in the image below.
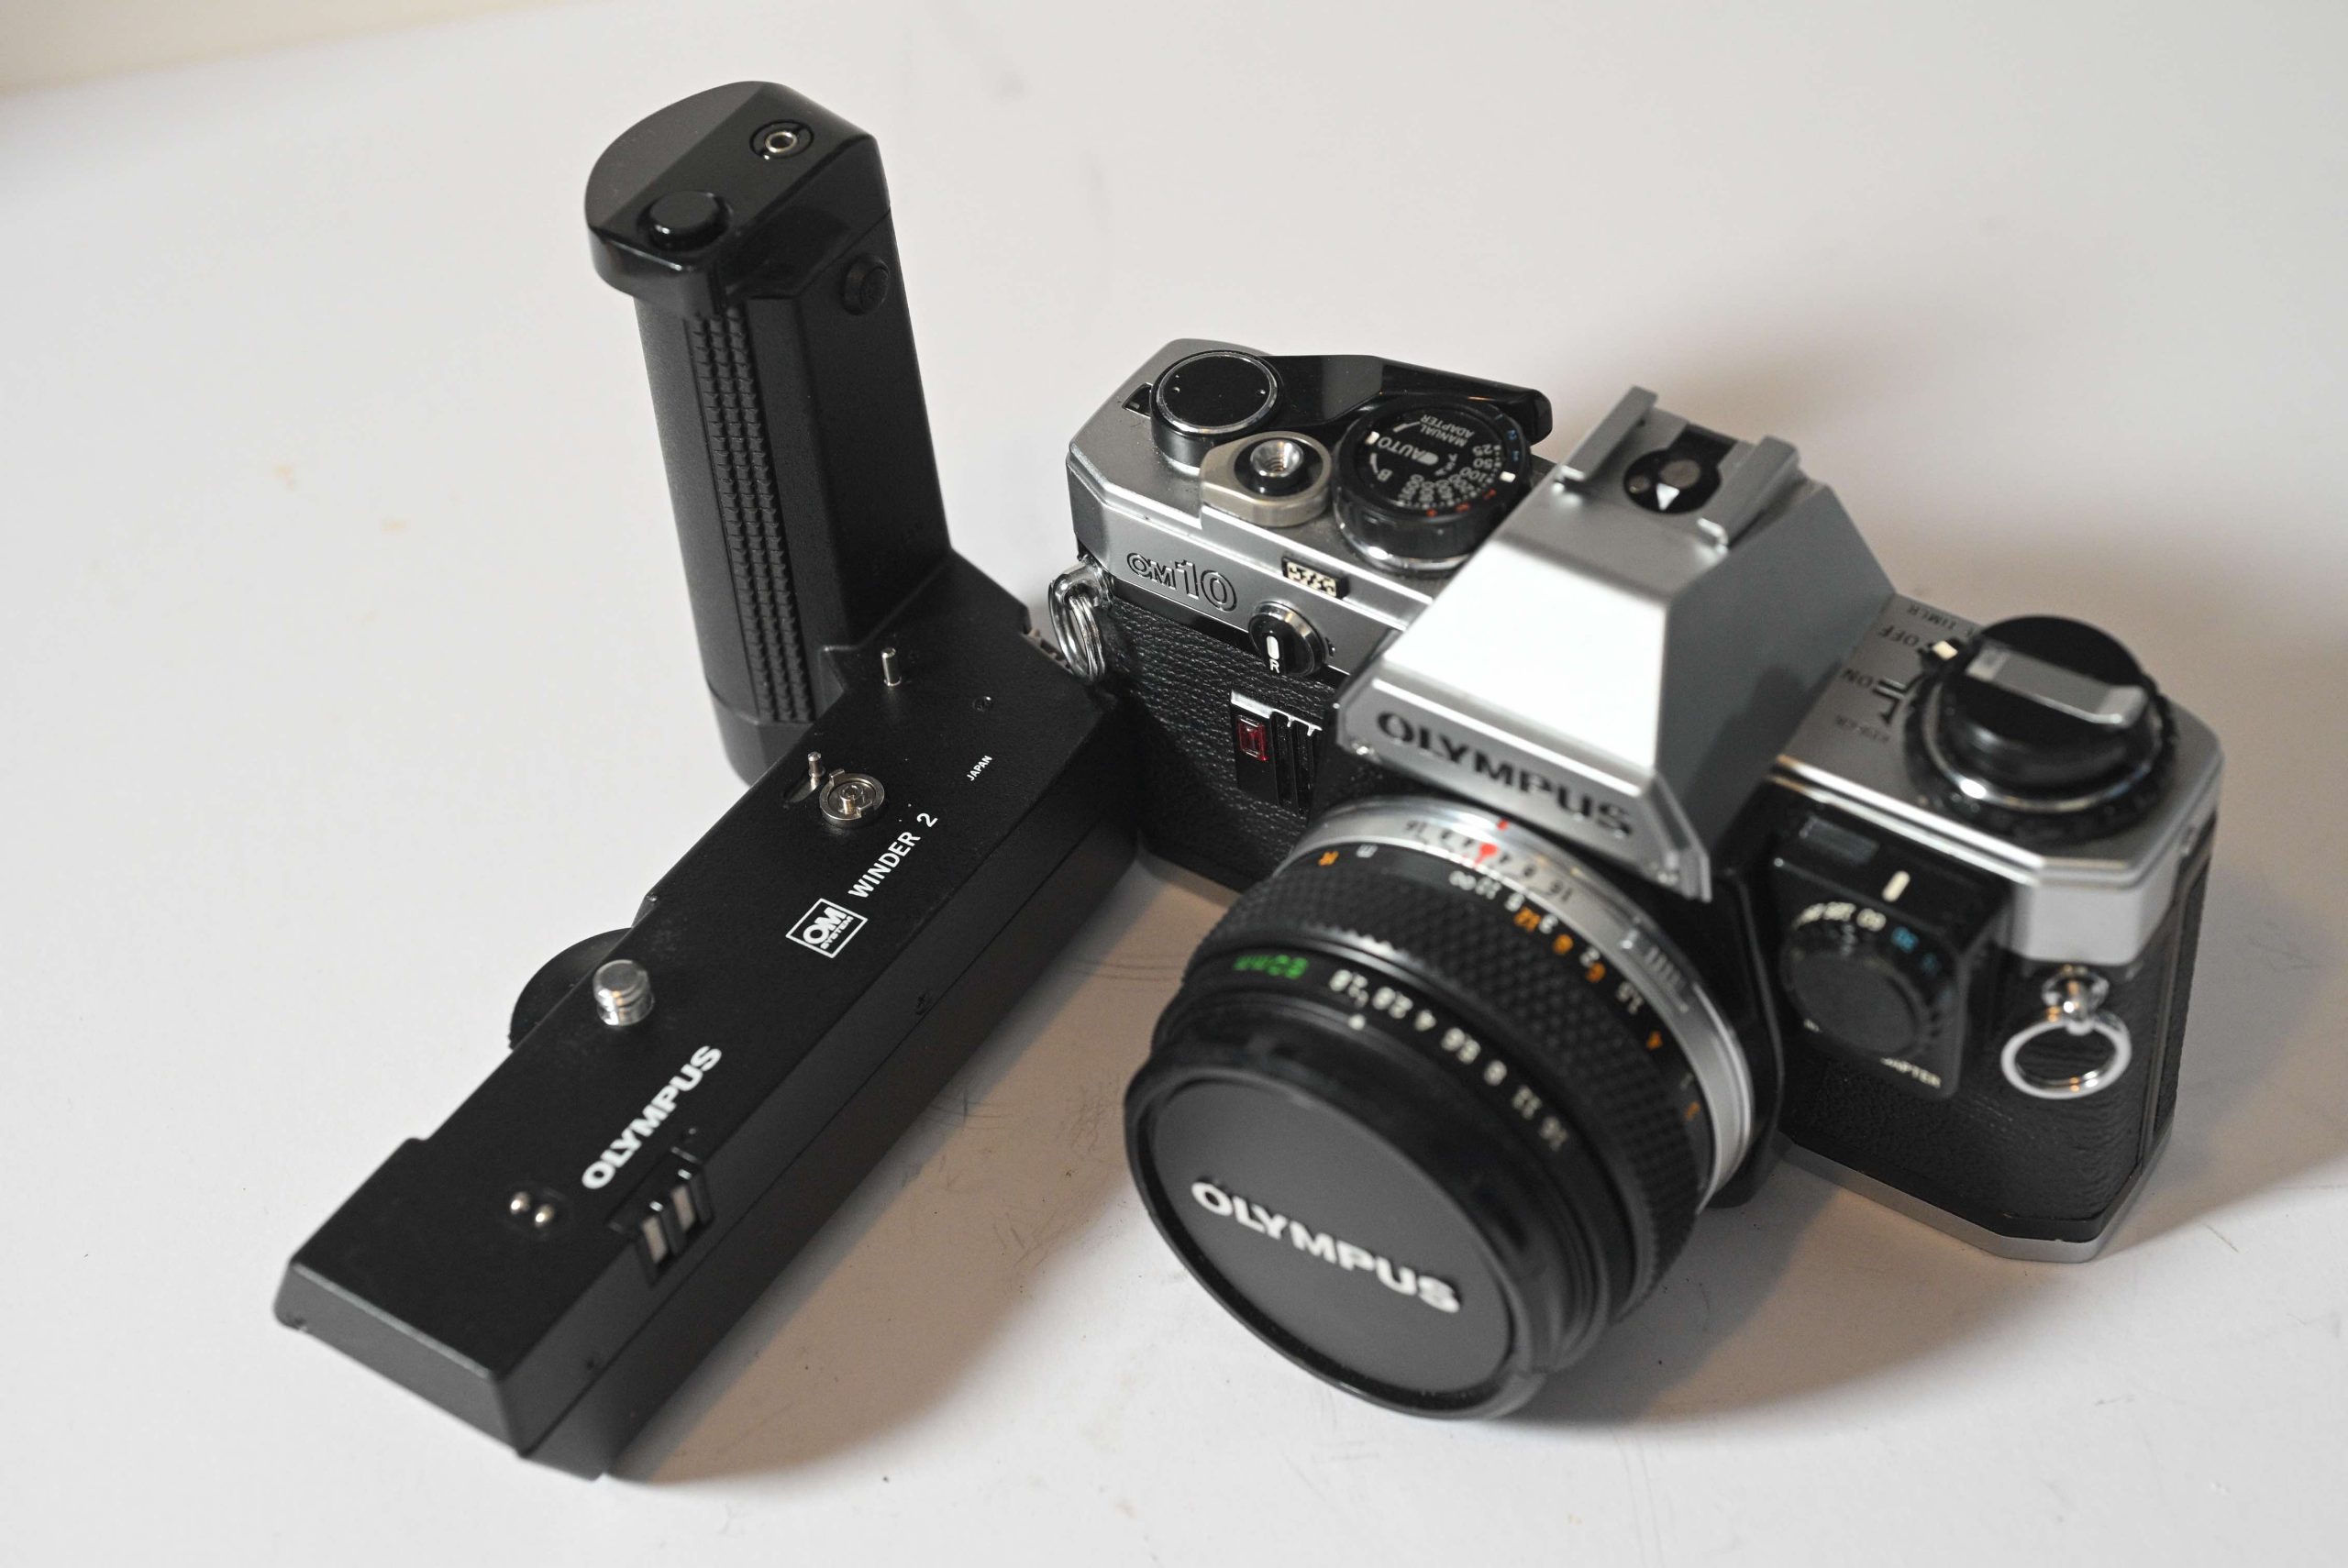
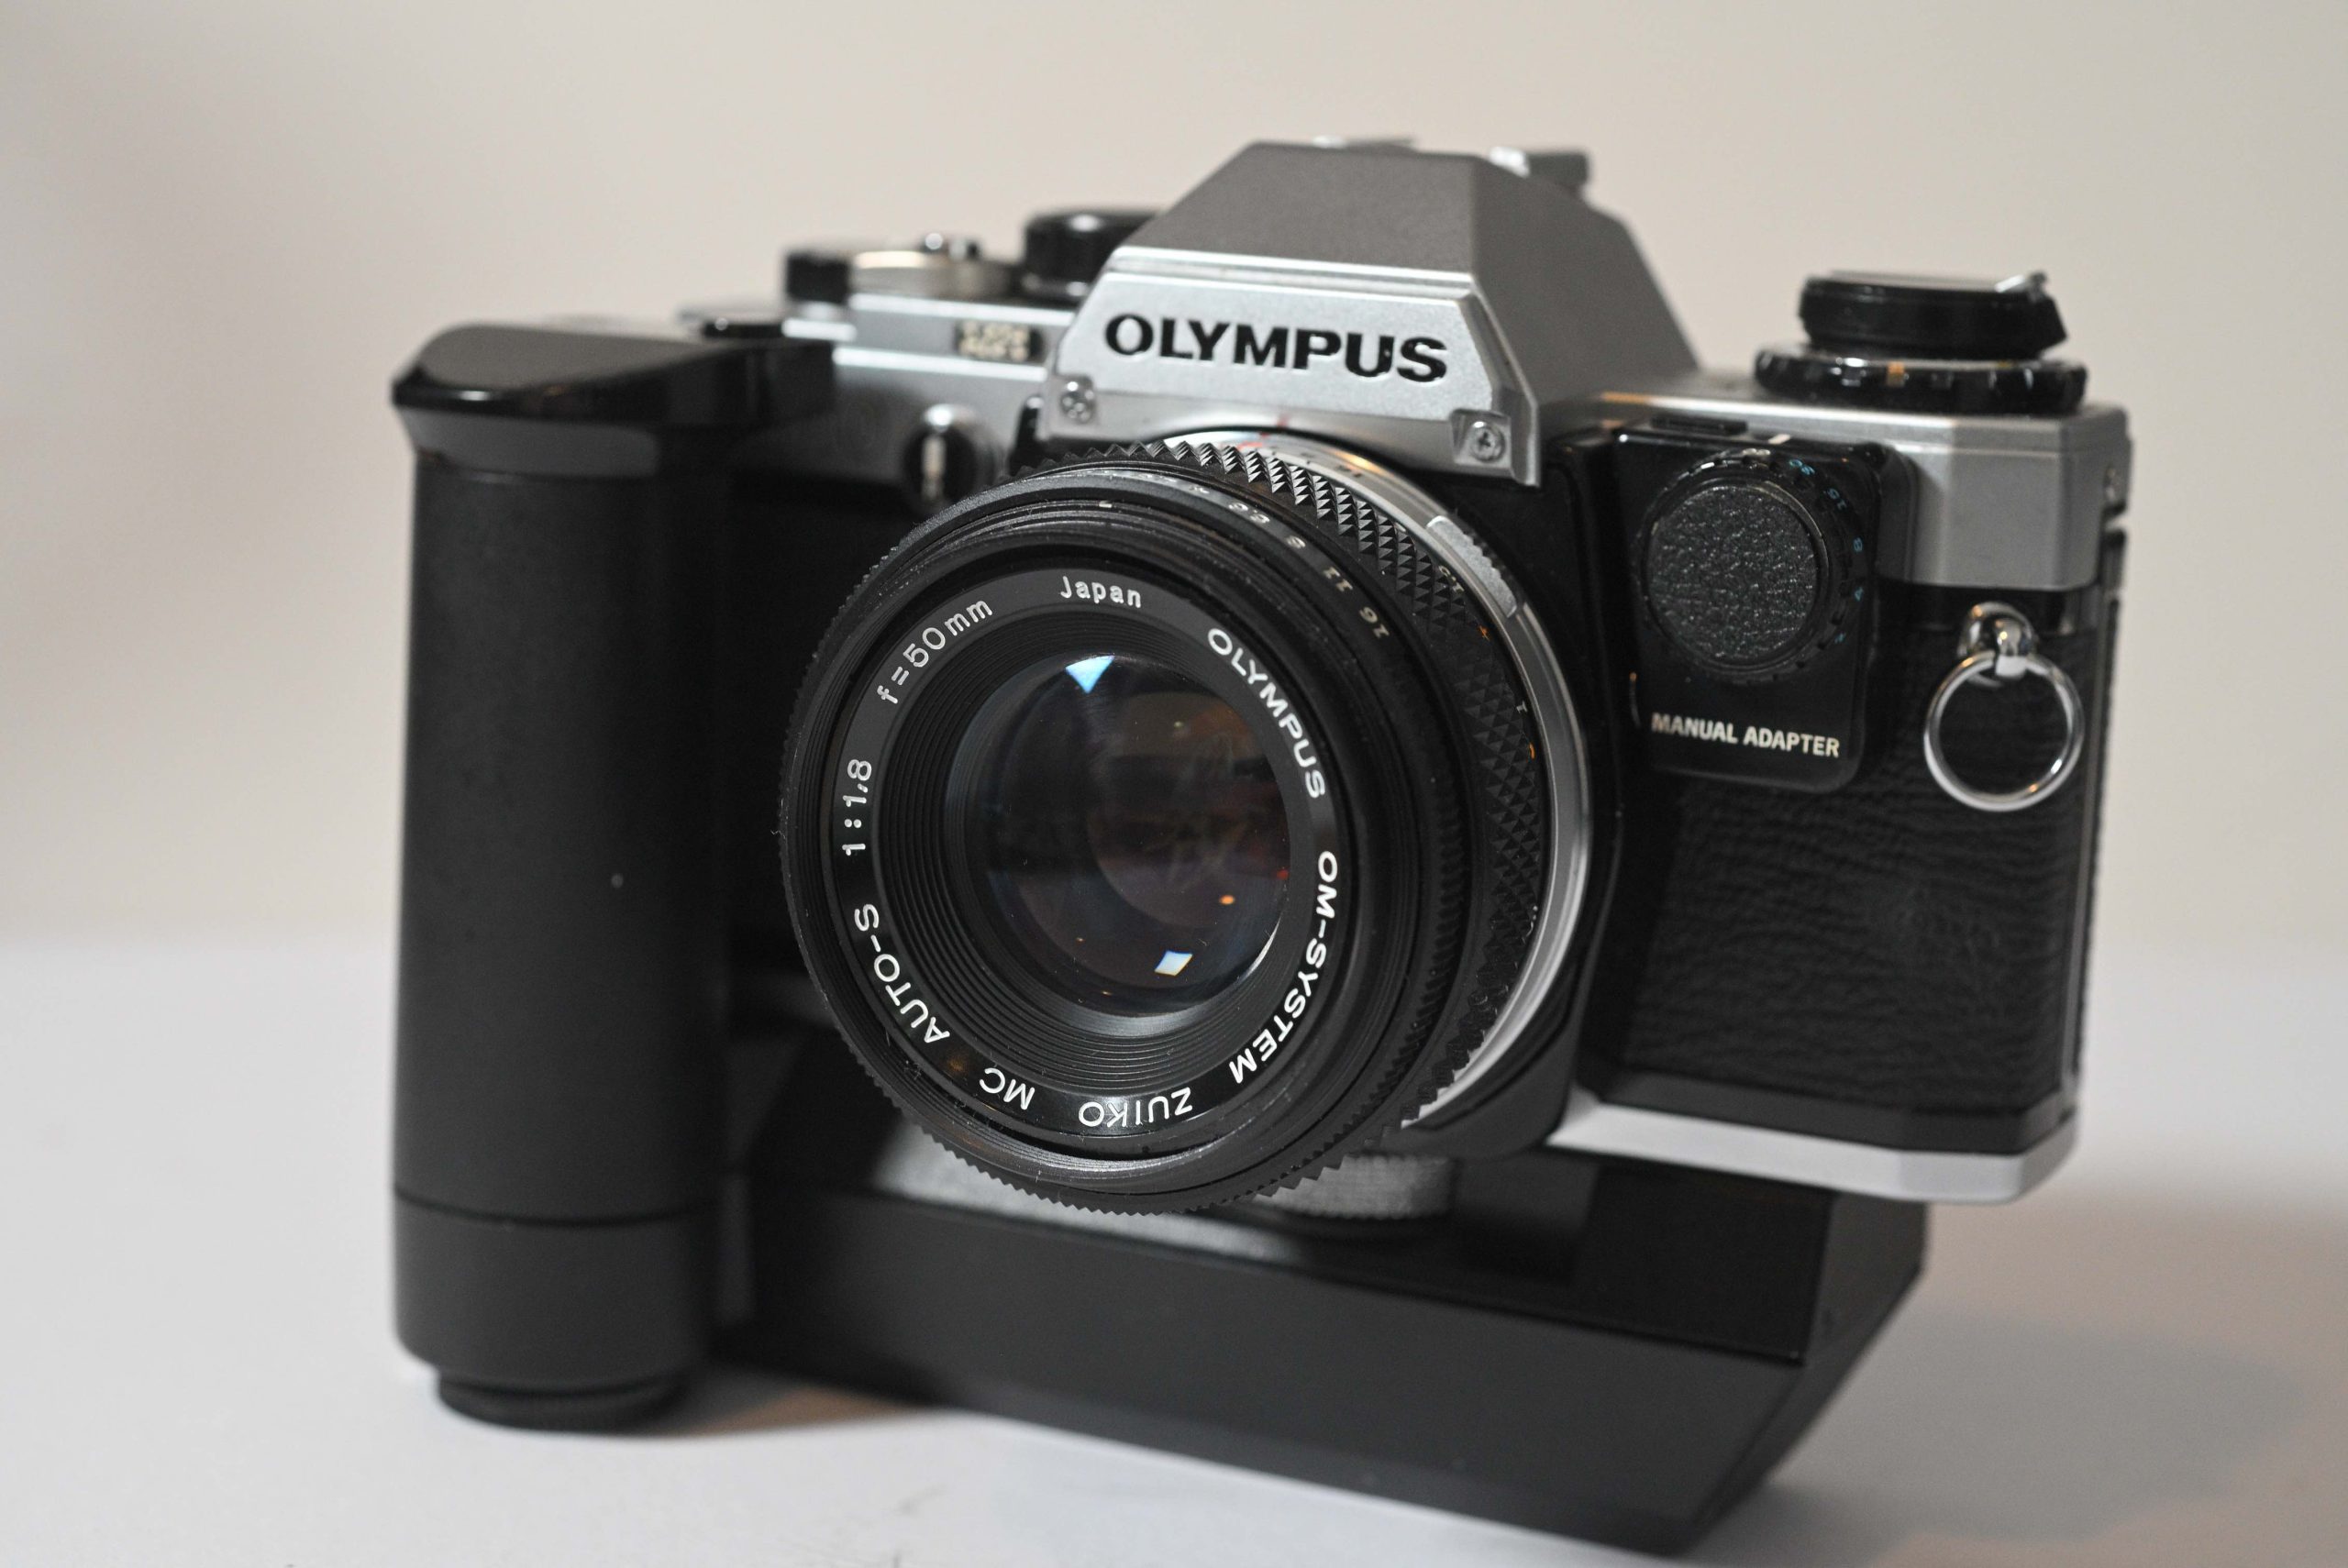
2. Winder 2 (The “Action” Add-on)
Olympus made a series of “Winders” and “Motor Drives.” The Winder 2 is the most common for the OM-10. It screws into the bottom of the camera and automatically advances the film and cocks the shutter after every shot and allows you to shoot at about 2.5 frames per second. It also adds a significant vertical grip to the bottom of the camera, making it much easier to hold if you have large hands.
3. T-Series Flashes
Because of that OTF (Off-The-Film) metering, the OM-10 works brilliantly with dedicated Olympus flashes.
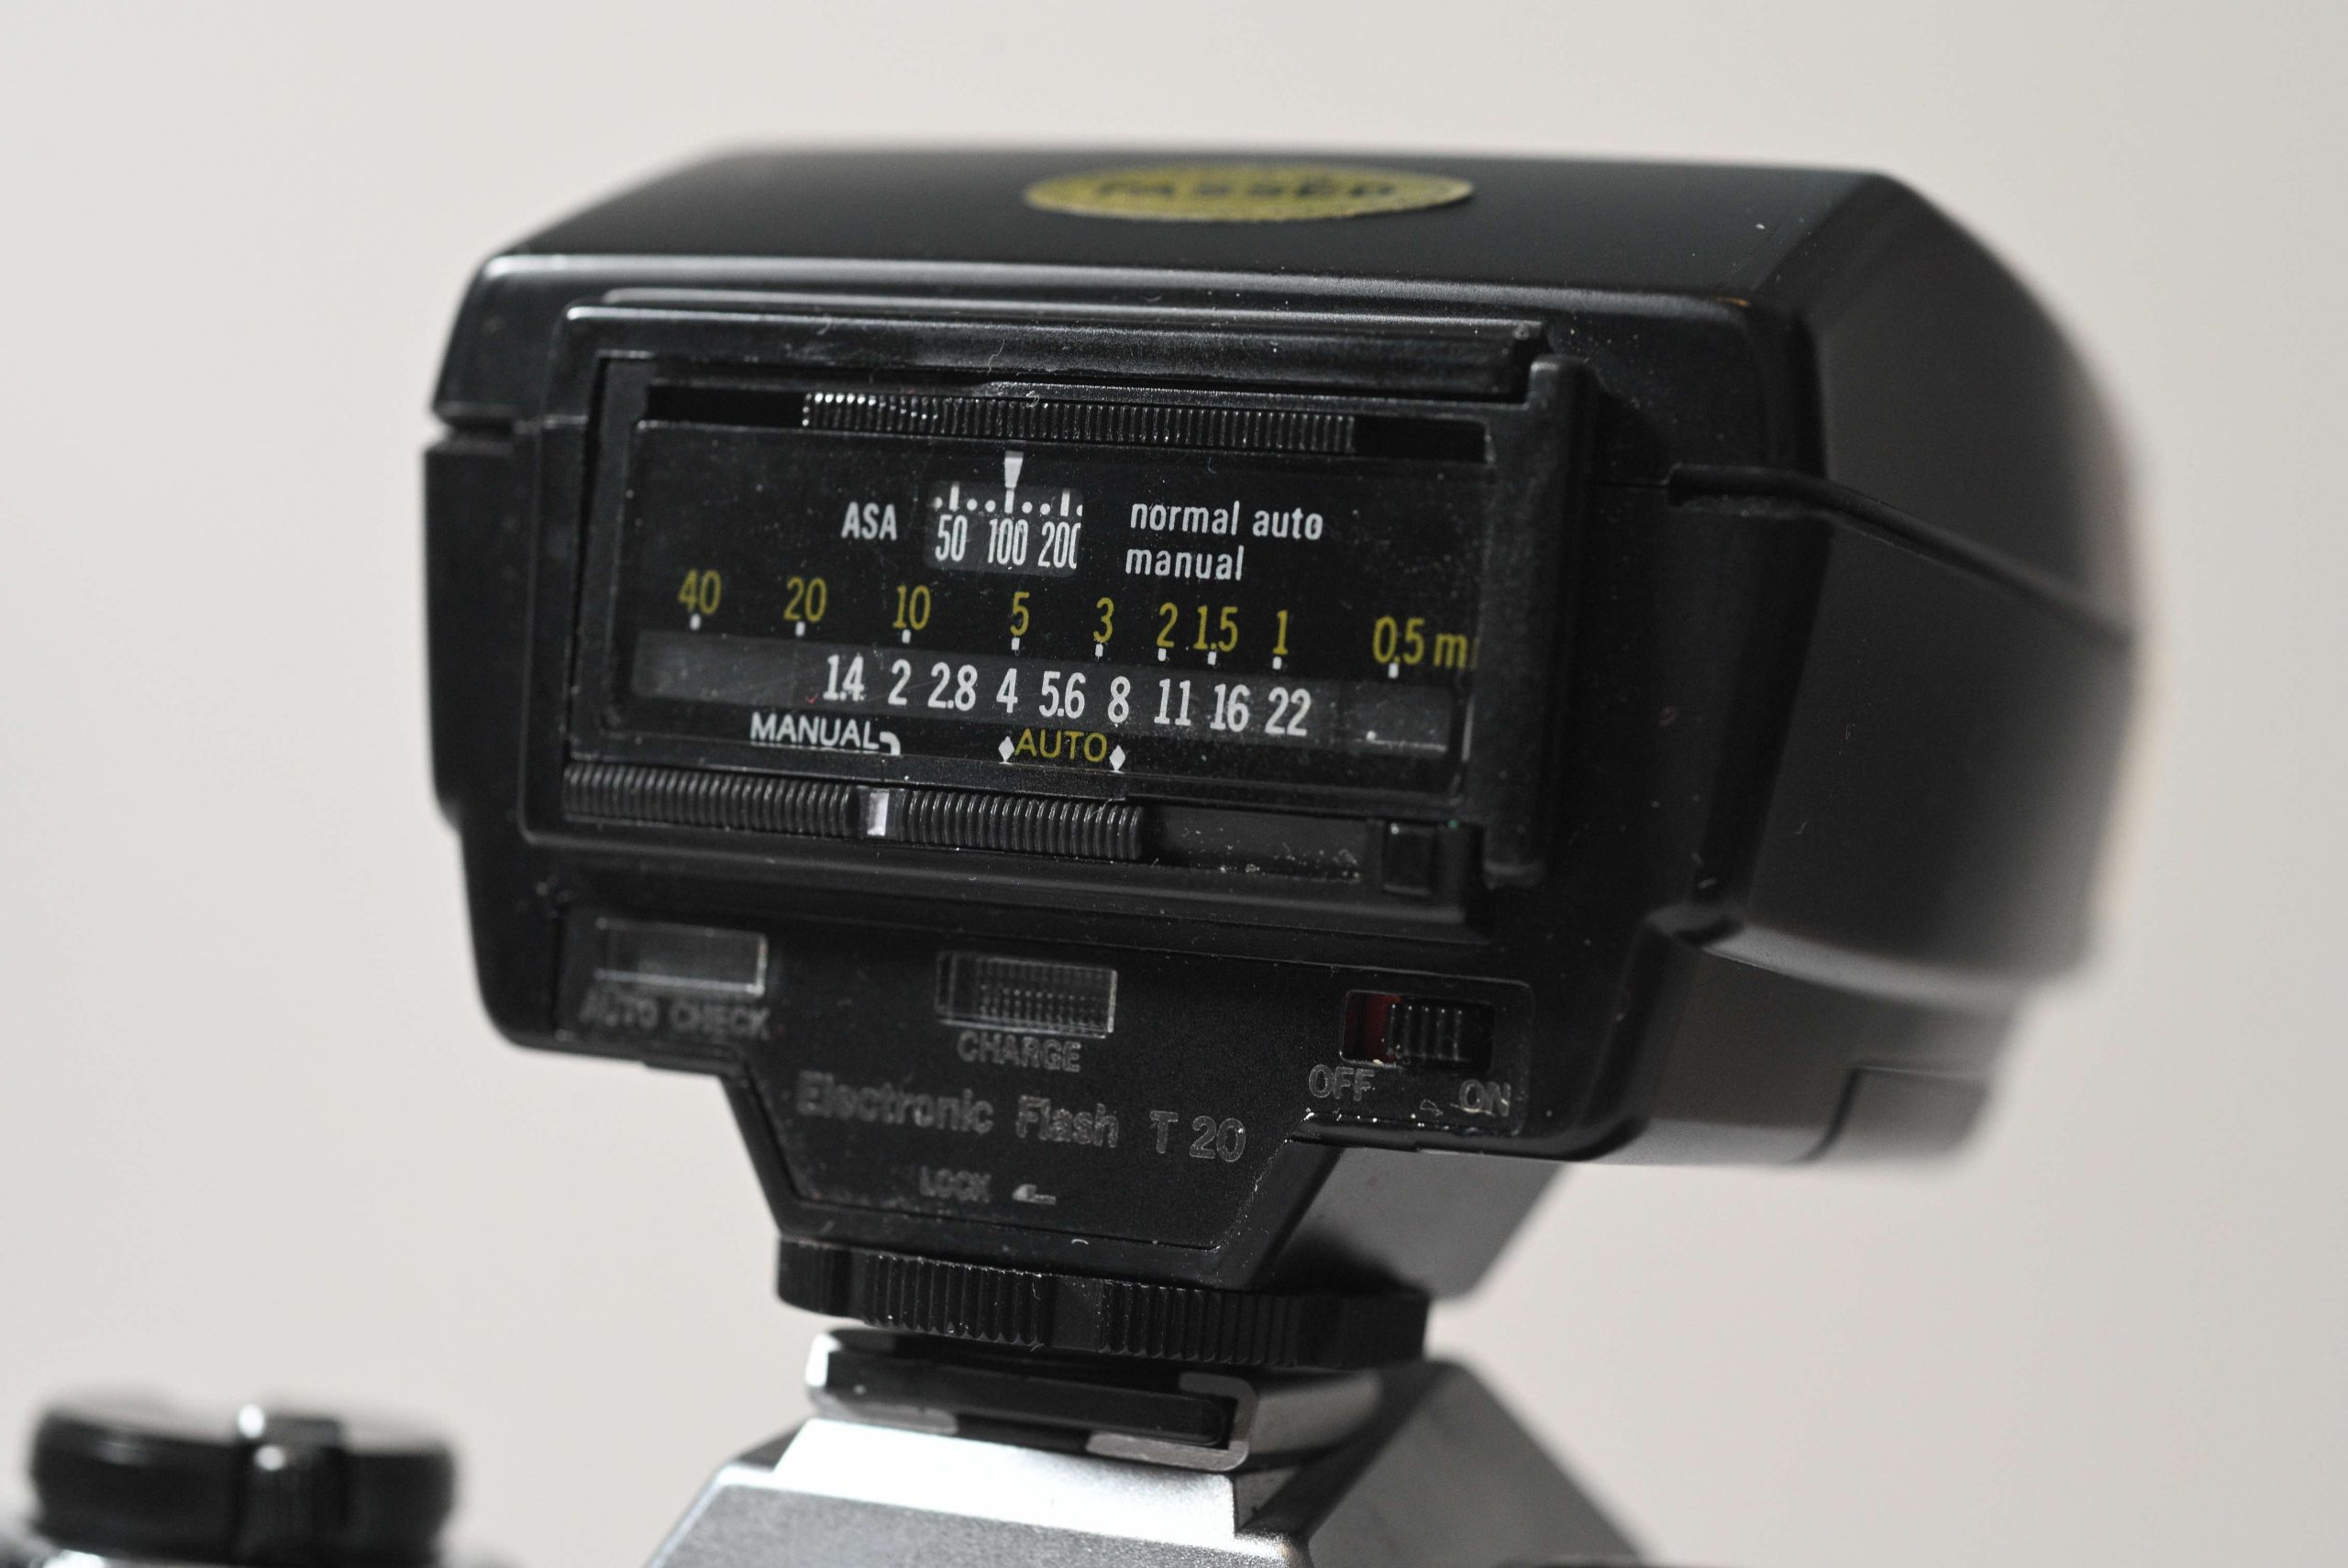
T20 Flash: The compact, classic choice. It’s small, light, and balances perfectly on the OM-10.
T32 Flash: A larger, more powerful unit with a tilting head for “bouncing” light off ceilings for softer portraits.
The Benefit: When you use these, the camera “talks” to the flash, automatically setting the sync speed and cutting the flash power the instant the film has enough light.
4. The Steady Grip (OM-20 Style)
The OM-10 has a very slick, flat front. If you find it hard to hold, you can actually find vintage screw-on plastic grips(often called “Butter Grips” or third-party steady grips).
Fun Fact: The OM-20 came with a small removable “Steady Grip” as standard, which was one of the design improvements over the OM-10.
5. Recordata Back
For the truly vintage “vibe,” you can swap out the standard metal back door of the OM-10 for a Recordata Back. This was a battery-powered door that would “burn” the date or time into the corner of your film. Note: Most of these only went up to the year 2009, so using one today will give you a very “retro” 80s date on your 2024 photos!
The Upgrade
While the original OM-10 was a smash hit upon its 1979 release, four years of user feedback had highlighted two major gripes: the lack of native manual control and the somewhat slippery handling. The OM-20 was the direct answer to those complaints.
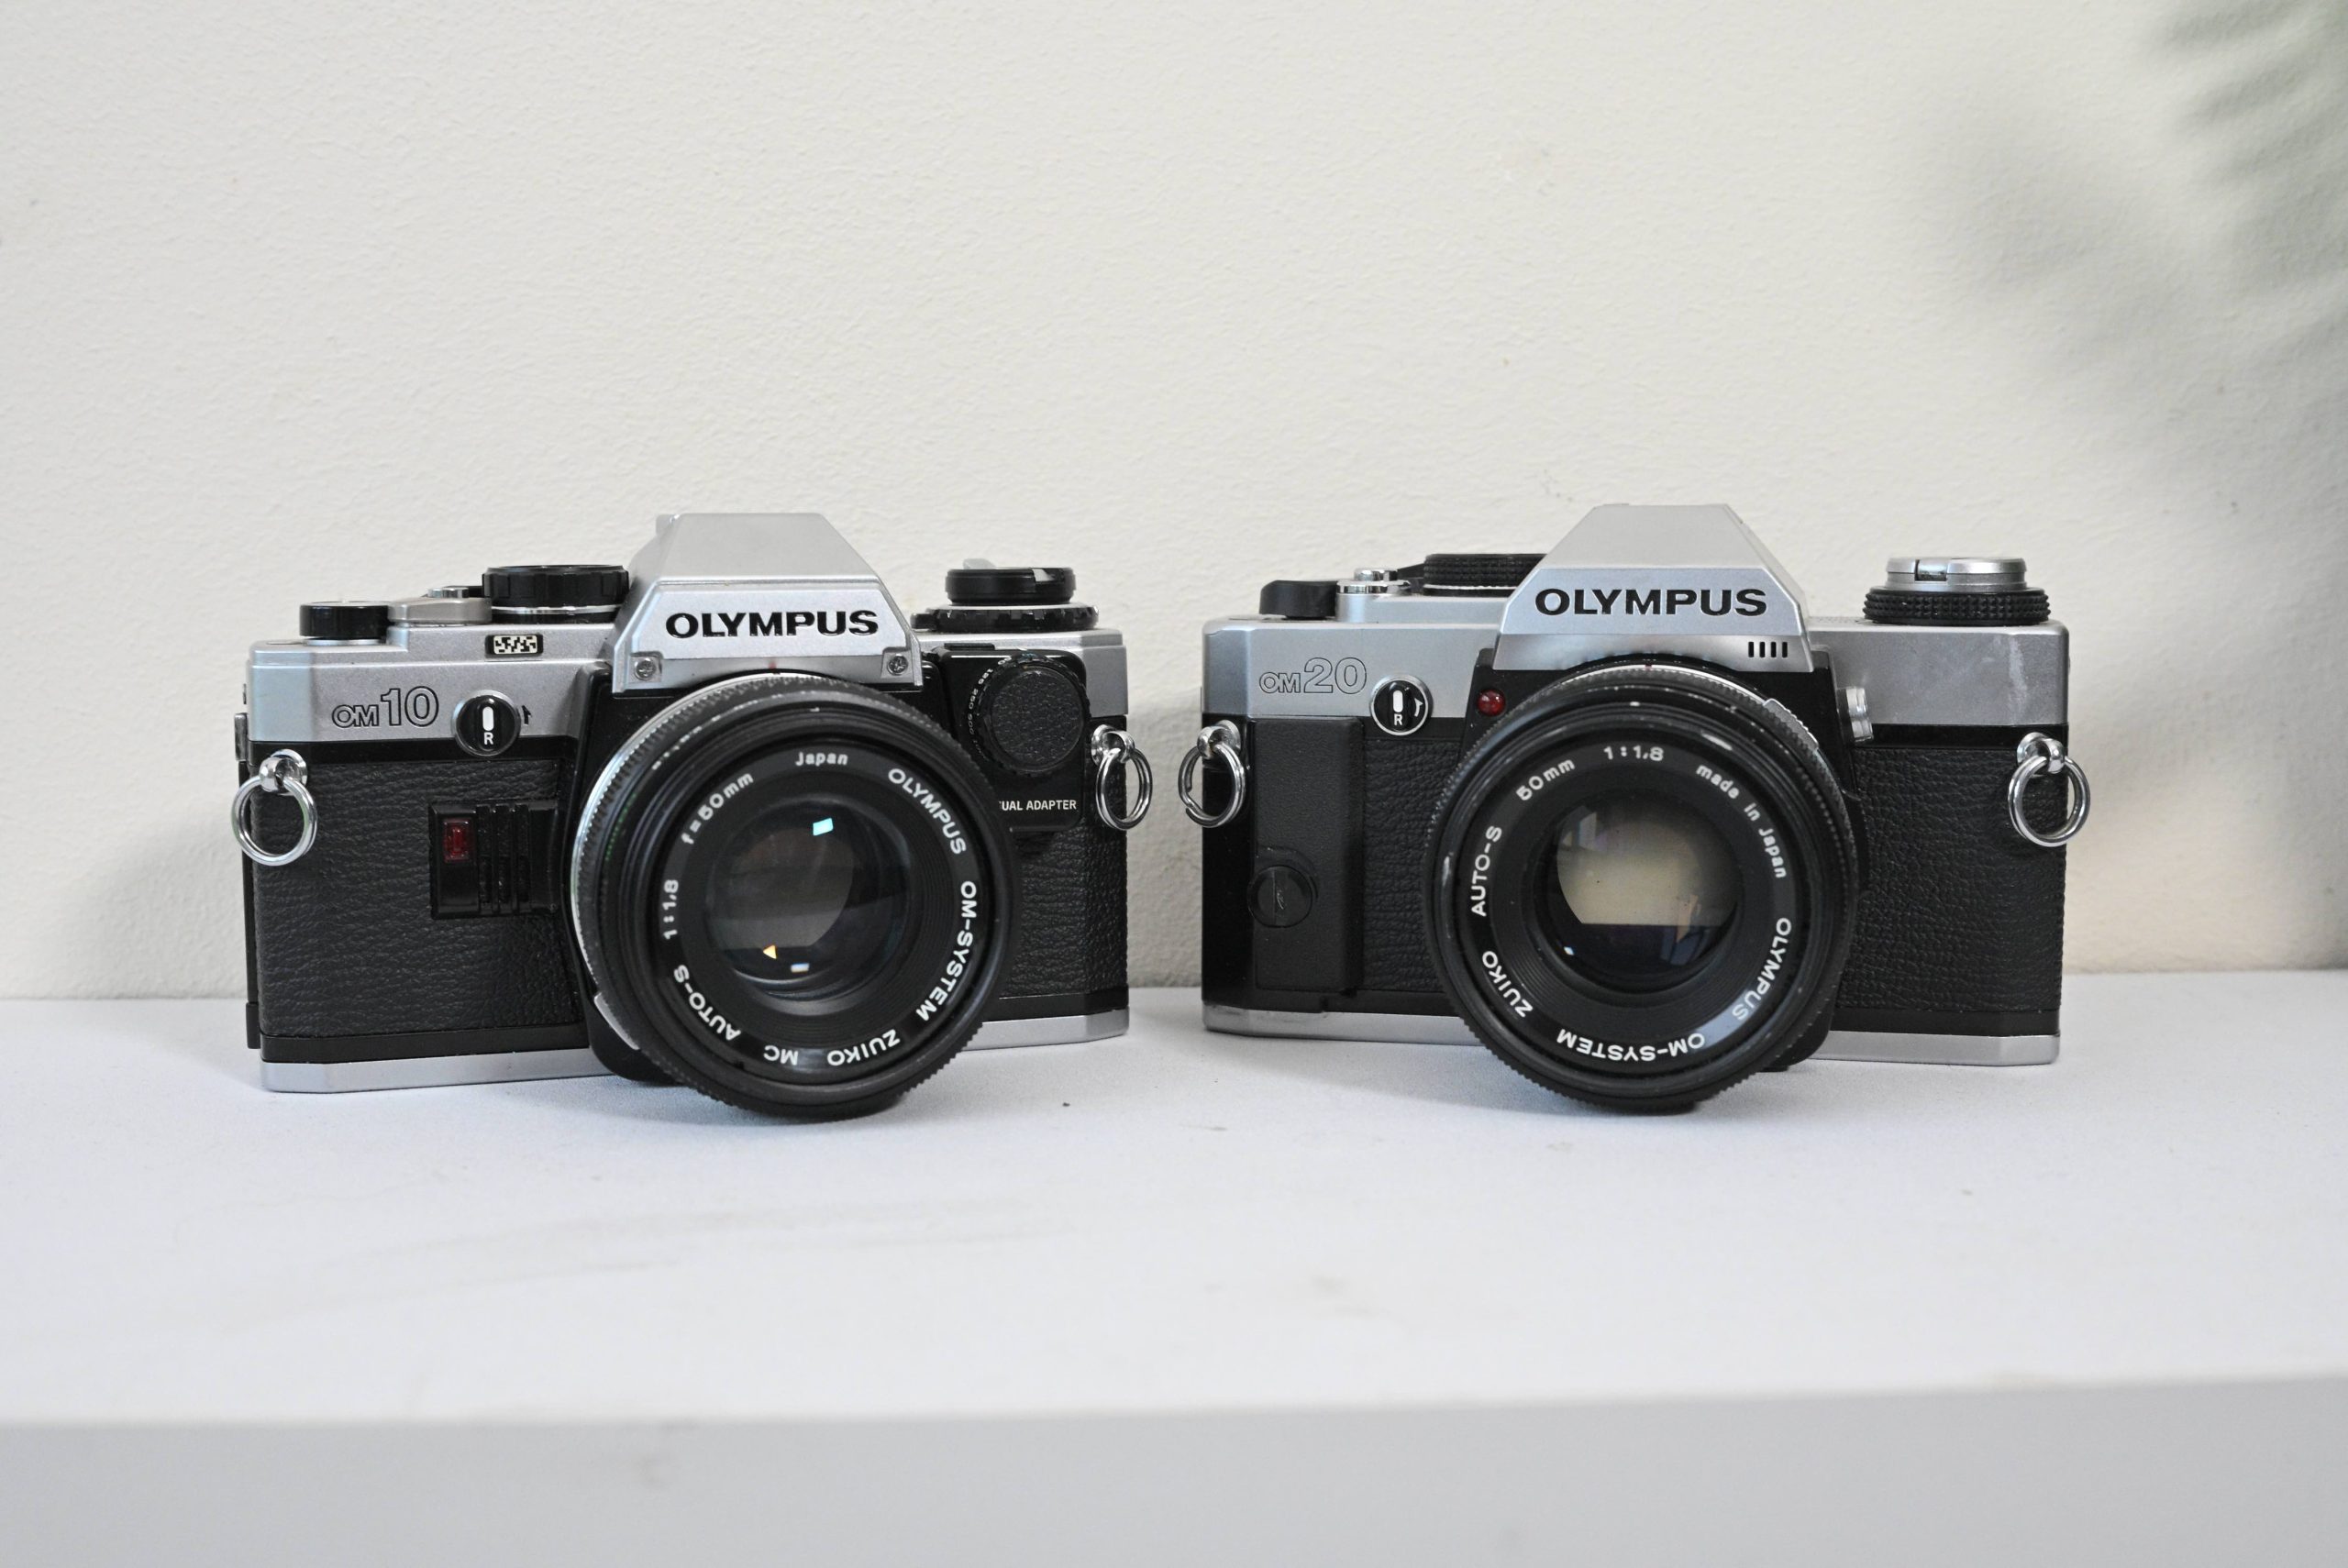
Interestingly, Olympus didn’t immediately kill off the OM-10 when the OM-20 arrived. Both cameras were sold side-by-side until about 1987, offering buyers a choice between the absolute “budget” entry (OM-10) and the “enthusiast” upgrade (OM-20).
A Quick Timeline of the “Two-Digit” Series:
1979: Olympus OM-10 (The Pioneer)
1980: OM-10 QD (Quarter Century version with a fixed data back)
1982: OM-10 FC (A US-specific bundle that included the Manual Adapter)
1983:Olympus OM-20 / OM-G (The “Fixed” Successor)
1983: Olympus OM-30 (An early experiment in focus-assist/autofocus)
1985: Olympus OM-40 (The final evolution with “Program” mode and matrix metering)
Why did I buy an OM-20?
To me, after having the use of an OM-10 for some time, the OM-20 was a no-brainer. Pretty much the same camera, same classic compact Olympus look and feel and the OM-10, except the OM-20 had the shutter speed dial built in. So there was no chance of ever losing the fiddly little thing!
The OM-20 also upgraded the focusing screen being slightly brighter than the OM-10. The OM-20 also came with a small grip making taking photos a bit more comfortable.
The OM-20 also had an upgrade inside the viewfinder with the metering table. Whereas the OM-10 would display ALL the speeds and indicate your speed with a red dot the OM-20 just Shows the speed number and hides all the others.
With the OM-10 being as popular now as it was back in the days of the Fonze (Happy Days), and the price you can pick them up for online I decided to grab one before the prices increase anymore or before they are all broken!
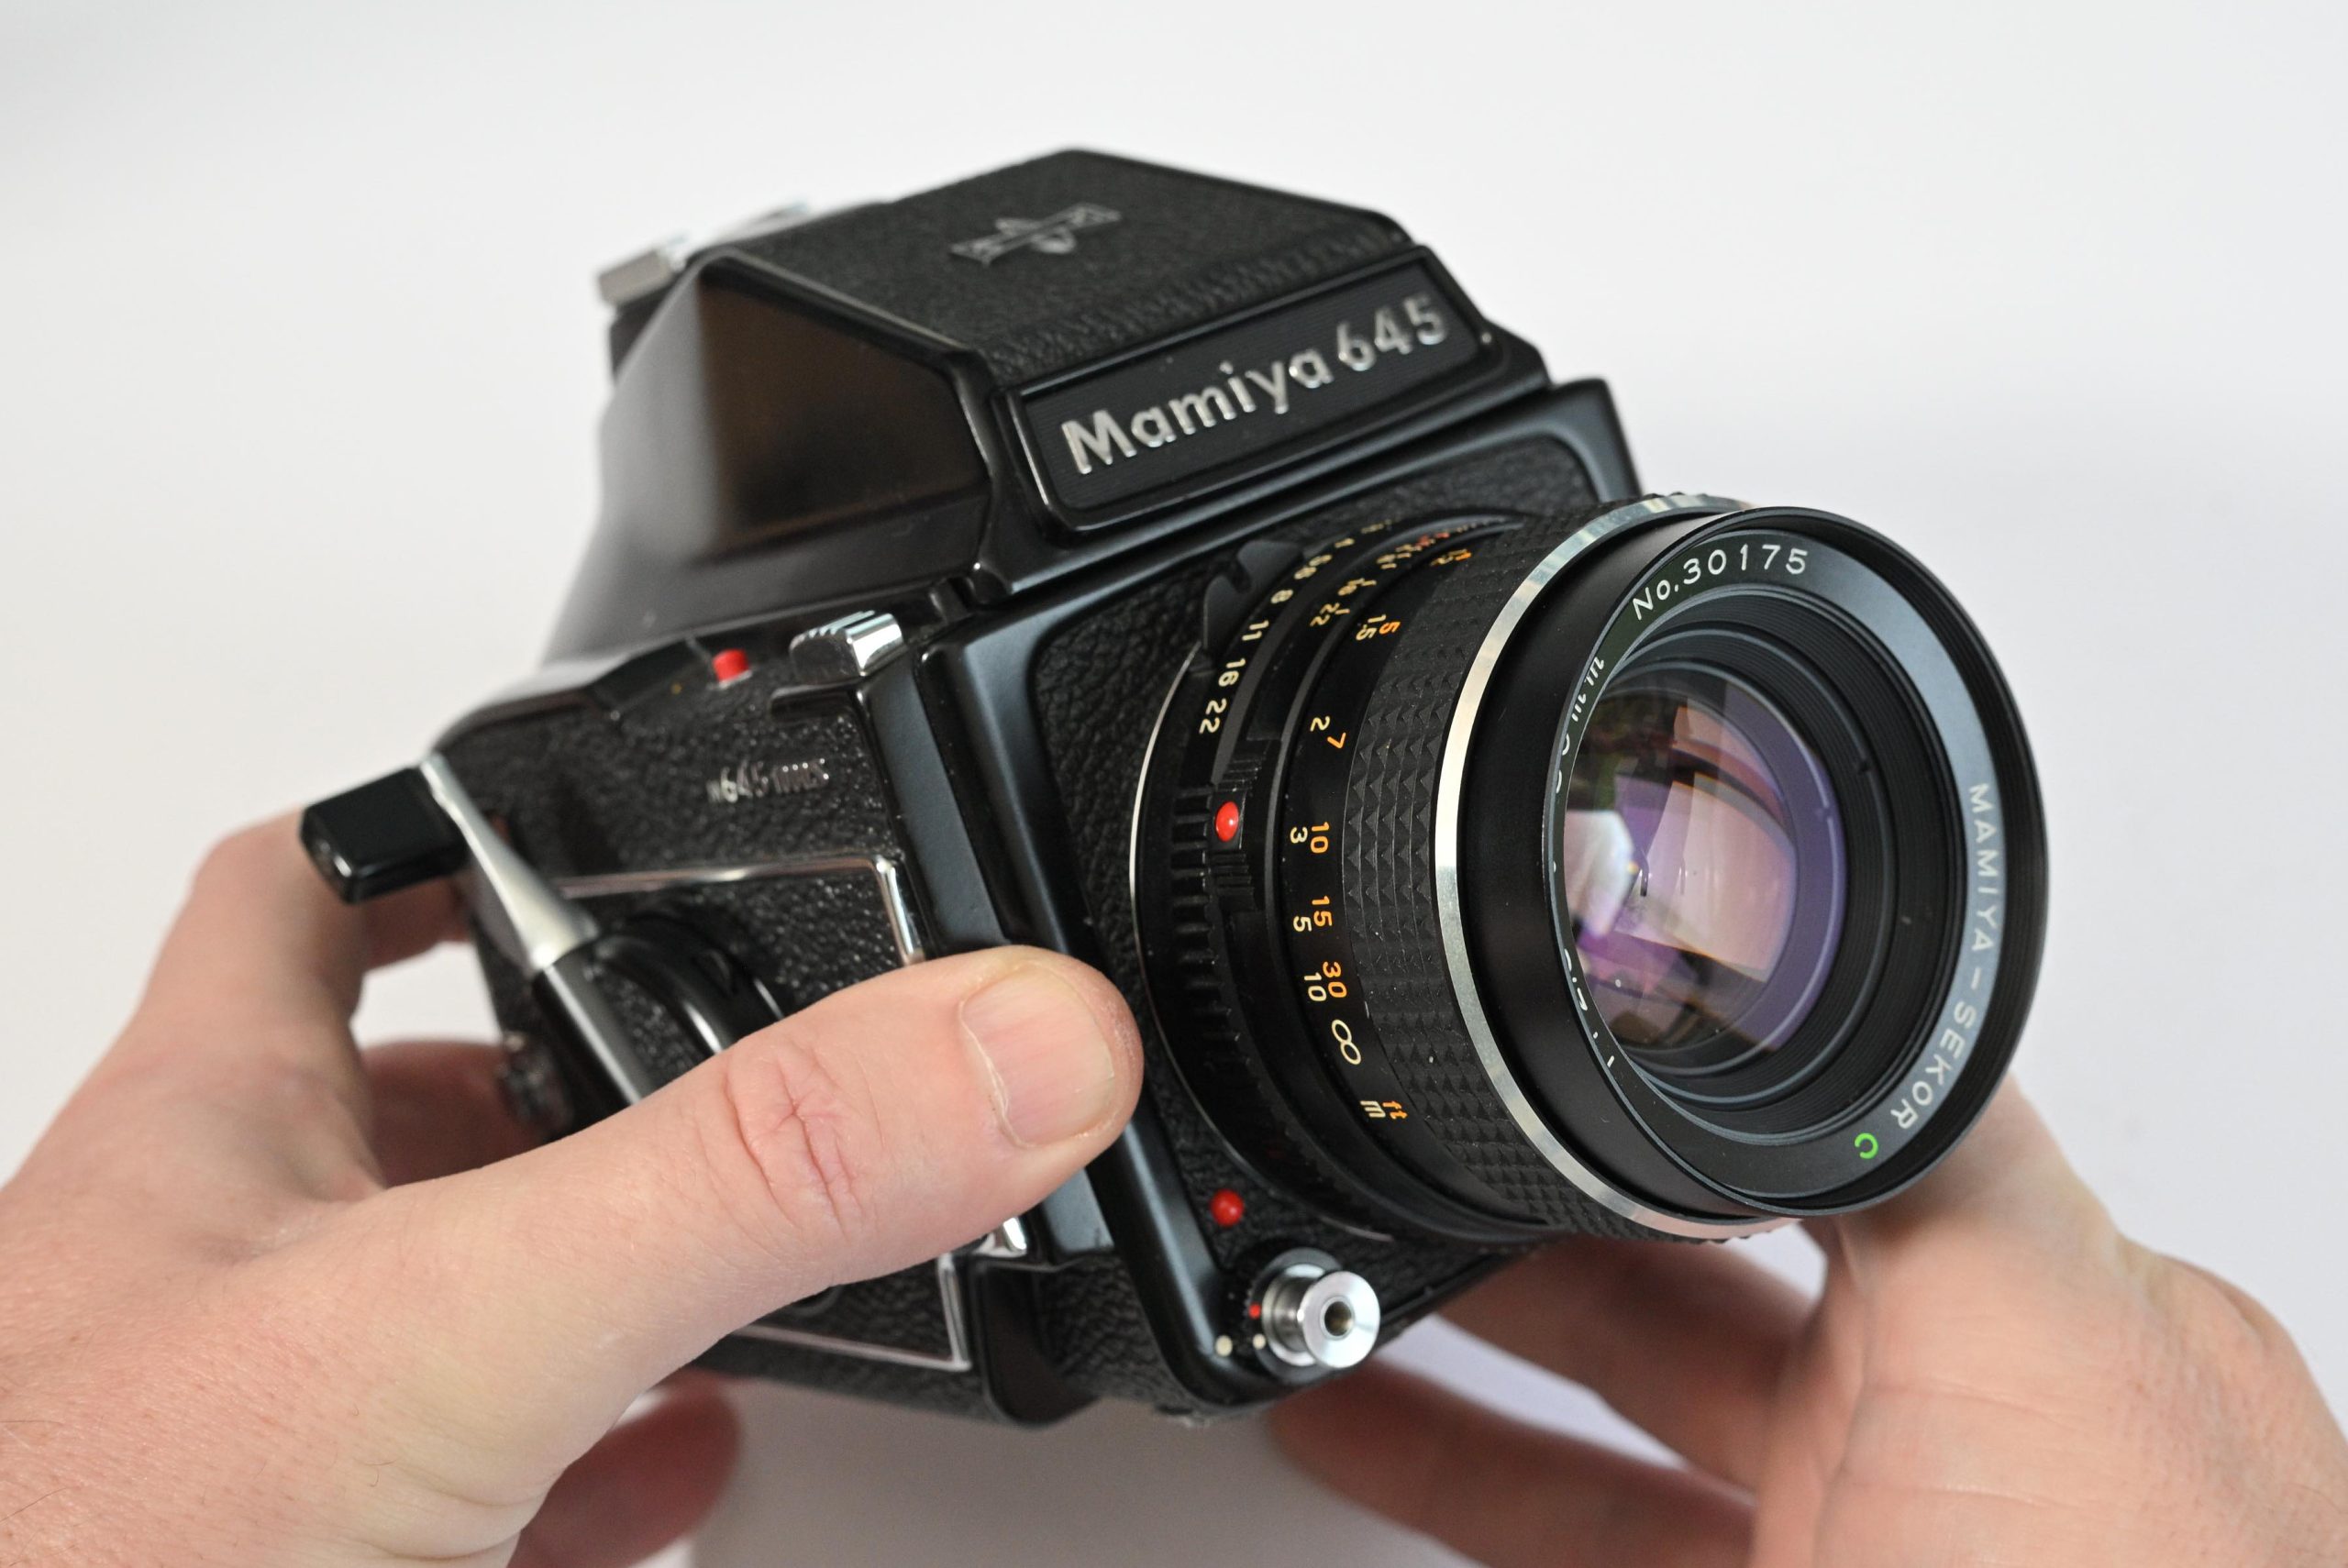
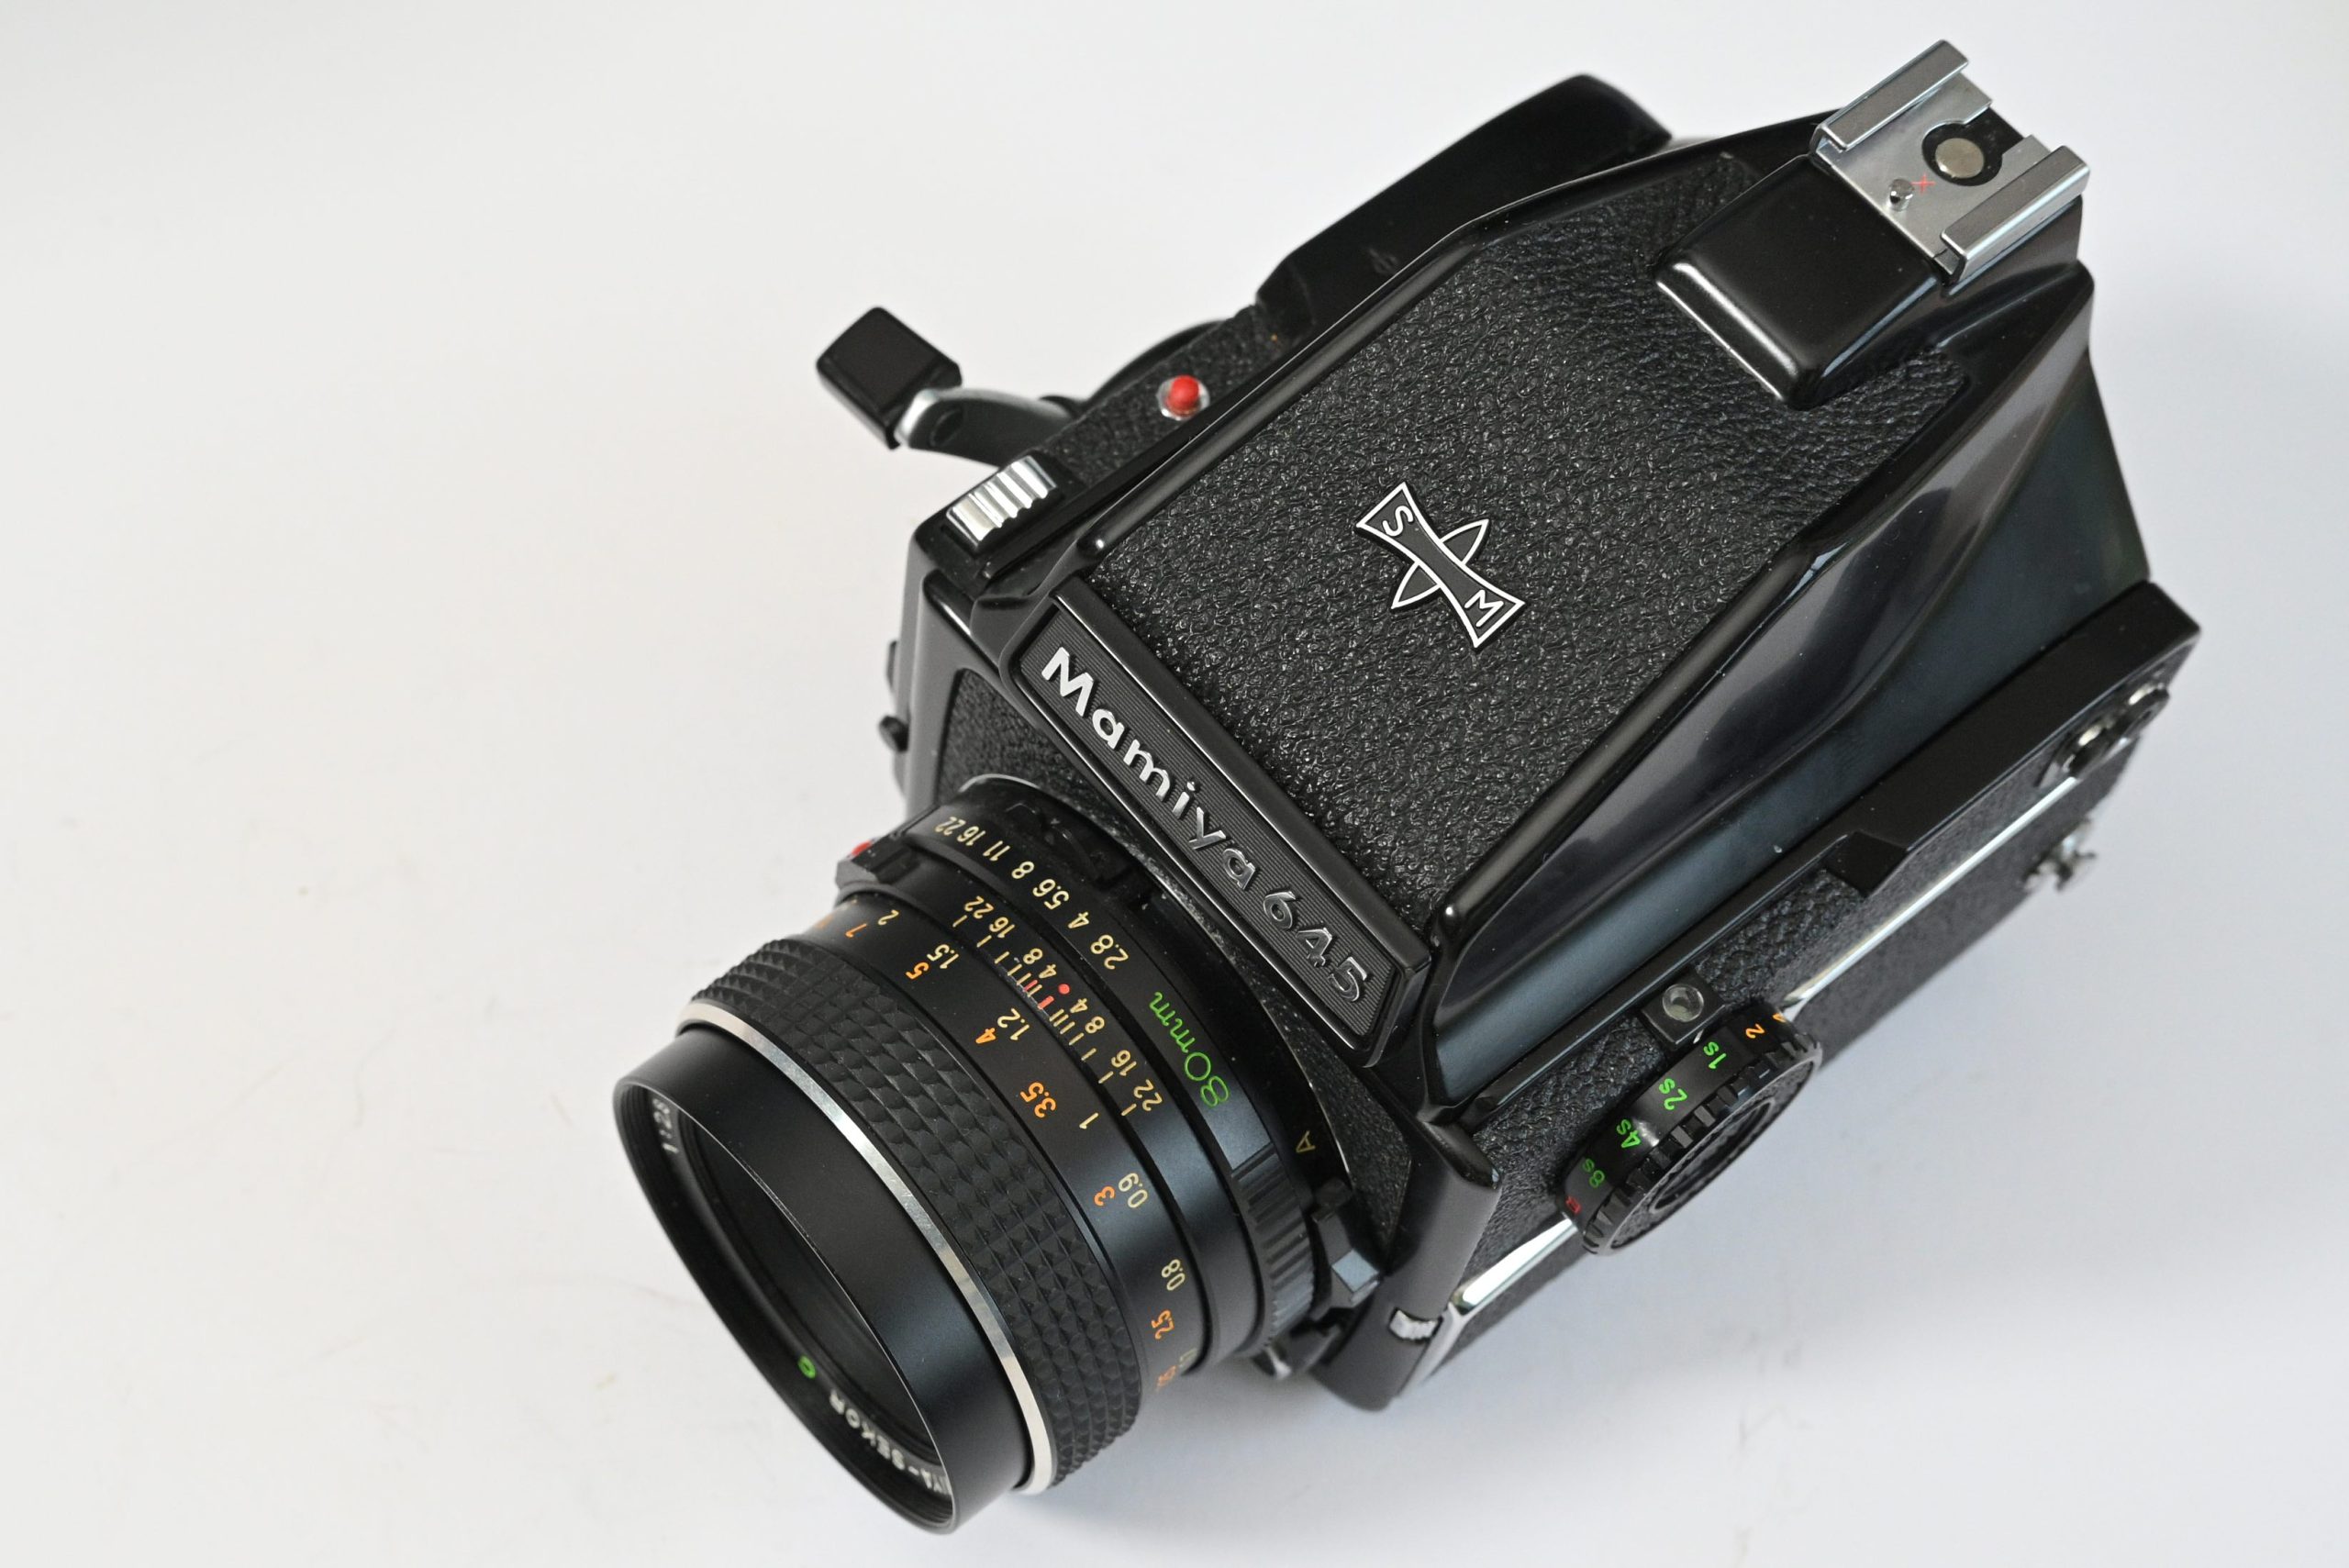
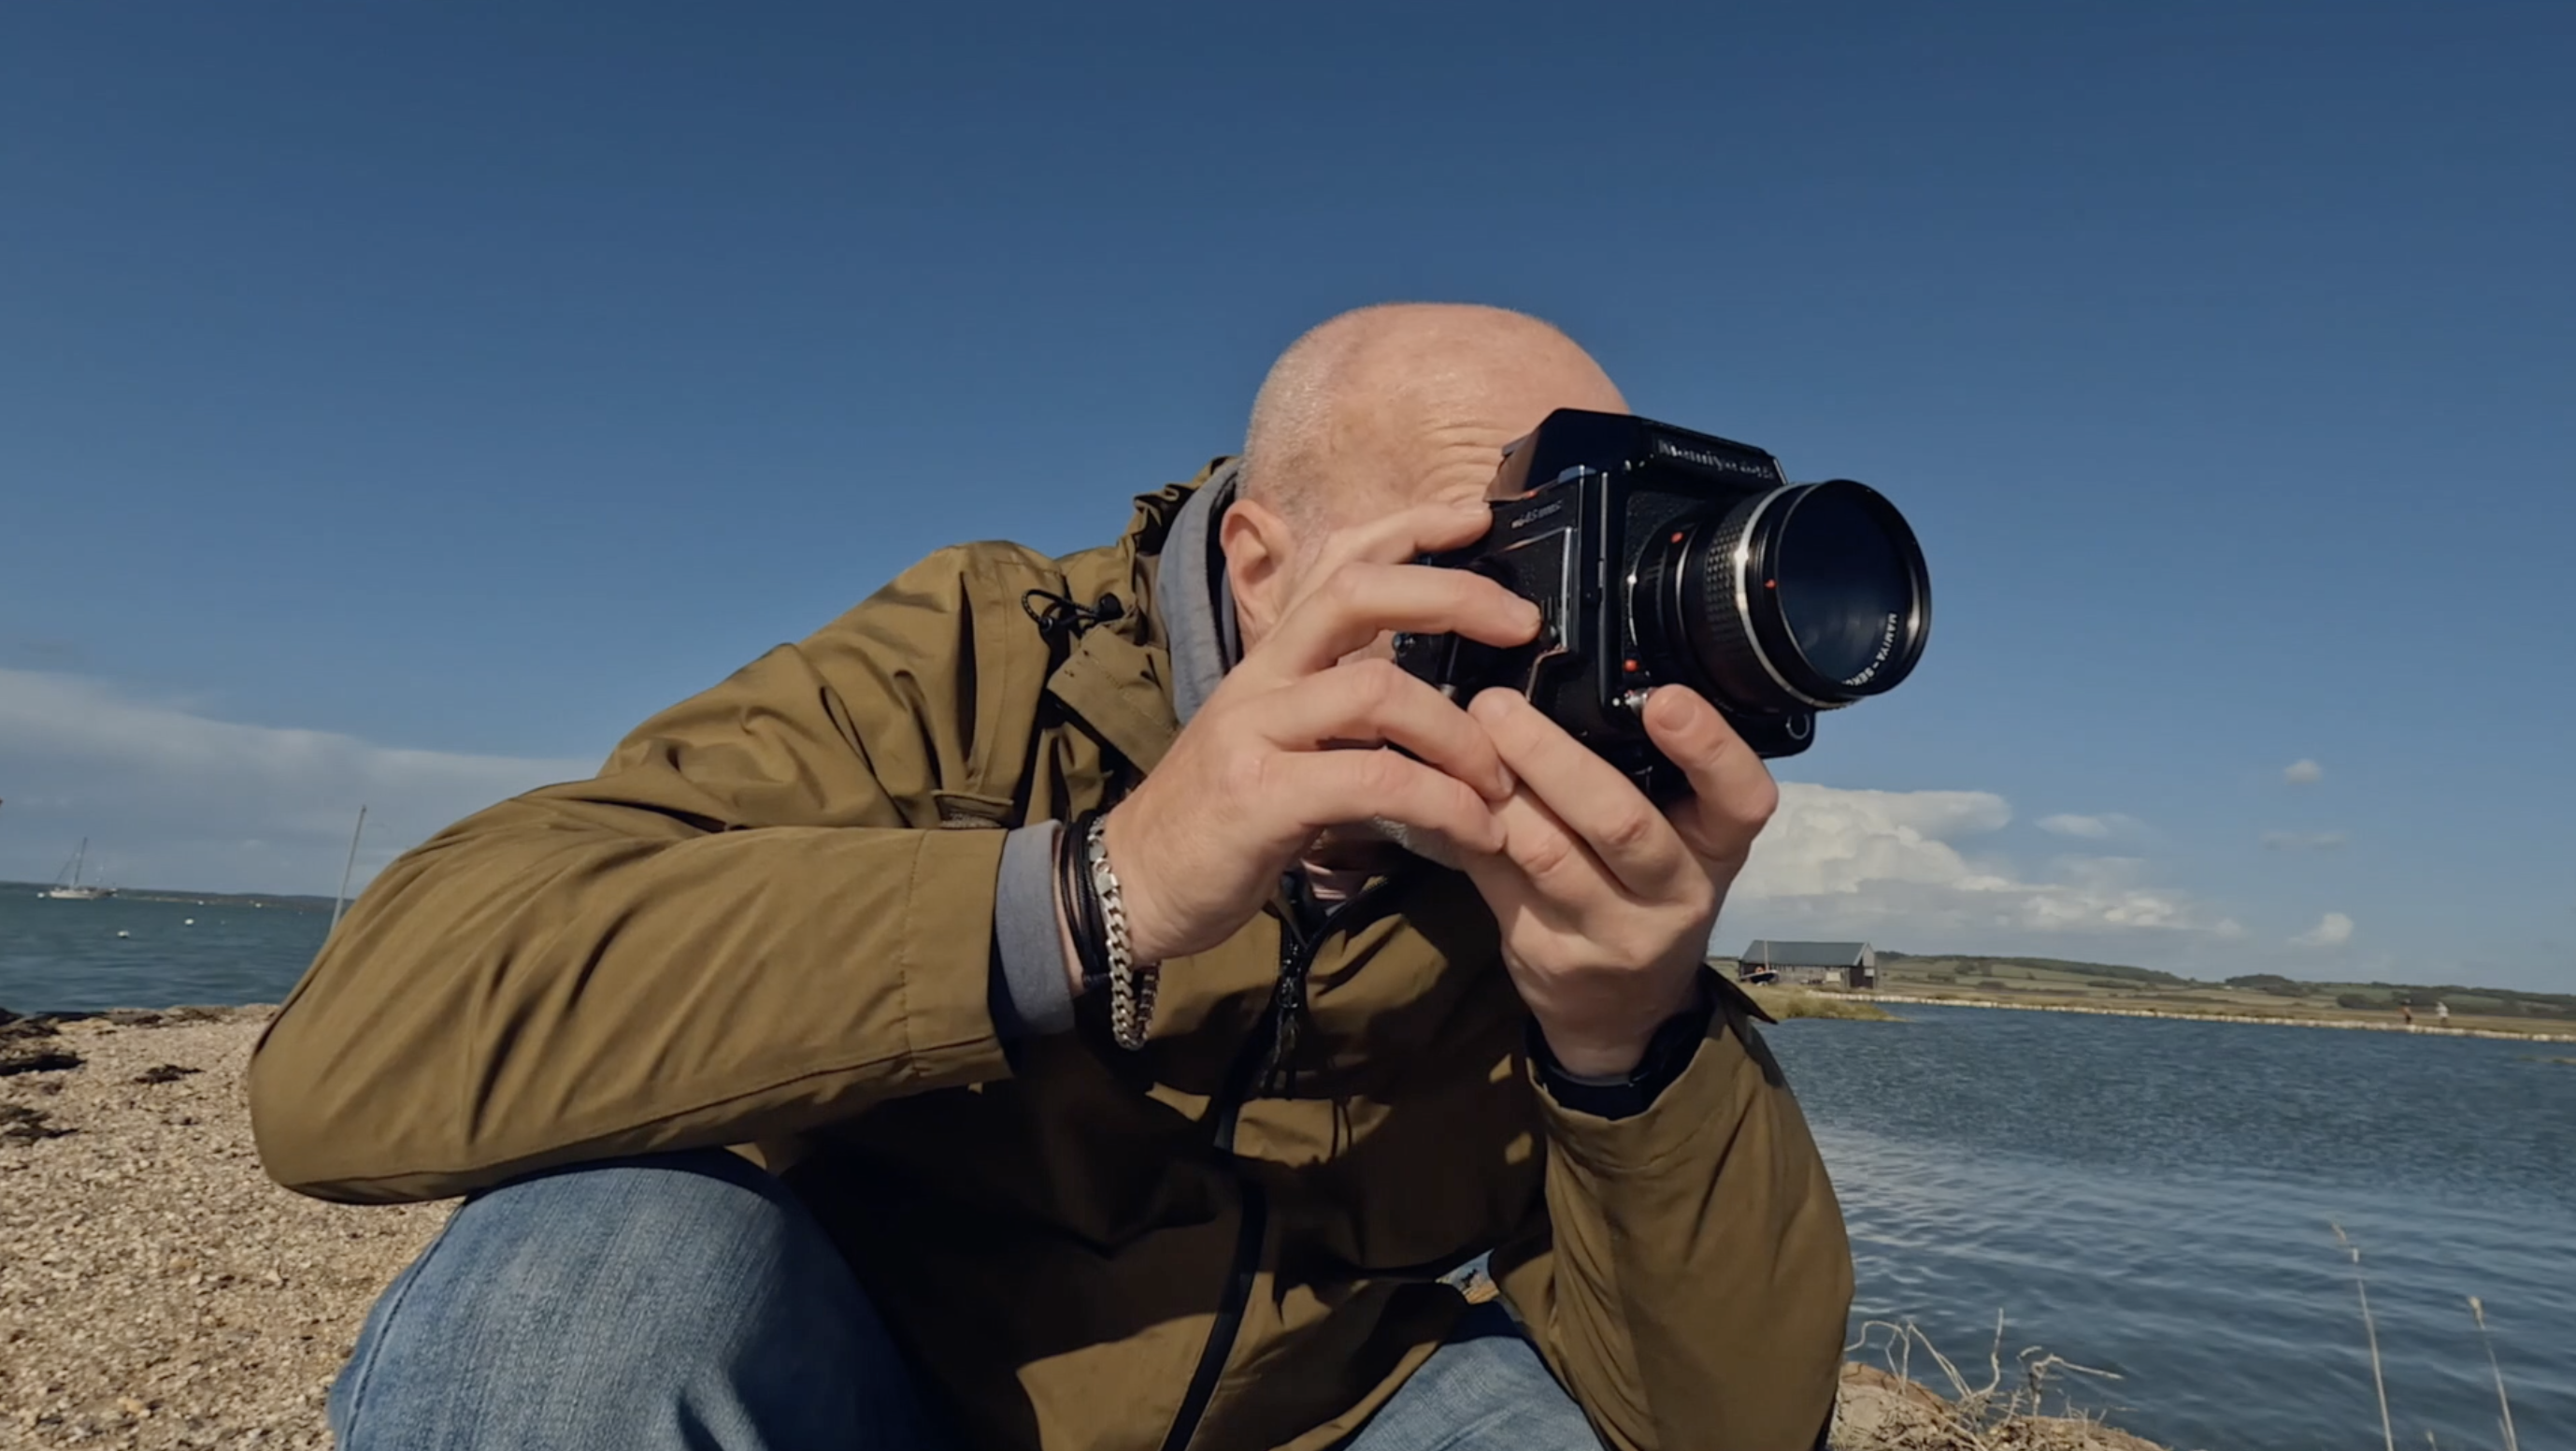
I do love these classic cameras, especially the ones from the 1970s and 1980s! I was lucky to pick up this beautiful example of the Mamiya 645 1000s camera from 1976 and it is a joy to shoot. Fully working too!
Let’s talk about 1975. Bell bottoms were in, disco was king, I was probably making a go-cart and Mamiya decided it was time to elbow their way into the medium format SLR party. The Mamiya 645 was born. It wasn’t just a camera; it was a modular system. Think of it as a photographic Lego set, but instead of little plastic bricks, you got a serious hunk of metal and glass.
It was Mamiya’s breakthrough, finally giving the big boys a run for their money in the ‘point-and-shoot-but-make-it-massive’ market. You got the interchangeable, utterly glorious Mamiya-Sekor C lenses (the glass is what really mattered, let’s be honest), a bunch of focusing screens, and viewfinders that looked like small modernist sculptures. Plus, you could bolt on things like accessory grips and film advance handles, turning your camera into a truly intimidating piece of kit. Mamiya also offered a “Power Drive” to bulk the camera up even More!
The Specs That Make You Say “Nice, But…”
This original 645 was quite the beast, boasting a generous range of shutter speeds from a glacial 8 seconds all the way up to a zippy 1/500th of a second, plus Bulb mode. For comfort, Mamiya gave you two shutter release buttons (because one is never enough when you’re wrestling a medium format camera), and a multi-lever for taking double exposures—because sometimes, one mistake isn’t enough, you need two on the same frame! And a mirror up switch for those less shaky long exposures.
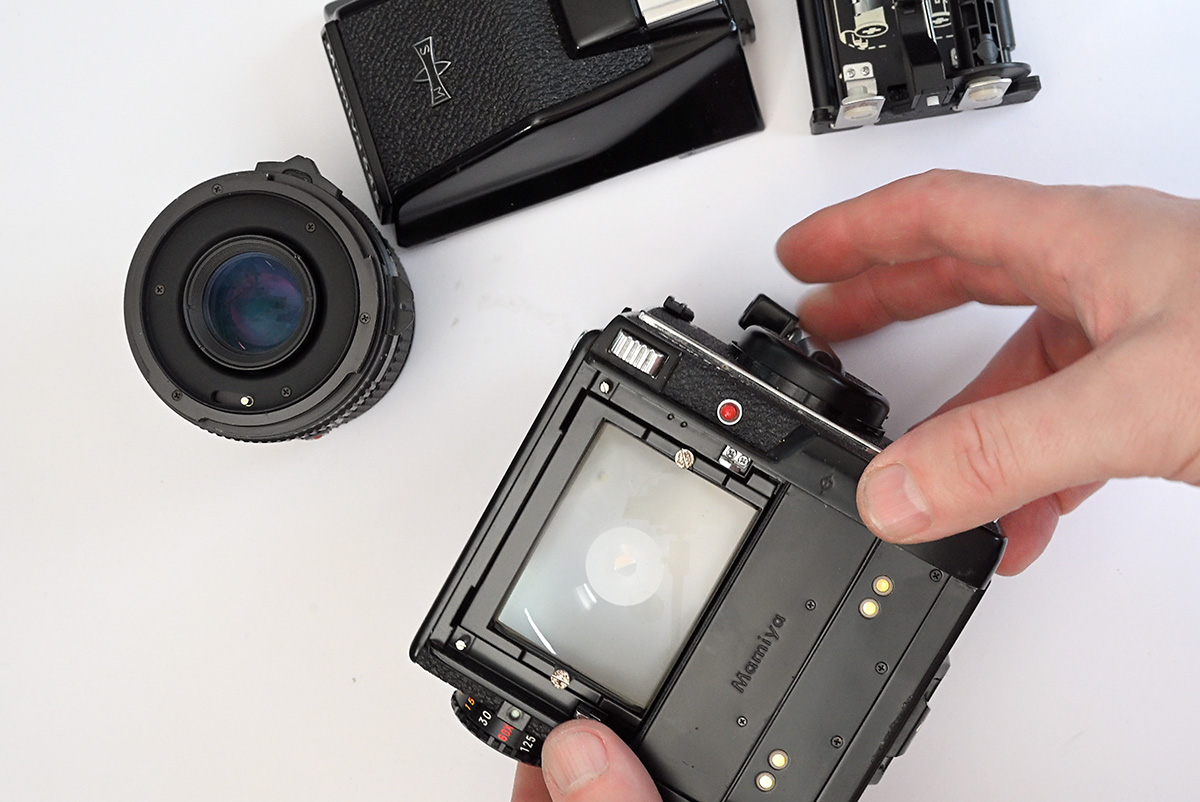
No interchangeable backs. That’s right. You’re committed to one film stock for the entire shoot. Want to switch from colour to black and white? Better bring a second camera, pal. Interchangeable backs? That was a luxury Mamiya saved for the “plastic lot” (the Pro, Super, and TL generations) that came later. Great cameras, sure, but they got all the fun gadgets!
No Depth of Field Preview. That one surprised me. Why Mamiya didn’t put a DOFP on their first 645.
The World’s Quickest Upgrade Cycle
The 645 was on the market for a whole 12 months before Mamiya pulled a classic corporate move. In 1976, they dropped the M645 1000S.
The difference? Well, it was exactly the same camera. Except Mamiya tacked on three things:
A Depth of Field Preview. Very useful!
A self-timer (perfect for when you really want to get in the group shot, but also want to use a heavy, tripod-mounted camera).
A new speed: 1/1000th of a second.
And that is how it earned the “1000S.” Can you imagine being the poor soul who splurged on the original ’75 model, only to have Mamiya release the one that had more features a year later.
Another downside to the camera is the electronics. It takes a 6v battery or 4 LR44 batteries (with an adaptor) and without any batteries the camera won’t fire. So make sure you have spares!
Shooting the camera
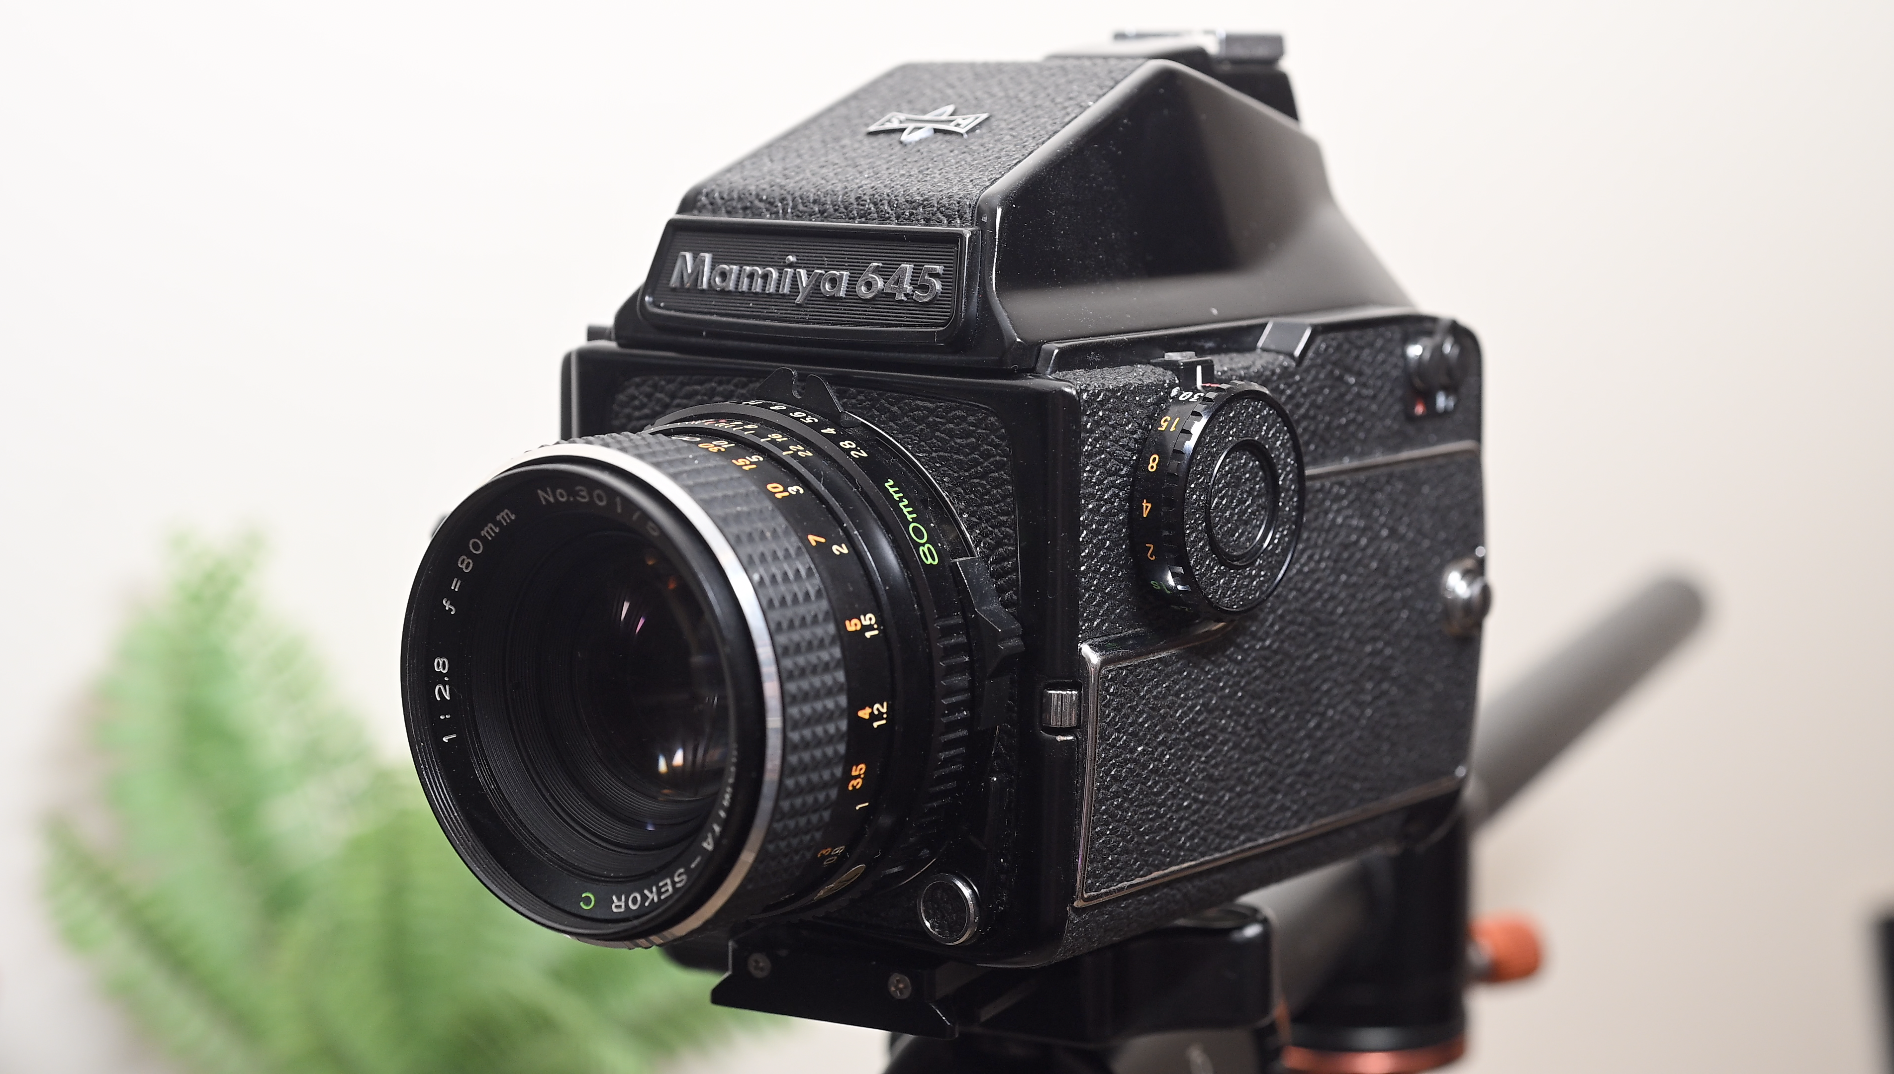
It’s not very heavy at all, just under a kilo, and it’s very compact. So shooting this camera around the streets or at an event is a breeze! A camera strap would be advised though!
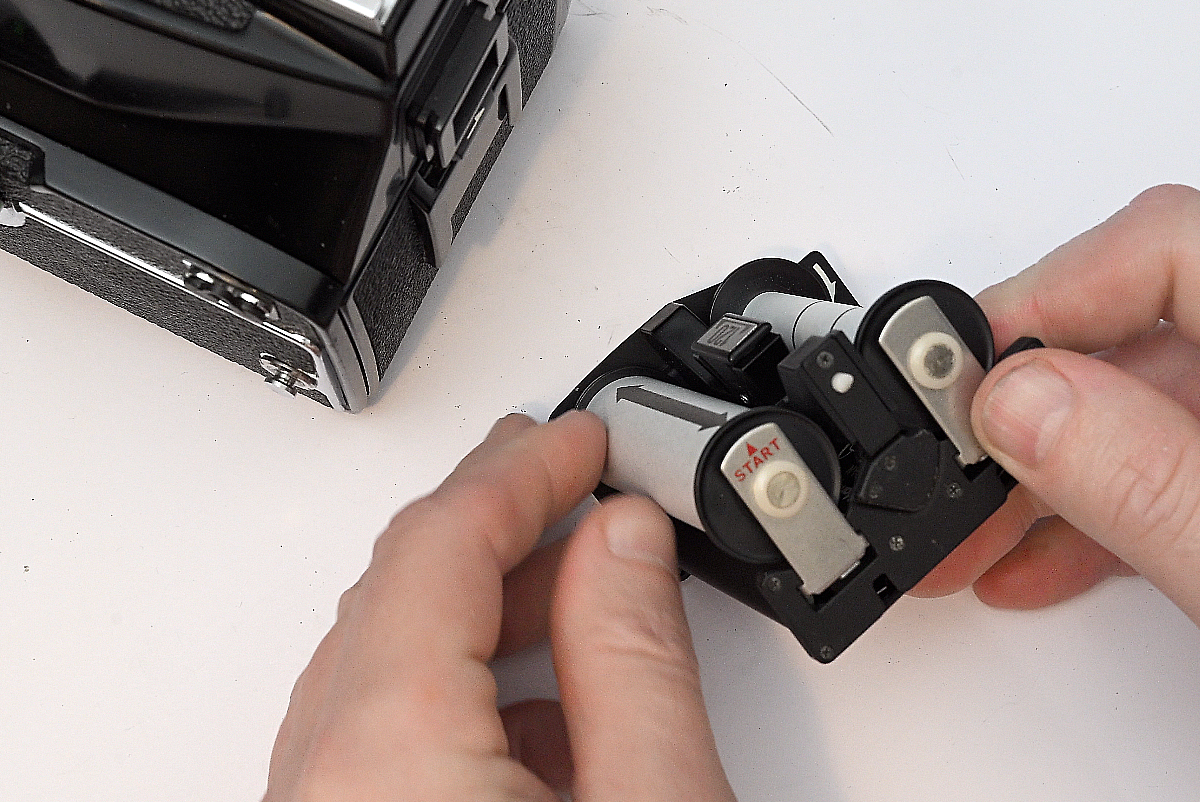
Loading the camera is easy with clear instructions on the cartridge where the start position is, however, if you only have the eye level view finder like me it may take some time getting used to! But as I have found, once settled in with composition and comfort it soon fits like a glove. A heavy one. It’s just a bit awkward at first, however, with the two fire buttons you get a choice of comfort.
Who’s it for?
I’d say this camera can easily replace the 35mm camera you are already shooting for your photography. As long as you don’t mind cutting down on exposures.
Studio Portraiture – Amazing Camera
Scapes – Definitely
Street / Urban – Maybe a bit on the large side but definitely an option
Still Life – Of course!
Events/Weddings. A big fat YES.
Wildlife – Hmmm?
Sports – The speed is fast enough!
And to make your photographic journey more comfortable for any of the above there is a range of lenses, prisms and focus screens.
Classic 645
So, it’s a 645 Medium Format Camera. A sweet upgrade from 35mm film and a good intro into medium format. With a 120 roll of film you get 15 photos and if you enjoy using the films rebate in your final prints then you won’t be disappointed with the 1000s rebate signature.
Some photos
And finally here are some photos I have taken with the camera and in particular the Mamiya-Sekor 80mm f2.8 Lens.
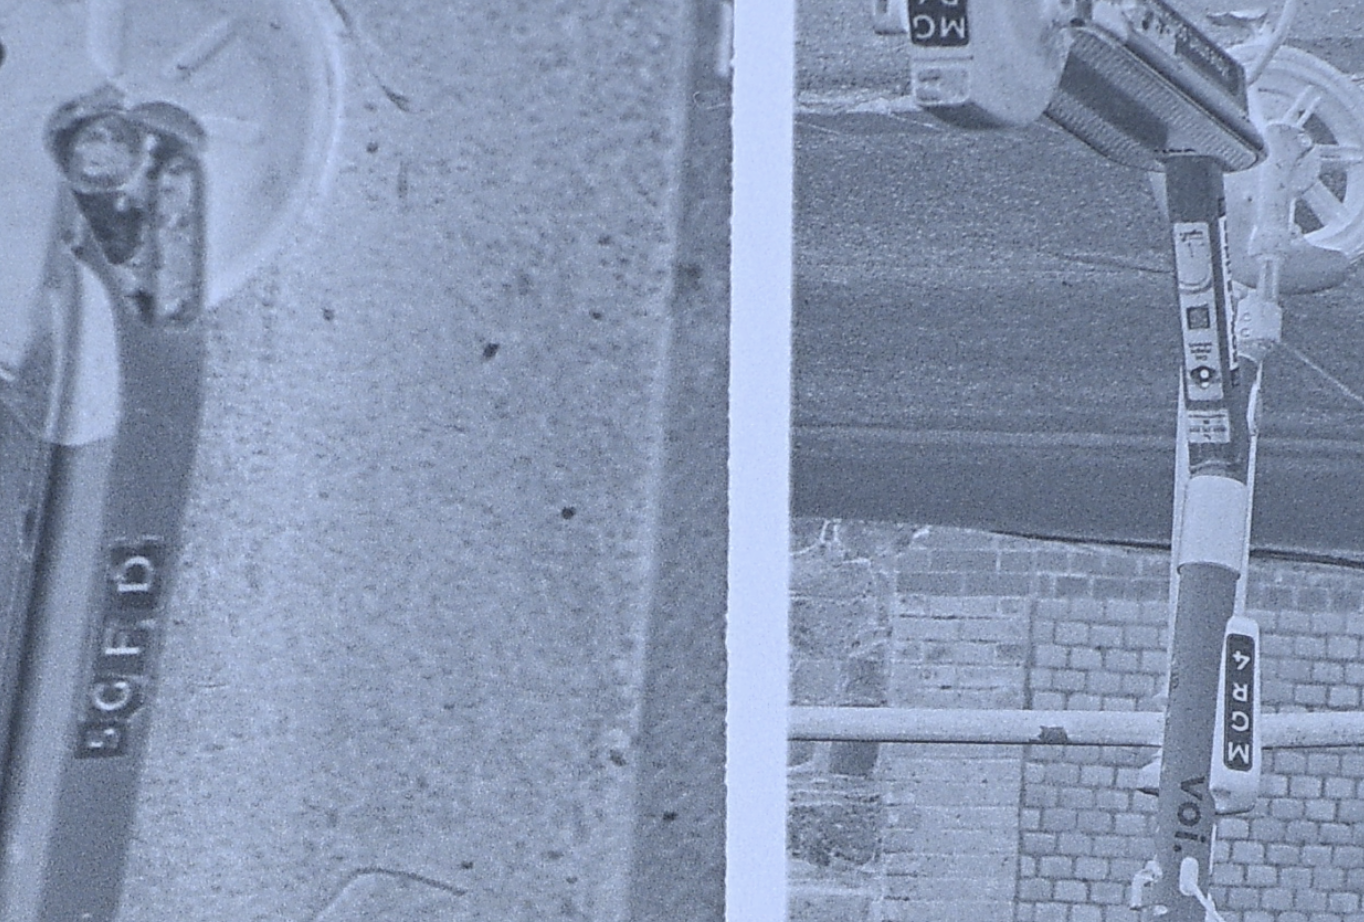
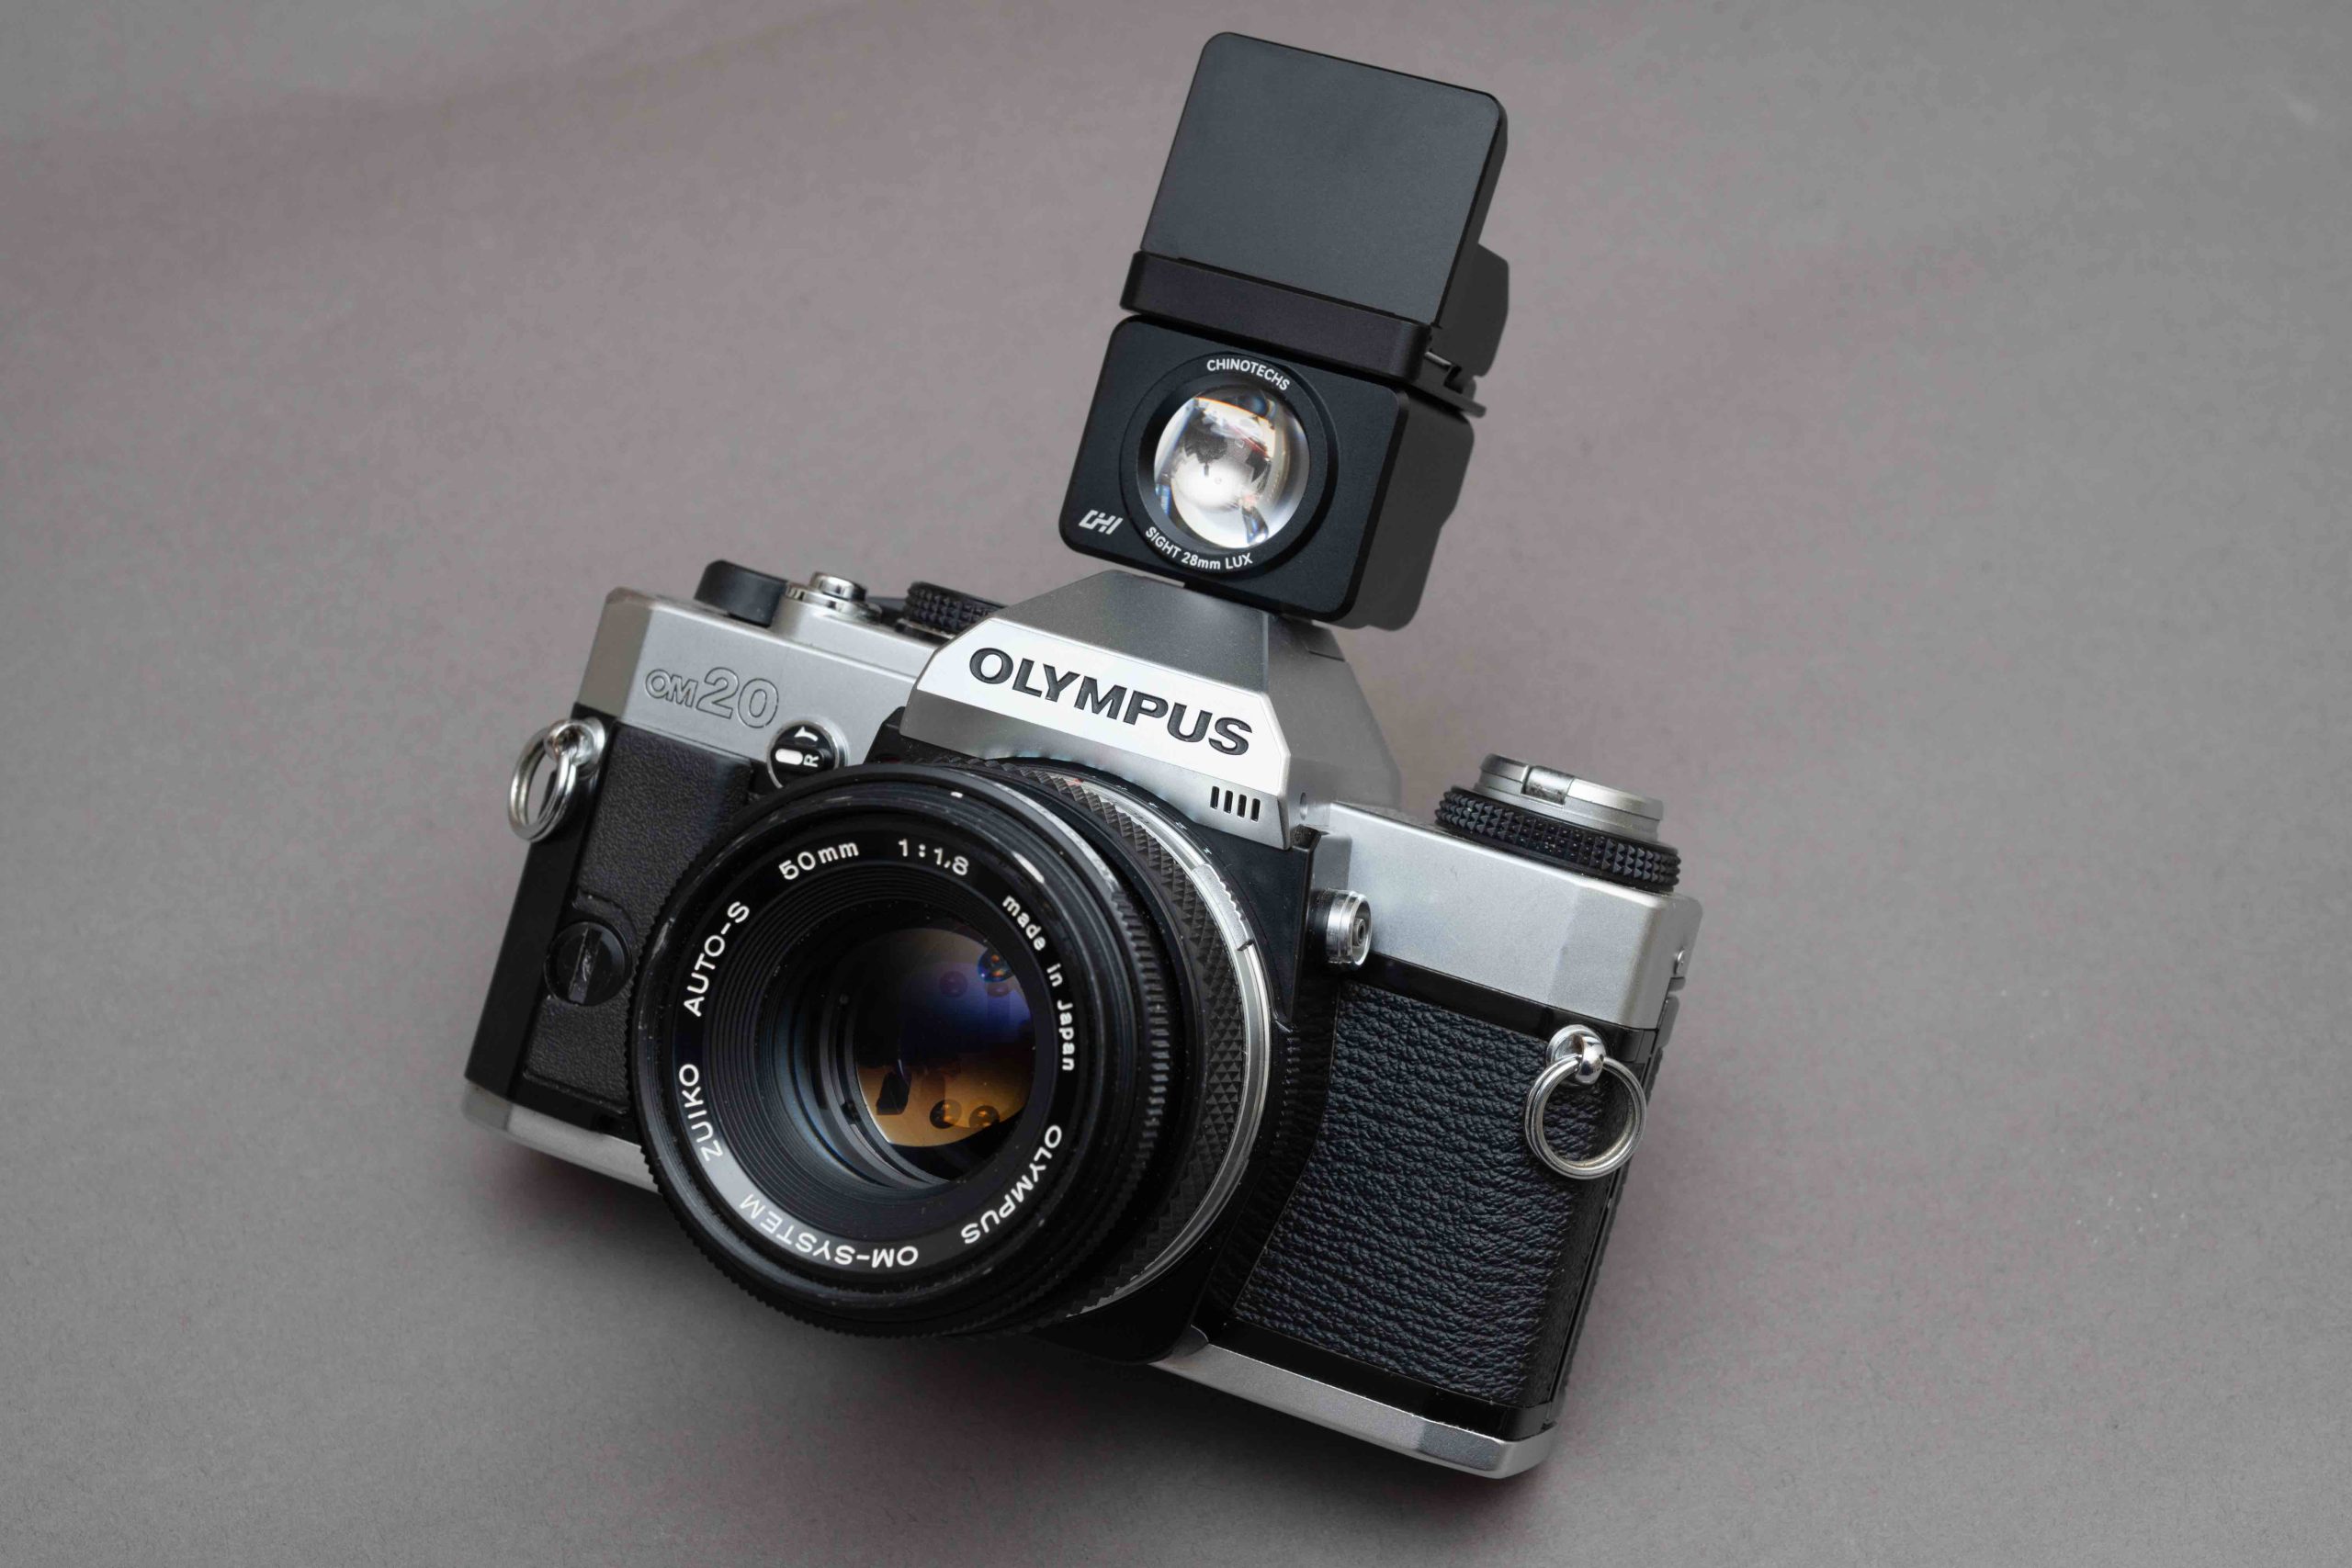
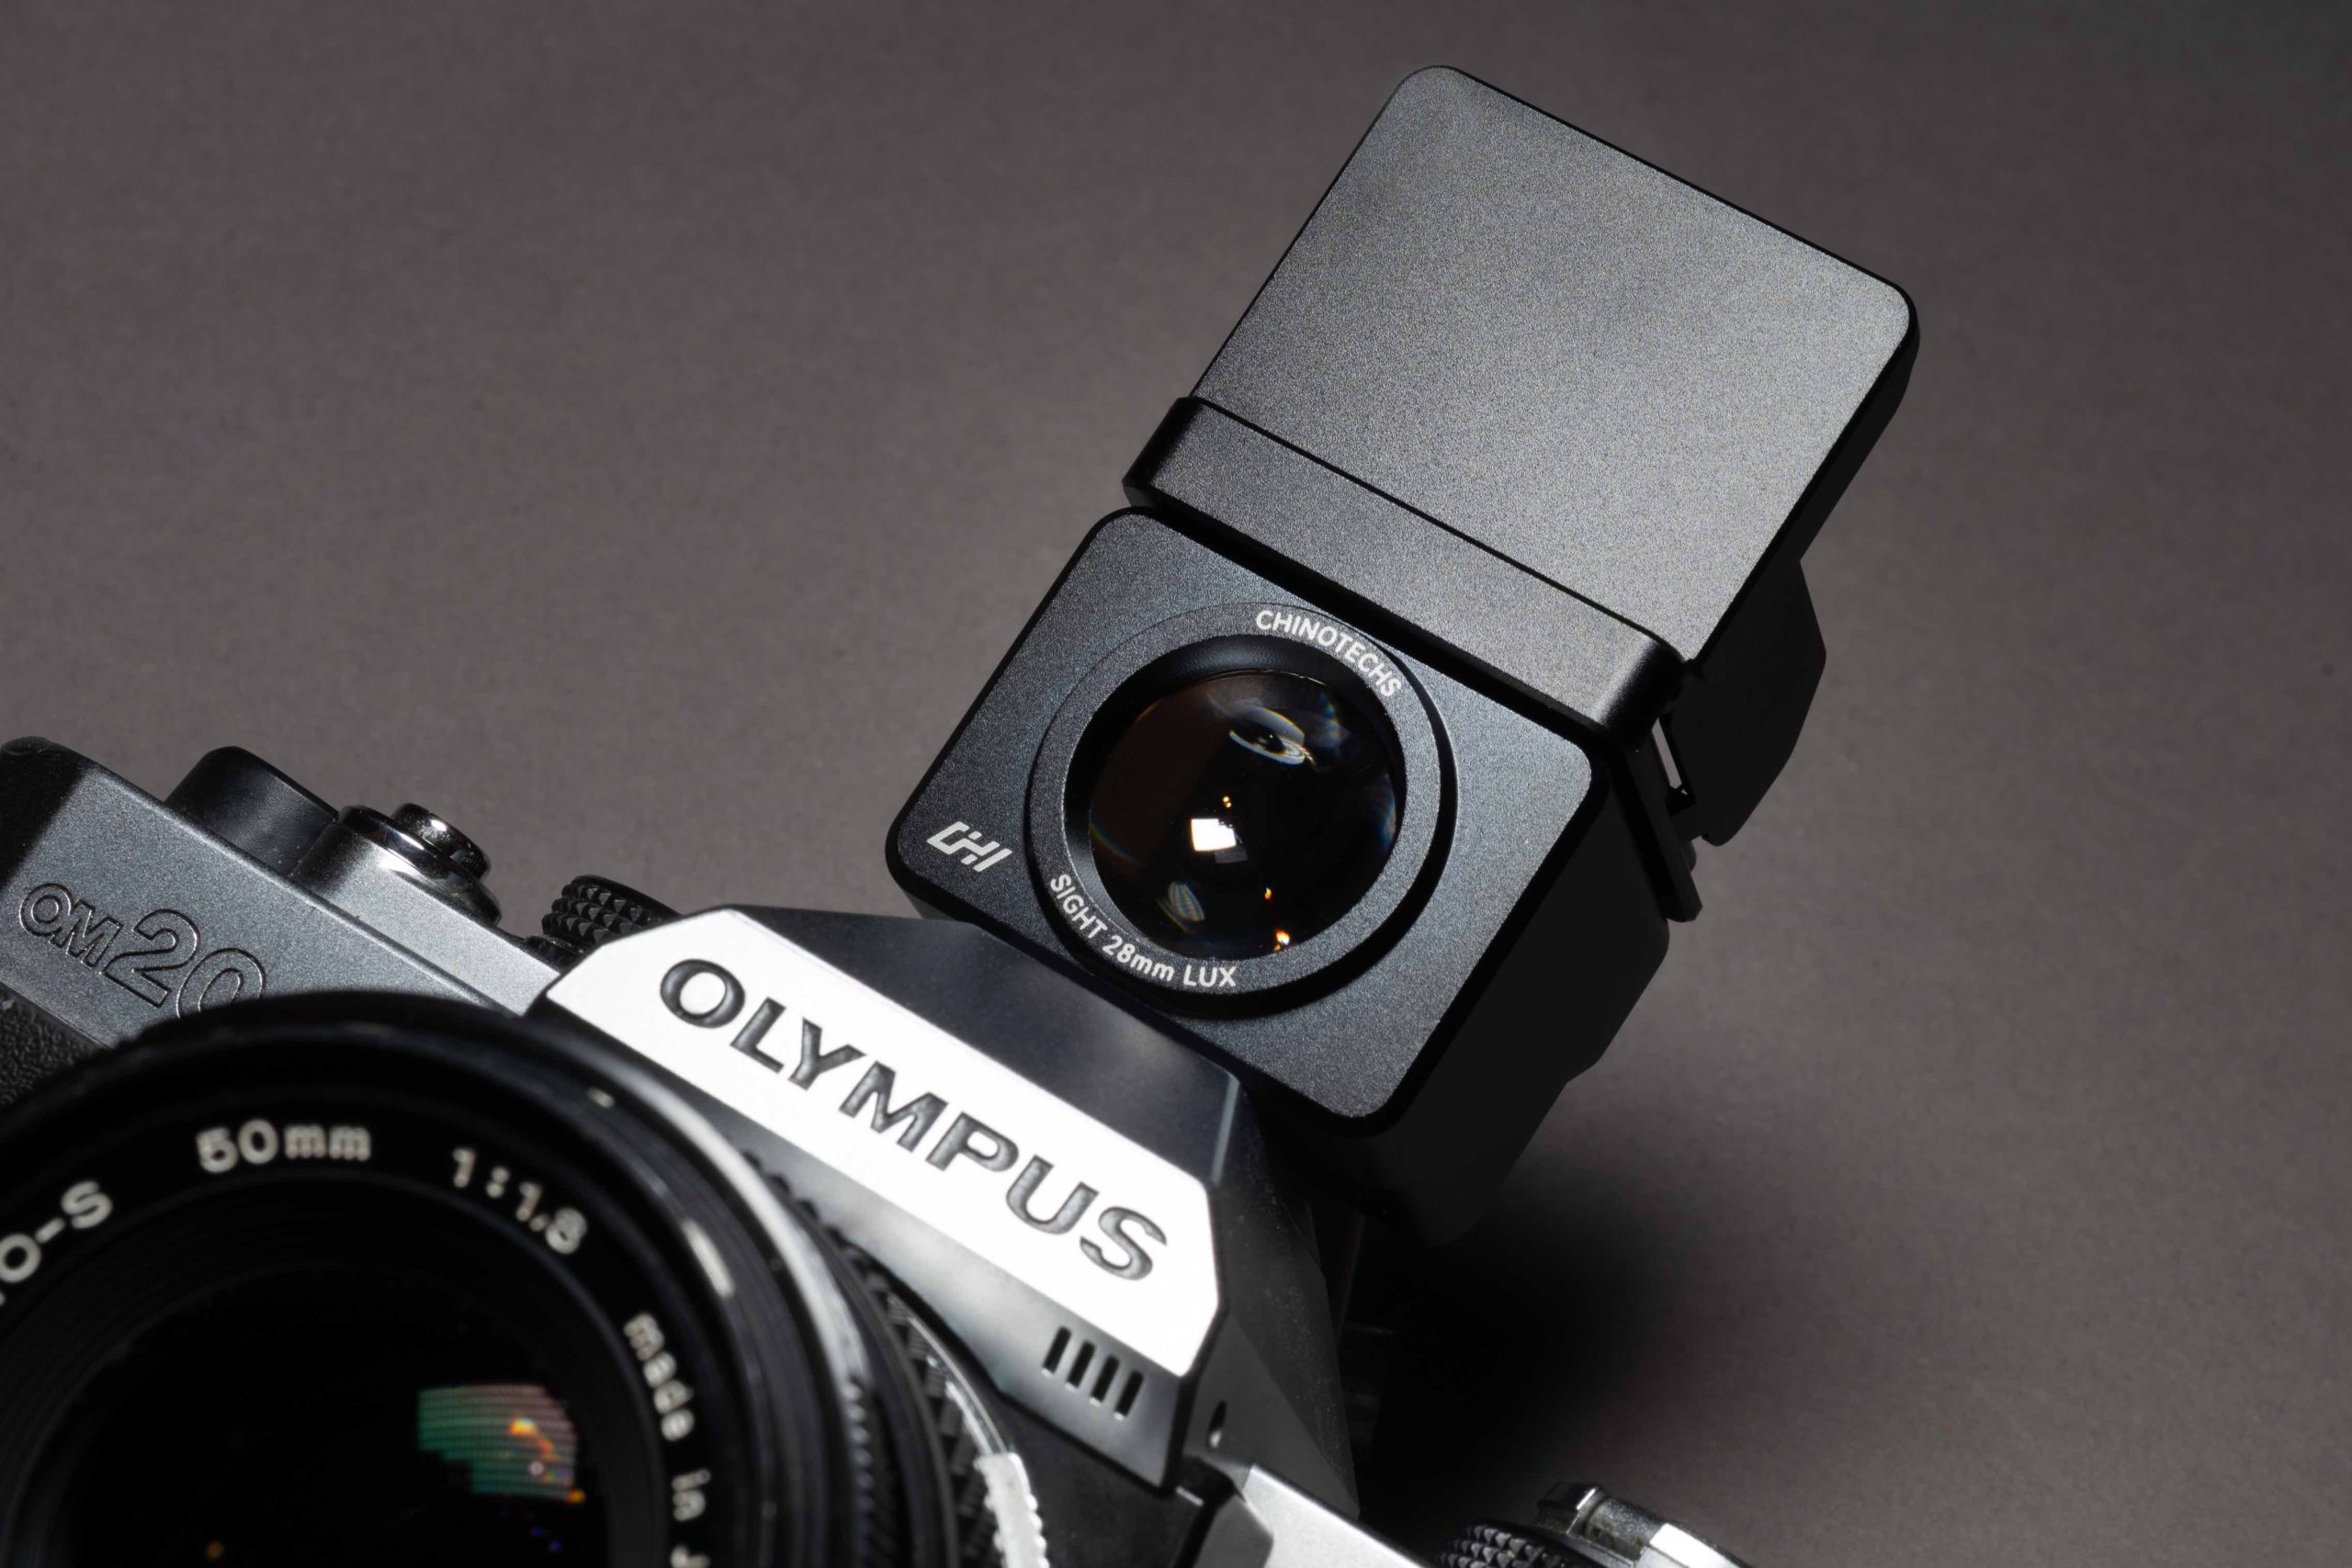
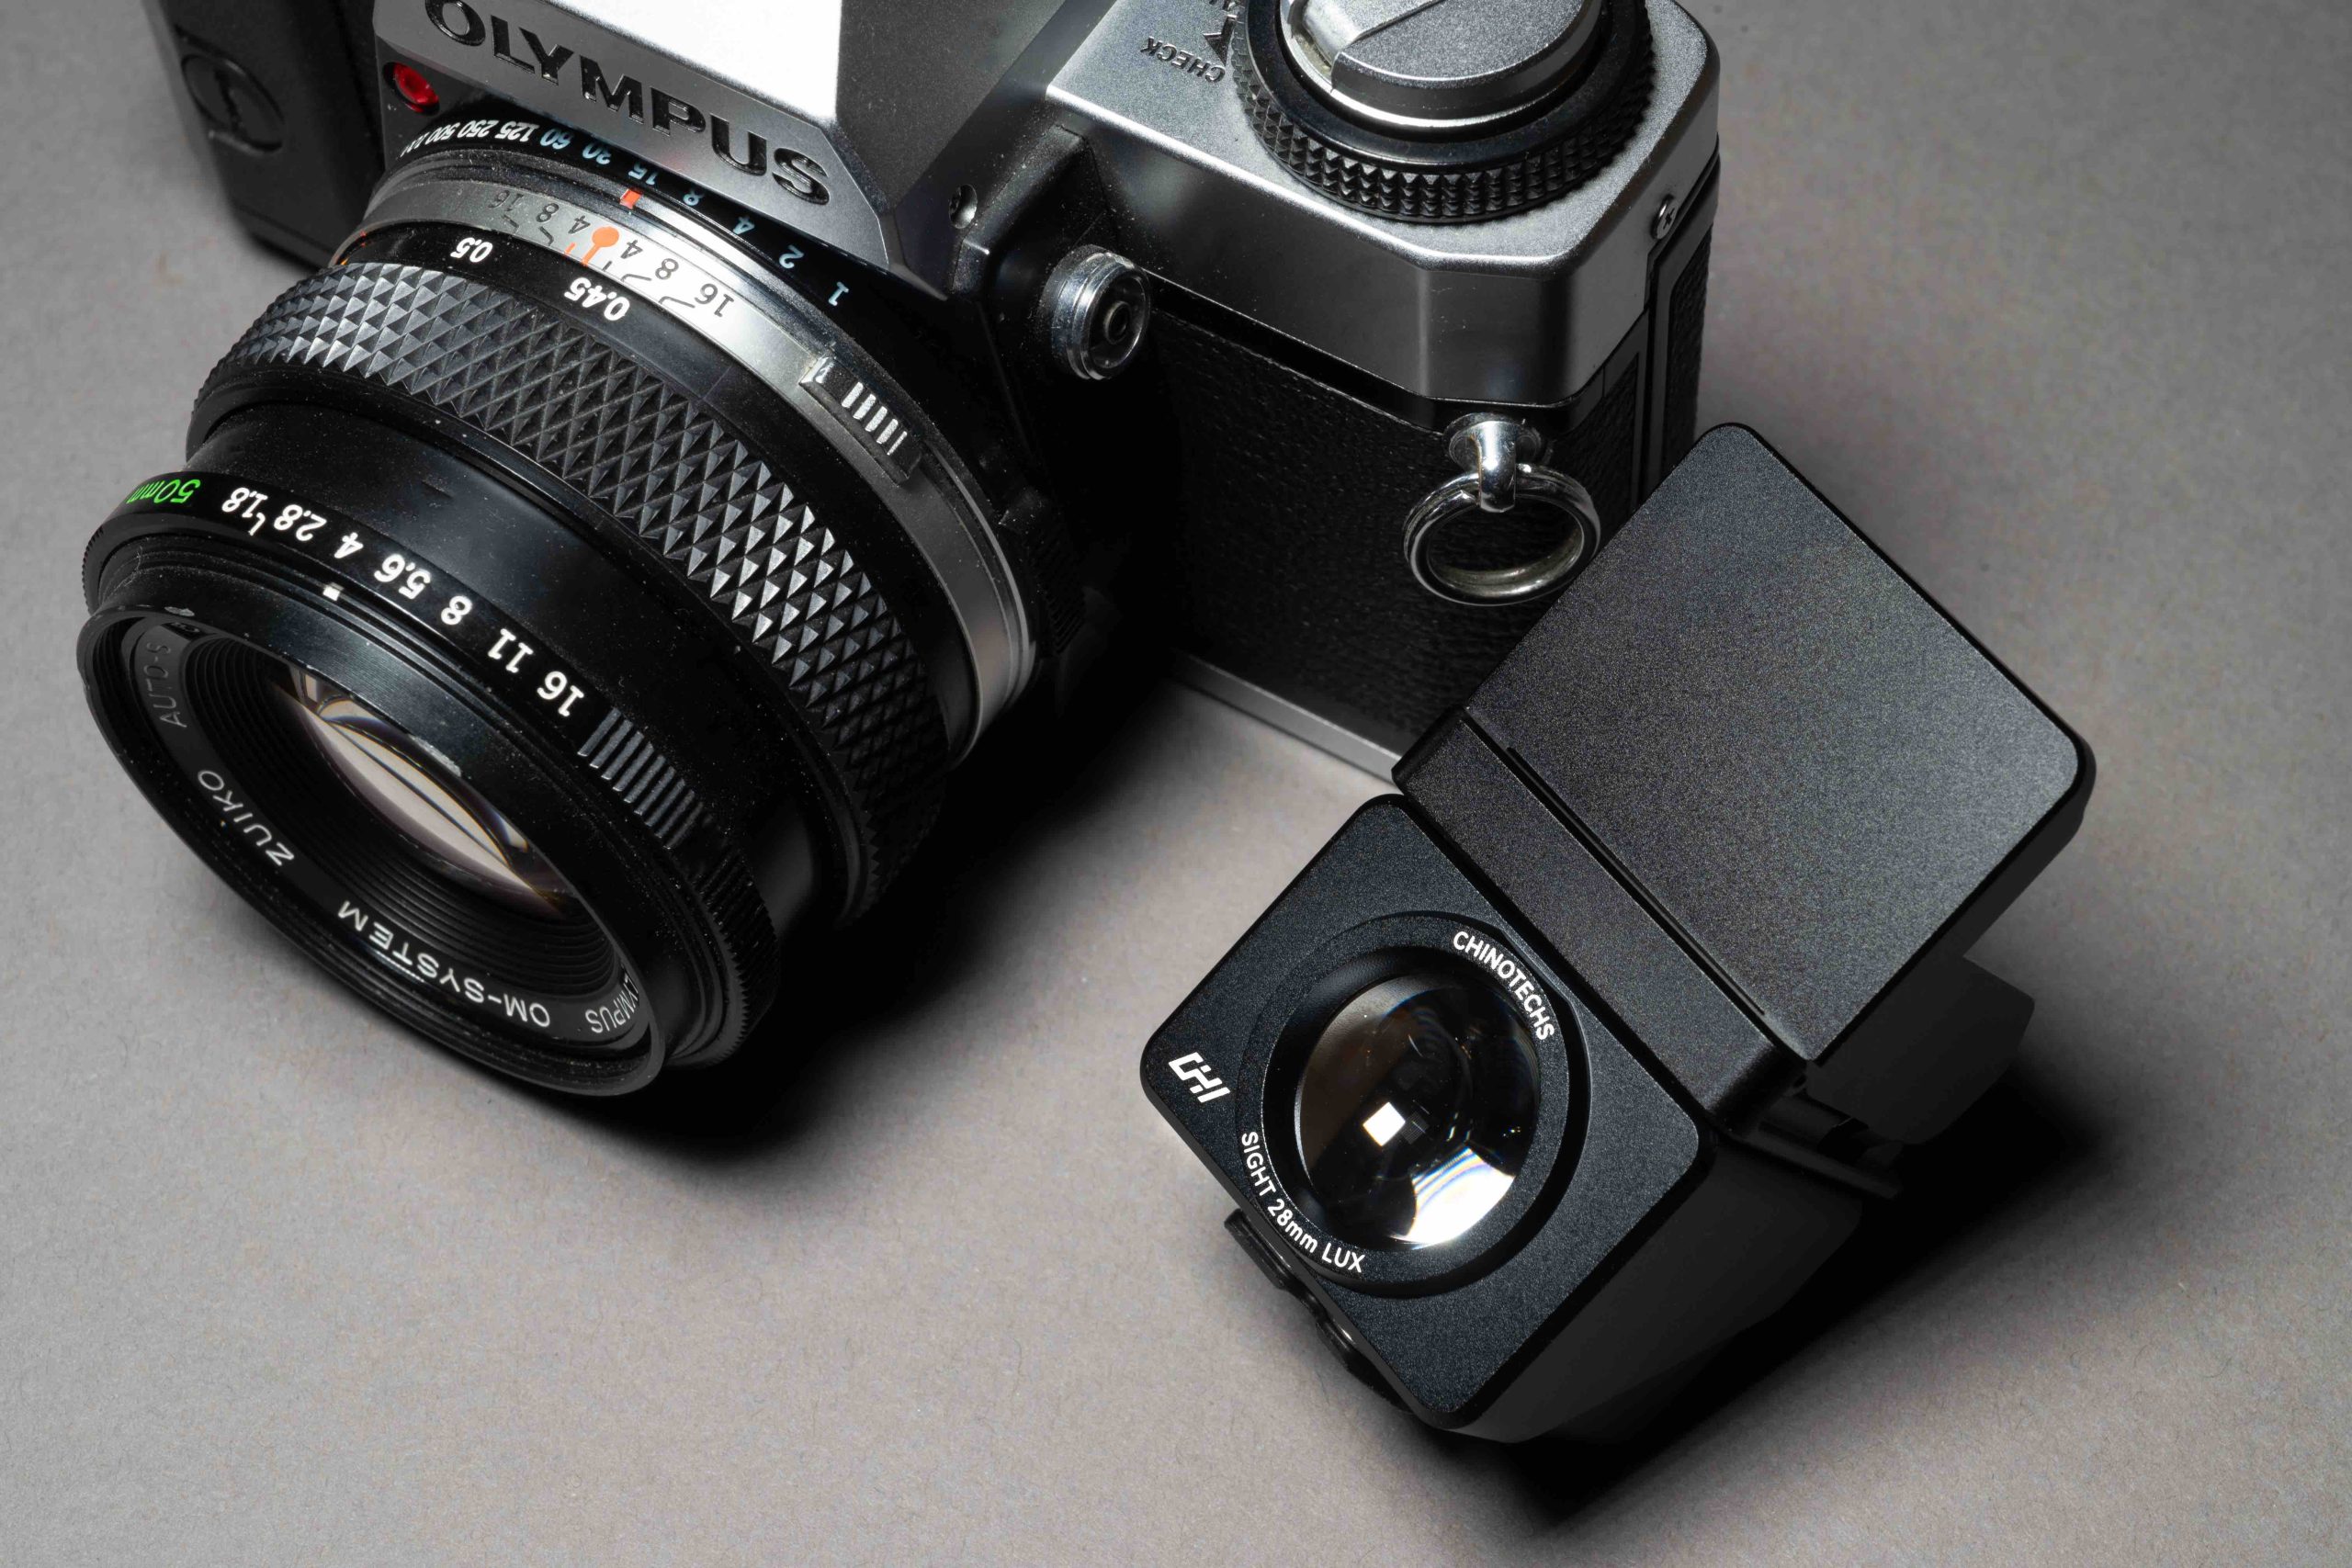
While we were all thoroughly impressed by the ingenuity of ChinoTechs’ Laser Light Meter debut last year (Those that have got one), the brand clearly hasn’t been resting on its laurels. Fresh off the assembly line is this remarkably neat Waist Level Viewfinder—a device that encourages one to abandon the common eye-level crouch and, quite literally, take a shot from the hip. Naturally, the team at Chi generously provided a unit for our field-testing and review.
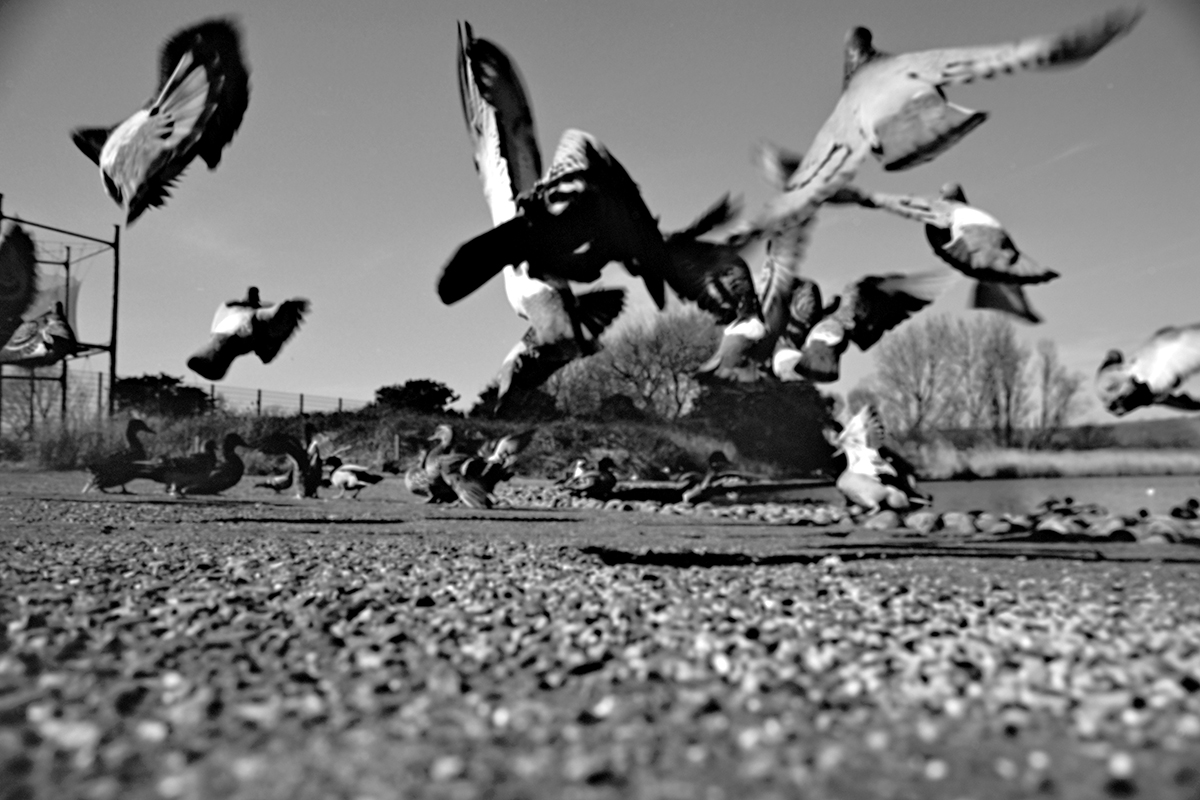
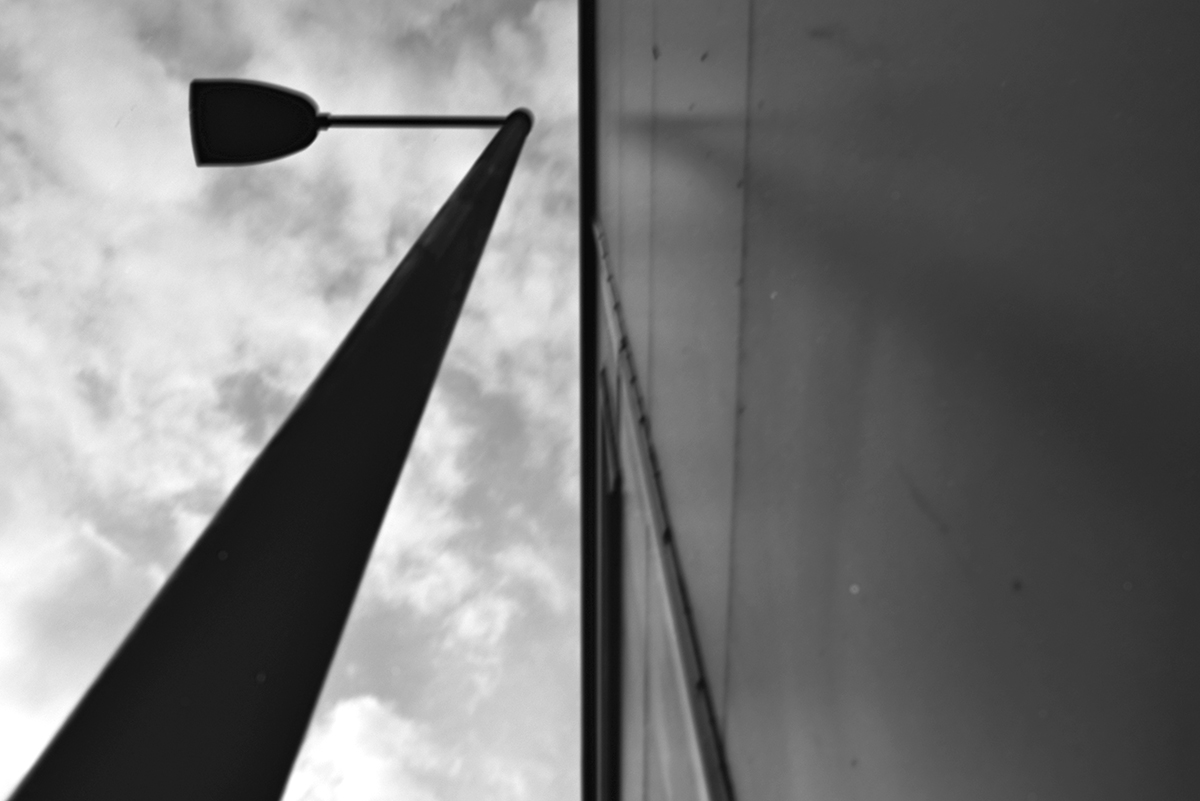
If your photographic style involves getting right down to the asphalt for those dramatic low-angle perspectives, you’ll know the score. It usually involves getting into a position where you’re simultaneously scraping your elbows and fielding concerned enquiries from passersby who genuinely believe you’ve just lost your keys (or maybe your mind). This little gadget is the elegant solution to that awkward crouch. It lets you capture those tough shots with absolute ease—as long as your focusing eye is still up to the job, that is.
I’m lucky enough to have a few cameras that offer the waist-level option straight out of the box. However, the true beauty of this gadget is its sheer portability. It’s a genuinely useful addition to the kit bag for those times I’m out with my regular, classic SLRs—the ones stubbornly stuck with the bog-standard eye-level view. It’s the perfect little ‘just in case’ item, ready to deploy the moment inspiration strikes for a ground-level perspective.
The specific model ChinoTech provided for testing is optimised for my 50mm and 35mm lenses, though it’s worth noting that they offer other configurations for the 28mm/40mm crowd.
Build Quality
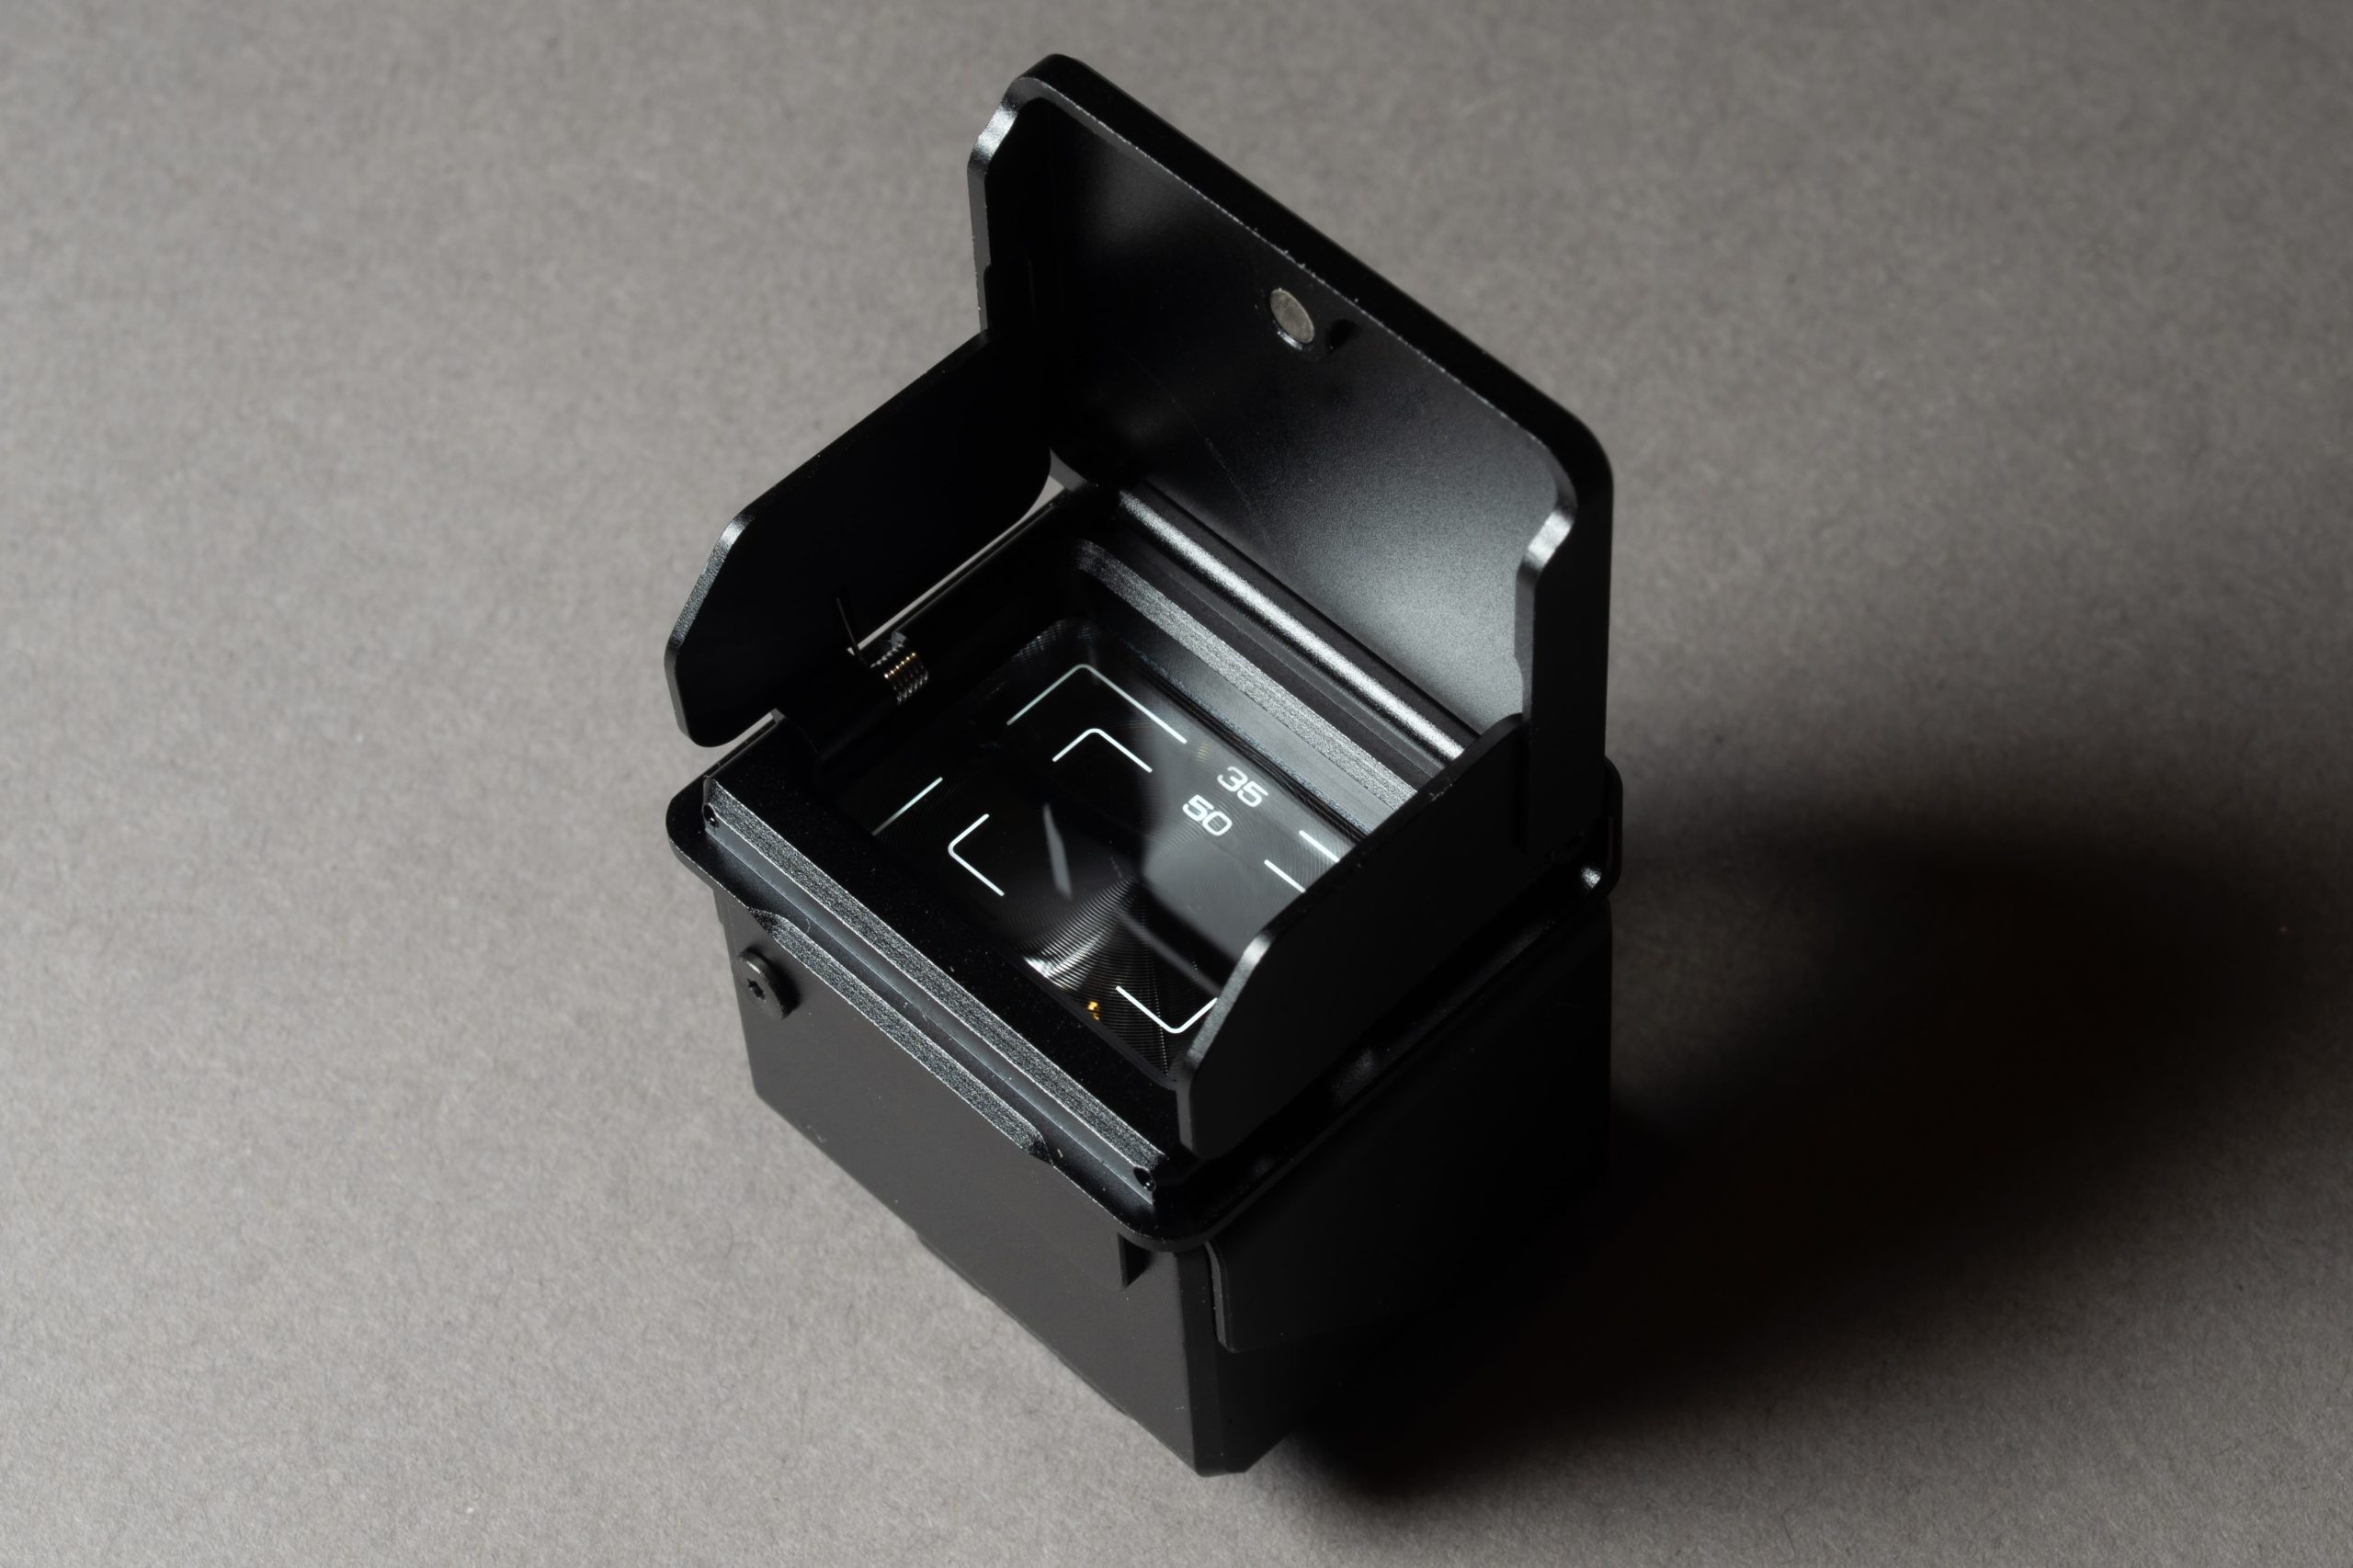
On the hands-on front, the build quality is properly solid thanks to the all-metal casing. ChinoTech informs us that the internals feature “optical elements and 0.17mm Fresnel lenses.” Honestly? I’m not a lab coat kind of person, and I’ve got no idea what half of that means. The main takeaway is that it works brilliantly. However, a quick note to the pixel-peepers: don’t expect 100% composition accuracy. It’s a tool for seeing and framing, not for forensic precision.
The unit comes equipped with a flip-up sunshade (detachable, should you prefer a more minimalist profile) and a solid mount for slotting directly into your camera’s accessory shoe—it’s fully manoeuvrable, so finding the right angle is no faff. The view itself is notably bright and clear, which is great, but let’s be straight: it is physically small. If you routinely find yourself reaching for the reading glasses to make sense of a menu, then trust me, you’ll definitely need them to nail your focus here!
Accuracy
If pin-point composition accuracy is non-negotiable for your process, then a bit of practice is essential. Being a universal WLVF sitting above the lens mount, perfect framing is always going to require a small adjustment in expectation. To properly calibrate my eye and avoid any unnecessary expense, I did the sensible thing: I mounted the viewfinder onto my digital camera and ran initial tests using the 35mm and 50mm lenses. After all, why splash out on film and development when you’re just finding your footing?
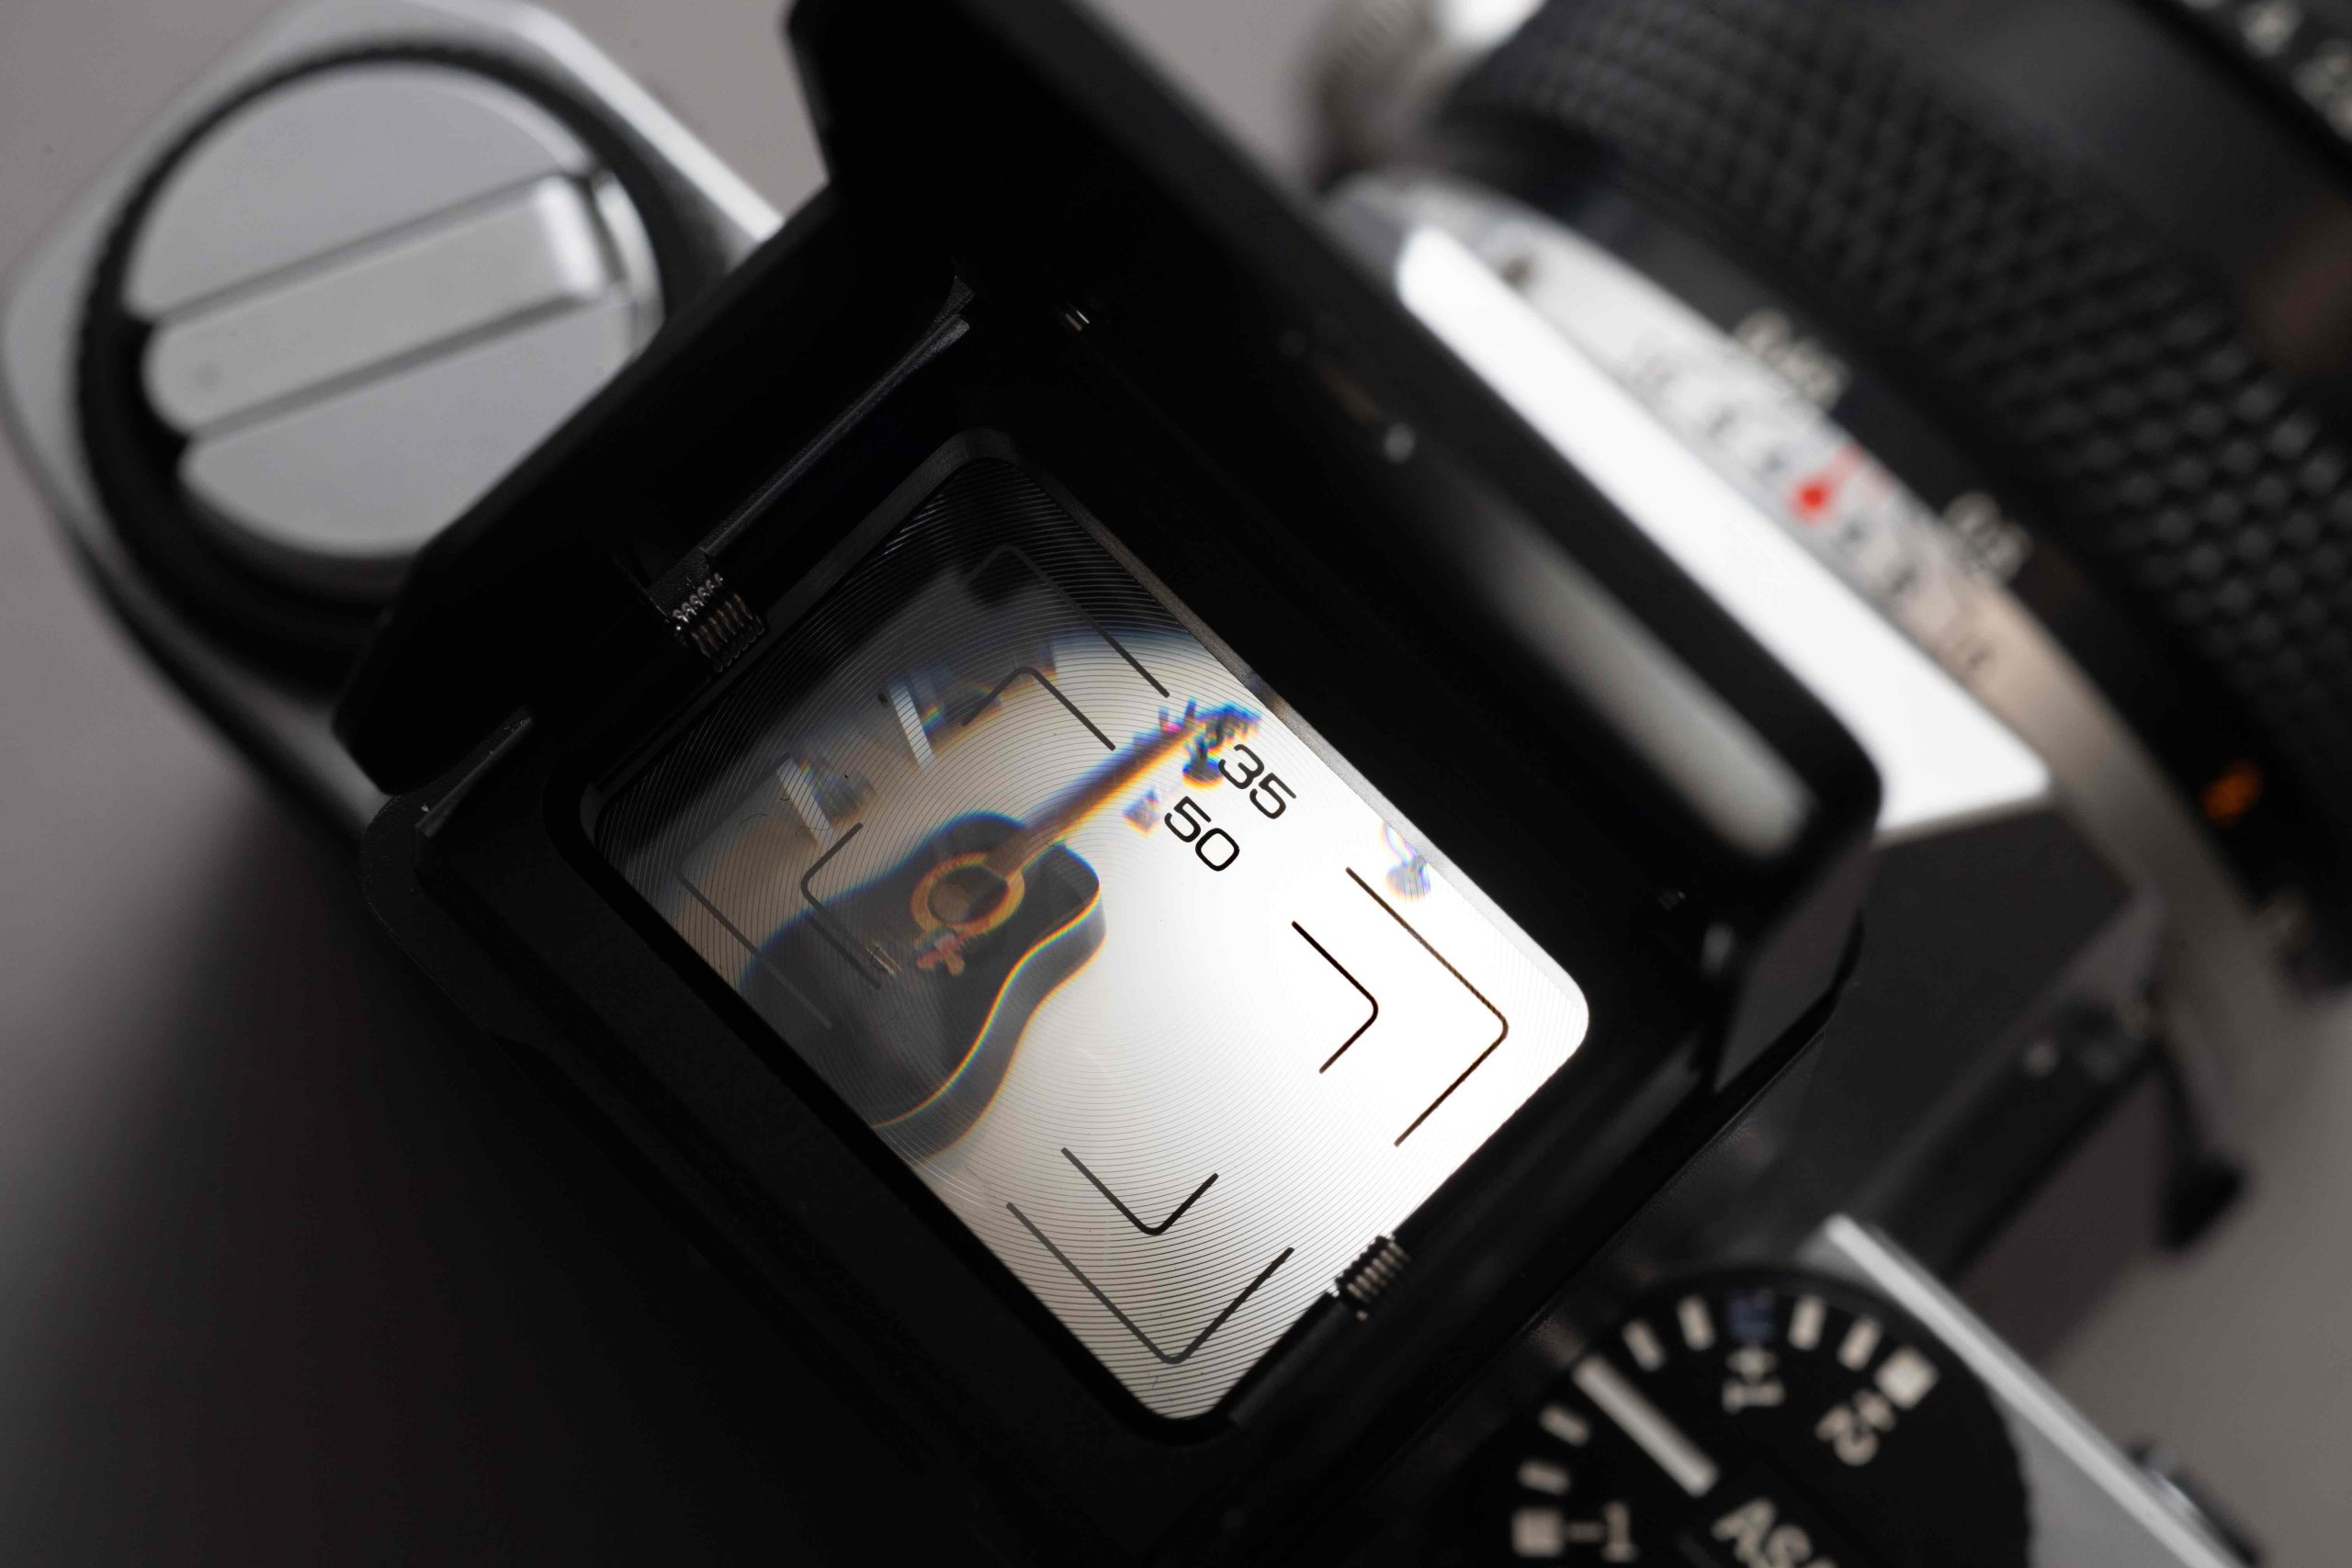
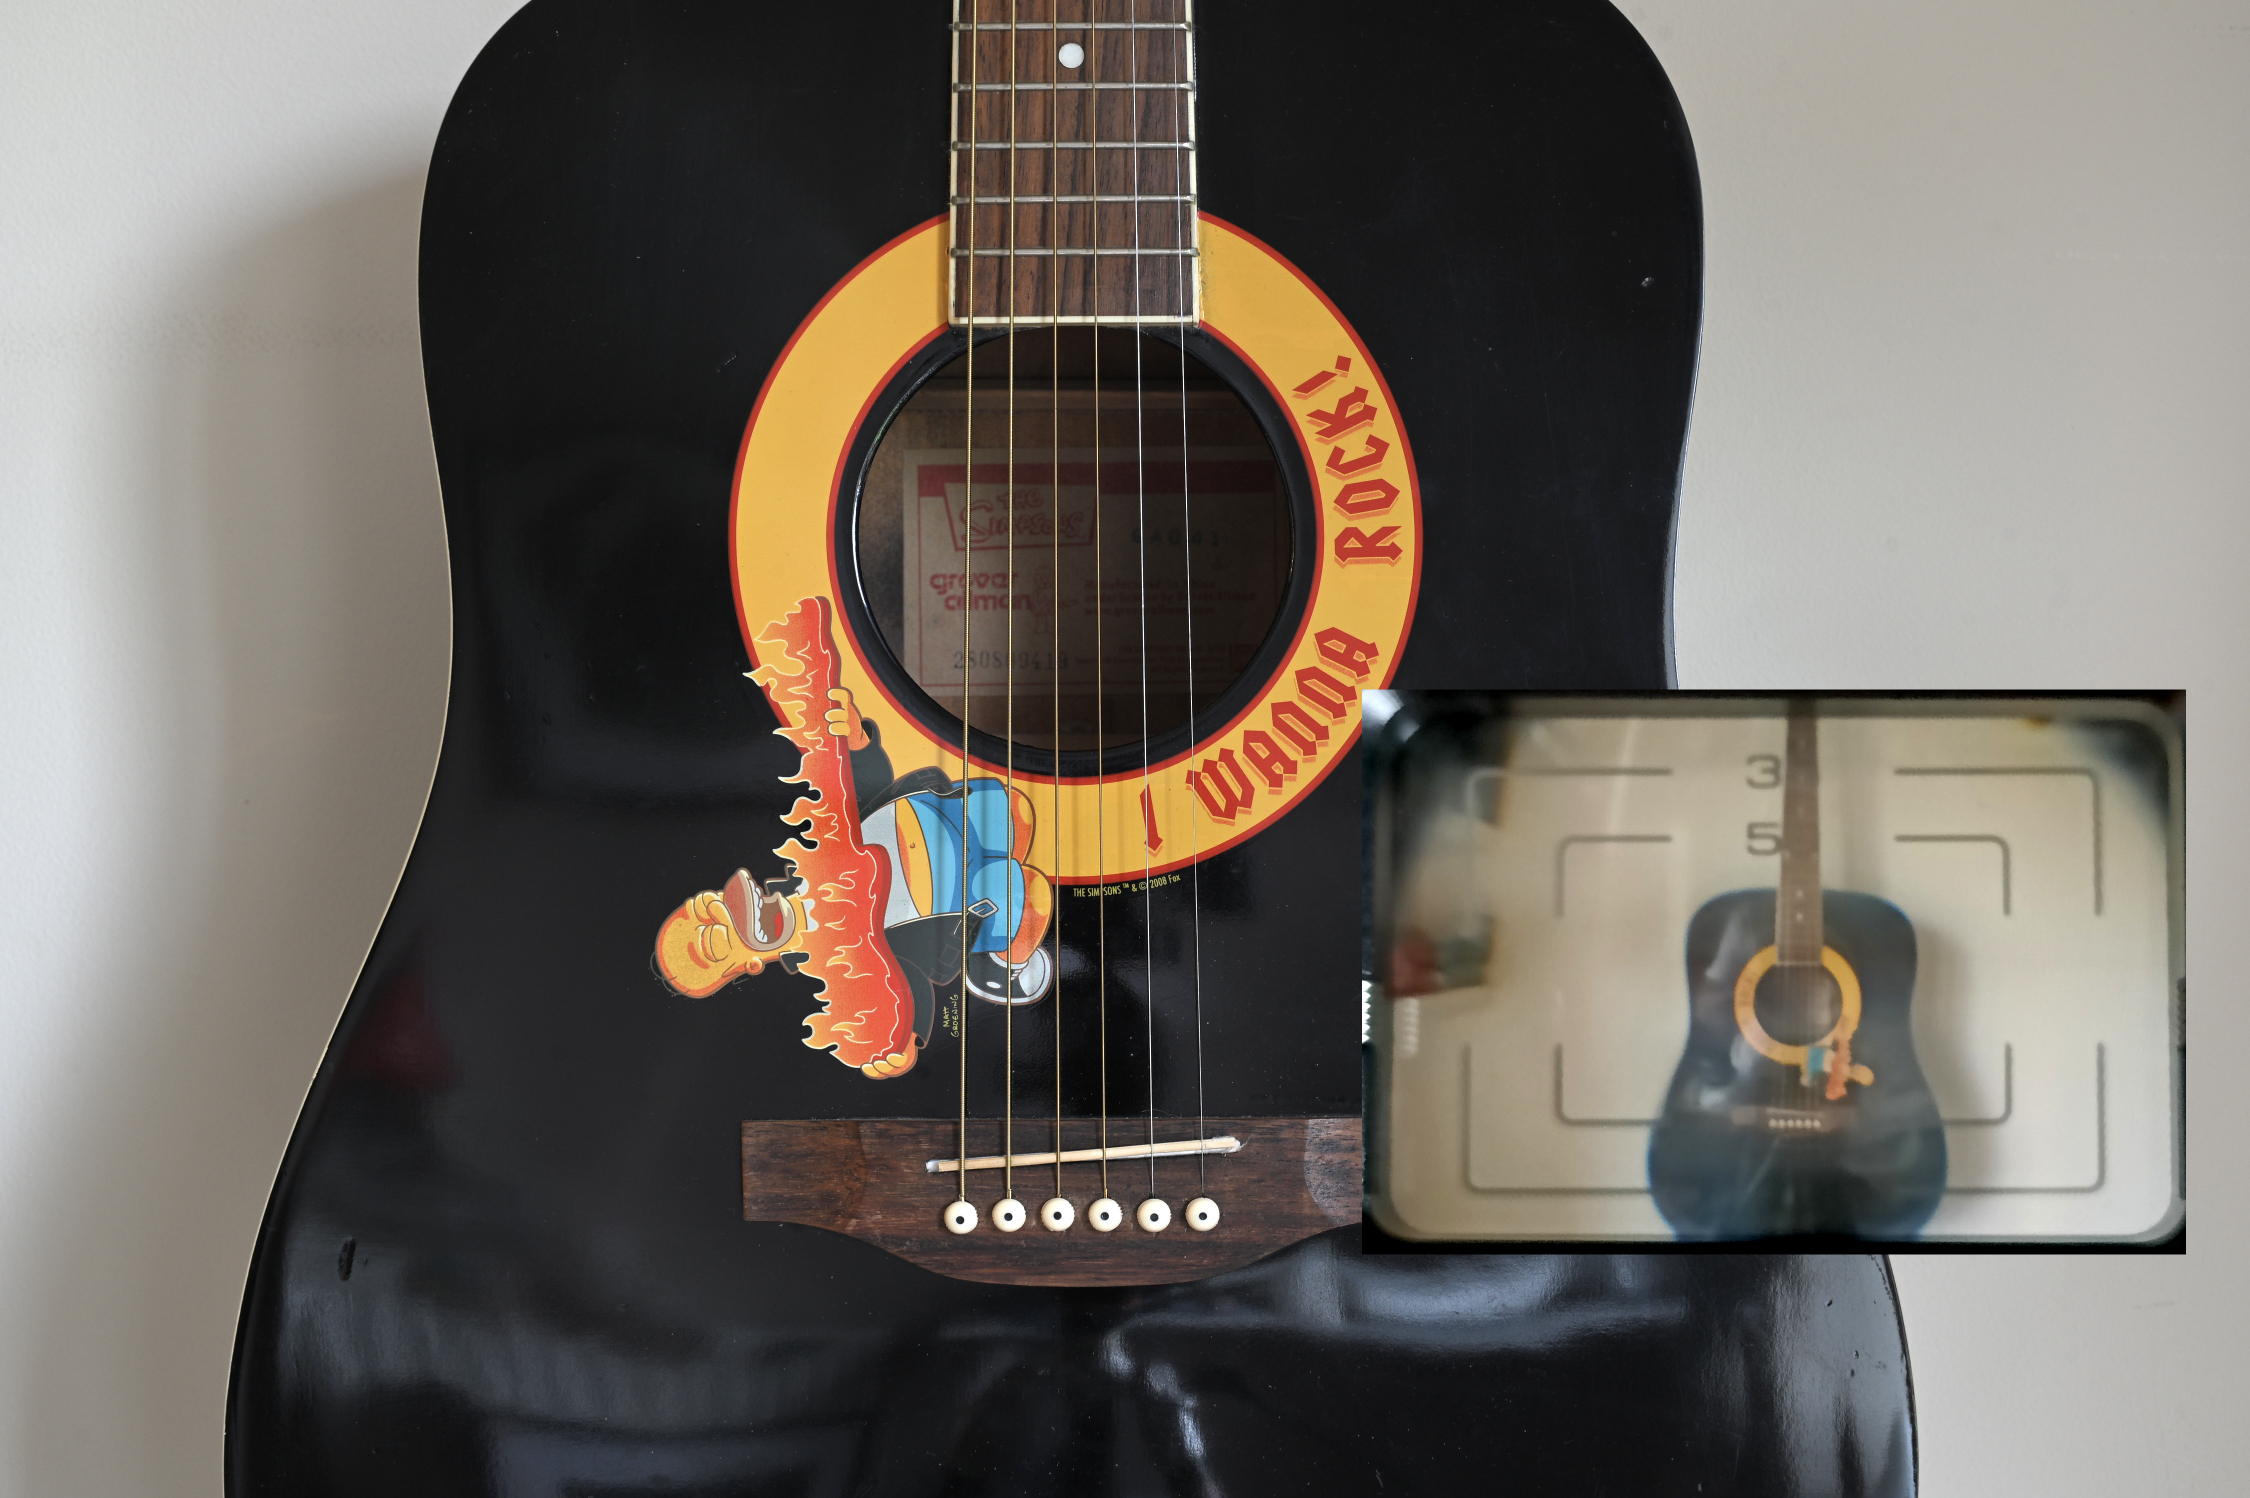
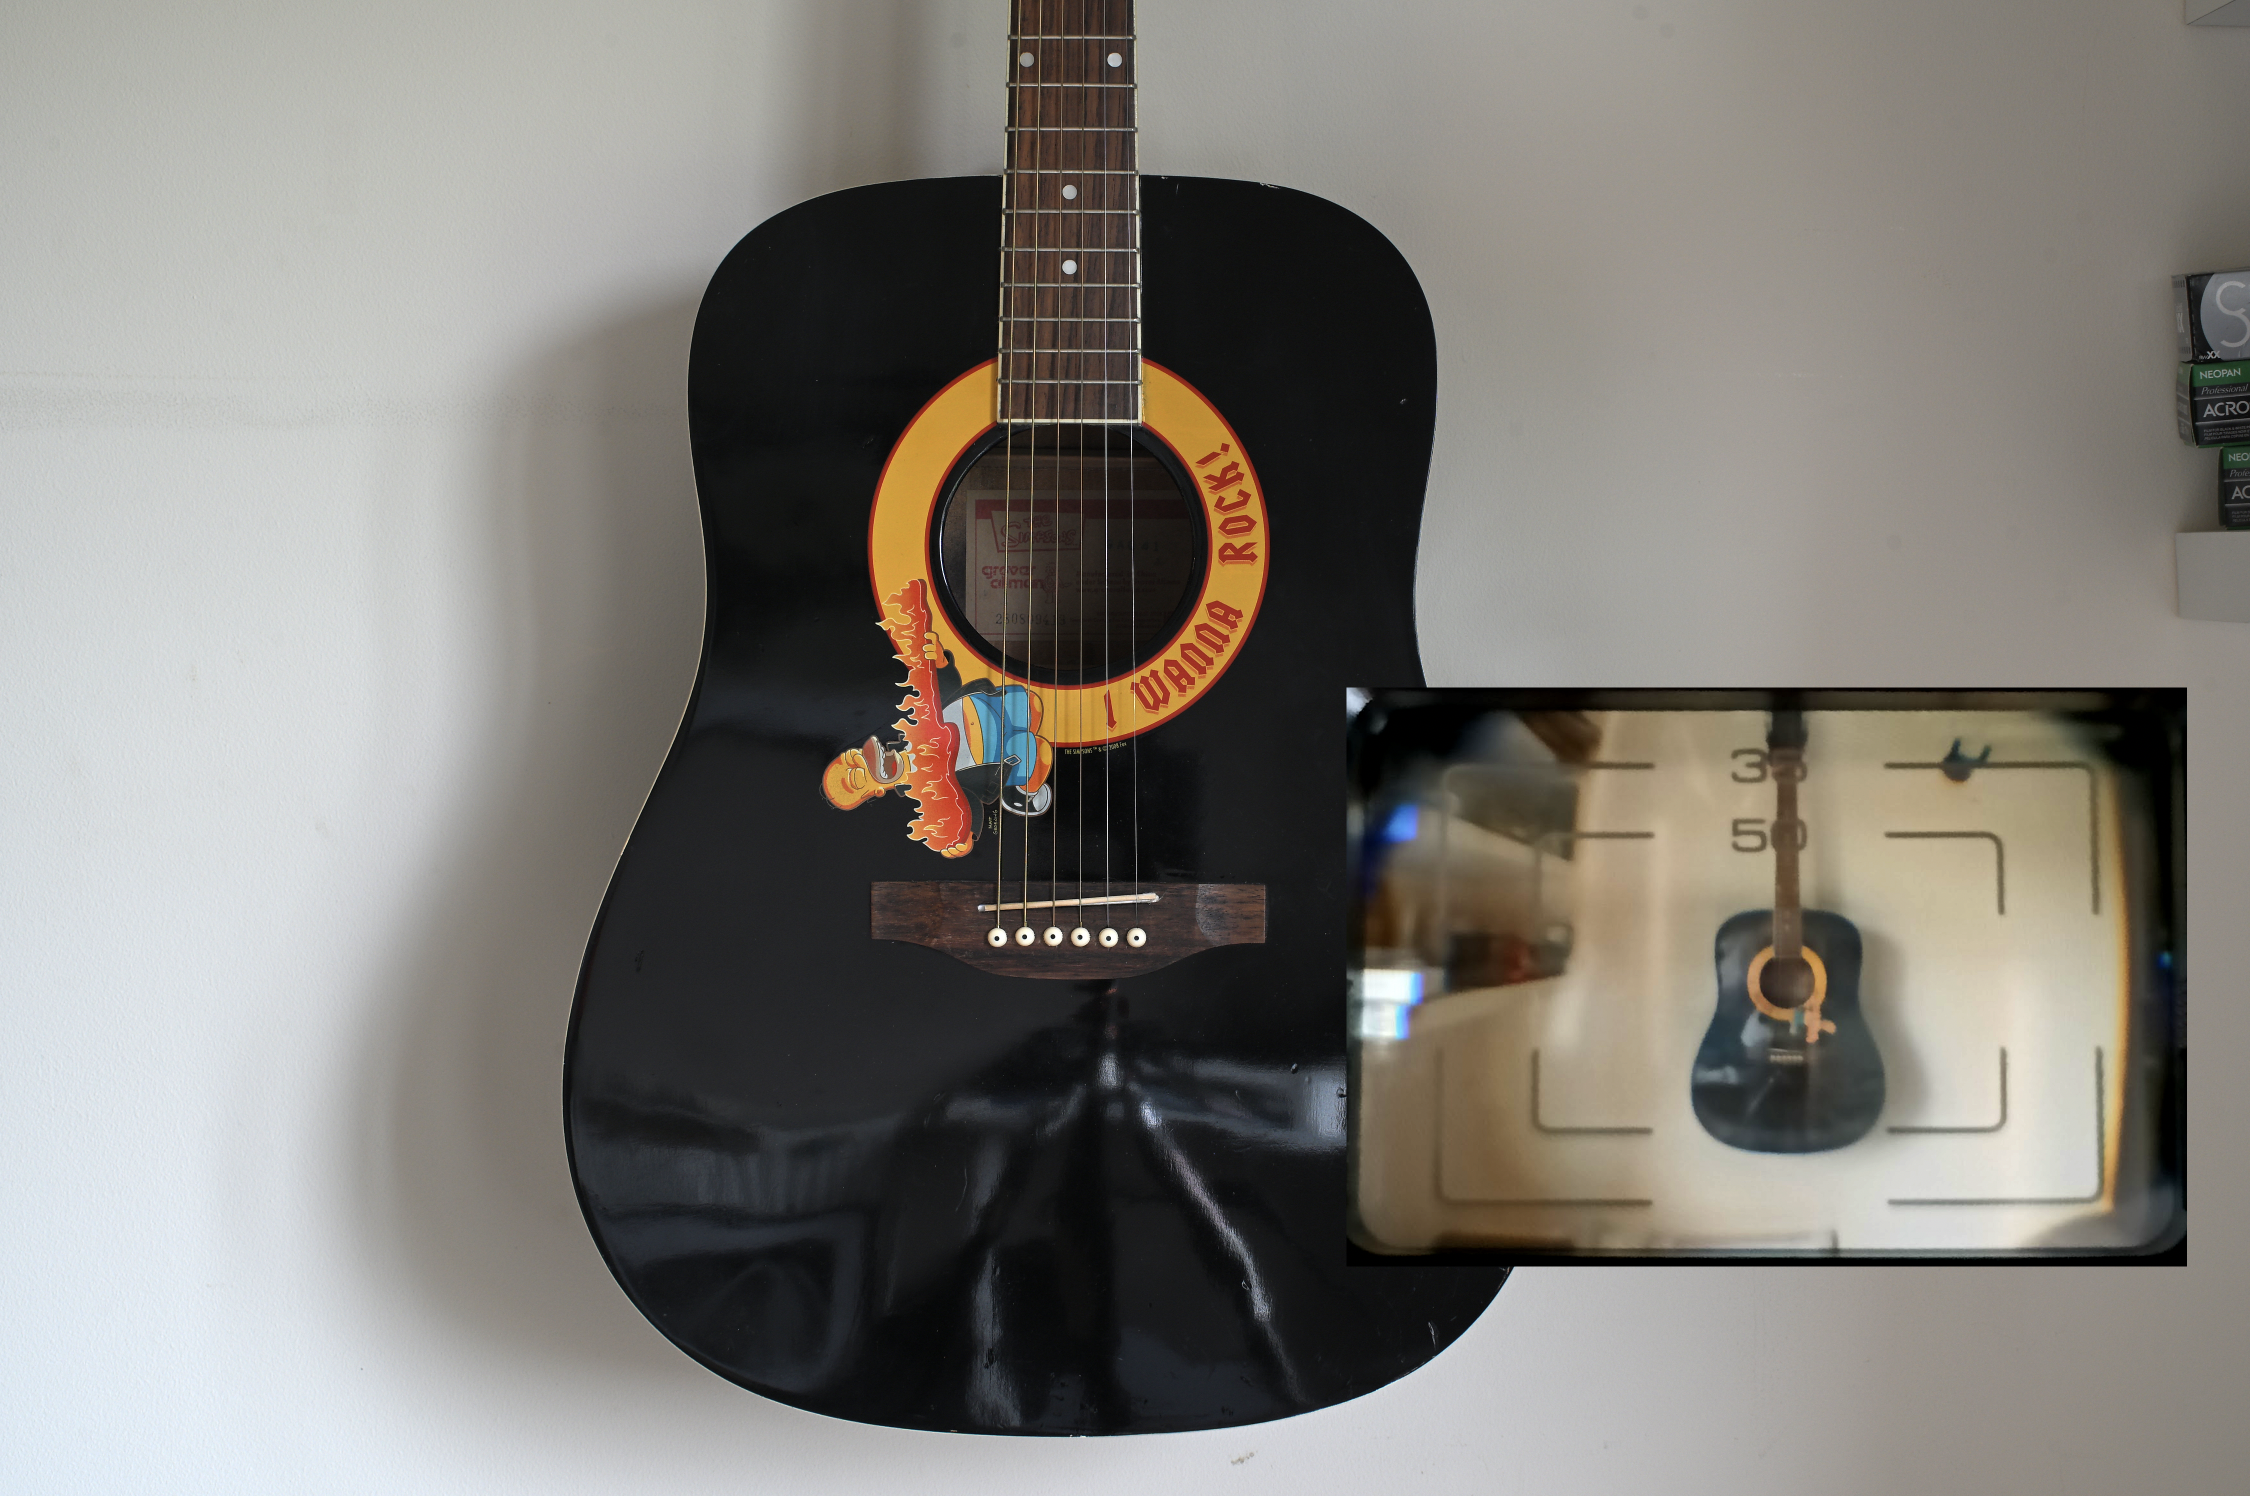
50mm Test
I put a 50mm lens on the camera and tried that first. A mid shot, close and a wide.
Note: The image is naturally flipped through the viewfinder
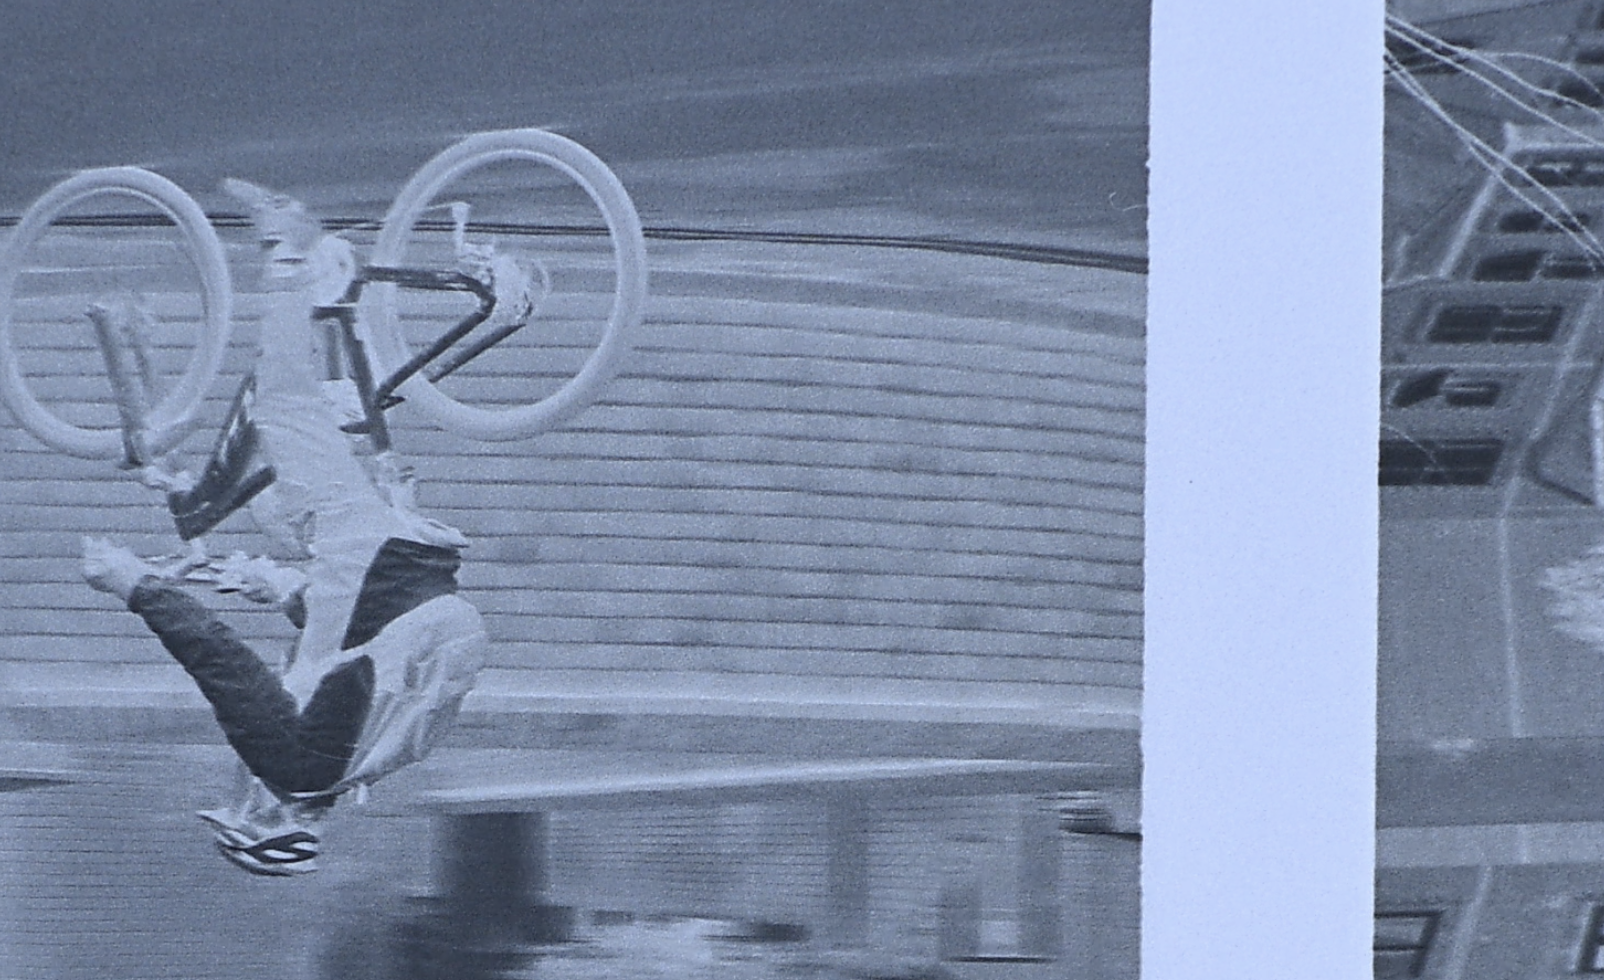
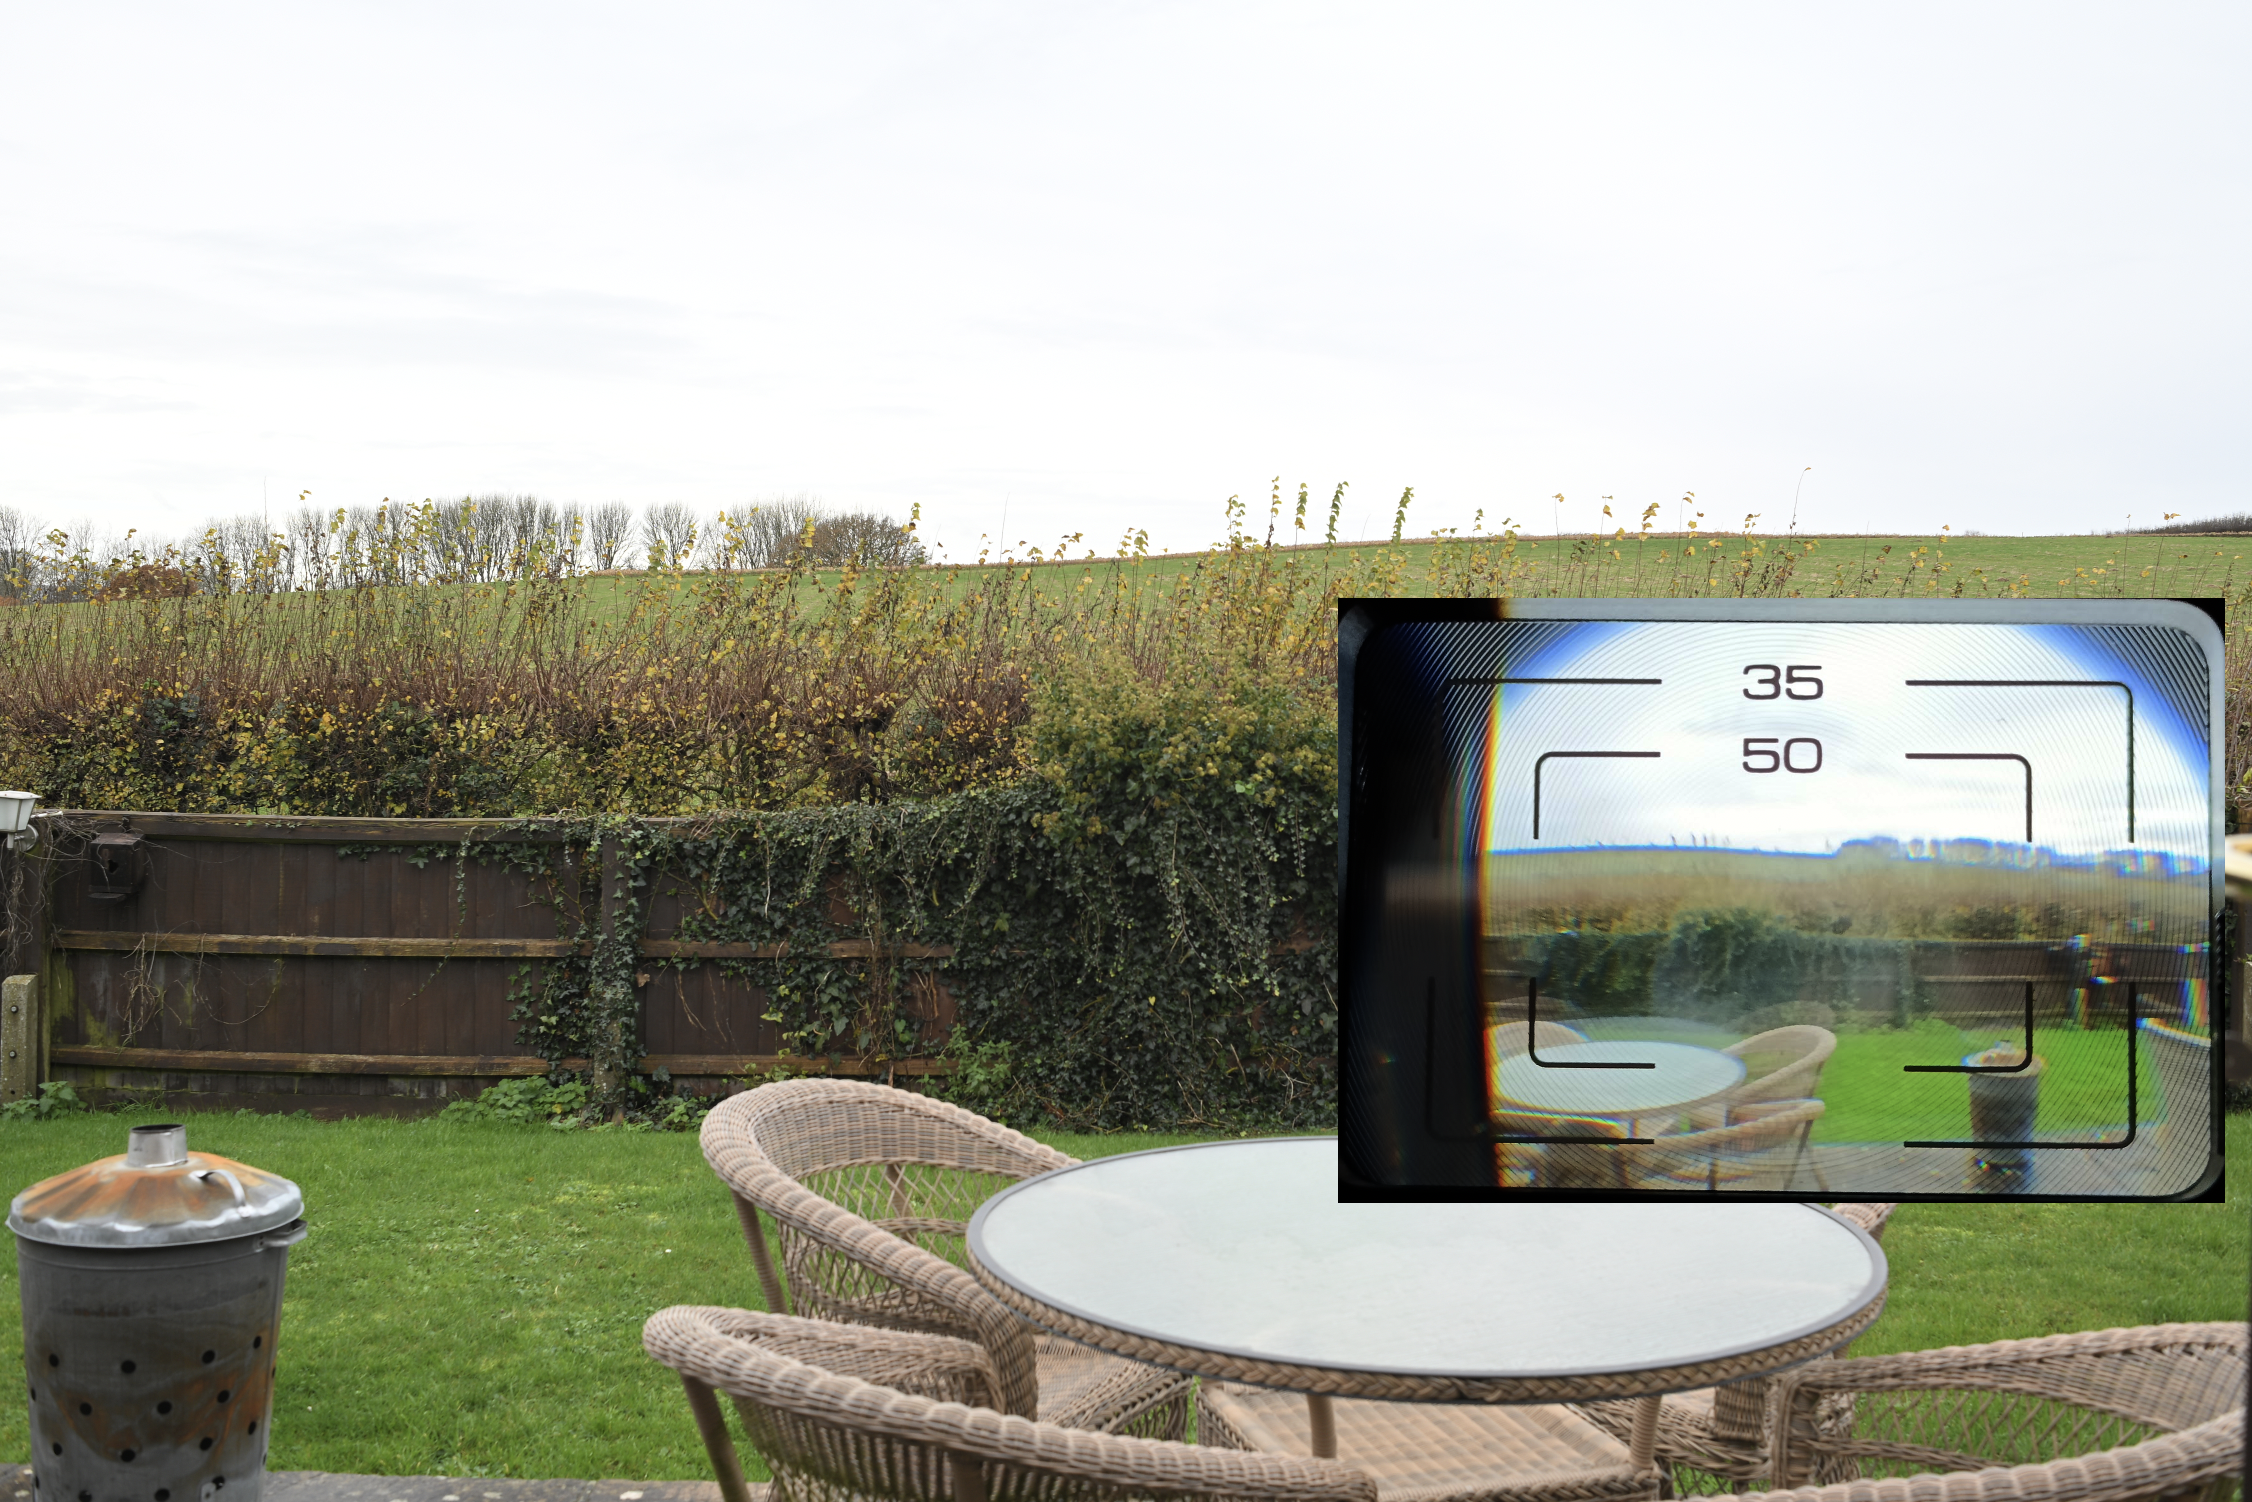
35mm Test
I put a 35mm lens on the camera.
As my initial testing revealed, the WLVF isn’t bang on target straight out of the box, but it is more useful than just winging it. When I need a low-down shot, the old routine was either getting flat on my belly for accurate alignment (usually just to guarantee a straight horizon) or getting on my knees, pointing, and praying I had enough room in the frame to crop later. This device completely changes that. You might suggest a simple bubble level would do the trick, but honestly? That’s not really a comparison. With the WLVF, I can see the composition for myself, making it a far more intuitive and efficient process than relying on a tiny spirit level.
Final thought.
Personally, I see this as a genuinely useful little gadget to have permanently nestled in the kit bag if you frequently enjoy shooting from the waist and crave a bit more certainty than guesswork provides. While it doesn’t offer the promised land of 100% precision—which, being a universal accessory, was never really on the cards—it ensures your subject is firmly in the frame for street work, or that your low-down horizons are acceptably straight. Given the very solid build quality we discussed earlier, it certainly justifies its existence.
Now, it’s easy for me to recommend this, as the unit was sent for review. So, the crucial question: would I rush out to buy one tomorrow? Probably not. I’m fortunate enough to own cameras that allow me to remove the prism for waist-level shooting. However, if my regular SLRs lacked that capability, this WLVF would suddenly become an incredibly attractive and valuable addition to my setup.
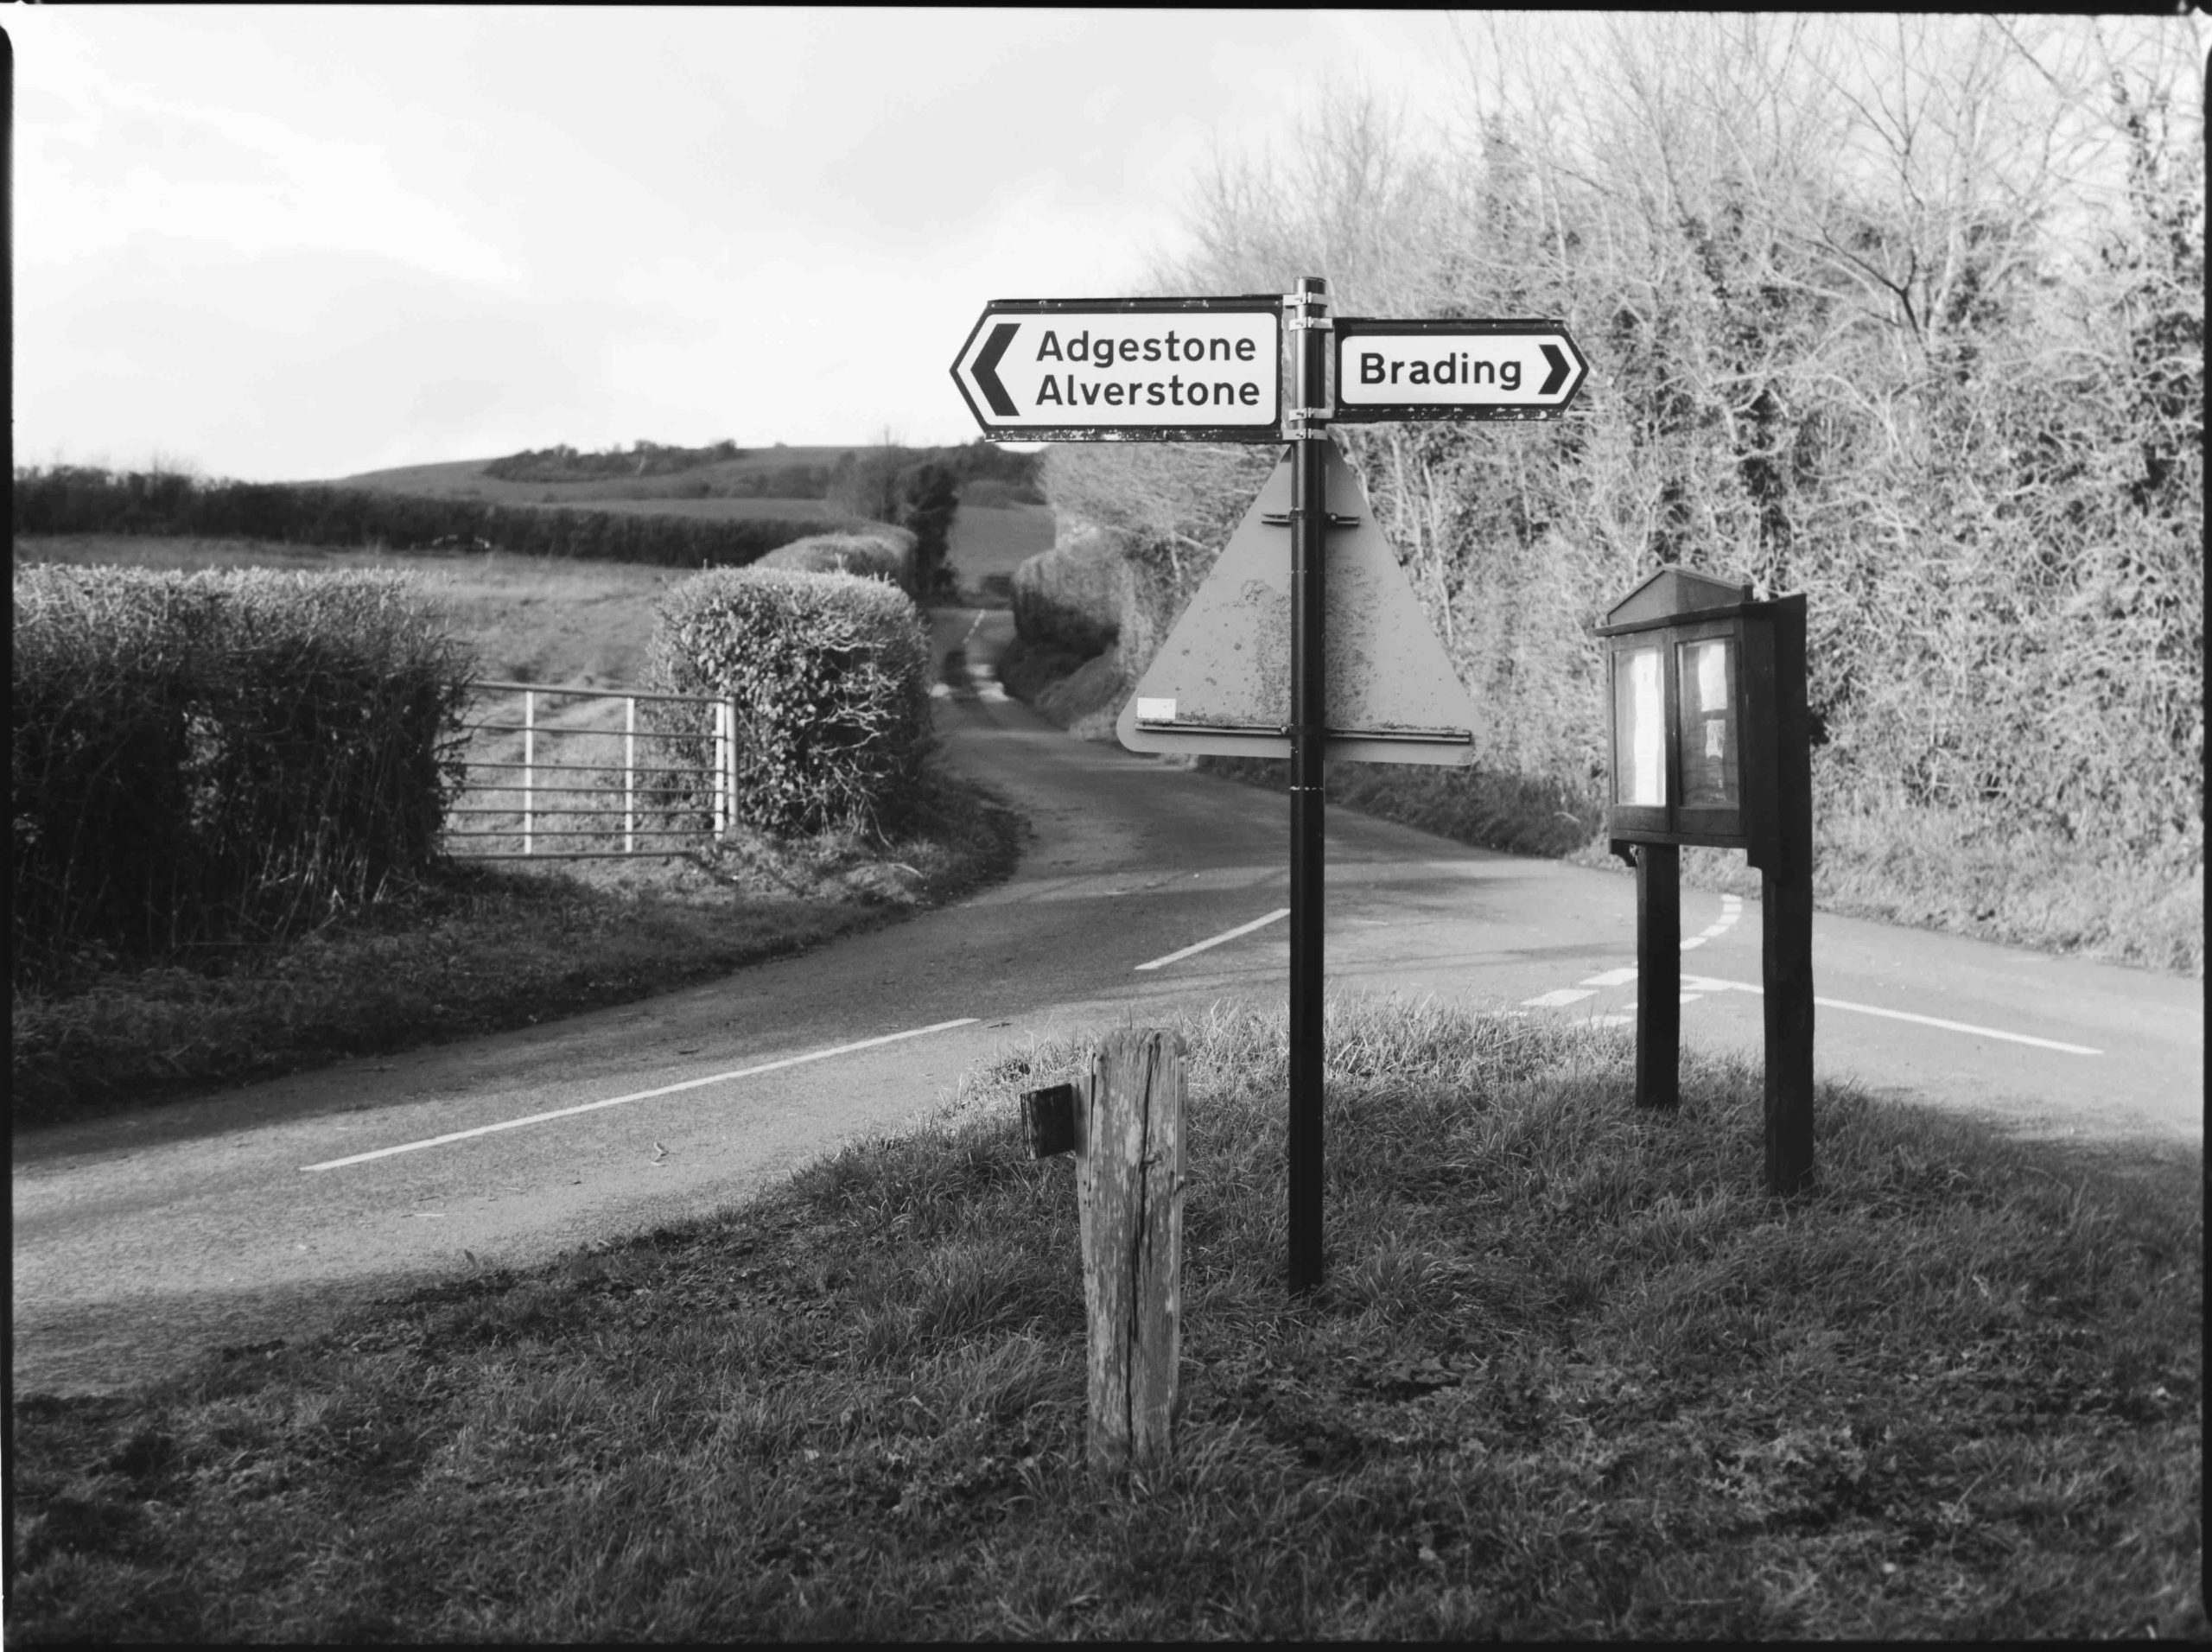
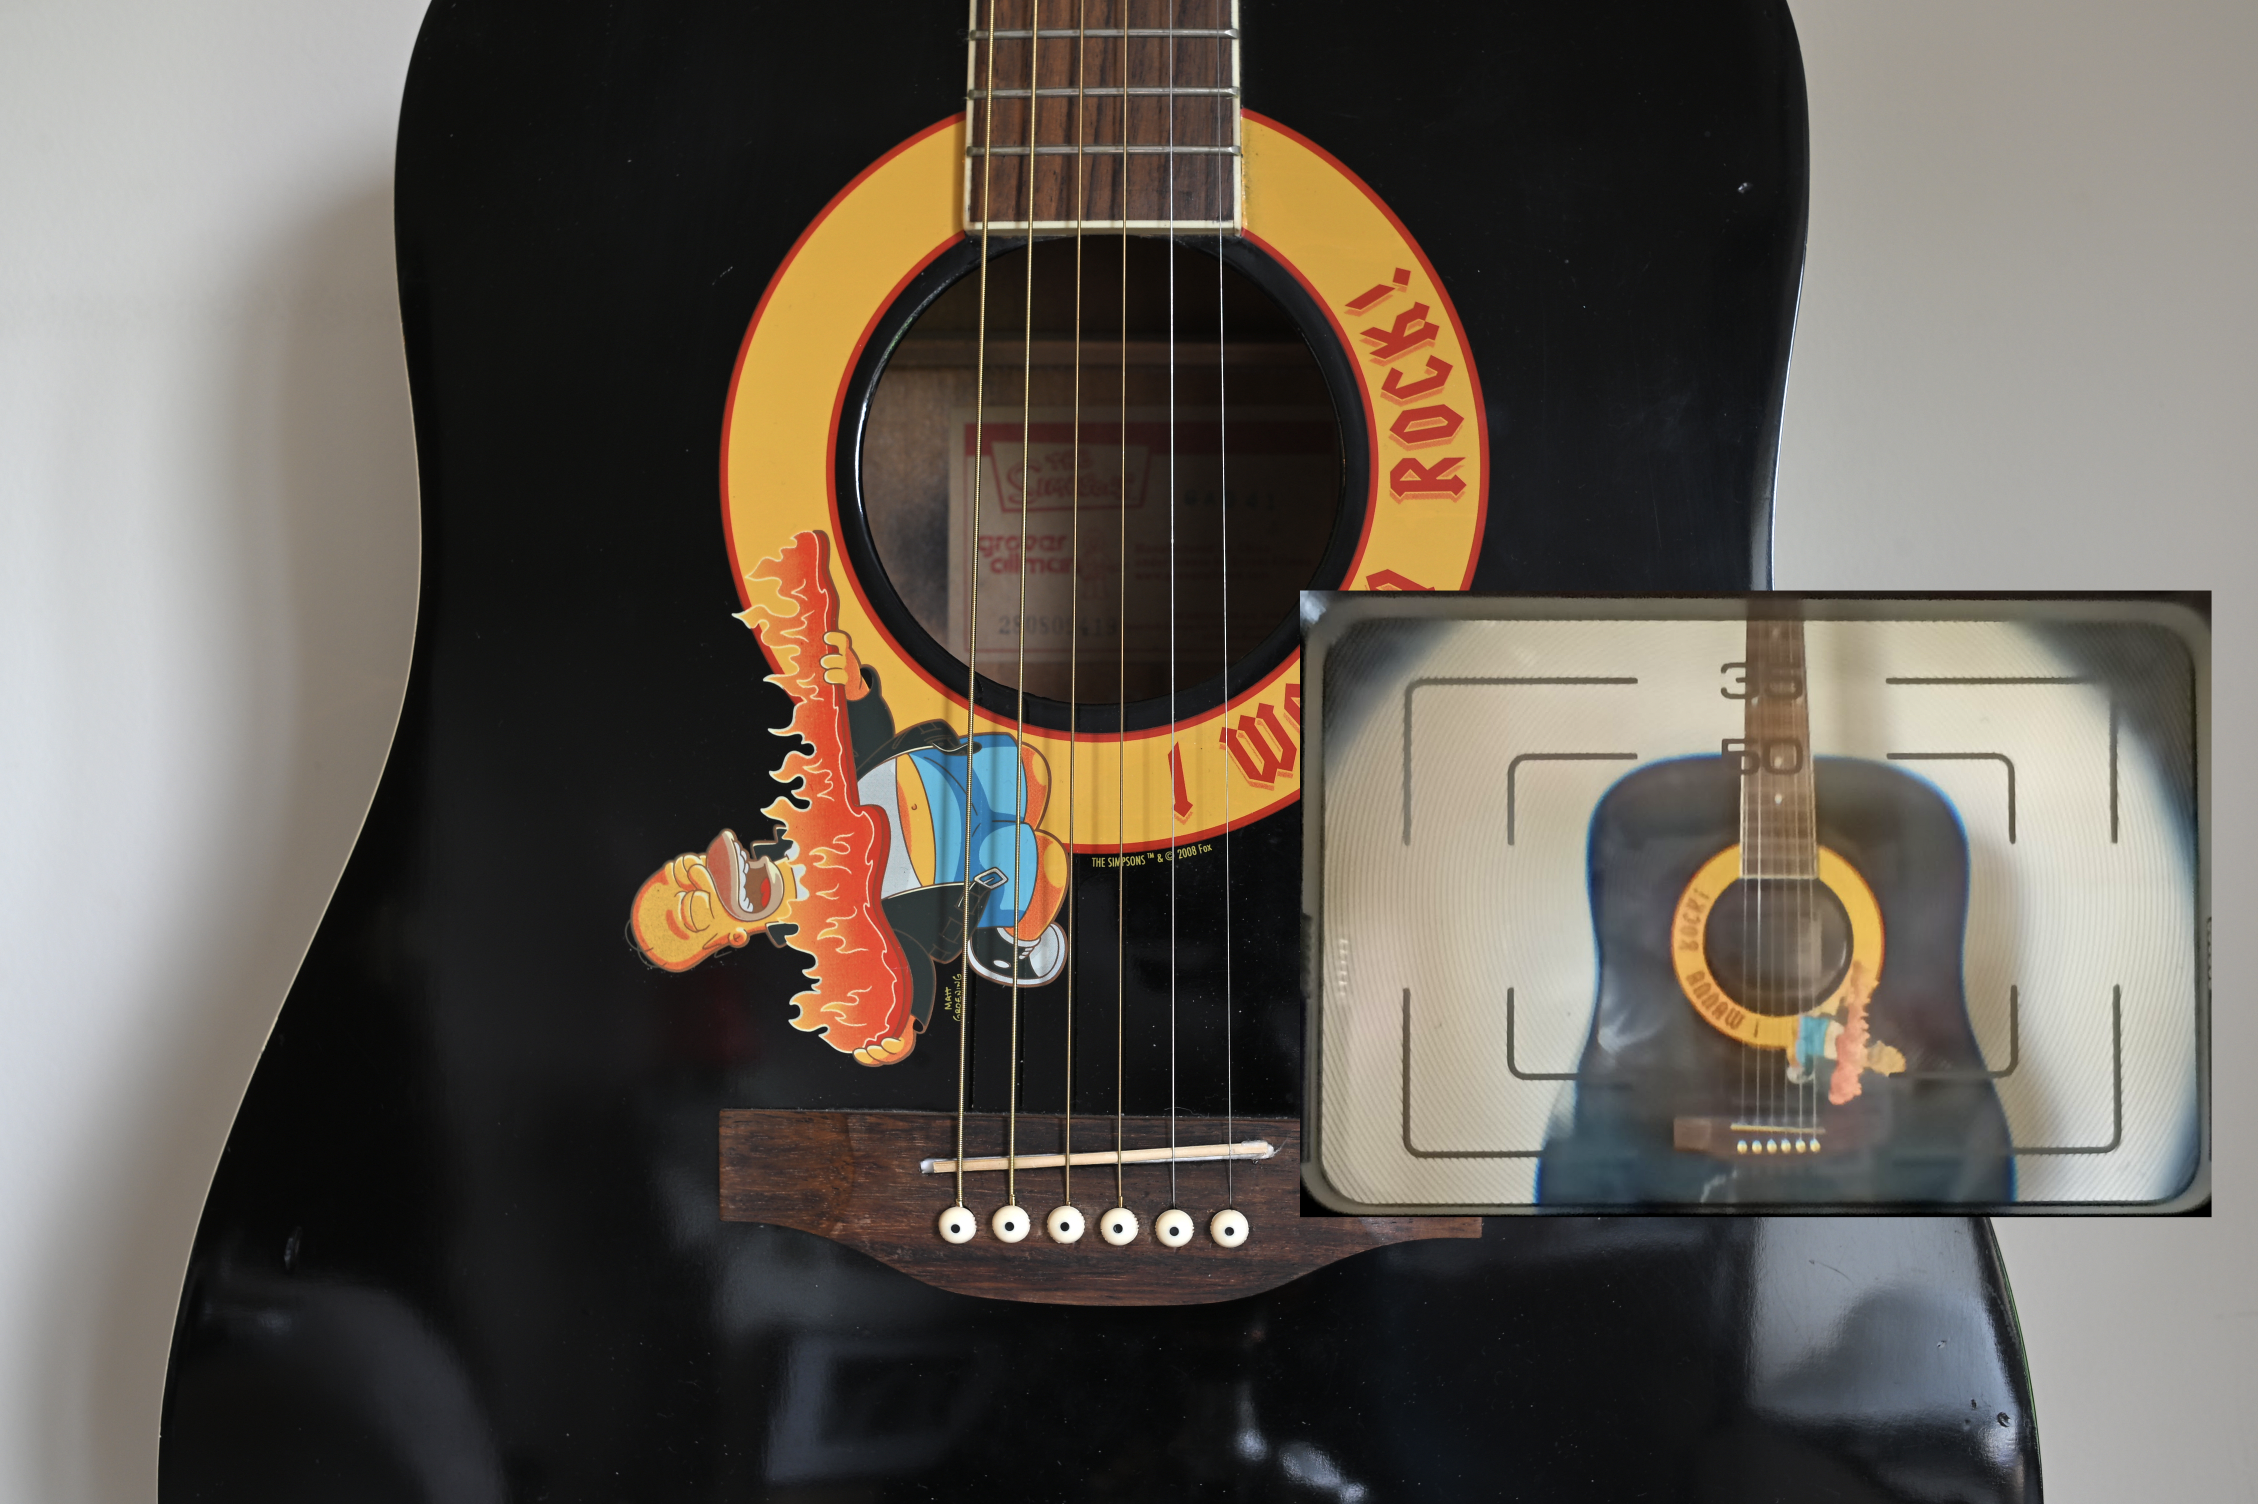
One memorable weekend, my friend Iain rolled into town, using the visit as a perfect excuse for a long-distance ride on his newly acquired Royal Enfield motorcycle. His journey was quite the trek, taking him from Coventry, through Portsmouth, and finally across the water to the Isle of Wight. Along with his riding gear, he brought a trio of cameras: the Pentax 17 I had lent him months before, a classic folding Ensign, and, most notably, a Lomography Horizon Panoramic camera. To my surprise, the Lomo was for me to try! That’s how this unique camera landed in my hands. It sat on my desk for a couple of weeks—a constant, visual reminder that I needed to stop admiring it and start shooting with it.
Limited Options
Despite its impressive 120∘ horizontal sweep, the Lomo Horizon is an exceptionally simple point-and-shoot experience. Its features are minimal, forcing you to embrace its simplicity.
Lens: A 28mm INDUSTAR MC 8/28 (multi-coated) provides the wide, sharp base for your panoramas.
Aperture: Fixed at f/8.
Shutter Speeds: A strict choice between 1/60s (for daylight) and 1/2s (for low light).
Format: Standard 35mm film, but shooting a huge 24×58mm panoramic frame.
Focus: Fixed from 2m to Infinity.
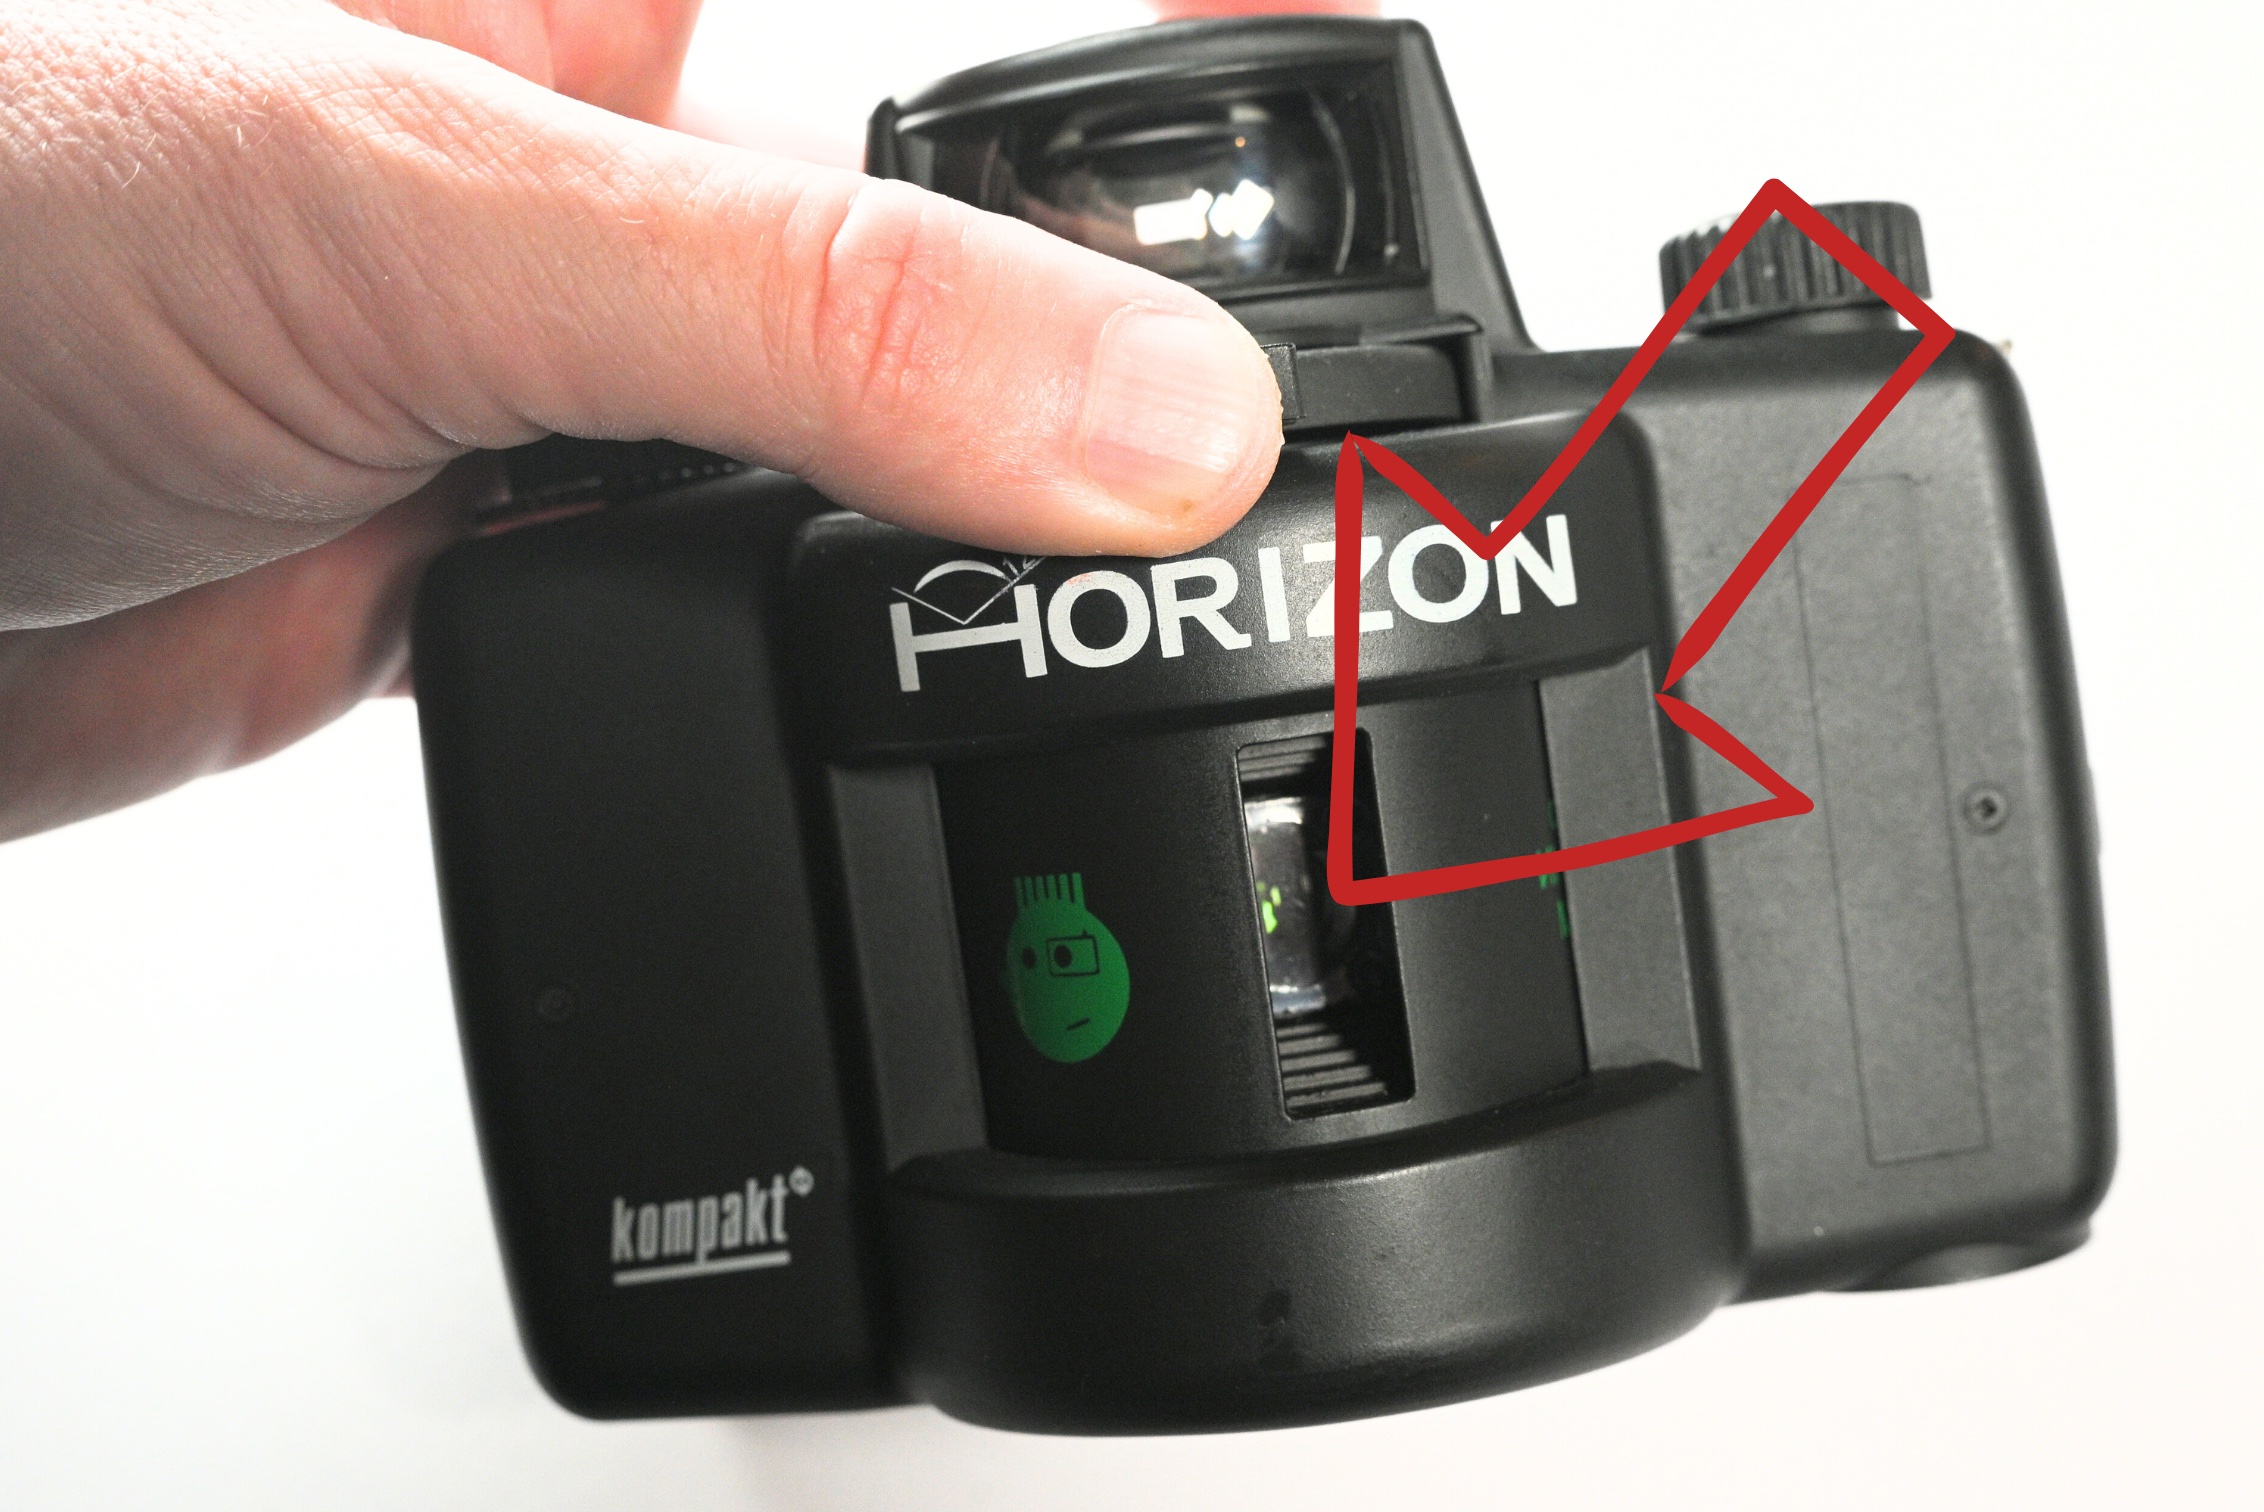
The Catch: There is no tripod mount! You’ll need steady hands and creative balancing if you want to use that slow 1/2s shutter speed.
When you advance the camera the front cover sweeps across the entire front giving you that panoramic shot.
Loading the camera
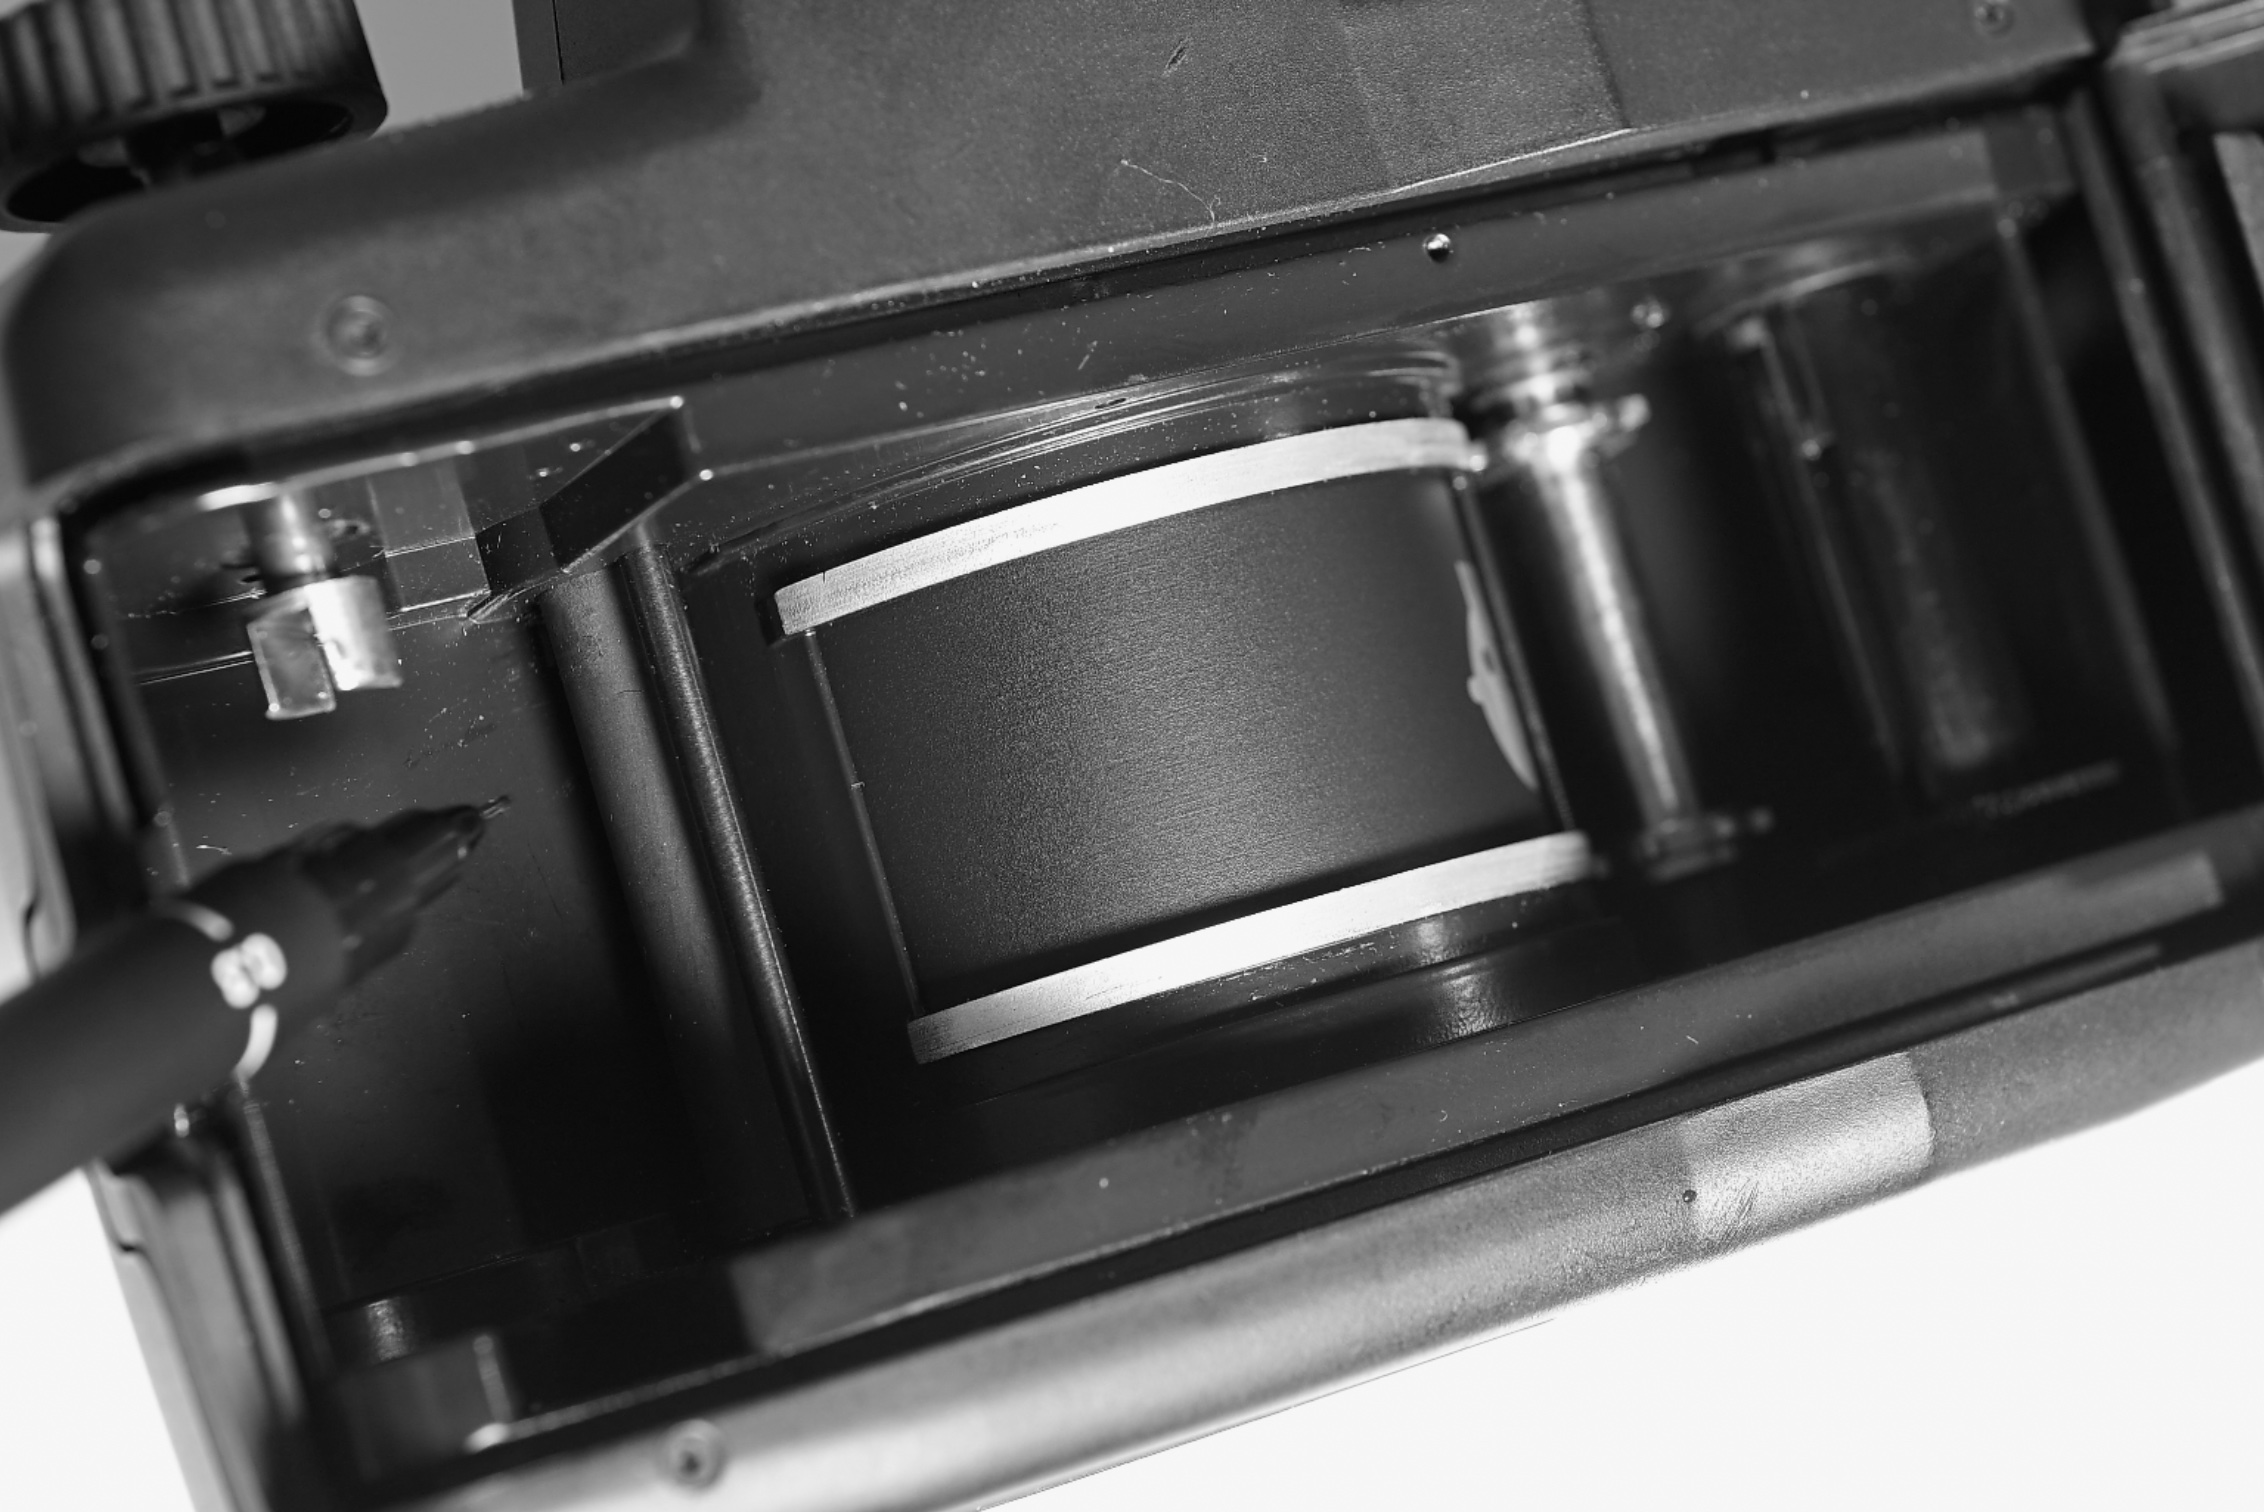
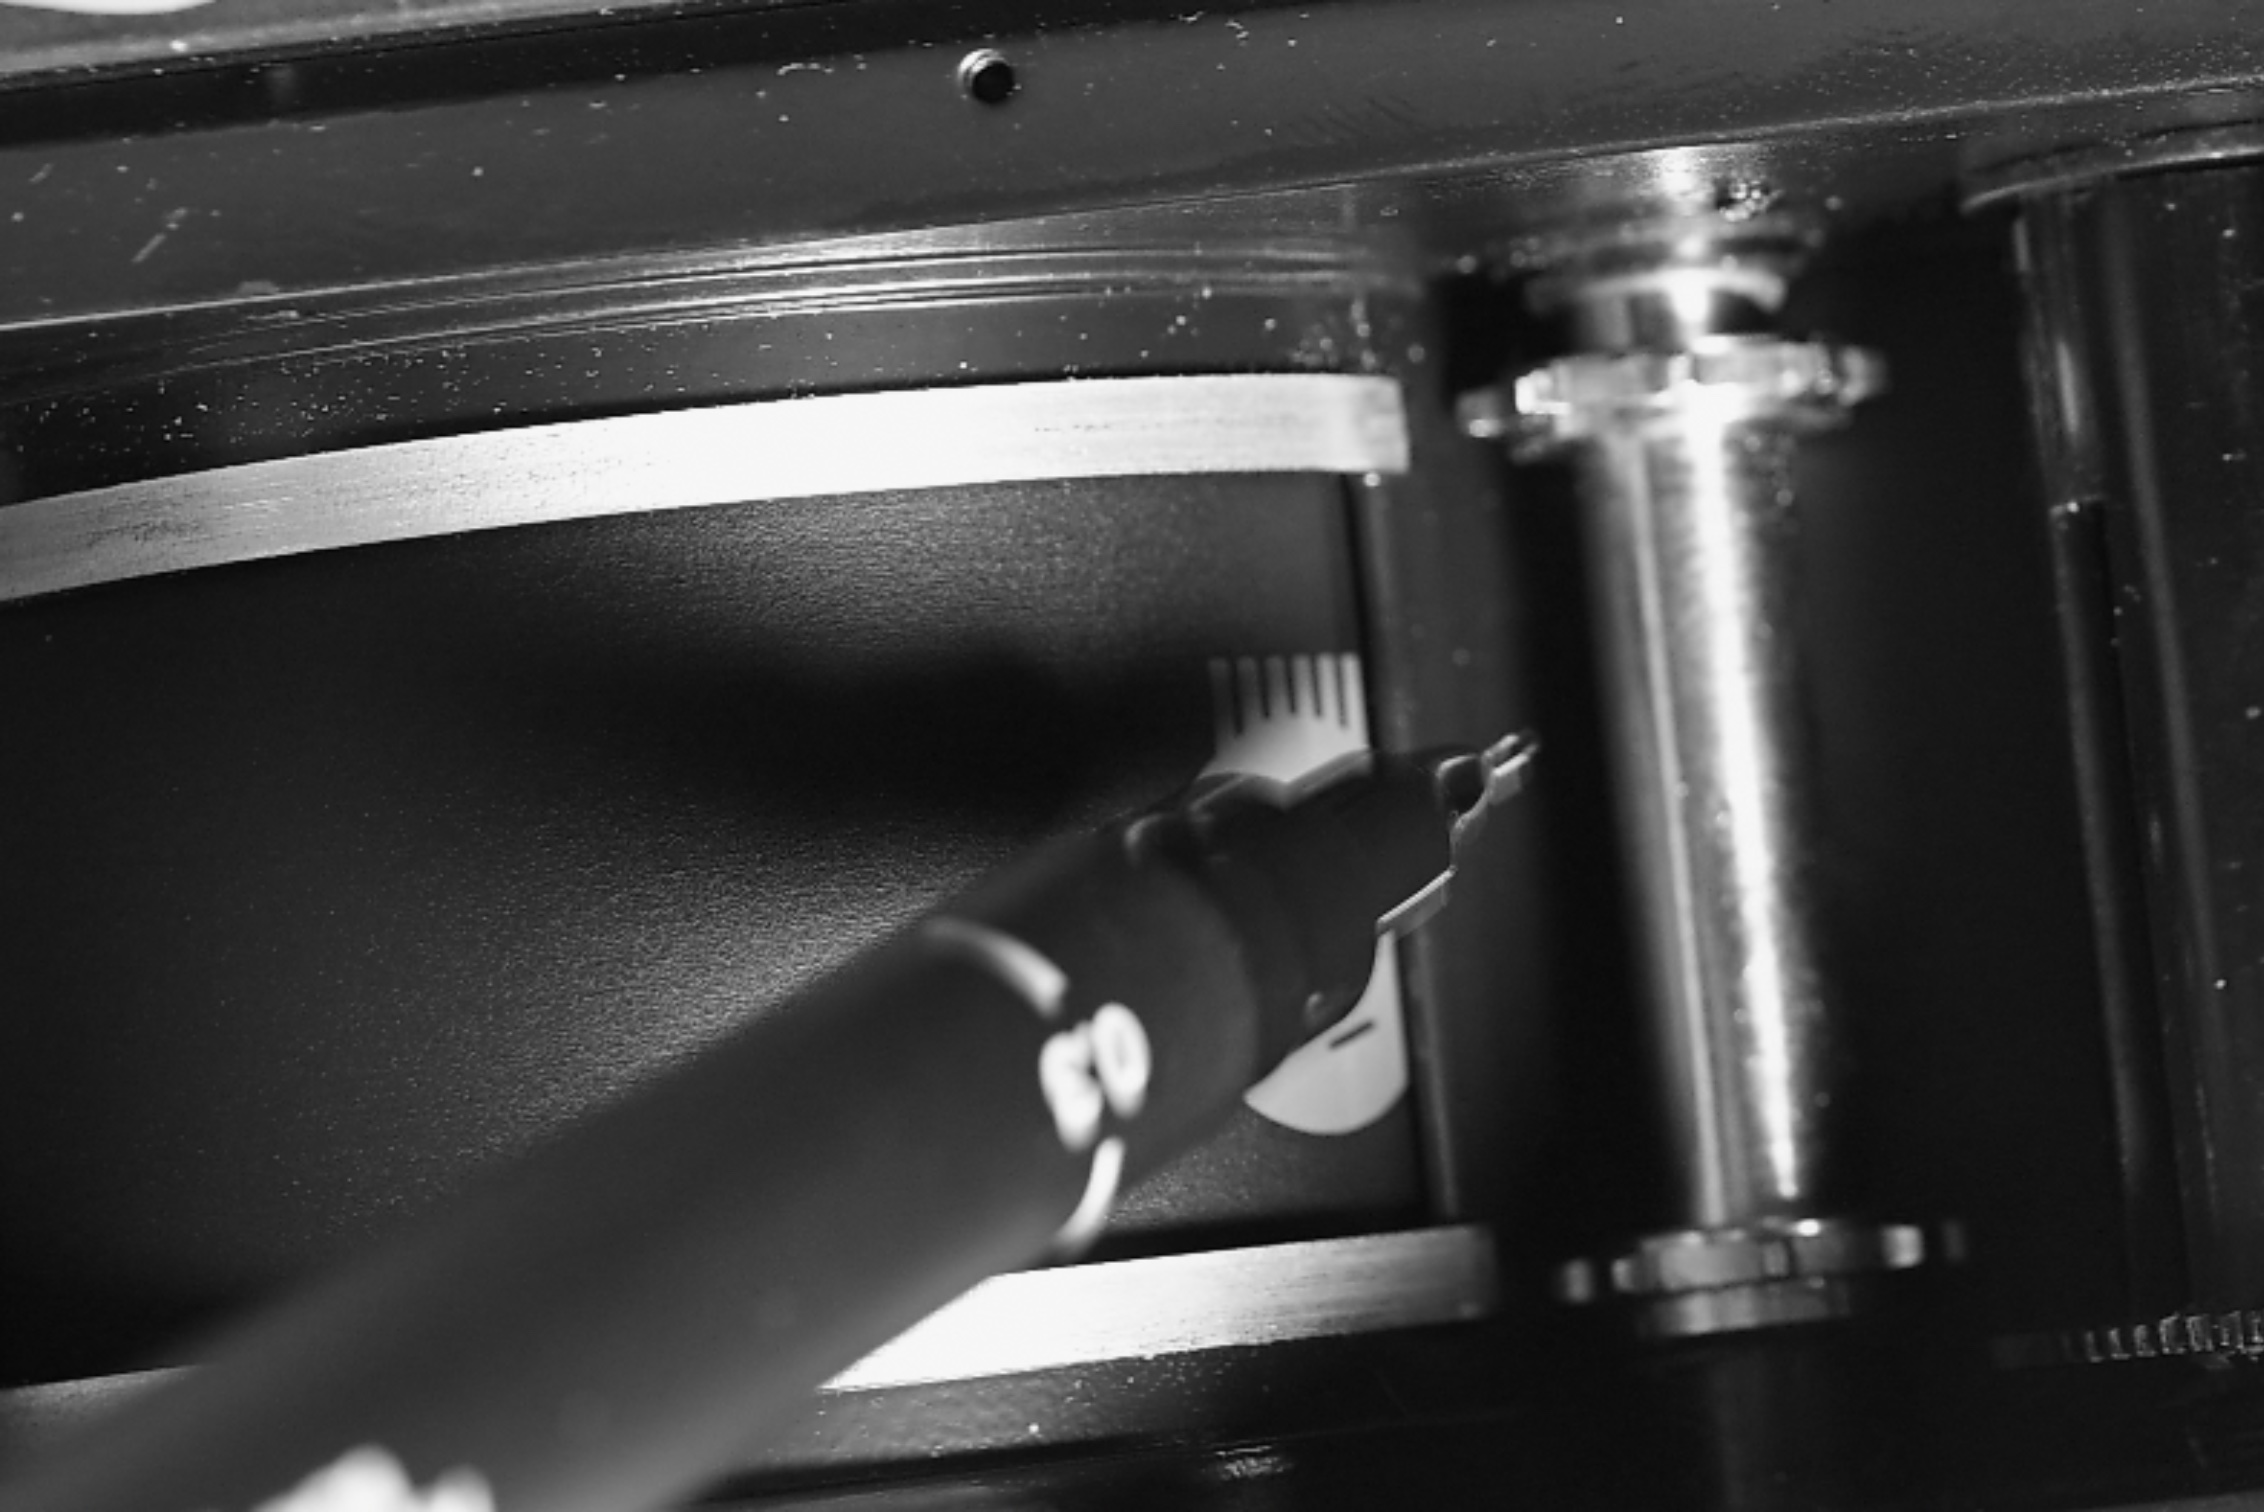
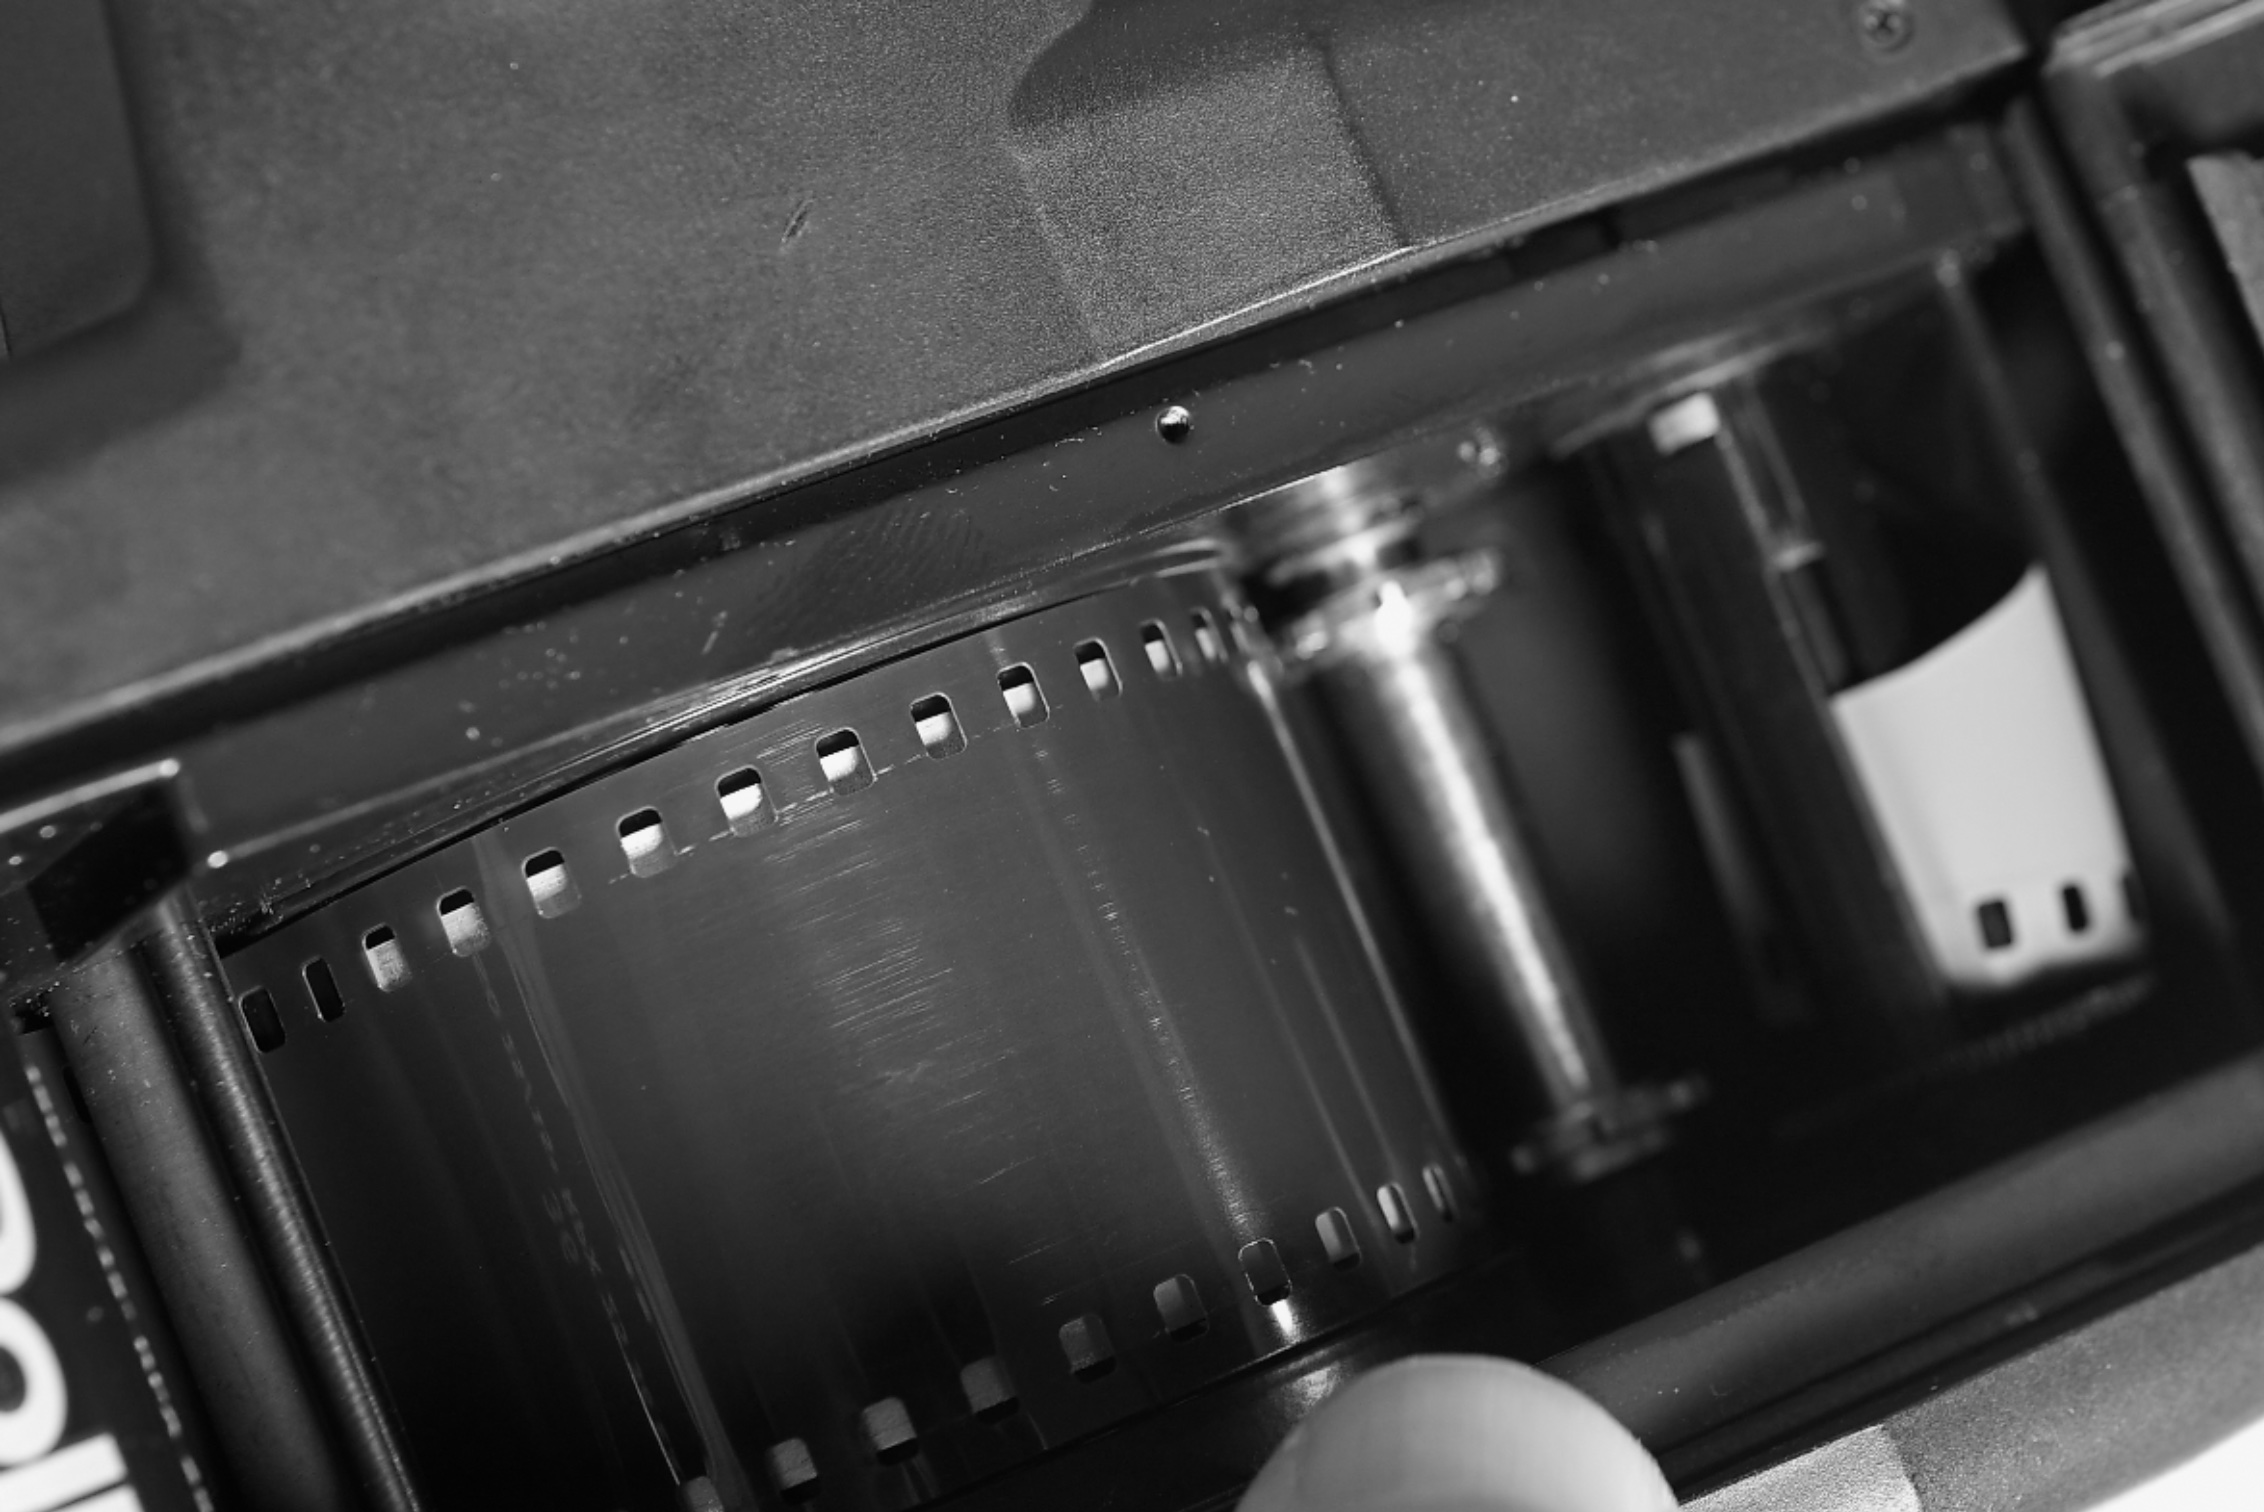
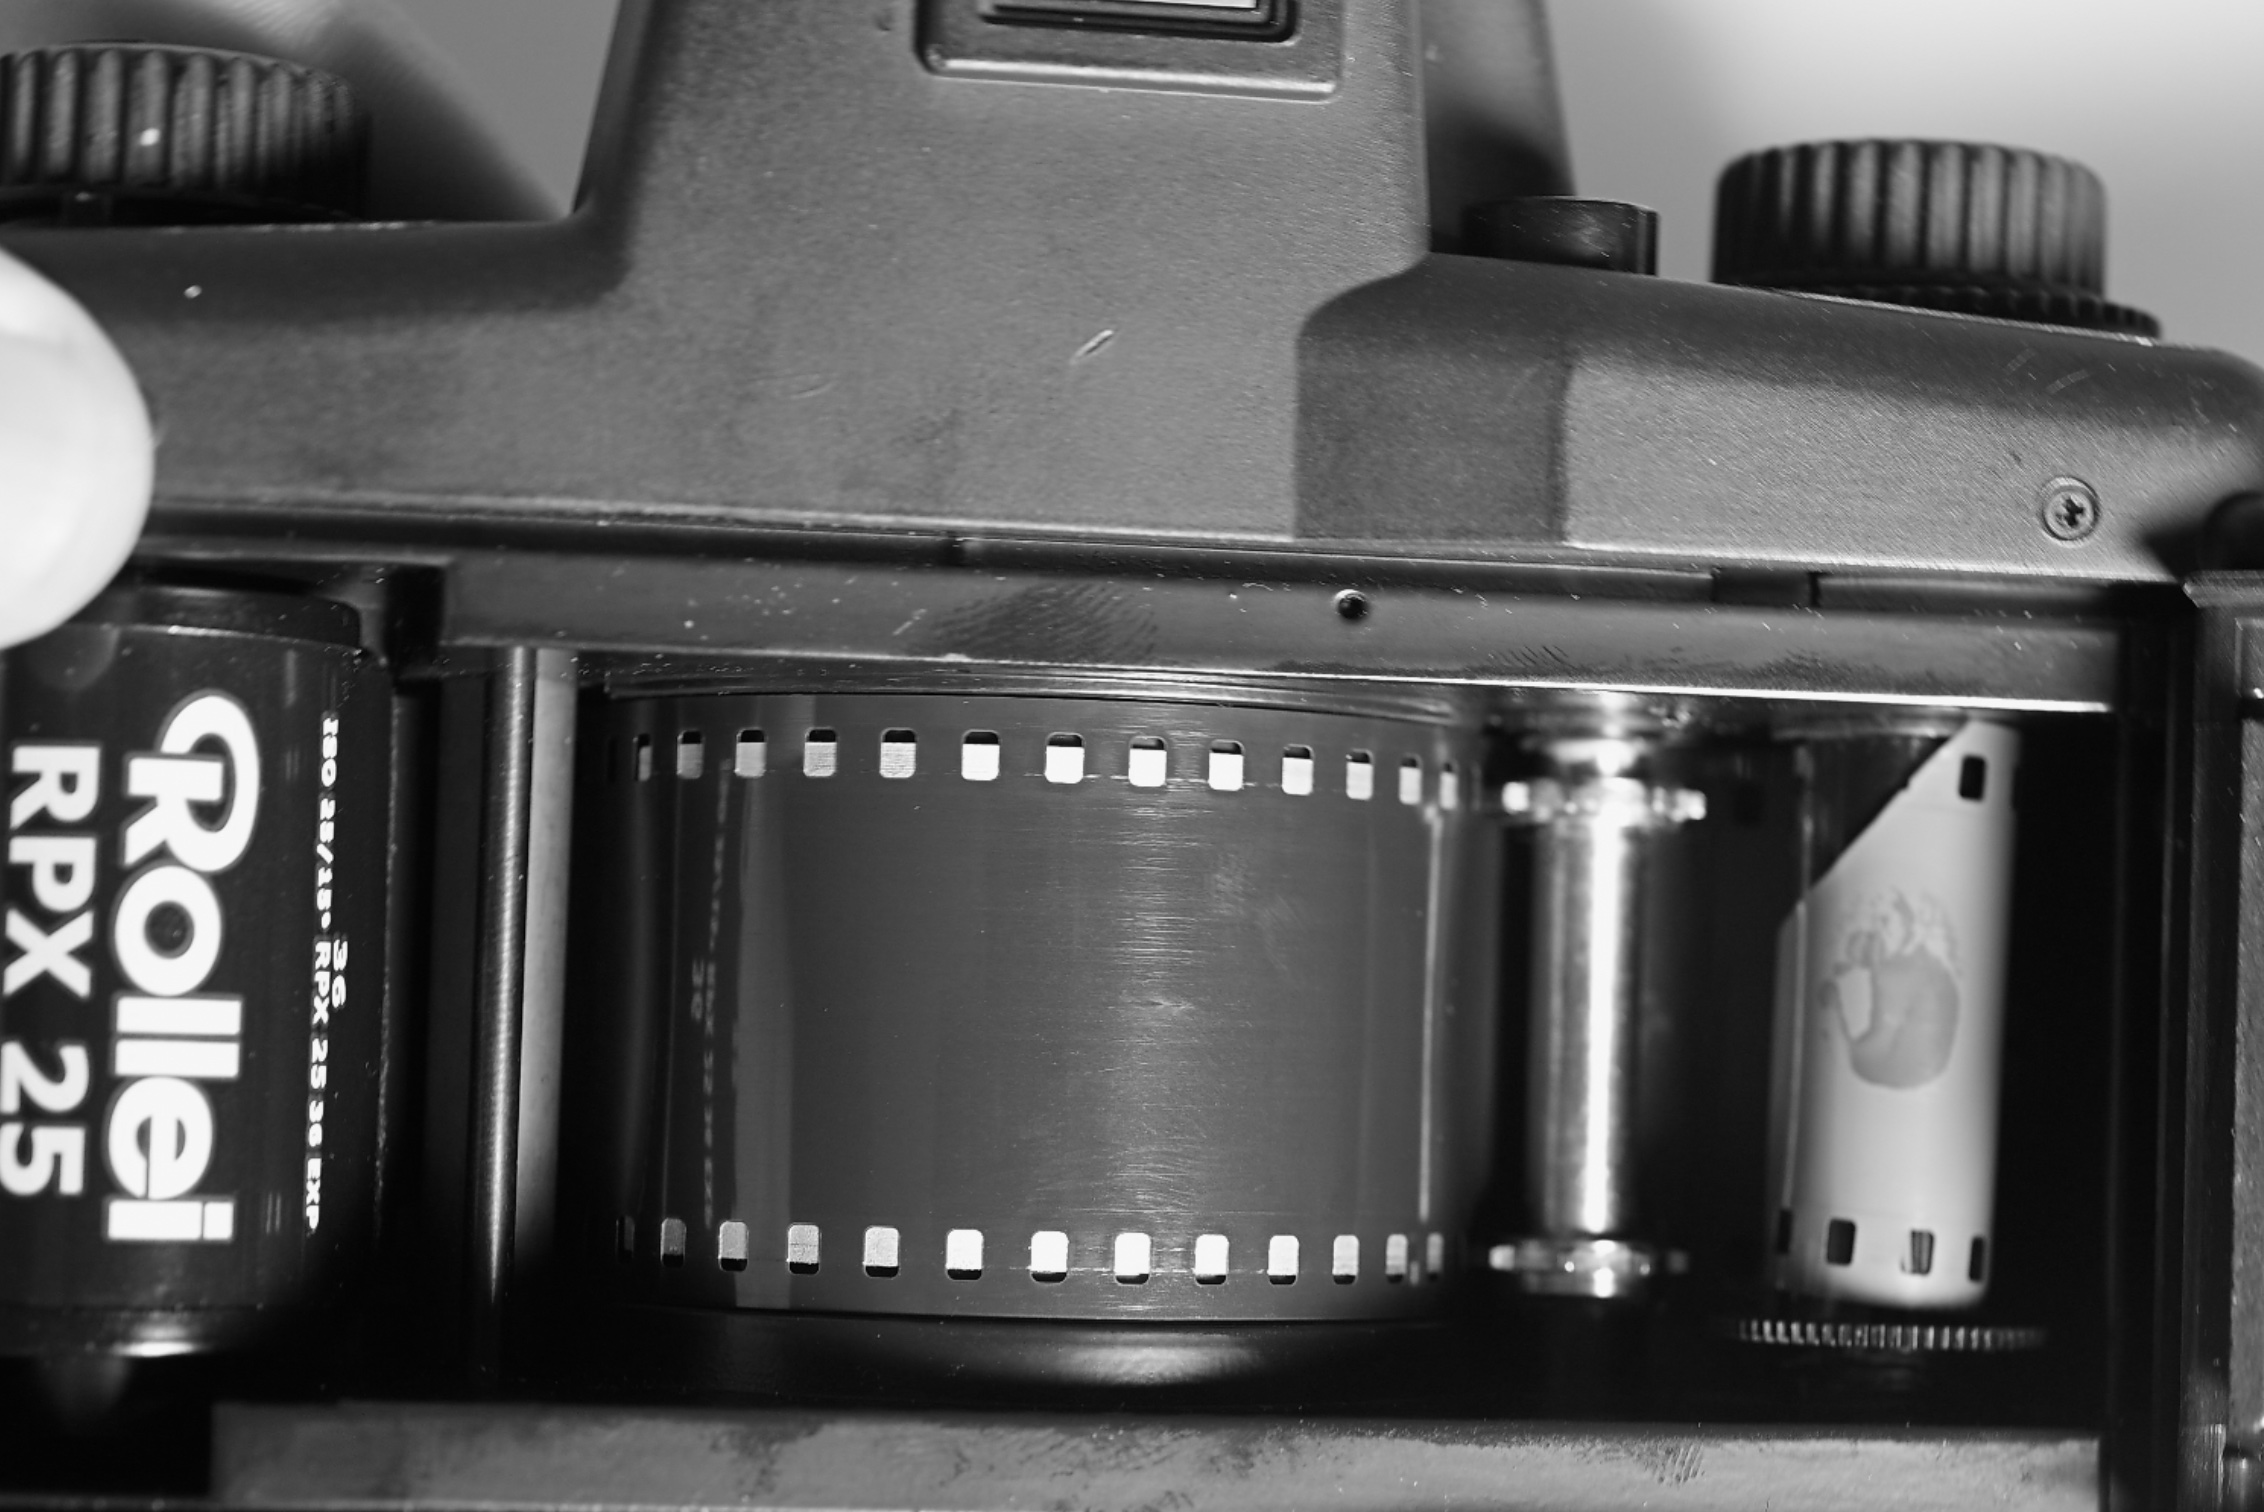
Loading the Horizon was, unexpectedly, the trickiest part of the process. I quickly discovered the internet is flooded with false or misleading information regarding the loading technique, which has resulted in many photographers ending up with poor negatives. Even the original rule book proved somewhat vague! Determined to avoid the dreaded blurred edges, I took a “duff” (scrap) roll of film and practiced the process repeatedly. My effort paid off when I shot my first real roll, the negatives came out perfectly, with edge-to-edge sharpness. Success! I loaded it right!
You have to feed the film under that fat roller. Not the thin silver roller. The fat one under it.
You then pull the film and feed it under the silver sprocket rod.
And then under the take-up spool, and feed the leader into the slit on the take-up spool. It helps to put a kink or bend in the end of the leader.
Feed the film onto the take-up spall half a turn and then you should be good to go. The film is now flush against the whole curvature of the film plane.
Close the back and then set the counter to ZERO and advance. This can be a bit tricky to get used to so I would advise to try all this with a duff roll of film. I used an old expired film that I know I would never shoot. I’ve used it for ages for tests such as this.
My first experience
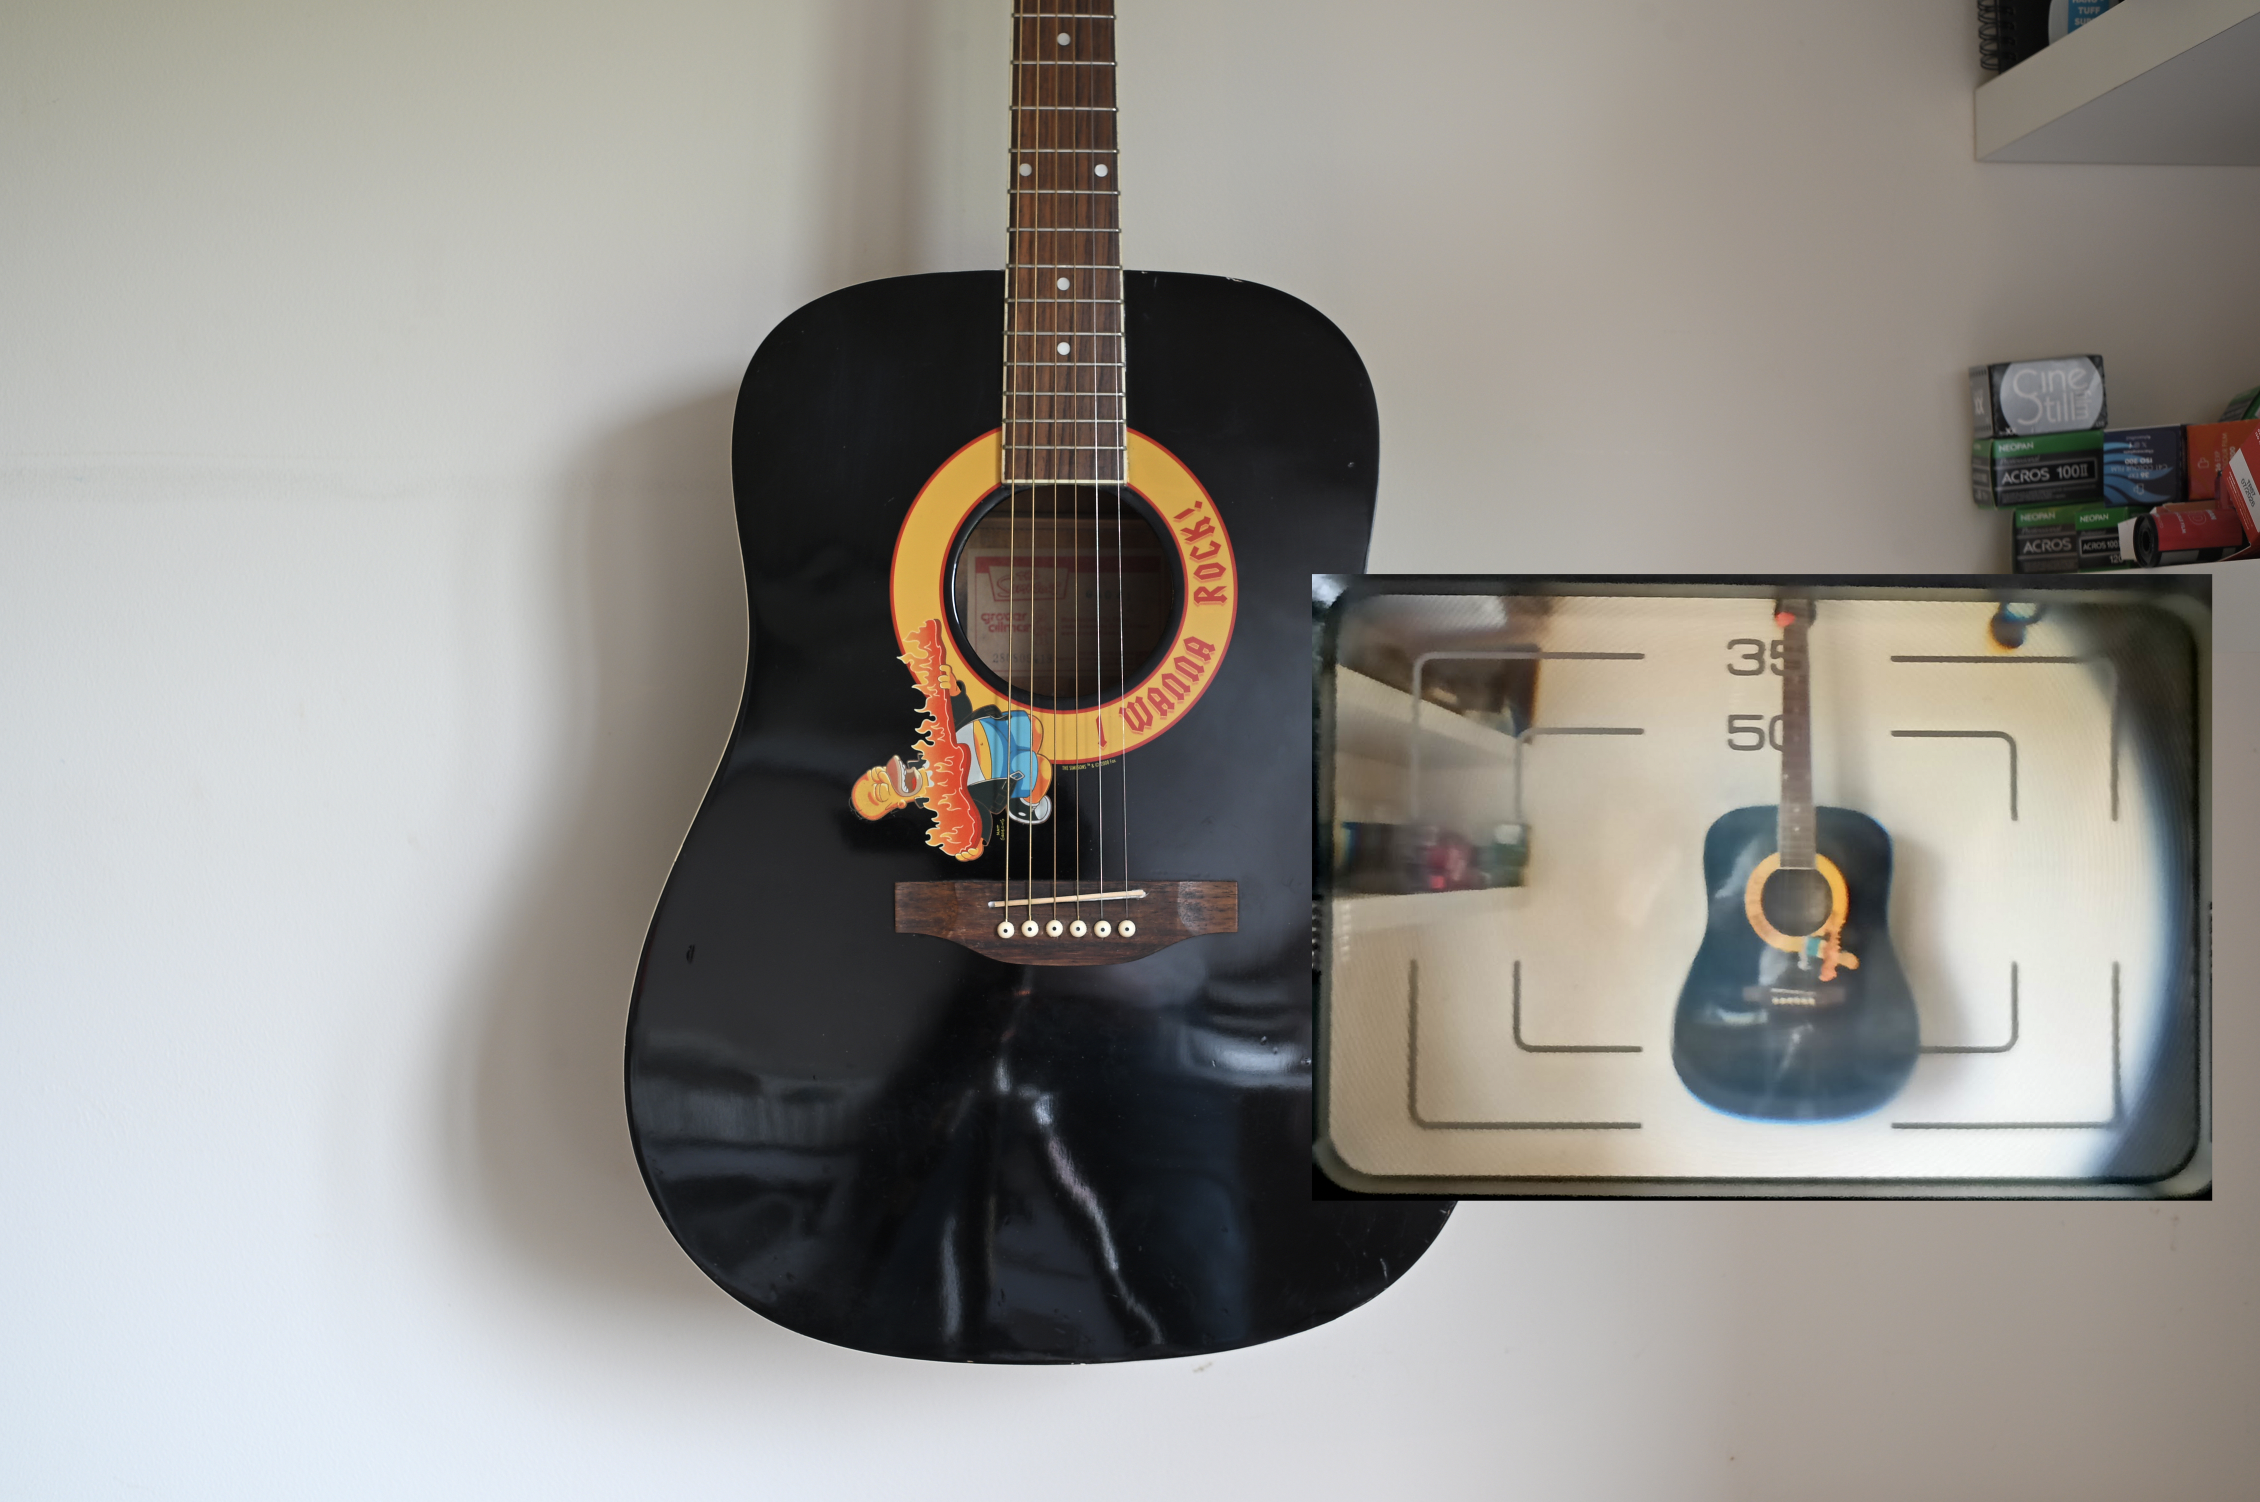
You might assume the Lomo Horizon is built like cheap plastic, similar to a Holga. Think again. This camera is built surprisingly tough, with plastics that feel remarkably premium and solid in hand.
To manage my expectations and embrace the camera’s simplicity, I decided to keep my first shoot completely casual. I loaded a roll of Kodak TRI-X 400 (expired 2022) and simply walked to the local shops. I had no grand plan, just a spontaneous urge to point, shoot, and see the results. If the photos were bad, I wouldn’t be disappointed.
The day offered mid-overcast lighting after an earlier rain. The ISO 400 film speed was perfect for these conditions. Since I favor contrasty images, I deliberately composed shots that included bright white elements. My strategy was to slightly over-develop the film later, which would boost the highlights and deliver that punchy, contrasty look I love. For those shooting in full sun, remember that with its f/8 aperture and 1/60s speed, you could easily shoot a slower ISO 100 film.
Here are some images from my first shoot.
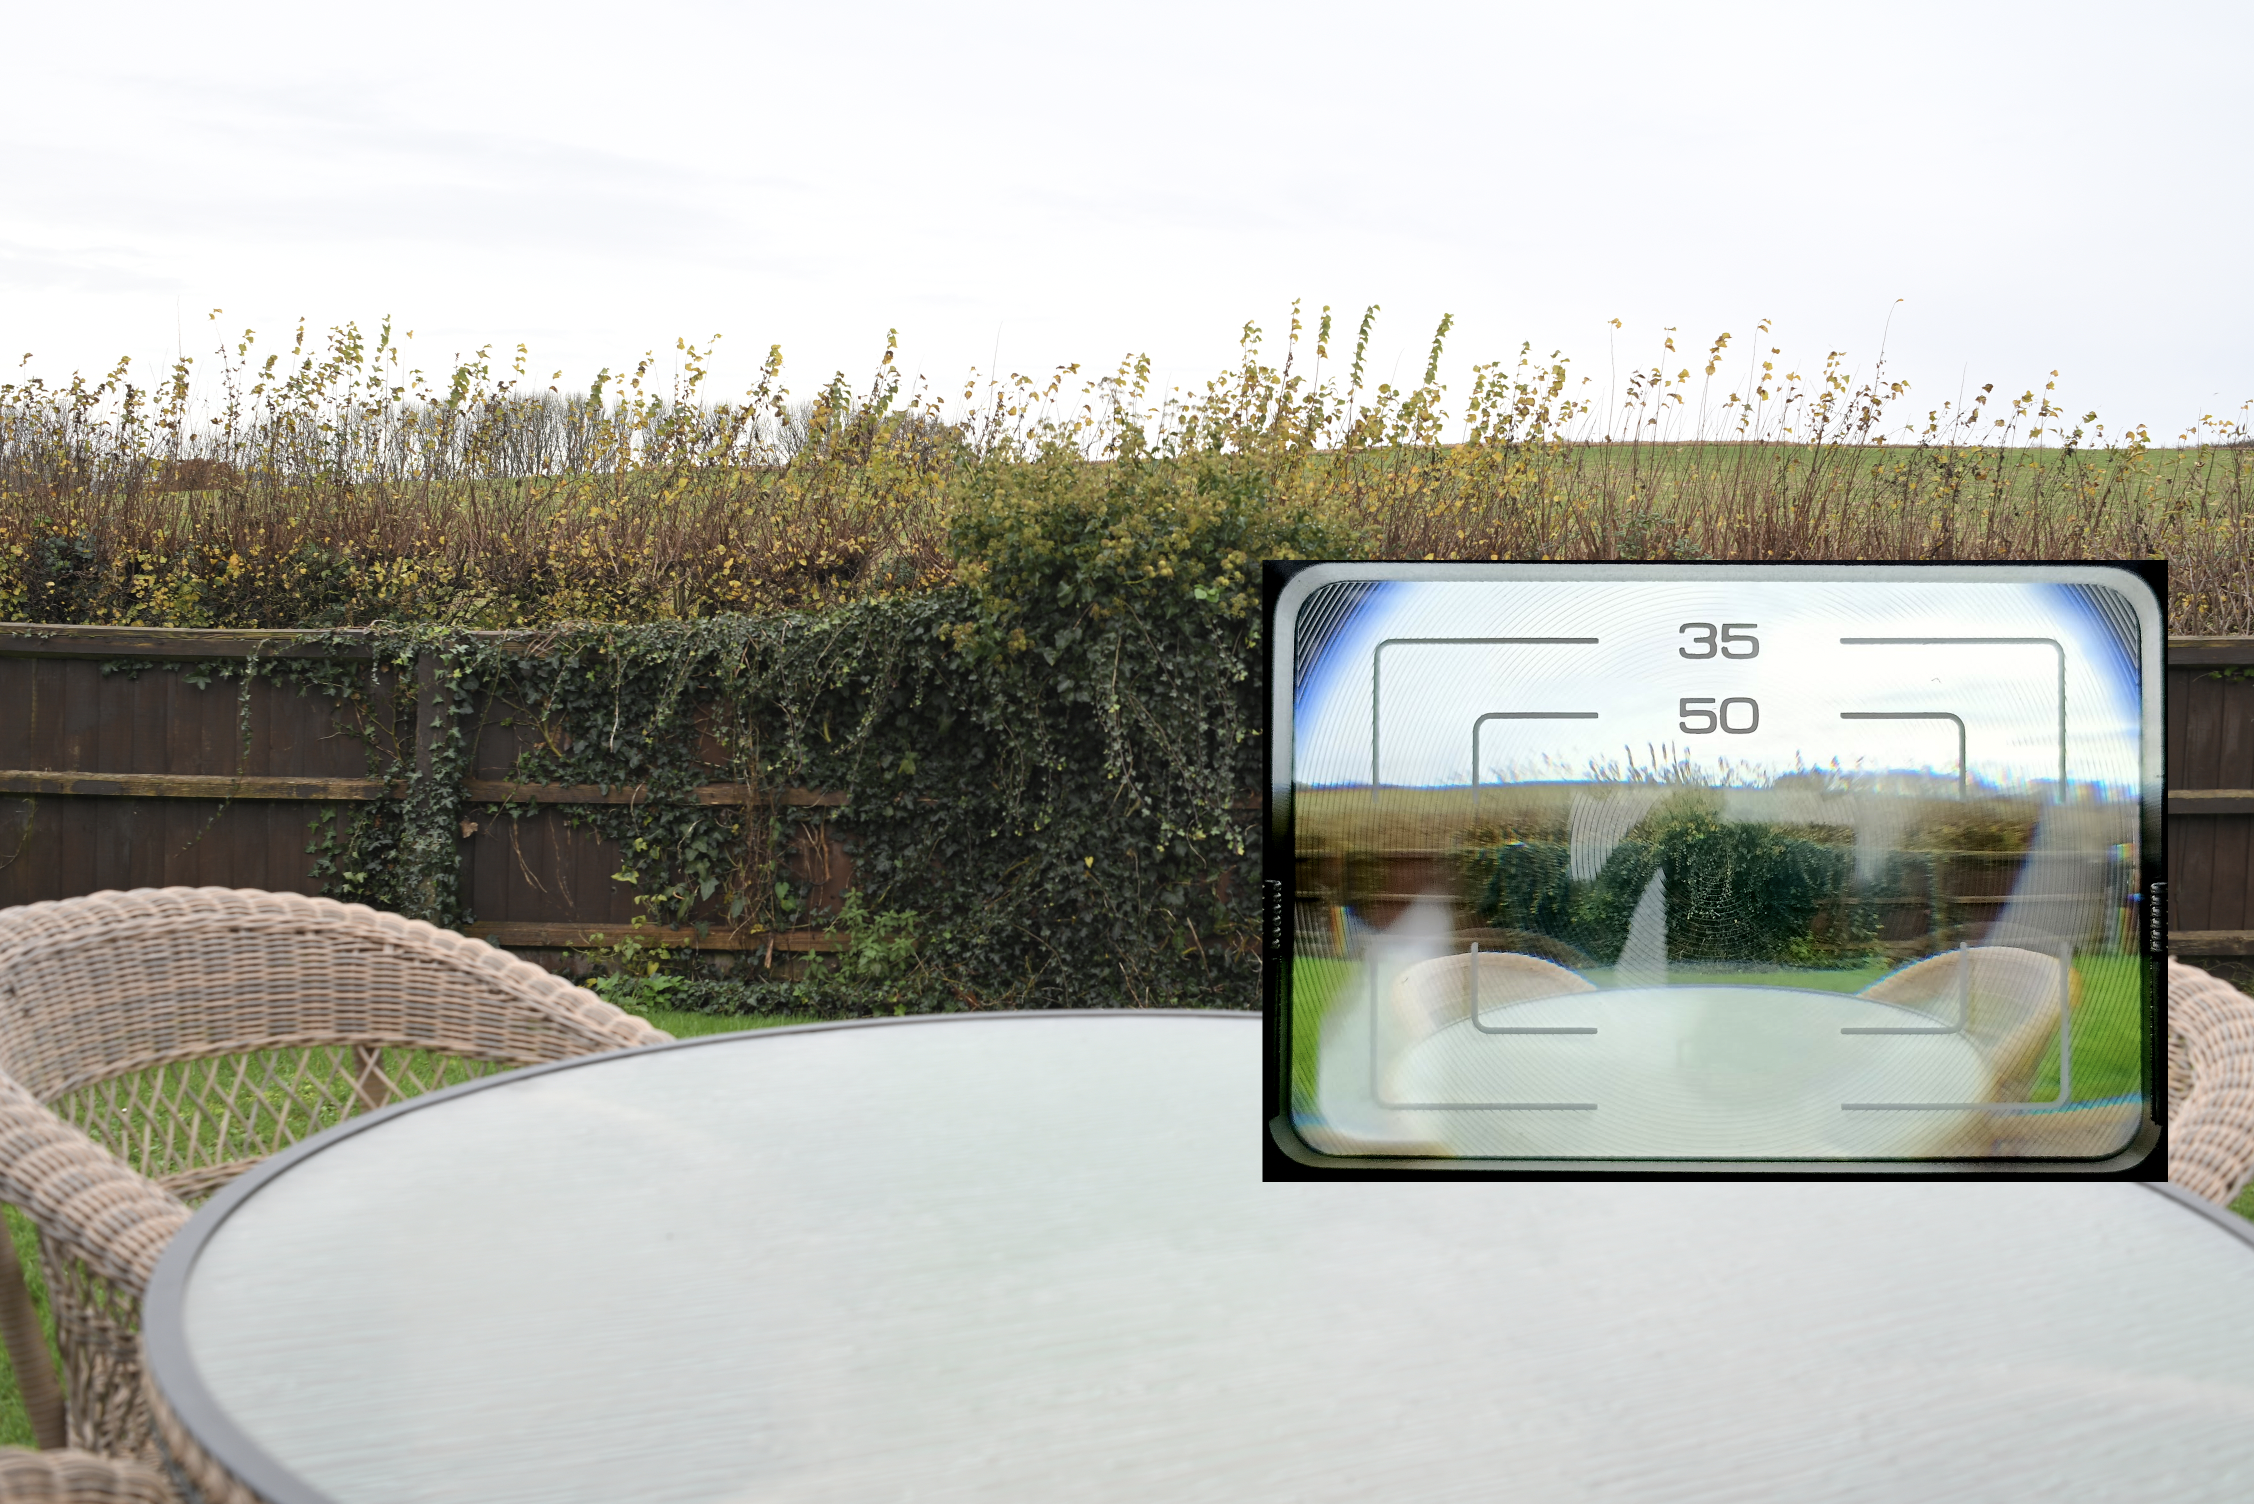
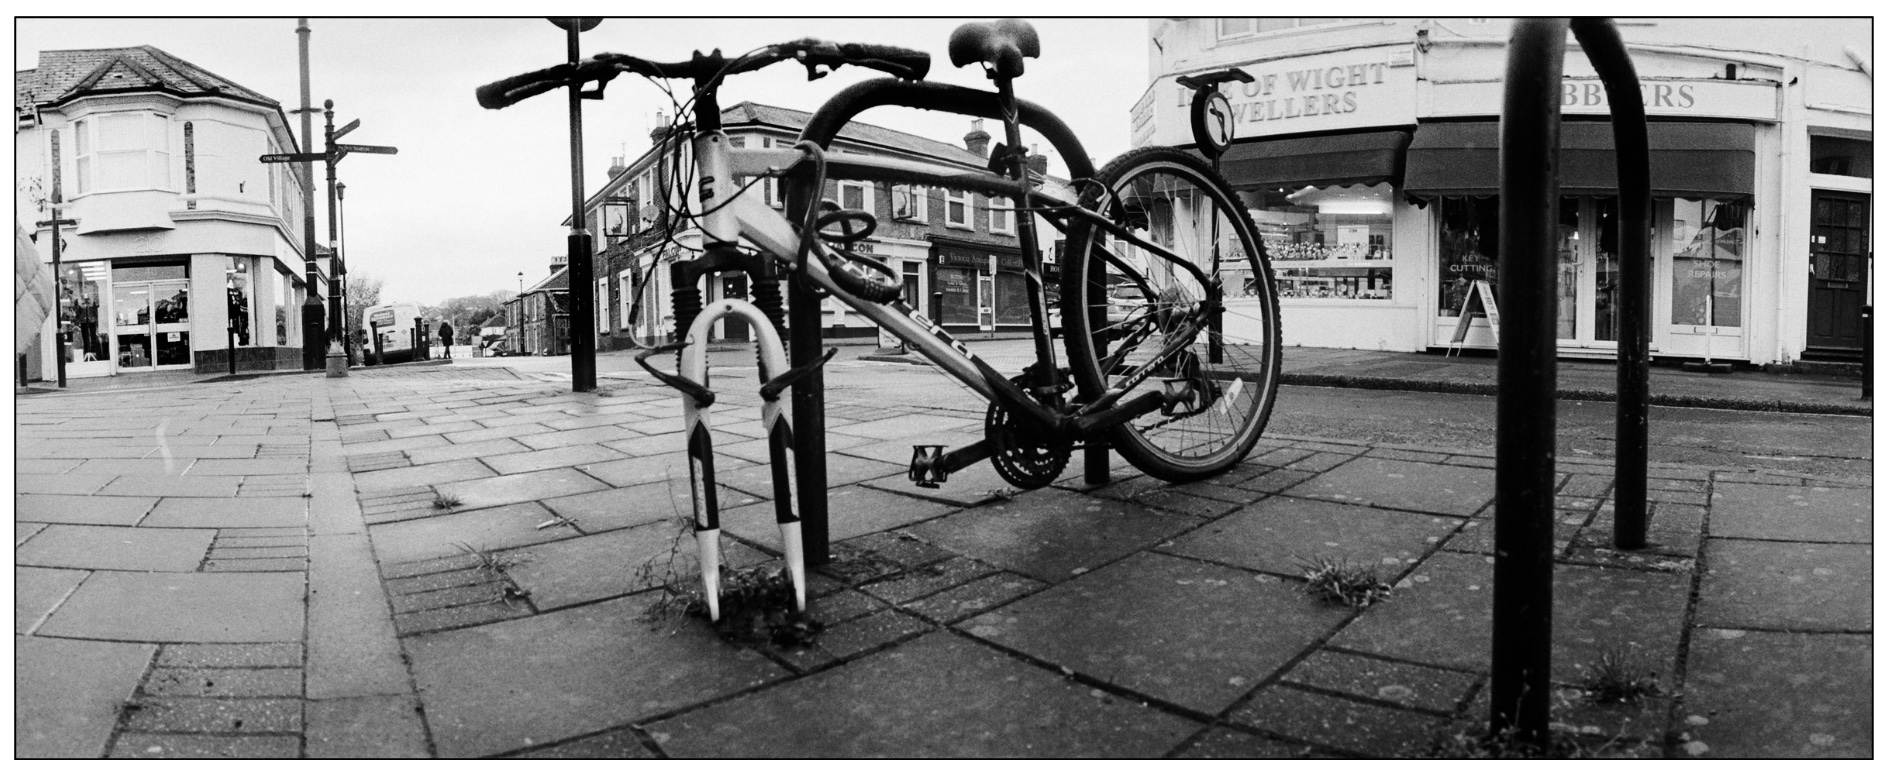
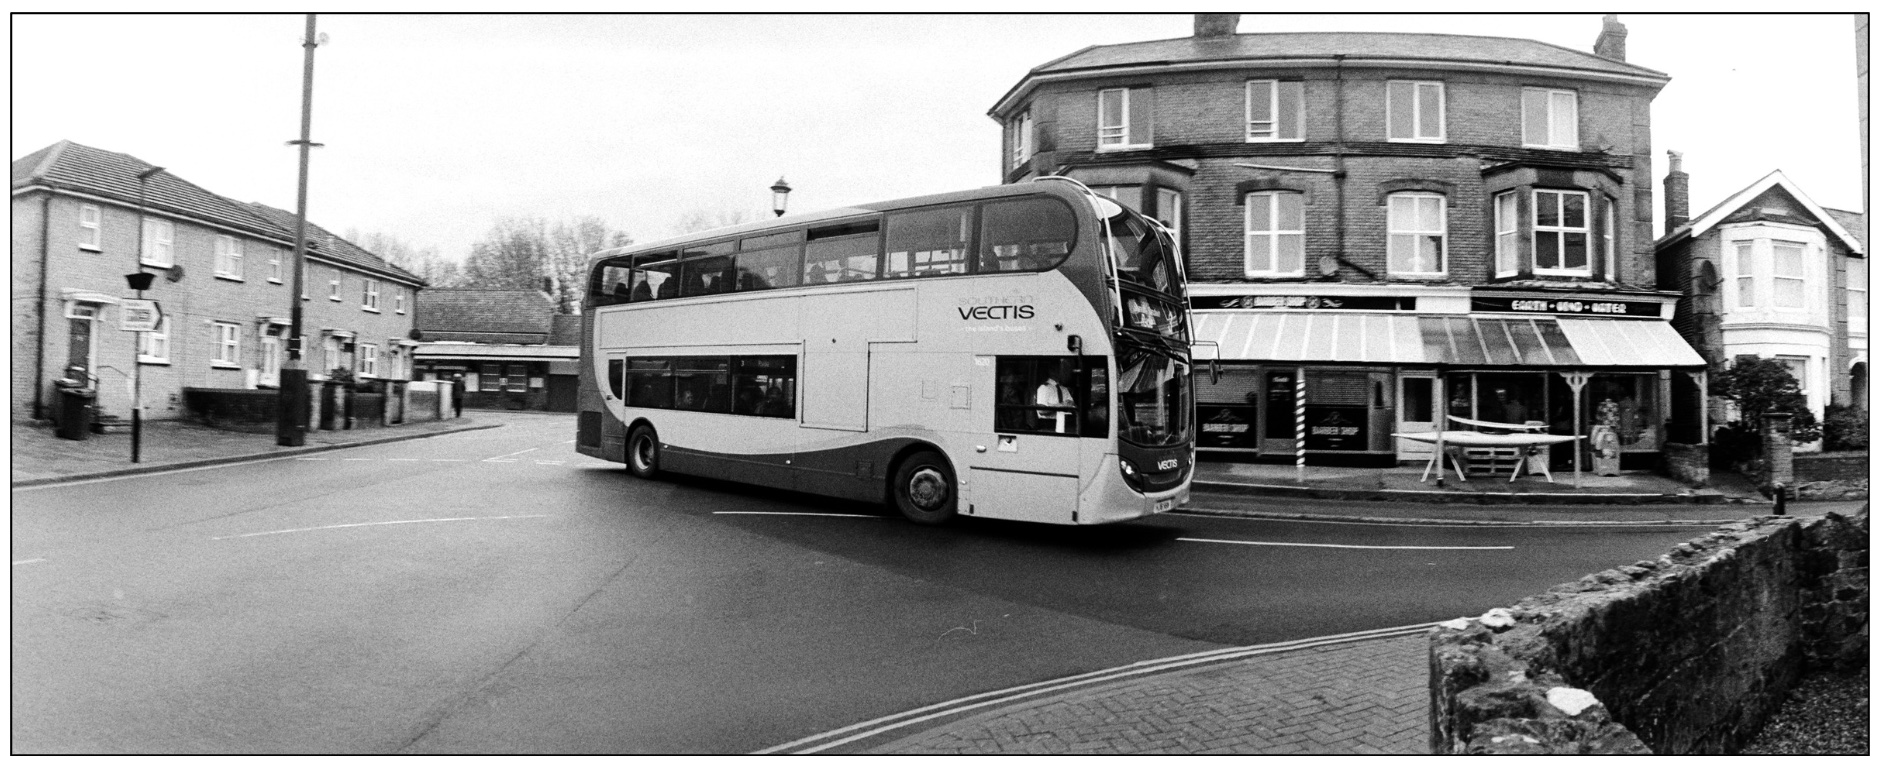
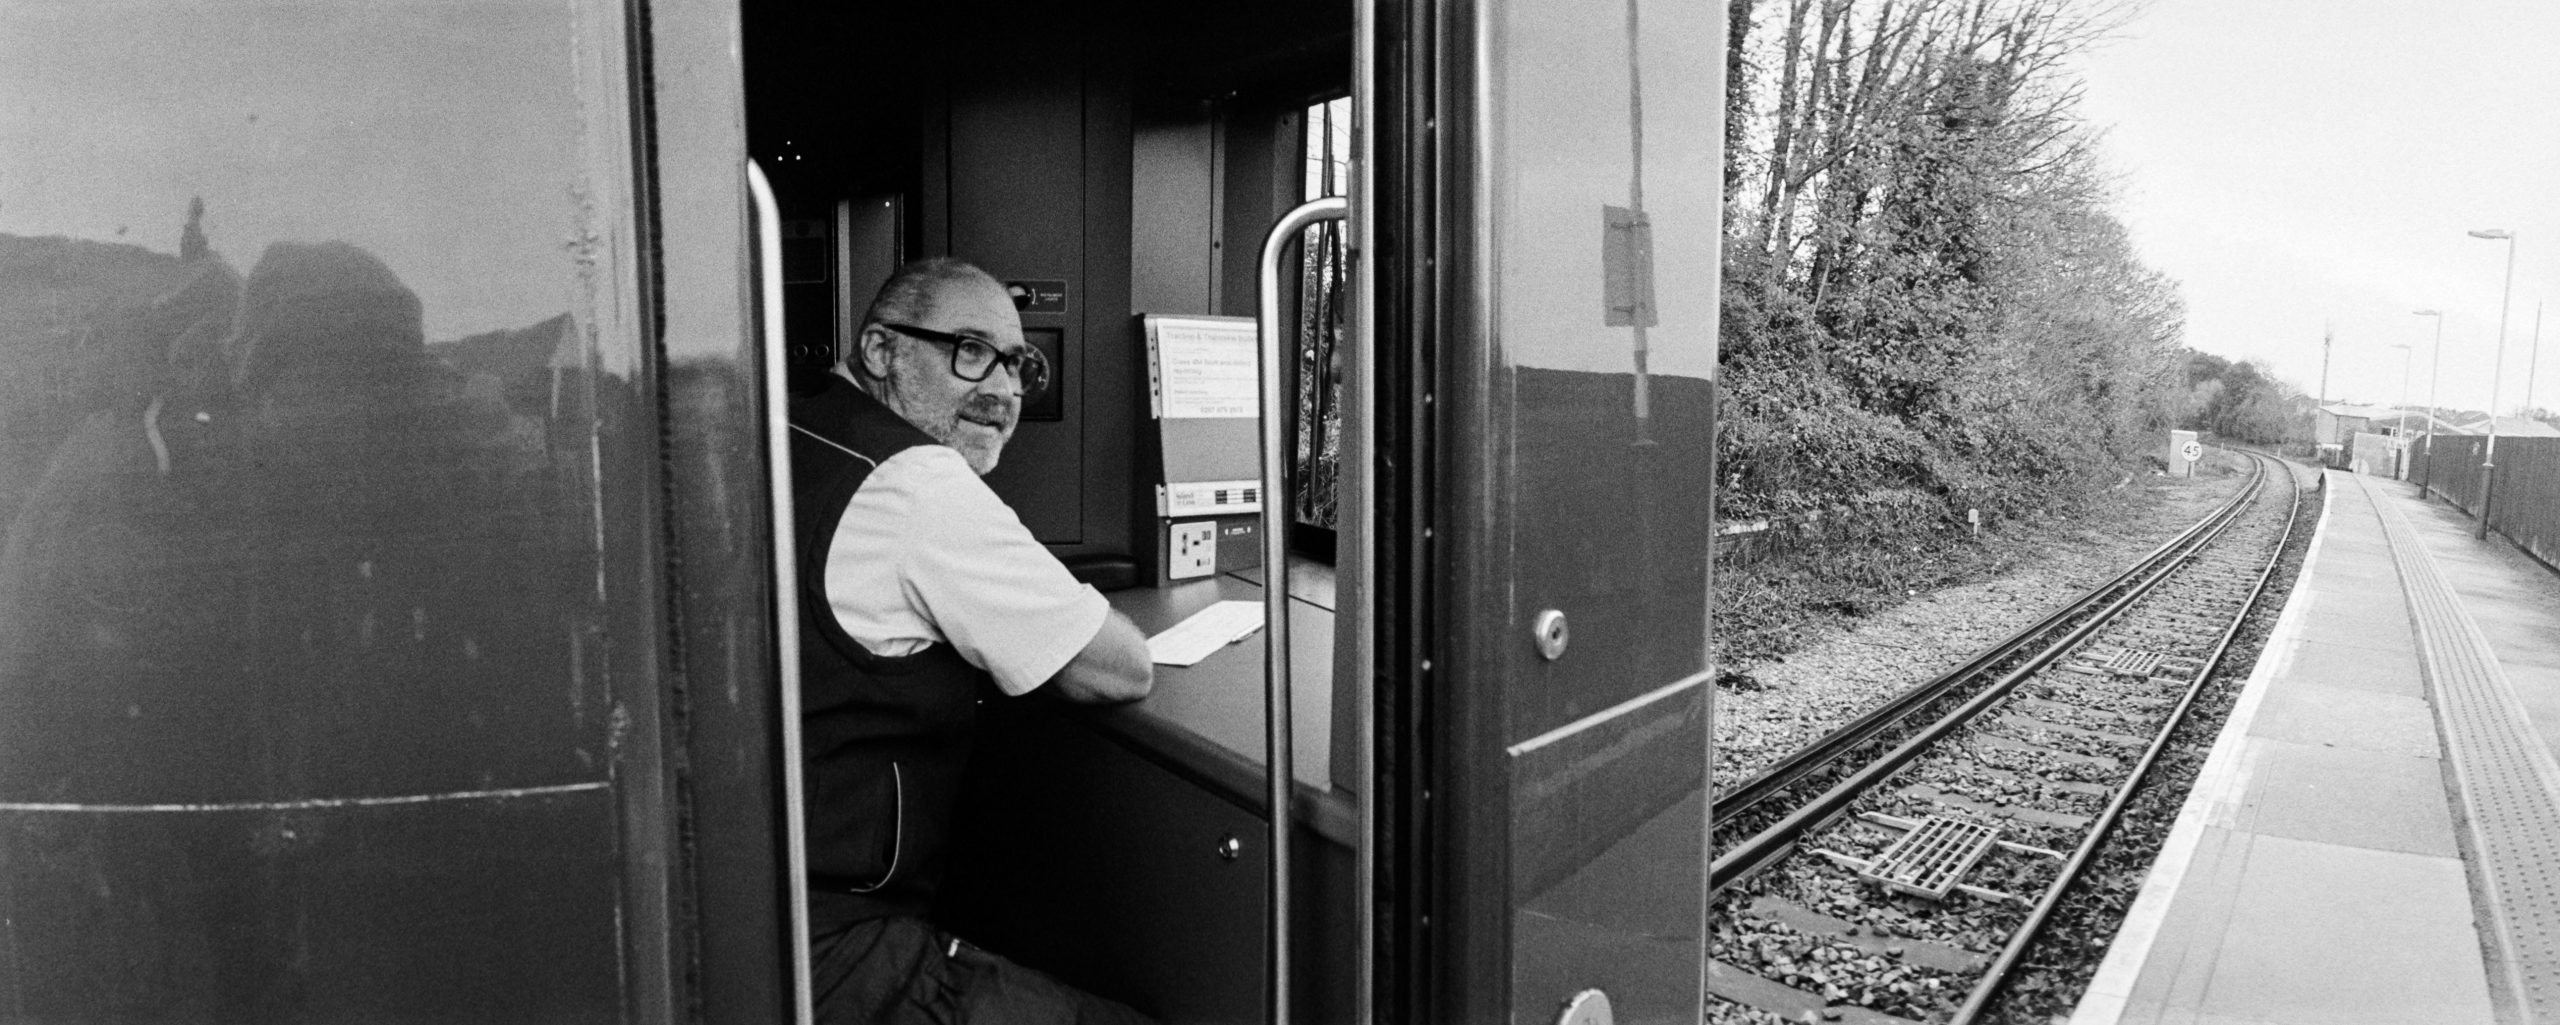
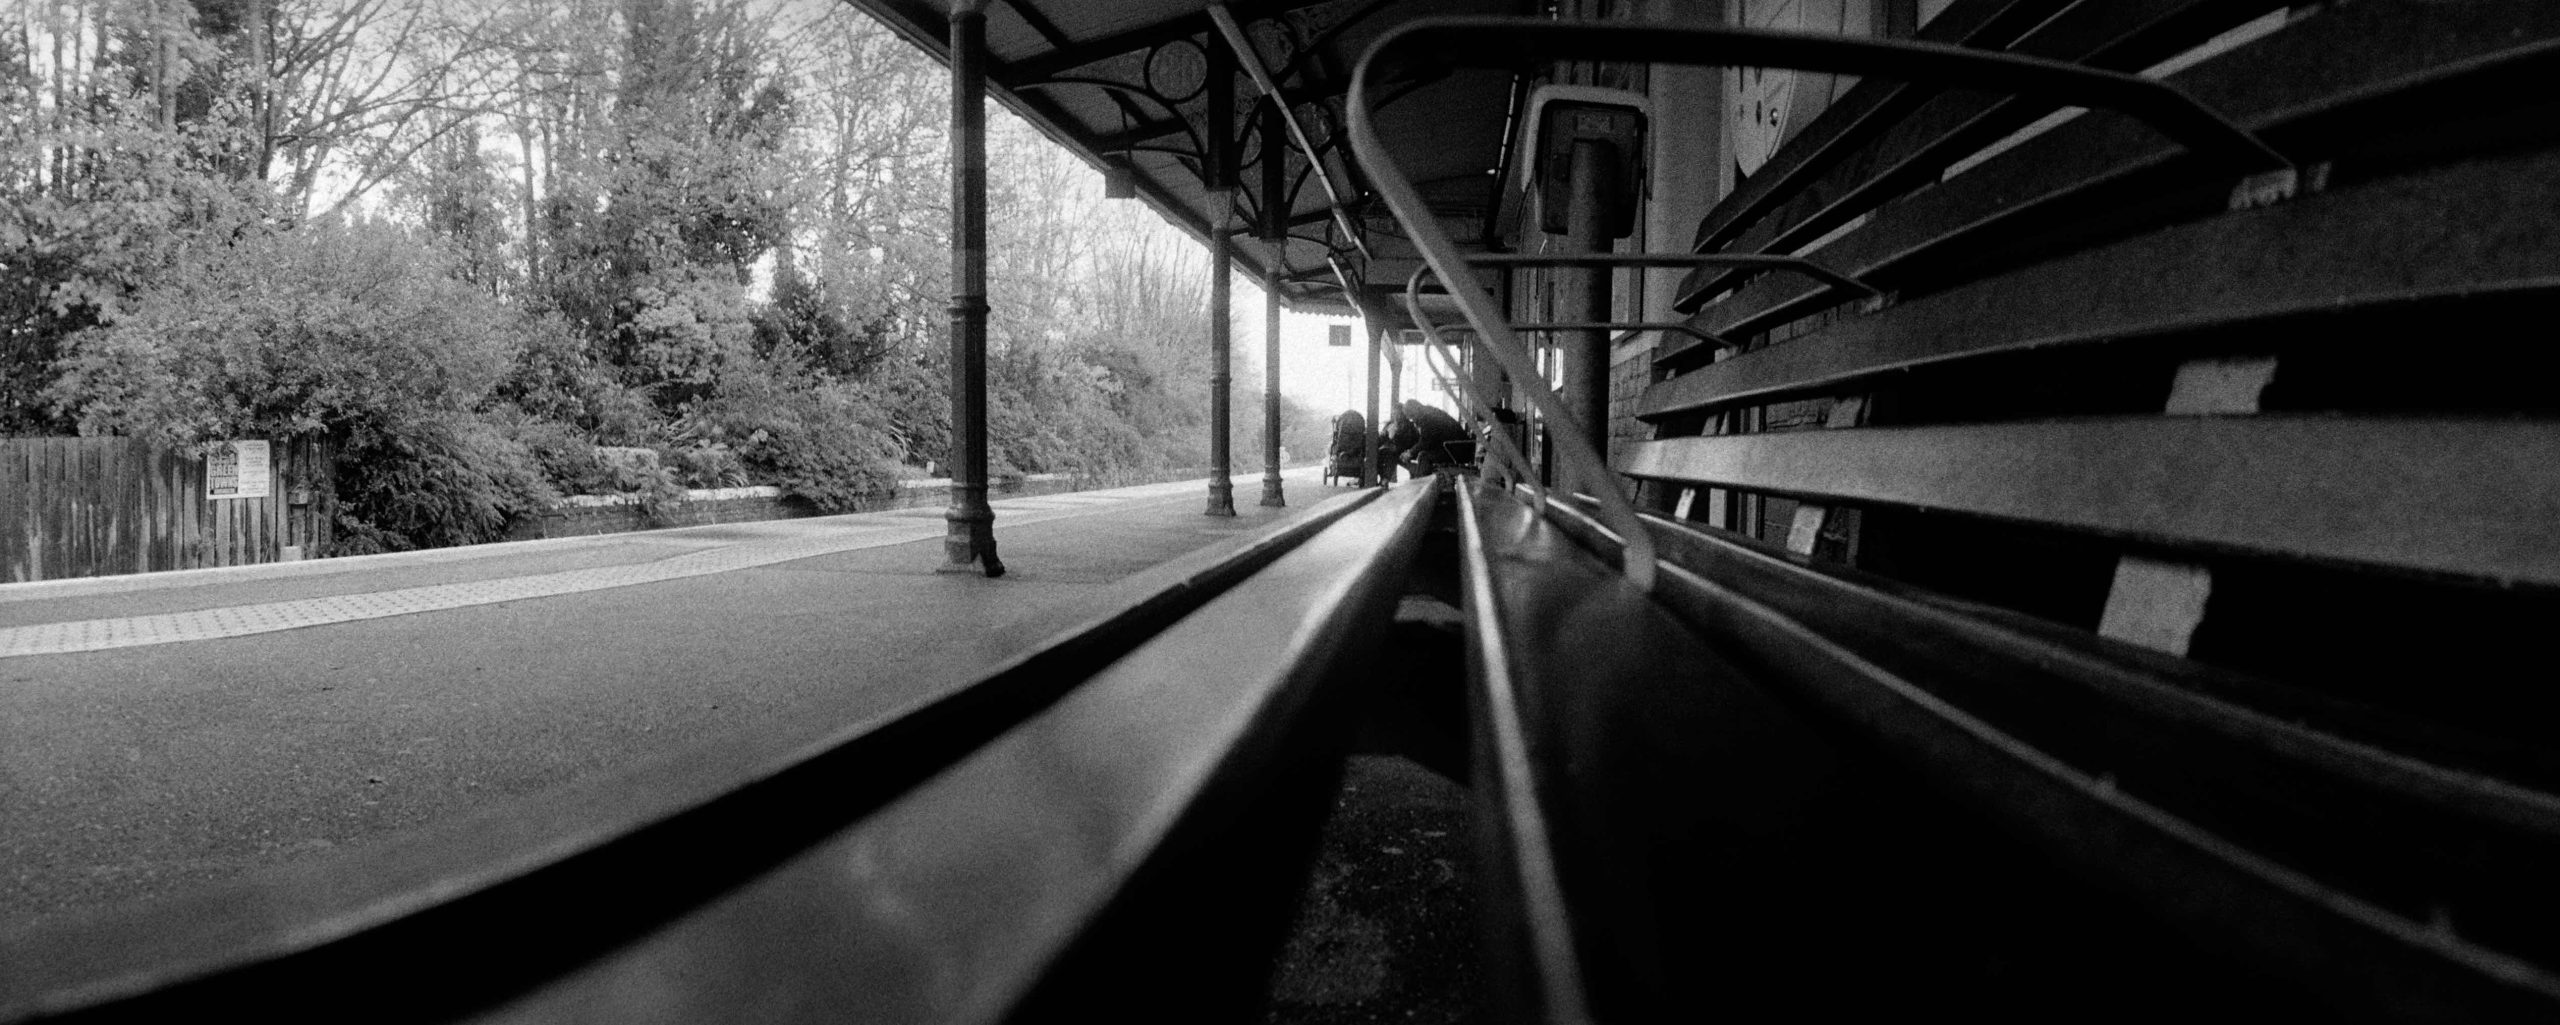
Reviewing my initial photographs provided a key insight into maximising the camera’s potential – the use of the Golden Ratio composition. The wide, sweeping 120∘ angle truly excels when you place something large and bold in the foreground, positioned to one side. This anchoring element allows the rest of the expansive scene to dramatically drift off toward the horizon. I saw this principle clearly in the photograph of the train station, and the portrait of the train driver reinforced this powerful compositional strategy.
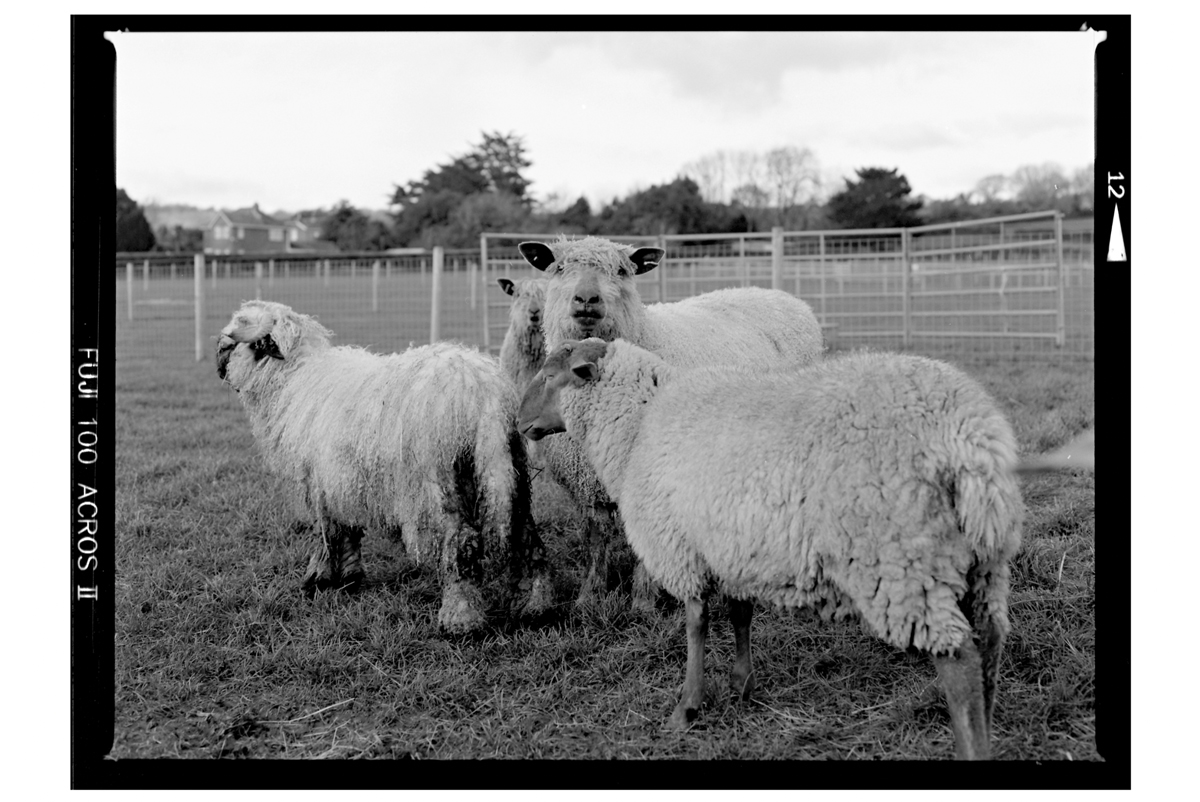
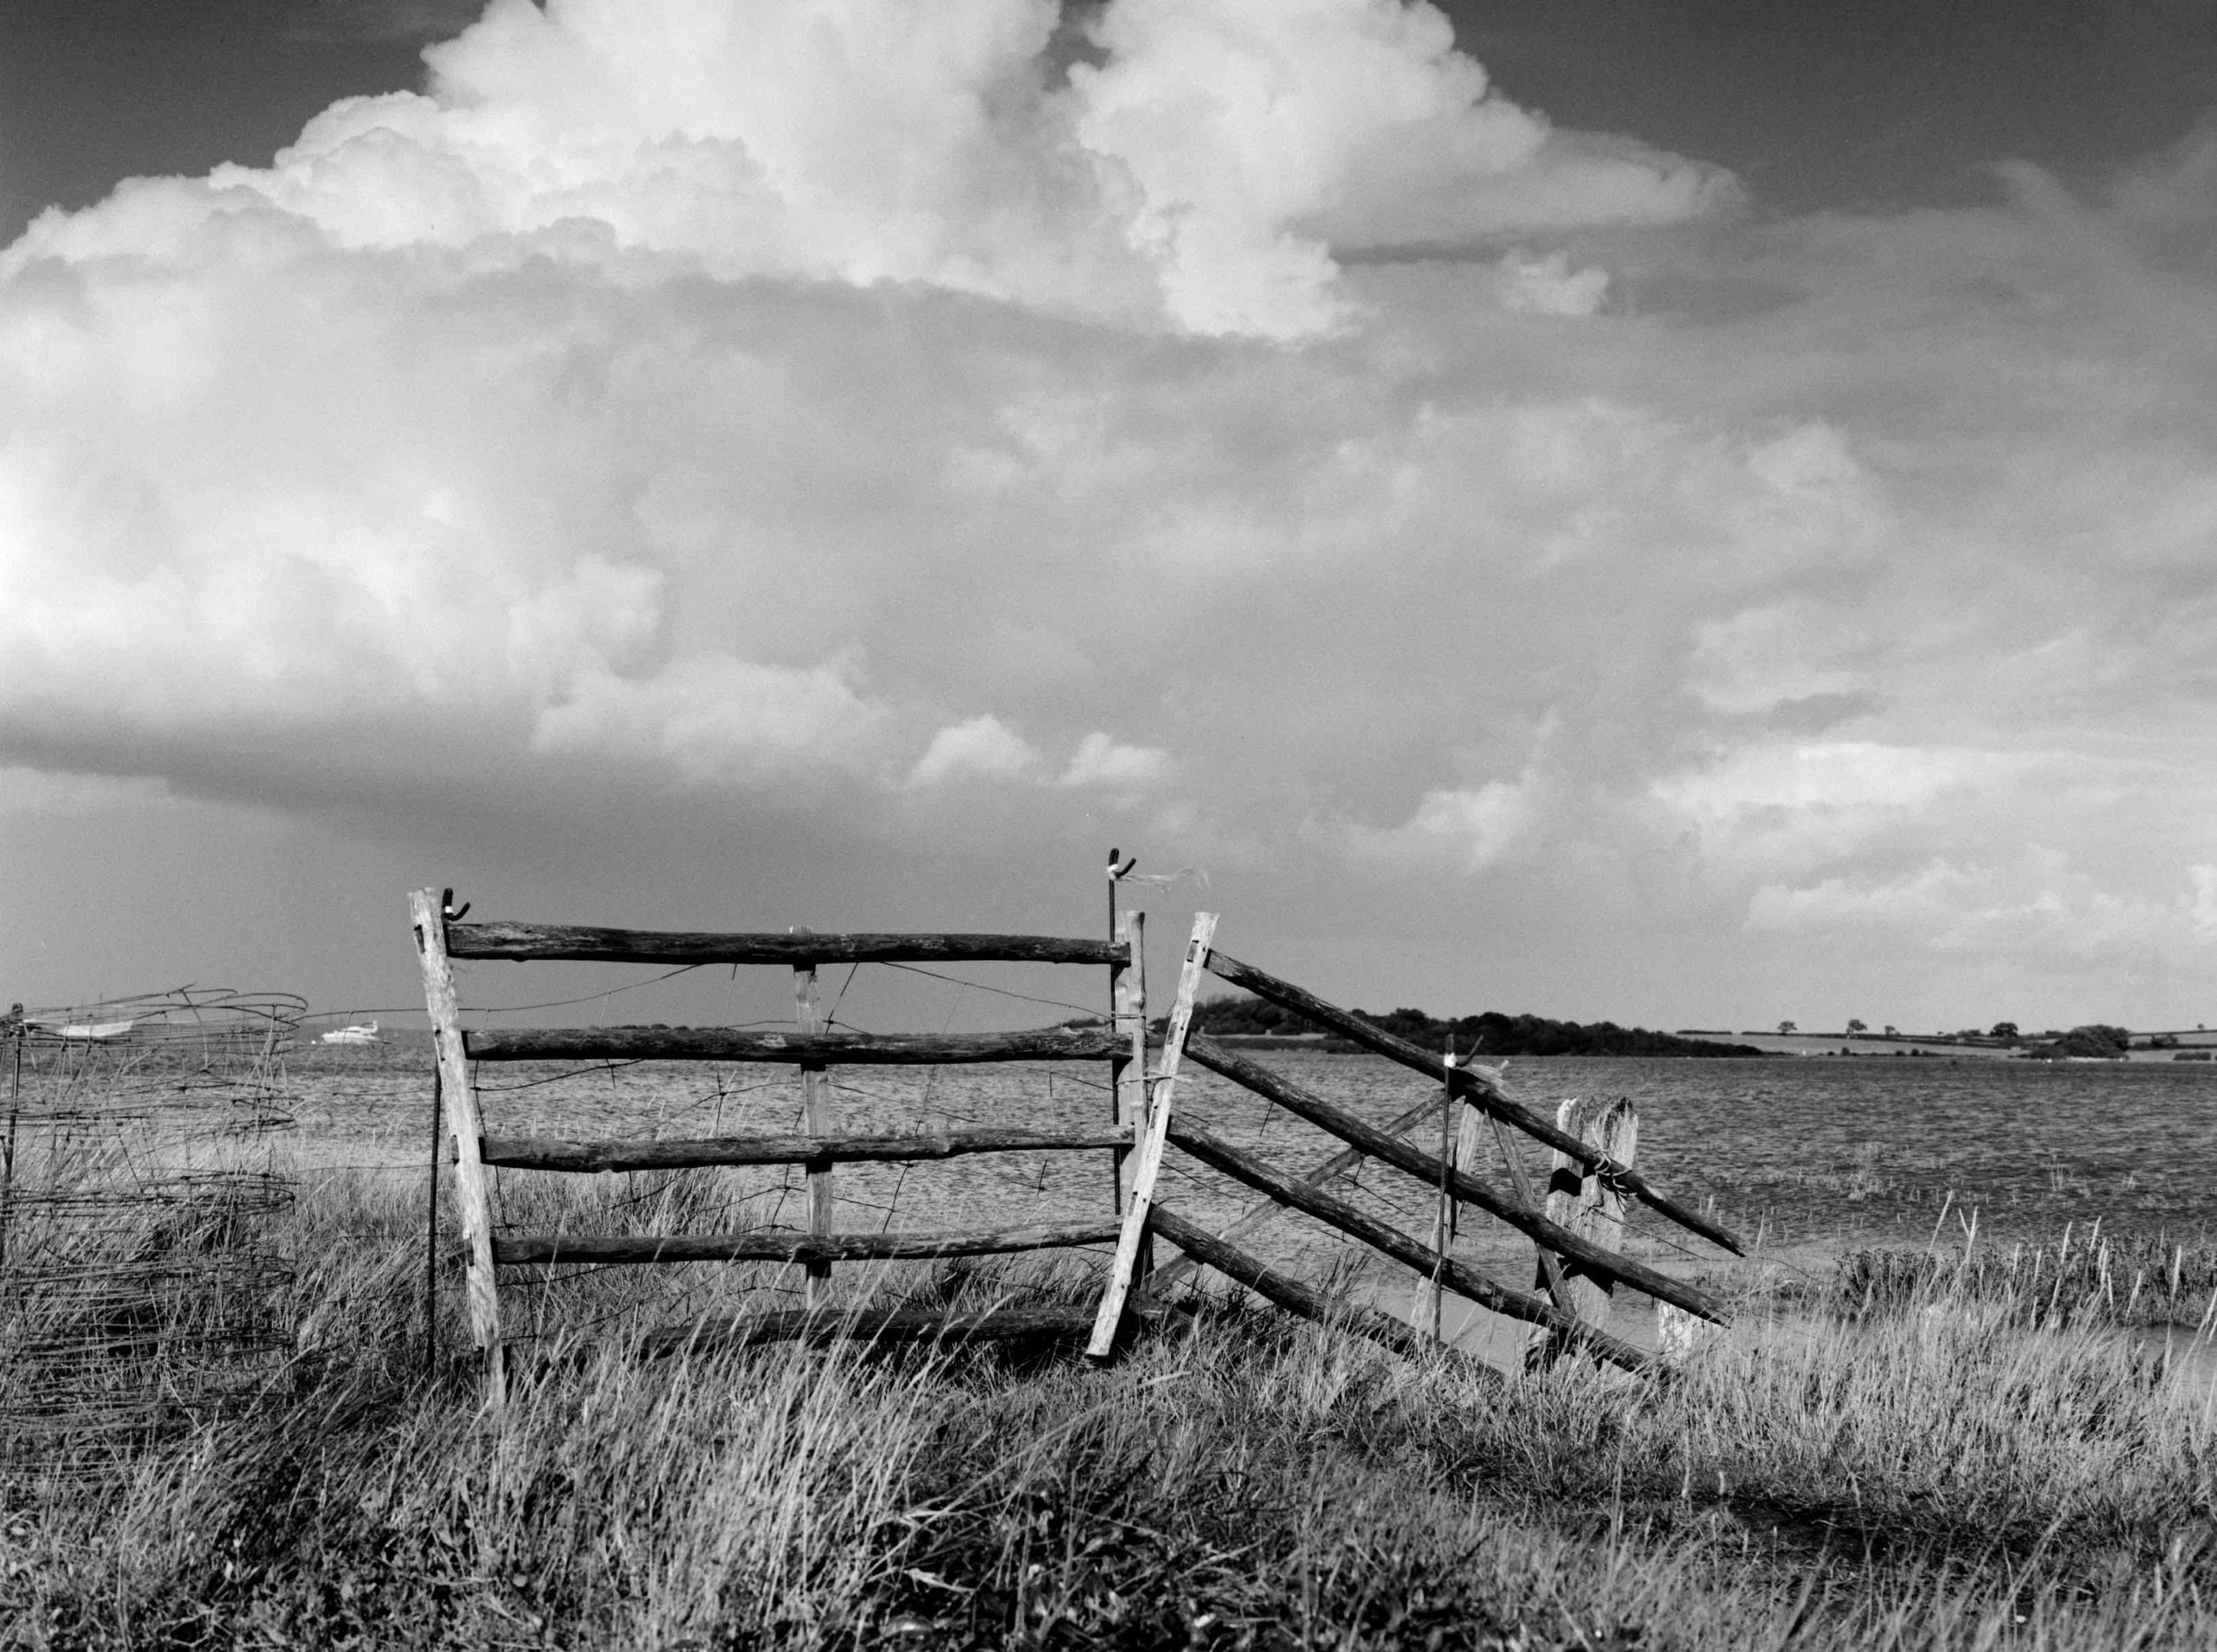
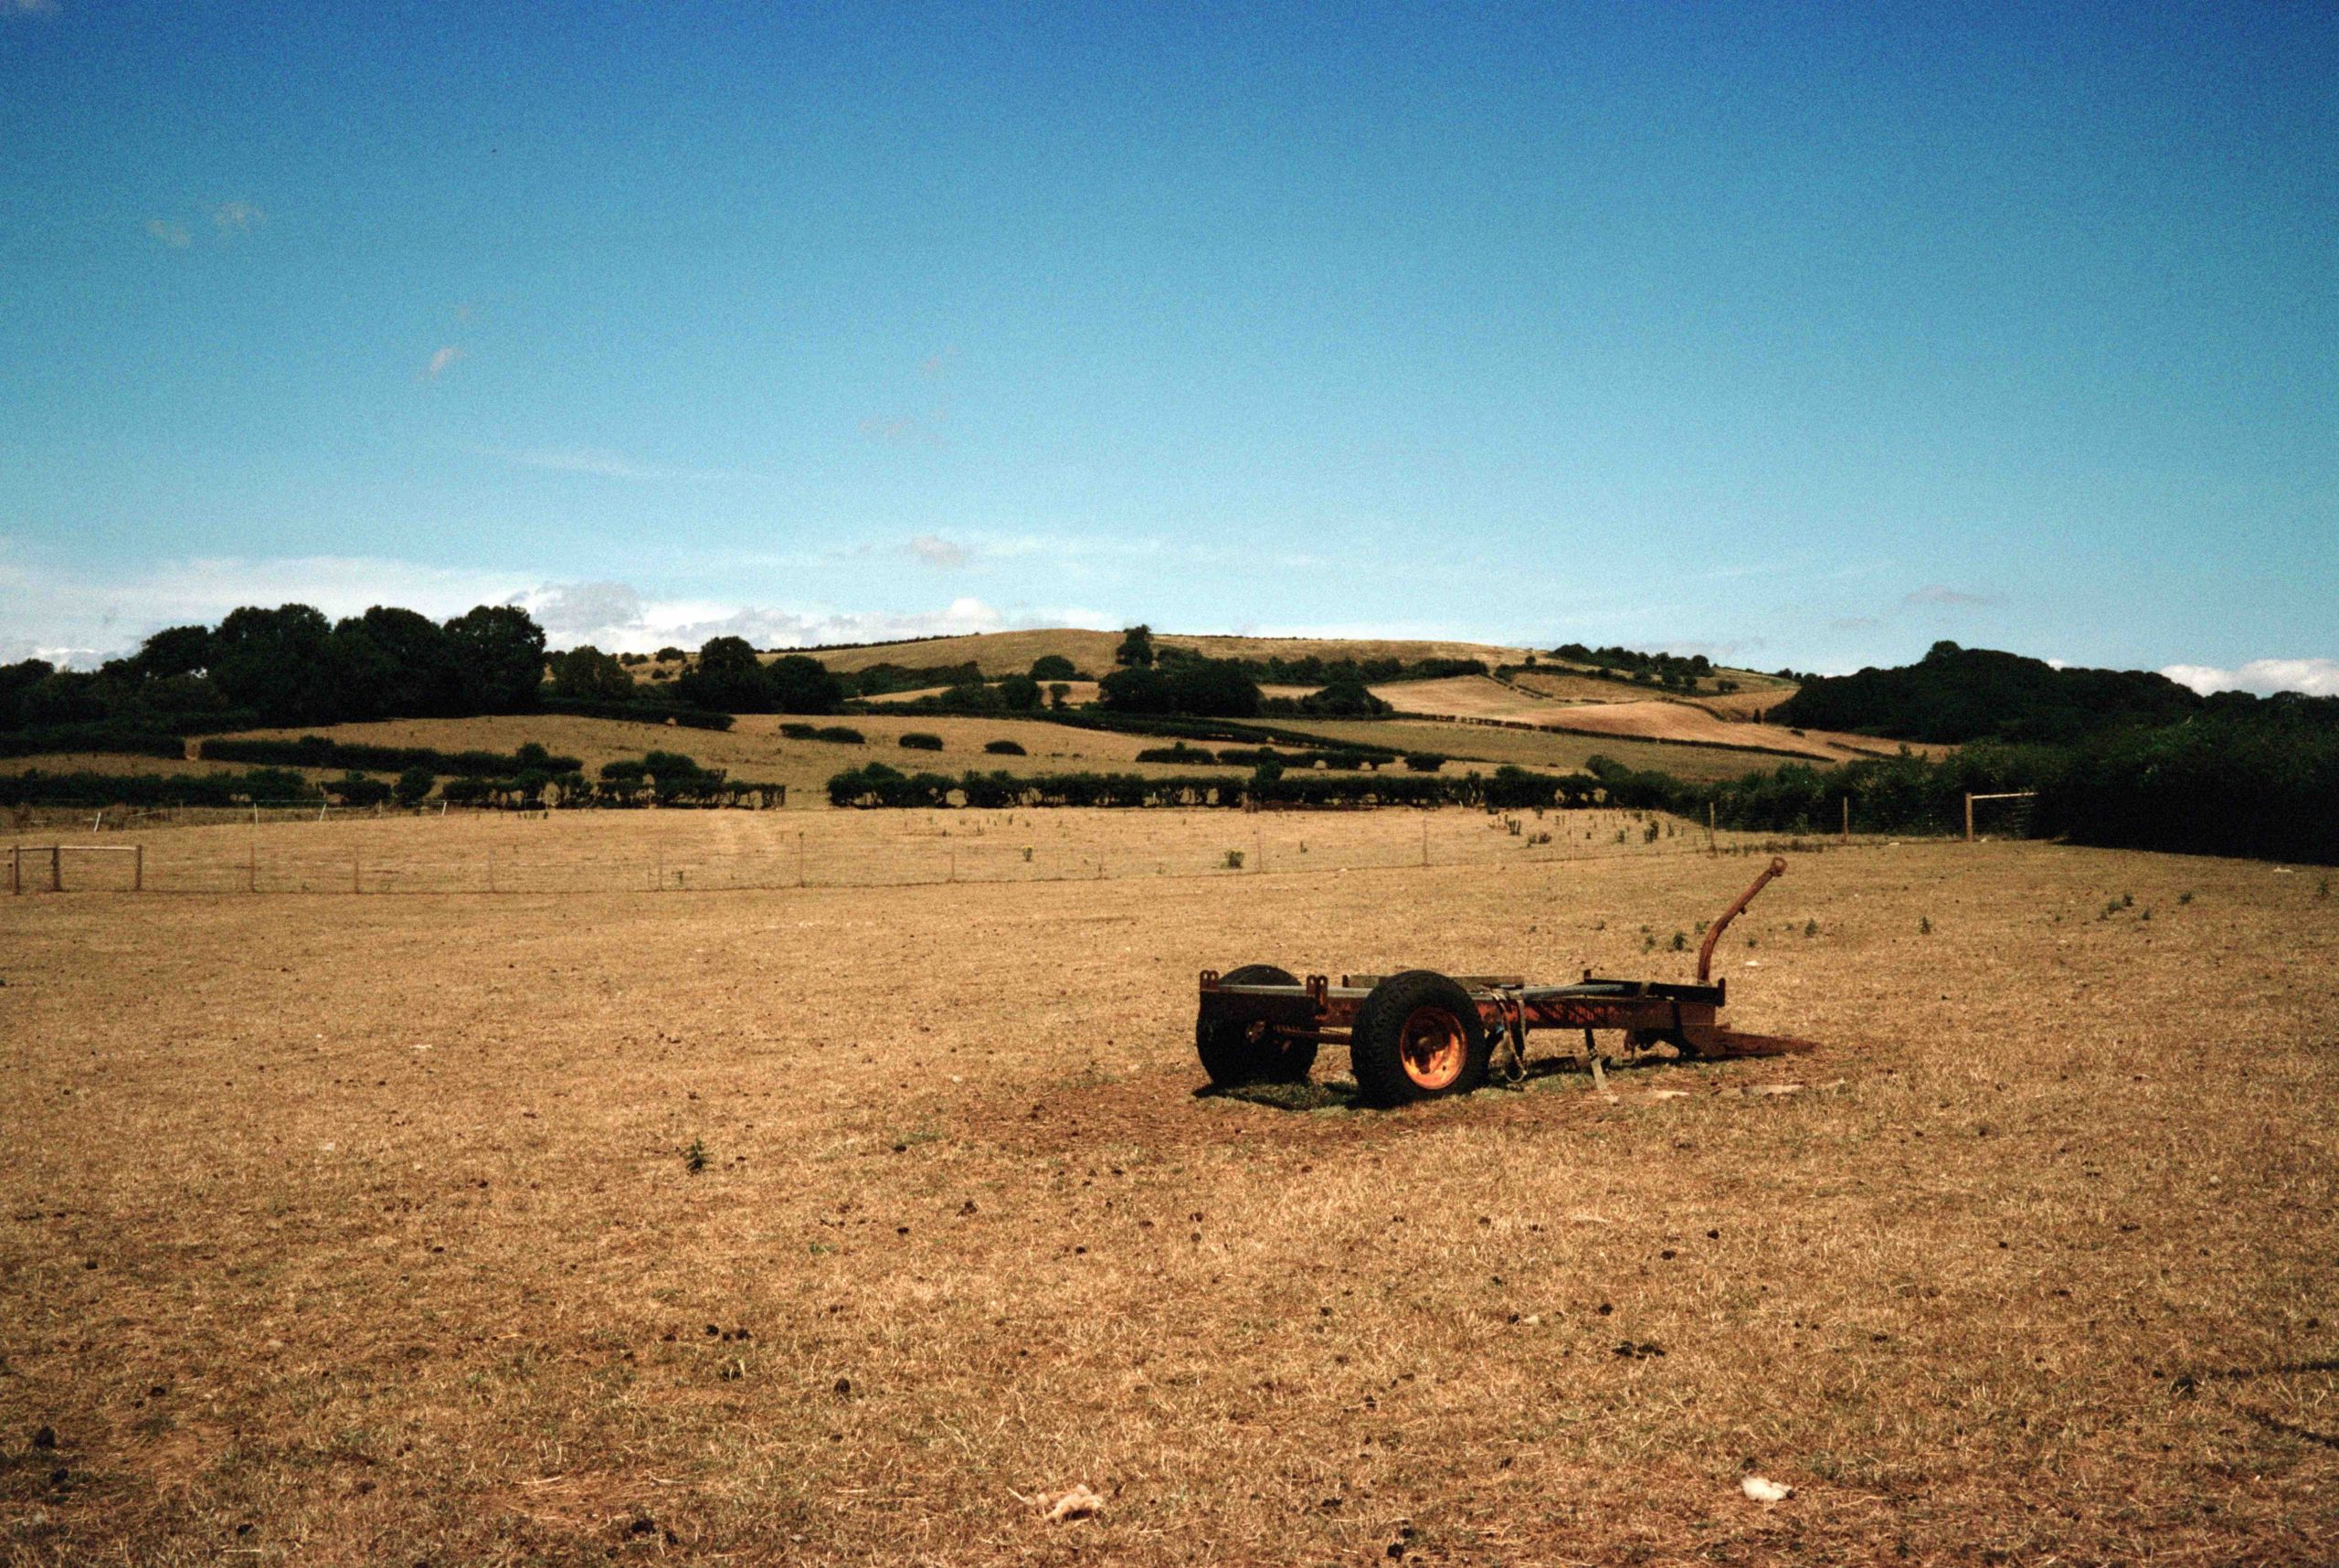
So, with my next test, this time with Ilford Delta 400 I went to the farm to try this composition style out.
And these were taken with Dragon No1 film (100).
What about vertical?
I took a few vertical shots but I was far from happy with the outcome. They felt too skinny. I also noticed the curvature on the buildings and also on the bin in the middle photo.
Final thought
Did I enjoy shooting the Horizon? Absolutely! It offers a delightfully fun and no-fuss approach to photography, sharing a simple, freeing ethos similar to Pinhole or Holga cameras. Once the (correctly loaded!) film is secured, your only worries are composition and ambient light.
This brings us to the other shutter speed! A full half a second (1/2s). I tested this slow setting on a bench in a very dimly lit area, and the results were surprisingly good. However, heed this warning, if the lighting is even slightly too bright for 1/2s, you will quickly venture into severe overexposure territory. Use it judiciously, and ideally only in truly darker conditions. Unless you are shooting a 25 ISO film!
As my test shots show, the first long exposure (taken under the train station shelter) came out well, while the outdoor bench shot was naturally overexposed. I had to try, but honestly, I’m not sure how often I would use the 1/2s shutter speed in the future—especially since the camera lacks a tripod mount, making stabilisation a serious challenge.
Despite that minor limitation, I thoroughly enjoyed the experience and have a few more specific scenes I want to capture before the camera goes back to Iain.
Panoramic Inspiration: Jeff Bridges and the Widelux
This journey brings to mind actor Jeff Bridges, an avid panoramic photographer who famously uses the similar Widelux camera. His work is undeniably excellent, but it’s important to remember that his online galleries are curated from decades of shooting. I imagine he has accumulated many “failures” over the years.
This highlights a crucial point. The Lomo Horizon is likely a brilliant camera for a long-term “Panoramic Project.” By committing to shooting countless rolls across many scenes and moments, you would eventually compile enough successful, captivating images for a truly interesting picture book. Extensive use allows you to consistently capture those fleeting good moments perfectly suited for the expansive panoramic format.
Alternatively, if you already have photography projects in progress using standard formats, adding a few sweeping panoramic pictures into the mix would instantly inject an intriguing new perspective and scale into your collection.
Thanks for bring it over Iain. And thanks for bringing the Pentax 17 back.
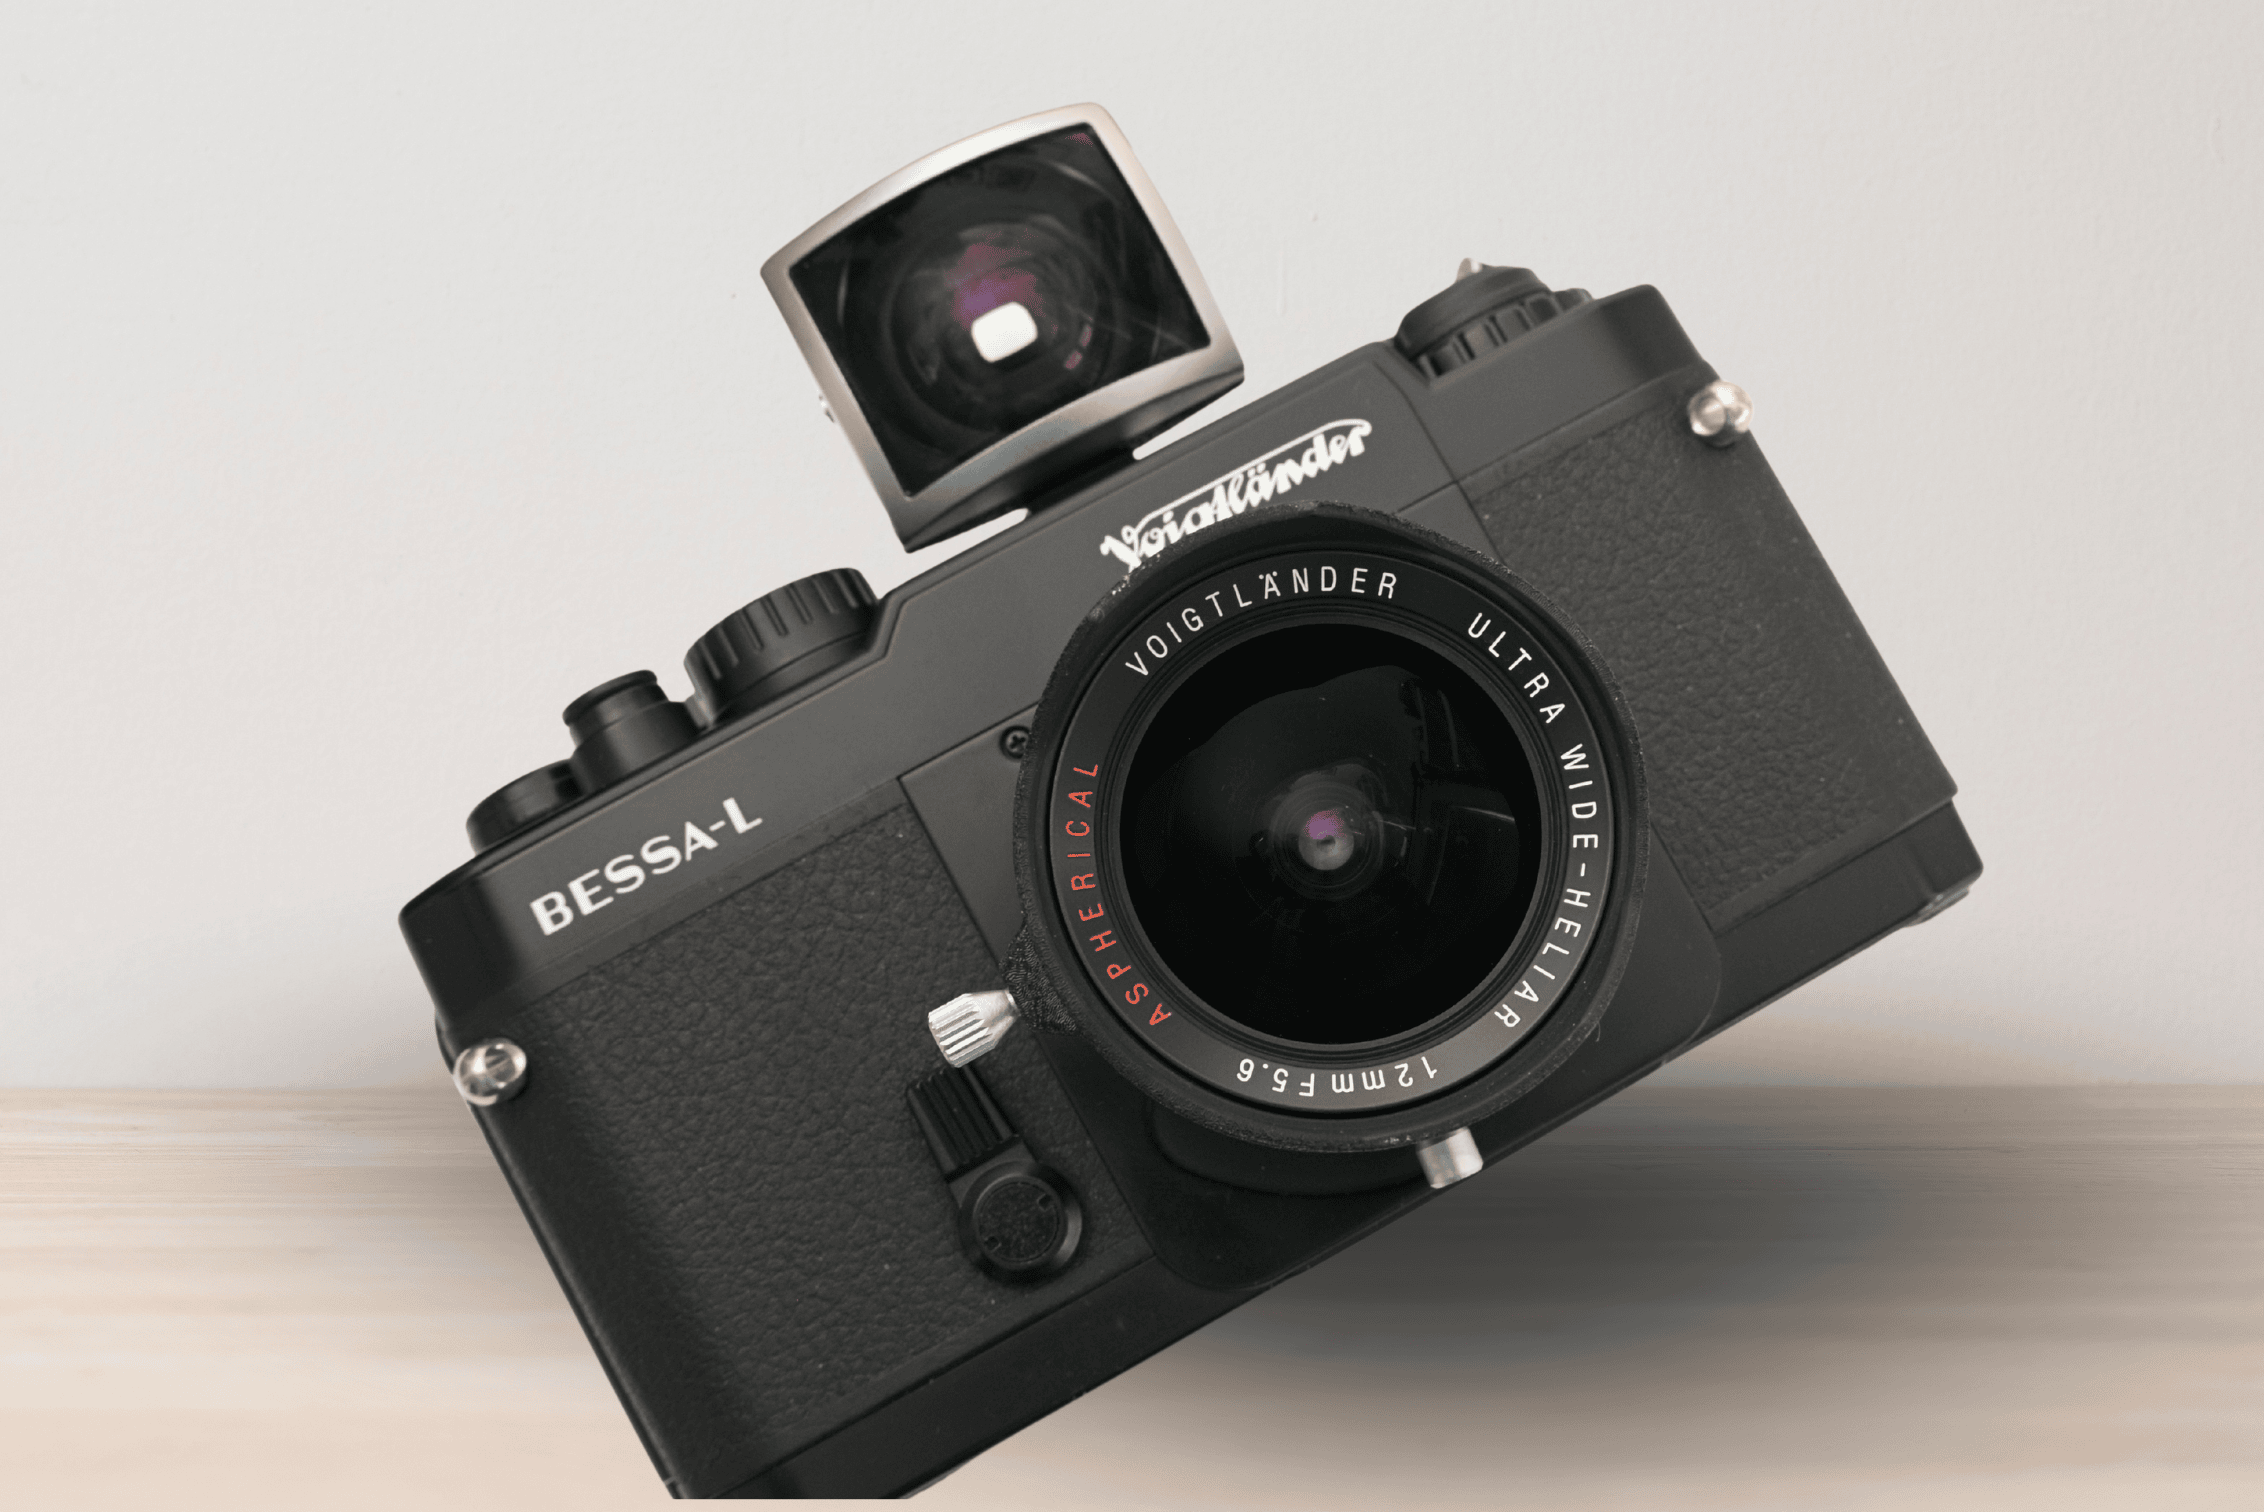
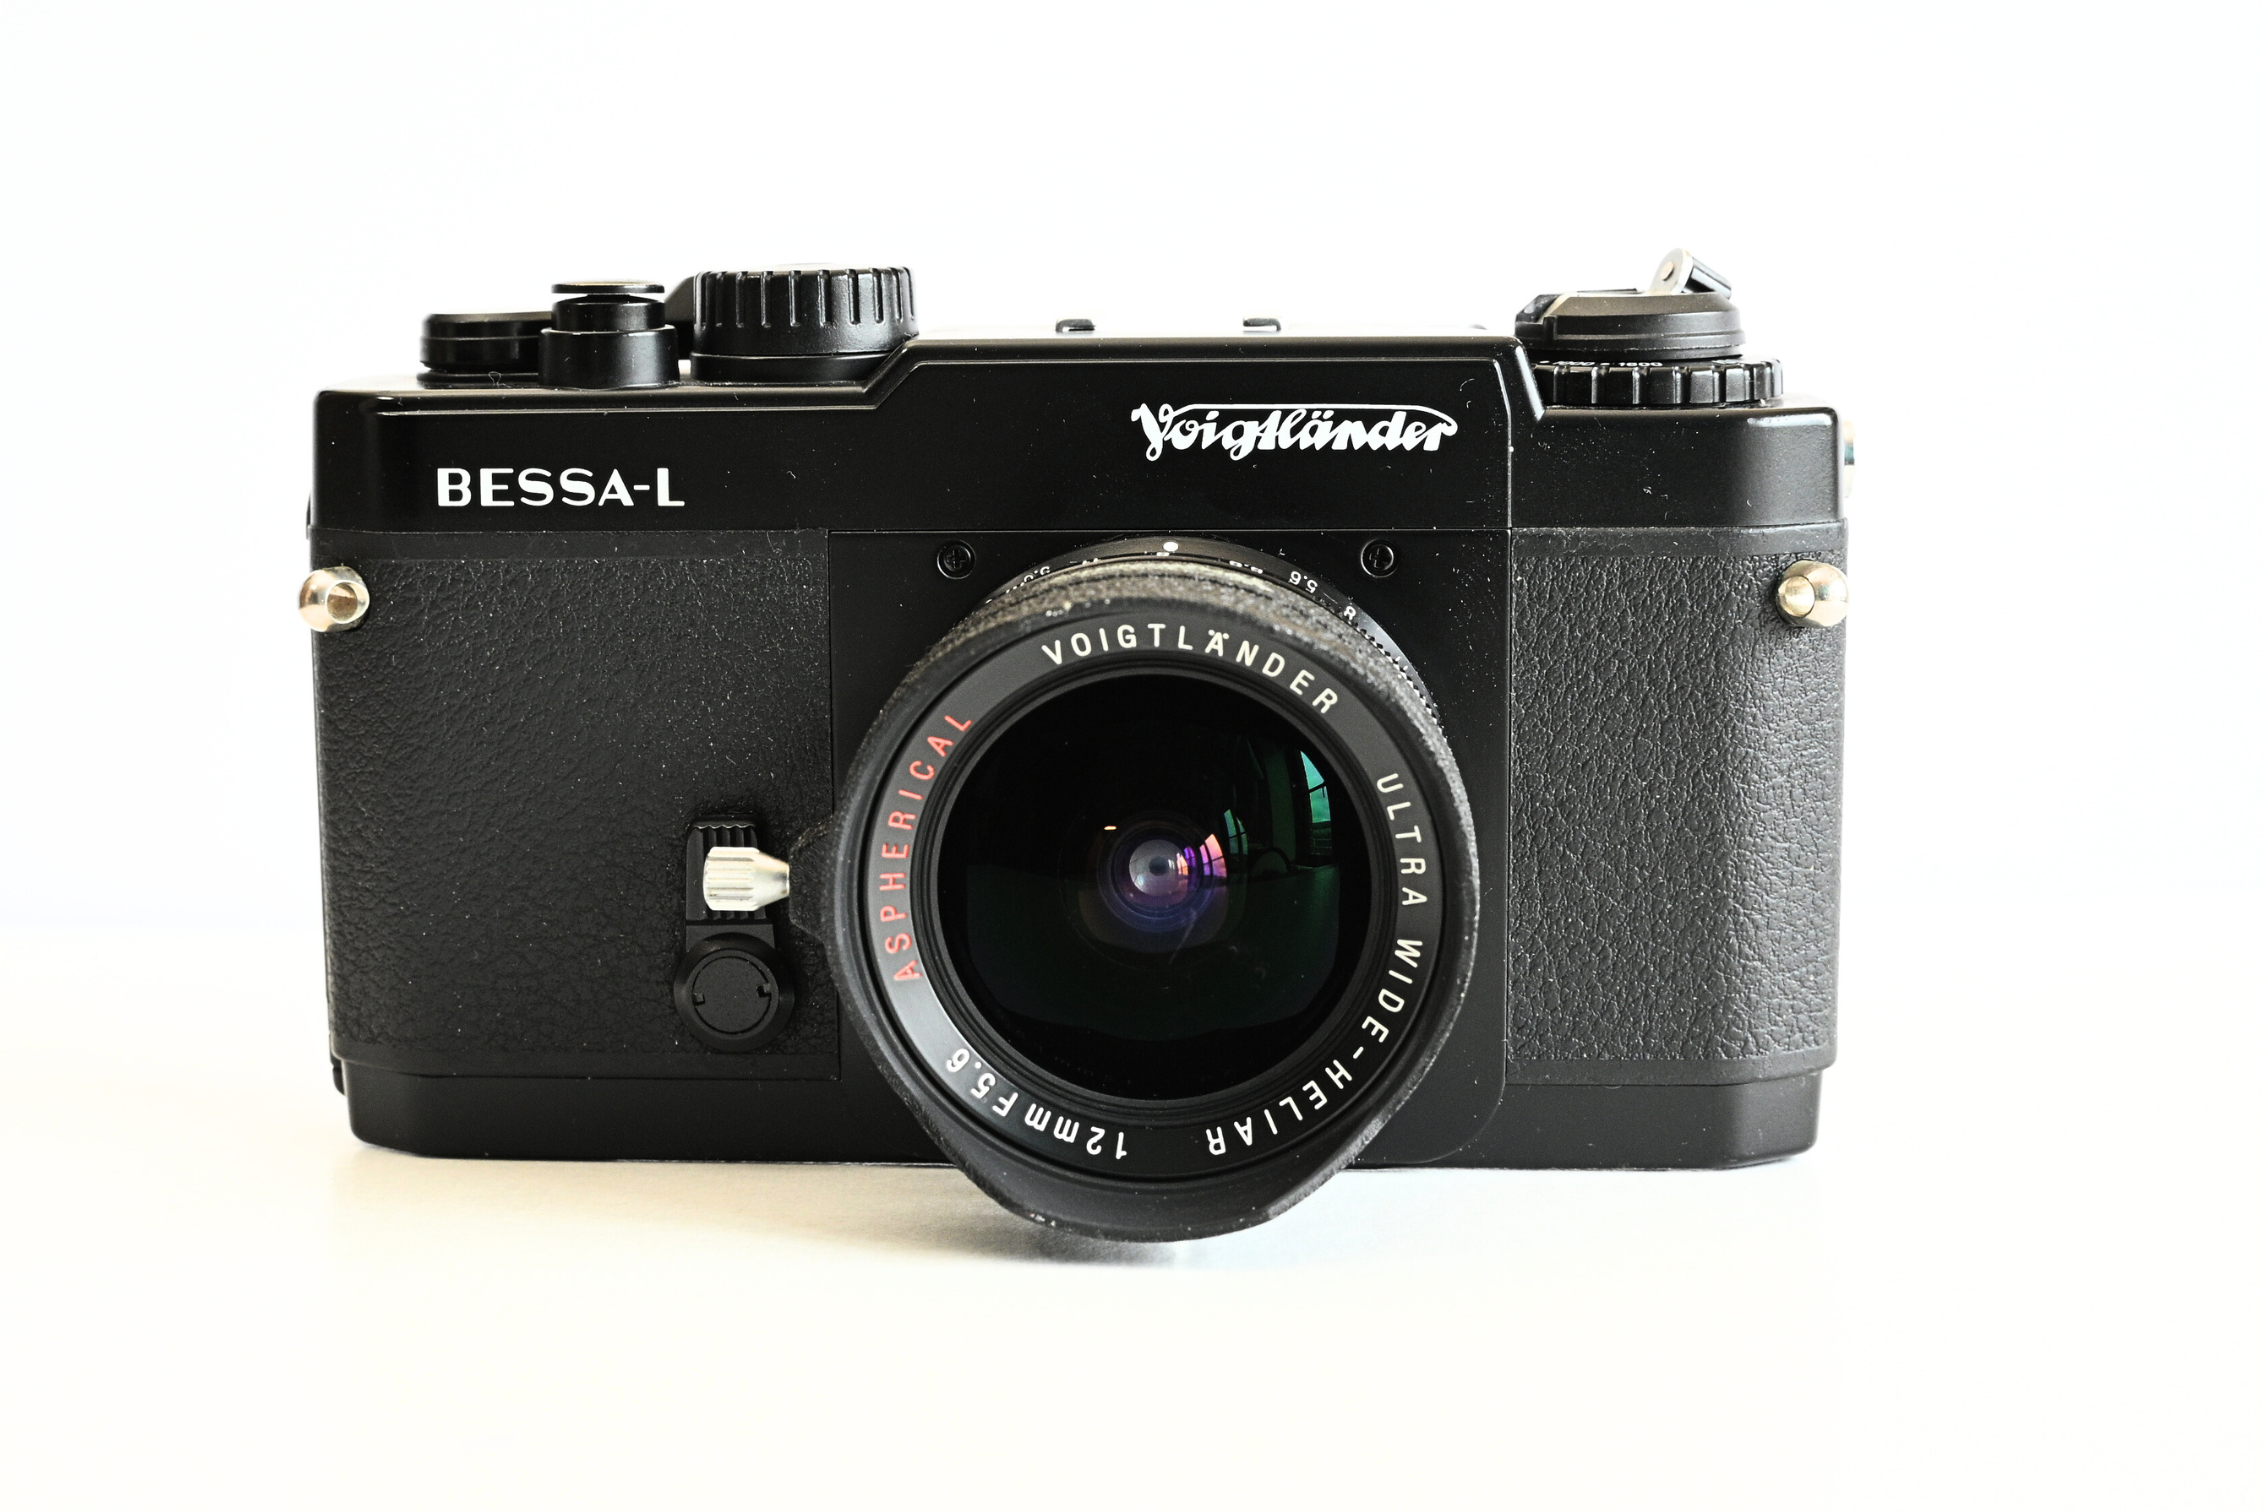
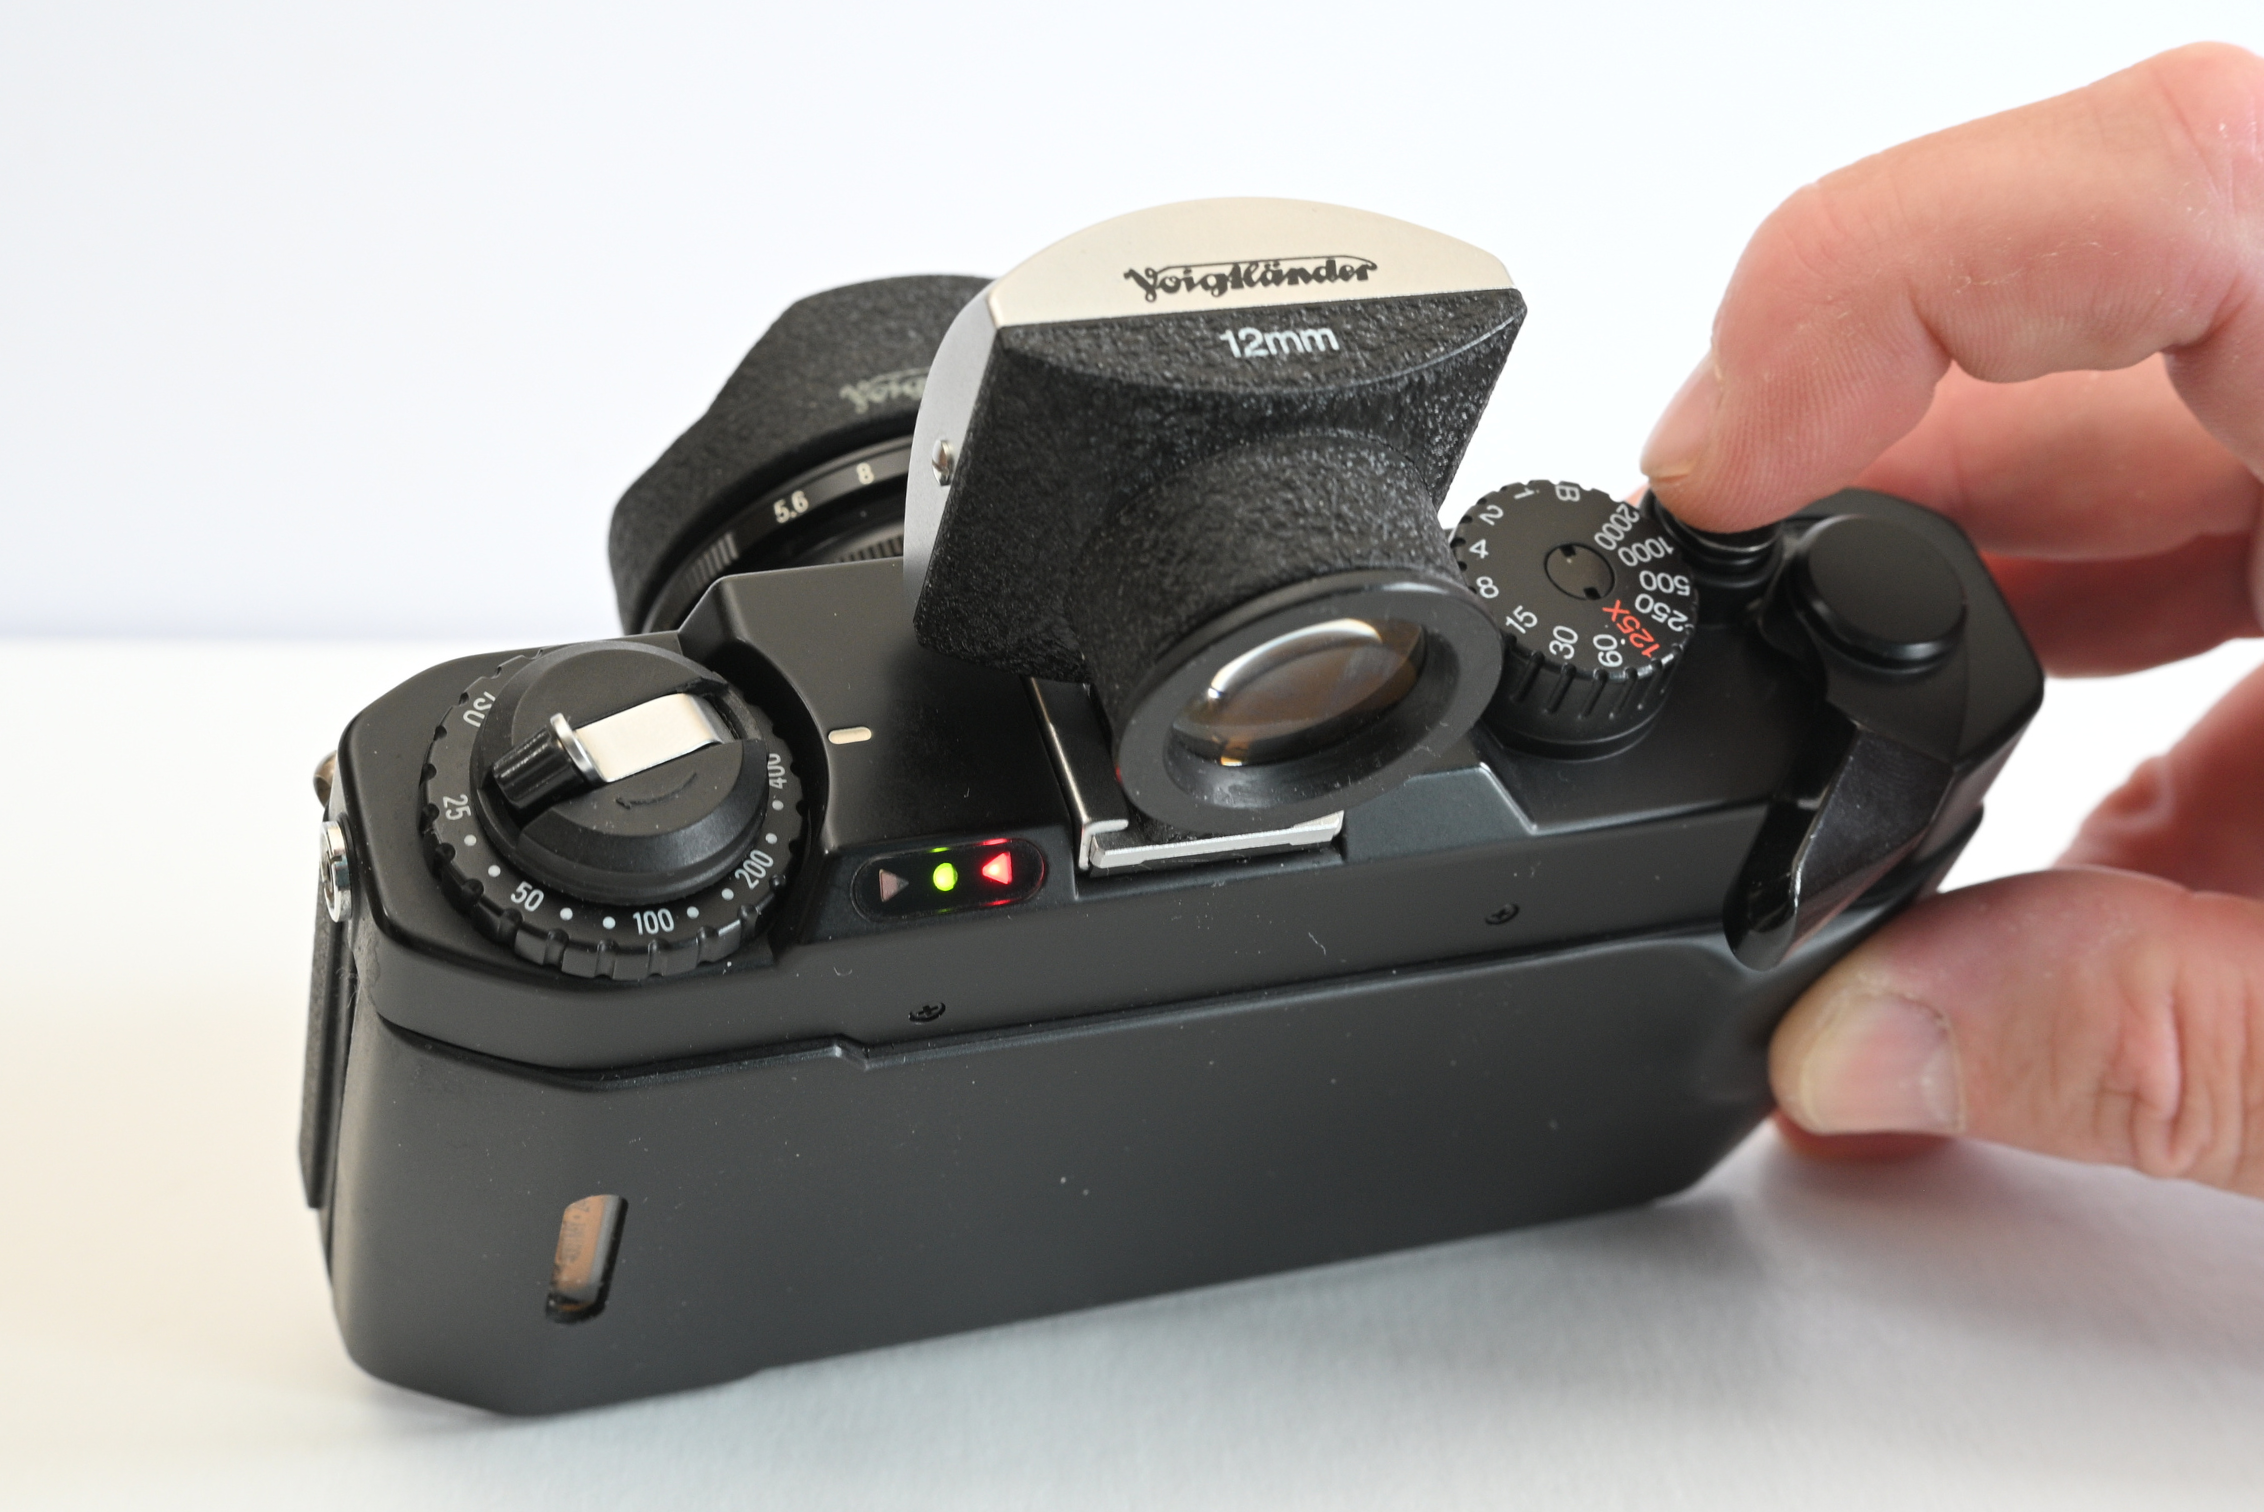
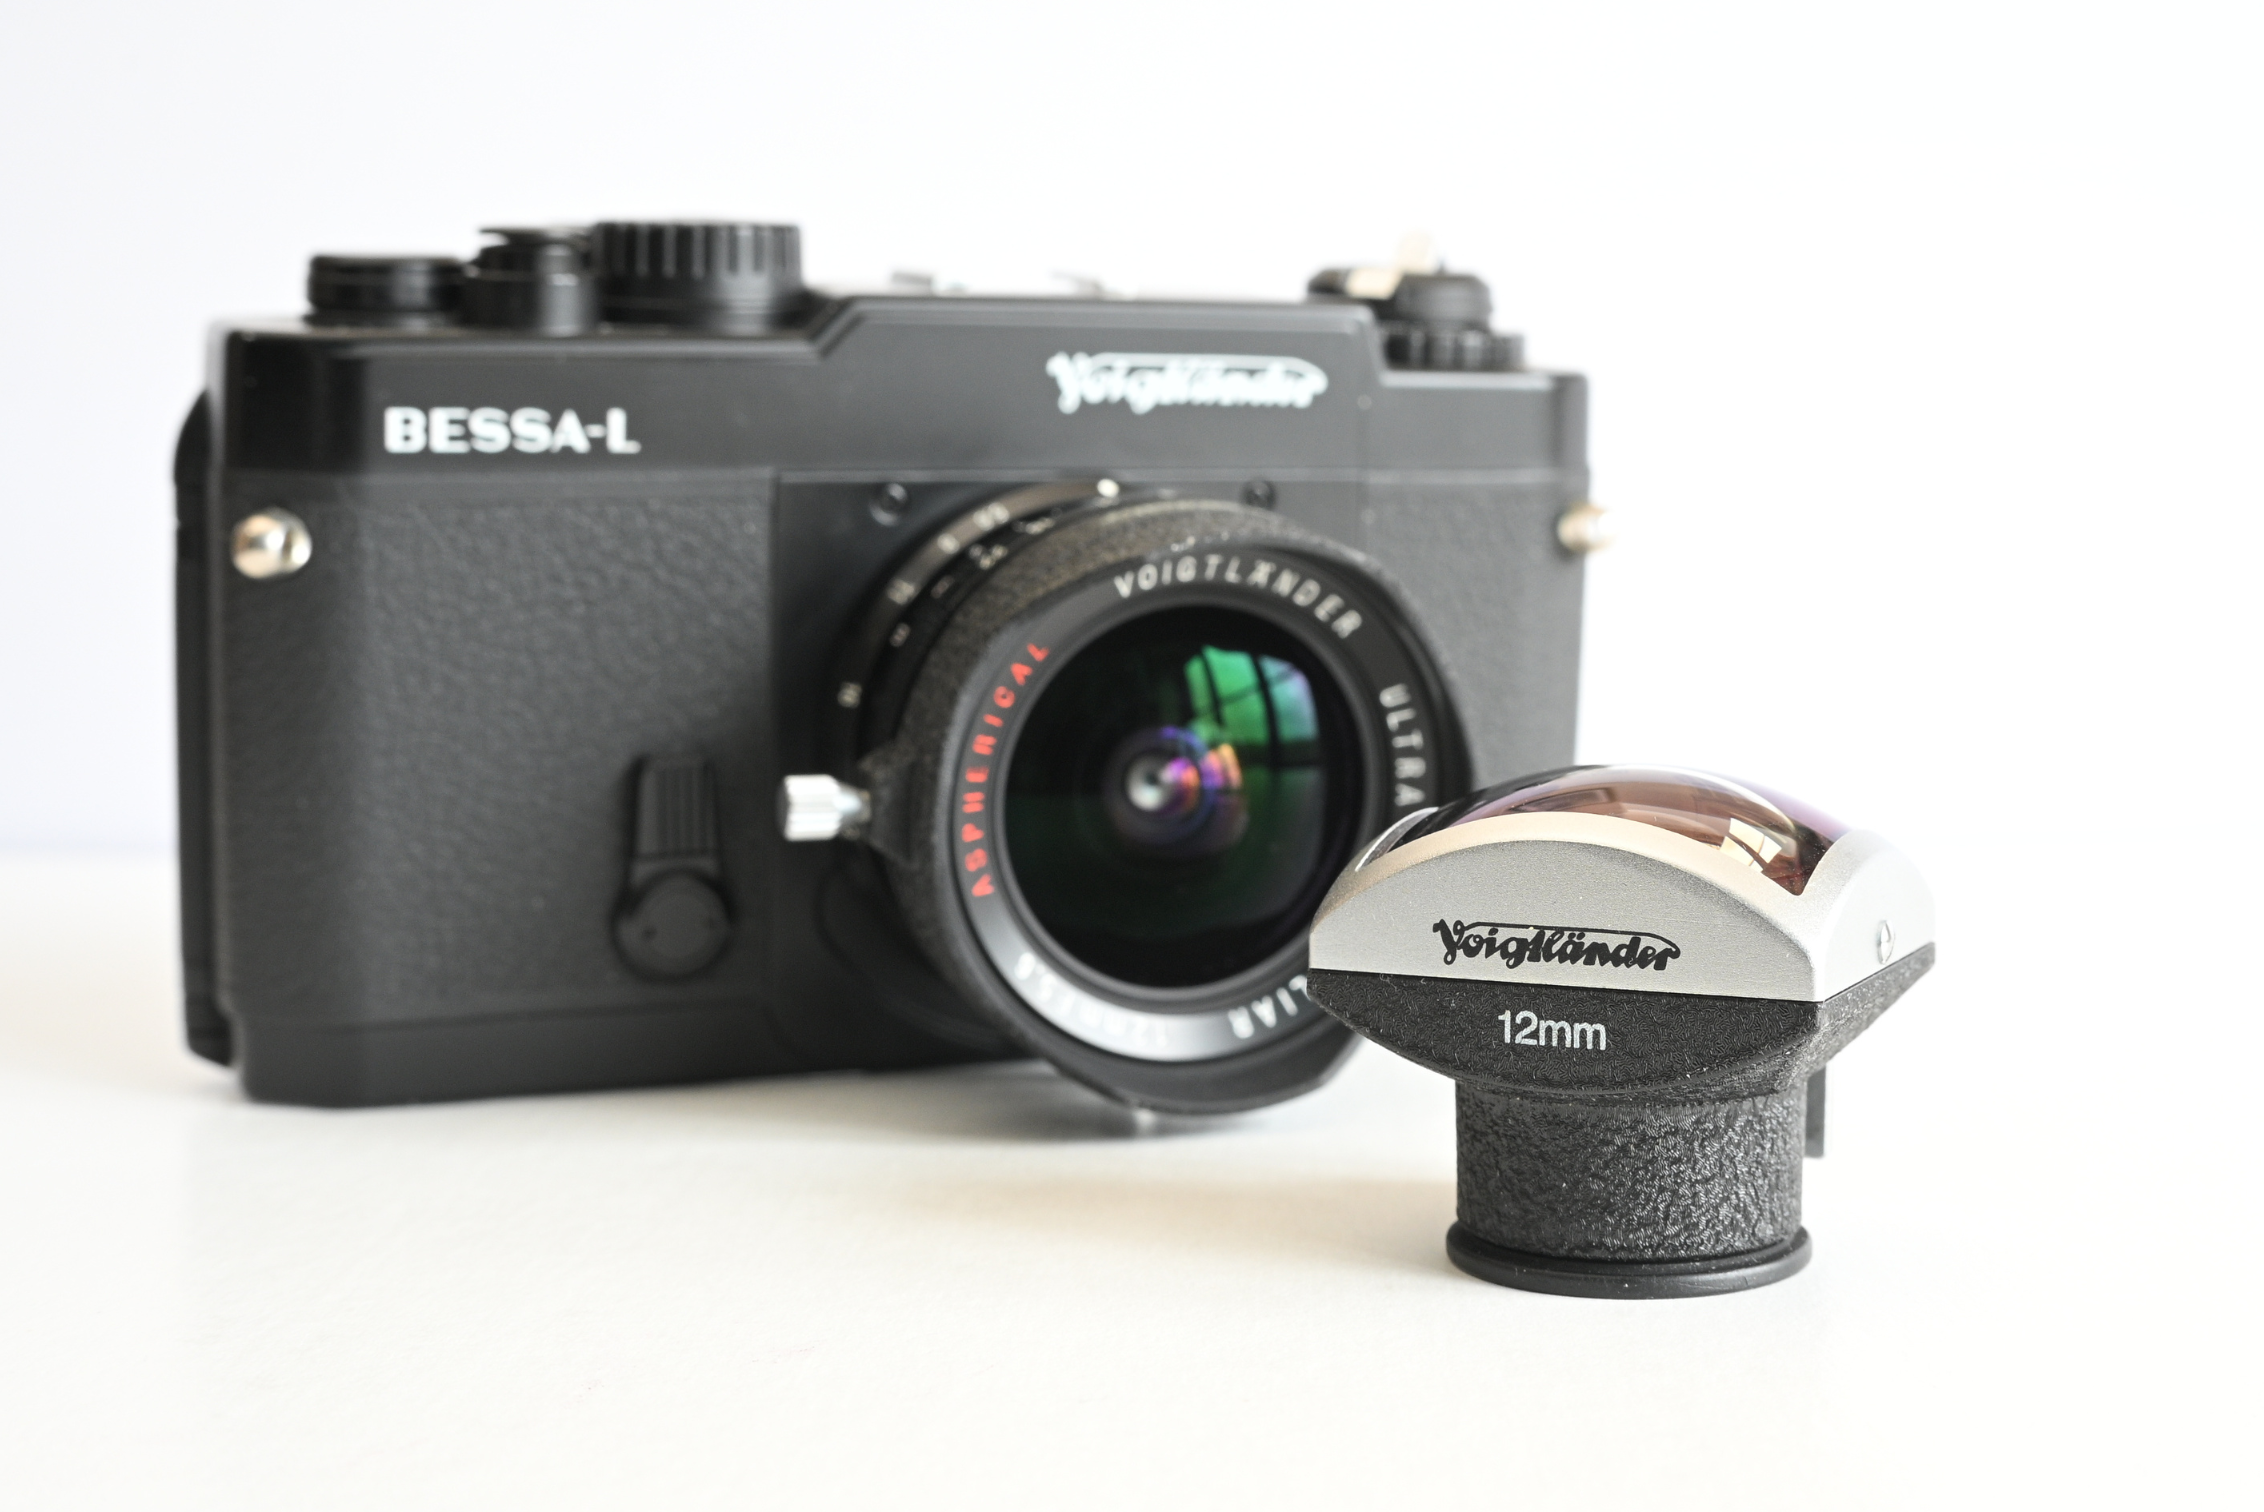
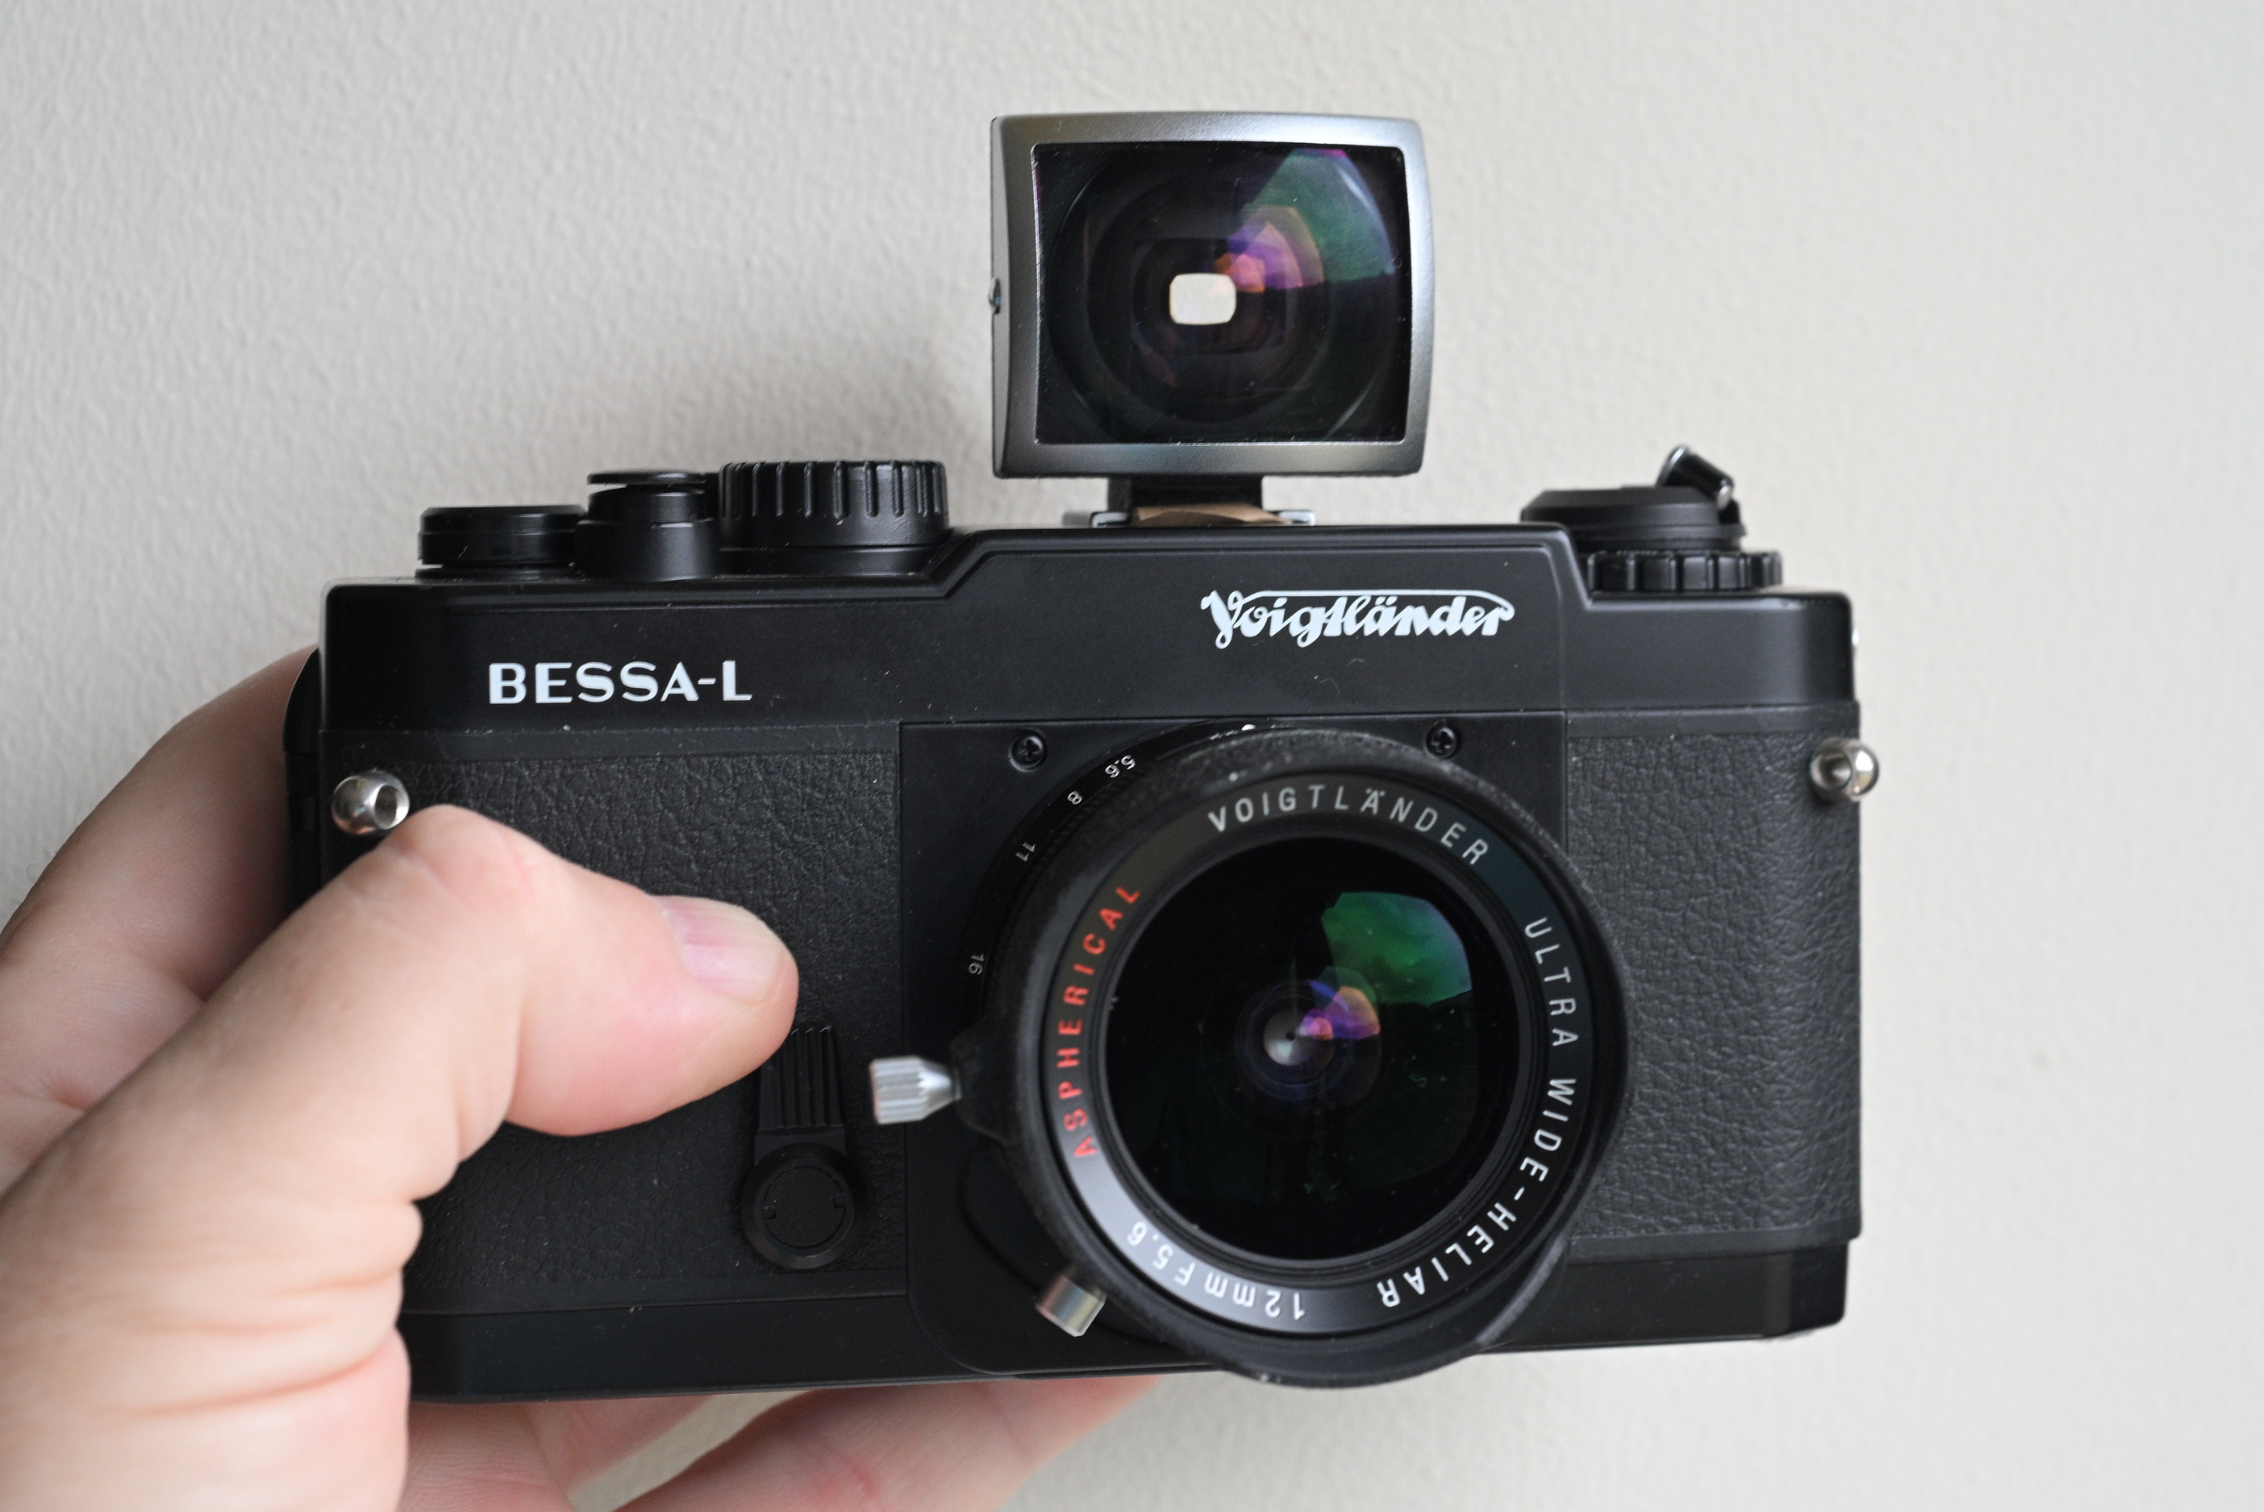
A new camera to my collection of 35mm film cameras, the Voigtlander Bessa L featuring the Ultra Wide Heliar 12mm f5.6 sLens. This has certainly put a cat amongst the pigeons with my compositions!
What is this camera?
The Voigtlander Bessa L isn’t a camera for everyone, and that’s precisely what makes it so special. At first glance, this 35mm film camera might seem a bit basic, which it is! A camera with no built-in viewfinder and no rangefinder. But this minimalist design is not a flaw. It’s a deliberate and brilliant choice by the manufacturer, Cosina, to create a versatile and remarkably lightweight body ideal for street, urban and event photography. And it’s hardly in your face!
The Bessa L was first introduced in 1999 and was produced until 2003. It was the camera that kicked off the entire modern Voigtlander Bessa line, proving there was a market for high quality, affordable 35mm rangefinder cameras and lenses.
Despite its minimalist appearance and lack of a built-in viewfinder, the Bessa L is far from a simple light-tight box. It boasts several features that make it a highly functional and modern tool for film photography. The camera is fully mechanical and includes a bright and clear through-the-lens(TTL) light meter with a simple three-LED readout. Two LR44 batteries are required to power the meter but being fully mechanical it needs no batteries to shoot at all speeds.
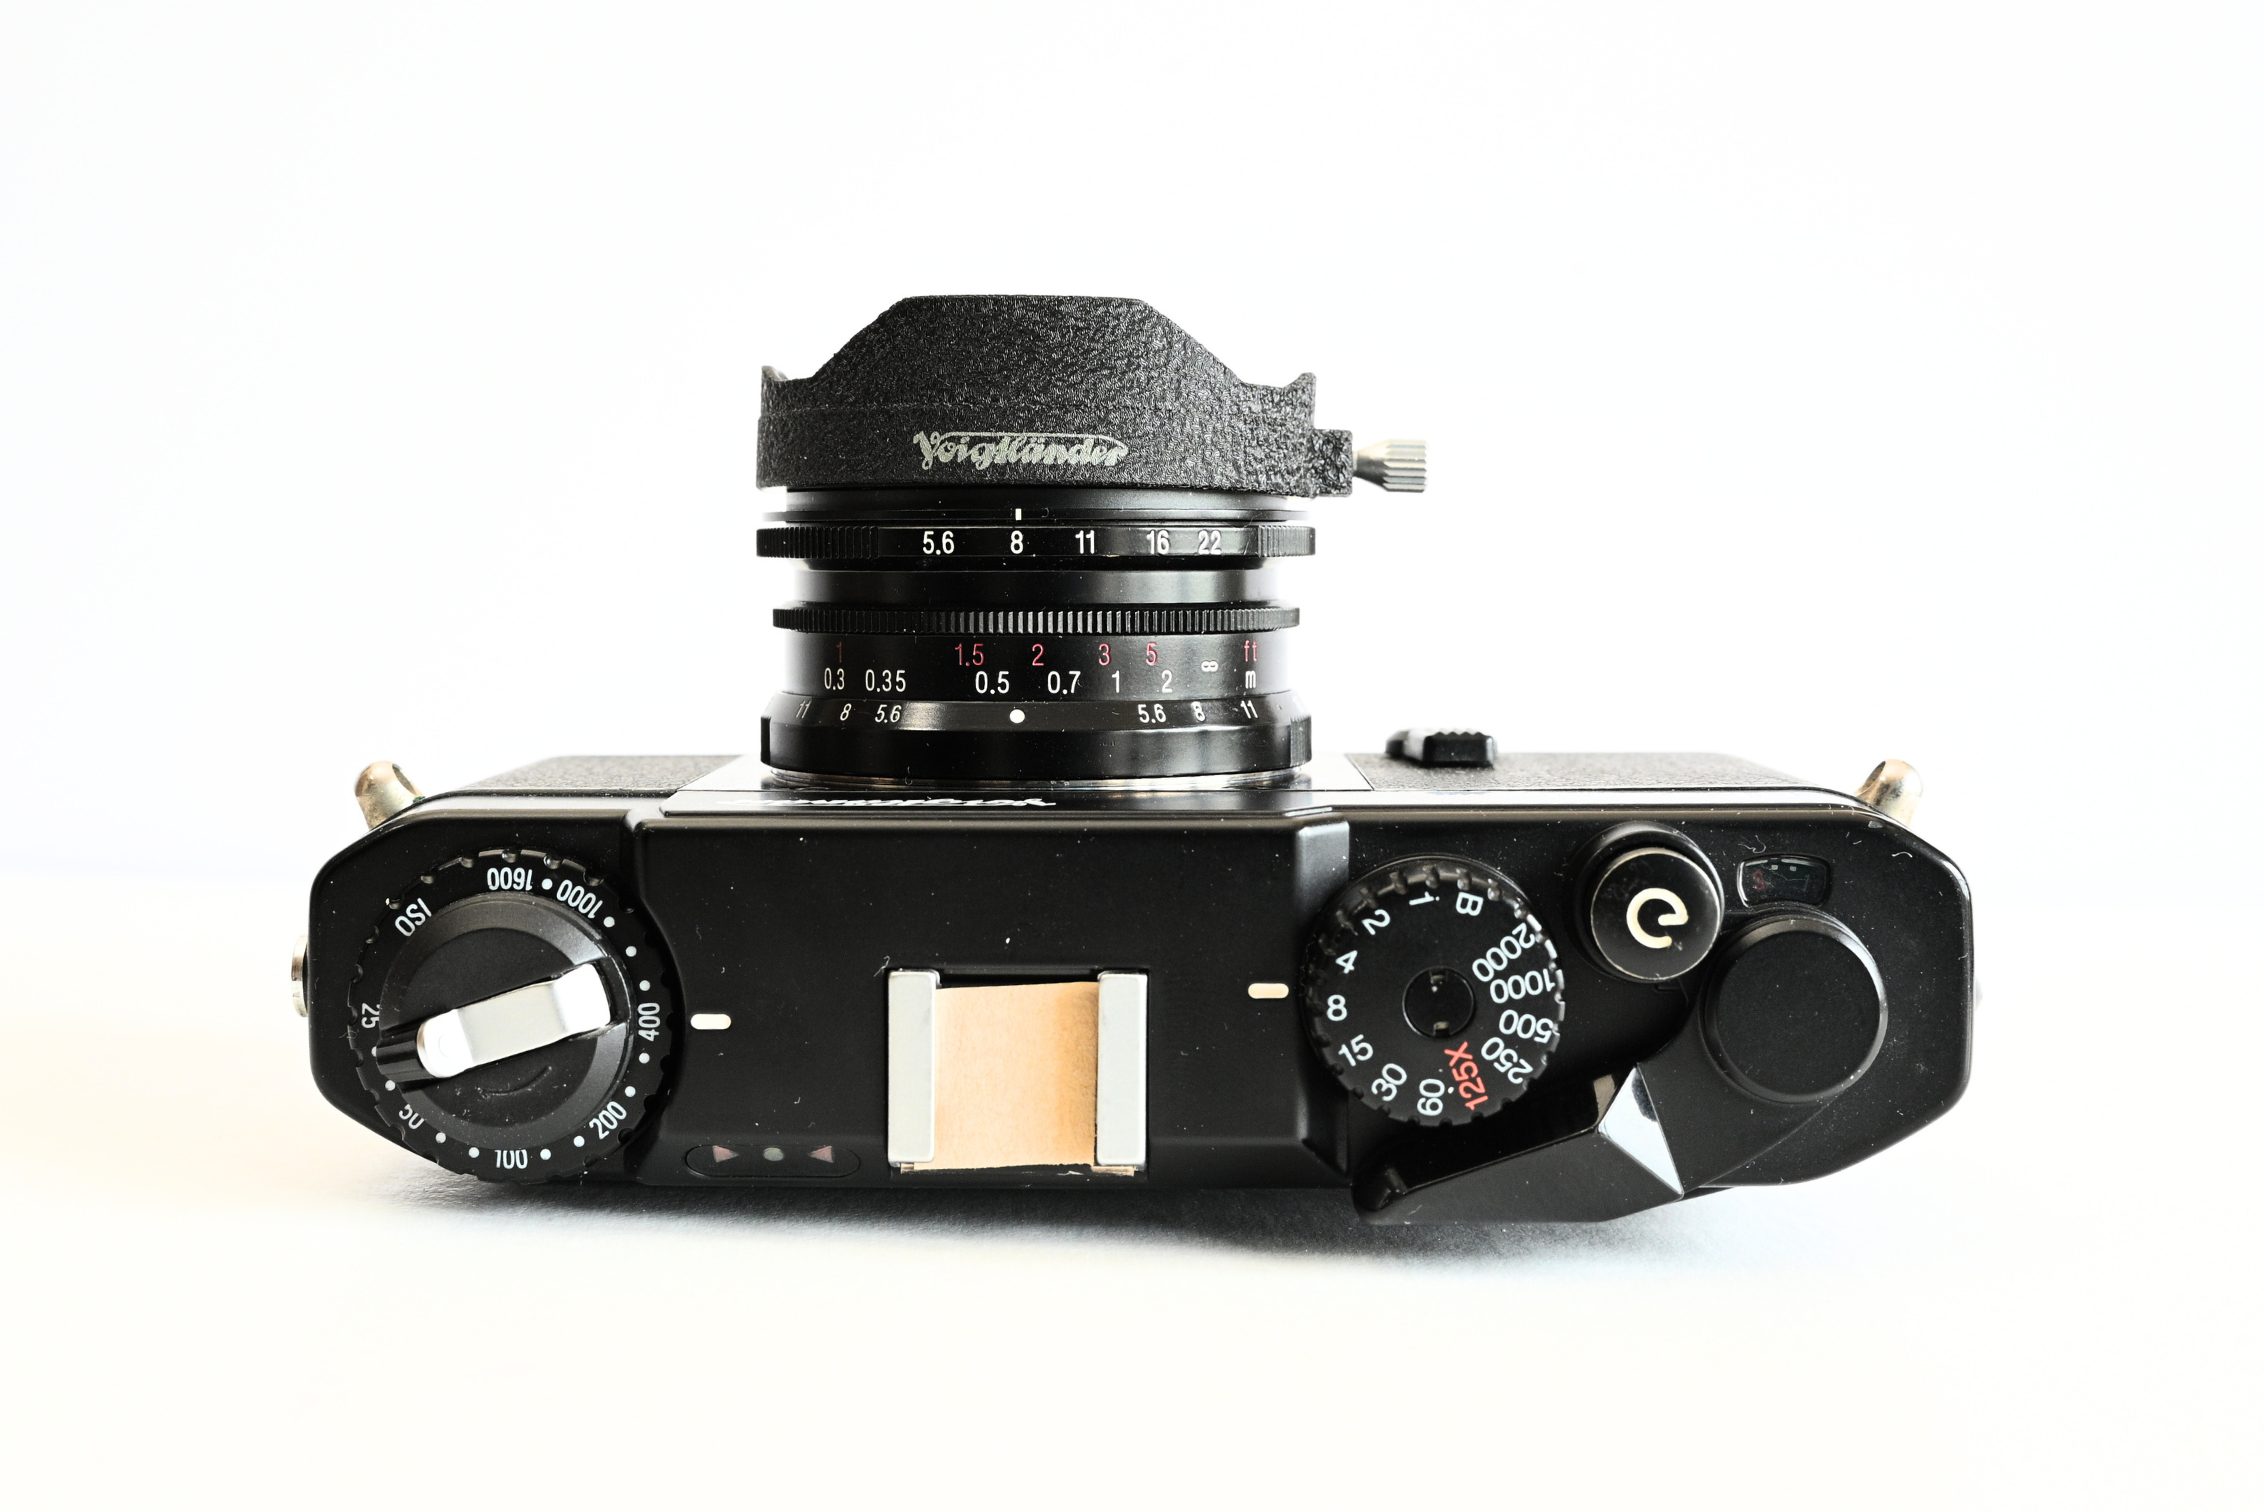
Additionally, the camera is built around a sturdy metal die-cast chassis, giving it a solid, durable feel. The top plate, bottom plate and back door is plastic helping to keep its overall weight to a minimum. The above photo with the 12mm lens and viewfinder weigh just over 500g. It also features a reliable mechanical focal-plane shutter with speeds from 1 Second up to 1/2000th of a second as well as a Bulb mode for long exposure work and meters film speeds from 25-1600 ISO. The Bessa L uses a Leica Thread Mount (LTMM39) screw thread mount.
So the with the Bessa L having no rangefinder you’re into zone focusing and using the lens distance scale which is in Feet and Meters for this 12mm lens shown.
It also has a self timer, useful for those slower tripod moments where you don’t have a cable release.
You can purchase the specific viewfinder for whichever focal length lens you are using. In my case I have a 12mm viewfinder for a 12mm lens. I don’t need the viewfinder, however, it helps… a lot! And there is no hot shoe! You can see mine is taped over. That is for an extra snug fit for the viewfinder, however, there is a flash sync port on the side of the camera, which as you can see syncs at 1/125th.
Here are some of the other notable cameras in the Bessa range:
Voigtlander Bessa R (2000-2004): This was the Bessa L‘s popular sibling. It was a proper rangefinder camera with a built-in viewfinder and a coupled rangefinder for accurate focusing. It still used the Leica M39 Thread Mount (LTM), and was excellent value for photographers who wanted a full-featured rangefinder without the Leica price tag.
Voigtlander Bessa T (2001-2005): The Bessa T featured a rangefinder for focusing but no built-in viewfinder for composition. Instead, it had a high-magnification rangefinder for extremely accurate focusing. It also was the first Bessa to feature the Leica M-mount.
Voigtlander Bessa R2 (2002-2004): The Bessa R, and R2 featured a more robust metal body and, the Leica M-mount.
Voigtlander Bessa R2A / R3A / R4A (2004-2013): This generation introduced automatic exposure (Aperture-Priority) to the Bessa lineup and a viewfinder and they all had a different viewfinder magnifications tailored for various lens types.
My experience so far
Since I have been using this camera I must say it has been a joy to use. Nice and light for walking around the streets with and the metering system is accurate and easy to read. And it doesn’t look intimidating, in fact, I have had a few curious looks because of the viewfinder on top!
12mm Lens
I have two lenses for this camera. 12mm and 25mm. With viewfinders to match, however, I have yet to try the 25mm lens. I am more intrigued in the 12mm lens and seeing where it can fit with my photography! And I can tell you now. It’s not easy!
The 12mm viewfinder is incredibly accurate for composing which makes it much easier to compose than say shooting pinhole.
Walking around with this ultra wide mindset looking for objects and scenes to work a composition with. And I have found it a struggle, however, just remember. Shoot the shit out of it and enjoy! That way I may stumble upon a negative and think… eureka! I’ve found a sweet spot for a series.
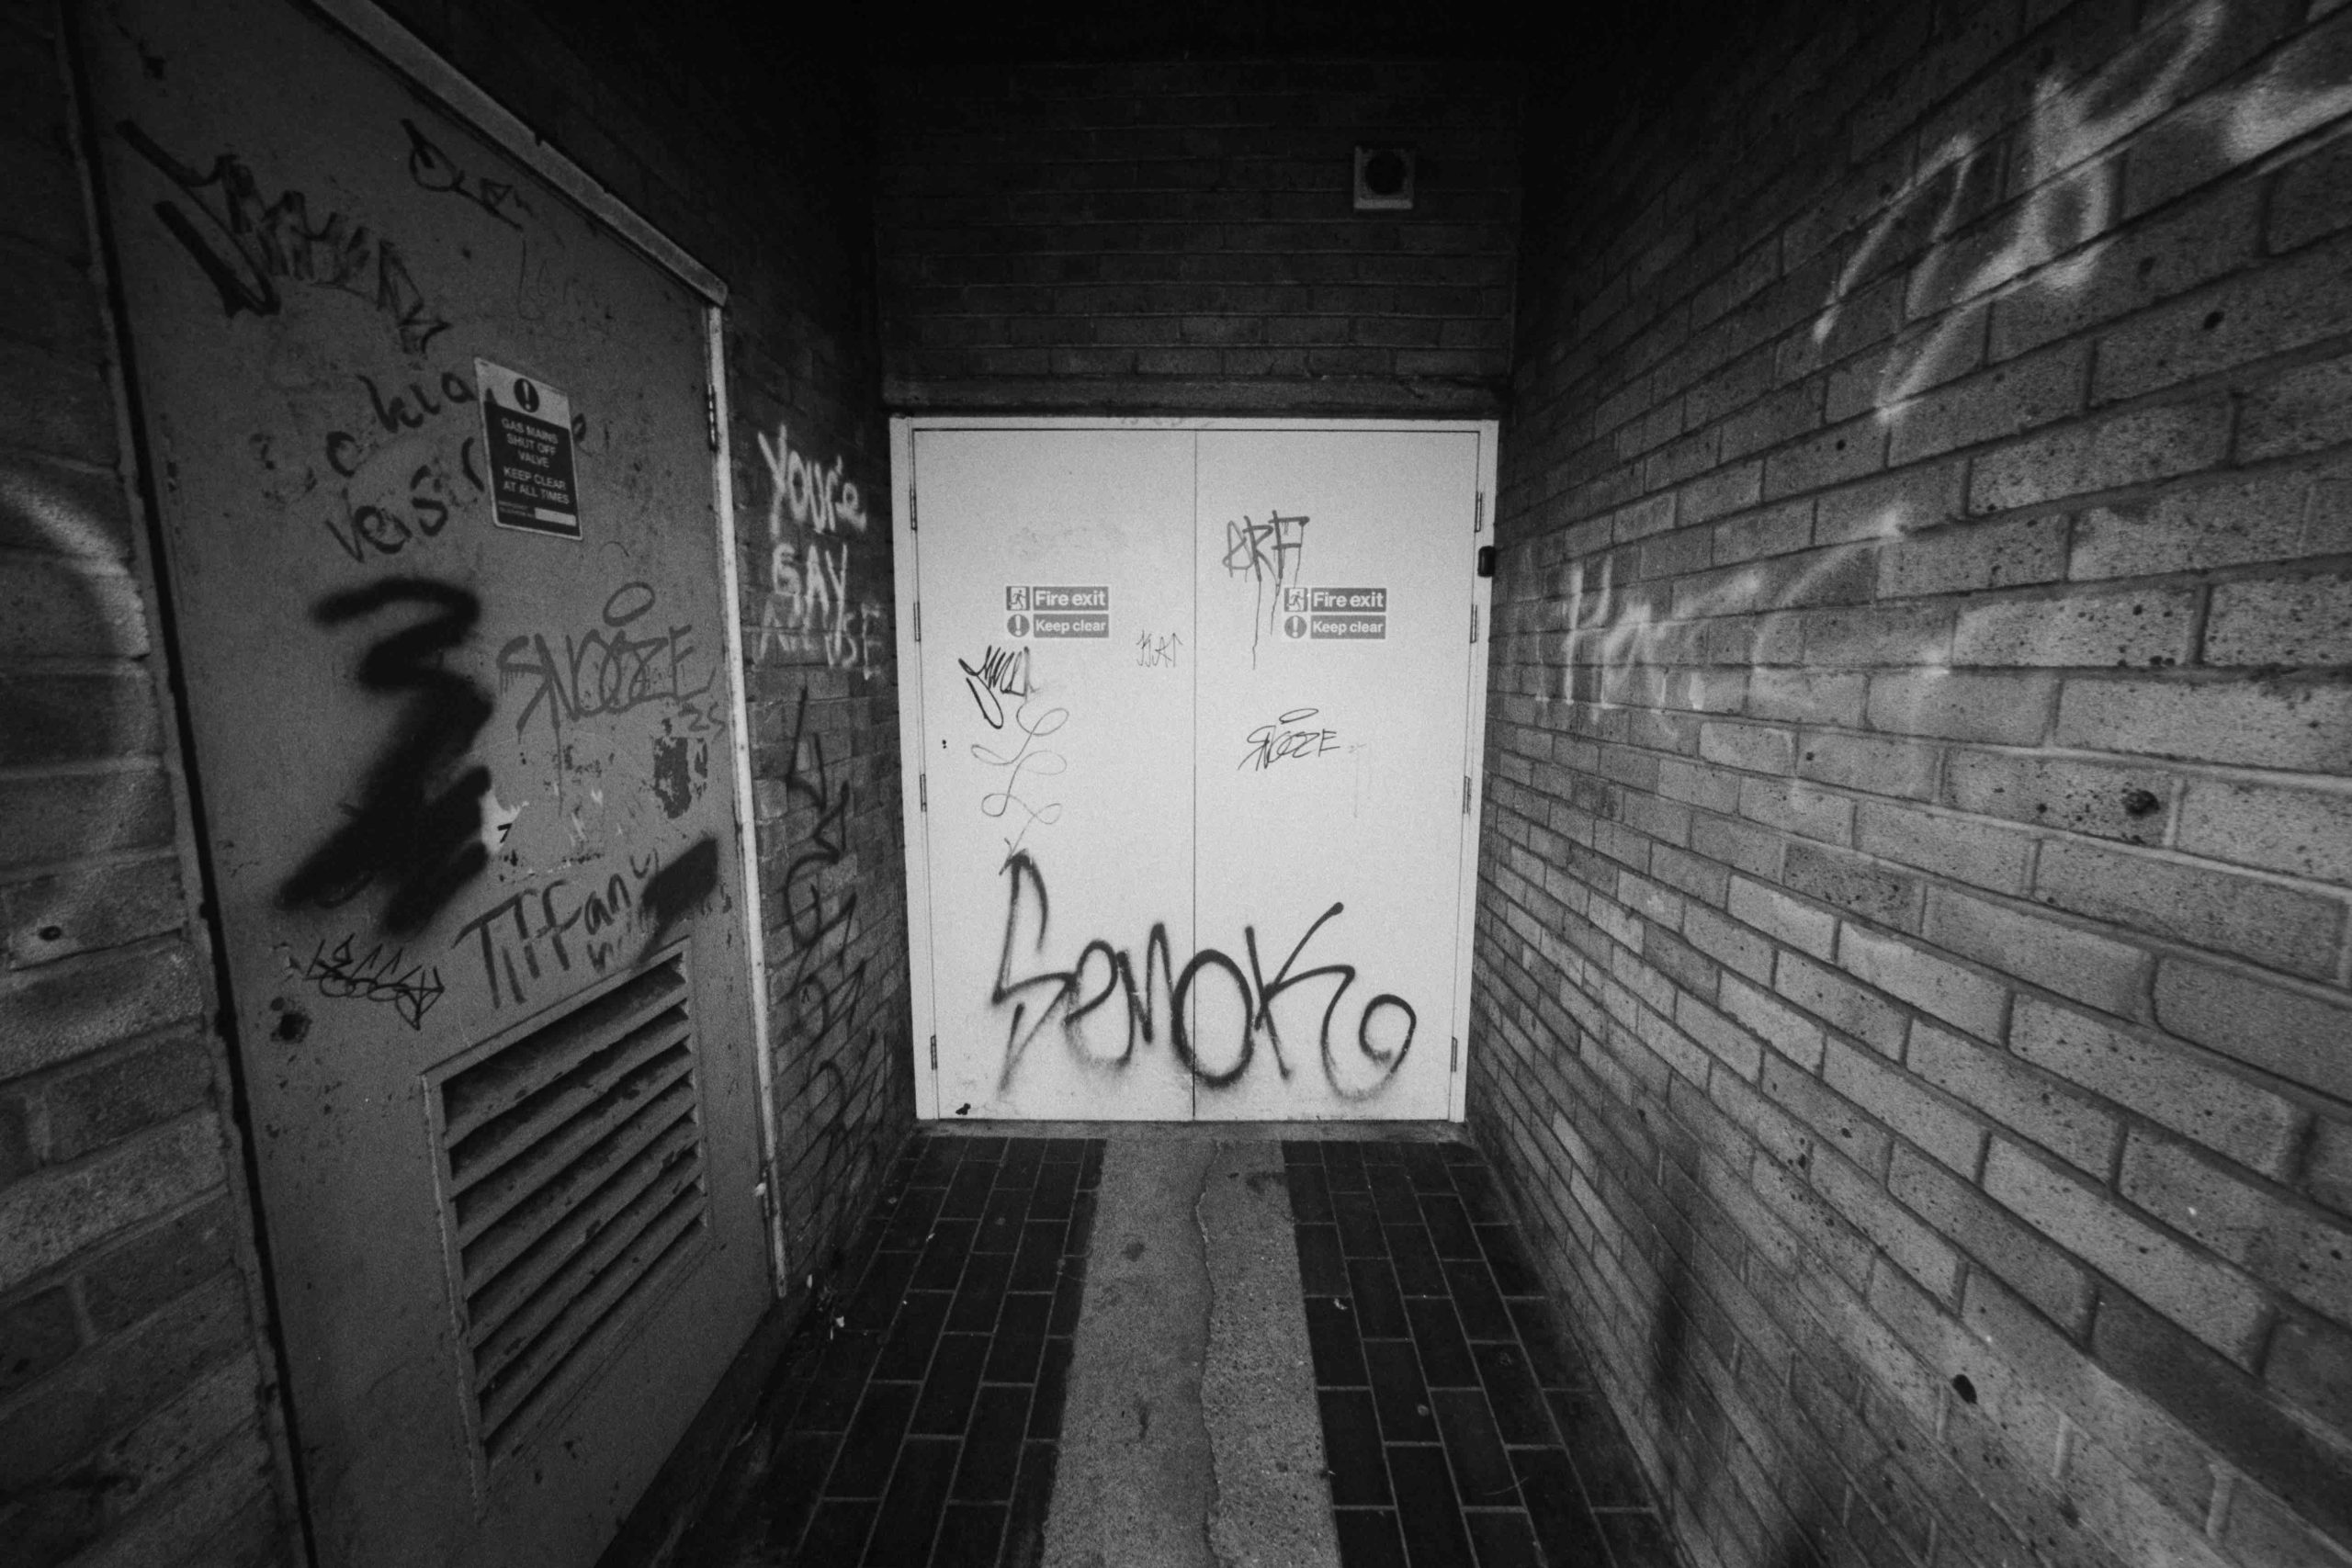
Tmax 100 push to 400
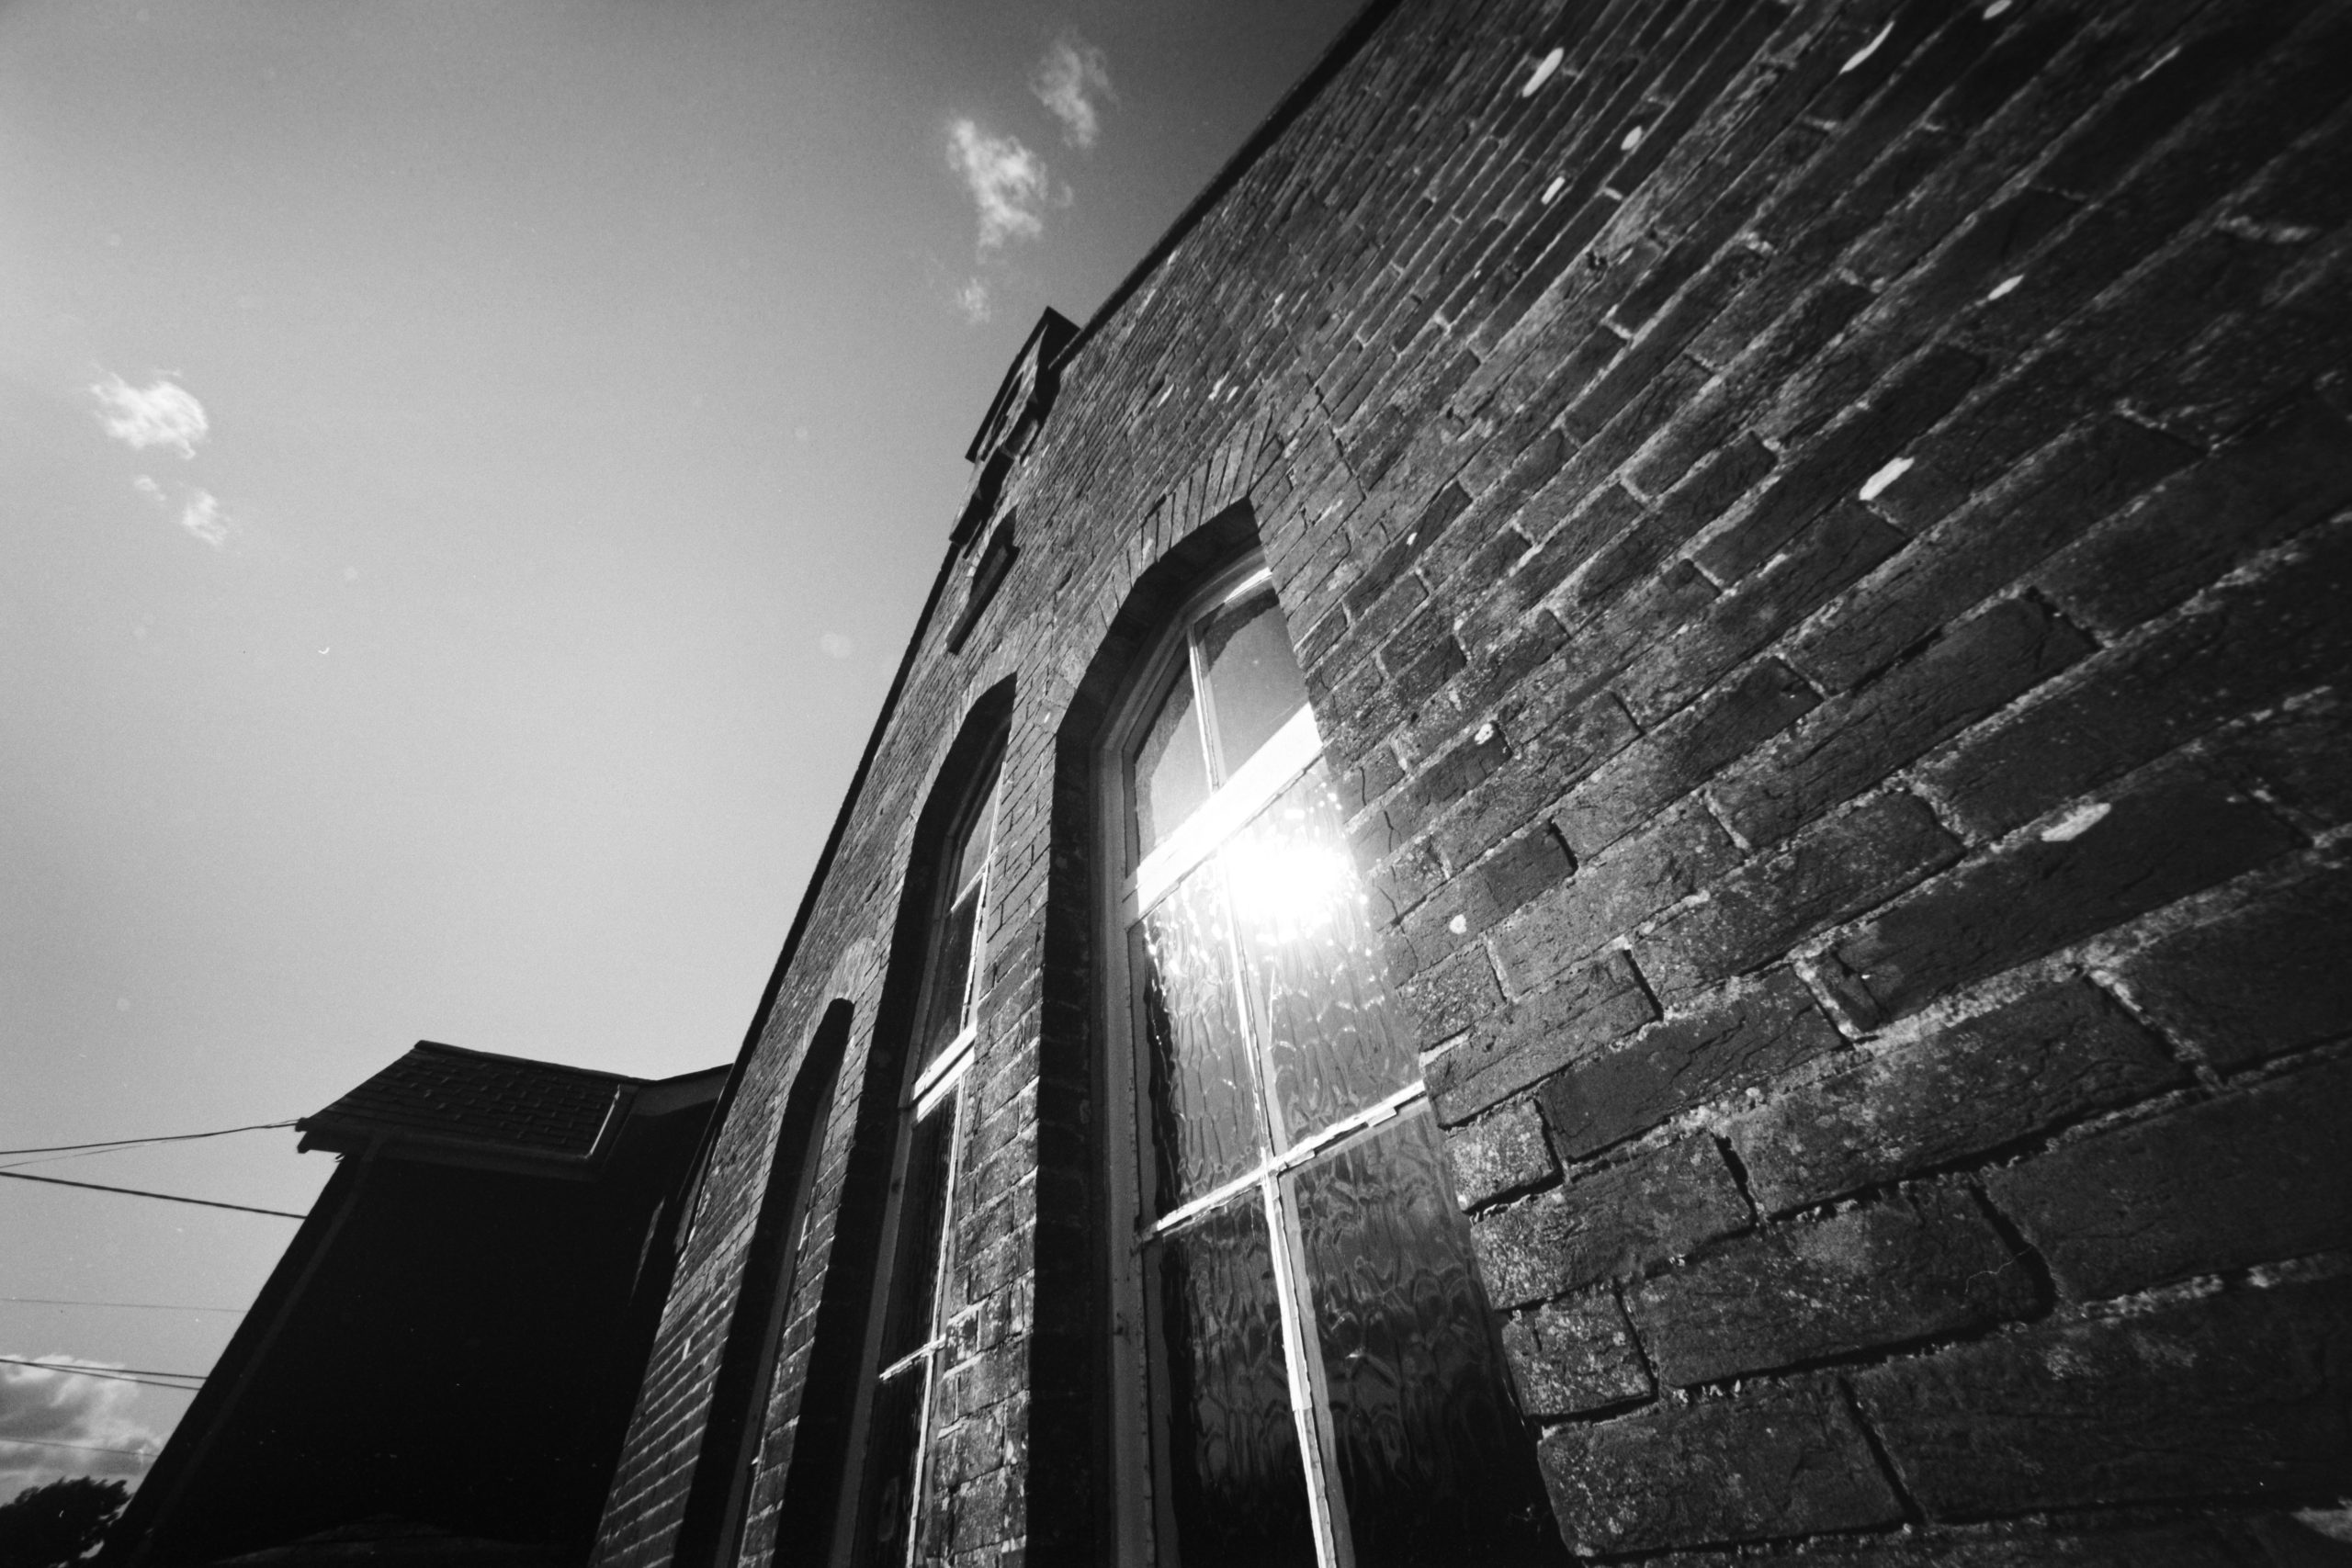
Such as this small shop emergency exit. It would be pretty cool with a person sitting down at the back doing something. Or maybe a person adding to the wonderful wall art! This area is only about 2 meters wide by about 3 meters deep.
Tmax 100 push to 400
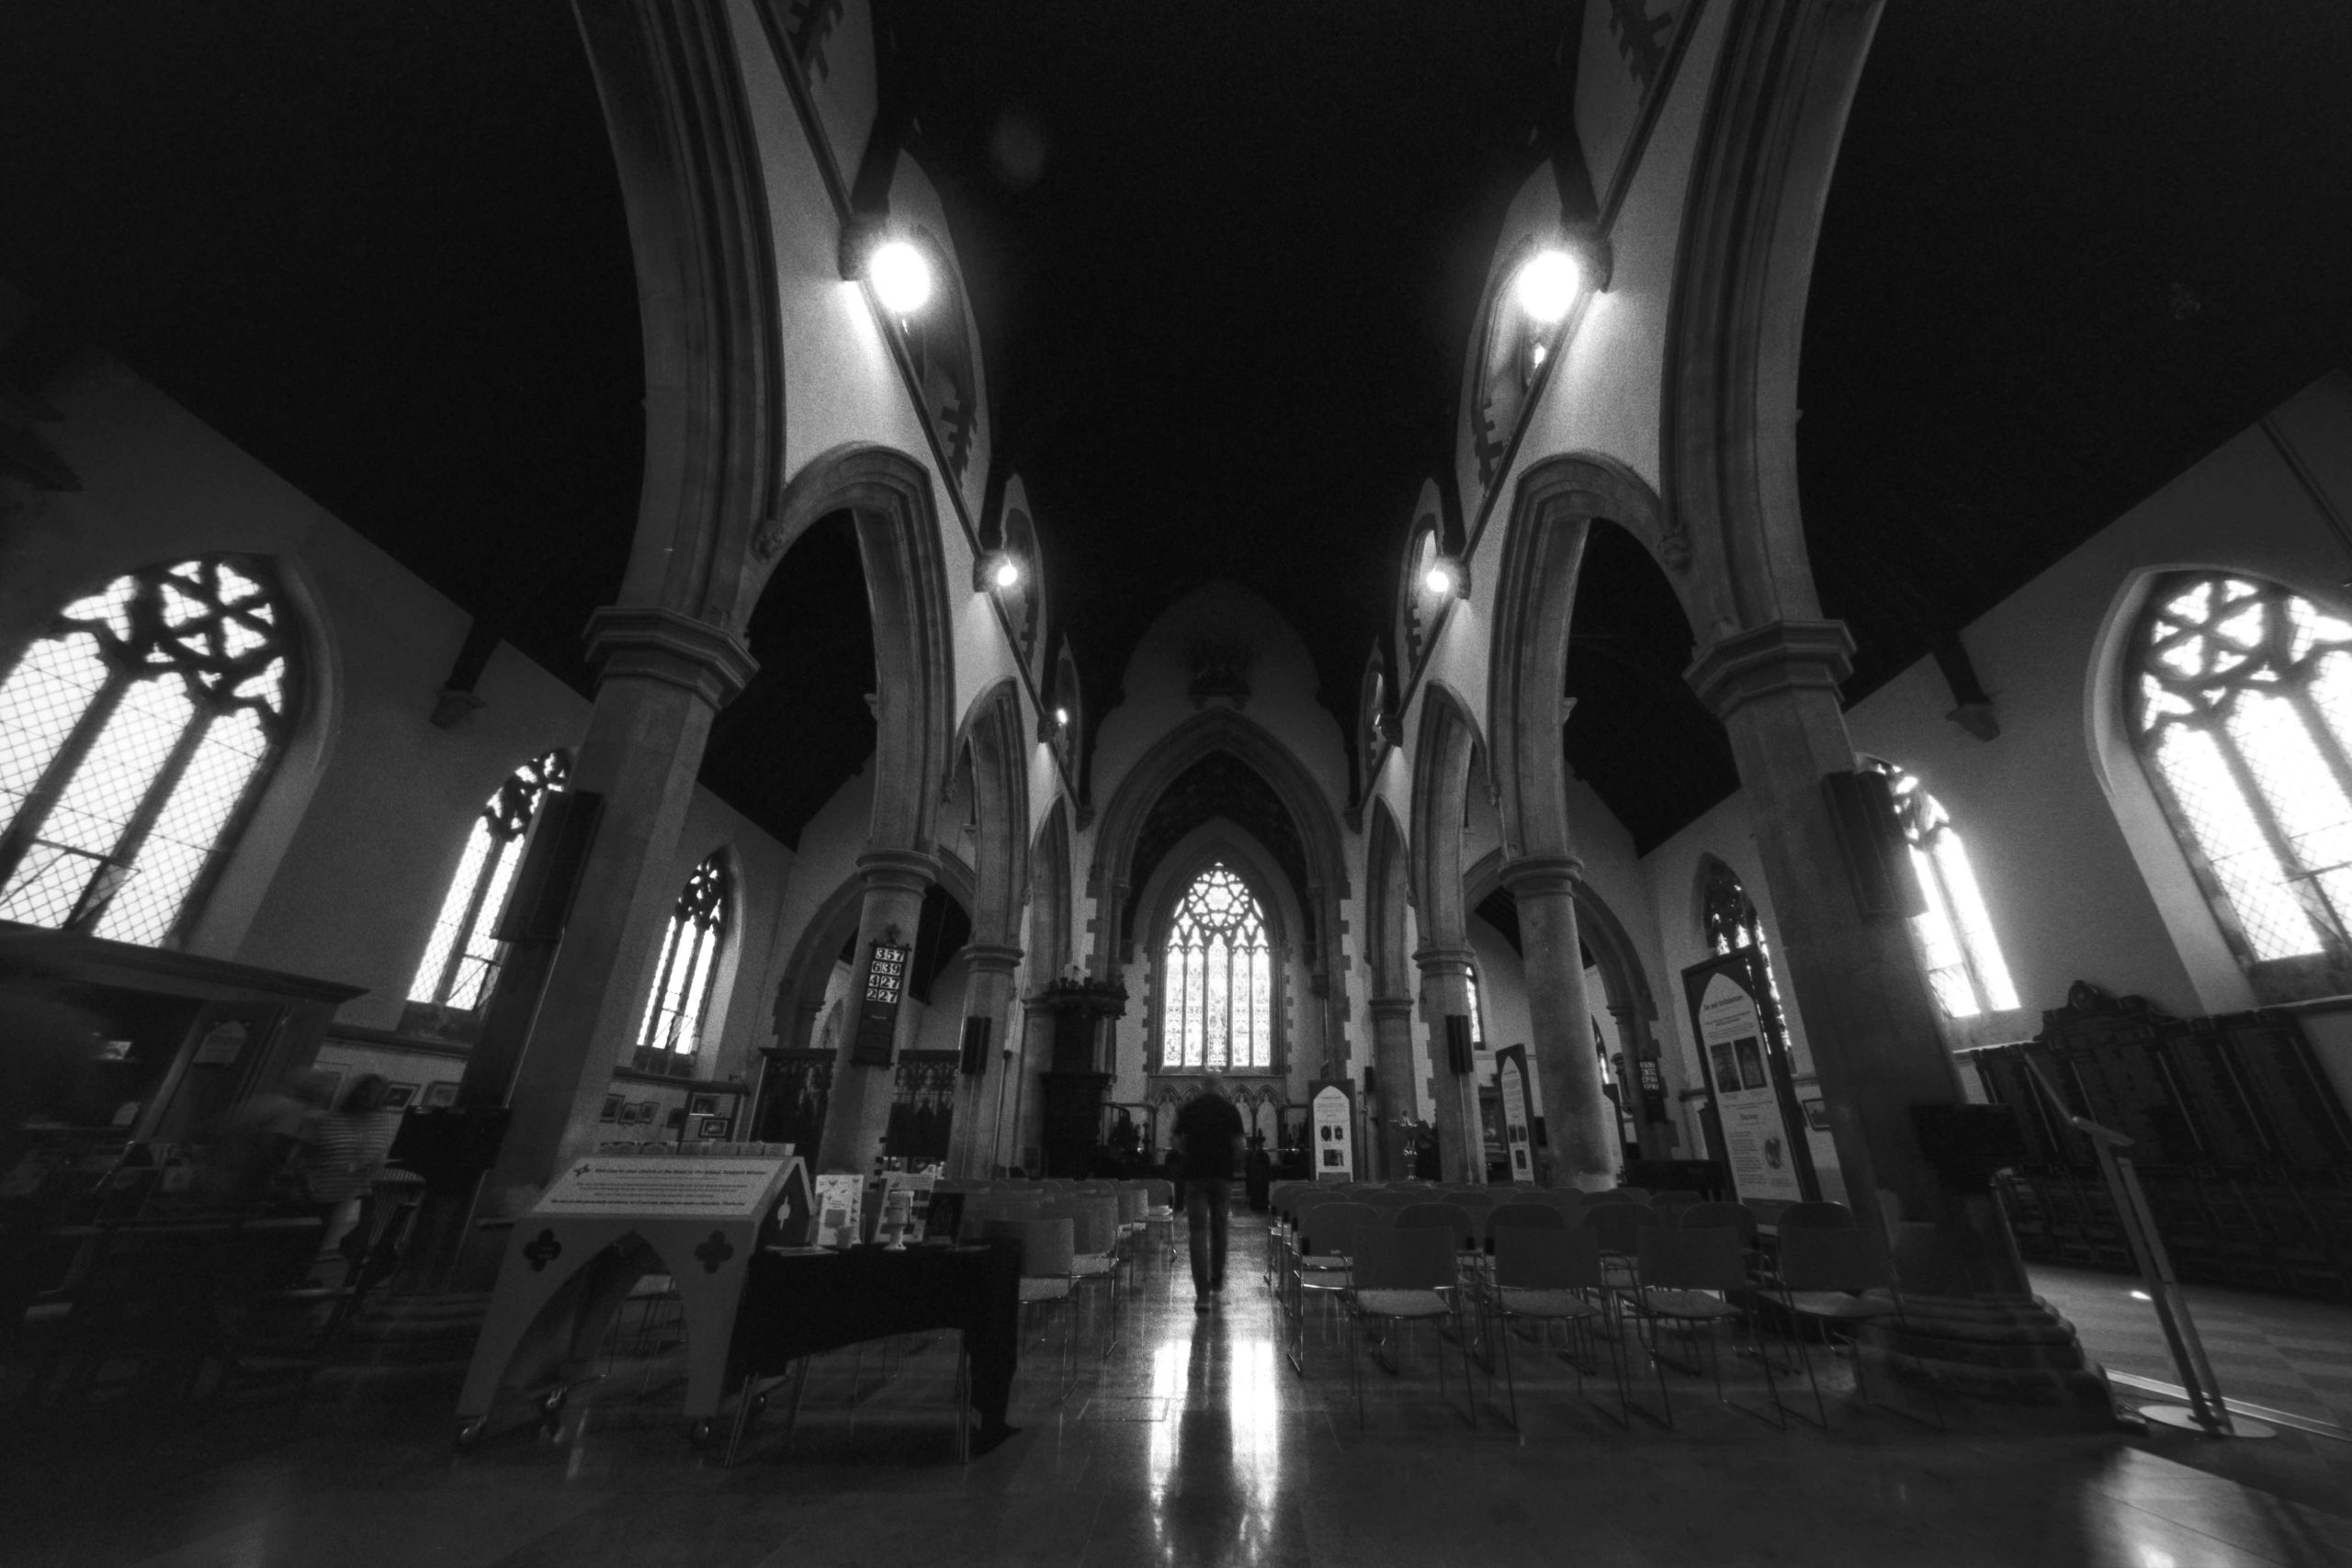
And if you have an ultra wide lens you just have to go into the church! Using a timer and a 1/4th exposure you can see me walking off in the background. I was amazed at how much detail I got in the shot, however, the viewfinder gives me pretty much an accurate composition idea. You just have to be conscious of your distorted edges.
Tmax 100 push to 400
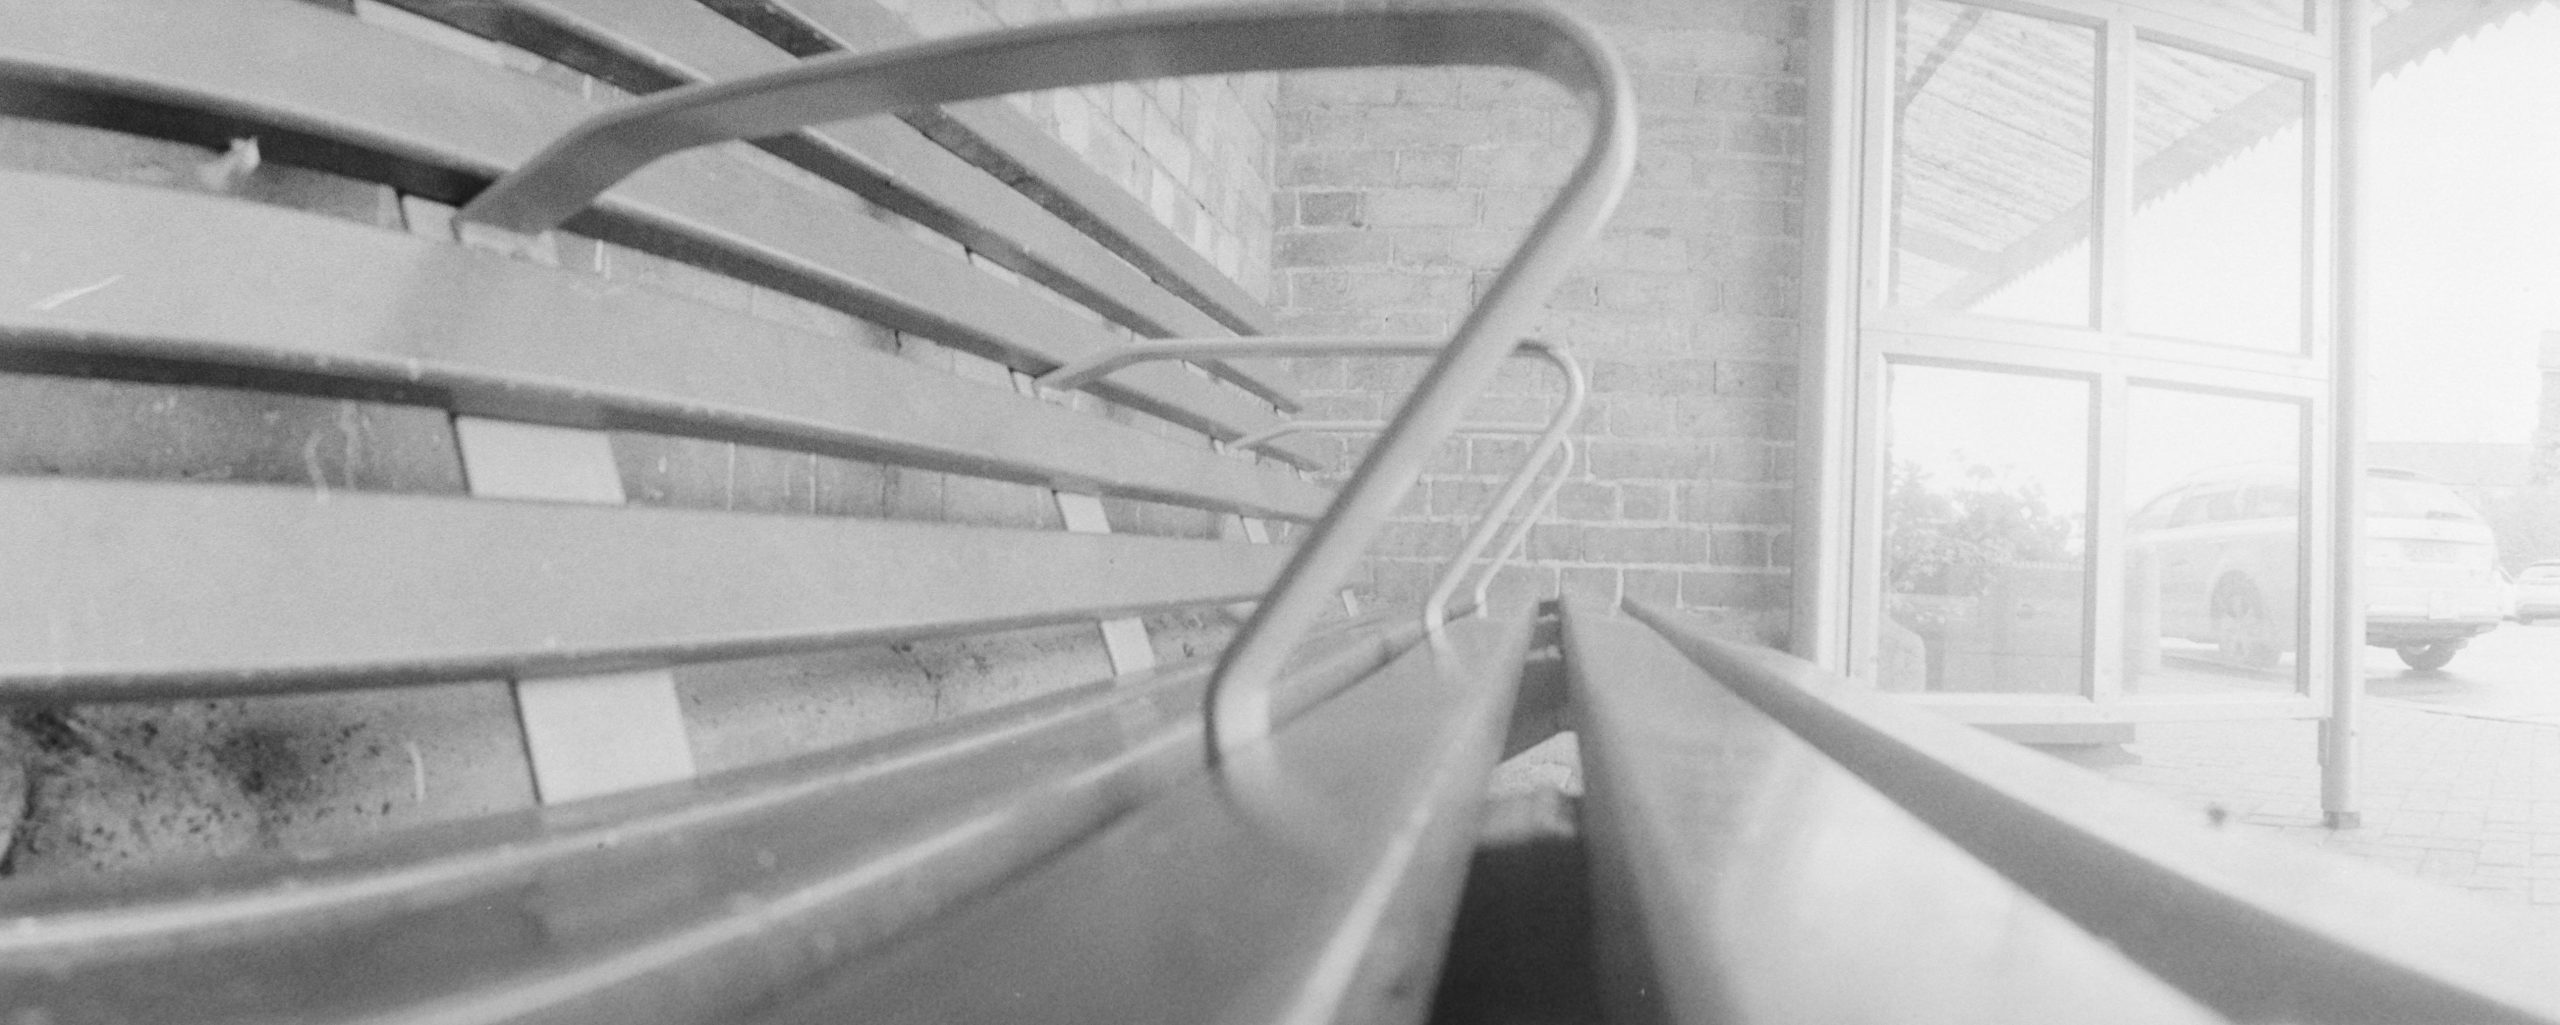
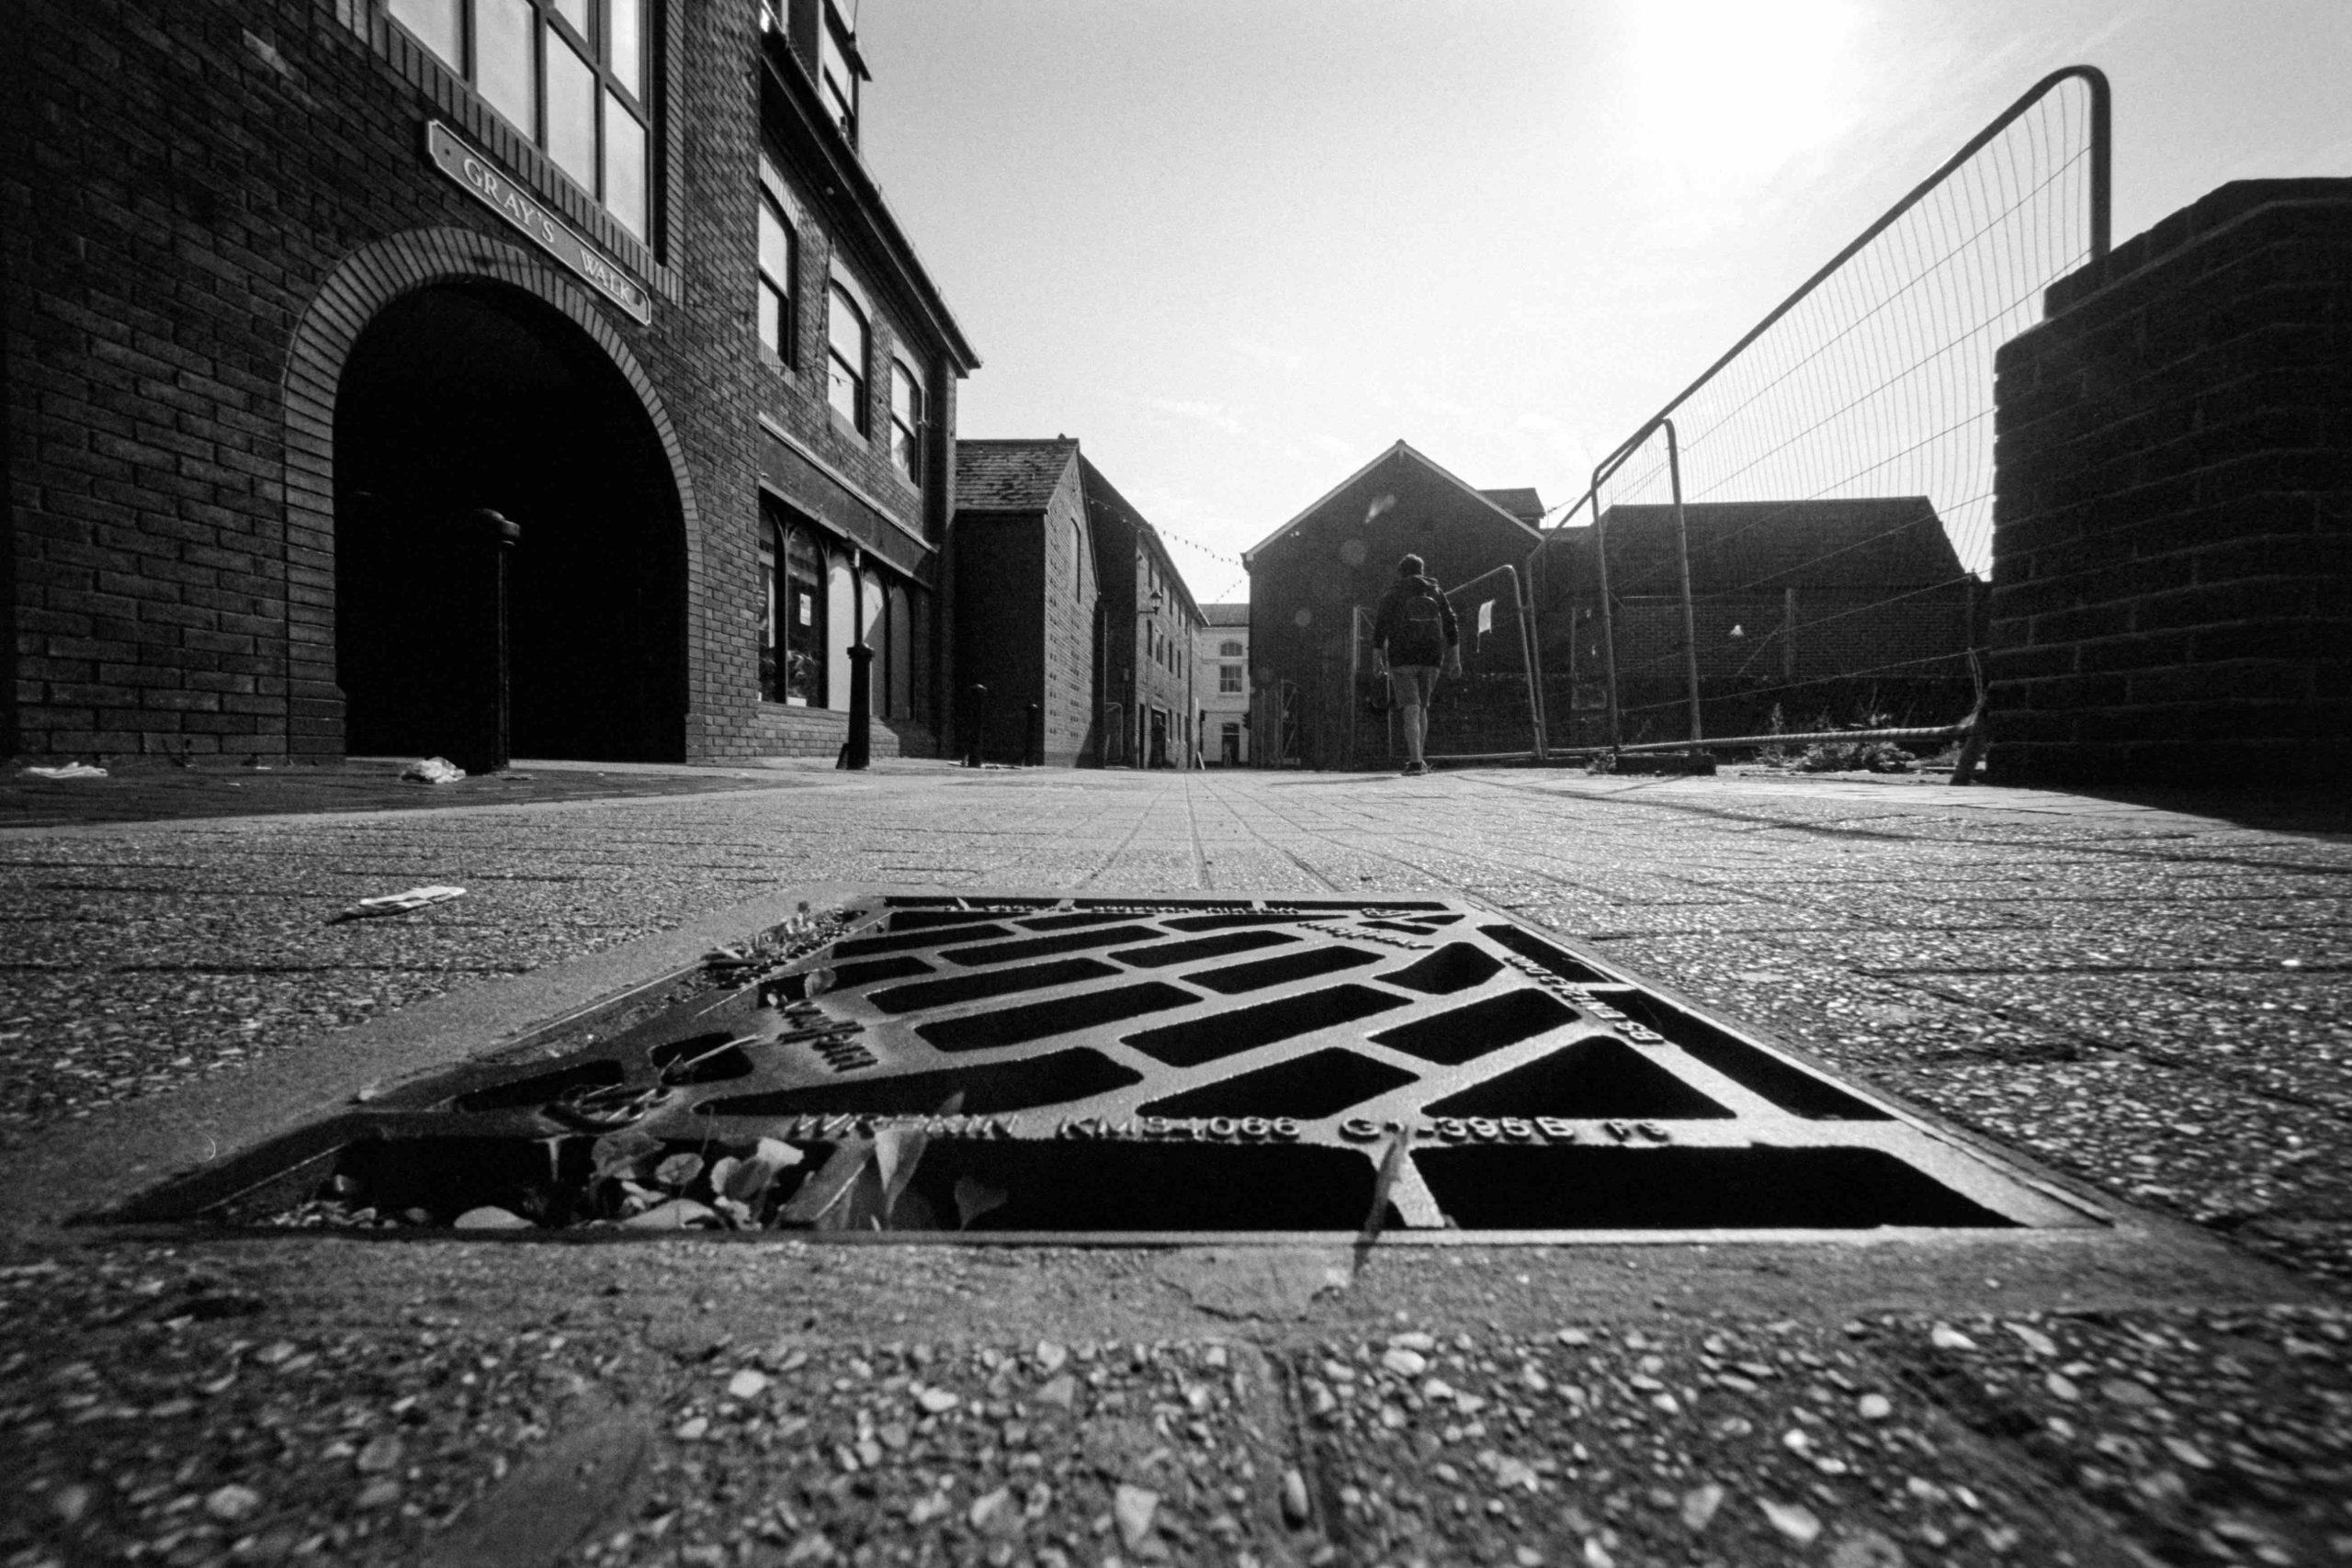
Another here where I placed the camera on the ground. The closest distance is 1 ft. And here I am about 1ft away from the grate. You can see how accurate the viewfinder is.
Dragon No1 Film at 100
It would be rude not to try a selfie! I couldn’t believe how wide this shot was. But notice one thing. There is hardly any distortion, centre and especially on the horizon!
Dragon No1 film at 100
Another photograph getting close to a fence. I purposely framed the near post out of the frame as that was bending through the viewfinder. It was the right decision.
Dragon No1 film at 100
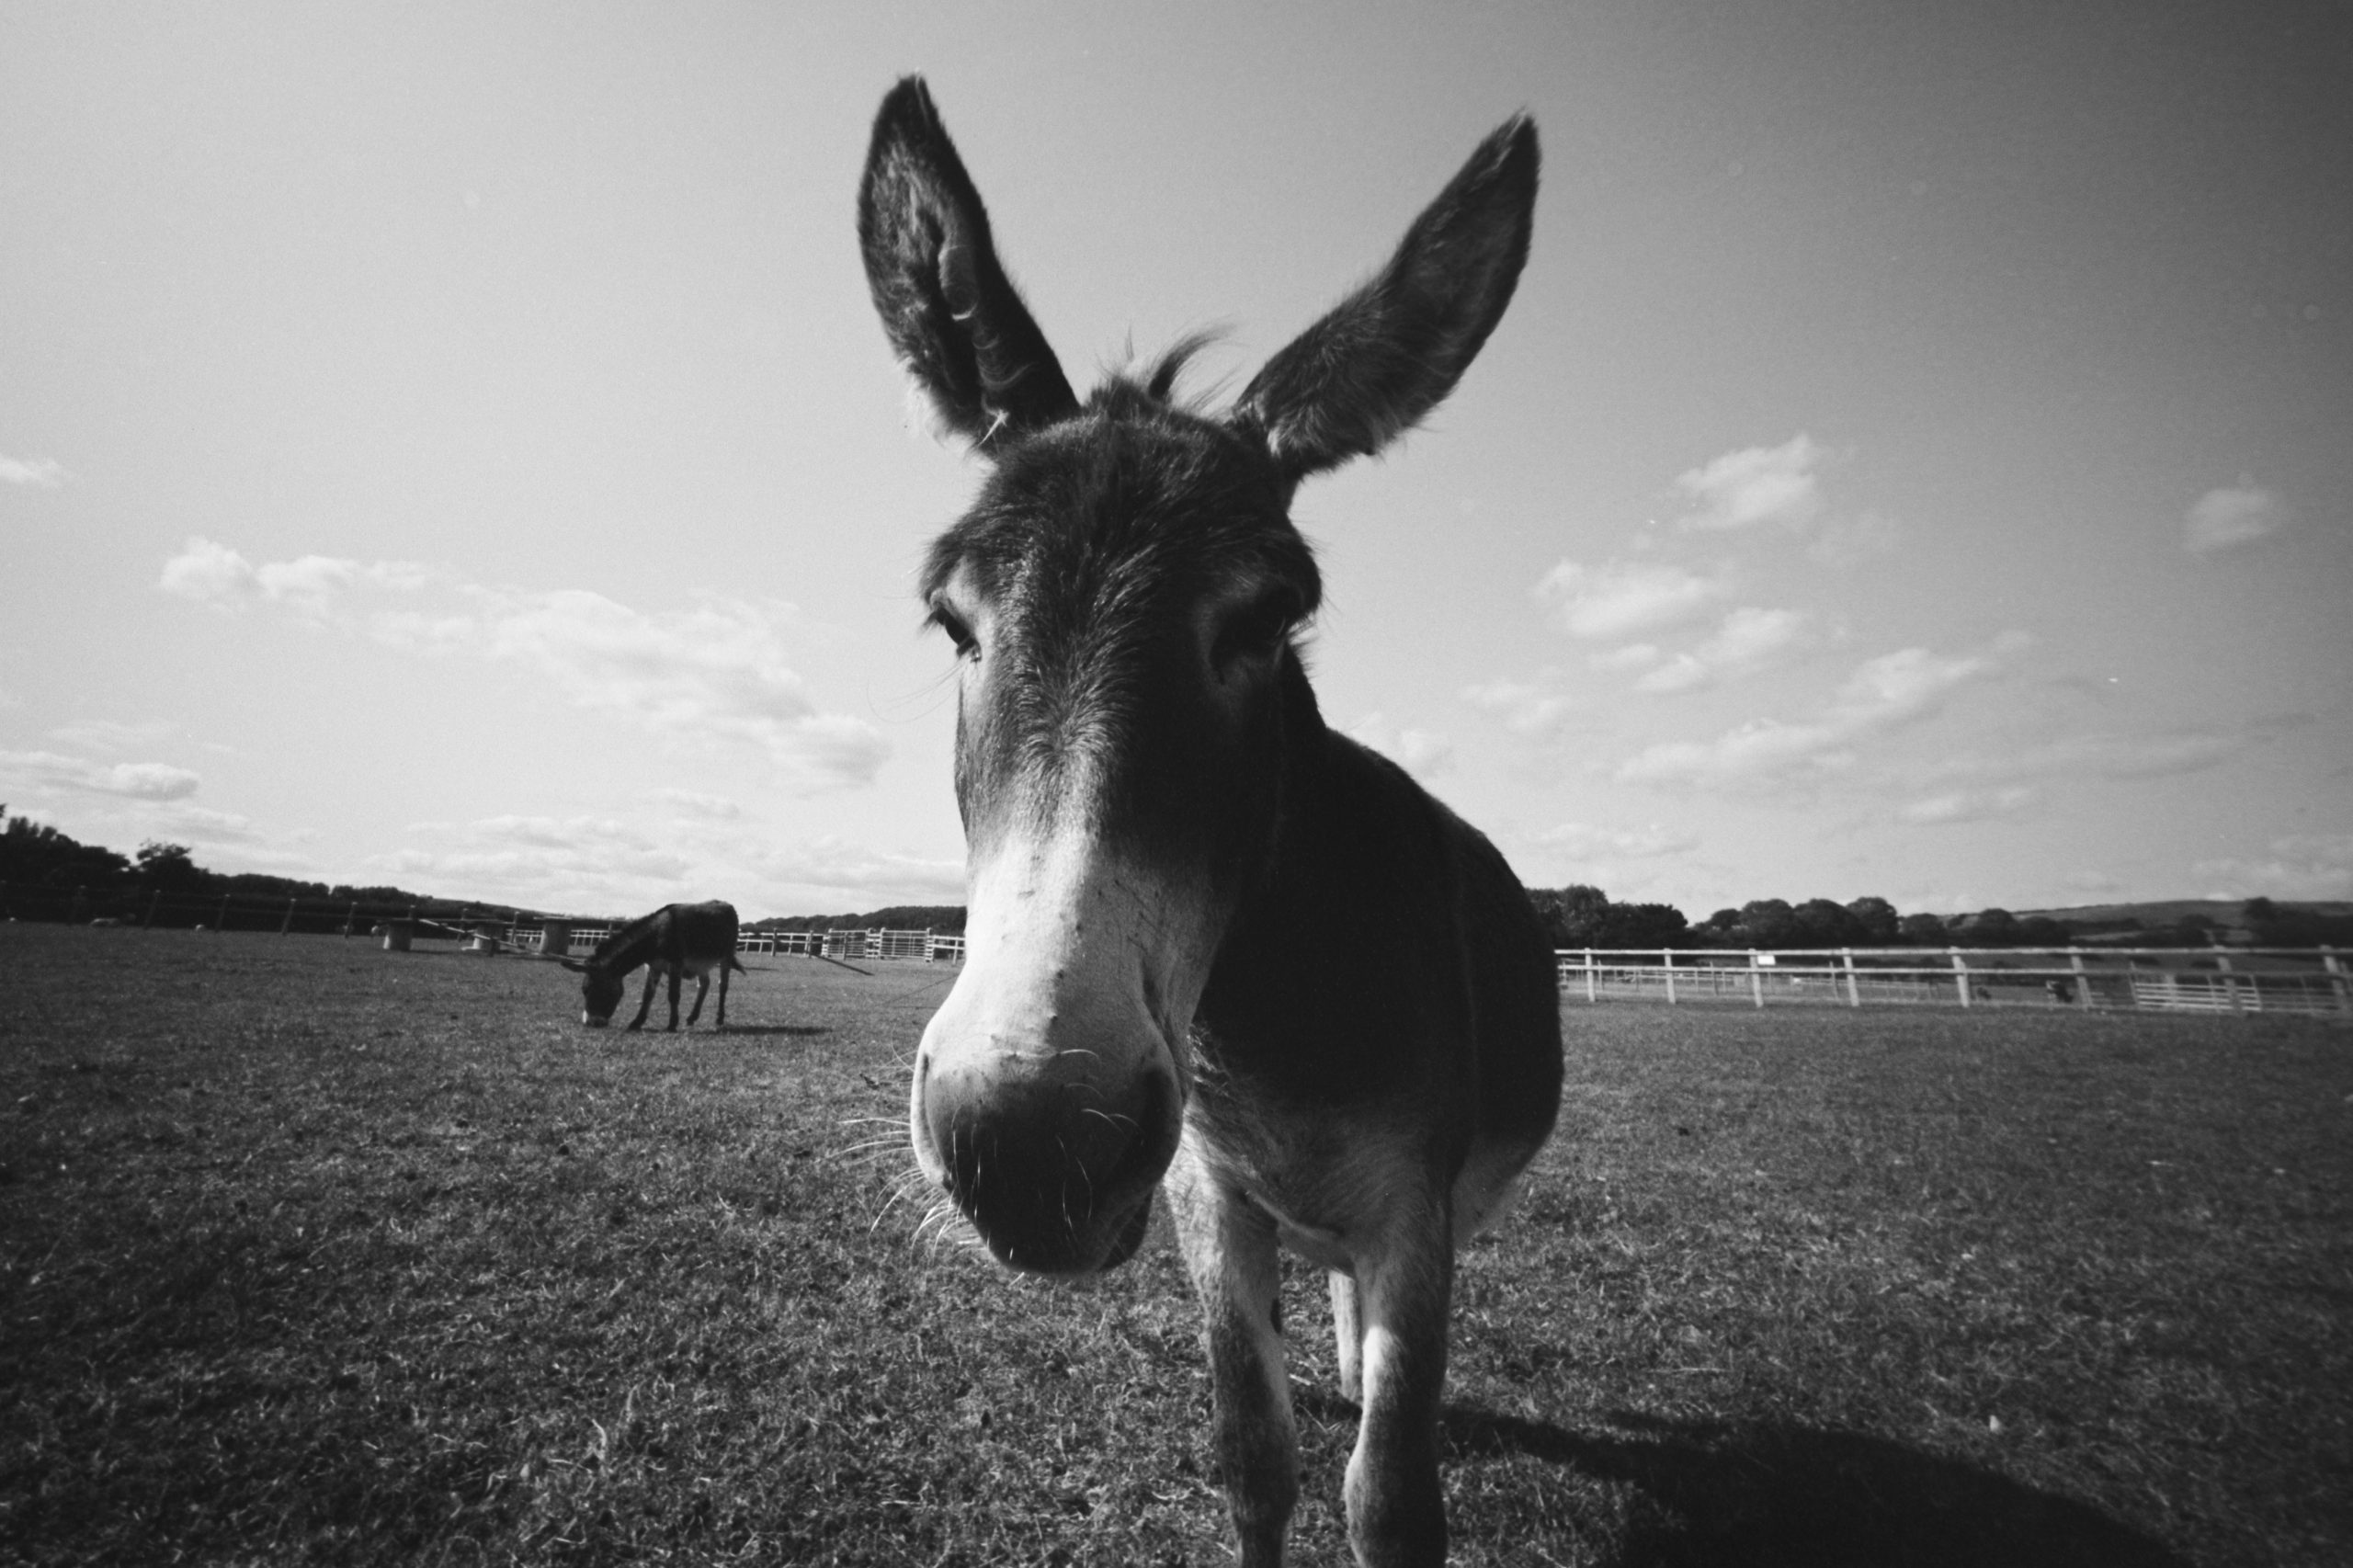
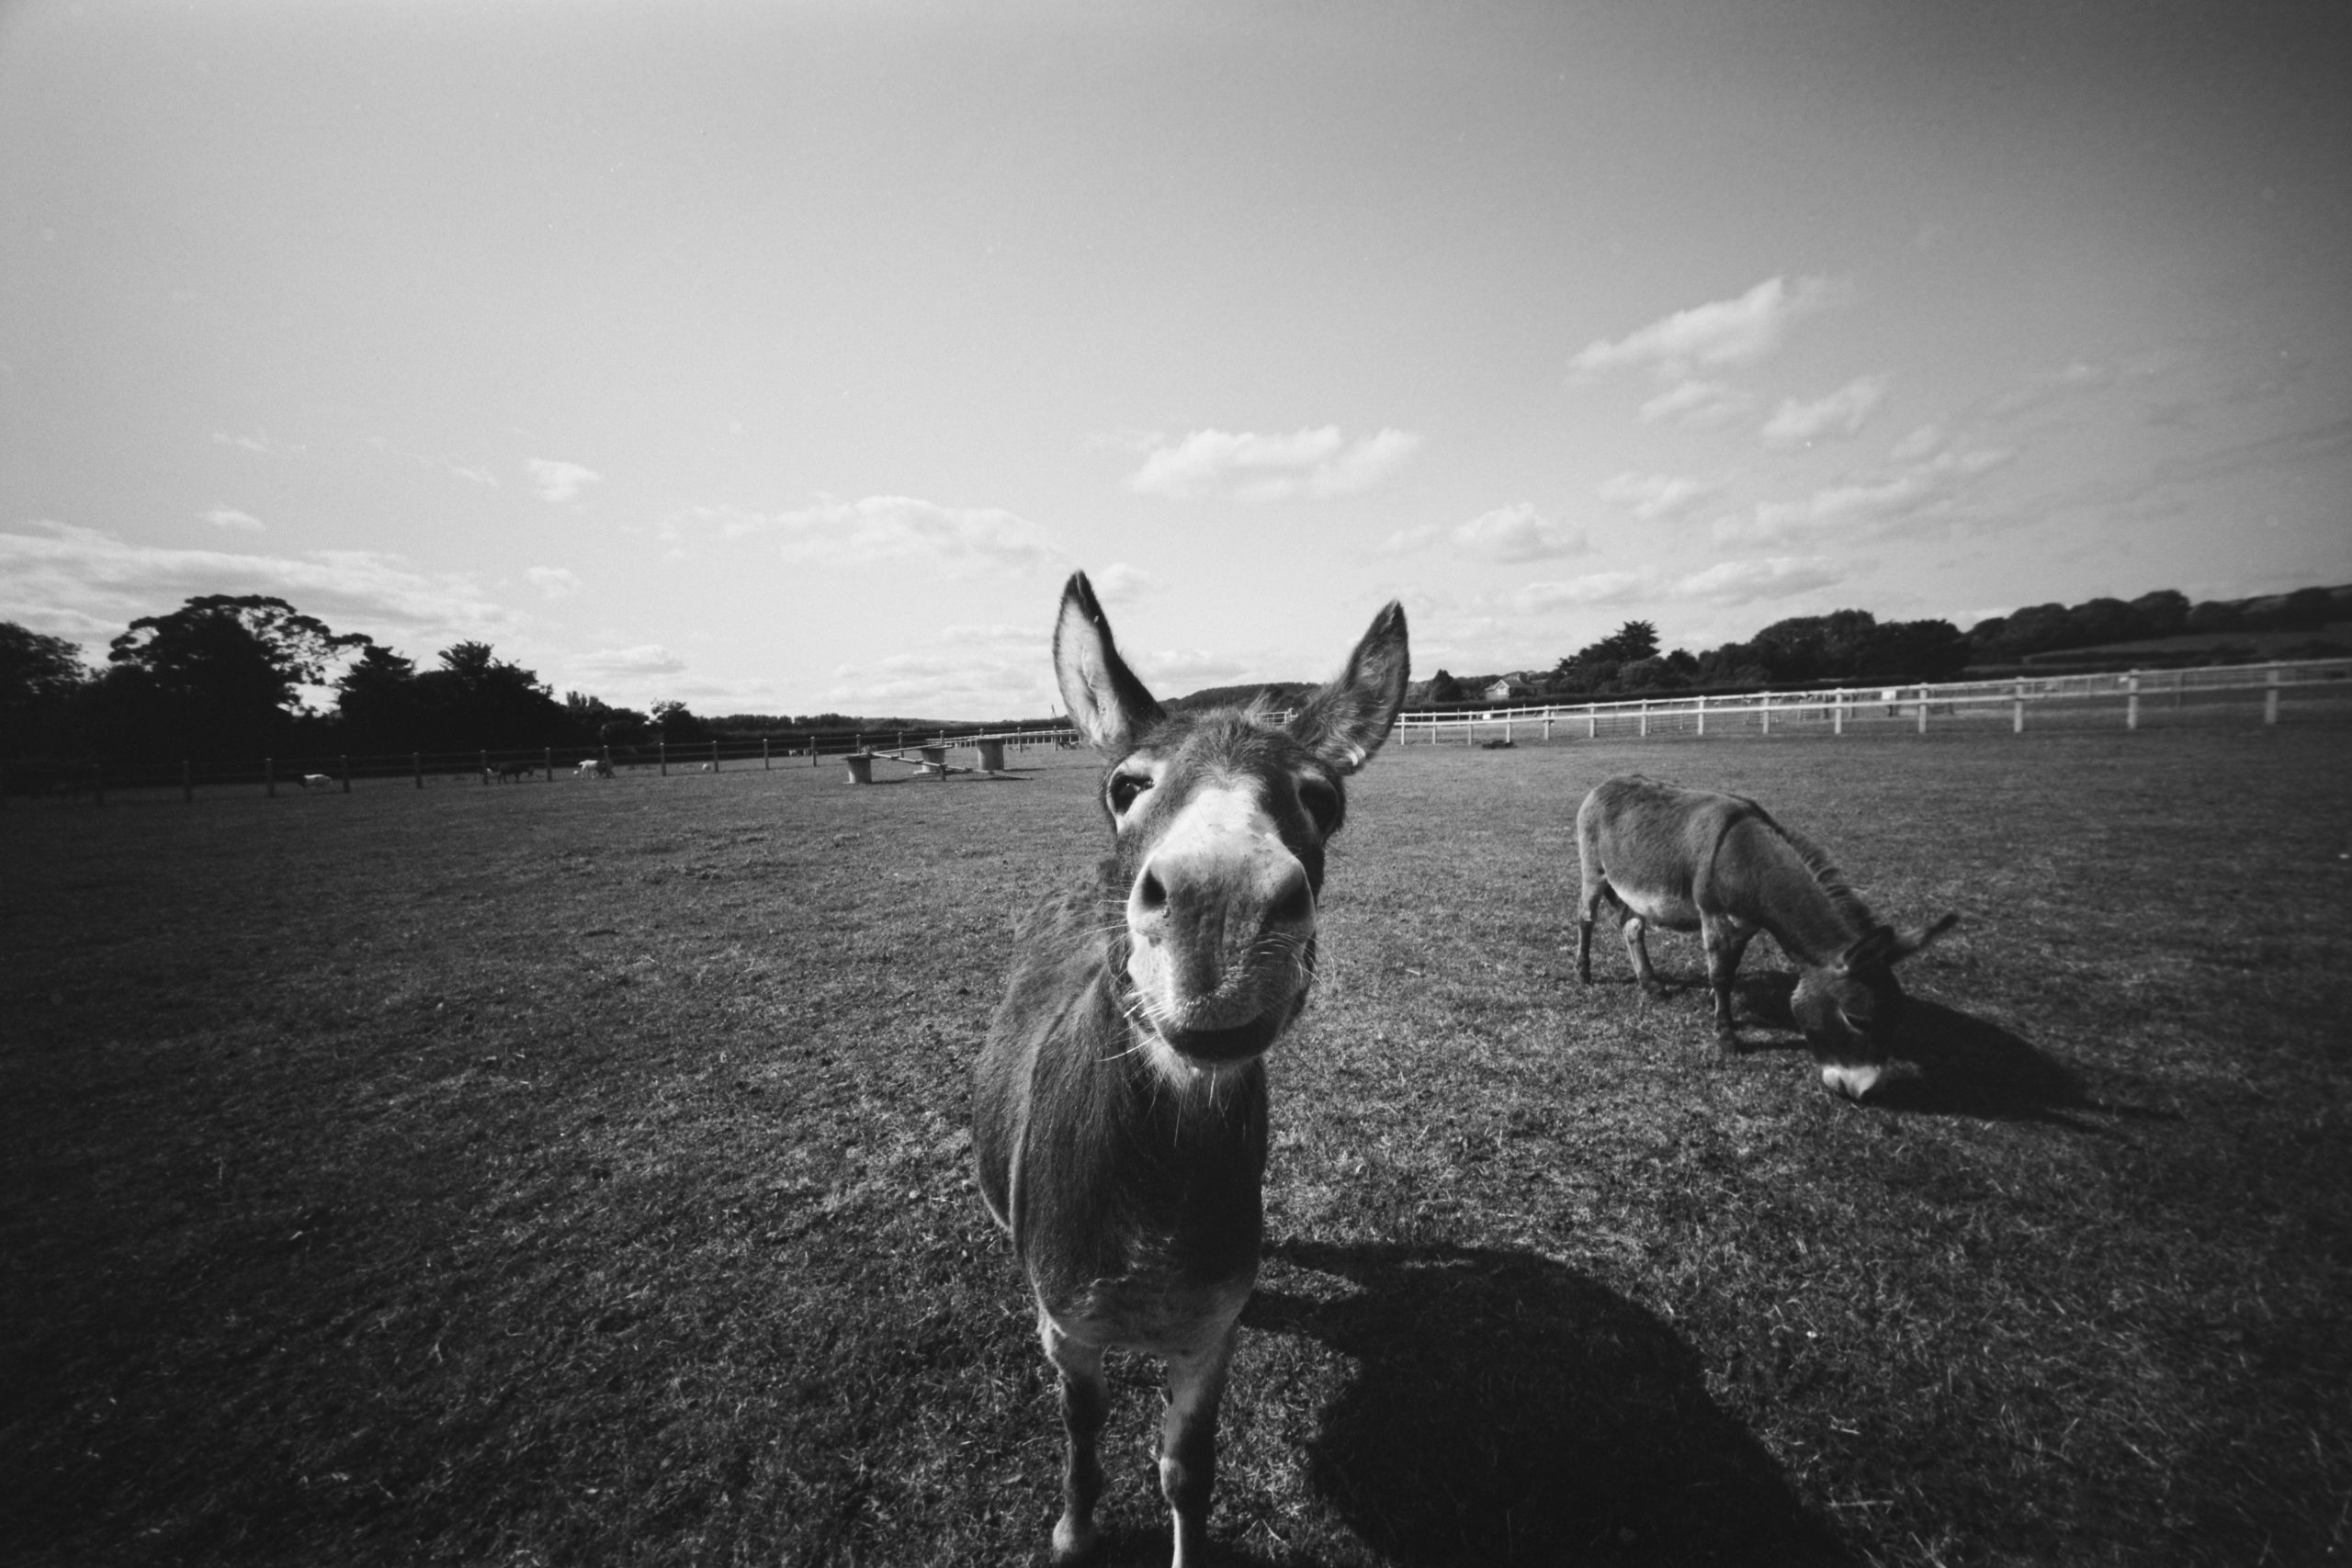
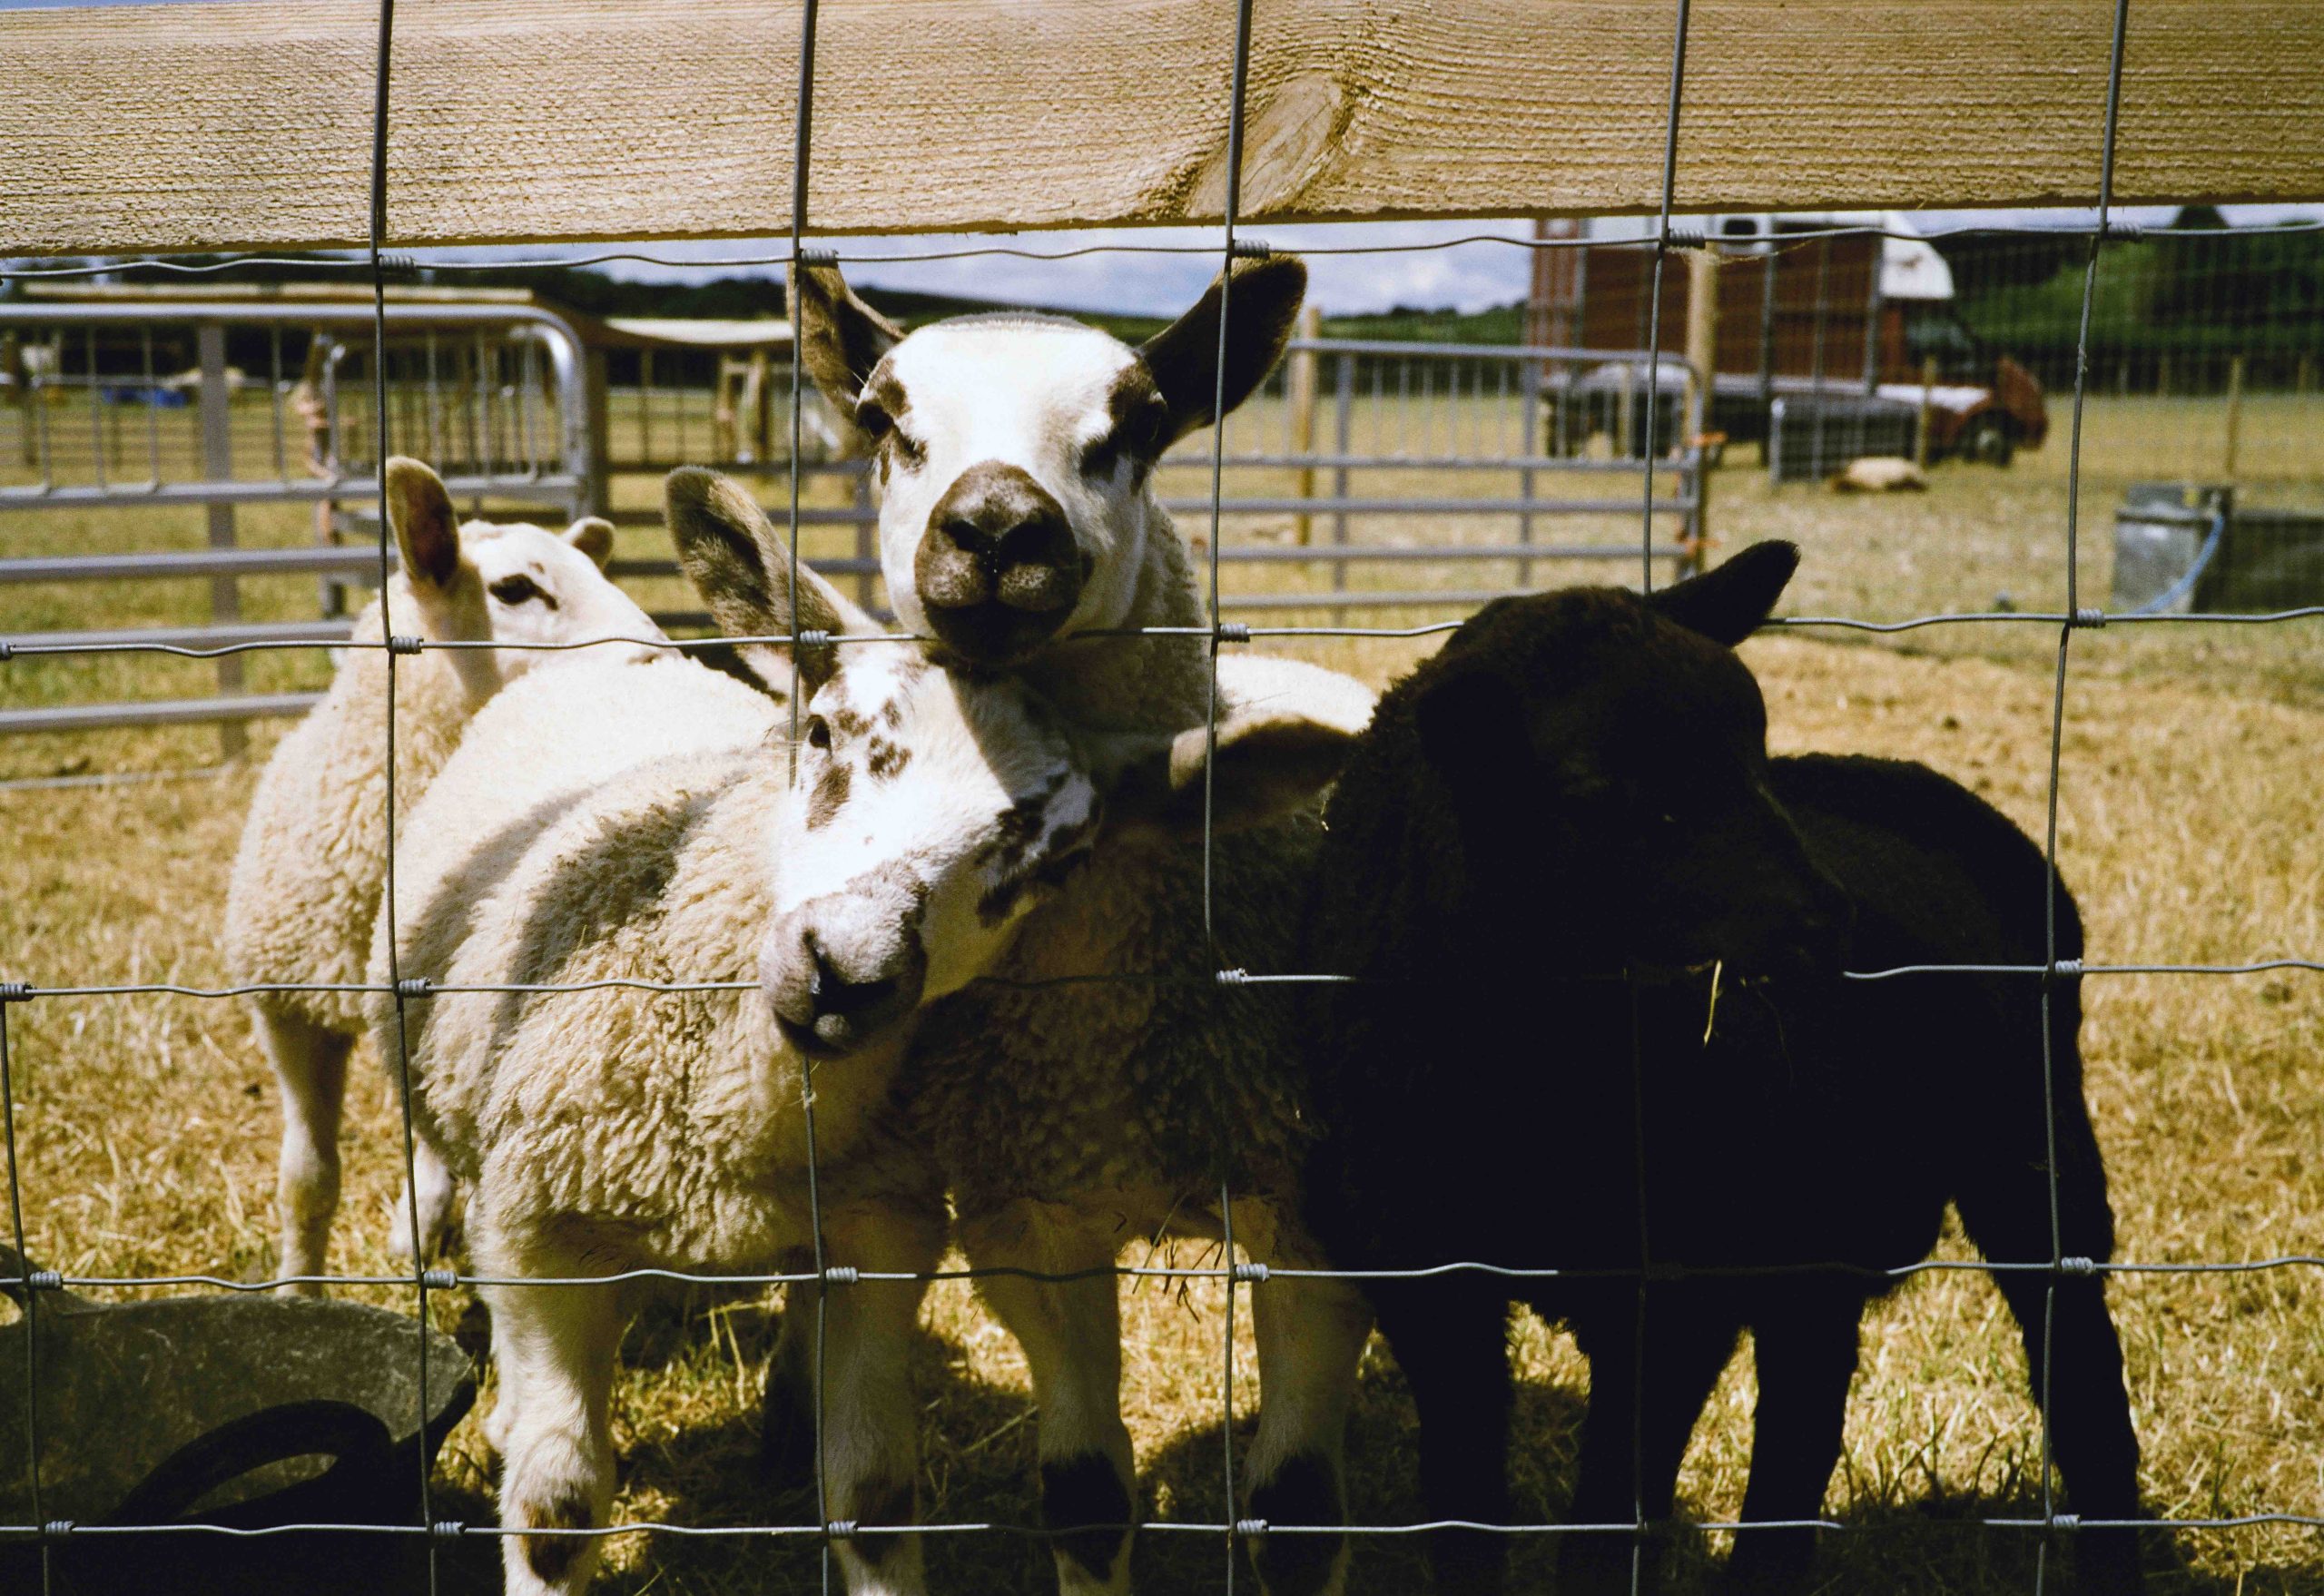
And here I just had to visit the Donkeys! I was focused around 3 feet away. It wasn’t easy as the Donkey kept moving toward me and I was shooting from the hip. It was the best of a bad bunch!
Dragon No1 film at 100
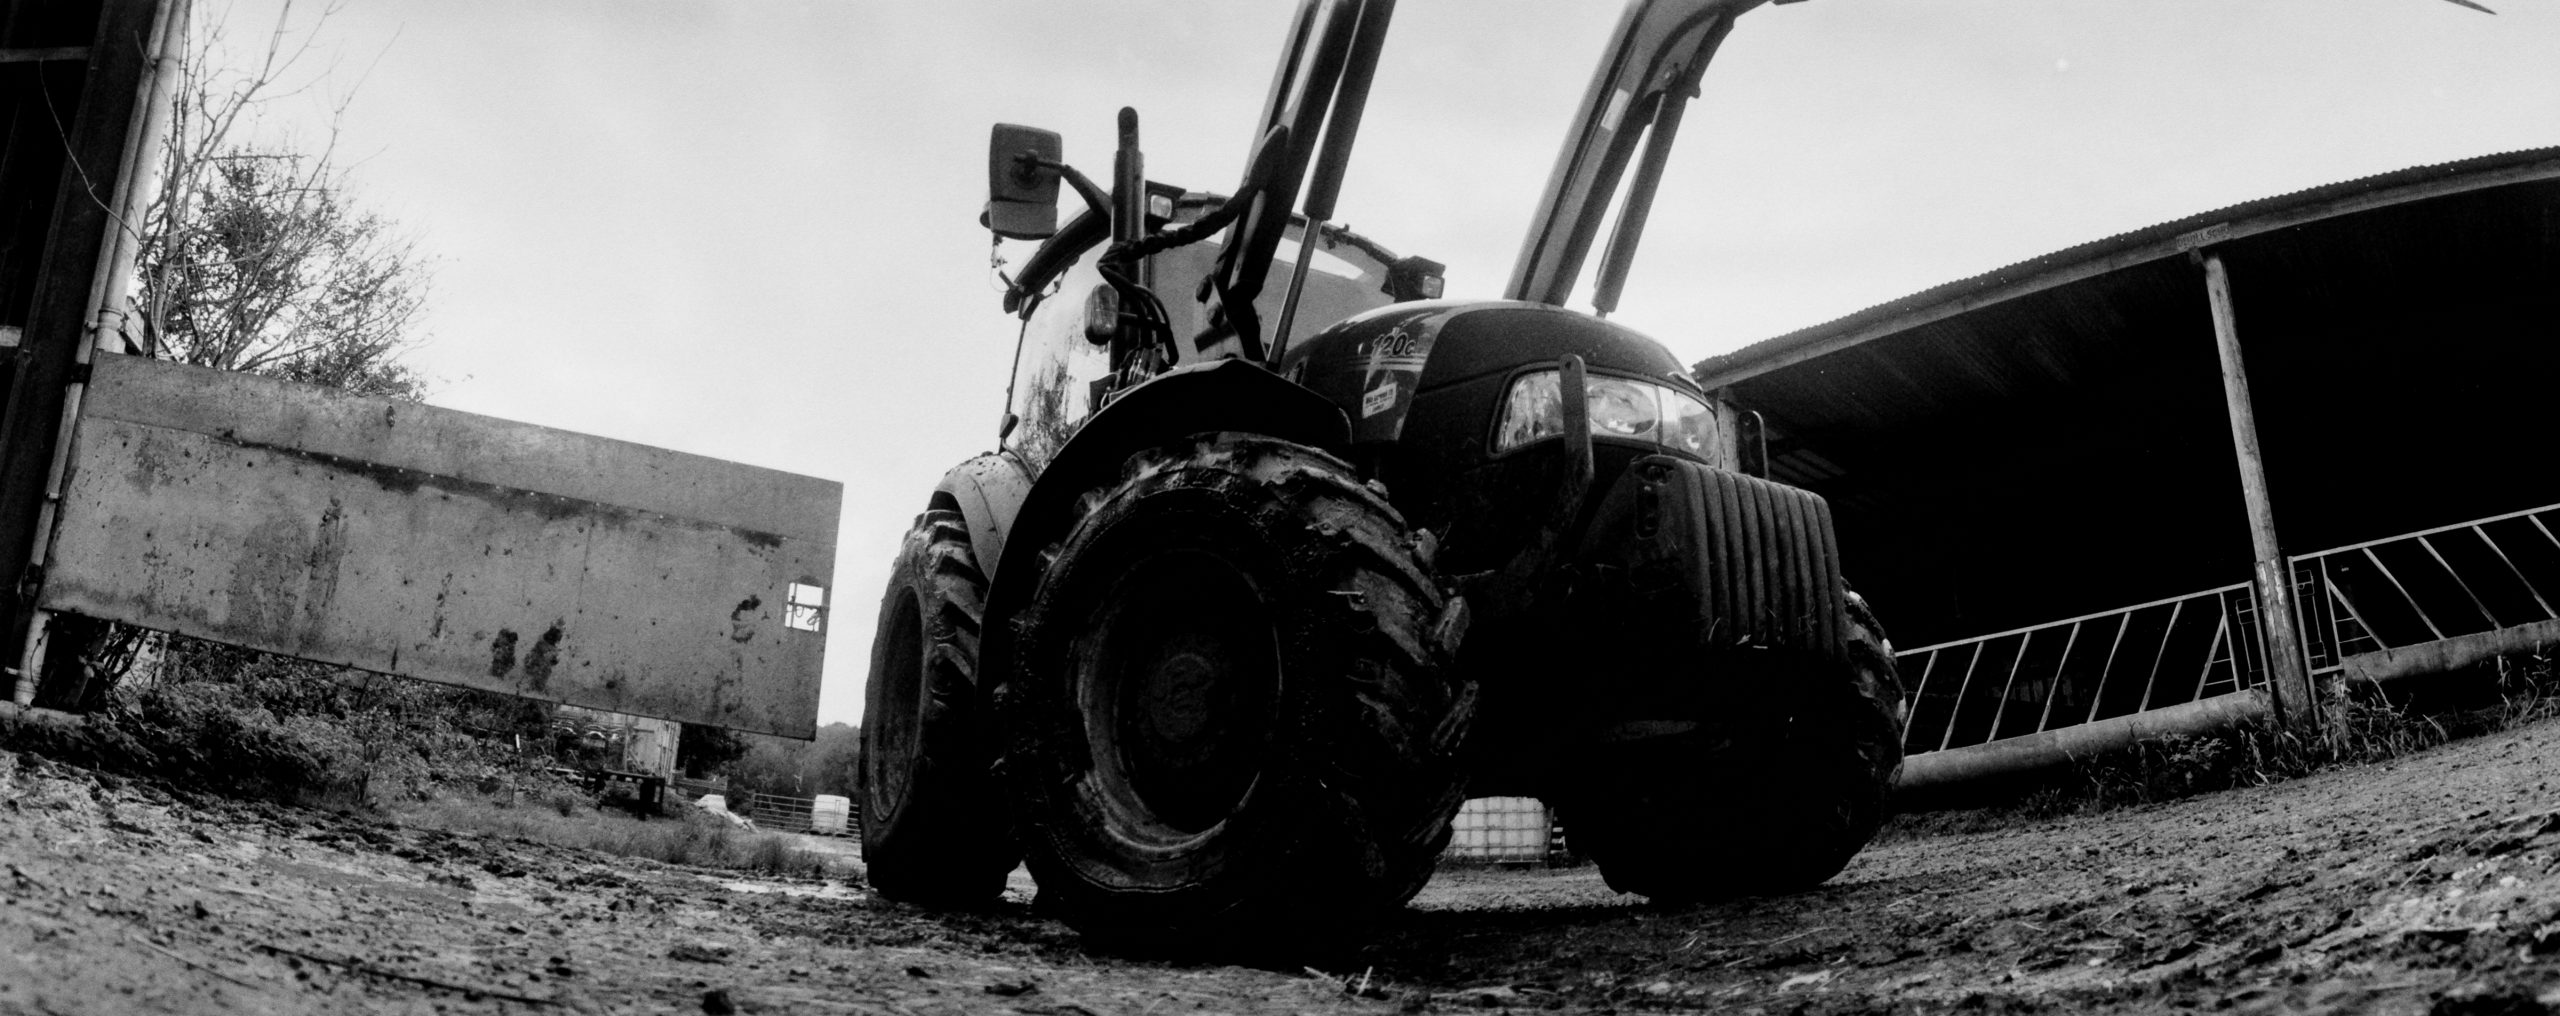
This is where you can see the distortion as we creep up from the wall in the bottom right of the frame.
Dragon No1 film at 100
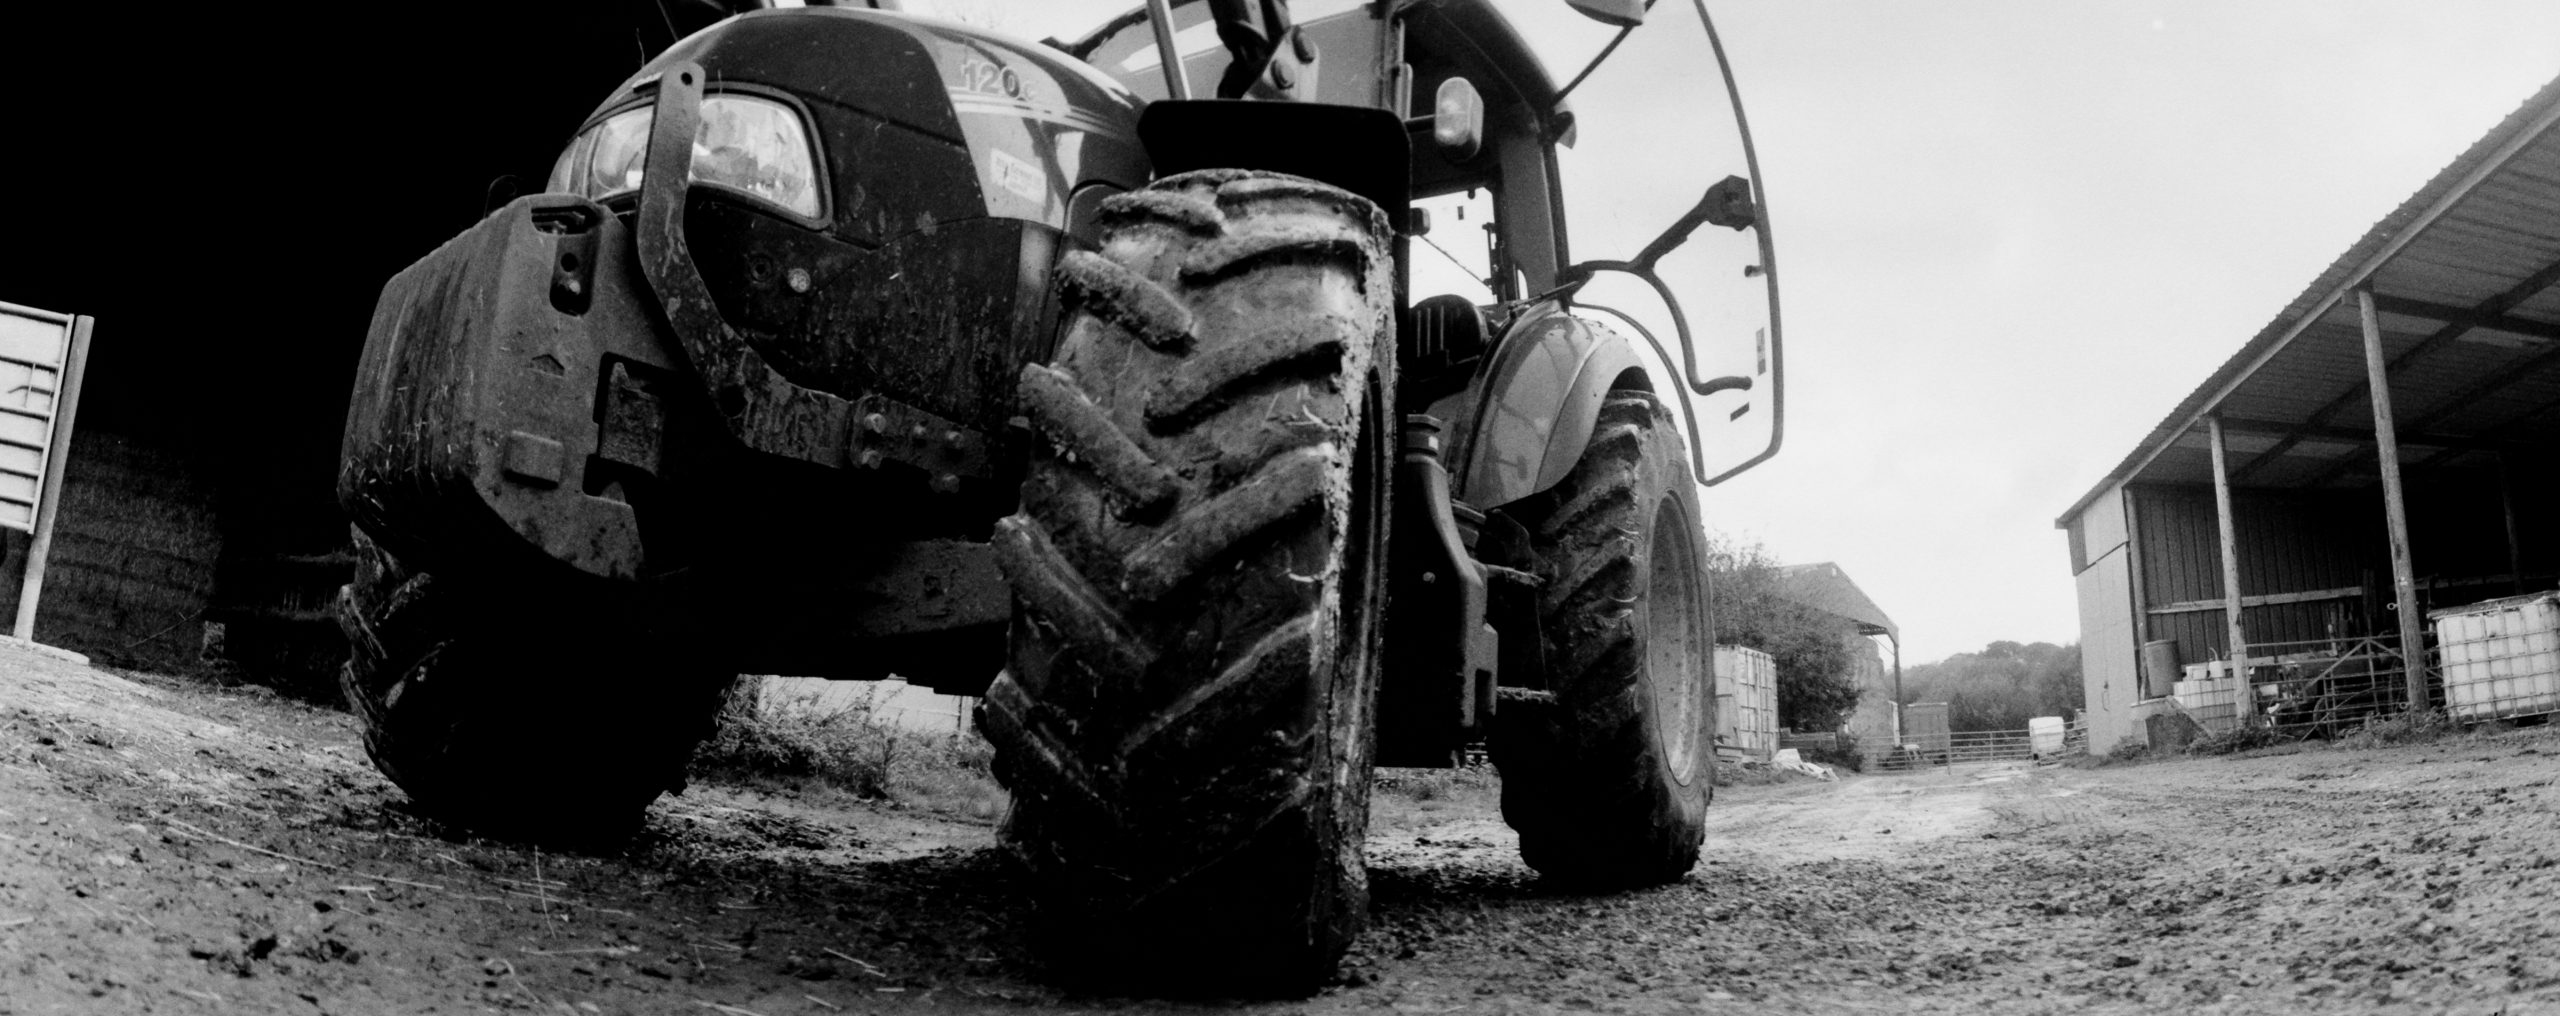
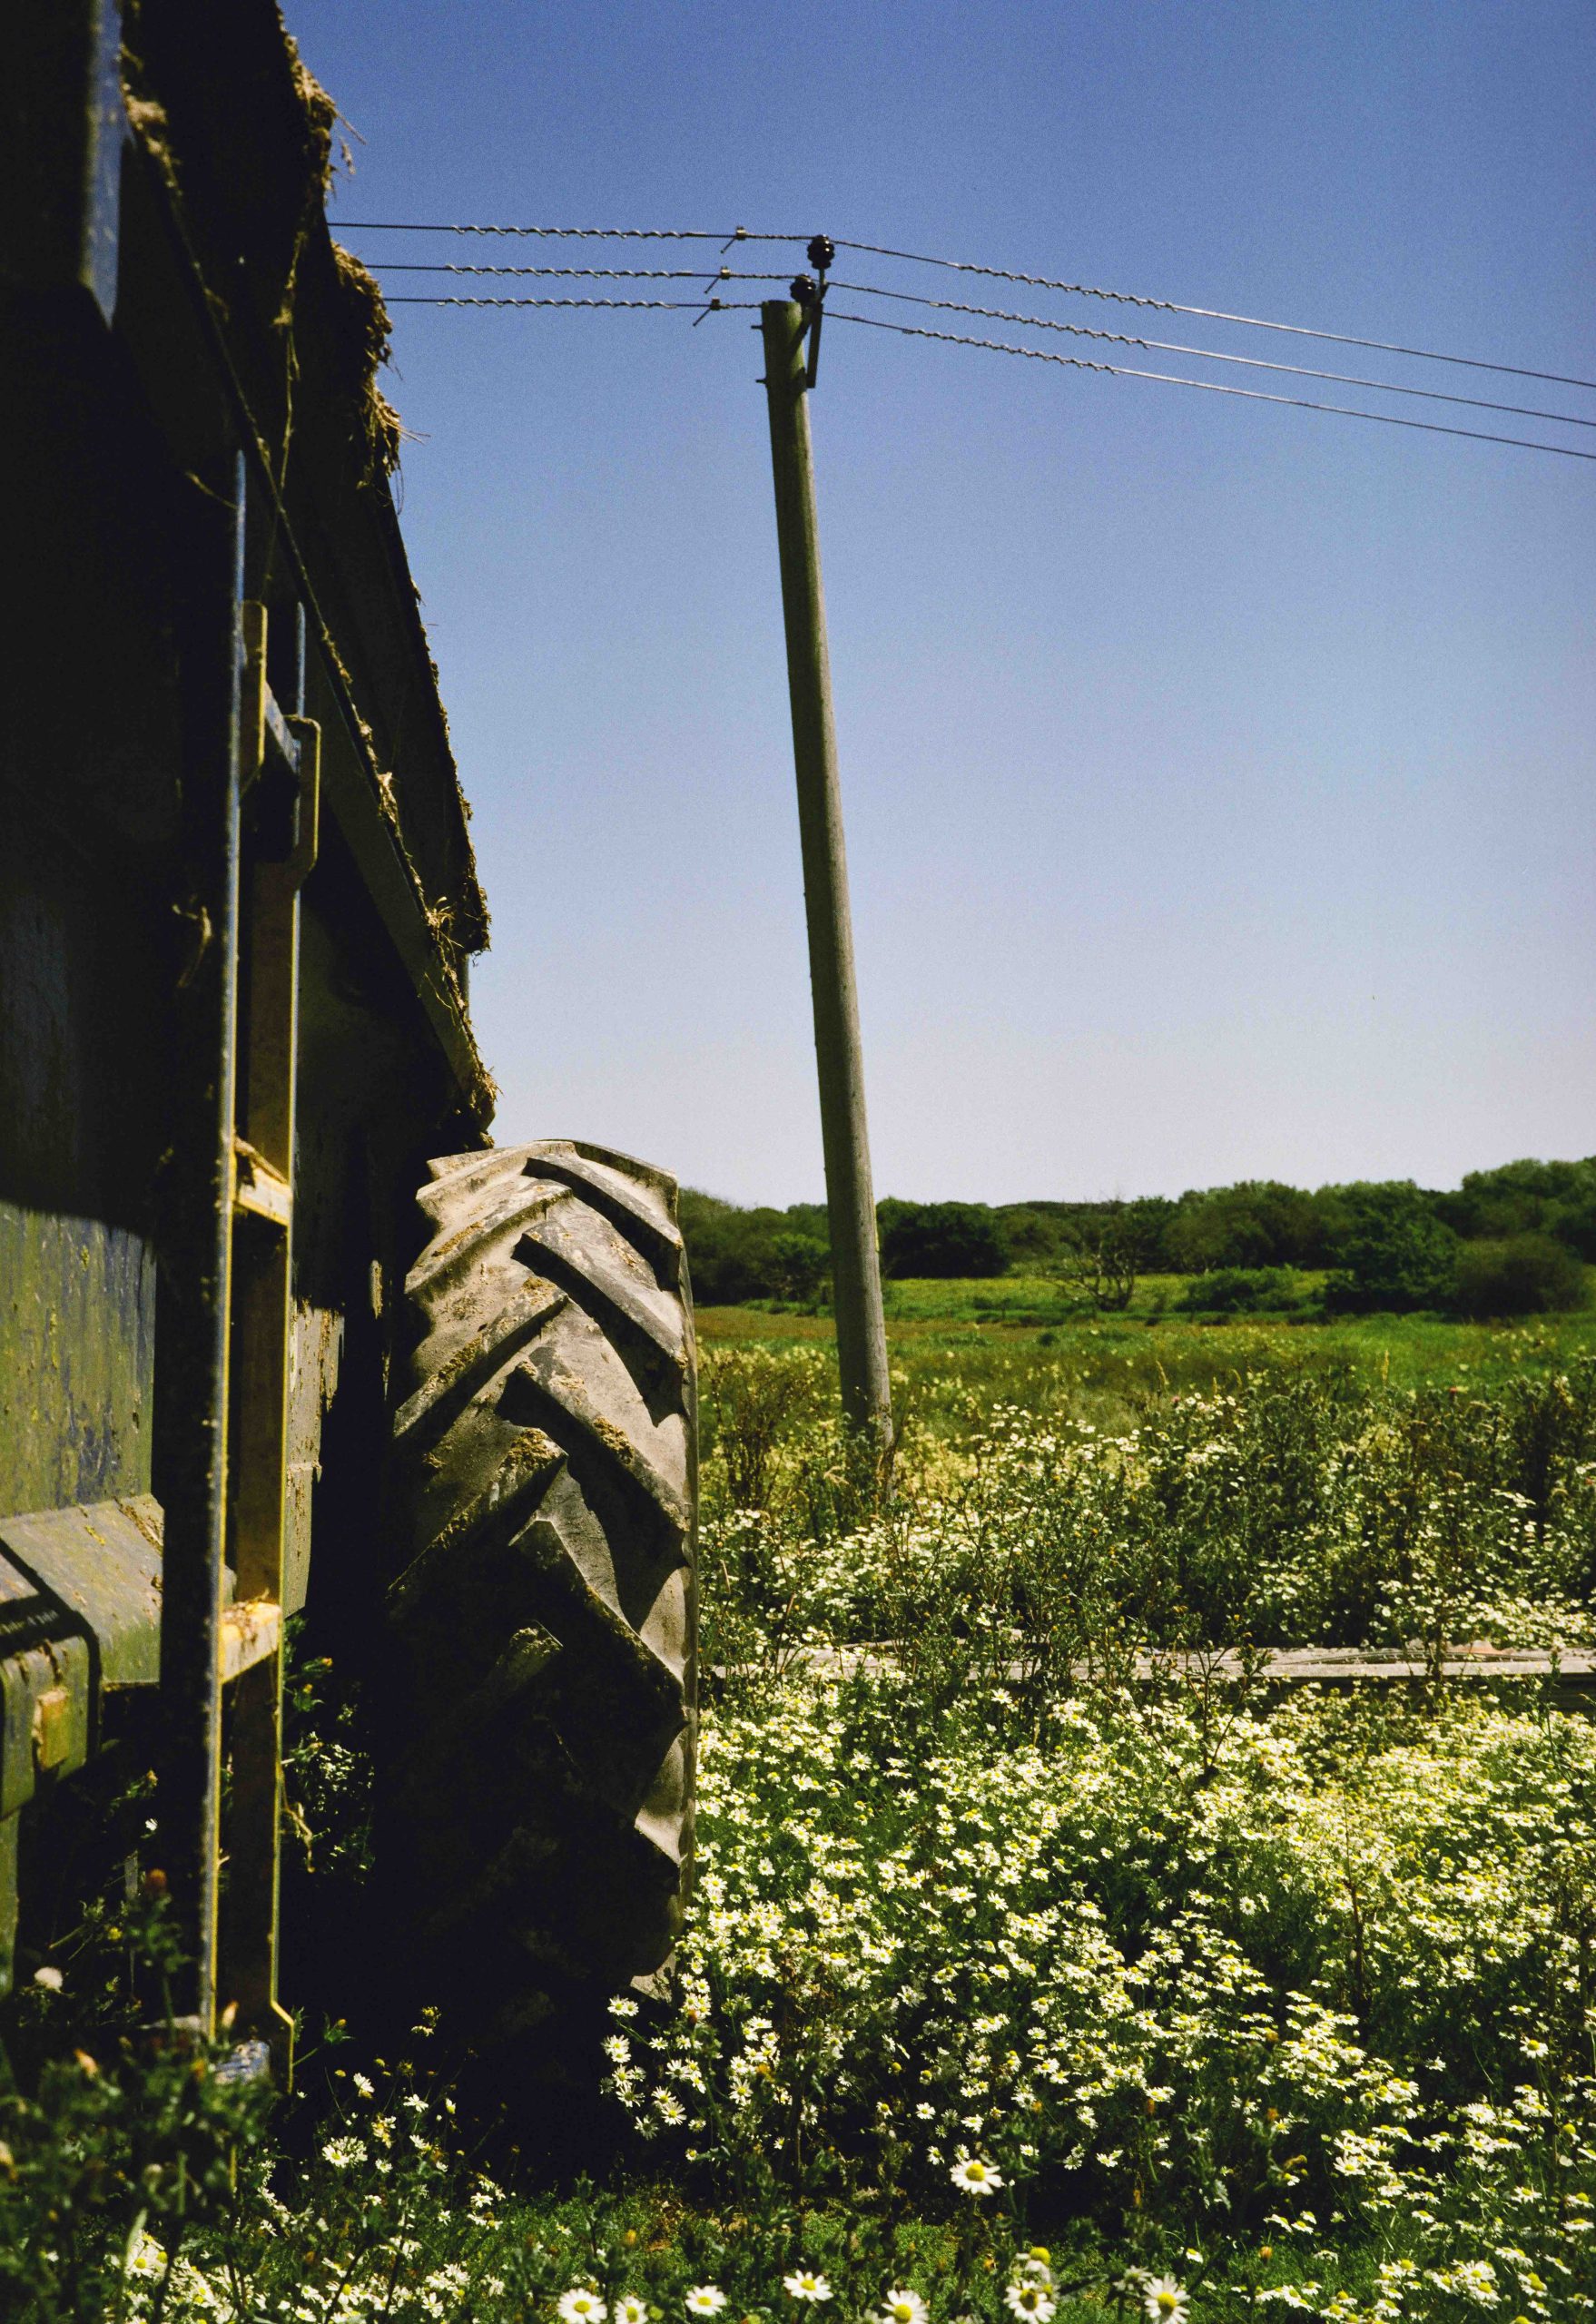
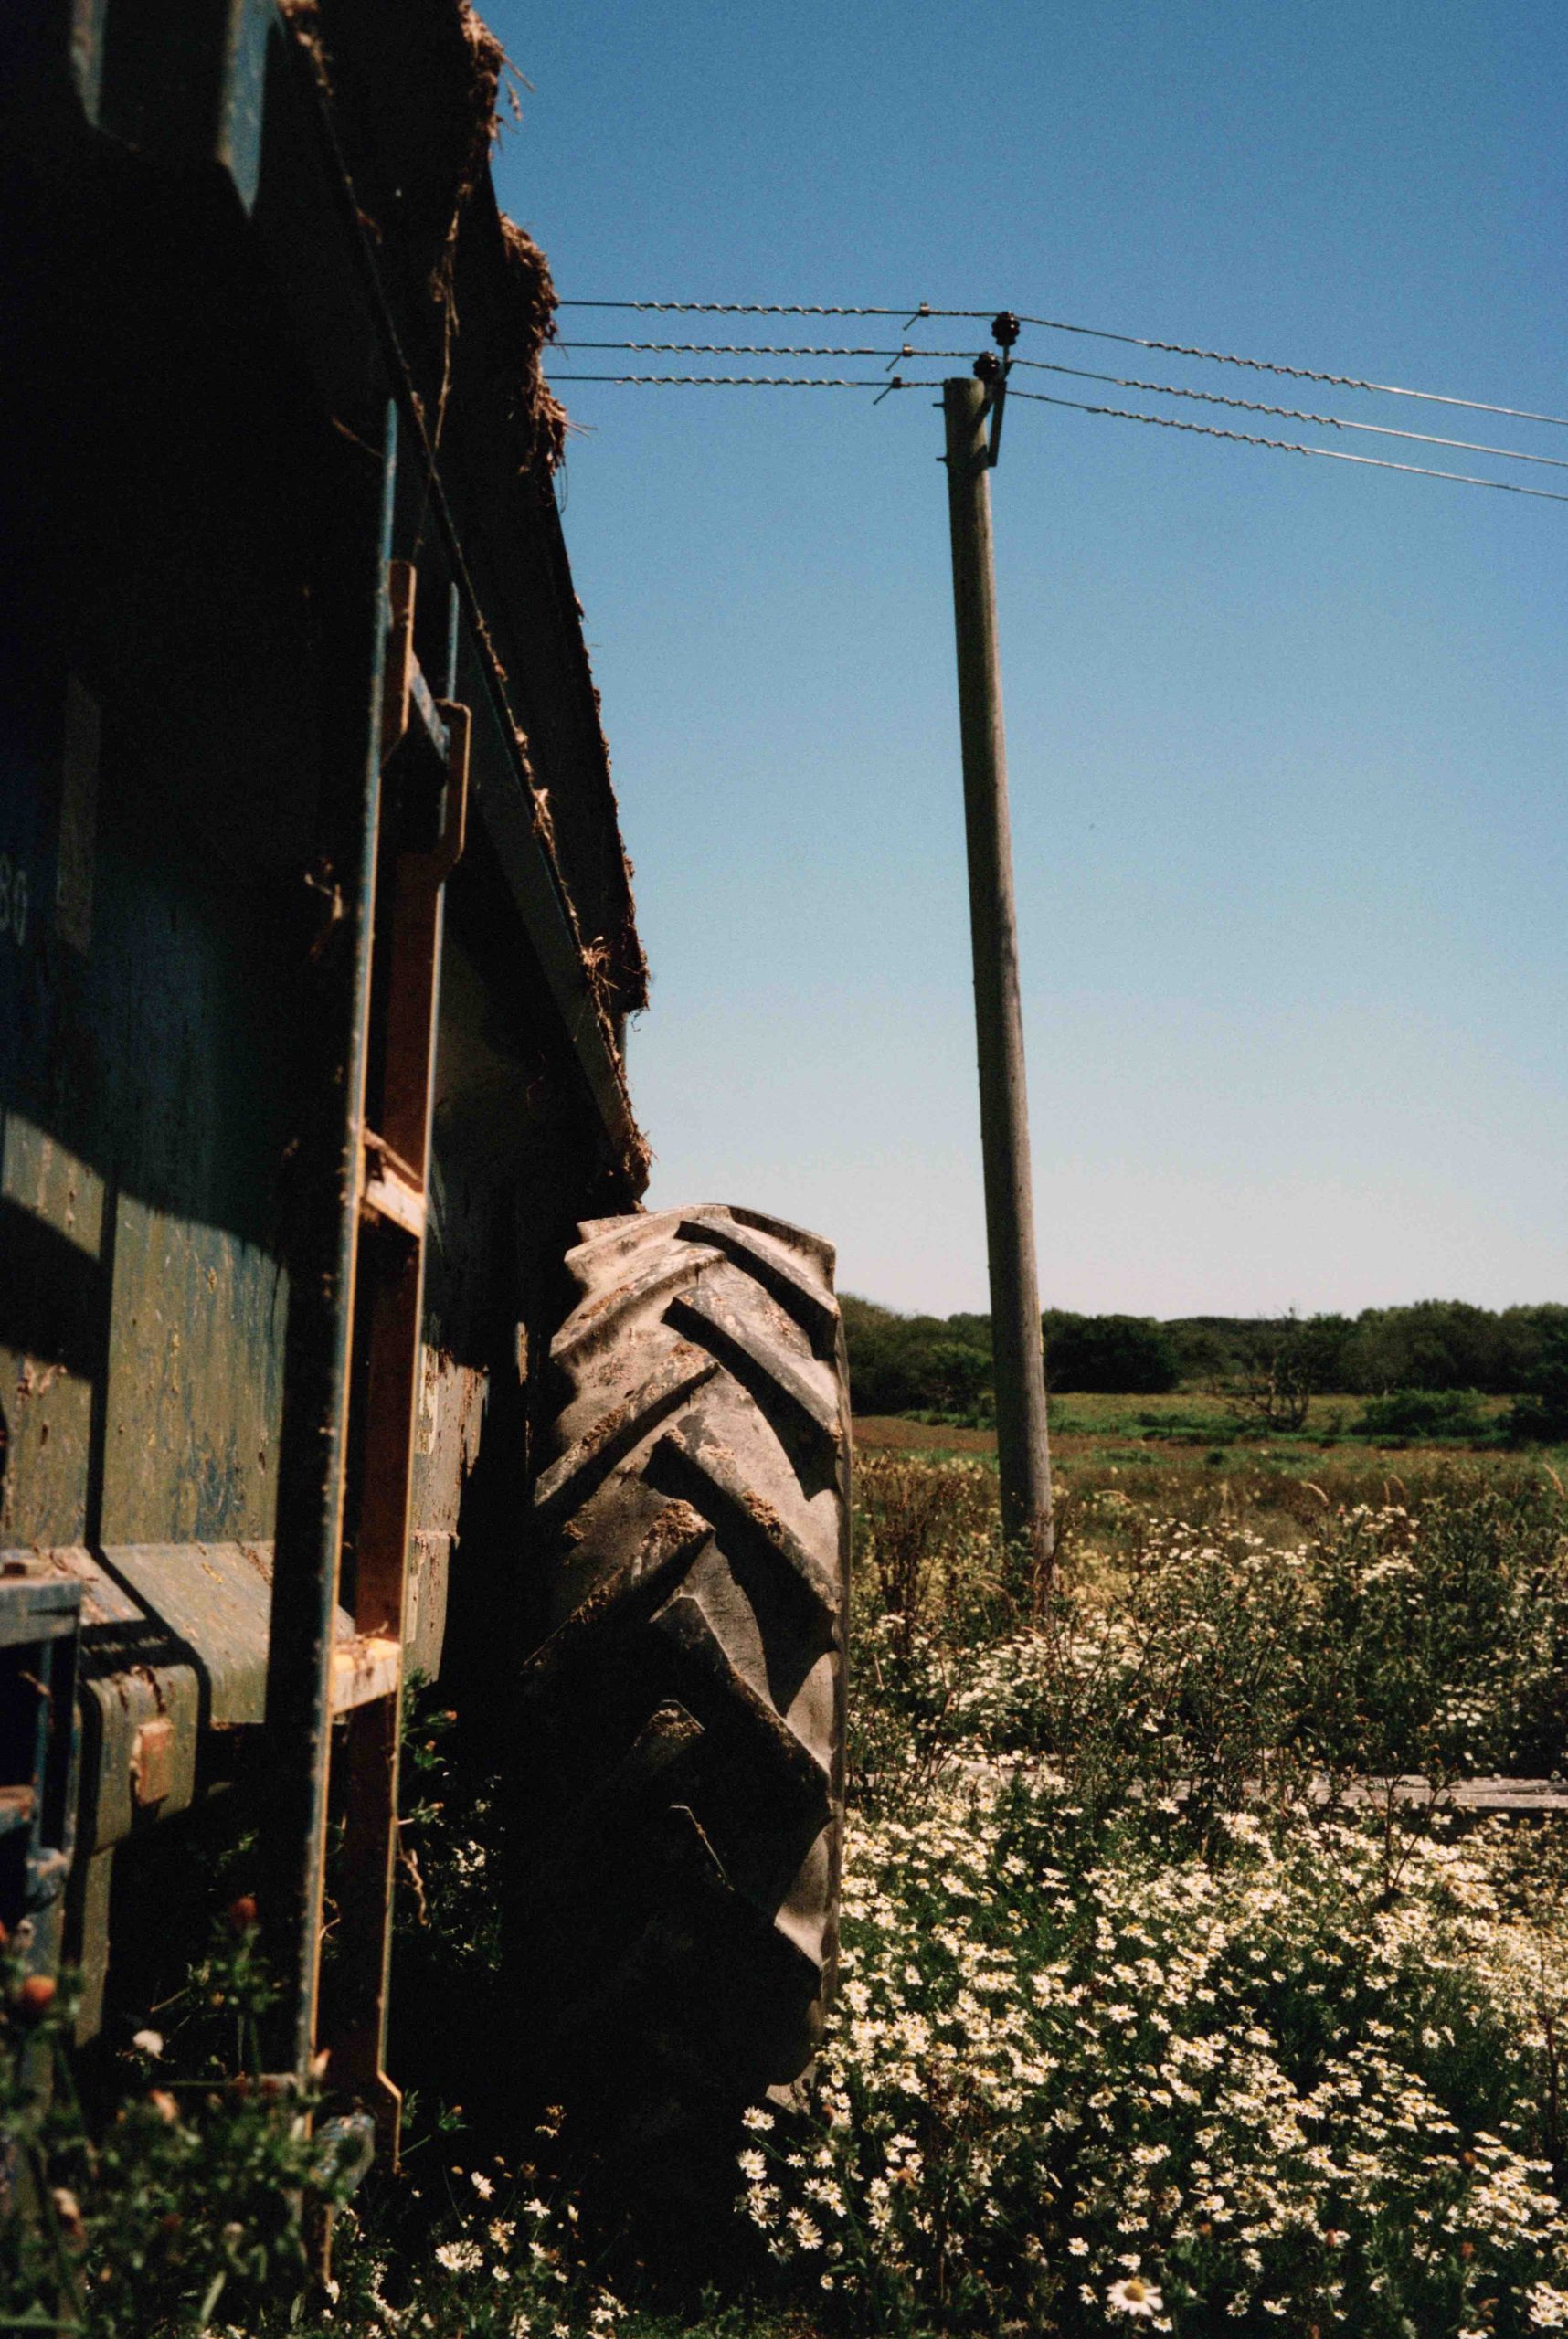
And again here. Notice the big tyre and how deformed it looks being over to the left of the frame.
Dragon No1 film at 100
What about people? Here is my Daughter, Jess, leaning out of my darkroom. I placed her here so I could close the aperture and make the background dark. Her arm sort of extends off out of the frame over on the left. And it does distort even though I was only a few feet away, however, it certainly has it’s uses in portrait photography for a certain, let’s say, interesting look!
Dragon No1 film at 100
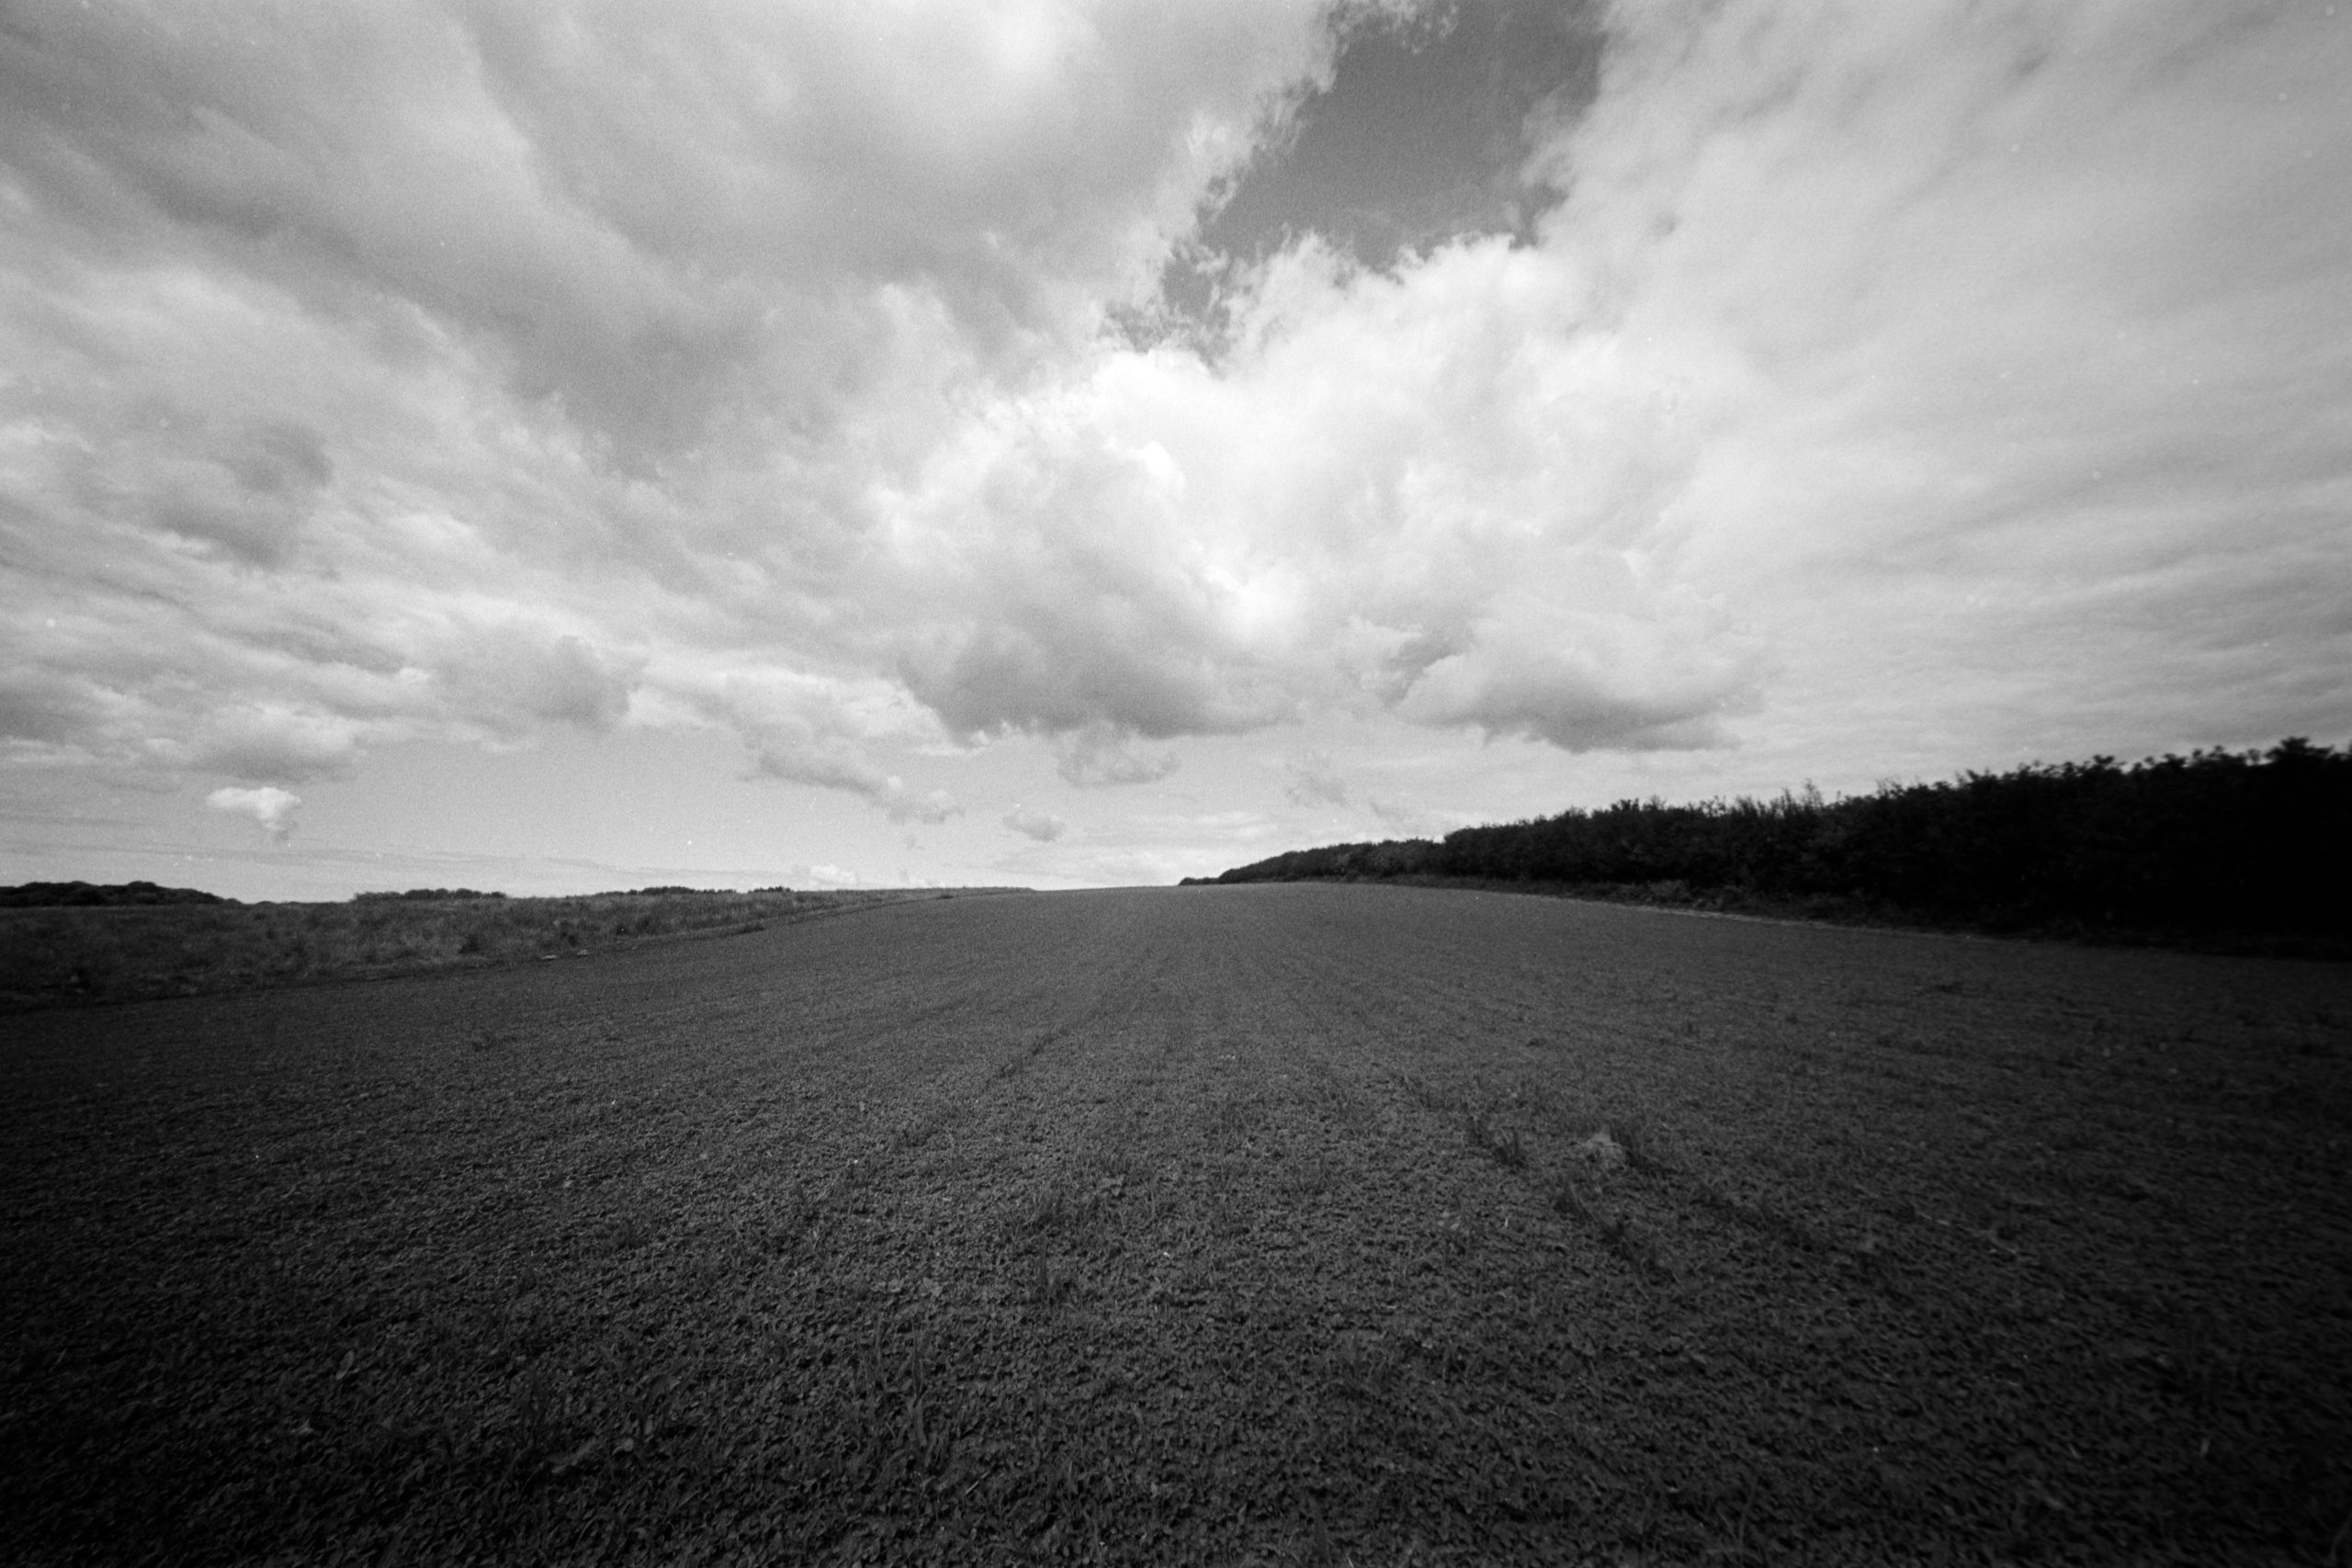
But I think this is where this lens excels, or at least for me. Massive impact in the background and something dominating the foreground. This means for landscapes I need to do the same. I don’t think just a cornfield will look that interesting unless there is an object big and bold in the foreground. That could even be the corn itself.
Dragon No1 film at 100
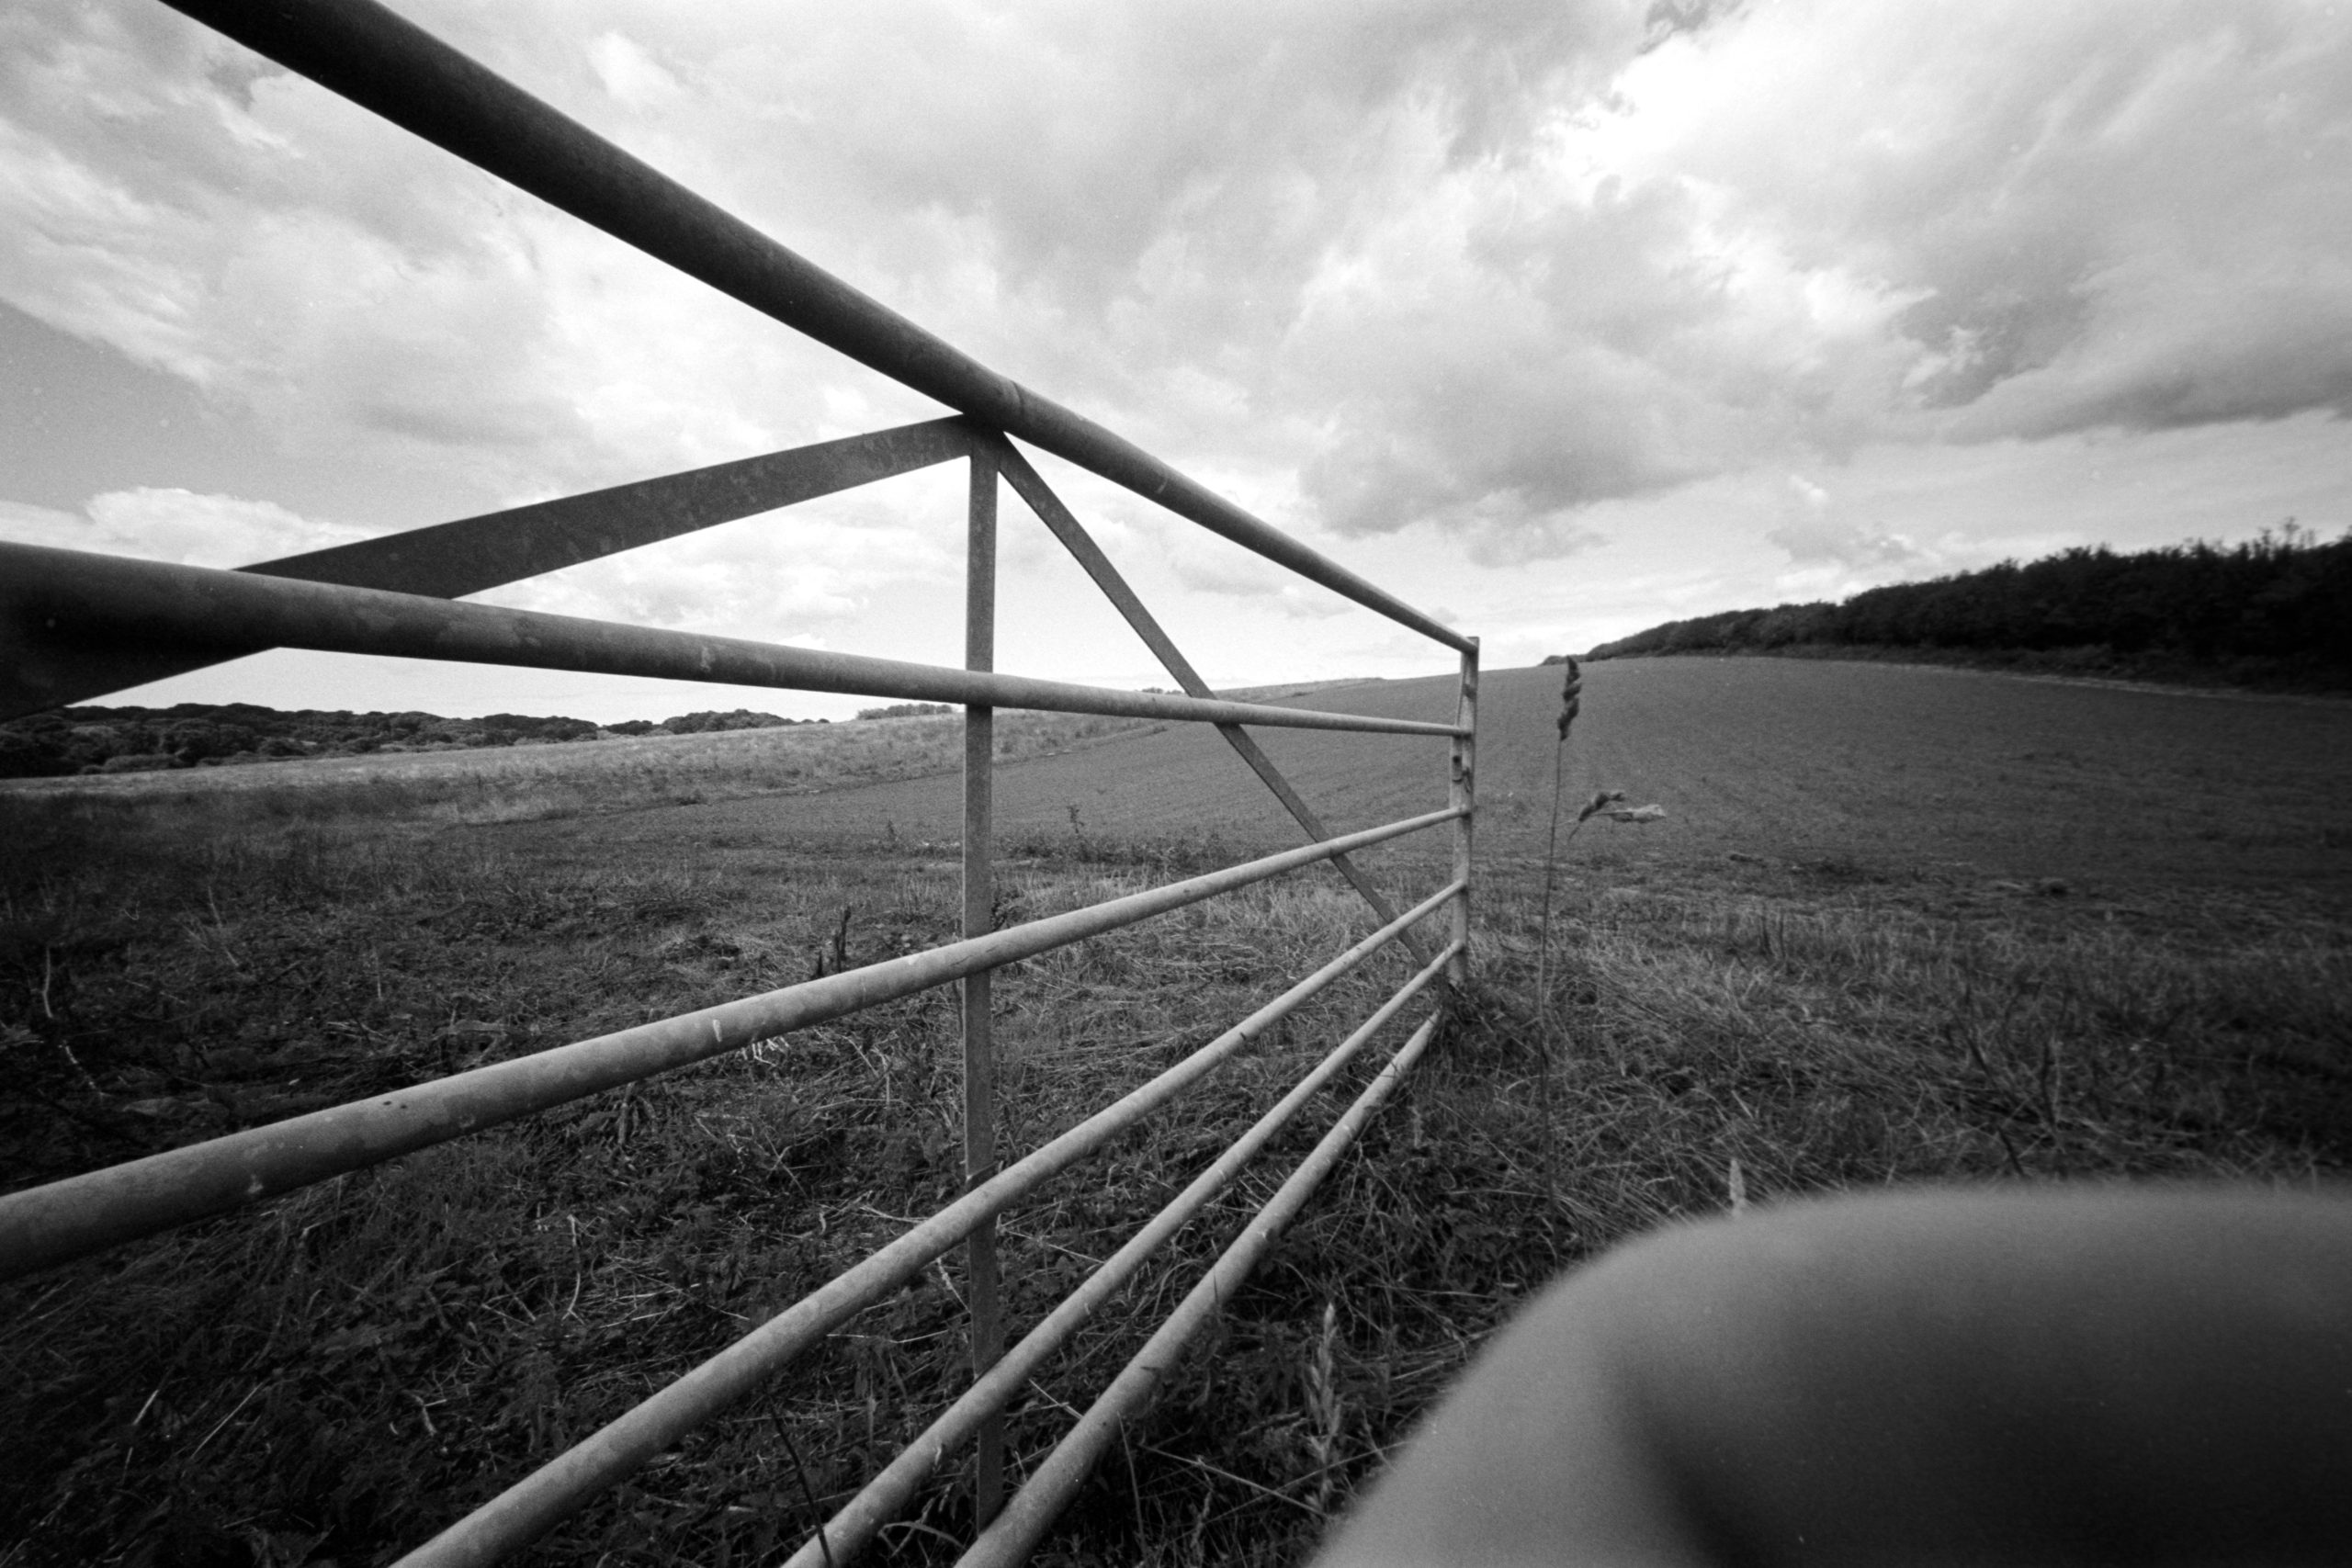
And I tried that here. Just a normal field. What amazed me was the lack of distortion on the horizon, due the lenses Rectilinear design. Basically make sure your horizons are in the centre of the frame for minimal distortion. But it looks a bit bland, so I took another photograph using the field gate.
Dragon No1 film at 100
Now!.. there is far more impact. It’s just unfortunate I got my finger in the way!
So, where now?
Well, I love the camera and I love the lens. I still have yet to try the 25mm lens, which I will do when I make a video on the channel. But for now I am trying to settle in with the 12mm lens.
I am not sure yet where this lens will take me. I think I am swaying more towards land and sea scapes with impressive foregrounds. Street Photography I can imagine is awesome, however, for real benefit you will need to be very close to your subject, which isn’t my style. But who knows until I take more street photos. I mean. Look at this Church photo. It’s ridiculously wide.
TMAX 100 pushed to 400TMAX 100 pushed to 400
And this time I went up to the top of the multi story carpark for a photograph of the town square. Getting real close to the wire fence.
Oh go on then… one more hit and miss with Daphney!
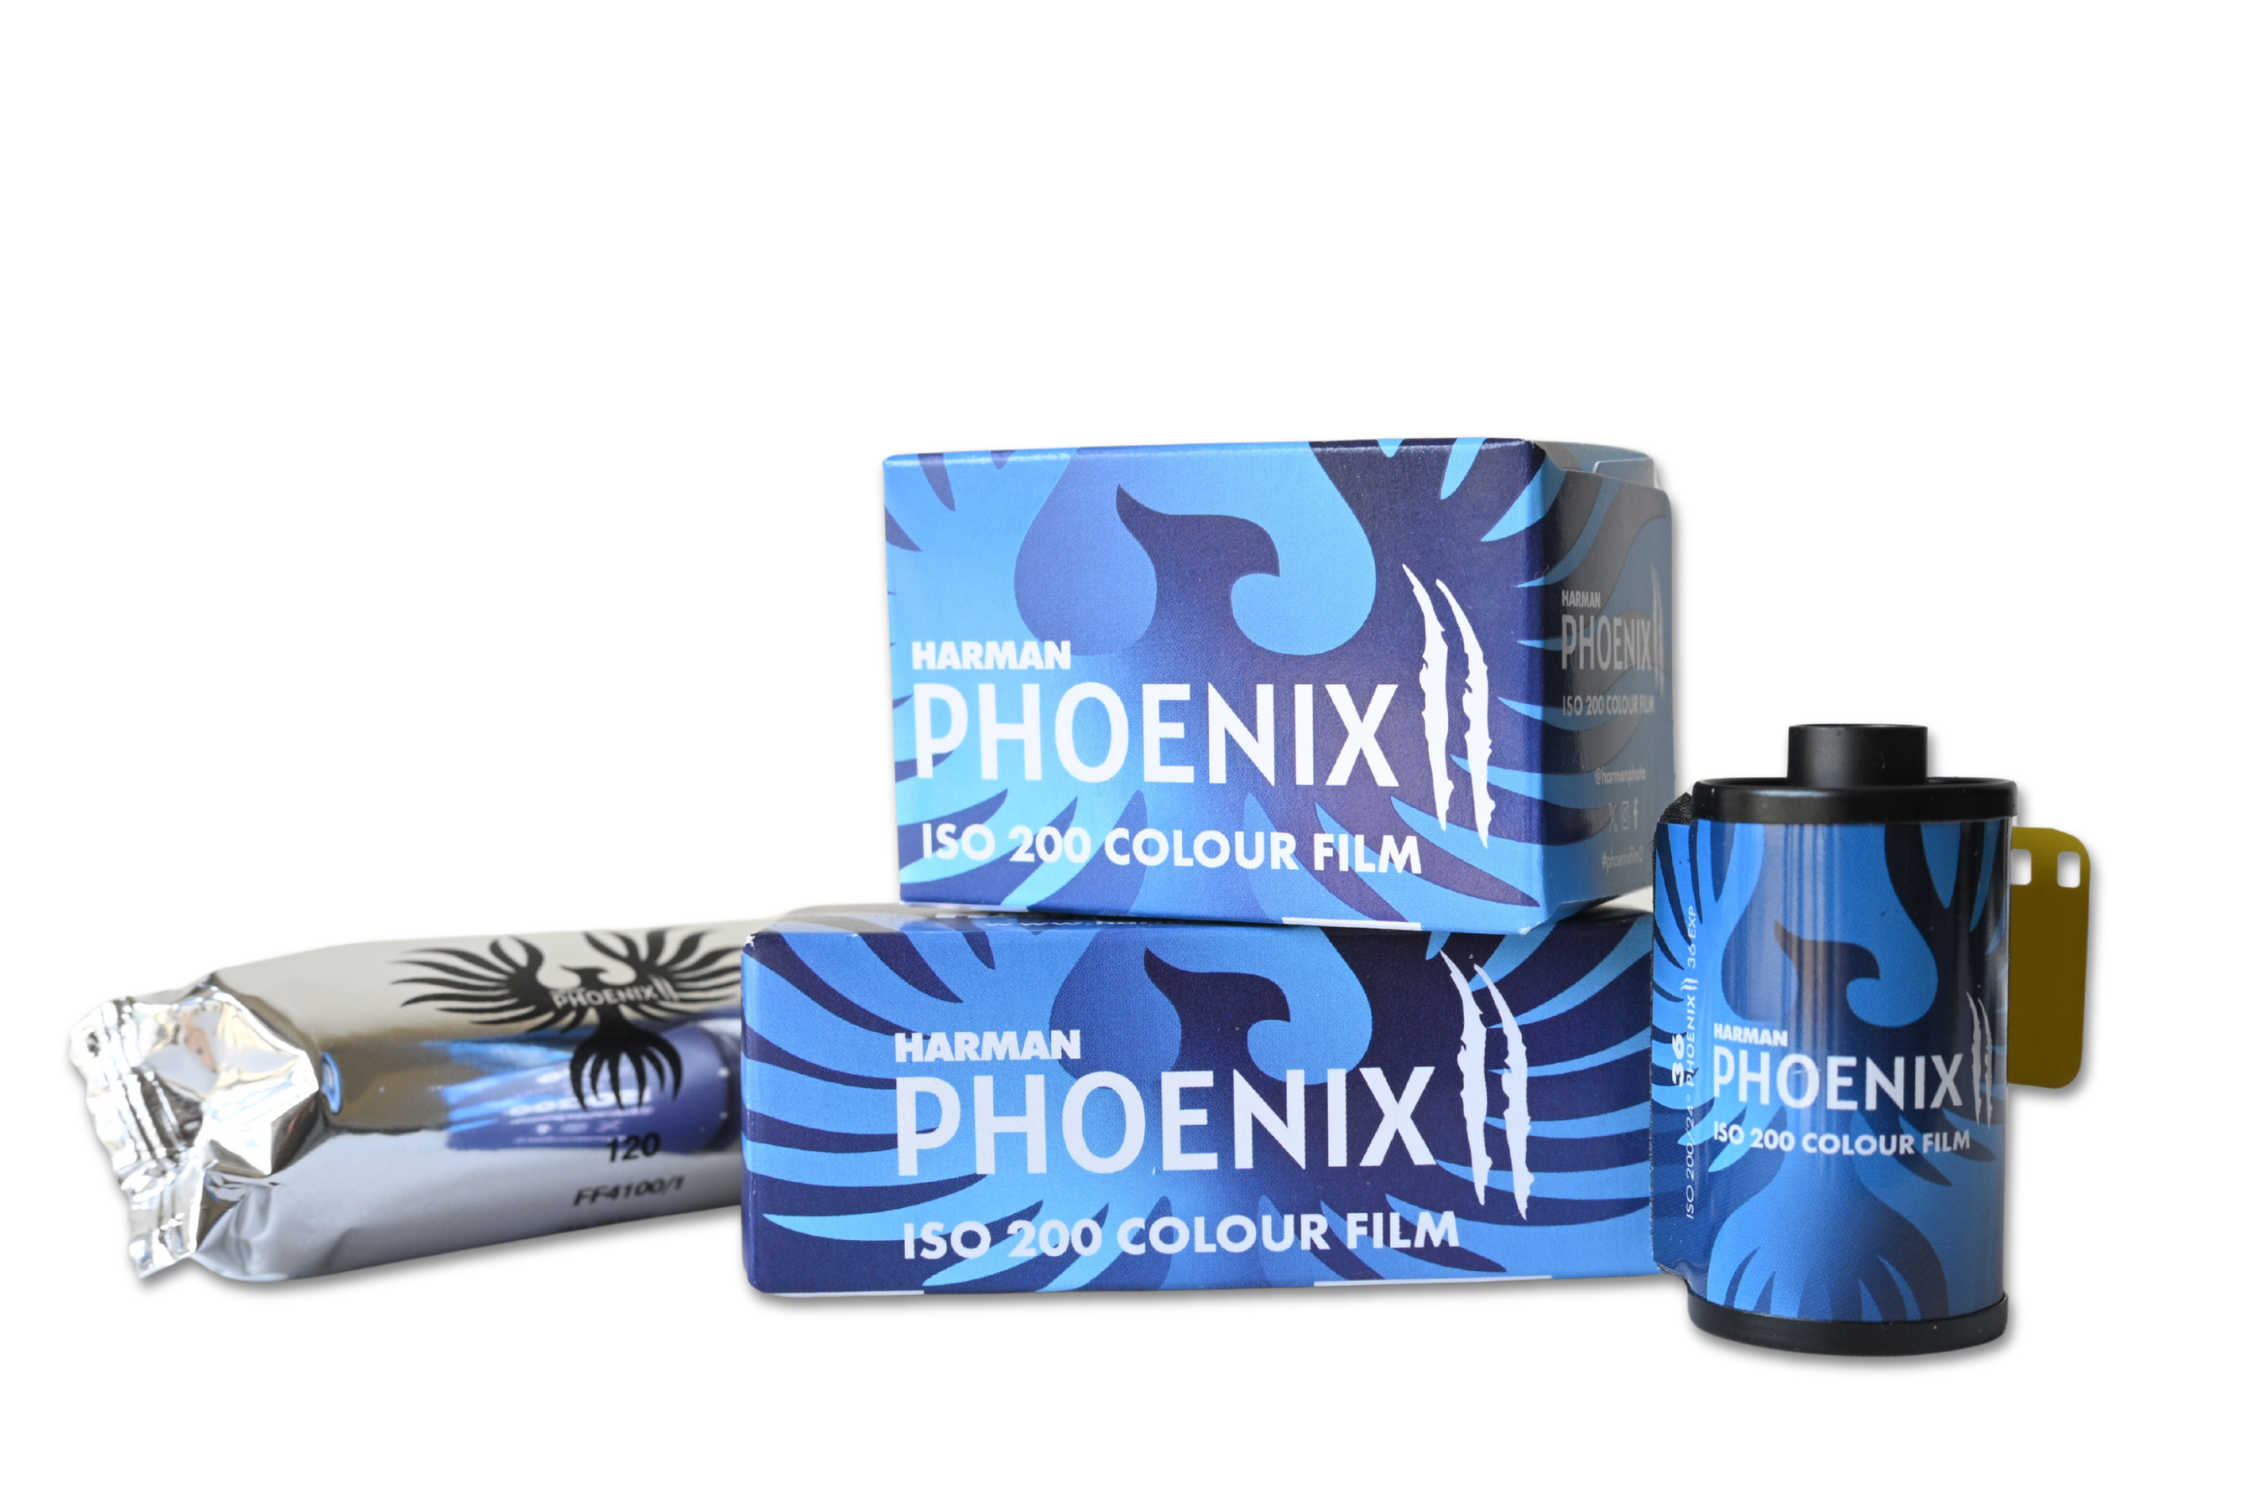
In December 2023 Harman released their first colour film, Phoenix 200. They had a long drawn out campaign on social media in the months building up to the release which got the film community excited in anticipation! And when it landed it got a mixed bag of reviews with many loving what Harman had done.
Well, it’s the 16th July 2025 and they have just released Phoenix II and Harman sent me some rolls to test out. So I did! And I asked Harman to develop the films for me. And here are some of the scans from three rolls I sent in including a roll of original phoenix so I could compare.
See the SFLaB Video here
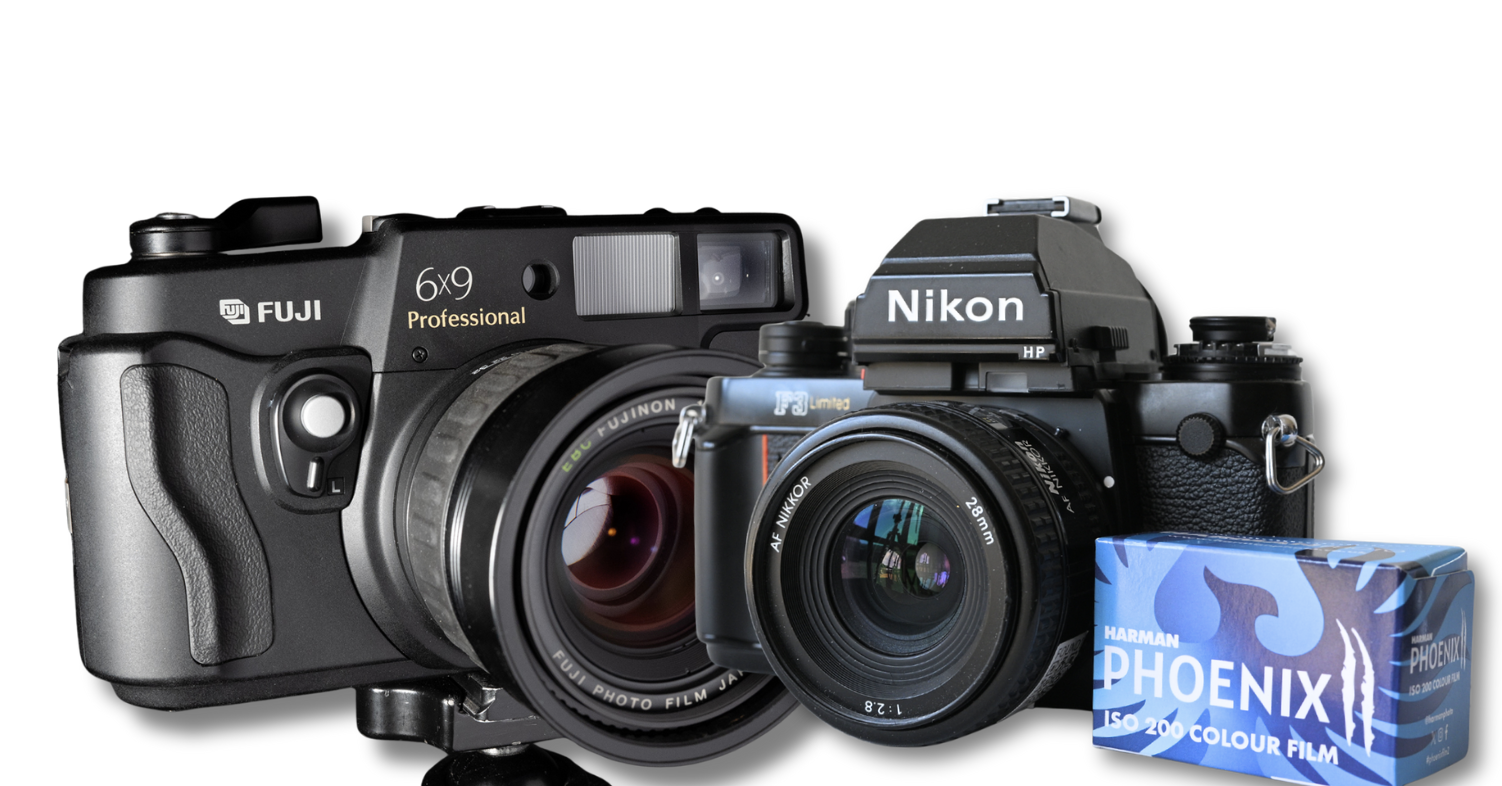
Eager to see how this new emulsion performed I set off with a Fuji 6×9 camera and for 35mm the Nikon F3. And from my results I wanted to see –
Colour Vibrancy and Rendition
Grain
Sharpness
Dynamic Range (Ratio between light and dark)
35mm
On a light overcast morning I went to the beach and purposely chose bland looking scenes. Colourful scenes come later.
So this was one of my first 35mm photographs. I knew the sands looked more browny sand and unless I am going colour-blind, to me this looks more of a hue of green. Harman scanned this no doubt on a default setting. And below is a screen grab from the GoPro I was using the make the YouTube Video.
After a bit of tweaking in Photoshop and I got a photograph I was pleased with. All I did here was highlighted the sands in the middle section and burned the bottom area. And a slight cooler temperature tweak to take the green away. (If it is green!).
I would be happy to print this photograph especially if I could manage the same in the darkroom.
Skin Tone
I took this photograph purely for skin tones. And I have tweaked it in Photoshop to get the colours I like and I am really happy the way this turned out.
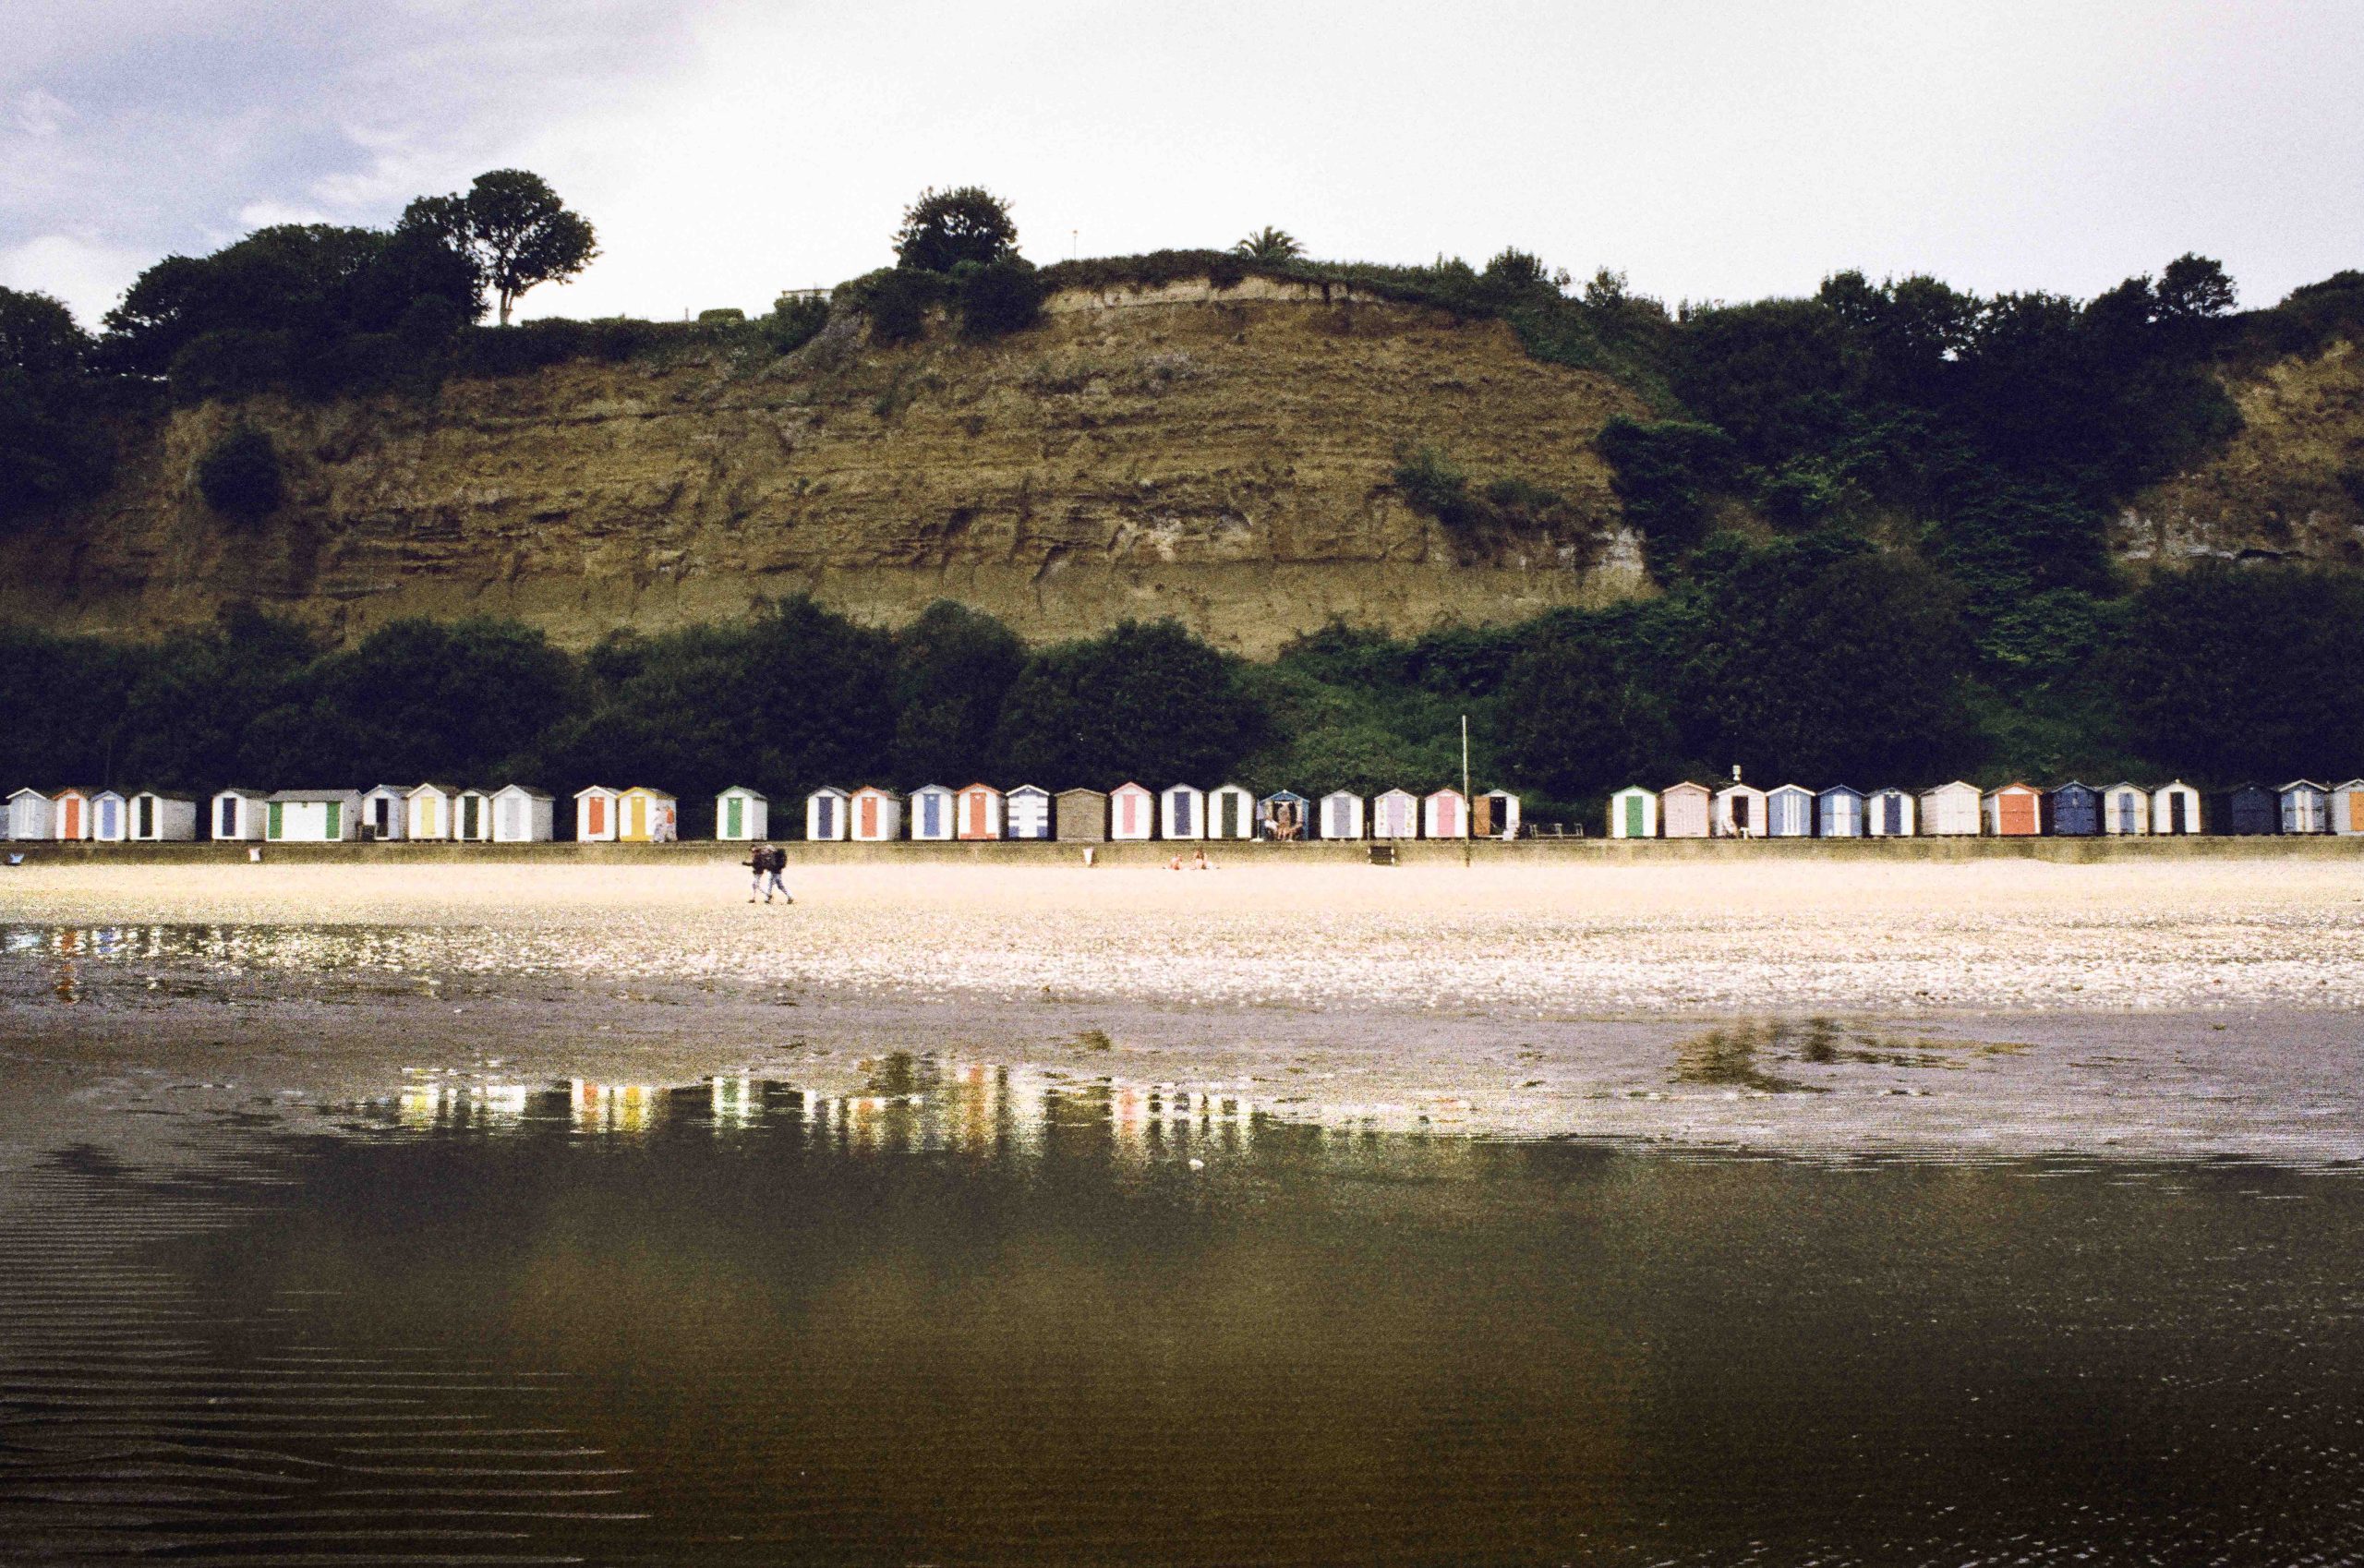
Next is a photograph of beach huts with their reflection in a water hole. Again, I have tweaked this photograph to my own taste with a bit of de-saturation and exaggerating the highlights (dodging) the hut reflections.
Colour
Aiming for some colour now I spotted these vibrant red deck chairs. This photograph was pretty much straight from the scan. As are the rest of these photographs.
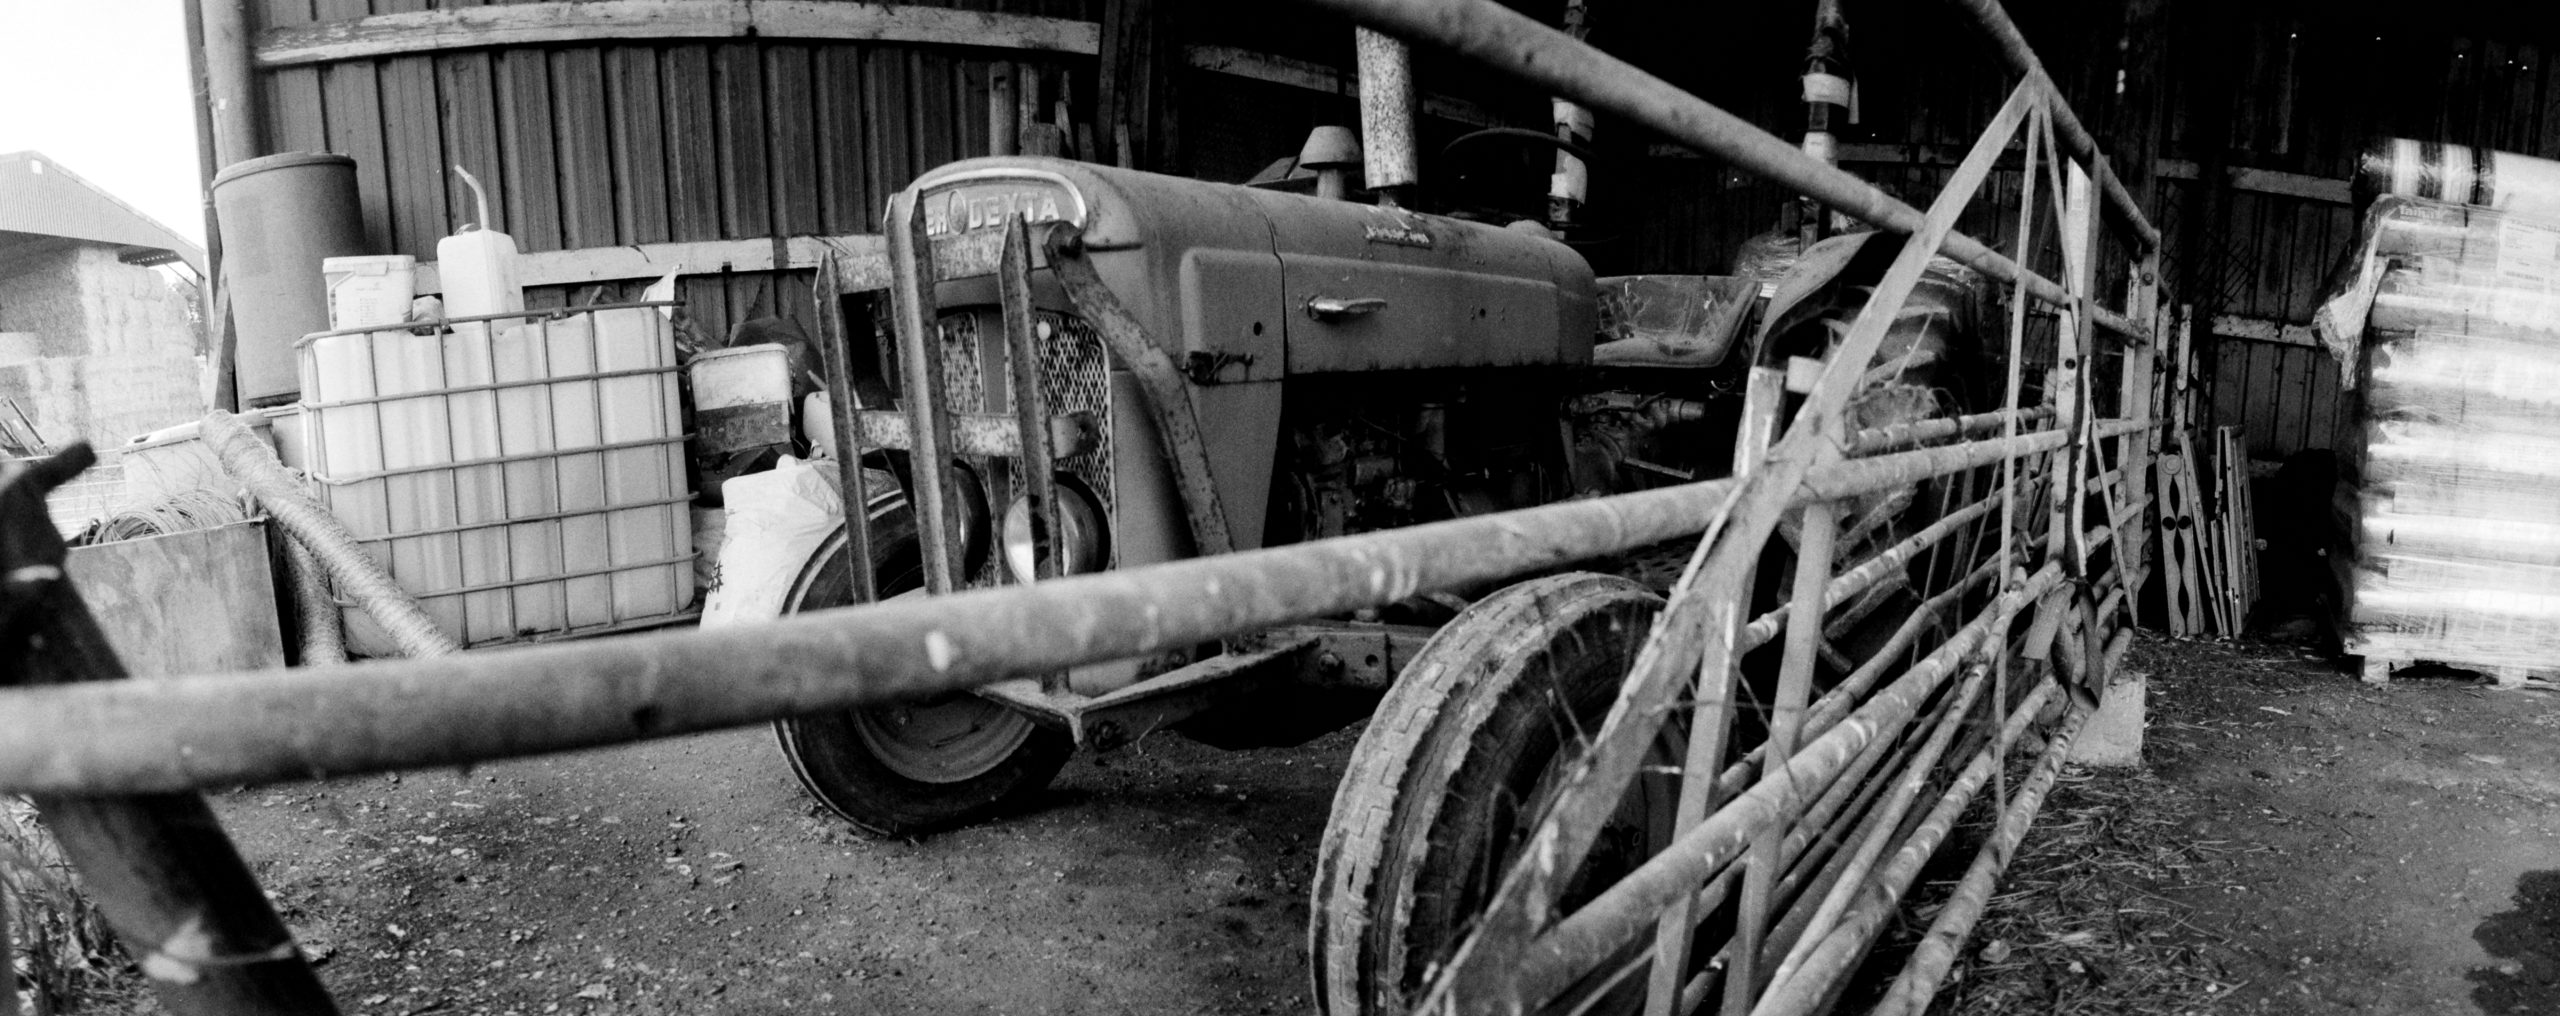
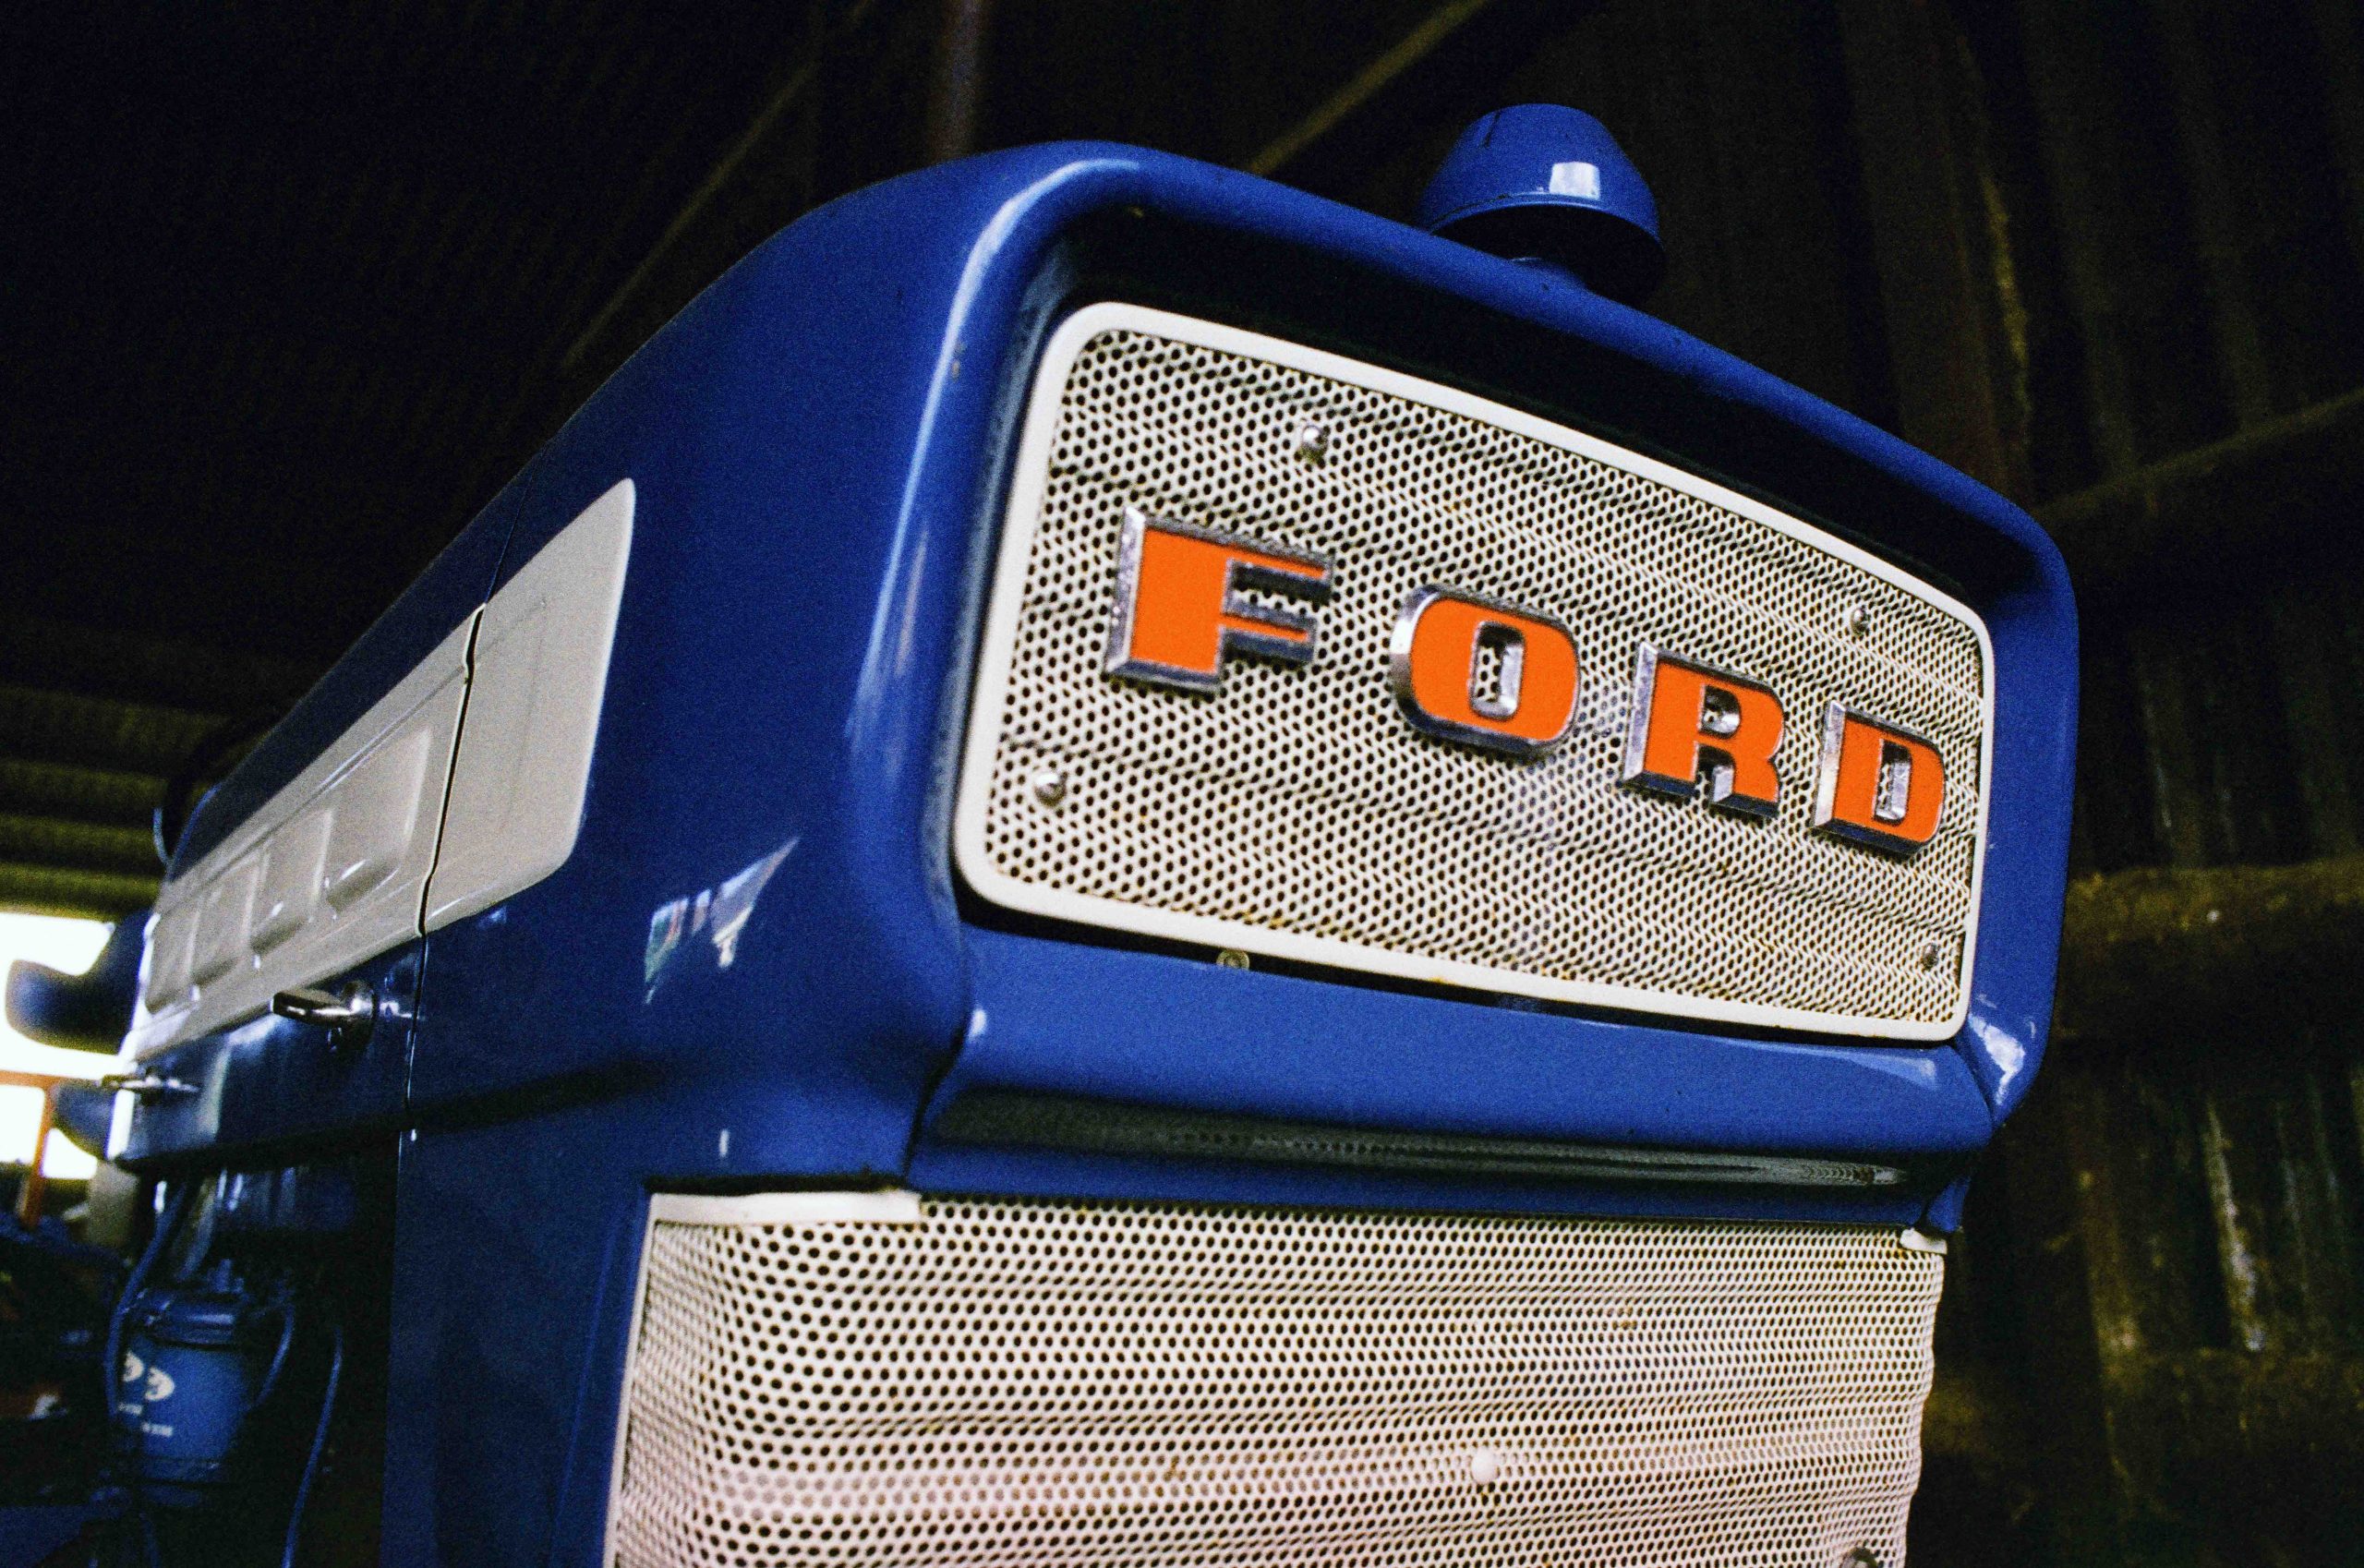
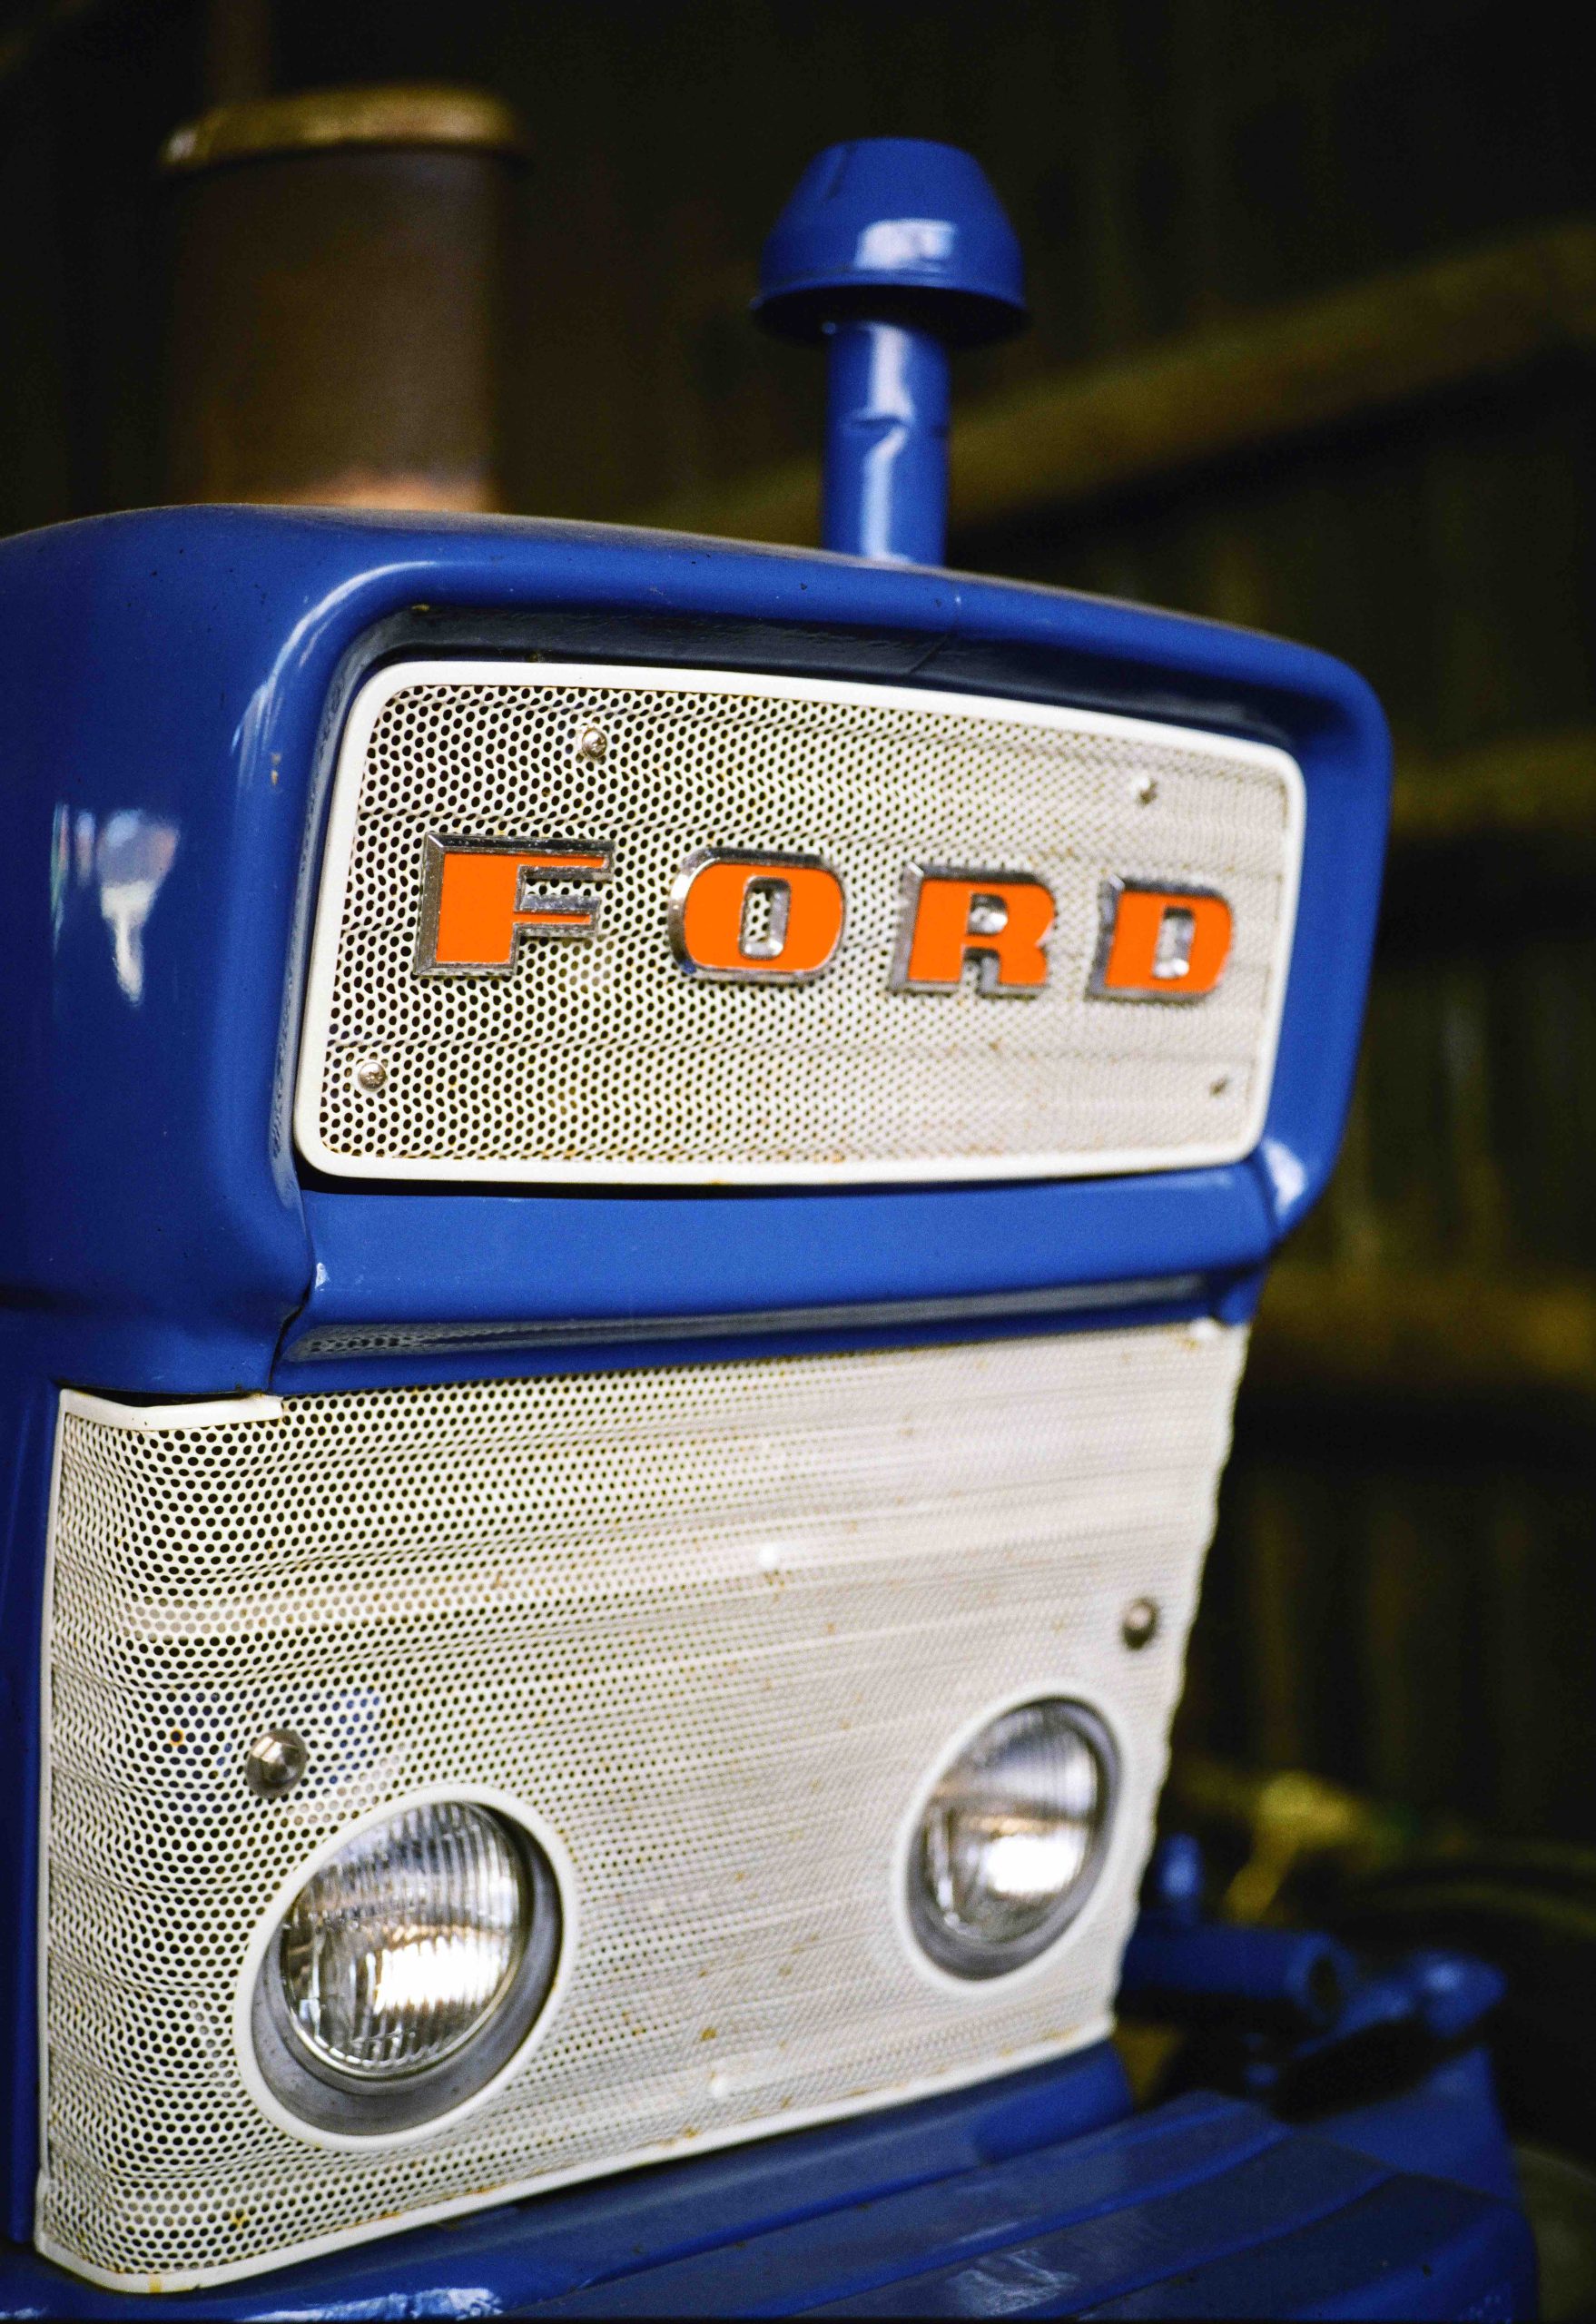
Coming away from the beach I went to the farm for some more colour. Just look at this blue tractor. It’s an amazing electric rendition of colour, the red Ford badge a bit more subtle. Just like the red deck chair.
Highlights
This is where things got tricky. The F3 it has an awesome metering system and I was shooting Aperture Priority. It was a bright day and I was hoping for better highlights. I’m not surprised I got little detail on the Black Lamb.
And back on the beach I couldn’t help but notice the bloom on the bright yellow sun umbrella, but again, check out those blues!
And I particularly like this photograph. It’s got that nostalgic colour film look with a hint of Phoenix quirkiness to it and the colours warm and vibrant.
So far the photographs above show the variance in vibrancy and I think the film mostly done a good job dealing with the bright scenes (and flat scenes). I noticed a difference in grain between the original Phoenix and this new version. The Phoenix II being a finer grain. Which will be welcoming to many.
6×9 120 Film
I was really excited to see my results from the Fuji 6×9 camera which I shot at the farm.
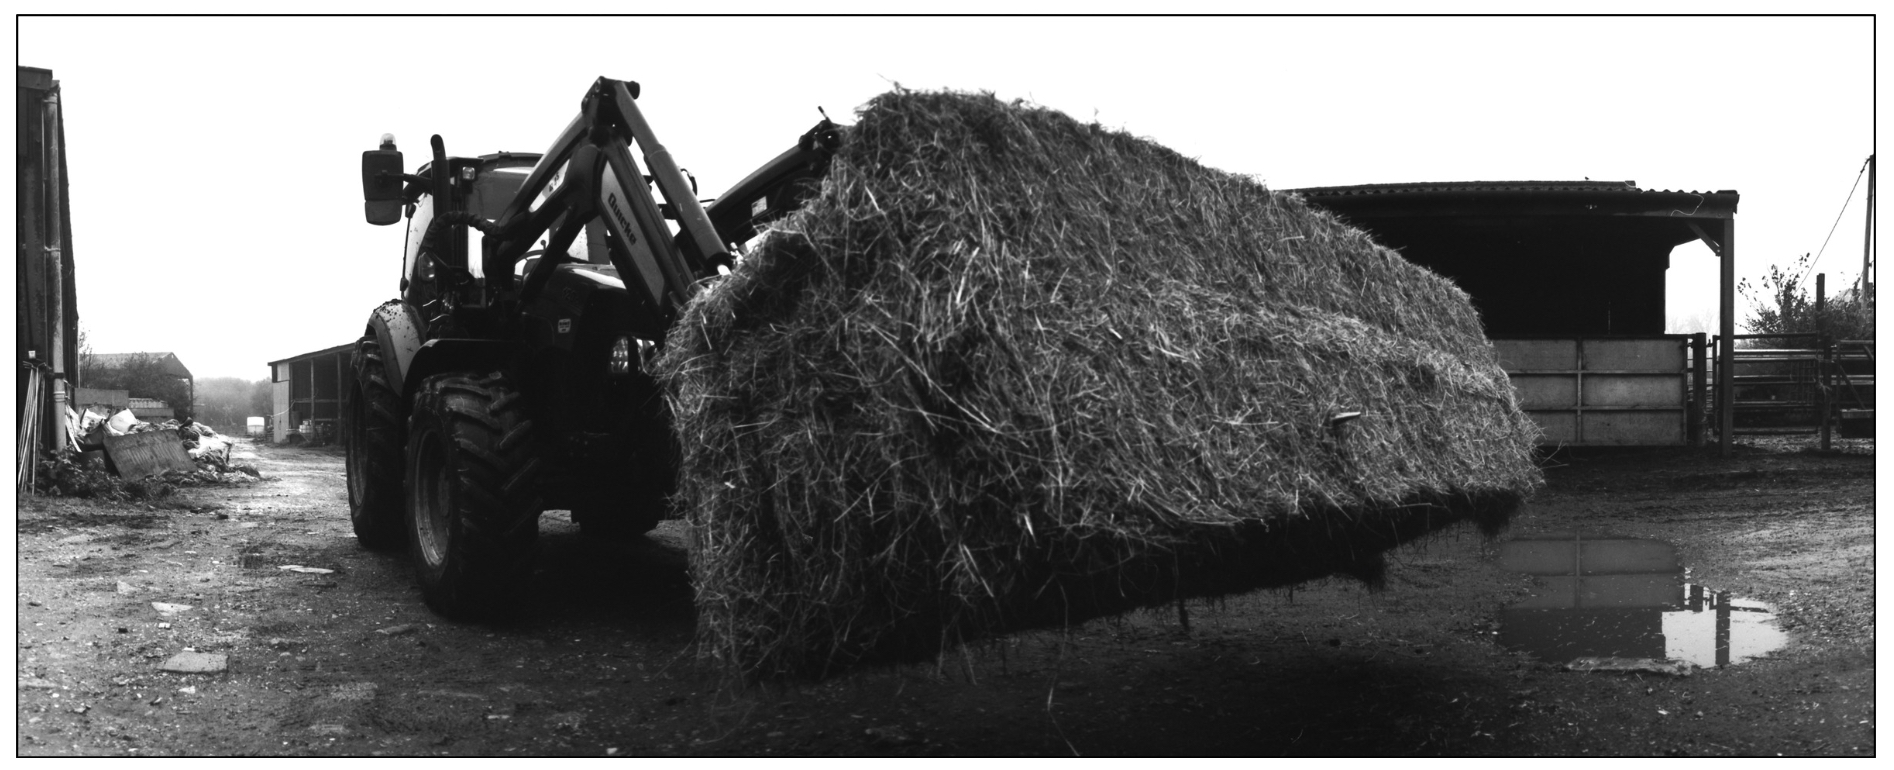
This haystack photograph was on Phoenix II, but I also shot the same scene on the original Phoenix and I noticed a big difference with the Phoenix II the clear winner.
Green!
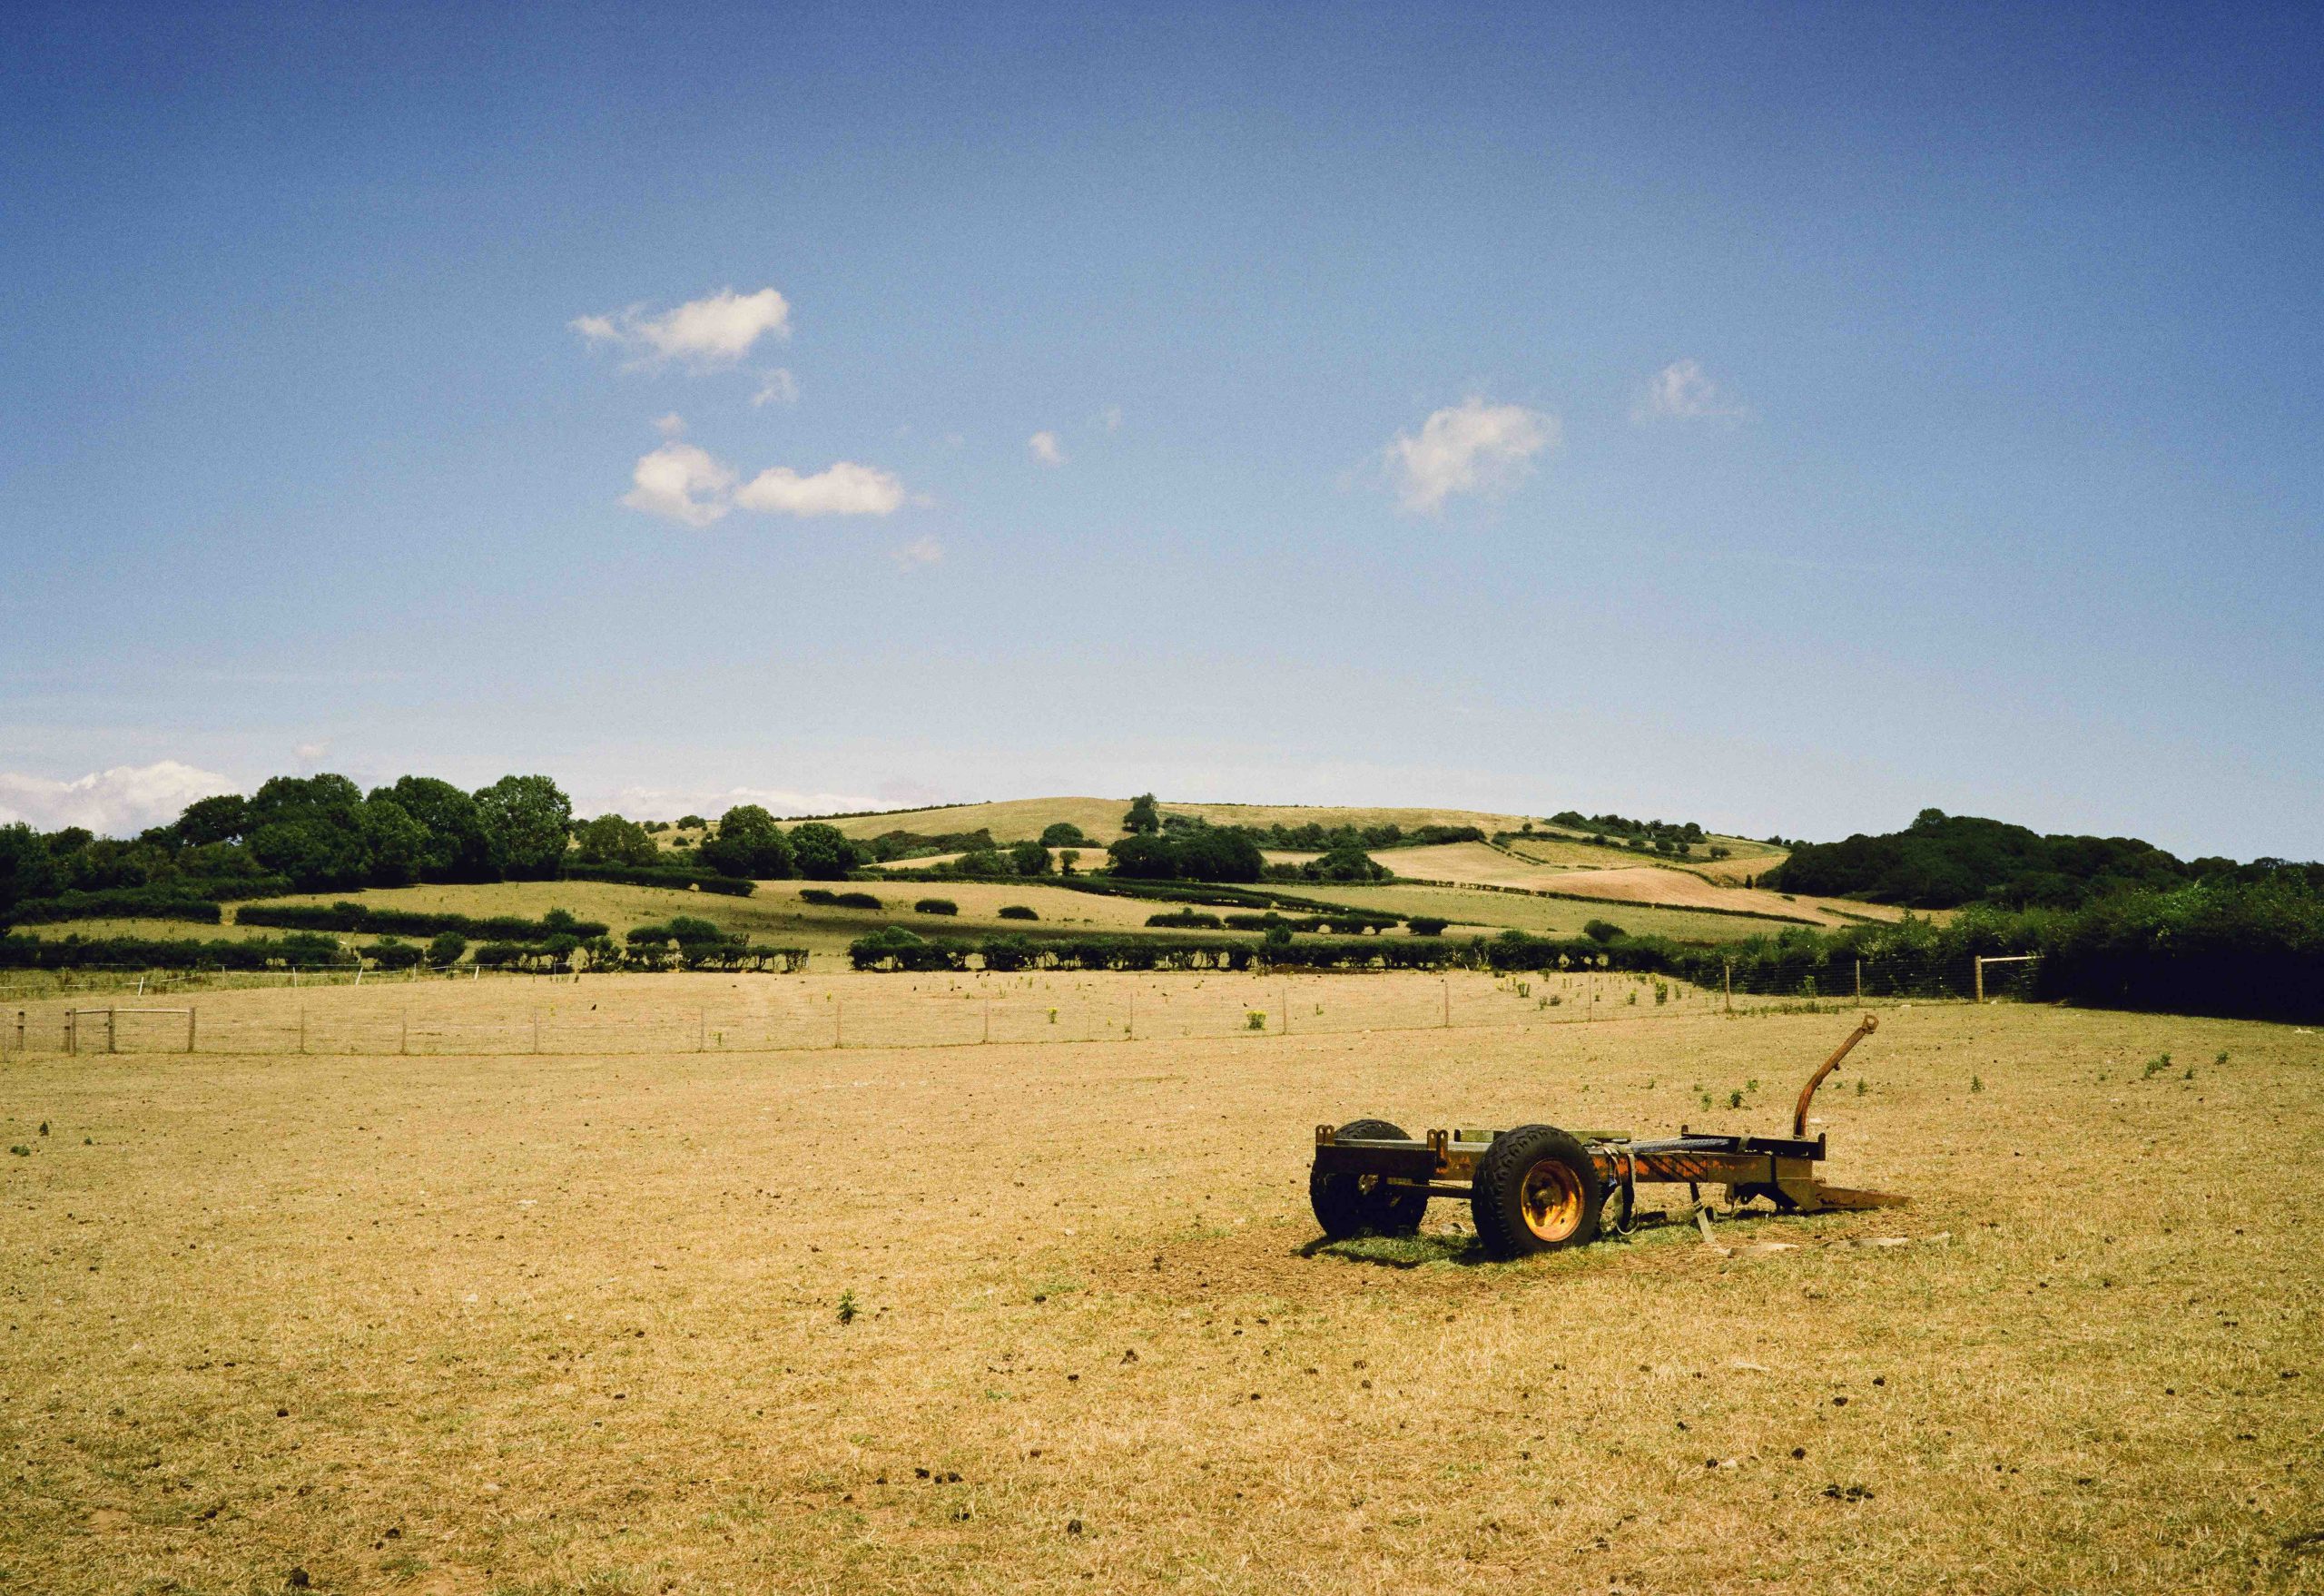
And this farm scape below surprised me. The grass looks more green when in fact it was actually brown from the recent heatwave. The original Phoenix got this more precise. However, the Phoenix II wins on the finer grain!
And back to the cute Lambs. Still pretty bright on the highlights, but as I said it was a super bright sun!
And finally another surprise between the two films. Both 6×9. The first is the Phoenix II and I noticed how lush the greens were. Certainly not what I saw! And underneath is the original Phoenix which appears to get the greens more precise. Yet the sky appears correct on the Phoenix II.
Conclusion
When Harman released Phoenix I was one of the first to try it out and for all it’s – I wouldn’t say flaws, I would say it’s difference from other colour films, I actually liked it. What’s the point in shooting a colour film that is so good you can’t tell the difference between it and digital? And what’s the point in shooting a colour film that is just as good as another branded colour film? I liked Phoenix because of it being different. Crunchy, Grainy and quirky! And I am pleased to see Phoenix II has not lost that identity. To me it’s still quirky and crunchy but less grainy. That is, of course, from what I have seen from the two rolls I shot in the conditions available to me at the time.
So if you are into colour film photography grab a few rolls and see how you like it.
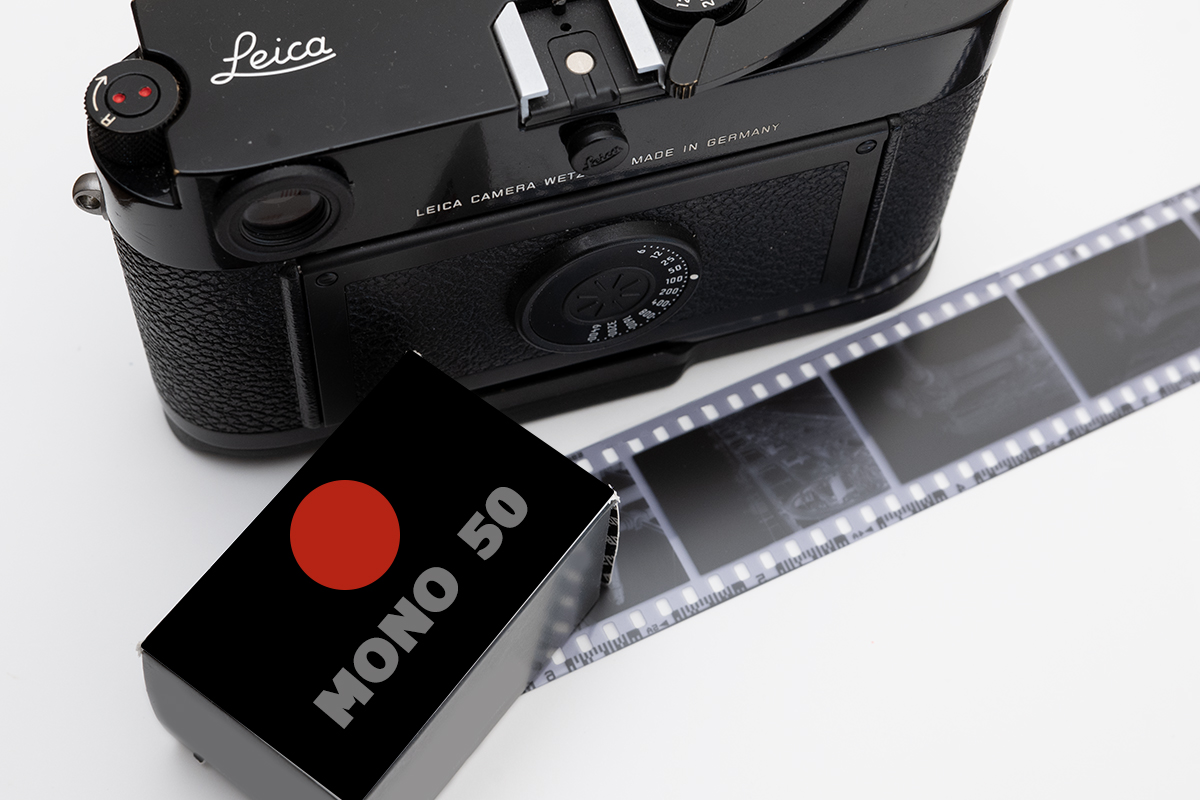
Leica has officially announced their first-ever “branded” 35mm film, the MONOPAN 50, to commemorate 100 years since the launch of the Leica I camera in 1925, which effectively pioneered the 35mm format.
(NOT ACTUAL PACKAGING)
What Leica Say
MONOPAN 50 is derived from “mono” (referencing their Monochrom digital cameras), “pan” (for its panchromatic properties, meaning sensitive to the full visible spectrum and beyond), and “50” for its ISO speed. It’s a black-and-white negative film with 36 exposures rated at ISO 50/18°.
Leica states this low sensitivity encourages a slower, more deliberate approach to photography and allows for shooting with wide apertures even in bright daylight, showcasing the “Leica bokeh.”
Leica emphasizes its “ultra-fine grain” and “exceptional resolution” of up to 280 line pairs per millimeter. This is marketed as being perfect for large-format prints and detailed scans, and for maximising the optical performance of Leica lenses. It boasts“super-panchromatic sensitisation” extending up to 780nm, which makes it suitable for infrared photography when paired with appropriate filters. It’s also noted to work well with yellow, orange, and green filters for contrast control and can be developed with all standard black-and-white developers.
It will be available in four distinctive, retro-style packaging designs, paying homage to Leica’s heritage and Leica explicitly states the film is “Produced in Germany.”
Well this sounds exciting!
A Leica Film Lab?
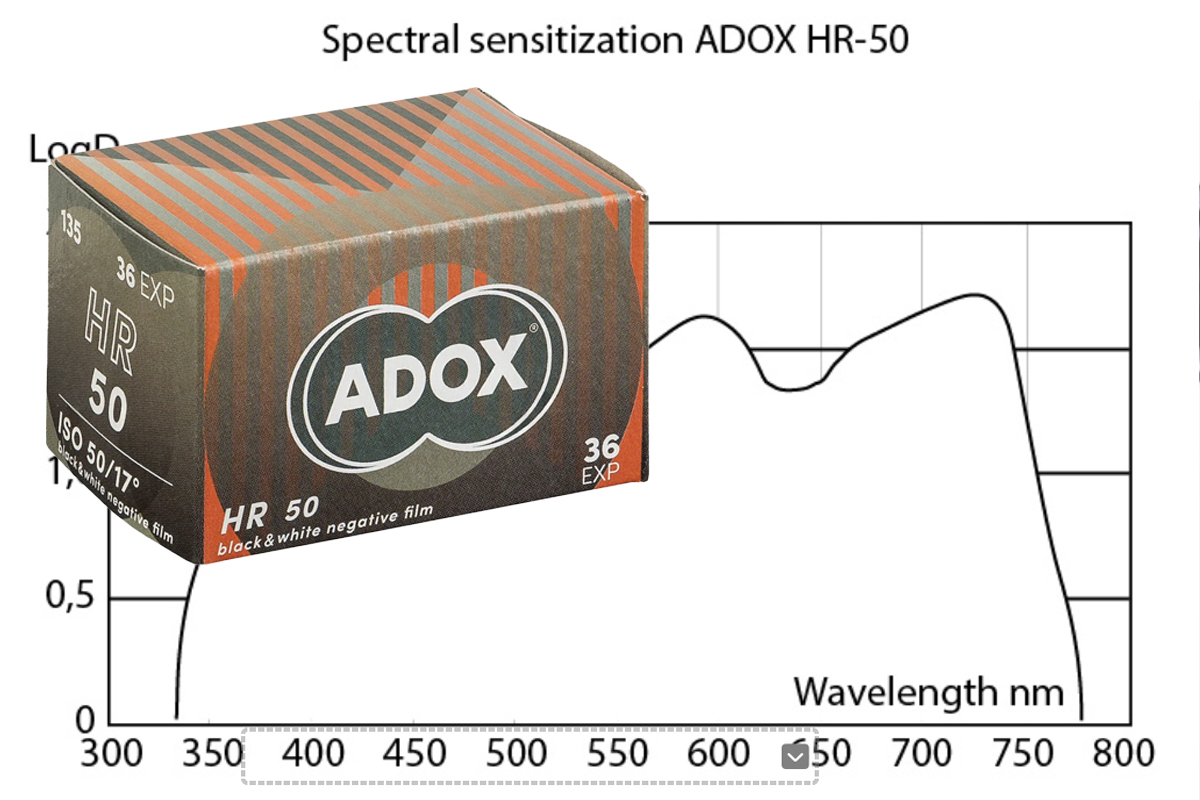
I think we can quite confidently say that Leica have not set up a film manufacturing lab in Germany and have approached an already popular facility to make this film. And when I think of film manufacturers in Germany I think ADOX.
But hang on…
280 line pairs per millimeter
Super-panchromatic sensitisation extending up to 780nm
ISO 50
Sound familiar?
There is another film that ADOX make called HR-50. A film I love! That too has up to 280 line pairs per millimeter and sensitisation extending up to 780nm.
So have Leica approached ADOX and asked them to make an emulsion for them based on similar technical specs as HR-50 or IS ITHR-50?
I do hope a “NEW” emulsion has been developed, somehow, by Leica ( and whoever the lab is). But already speculation online is pointing to ADOX HR-50.
Which could be a good thing! If it is.
ADOX HR-50 is a truly brilliant emulsion. I love it. The new film shooters and those that don’t follow the communities will take a punt on this new Leica Film and get to experience HR-50. Even if they don’t realise it. I’m not sure that HR-50 is that popular so hopefully, if it is HR-50, then Leica has possibly saved this film from extinction.
So with all that said we will just have to wait and see when Leica release the film in August and I for one will be buying a roll to compare with the HR-50 I have in the fridge. Even though I will not enjoy passing a few quid onto Leica for the fancy packaging and name – if it turns out to be HR-50.
The film was released on June 18, 2025, and will be available worldwide from August 21, 2025, at Leica Stores and authorised retailers. The recommended retail price is £10.00 / €12.00 / $10.00 per roll.
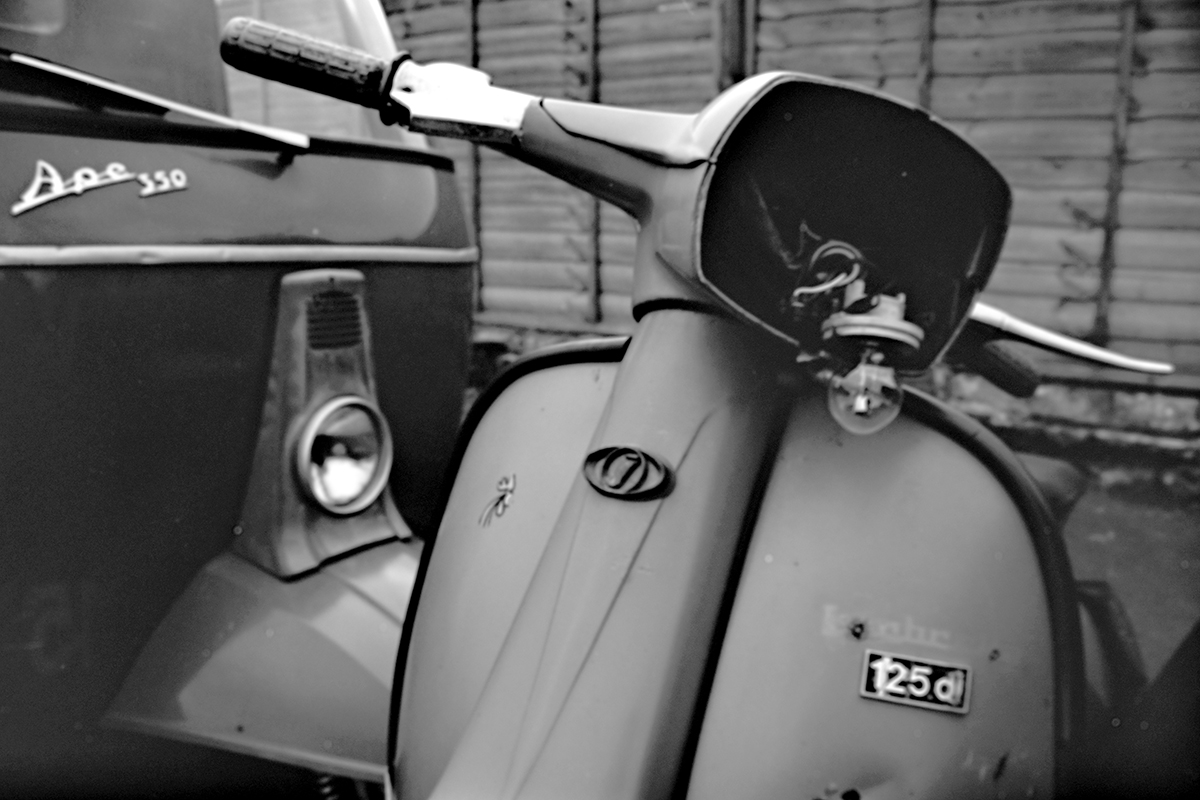
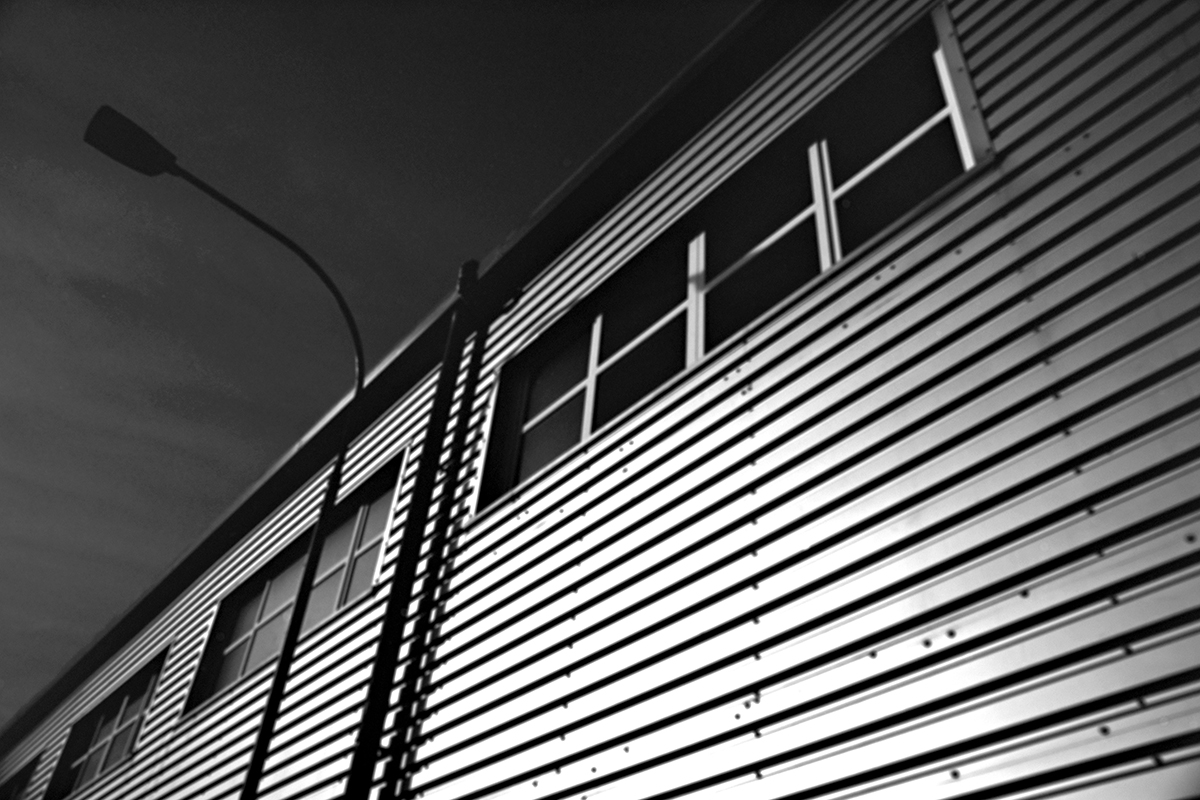
HR-50 IMAGES
So whilst we are all “Speculating” no one knows for sure. and here some recent examples of photographs I shot with HR-50. A film worth trying!