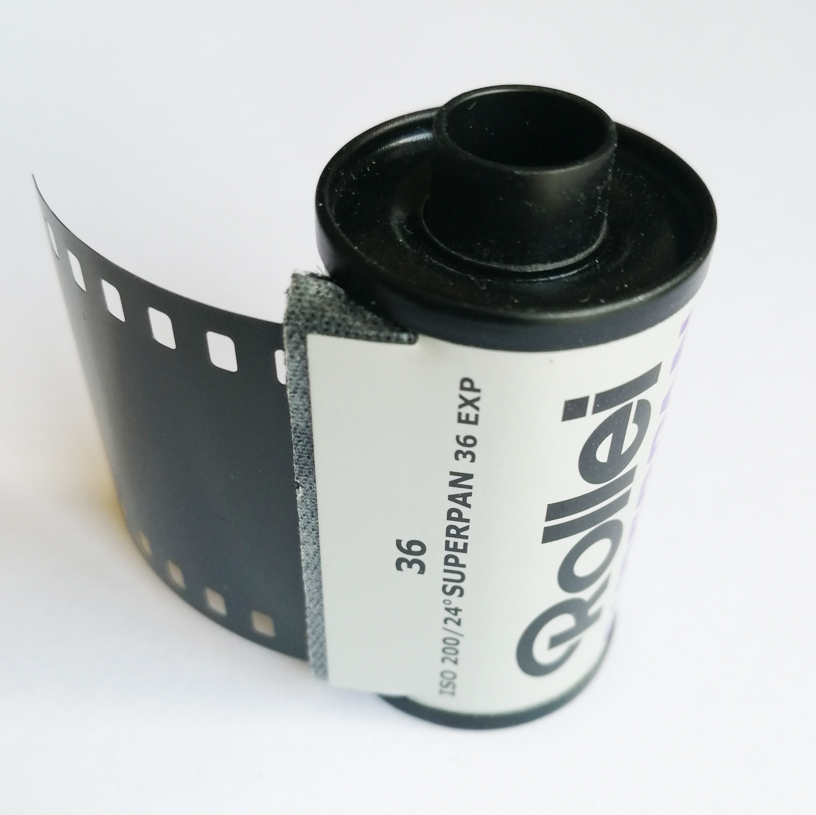
Rollei Superpan 200 Film
From Emulsive.org
Rollei Superpan 200 is a medium-speed black and white negative film with a nominal sensitivity of ISO 200/24°. The film is ideal for push processing and like Rollei Retro films, is based on the Agfa Aviphot family of emulsions. This means the film features excellent tonal reproduction, an extended red sensitivity and responds well to push processing.
It’s also known as Agfa Aviphot 200 or Agfa Superpan 200 and can be developed as black and white slides. It also has an Infrared sensitivity up to 750nm.
It is made by AGFA in Belgium and these are cut to the usual 135 and 120 formats by Maco in Germany and distributed under the brand name Rollei. Same as the Rollei Retro 80S, 200S and 400S which are aerial surveillance films.
I have experimented a few times with this film and I had half a roll left in the can with this particular roll and I wanted to see how it looked pulled to 100. So I took my Light Meter out and set it to 100 ISO and spot metered my scenes. Some I took spot reading of the brightest areas, middle areas and shadow areas and averaged and others I spotted for middle grey and decided where on the zone system scale I wanted that scene to fall.
I had good results with guessing my zones and also pulling the film. I developed in my XTOL Replenished stock, which is still going well, and developed for 8 minutes.
I used a Chinon CS Camera with a Hanimex 28mm lens.
[envira-gallery id=”2009″]
AGFA COPEX RAPID
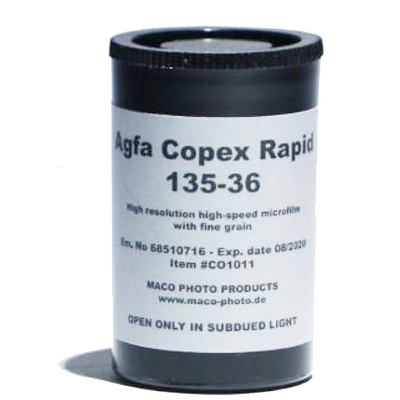
Here is another film I recently tried. AGFA COPEX RAPID!
See the Video –
This is from Emulsive Website –
Agfa Copex Rapid is a low-speed panchromatic black and white film with a nominal sensitivity of ISO 50/18°. Excellent resolution, very fine grain and excellent acutance are characteristic of Copex Rapid. Copex Rapid is coated on a polyester base and ideal for reversal processing in the Scala process.
Copex Rapid remains one of the only Agfa films sold under that brand name. It is purchased, bulk loaded and sold by Macodirectin Germany.
A little more research and I found this film was used for ‘Microfilm’ and has some crazy ass resolution IF developed in Spur Modular UR which is available from
From Nik & Trick Website
Copex Rapid is ideal for reversal processing in the Scala process but can be developed at home as a b&w negative film.
Agfa Copex Rapid is recommended to be developed with Spur Modular UR for optimal results. The Parts A1 and B are needed for the absolutely streak-free development of the SPUR DSX/Agfa Copex Rapid roll film; Part C is no longer needed as previously. When Copex is developed with Spur Modular UR, sharpness, fine-grain, exposure latitude, tonal values, speed utilisation are retained by Spur Modular UR developer.
Well, I didn’t have any Spur Developer (Which is a low contrast developer) and I wasn’t going to buy any so with a bit more research I found I can develop the film in good ole Rodinal 1/100 for 18 minutes. So I did just that!
I went to the local farm for some photos. The images below are scanned.
Quite contrasty (It was a sunny afternoon) but hell are they sharp! Maybe to lower the contrast I should try Rodinal at 1/200 or maybe XTOL at 1/3. But for best results it appears Spur Developer is going to be the winner. But like I said, I wasn’t going to invest in it. However, I’m happy with what I got from the Rodinal.
TEST 1
[envira-gallery id=”1928″]
TEST 2
[envira-gallery id=”1956″]
Derev Pan 100 (Film Photography Project)
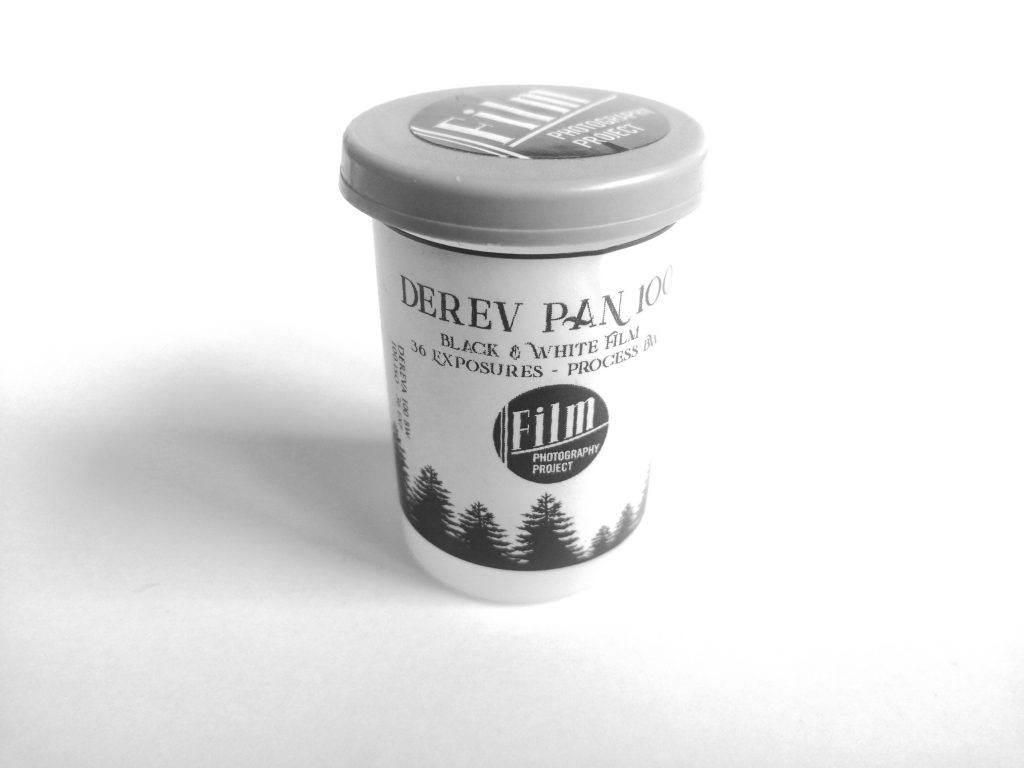
This is Derev Pan 100 supplied by the Film Photography Project for around £9.99 a roll for 36 exp.
I wanted to know who makes the film, or what manufactured brand film is inside. On their website FPP say ‘DEREV is named after the forests of the Ukraine, its country of origin as a scientific aerial photographic film’.
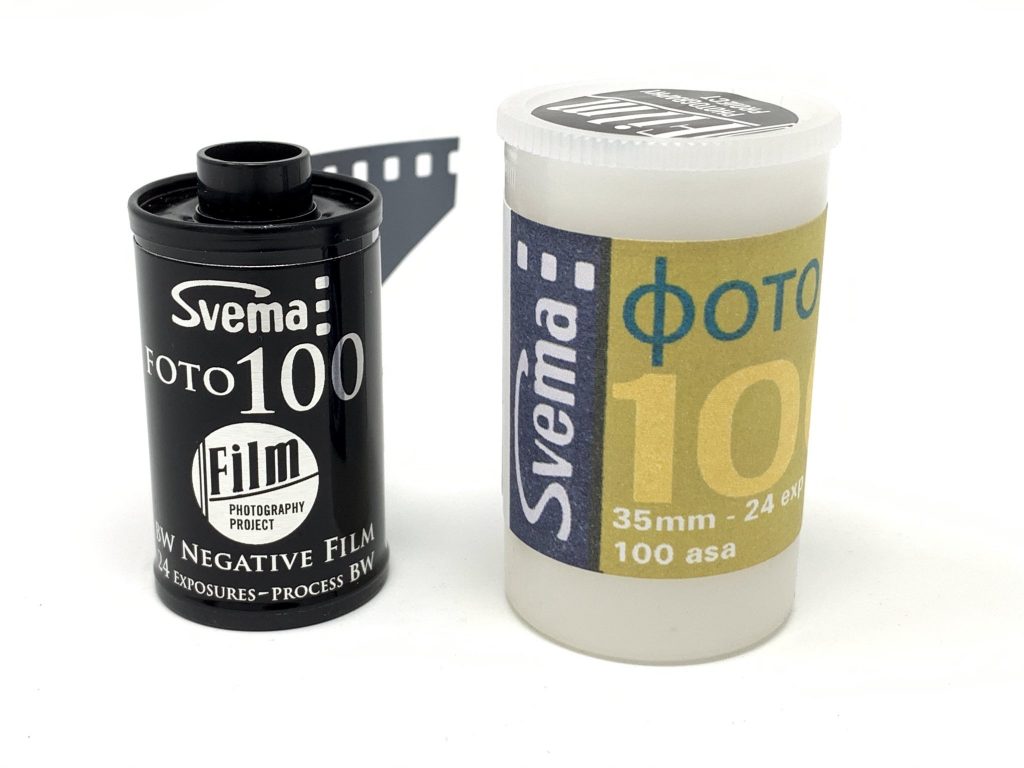
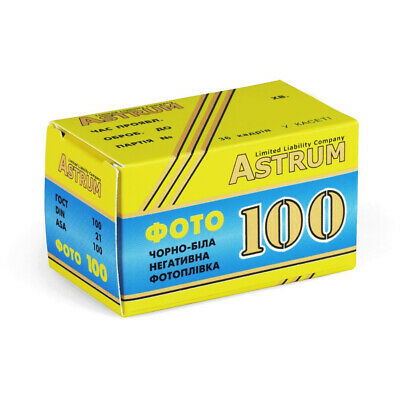
Svena used to be a main manufacturer of photographic supplies, including film, but went bust in 2000 and the equipment today is used by Astrum. I’ve read that Astrum use the equipment to cut tech film from AGFA and Kodak. Not sure how true that is. Astrum also make Svema branded films.
There are Svema Foto 400, 200, 100, Mz3 (ISO 3) and also a 64. All available at Analogue Wonderland.
I have used Astrum before. Astrum 400 is a very nice film. Very thin but renders great contrast and tonality. I checked my Derev negatives against my Astrum 400 negatives and the base is slightly thicker, but still not as thick as say Ilford or Kodak films. I’ve not tried Astrum 100 so I can’t compare the two.
So for now I am guessing Derev 100 is Astrum/Svema 100 re-labeled.
Looking at the Astrum packaging I wouldn’t have touched it as they look like cheap Russian/Ukrainian films. However, being rebranded for the Western side of the globe the packaging seems more appealing and trustworthy so well done to the Film Photography Project and it’s re-sellers for bringing this film onto the market. It won’t disappoint.
Like I said I have tried Astrum 400 as it was sent to me, and I liked it a lot.
So on with the Derev 100 Film. I went out and shot a roll at the local train station. Train stations are usually boring but over here on the Isle of Wight they are still pretty much as they were when trains were ran by steam! So you’re not short of nostalgia if you look for it.
As expected the film negatives did start with light leaks around the sprocket holes. This is because the film is quite thin and rolled into normal 35mm film cassettes. But it doesn’t leak into the frames so that’s good.
And the images themselves are sharp and full of tonality with, I find, a creamy, punchy look. Here are some scans of the images I took.
Camera – Nikon f90X.
Developer – XTOL Stock 9 minutes.
Conditions – Light Overcast
[envira-gallery id=”1889″]
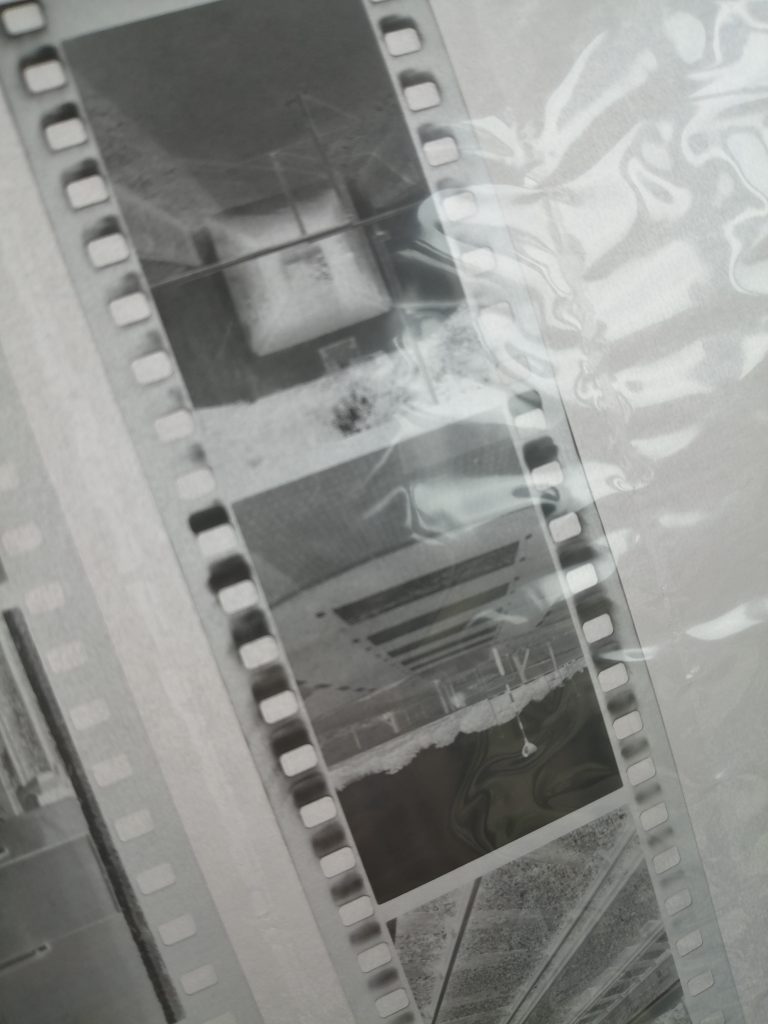
Silberra 75N+ (74N+) ORWO
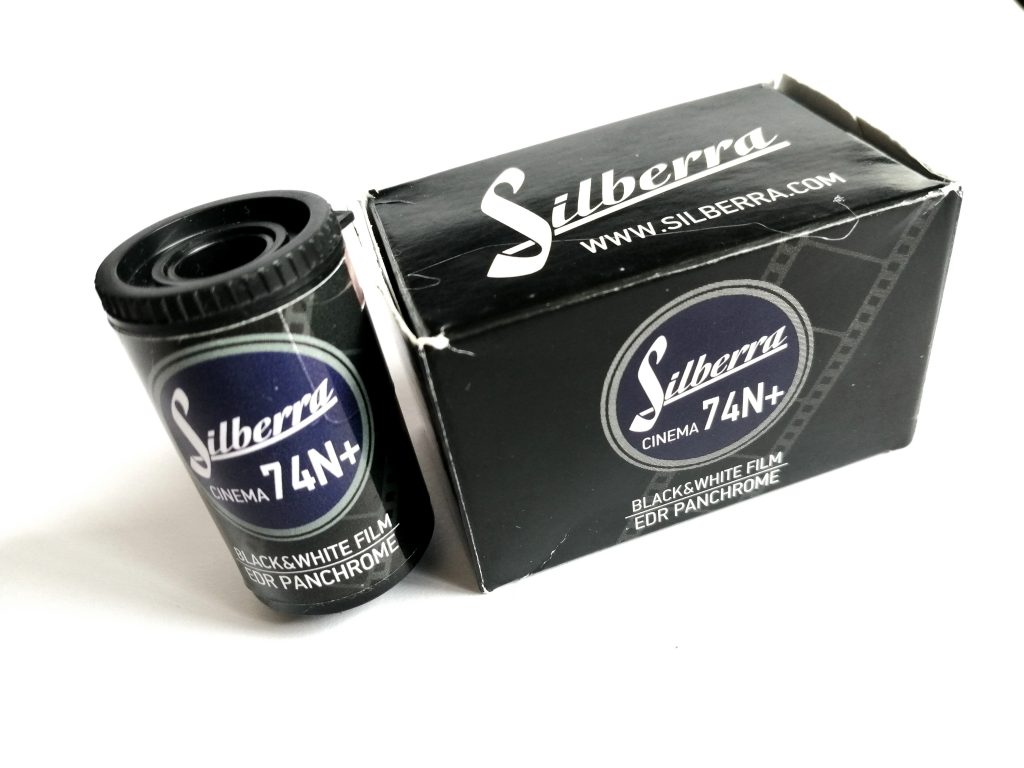
Here is the Silberra 74N+ 400 speed film.
It’s actually manufactured by Filmotec in Germany and released as ORWO N74+. A ‘Motion Picture’ film which is released by Filmotec in 100 ft rolls. Great if you are a bulk loader. If not then other companies, such as Silberra, re-package the film pre rolled and into 36 exposure cassettes. However, it’s now discontinued and sold as ORWO N75+ and rated at 320 ISO/400ISO.
Analogue Wonderland sell the Silberra branded version (New Cassettes, DX Coded) of ORWO’s N75+ for around £12 a roll. Nik & Trick sell their own version of the ORWO N75+ for around £6.80 (30 exp – No DX Code-Used Cassettes) however, if you are into saving and can bulk load you can buy a 100ft roll from Nik & Trick for around £80 which will give you 18 rolls for around a fiver (£5). Massive saving! Especially compared to Silberra’s Package. Silberra use brand new cassettes and their versions are DX coded, handy for the point and shoot cameras!
Whilst I am in no way an expert on this film or working with the two companies suggested above I have recently been shooting ORWO film and the research above is my own if in the future I decide to shoot more of the stuff. But I do like it!
So I went out and shot a roll of ‘Silberra 74N+/ORWO discontinued N74+ to see what it’s like. To be honest I could see no difference between this film or my experiences with Ilford HP5+. A bit more punchy in the black areas if anything swaying more towards Kodak Tri-X- 400. So I went out and shot some scenes late in the afternoon. The sun was low but still quite bright.
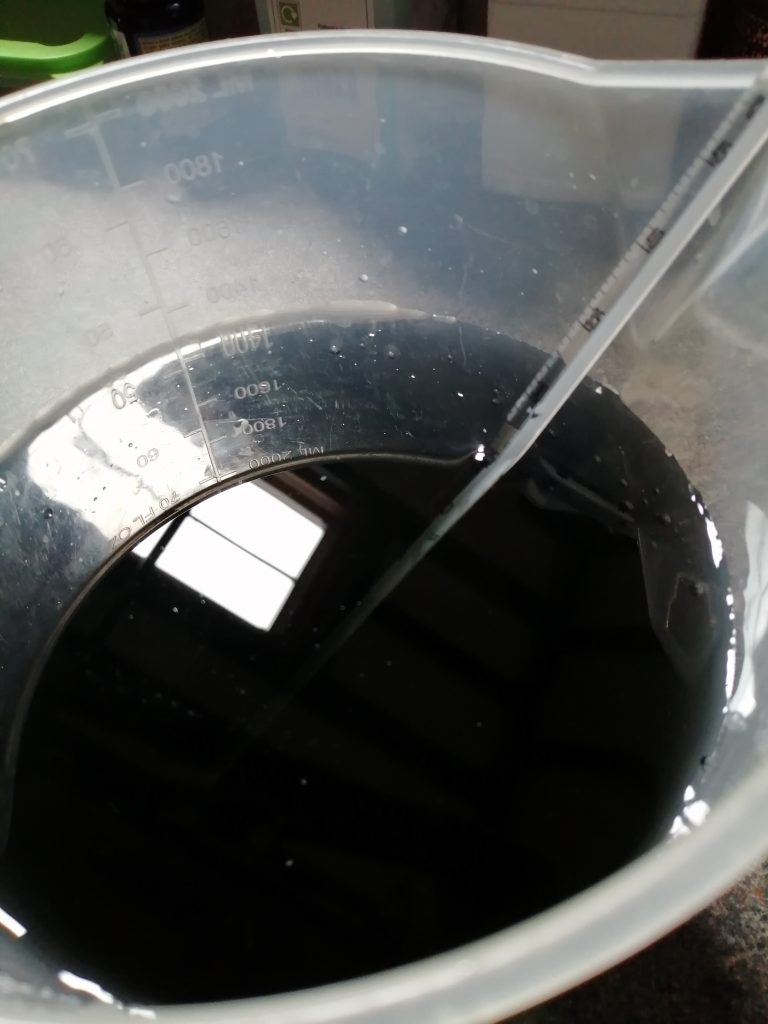
I developed the film in my XTOL replenished soup for 7 minutes. The negatives came out well and here are scans I made of the film. I have yet to take the negs in the darkroom but when I do I can expect some deep blacks, bags of latitude and tones and some grain in the prints.
Camera – Nikon F90X
[envira-gallery id=”1855″]
Rollei RPX 25 Film
Recently I shot some long exposures on Rollei RPX 25 Film. It was early morning with beautiful clouds and to help with getting past the 1 second mark I added a Red Filter and also a Polorising Filter to my lens.
I developed the film in my replenished XTOL stock for 6.5 minutes at 20°.
Negatives came out well with very fine grain. I had to pre-wash the film first to get rid of the anti dilation dye that I know is quite heavy on this film. I didn’t want that colour to get into my XTOL STOCK.
The reciprocity failure times were not bad at all. I found some information online for this.

Here are the scans from that shoot. I don’t use a professional scanner but the scans give me an alternative reference to a contact sheet.
You will see I bracketed my shots starting with 3 second exposure, the 1 second then 6 seconds. And here is the YouTube video associated with me shooting this film.
[envira-gallery id=”1766″]
ORWO UN54 35mm FILM
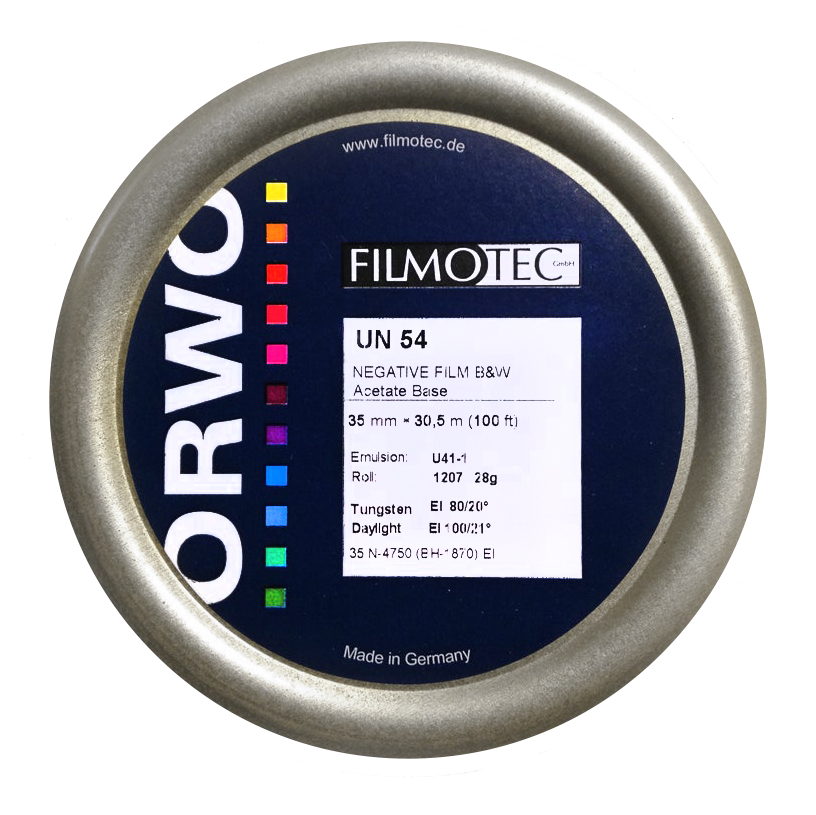
I have had two rolls of ORWO UN54 (1oo) 35mm B&W Film for some time and have been waiting for a time where I can shoot the film and feature it on the SFLaB channel.
Like any other photographic films I am not used to I have to do a little research, mainly it’s characteristics and other users reviews also. And the big question, if I like it where can I buy it!
What I know so far
It’s a Black and White Panchromatic Film manufactured in Germany by a company called ‘Filmotec’ and is manufactured for motion picture cinematography. The company says it can be processed as black and white reversal film and be used to produce direct positives.
You can’t buy it from the factory as 35mm film rolled into cassettes for photographic cameras. It is sold in bulk reels. So you either need to find supplier that has bulk loaded the film into 35mm cassettes for photography or buy a 100ft reel, as seen above, and bulk load yourself, if you know how and to be honest, I don’t. So if I like the film I will have to look for someone that has pre rolled into camera film cassettes. I found online there are a few suppliers one being ‘The Film Photography Project’ which sells the rolls for $7.99. And also Nik and Trick here in the UK for £6.60.
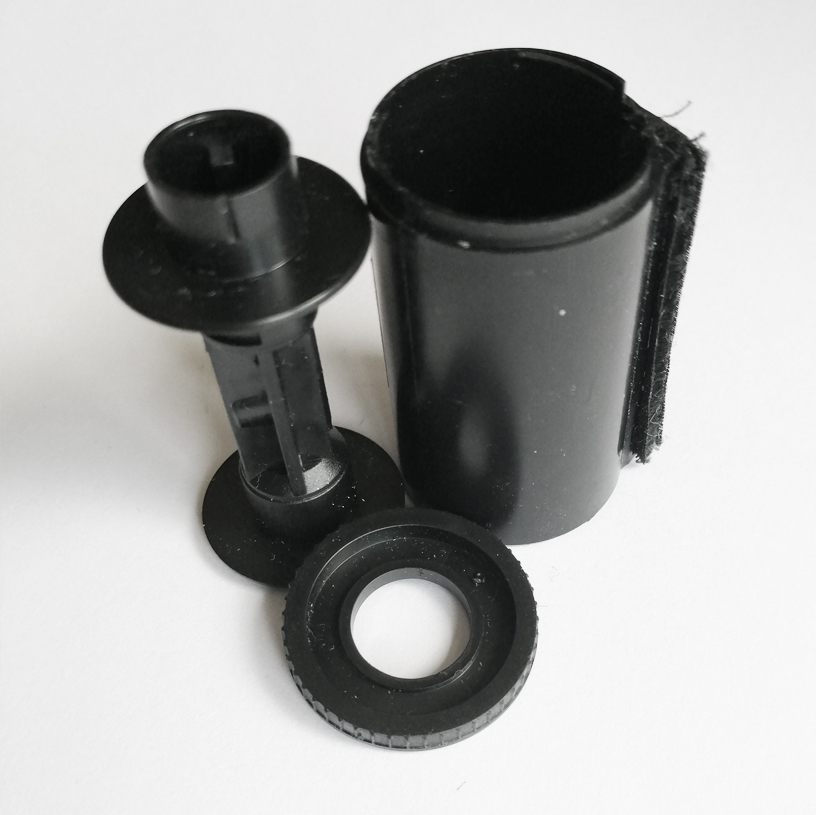
If you do want to buy a 100ft reel and bulk load yourself then they seem to be more available and I can get a 100ft reel here in the UK from Nik & Trick for £61.99 inc VAT. I guess I can get 18 rolls from that 100ft reel so I can shoot a 36 exp roll for £3.44 with a bit left over for fun. Then of course you need a bulk loader and empty film cans. I’m sure if you hunt around you can buy these for pennies in bulk but if you’re like me I save a lot of my 35mm film cassettes with a small strip of film hanging out, in case I ever want to bulk load.
It’s easy to save your used cassettes for bulk loading. Just don’t crack the cassette open when you develop your film. Load the film onto your spool whilst it’s still inside the cassette and when you come to the end just cut the last frame leaving some hanging from the film. You do, however, need to rewind the exposed film carefully inside the camera so you leave the leader hanging out of the film. You can usually hear the film come off the advancing cogs inside the camera as you rewind back. Thats when you know the film has been rewound, light tight and just the leader hanging out.
Some cassettes are have twist-off lids which are great for no fuss bulk loading. Not so popular to find though.
So, with this research out of the way I’m off to shoot the film. And you can see me shooting the film and developing the negatives and some prints on the SFLaB YouTube channel.
I have already made a developing test using my Replenished Kodak Xtol developer and I found best results for my development is 6 minutes at 20°. This is a stock solution. I could not find a stock time on the massive dev chart. Only 1:1 for XTOL.
[envira-gallery id=”1730″]
Black Lives Matter IOW
Peaceful gathering on the Isle of Wight 5th June 2020.
Camera – Olympus OM20, Film, Kodak Double X, XTOL Stock 10 minutes.
[envira-gallery id=”1692″]
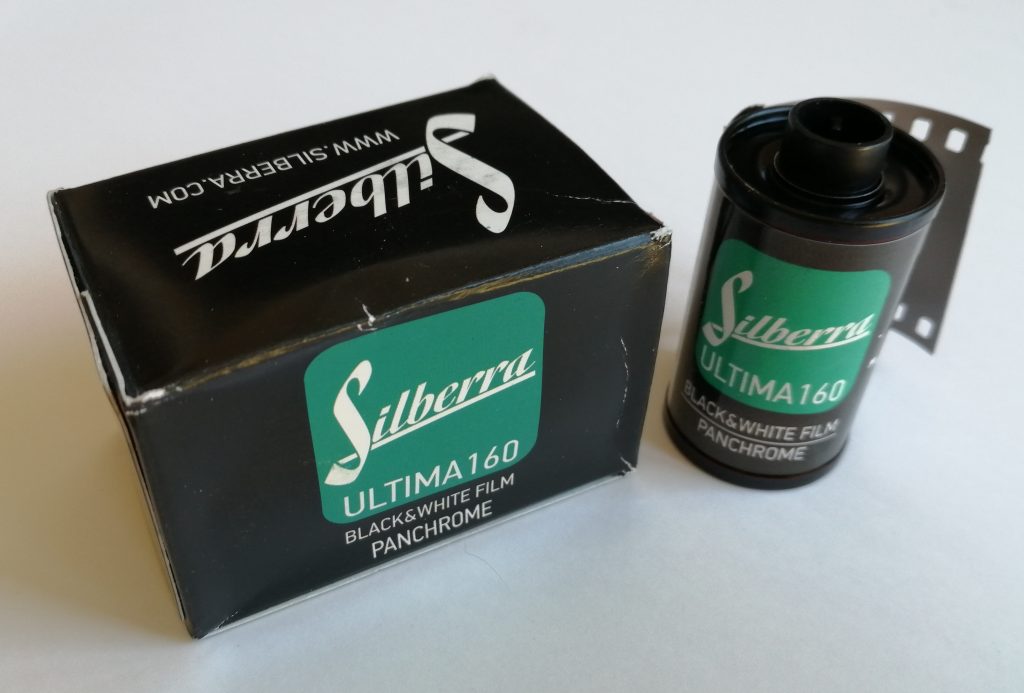
Silberra Ultima 160 Film
Camera – Olympus OM20
Manual Mode Sekonic Metering
XTOL Replenished Developer
Bright Sunny Day/Hot
Kenro Scanner
I shot this film on a bright sunny hot day in June 2020 using the Olympus OM20 and metered all images at 160 with a Sekonic Meter. I developed the negatives in my replenished XTOL soup for 6.5 Minutes with 5 inversions every minute at 20°.
The negative material is very thin but easily manageable. I had no problem loading the film onto my Patterson reel. The film base was very clear, although I did prewash the anti hilation dye from the film before I developed. Didn’t want that getting in my XTOL.
The negatives came out looking good. To be honest I think I could have left them for another minute in the developer just to build a bit more in the highlights but overall I was impressed with the sharpness, tonal range and detail. I have yet to make prints, however, looking at the scans and especially the negatives they are going to print well with hardly any noticeable grain.
[envira-gallery id=”1647″]
Pinhole Photography Exposure
Pinhole Photography Exposures and Reciprocity Failure
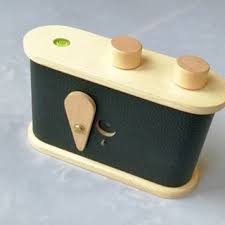
When I first got my pinhole camera calculating the long exposures confused the hell out of me.
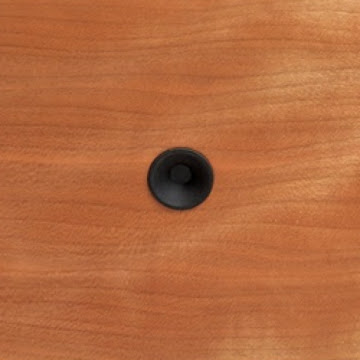
I Purchased a Lerouge 66 Pinhole camera from Greenwich Cameras in London.
I remember asking the guy on the stall about exposure times and he gave me a handy little leaflet which was a rough “Guesstimate” of how to expose a 100 speed film. Here is what the guide said.
For 100 Speed Film
- Bright Sunshine – 2s
- Hazy Sunshine – 4s
- Cloudy Bright – 8s
- Cloudy – 15s
And thats it.
These exposures depend on the camera you are using and in particular it’s pinhole size. My Lerouge 66 has a pinhole size of 0.2mm, and Aperture of f.150 and a focul length of 30mm.
I wanted to know more and in particular various film speed calculations and of course, reciprocity failure times.
I downloaded an app for my android phone called… wait for it… Pinhole!
It’s a relatively easy app to use and by far the only one I really understood. All you need to know is your camera’s set up.
So within the app you input your Focul Length (30mm). Pinhole Diameter (0.2mm) F Stop (f.150) Film size (120) and the speed film. The app will then give you a range of shutter speeds and corrisponding f number.
You can also save these settings.
So for example. Here is my set up within the app for FP4.
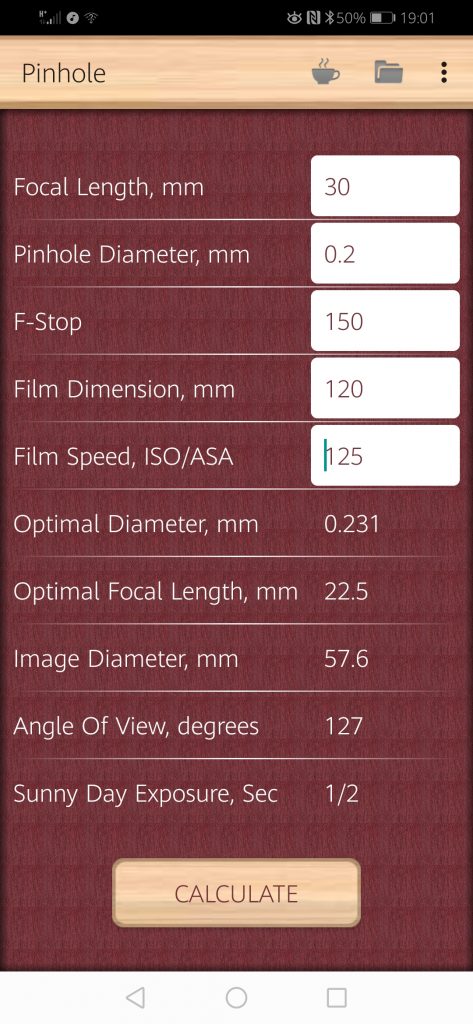
You can save this information and name it for easy access another time.
Swipe left and you will be greeted with the exposure scale.
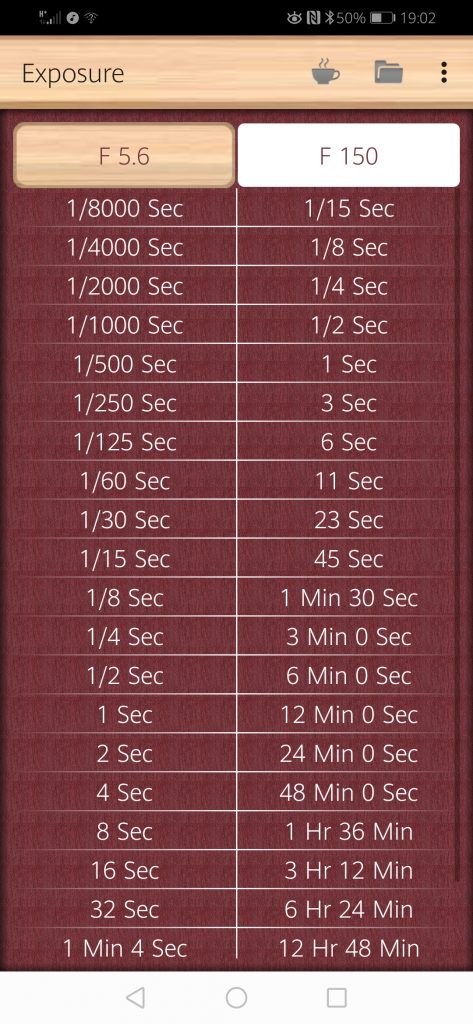
If you press the F Stop button (top left) it will increase to the next stop. But I always leave it on f.5.6 and I meter for f.5.6. and whatever speed my light meter suggests at f.5.6 then I convert it to the pinhole speed on the right. It’s quite simple.
Then on top of that speed you need to allow for any reciprocity failure.
I have made myself a cheat sheet for my reciprocity failures on various films for this camera. You can usually find a films reciprocity failure compensation on the films data sheet online. Ilford have quite an easy chart for reciprocity failure.
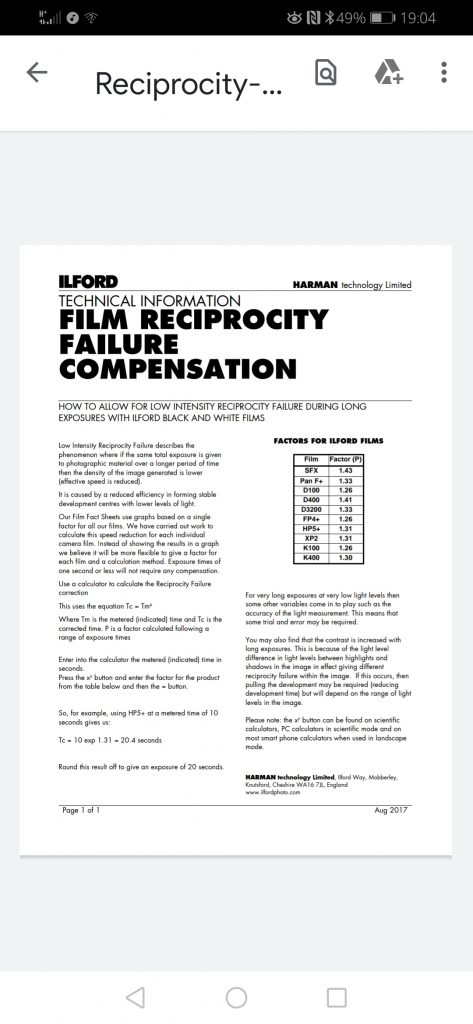
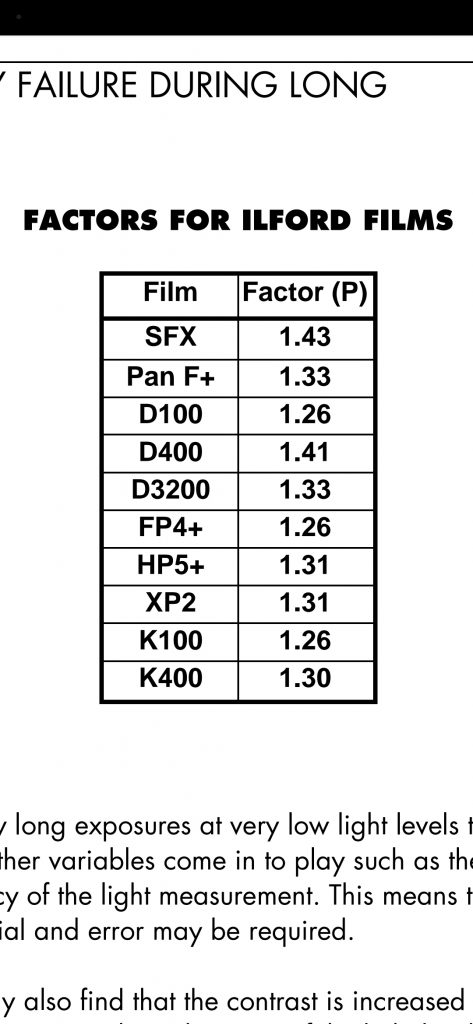
So on the chart above you need to work out ’to the power of’ on a scientific calculator. So for example if we look at FP4 we can see it says 1.26
All you need to do is use this simple calculation.
If my metered exposure for FP4 at EI 125 and at f5.6 is 1/60th I look at the Pinhole Chart and it says convert to 11 Seconds. I now need to work out the Reciprocity failure.
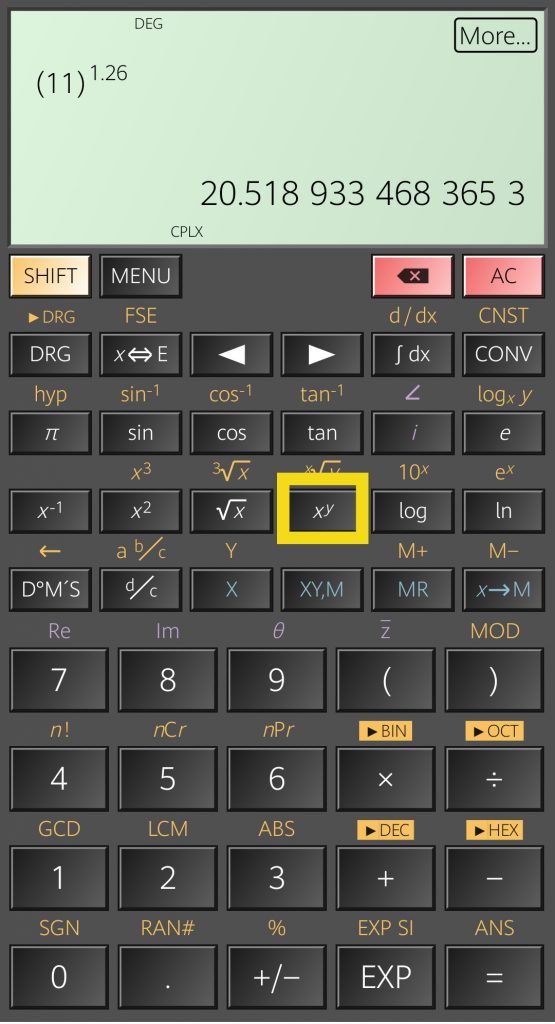
On a Scientific Calculator (I use an App) I input 11 (xy) 1.26 and it returns 20.518 933 468 365 3. In short 20.5 Seconds. And that would be my correct exposure for my scene.
I have used this system for all of my pinhole photography and so far have had good results. I am not sure how accurate the app is but it seems to work quite well.
Photography Competition

Lockdown Compotition.
Let’s have some fun with our Photography!
As probably most of us are in Isolation at the moment and our Photography is either on hold or being challenged Ithought it would be great to get our creative minds ticking with a Lockdown Photography Compotition. Simple really. You send your ONE best lockdown Photograph into us here at SFLaB and we will get two other inspirational YouTubers
to help find the best FIVE photographs and a Winner. Winners will be announced in May on the SFLaB Channel.
Subject
The subject matter must be taken within or from your own home boundaries.Either indoors, your front or back yard or views taken from your front/back yard.
Medium
It’s up to you what you shoot it on. Film, Digital, Polaroid, Smartphone. Colour or Black and White. All we ask is you re size your image to 1200px long edge and at least 240DPI.
Closing Date
Entries to be in by 31st April 2020
So get thinking and shooting and email your Photographs to roglowe147@gmail.com along with the date and location of the photograph.
Photographs should be resized to 1200px and be at least 240DPI. Entries must be in by 31st May 2020 and the Winners will be anounced on the SFLaB Channel in May.
Ideas
- Look for interesting compositions, low down, high up
- Stare around you for a while and look at objects that you’d never think would look interesting as a Photograph. They probably would.
- Think about lighting. If you don’t have all the latest gear try using natural daylight coming in from a window or using a lamp or a flash light. You can always diffuse using a piece of white paper.
- Try making your own interesting backgrounds for an object.