Zeiss Ikon Nettar Woodland
Hey camera connoisseurs and vintage enthusiasts! Today, I dive into the world of a true photographic icon: the Zeiss Ikon Nettar. This little folding beauty isn’t just a relic of the past, it’s a gateway to a simpler, more deliberate approach to photography.
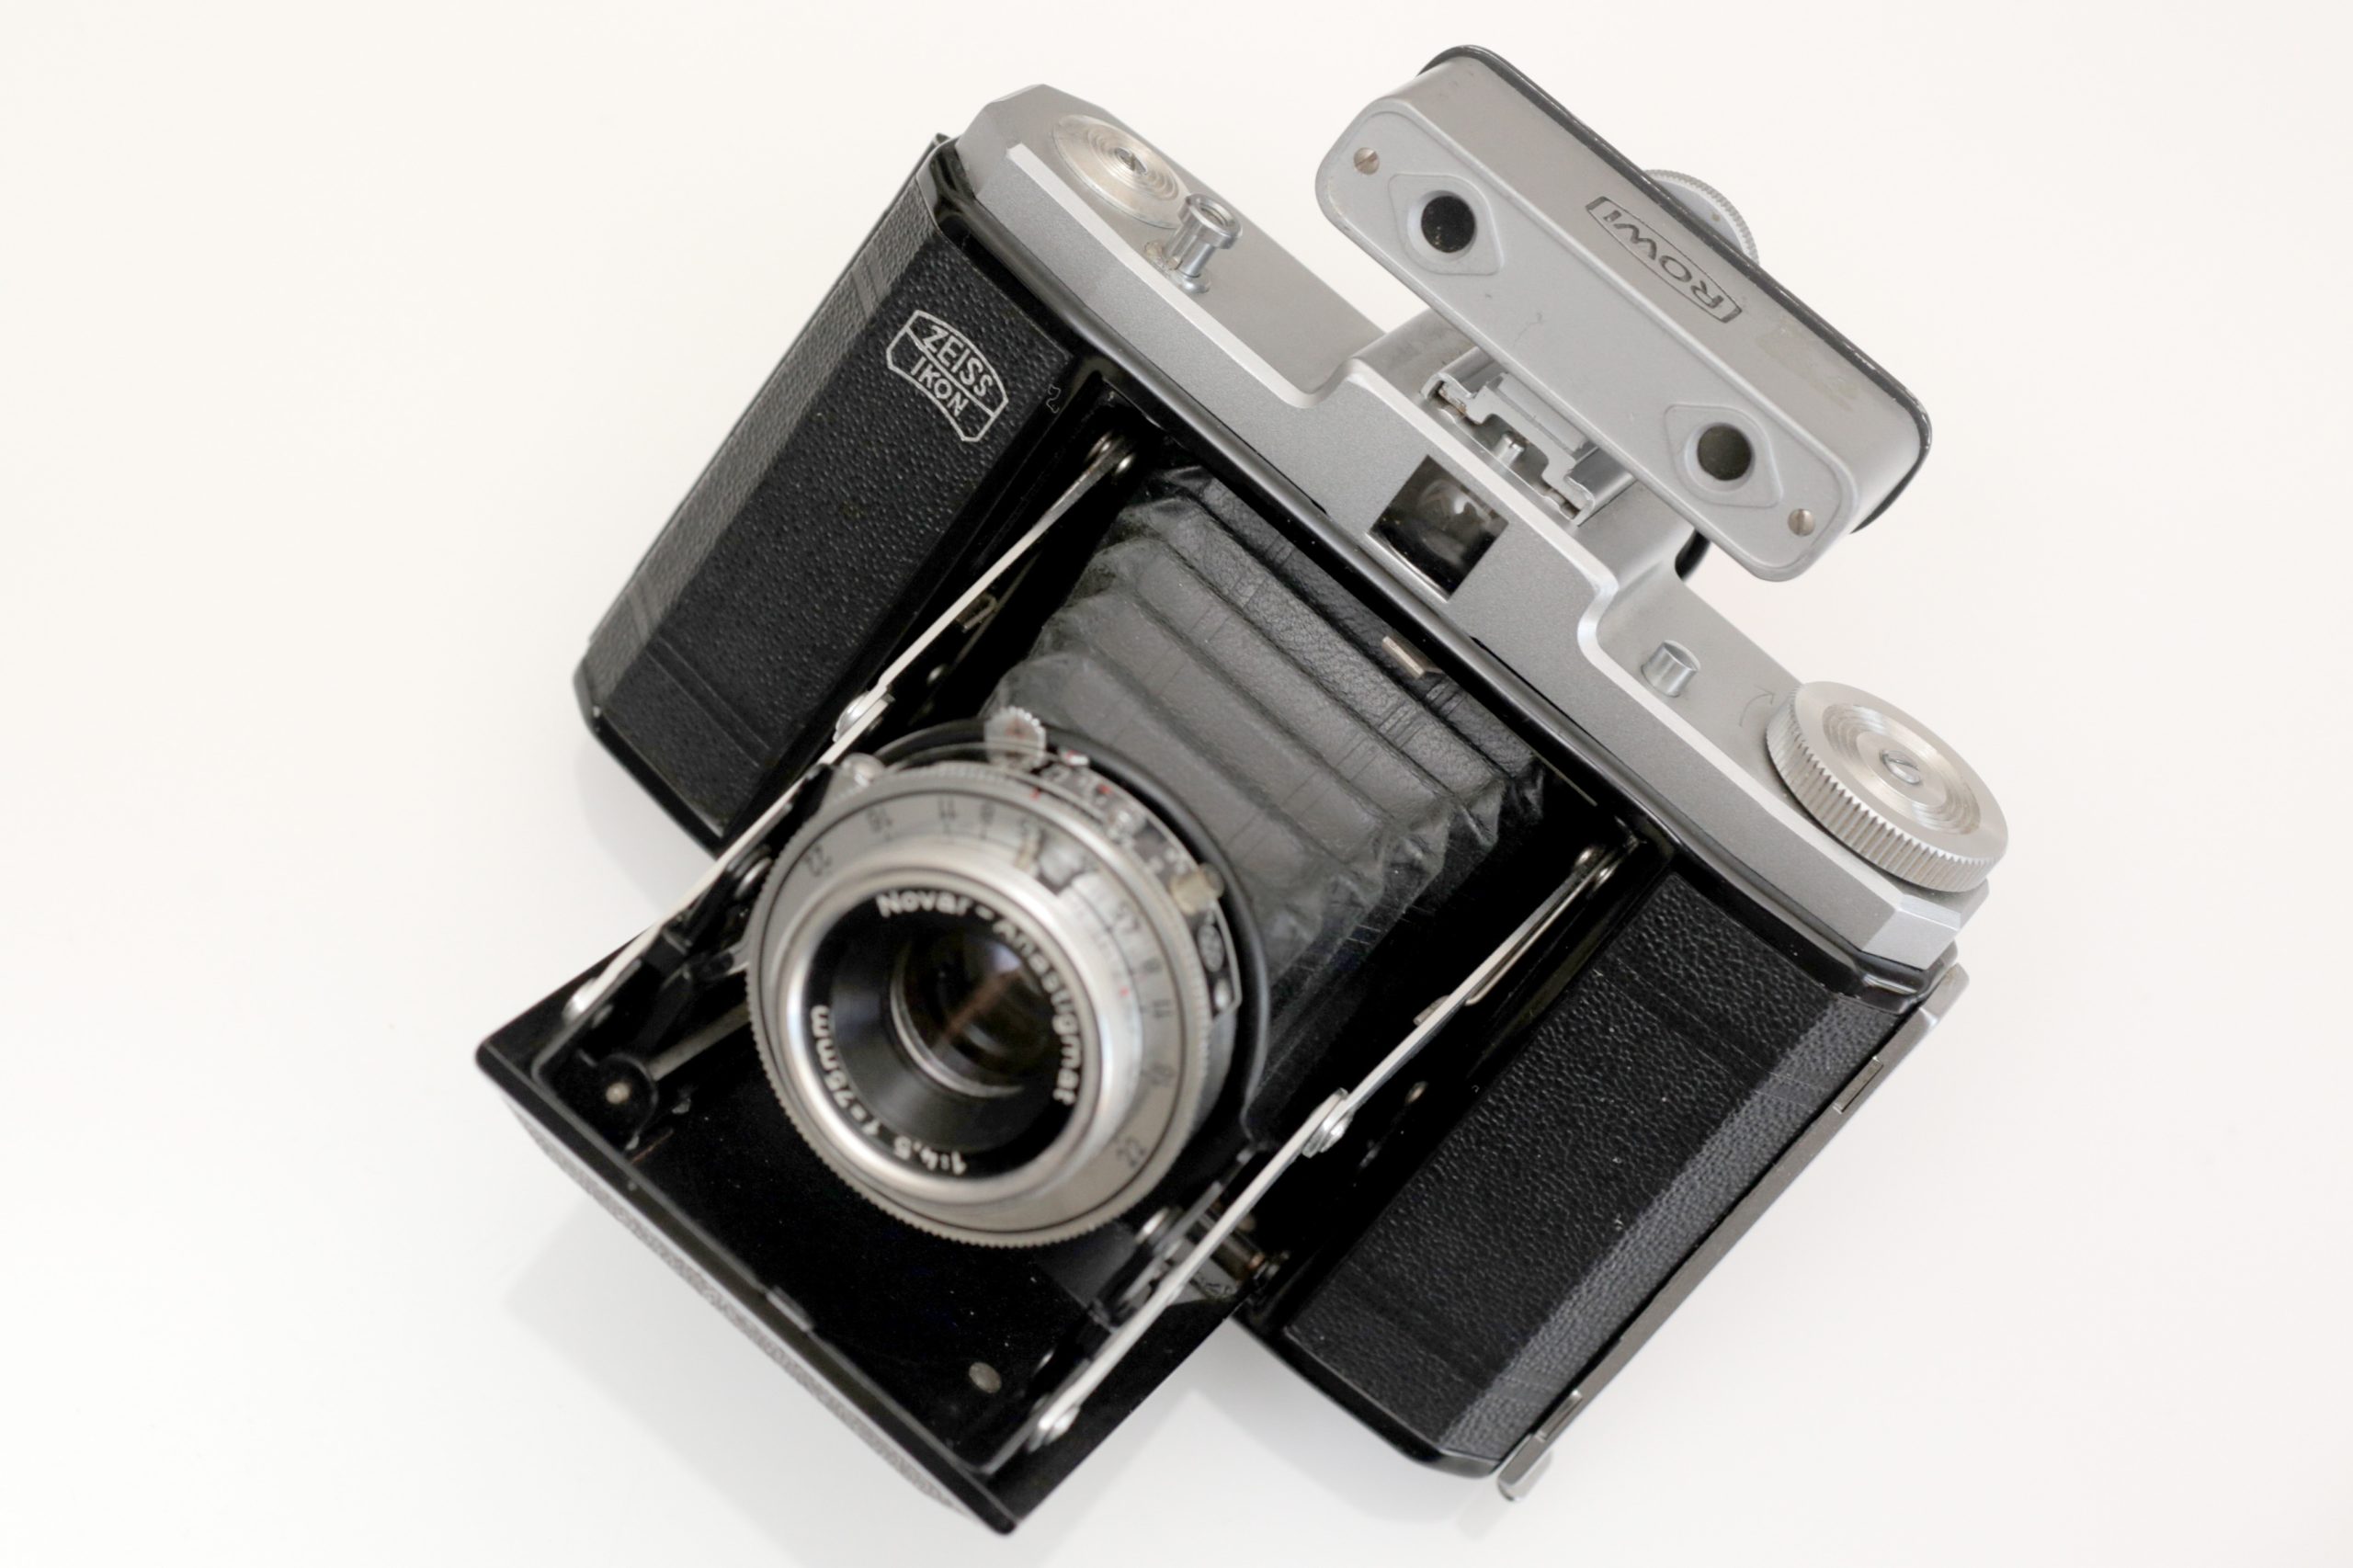
Back in the 1930s, Zeiss Ikon had a vision: make photography accessible. Enter the Nettar, a folding masterpiece engineered for the everyday snapshotter. No fancy rangefinders, no light meters, just clean lines, a satisfying click, and the legendary Novar lens. These cameras weren’t about technical acrobatics, they were about capturing life’s moments with intention and a touch of nostalgia.
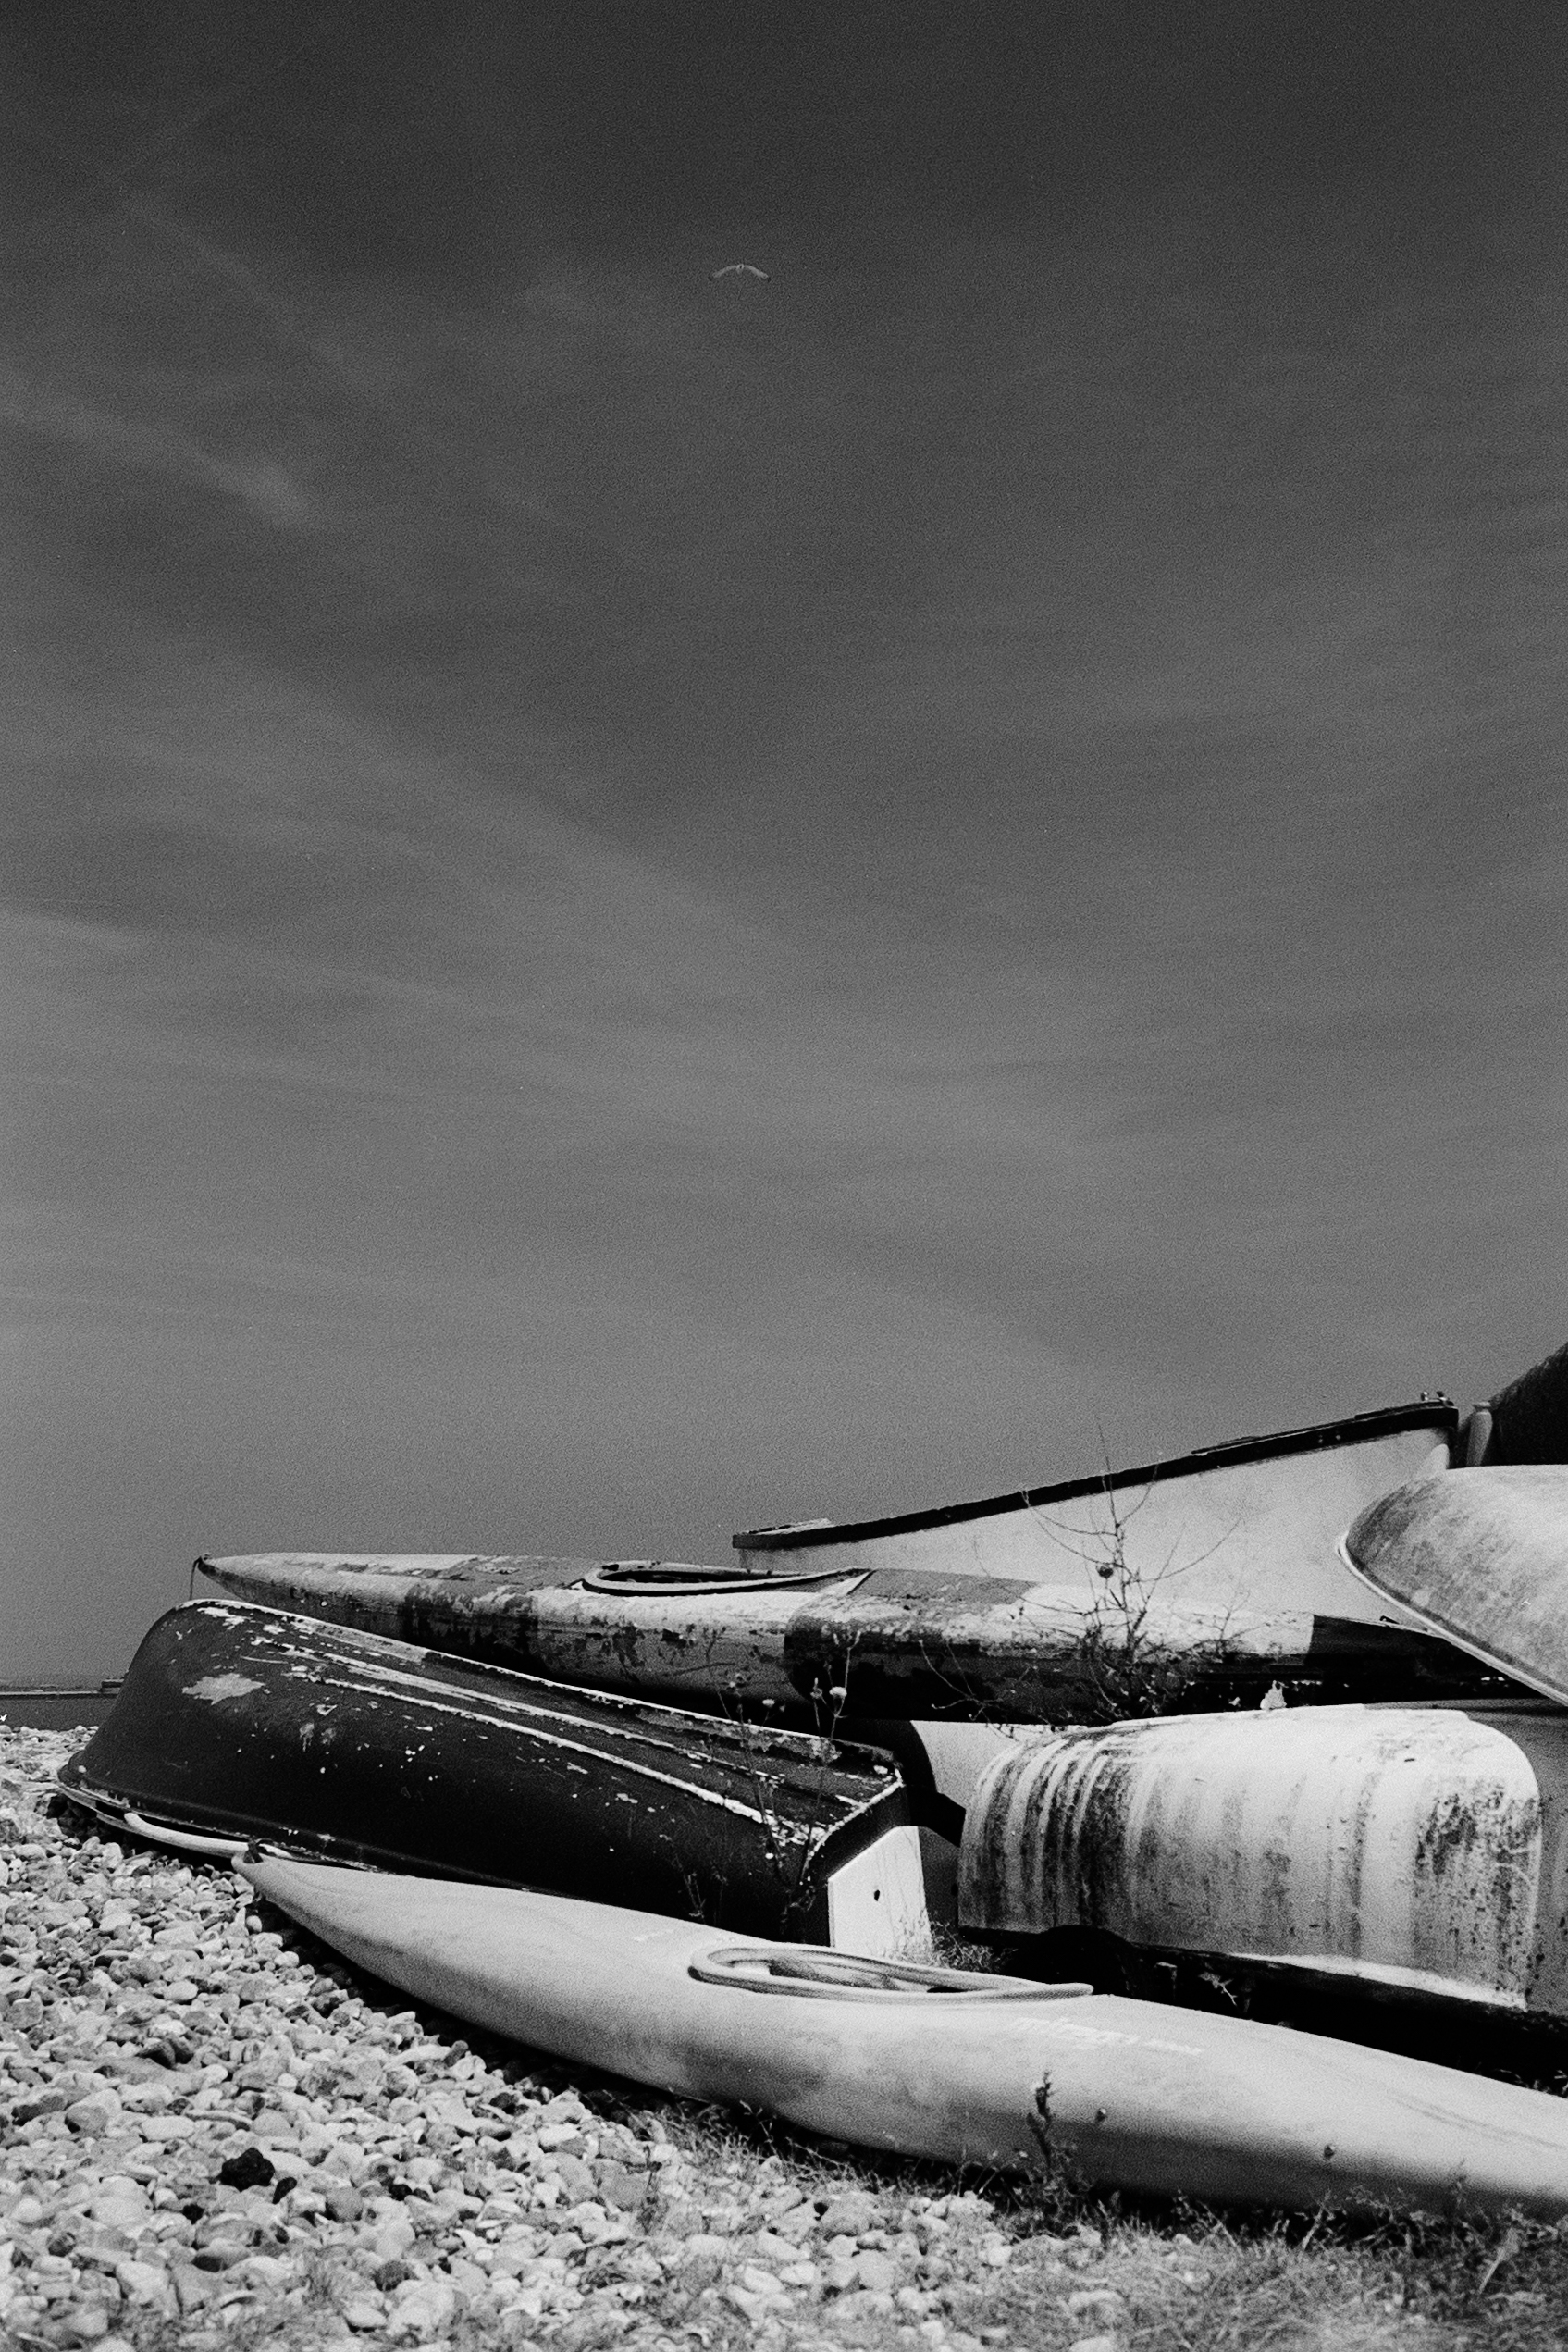
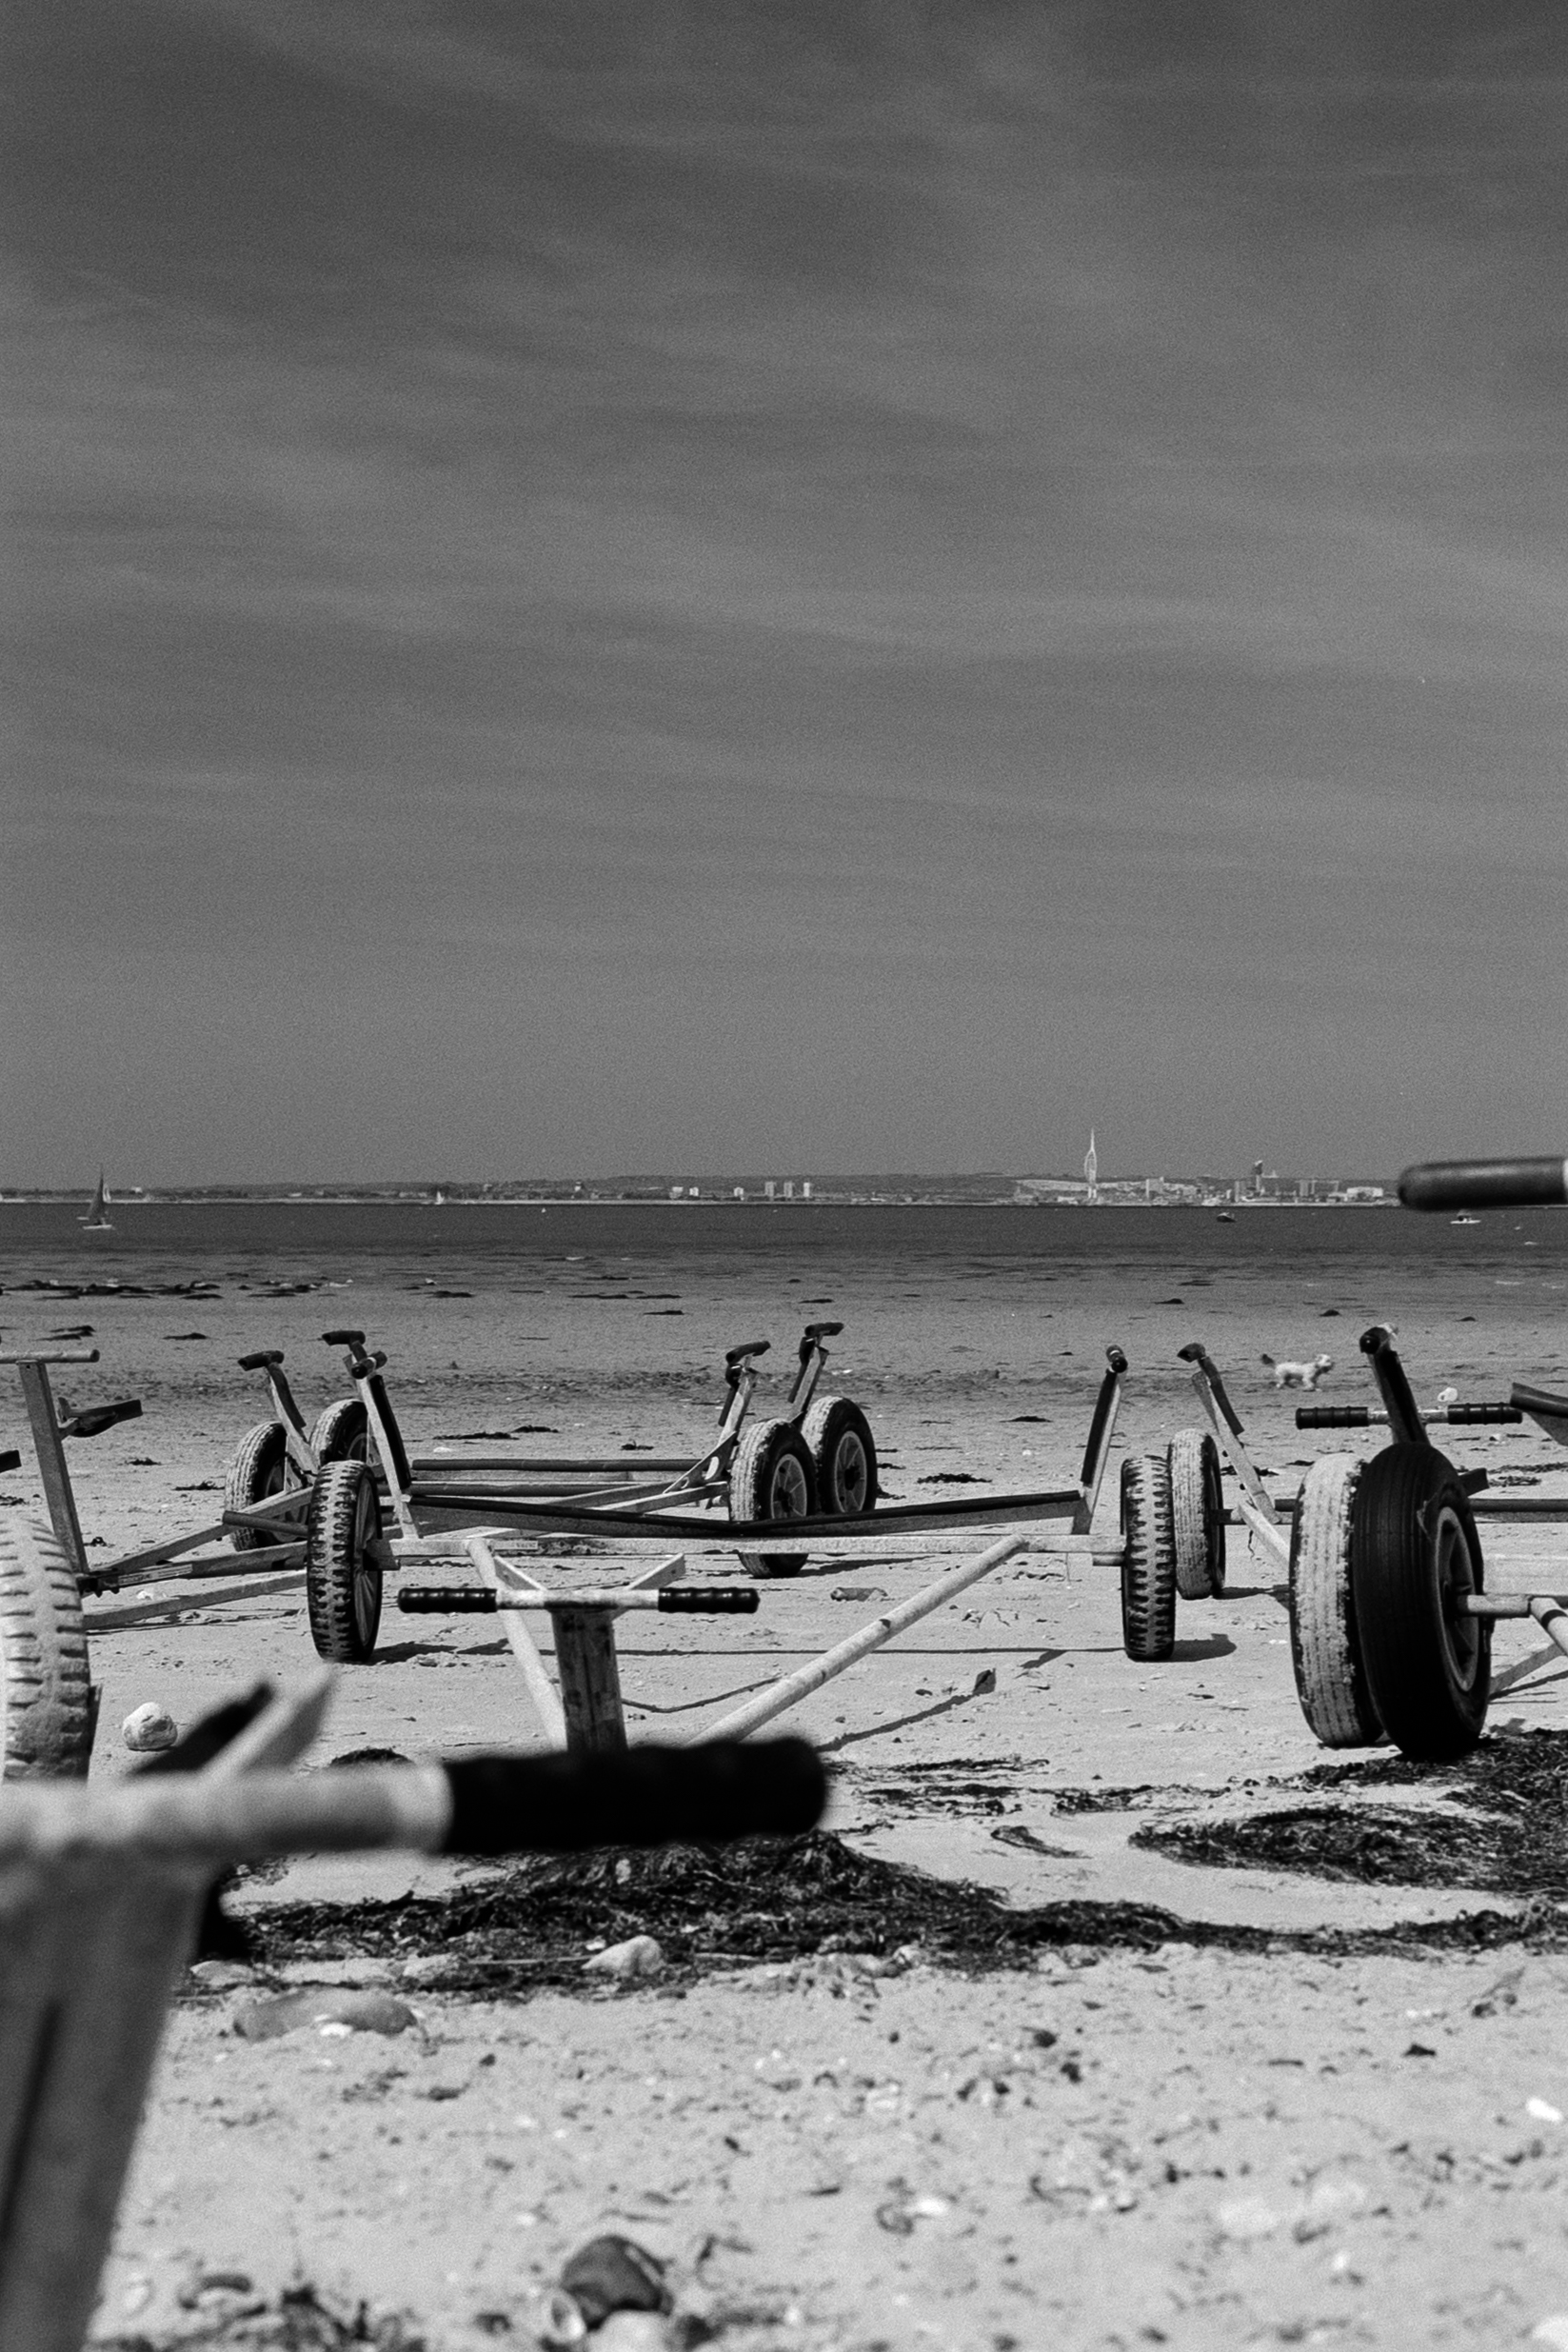
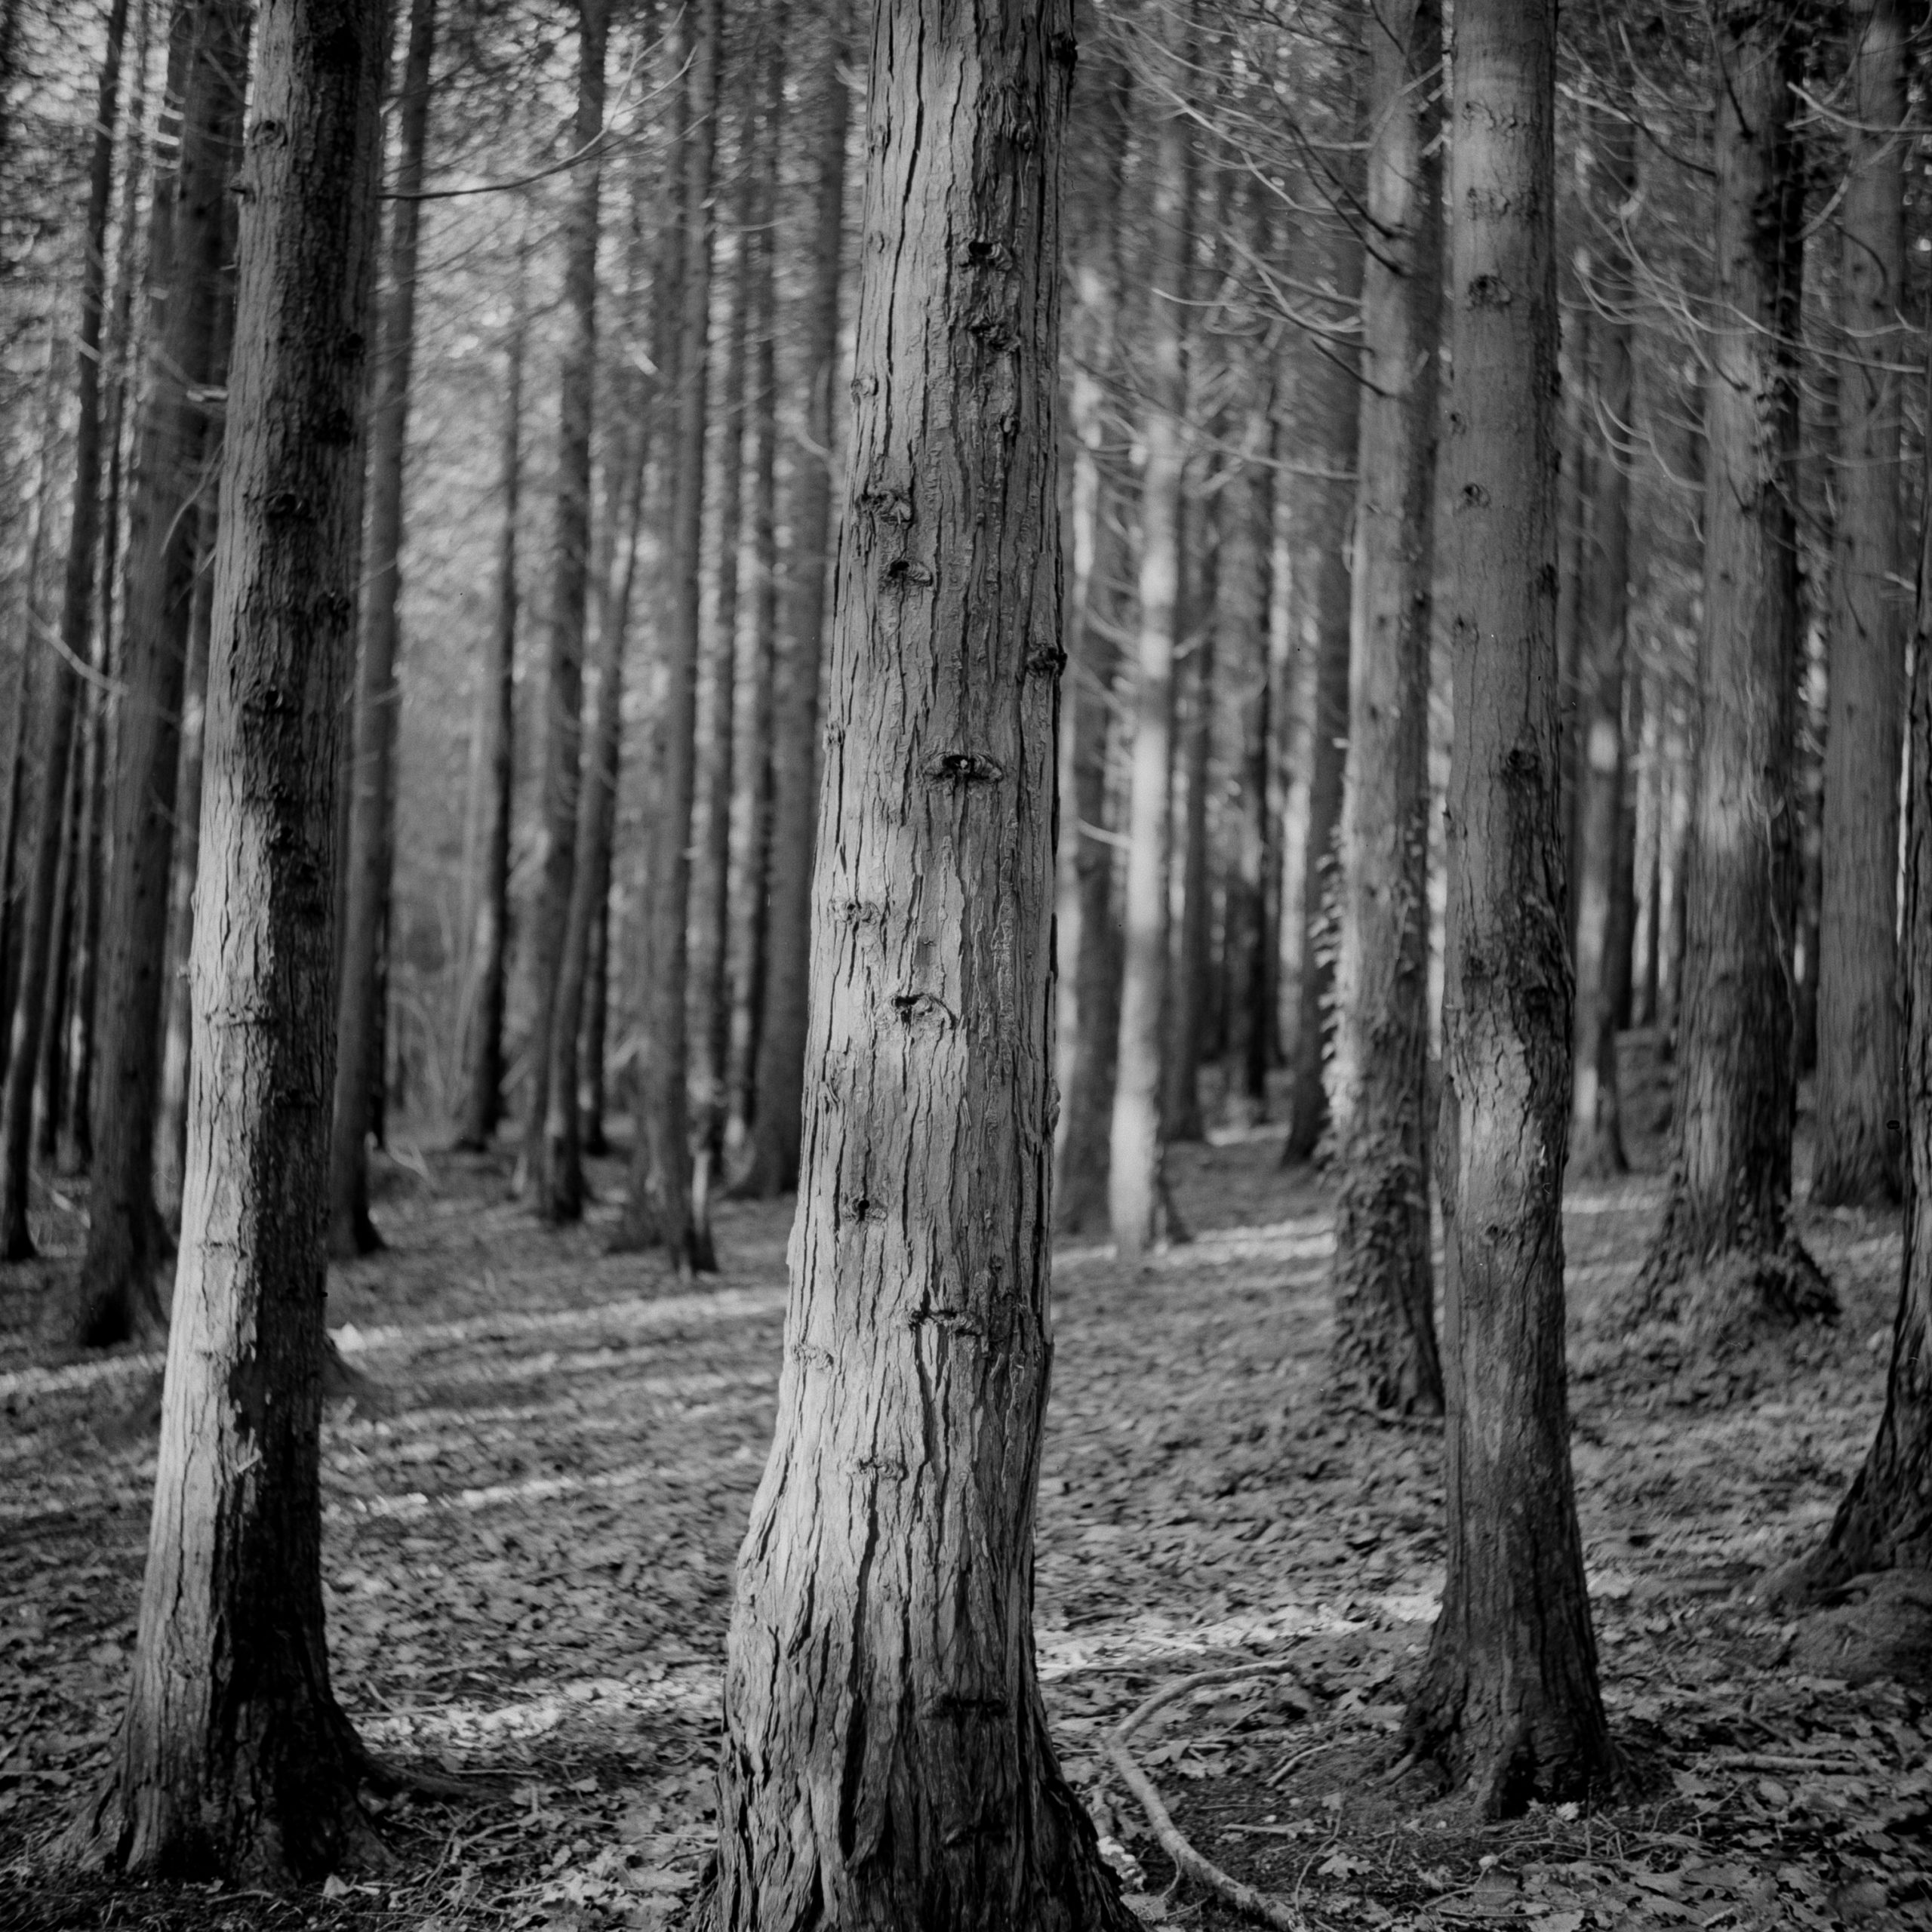
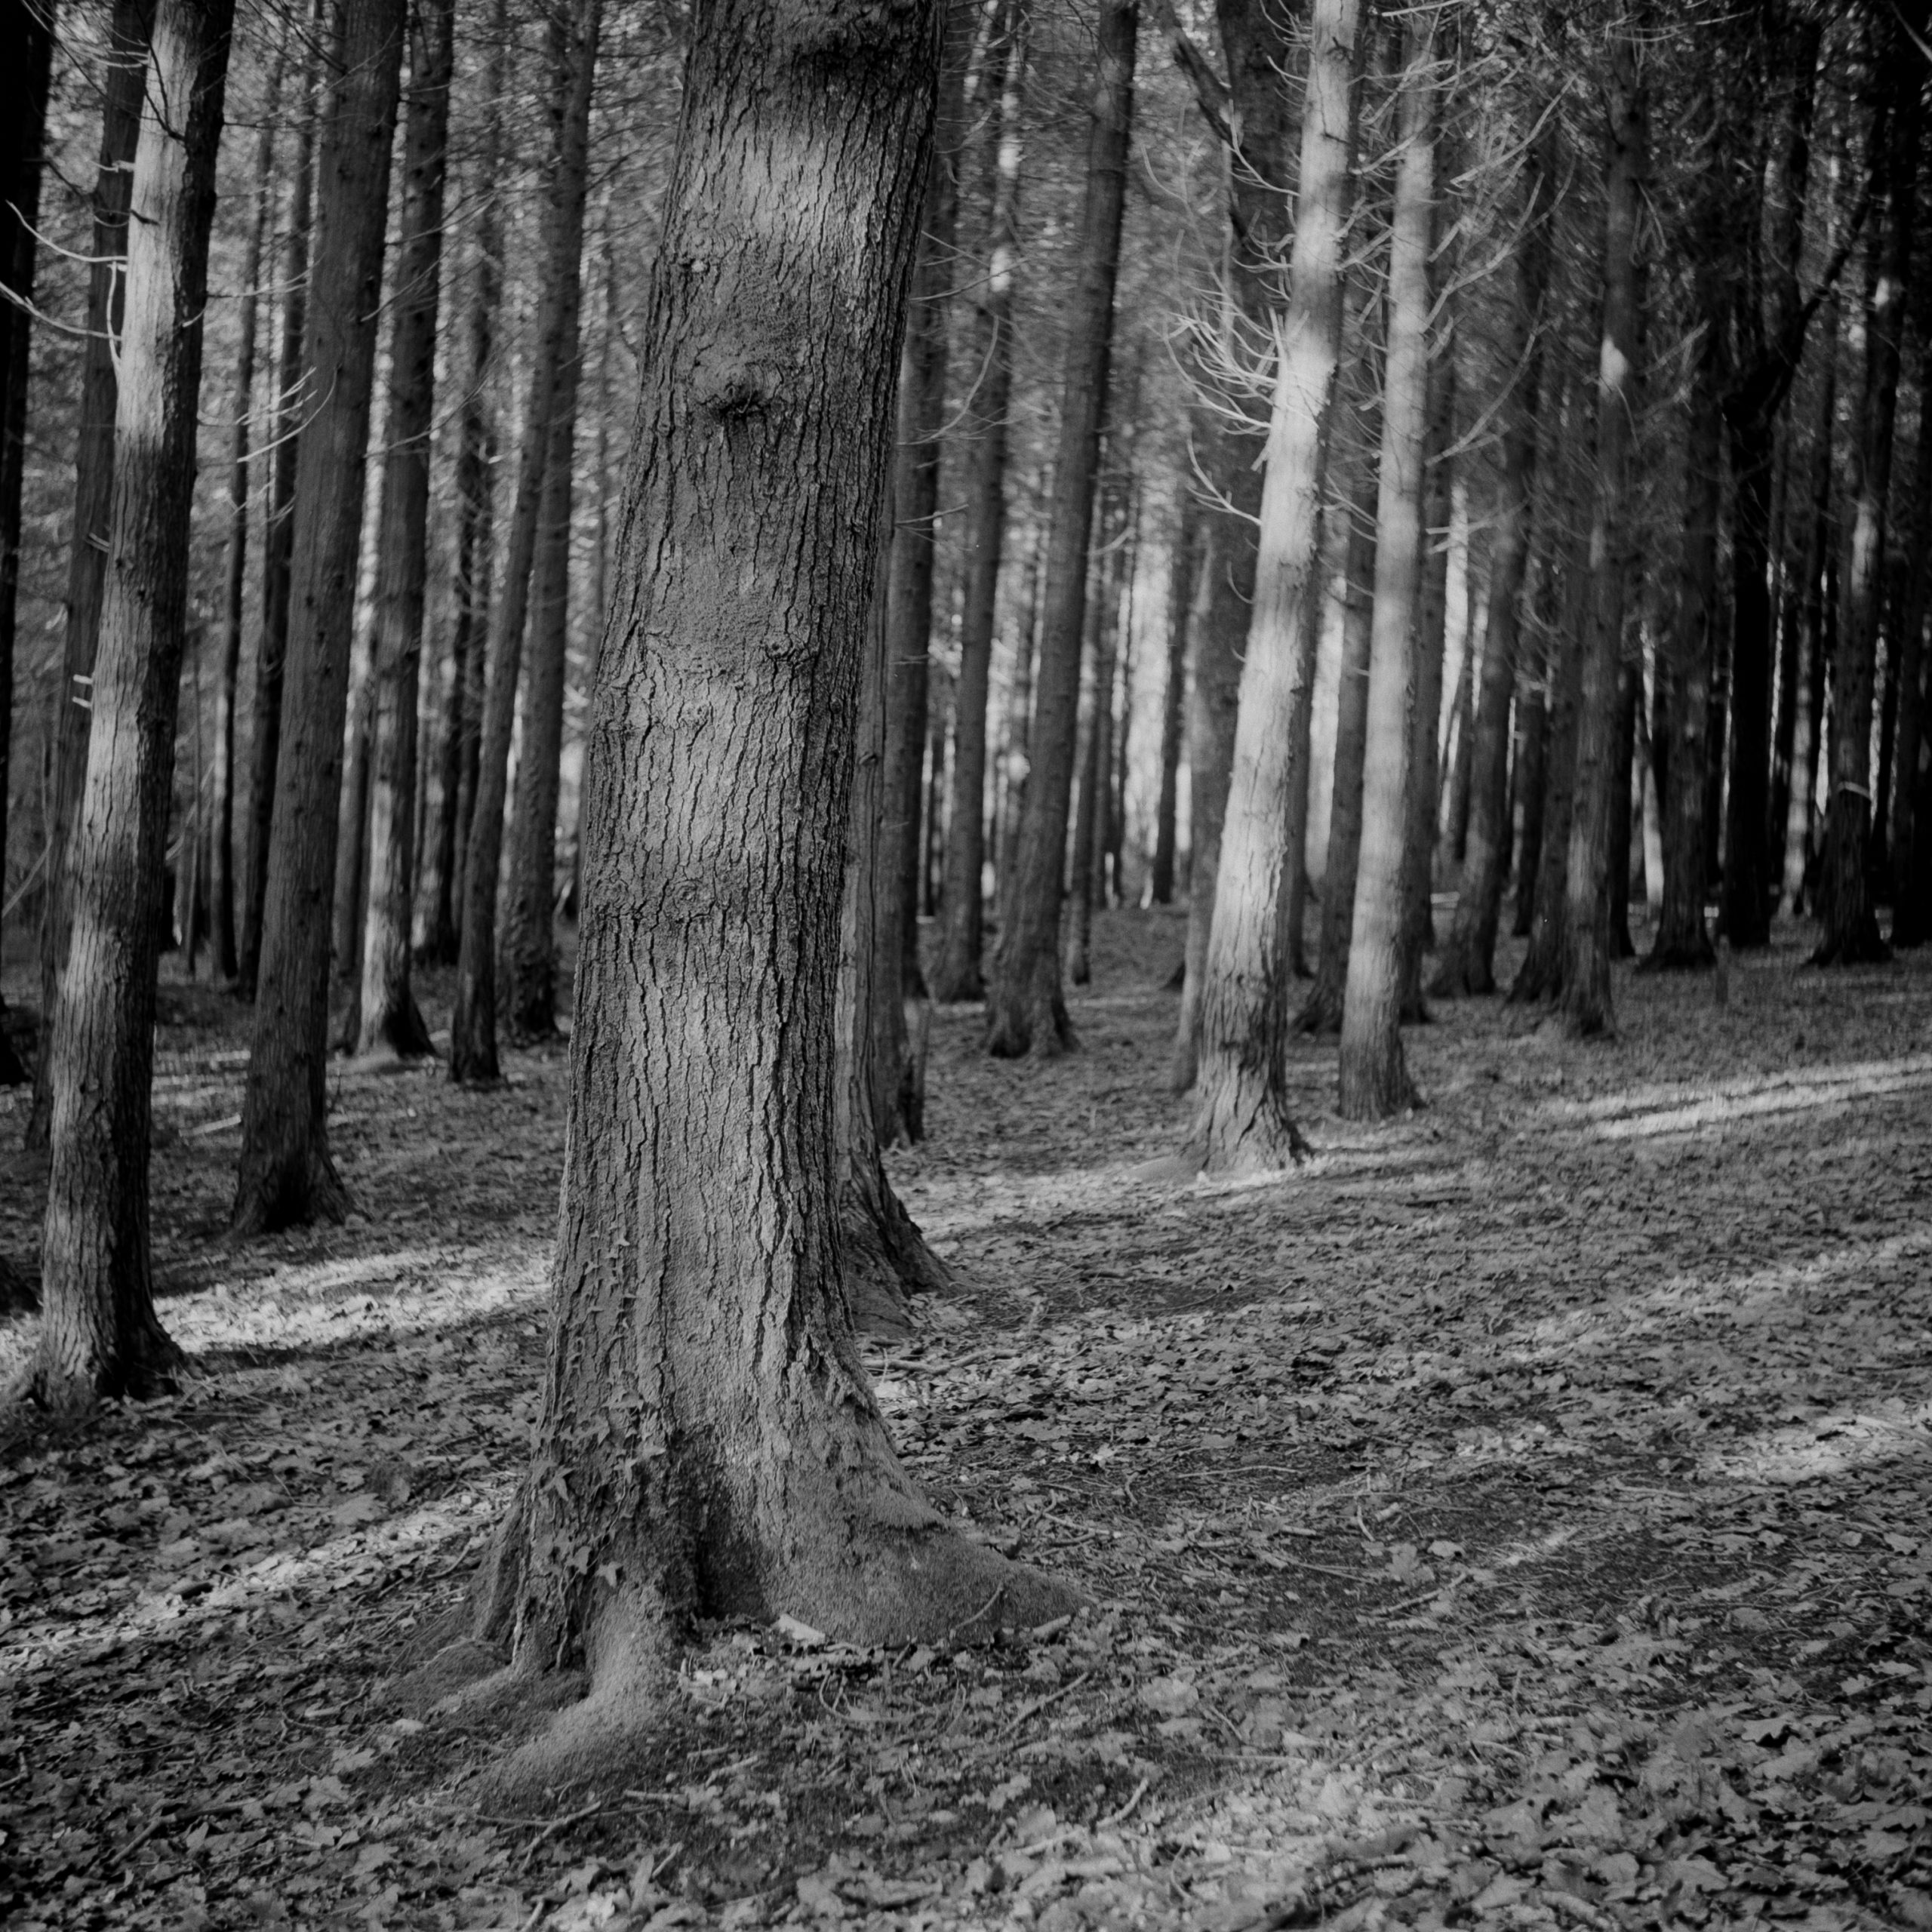
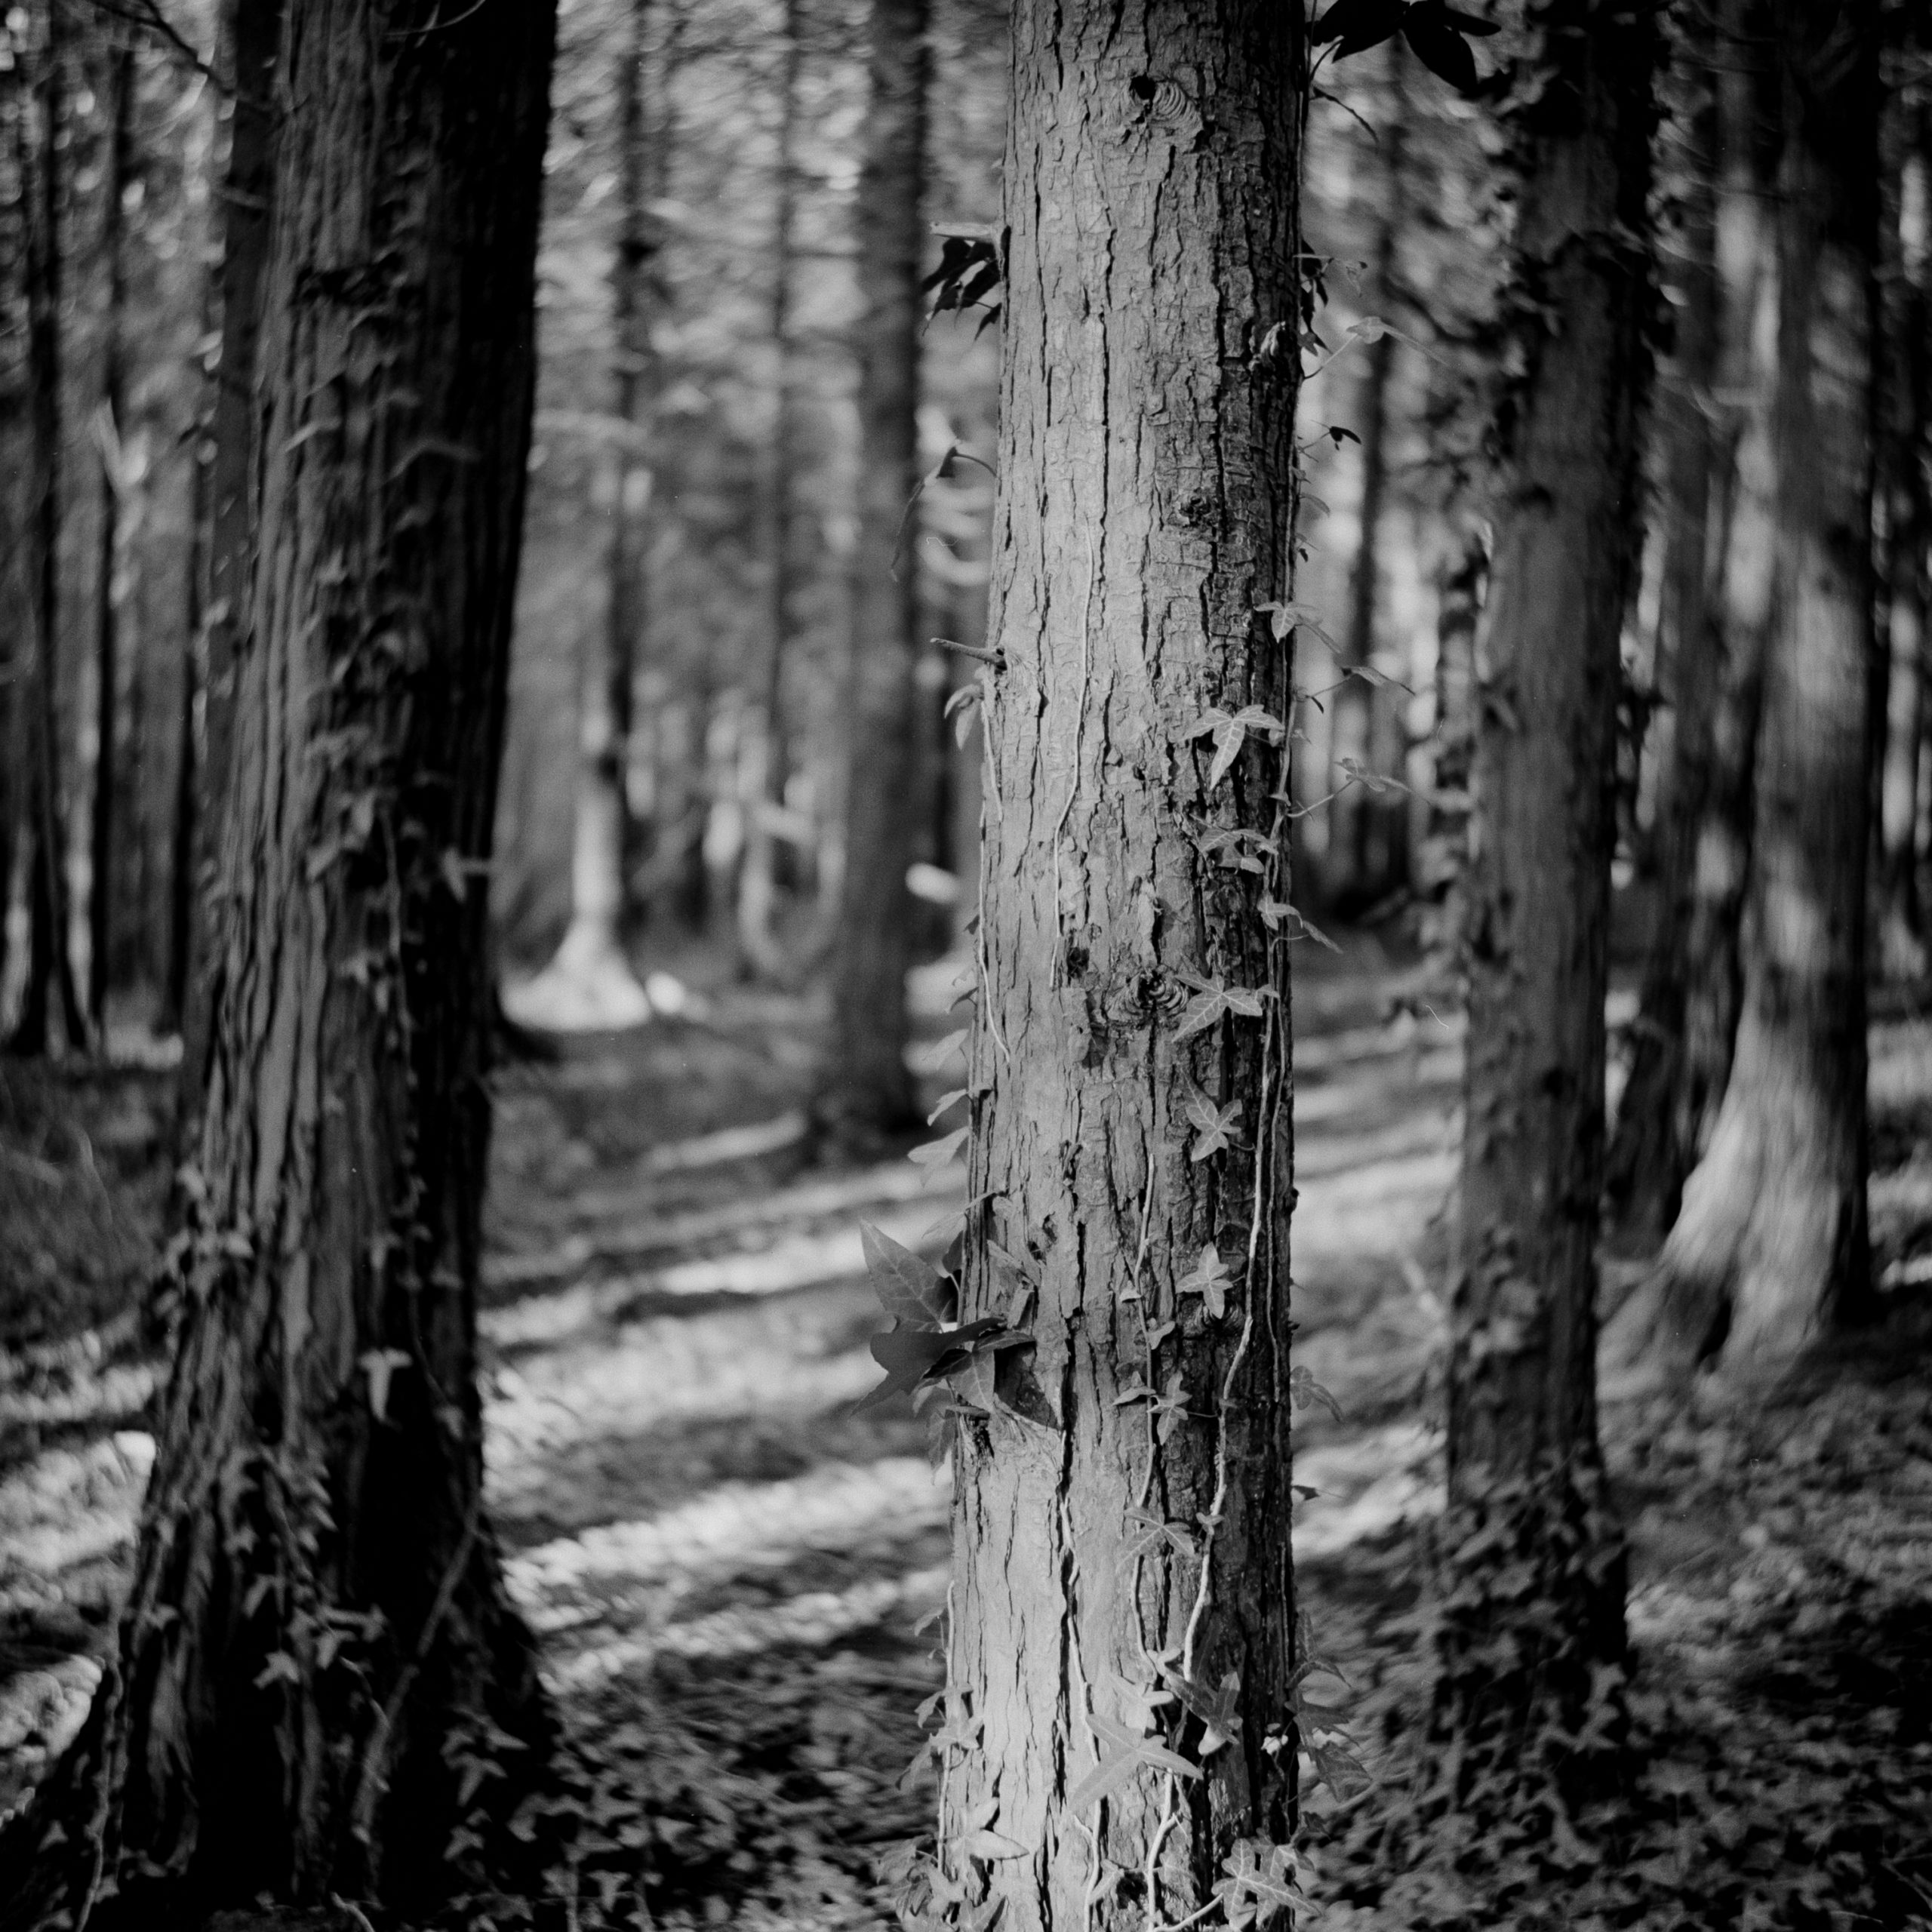
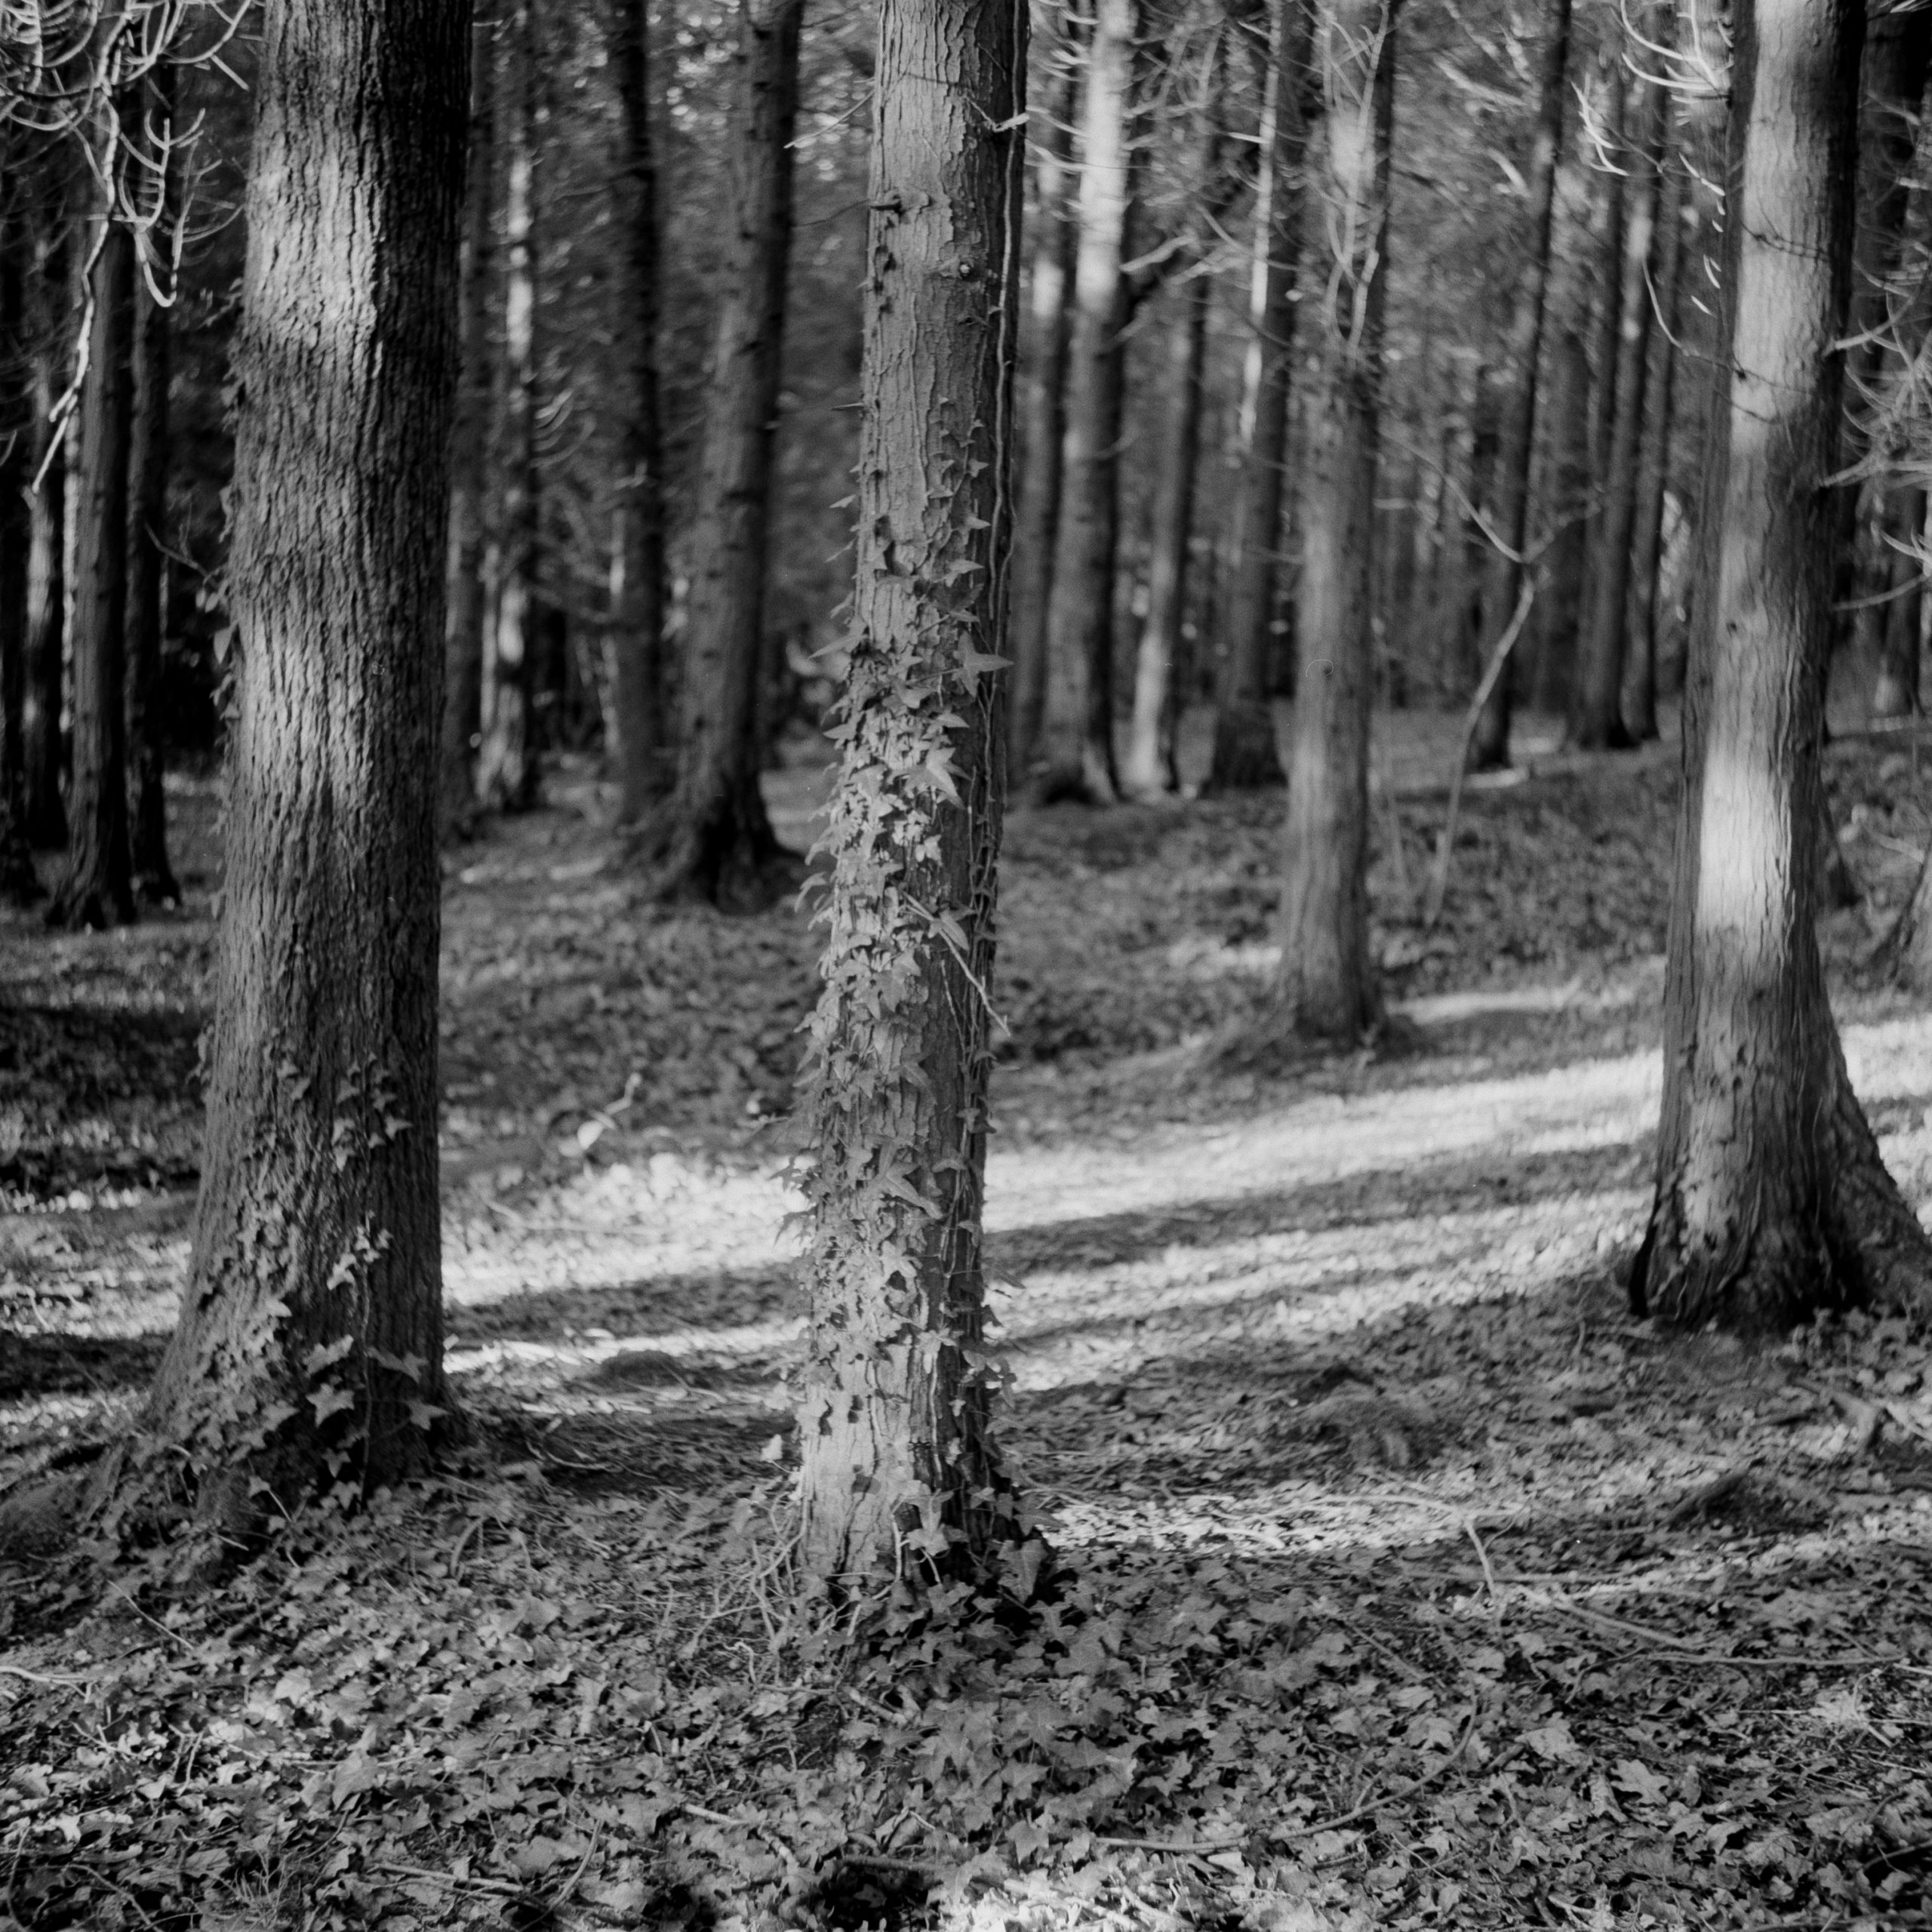
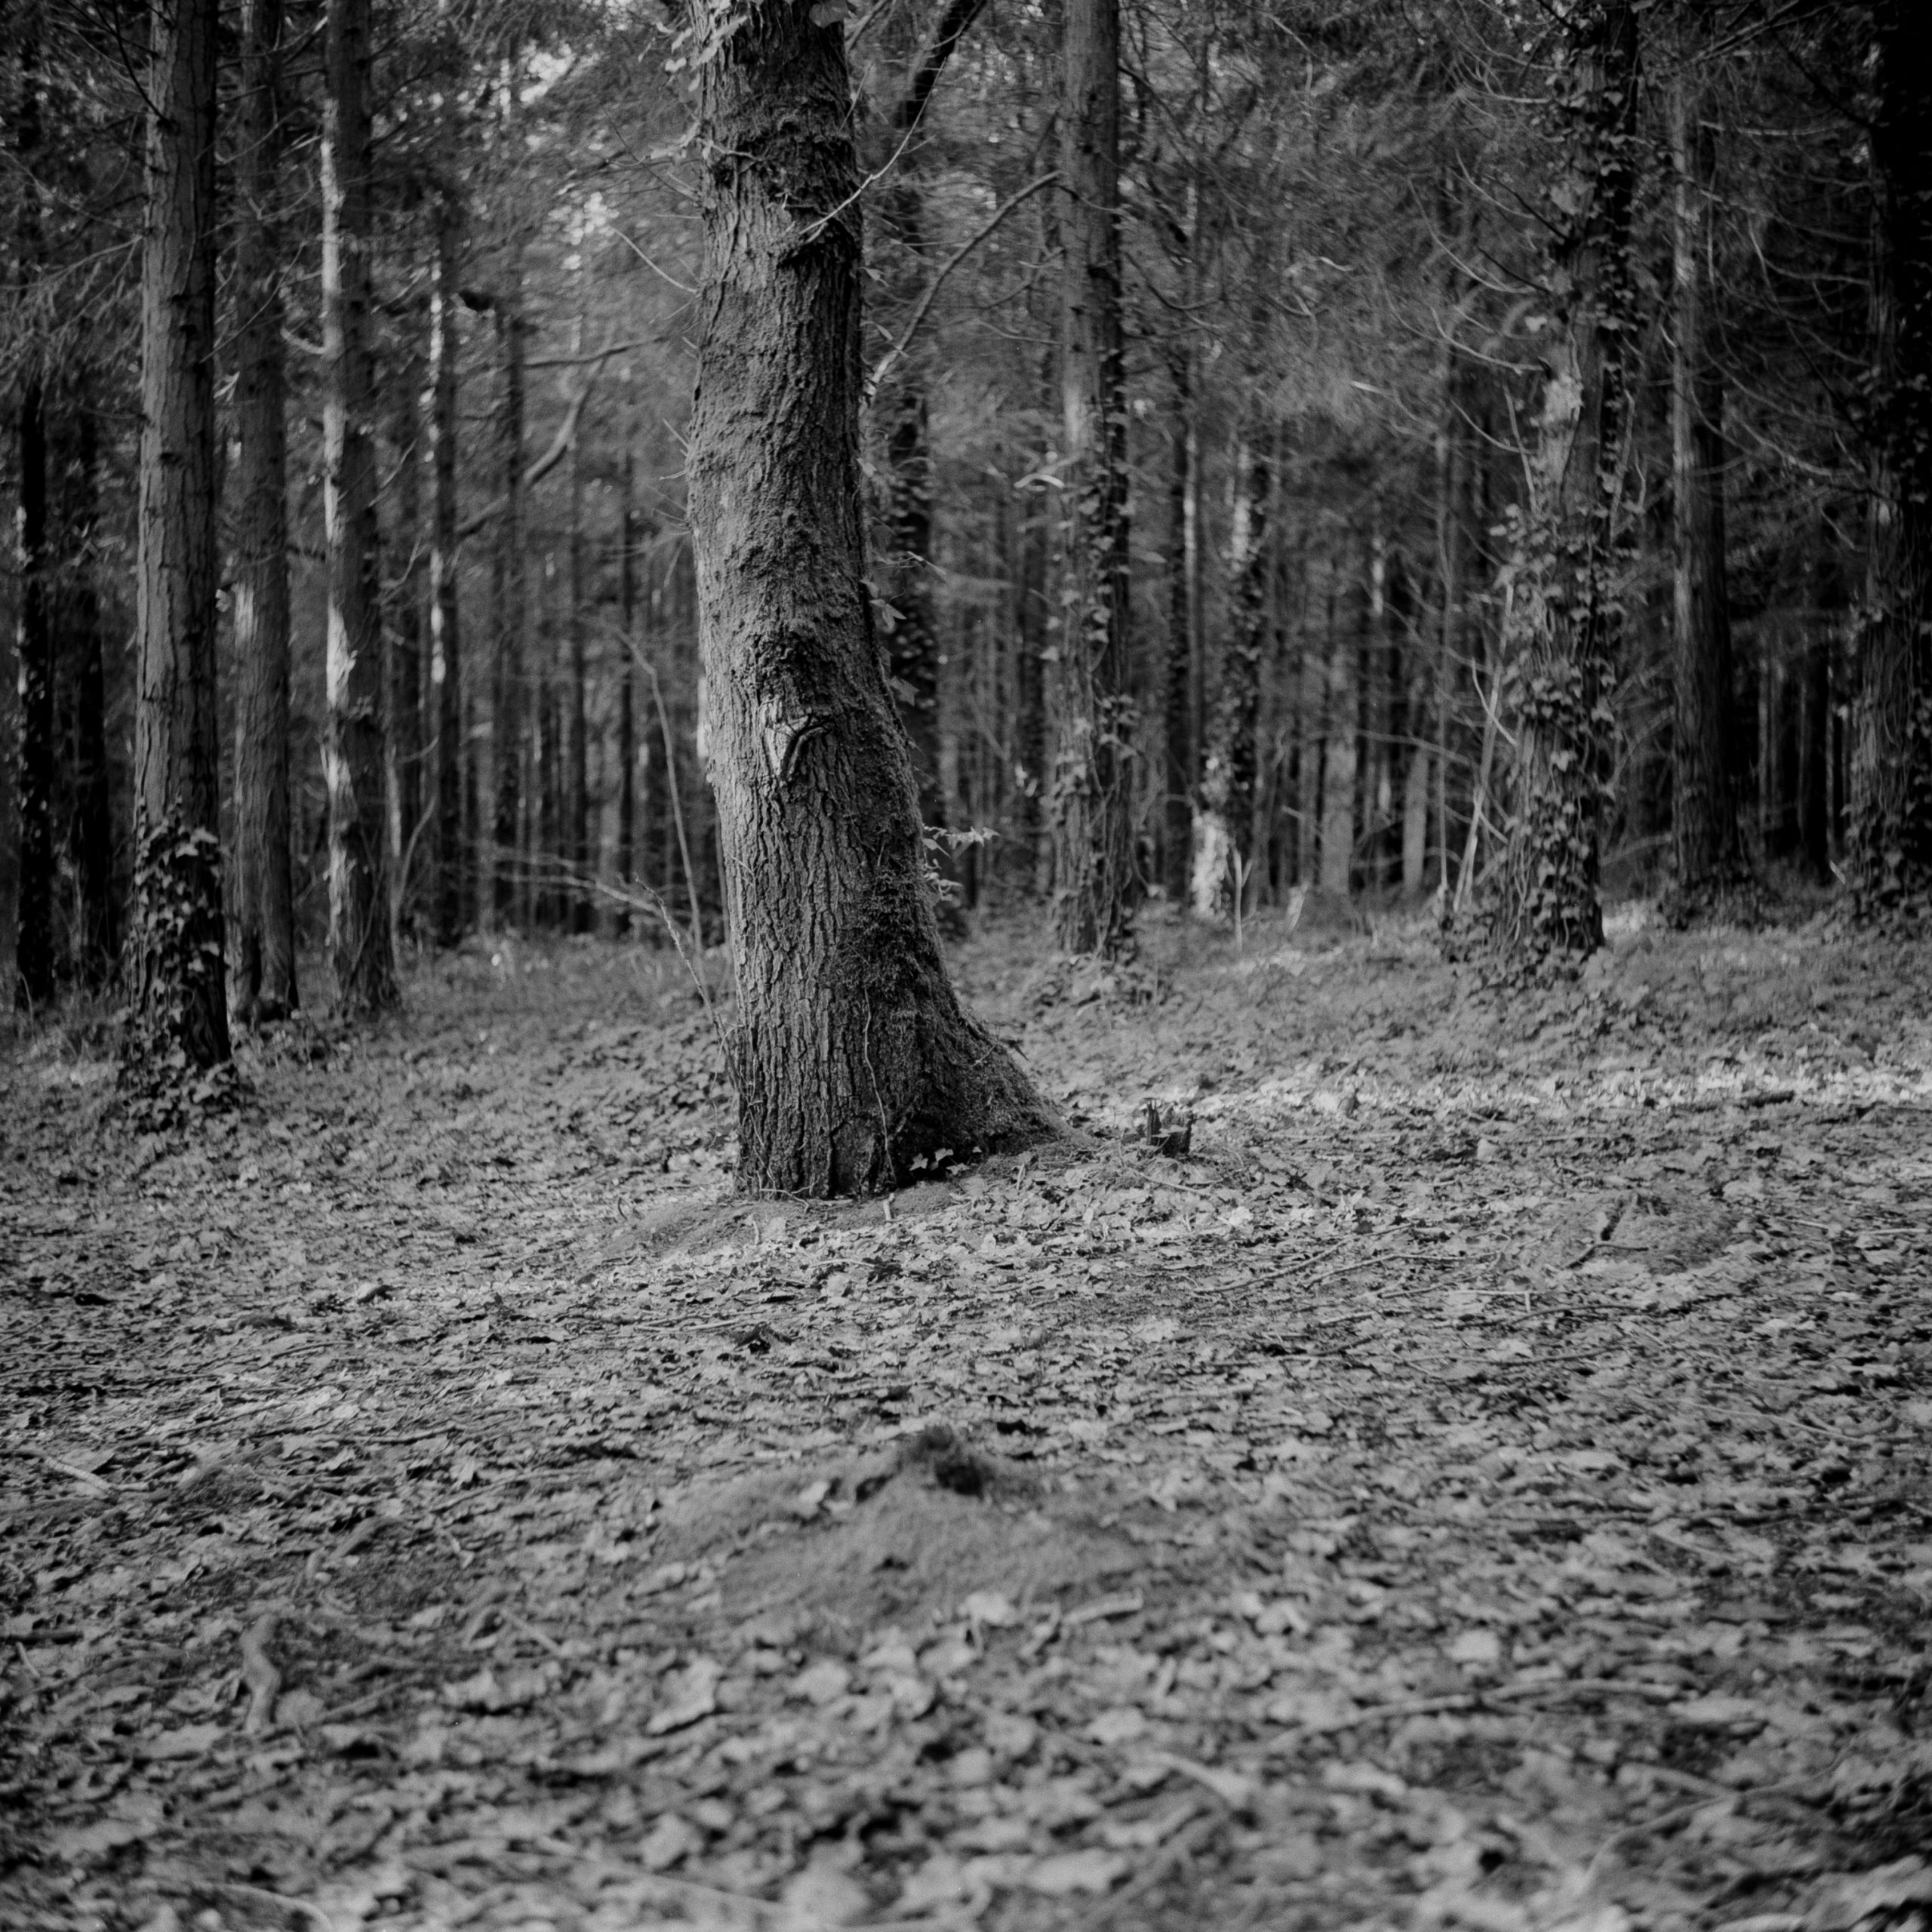
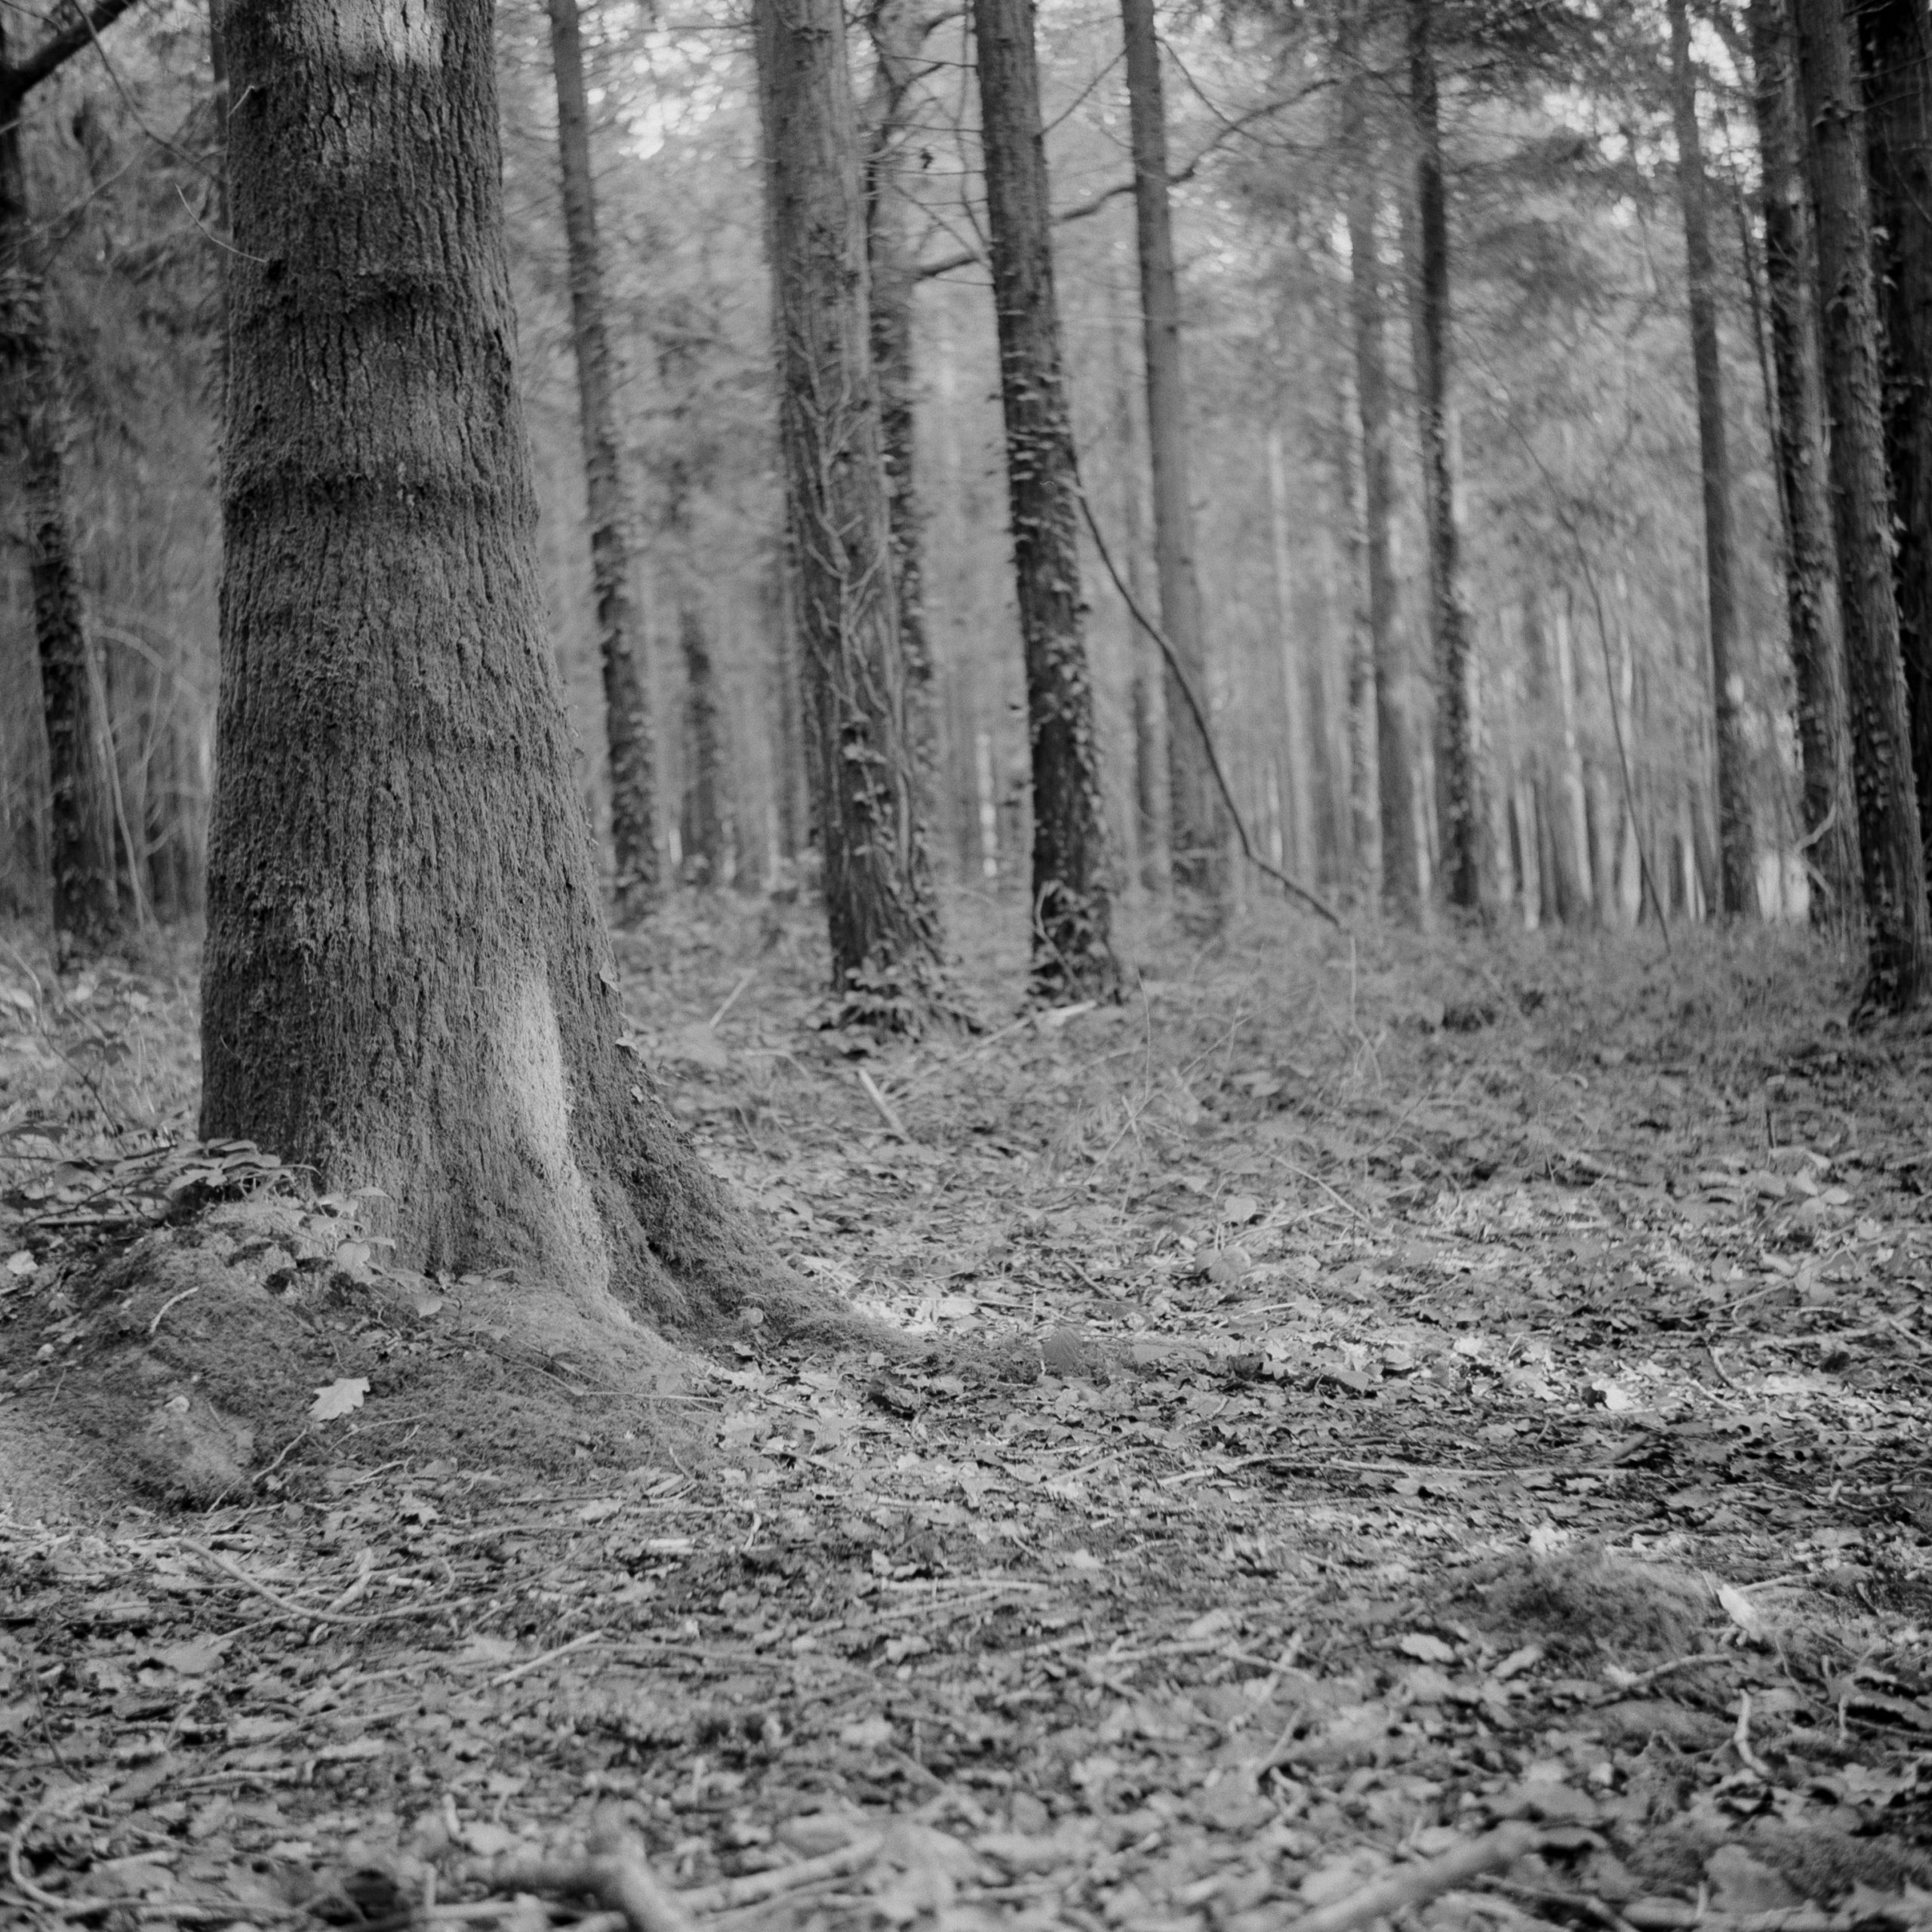
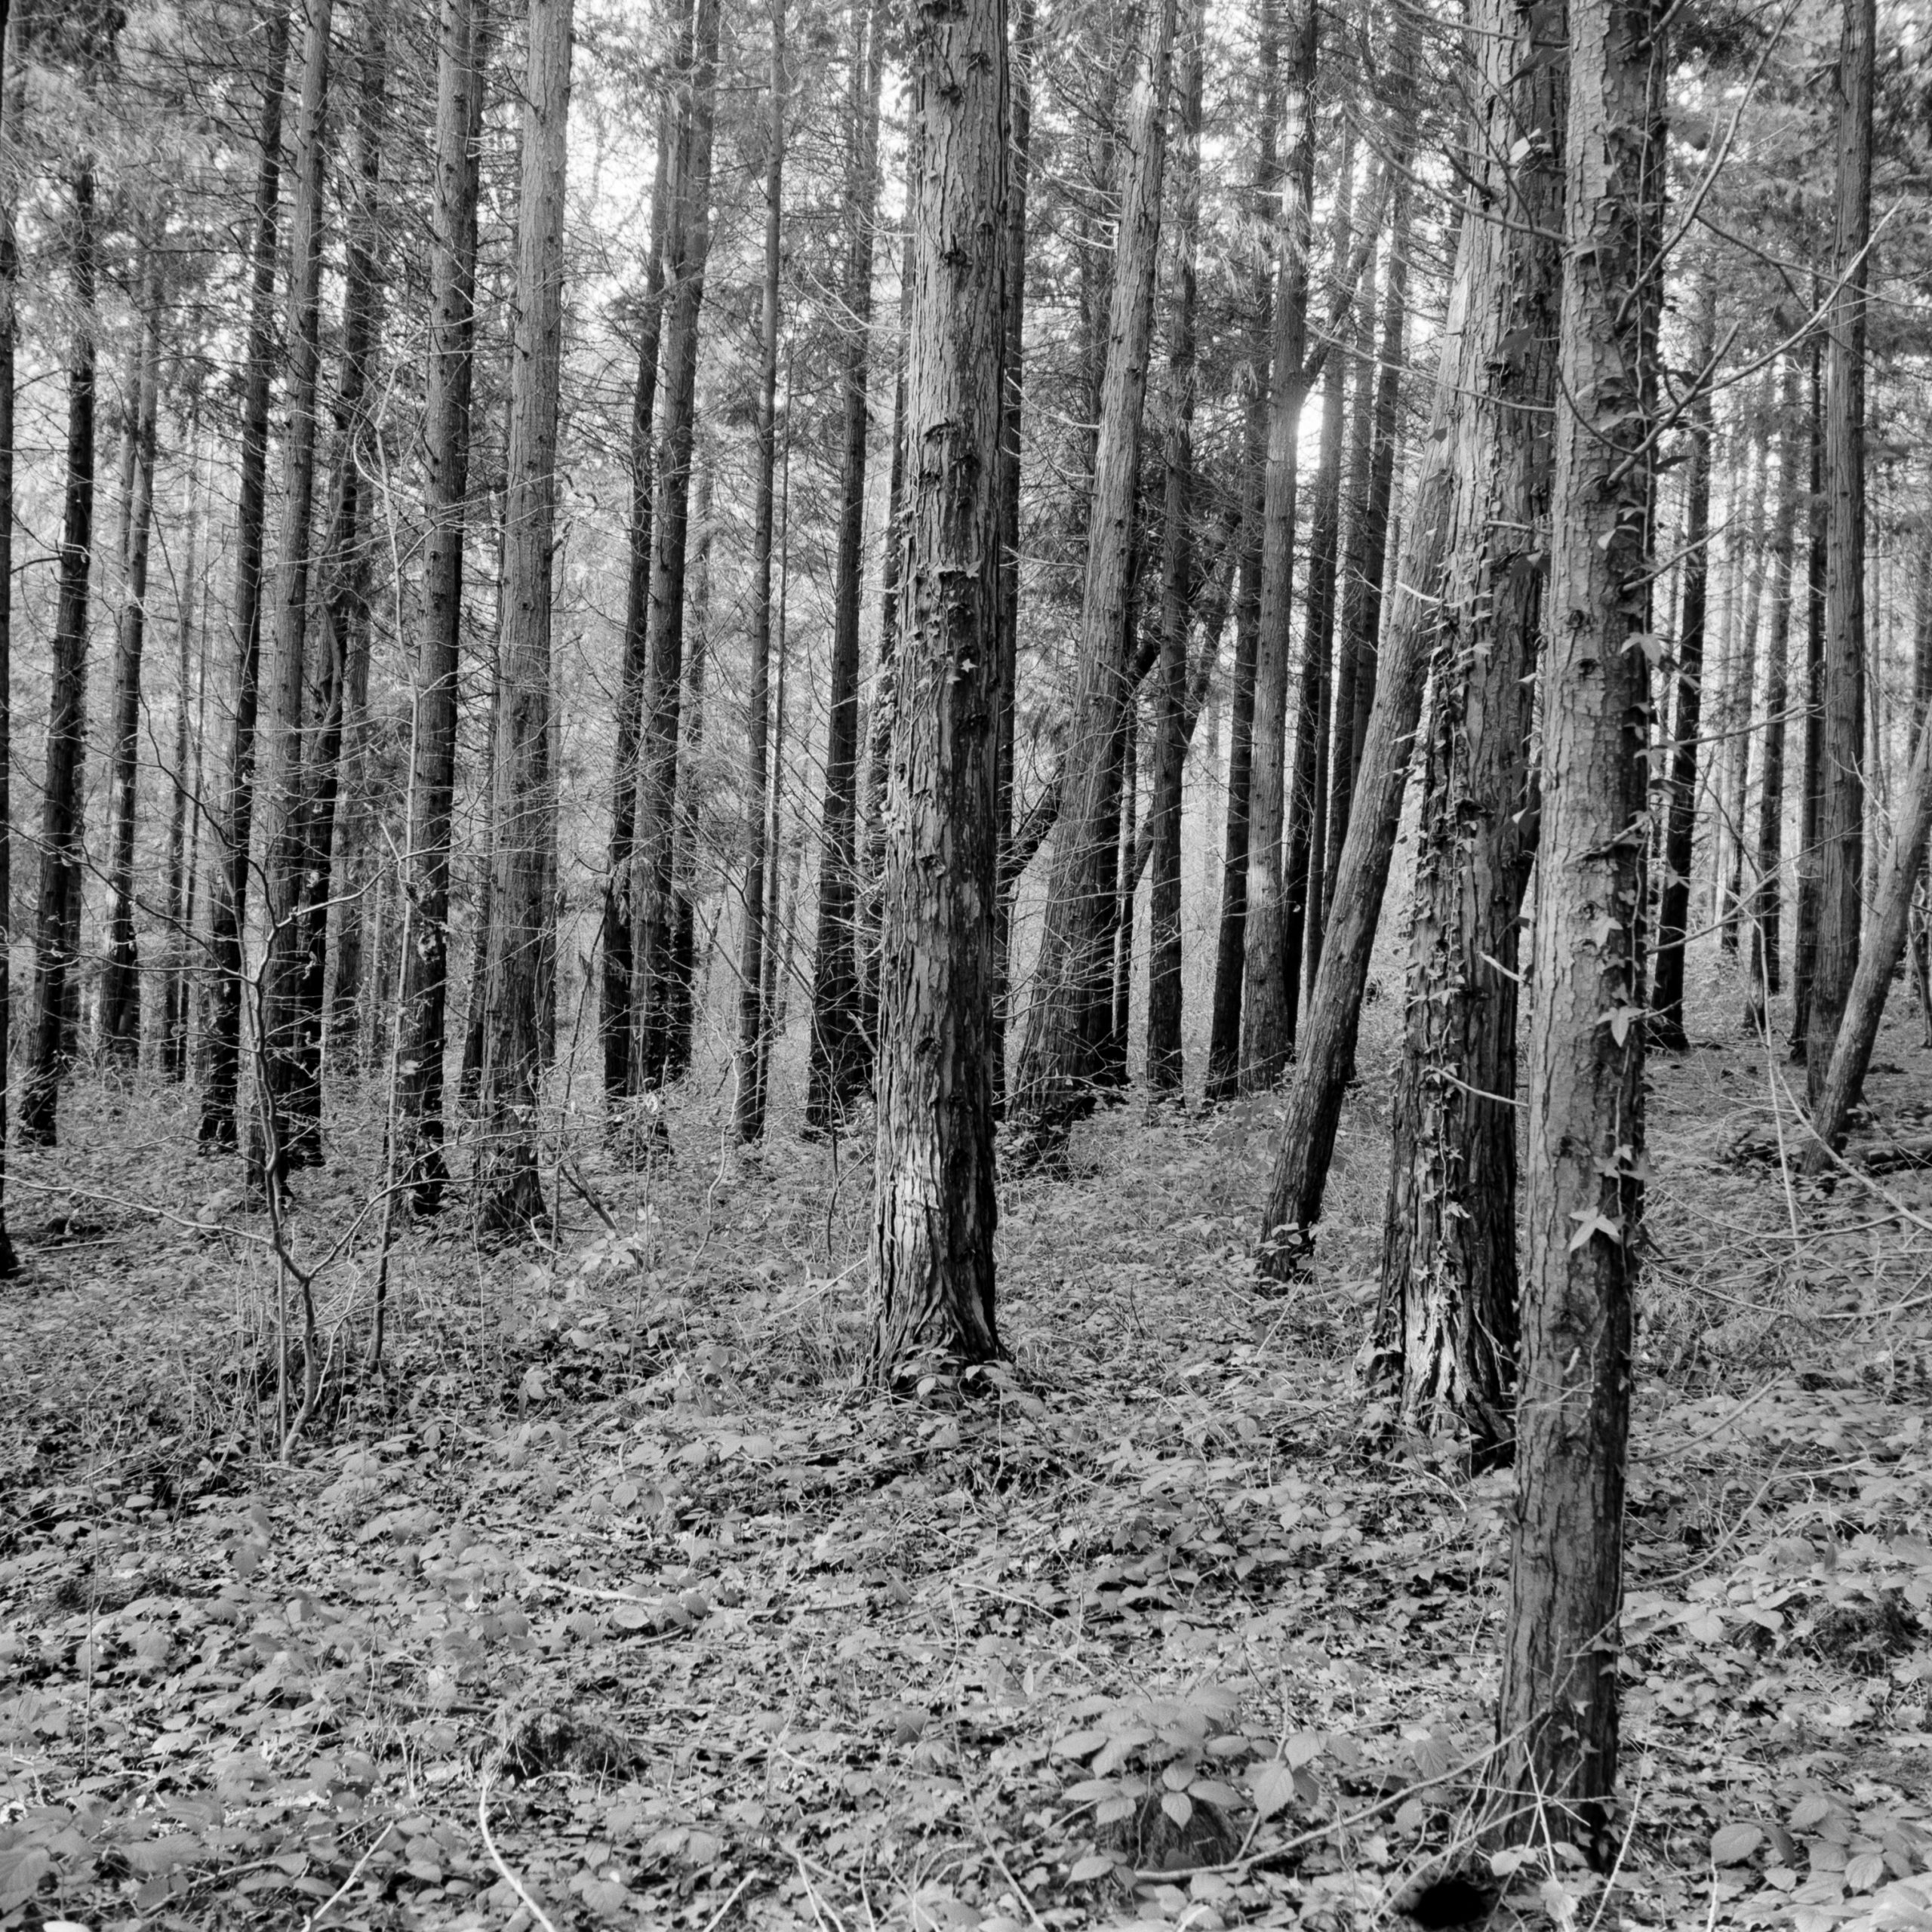
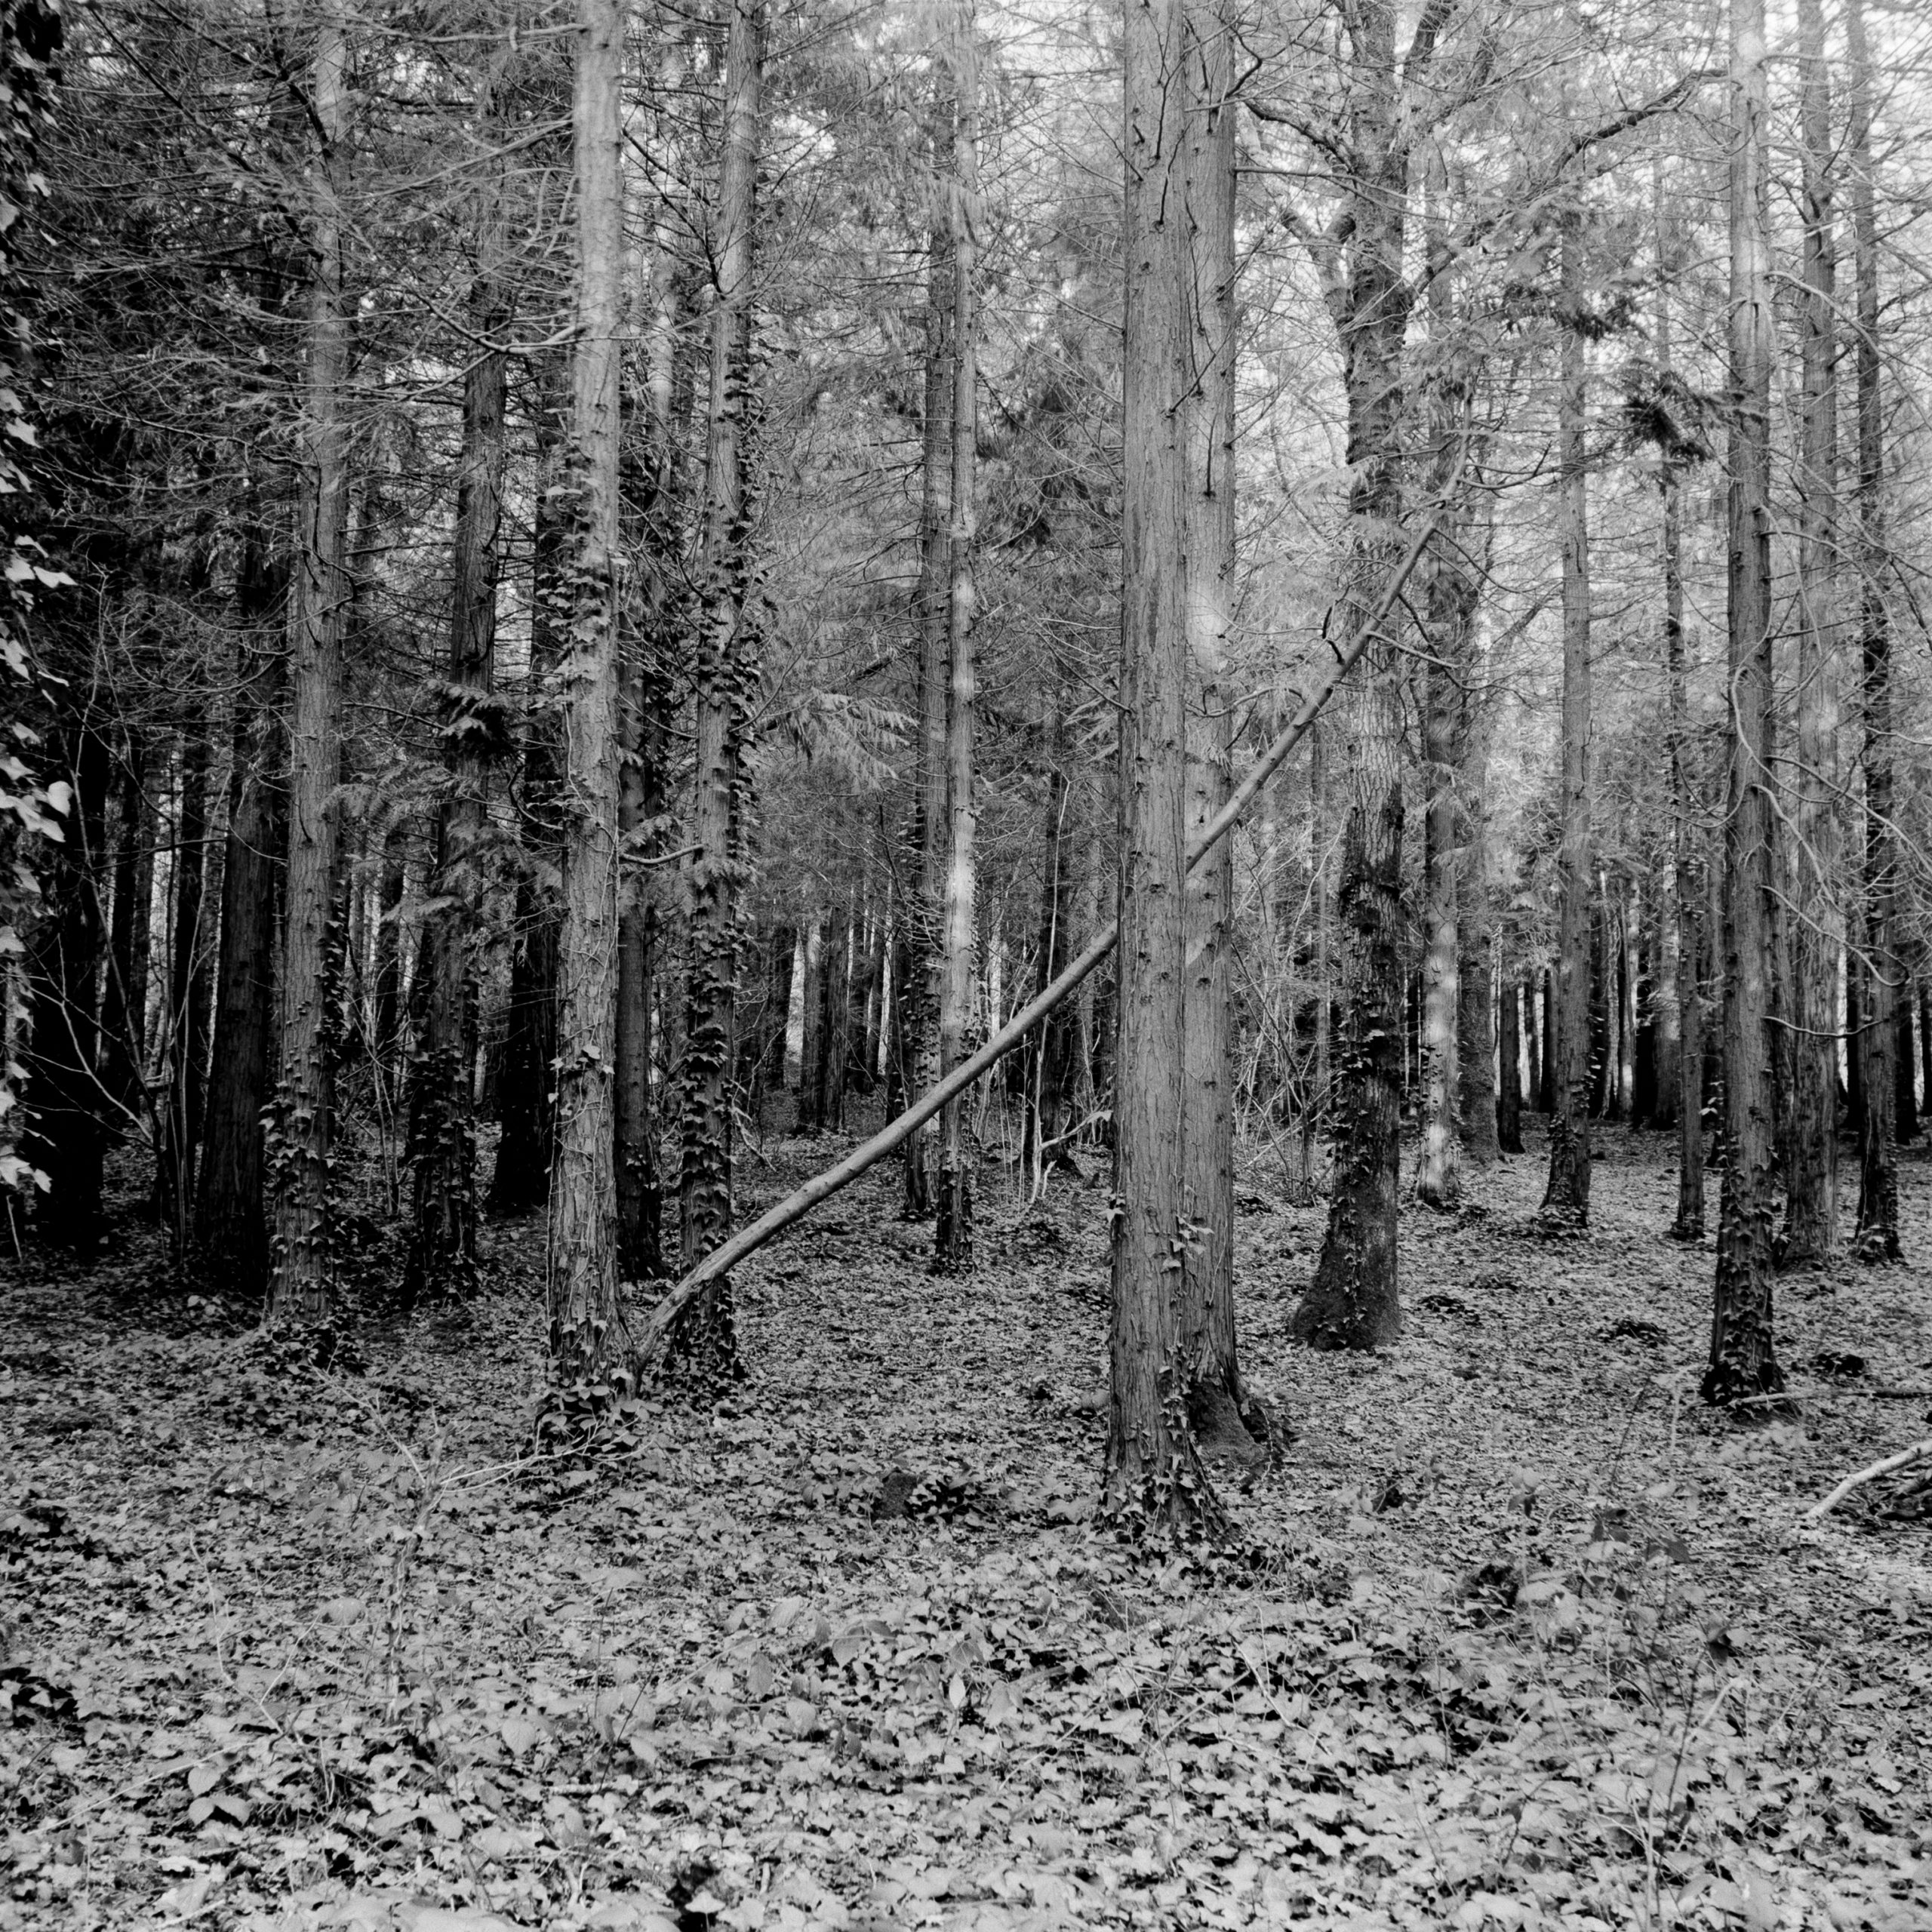
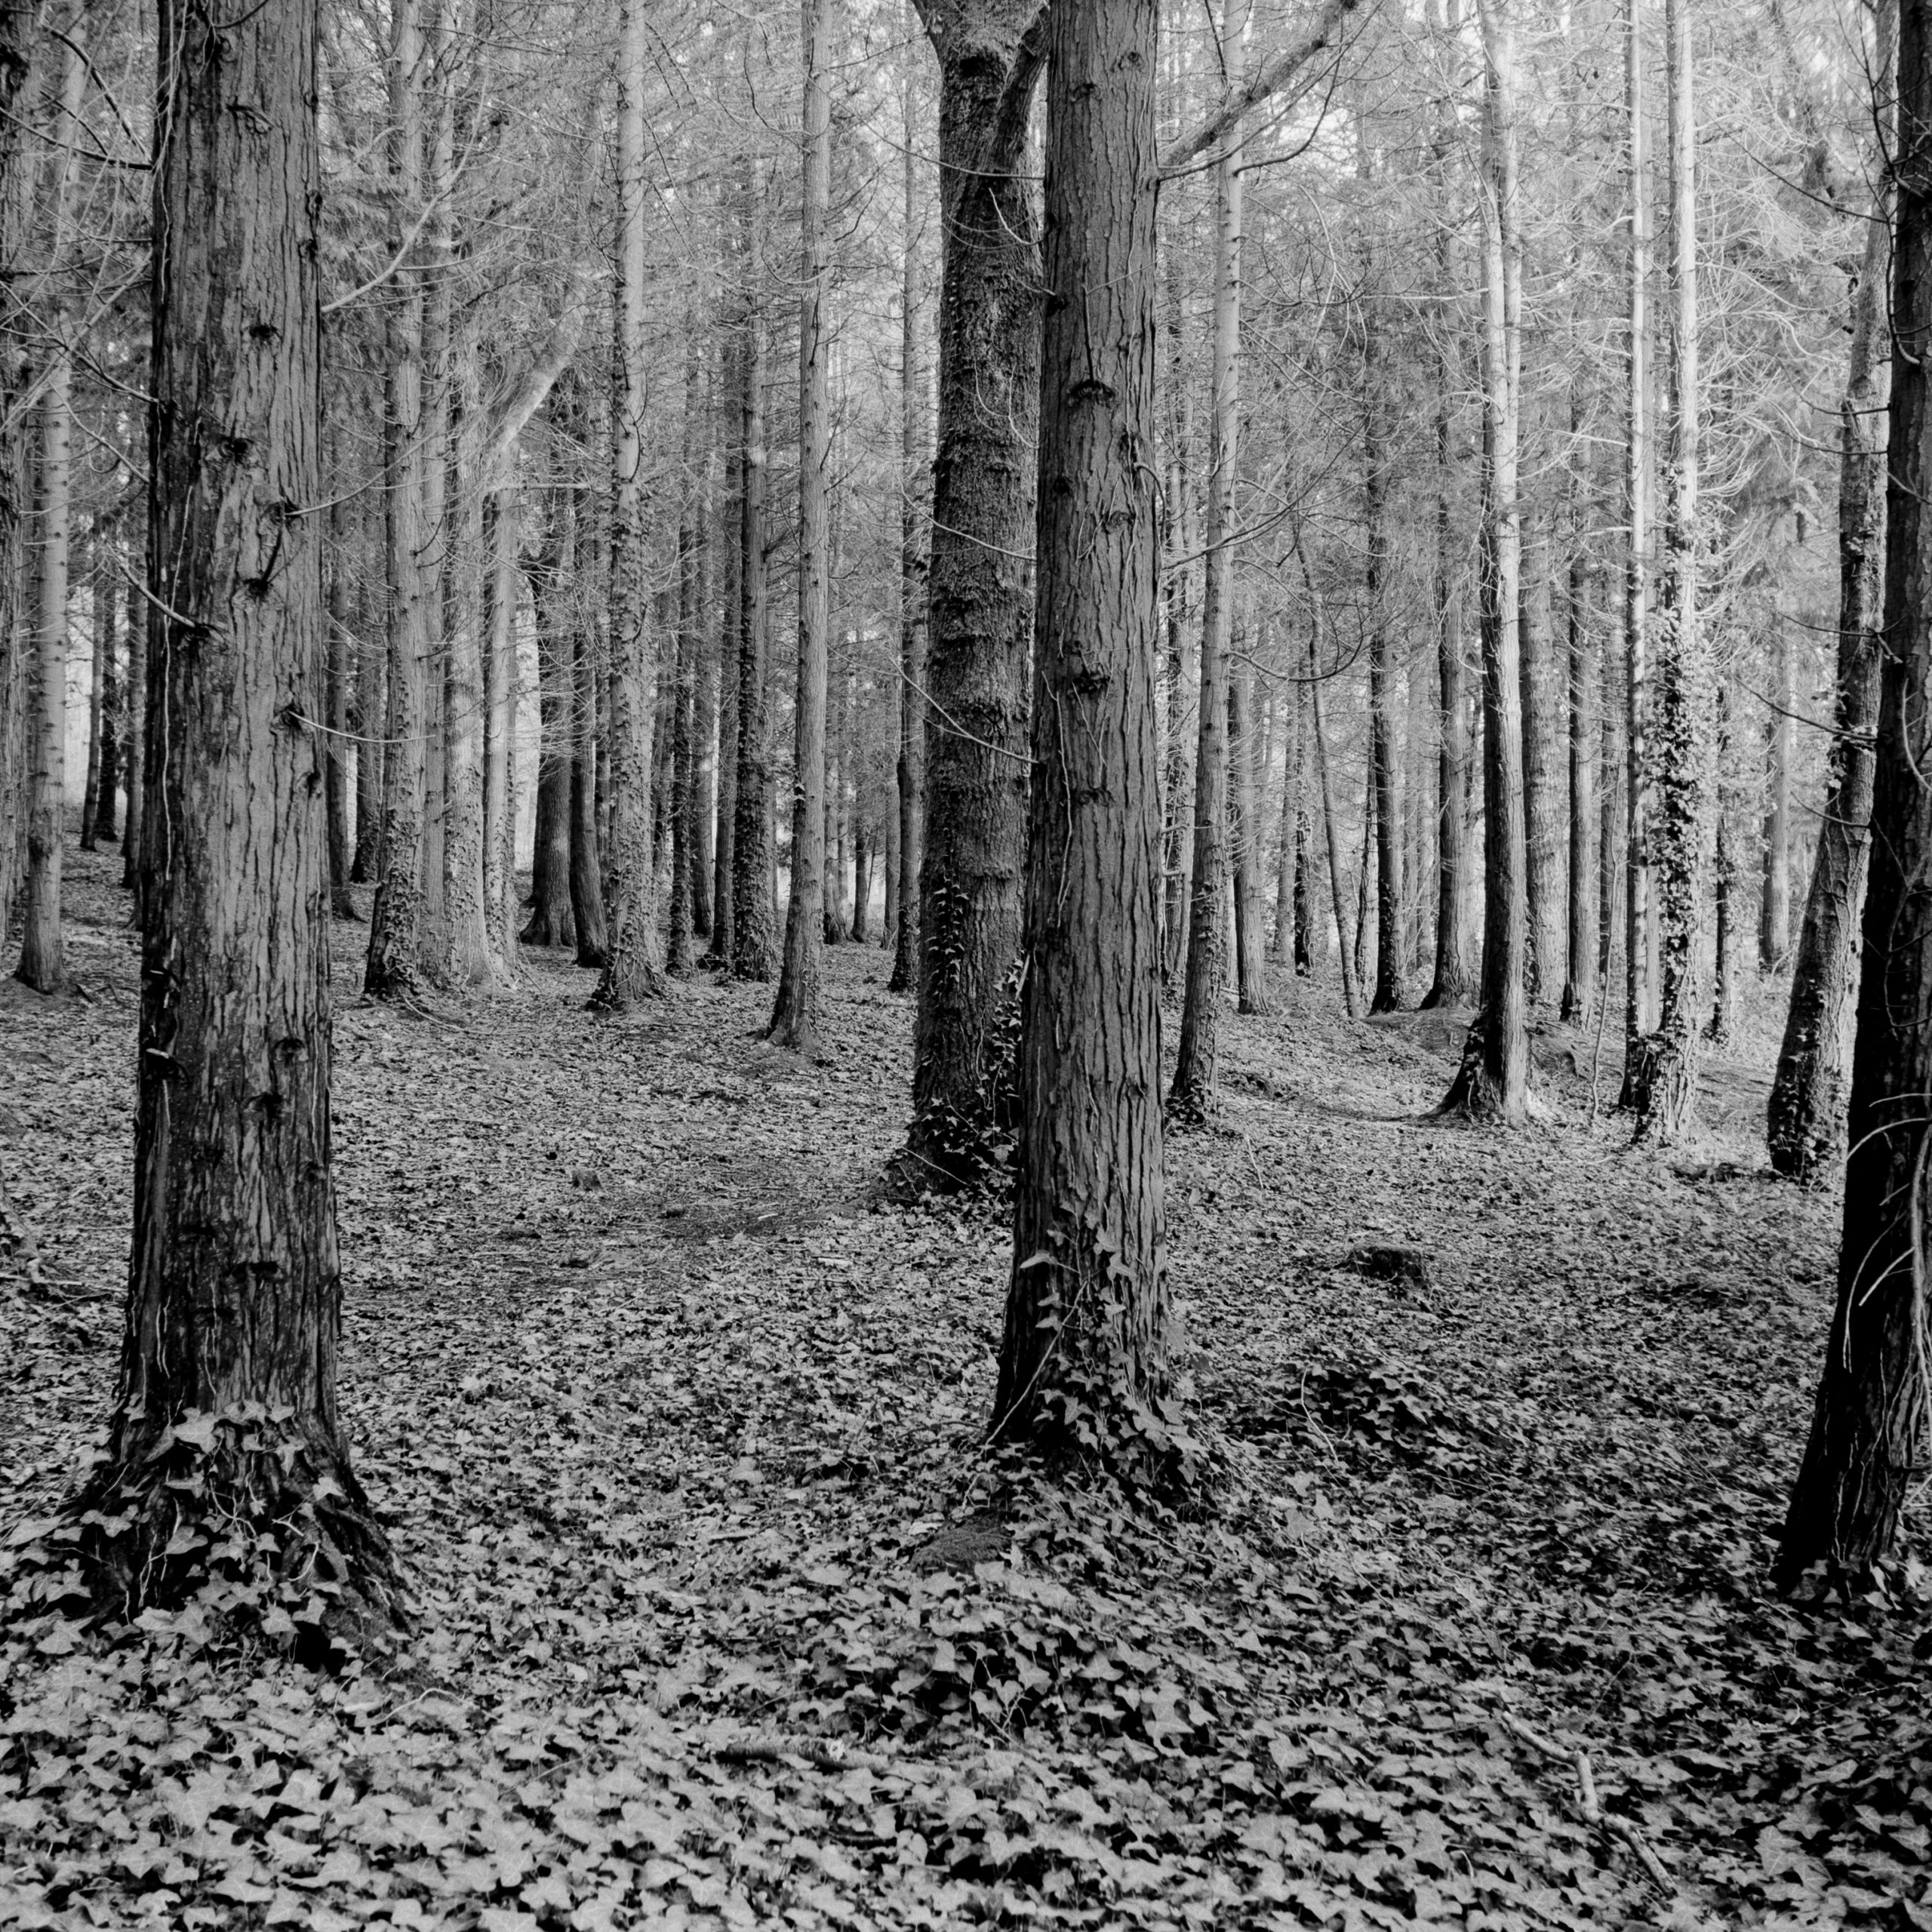
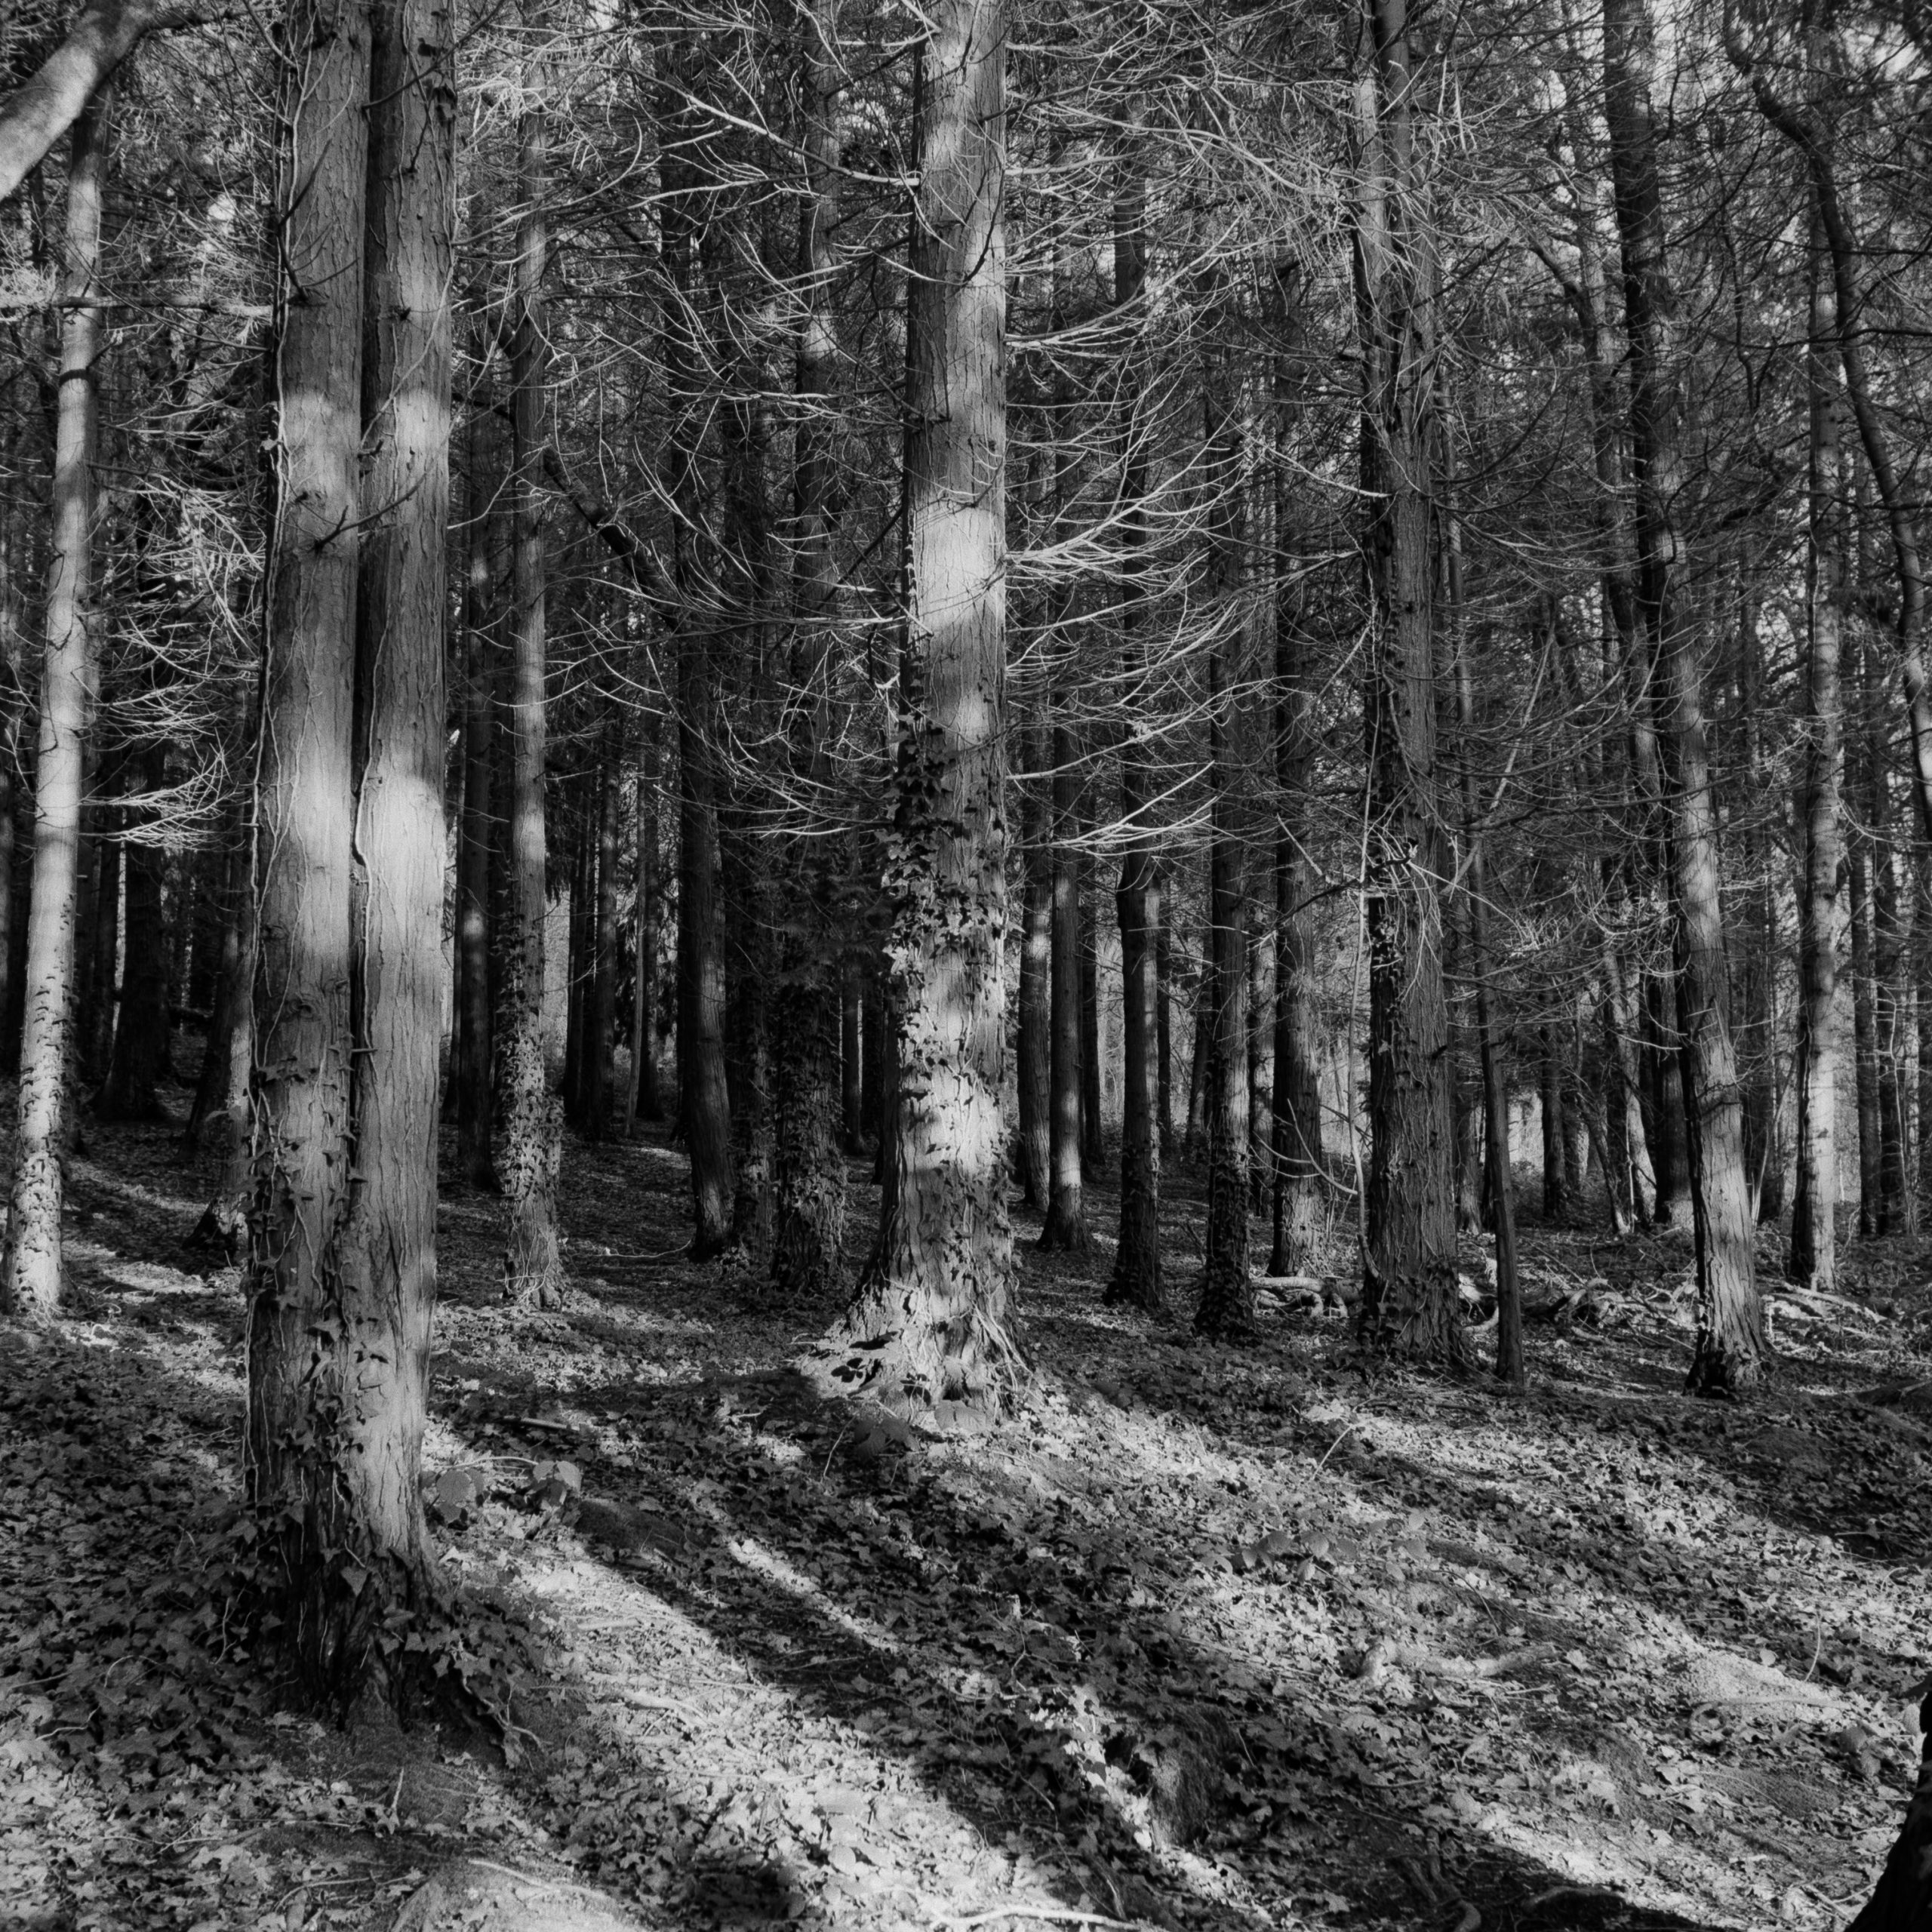
I took this beauty into the woods recently with a challenge! I shot a roll of Kodak TMAX 100 and was left with speeds slower than are on the camera itself and after metering the low lit woodland all I could do was to put the camera into Bulb Mode and guesstimate and count my exposure times. Most of which were around 1/15th of a second!
I made a vlog on the experience and here is the video, and also below are the negatives and scanned images as well as a couple of prints I made in the darkroom!
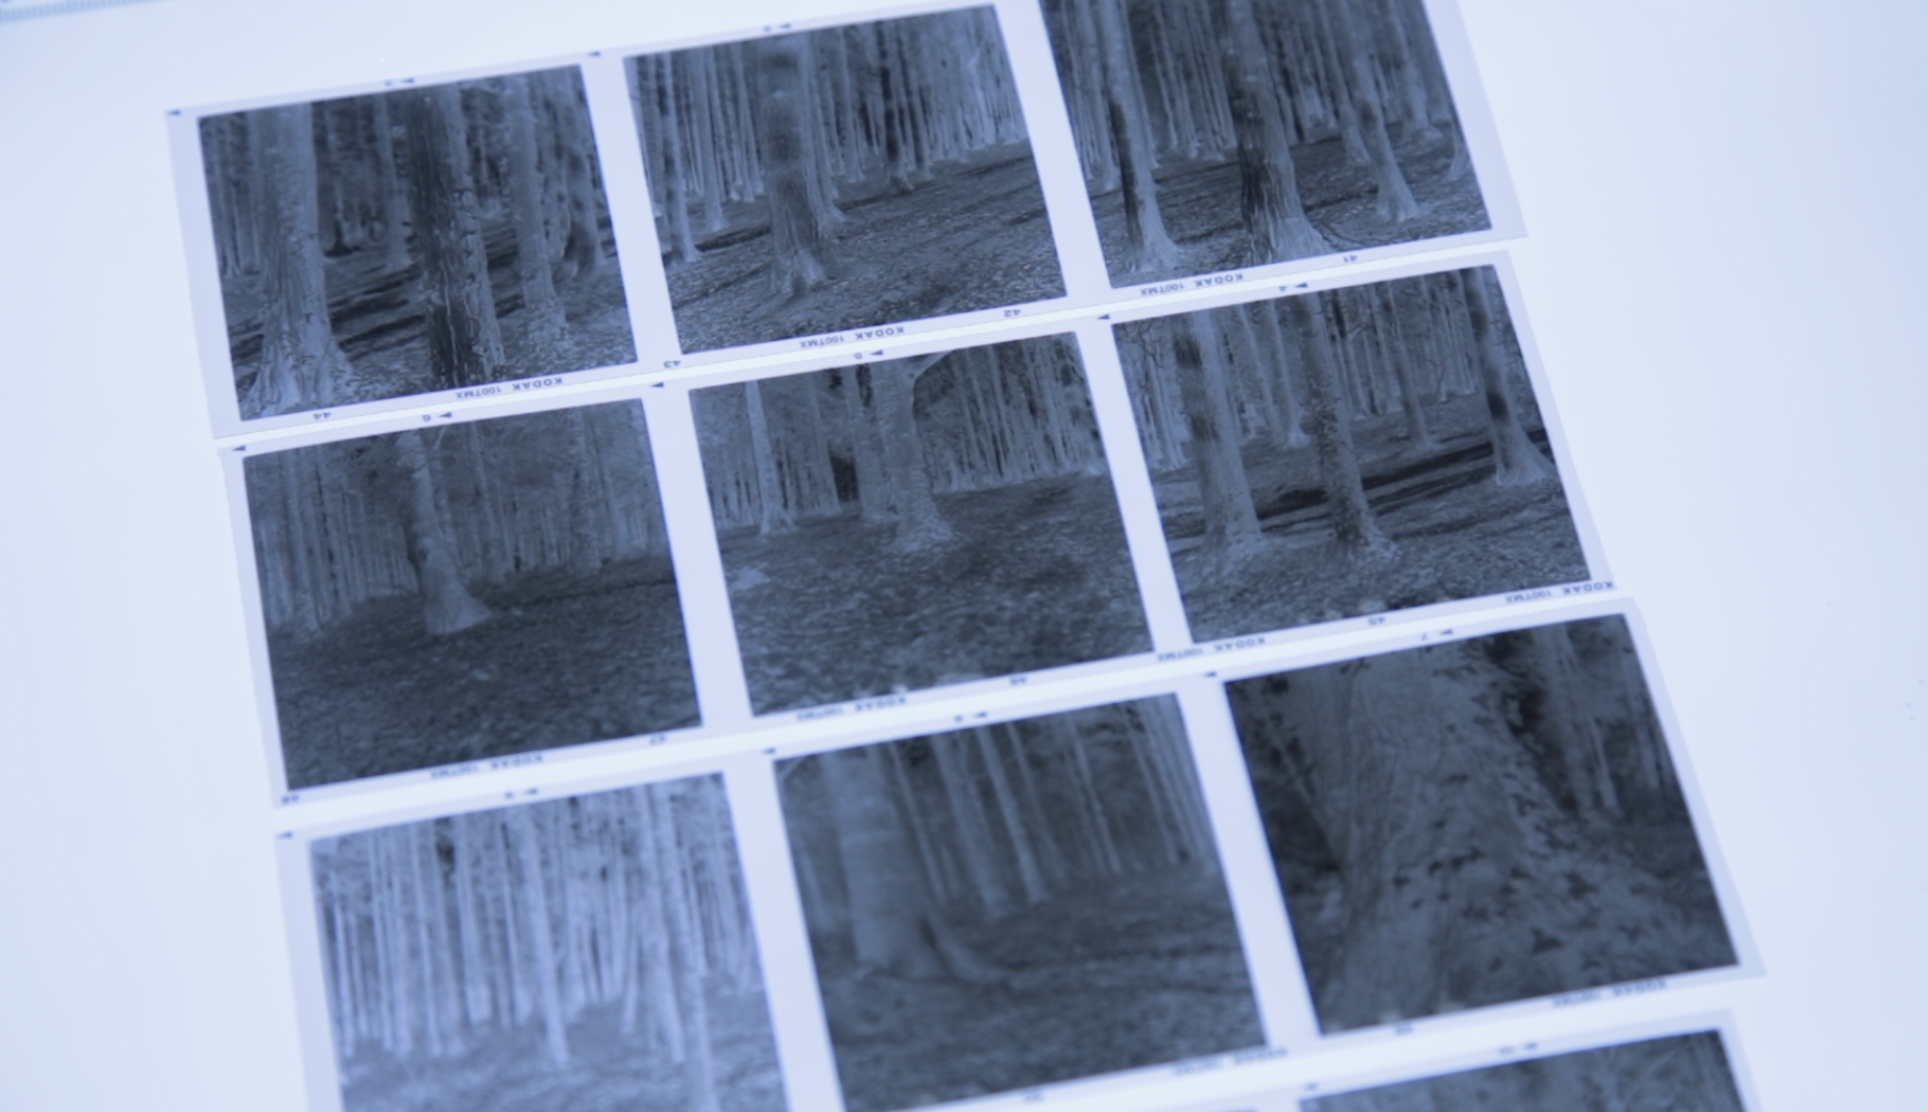
As expected my negatives were over exposed, but not ruined! This film has bags of latitude and I knew I would easily be able to get a print from them in the darkroom. They were developed in 510 Pyro.
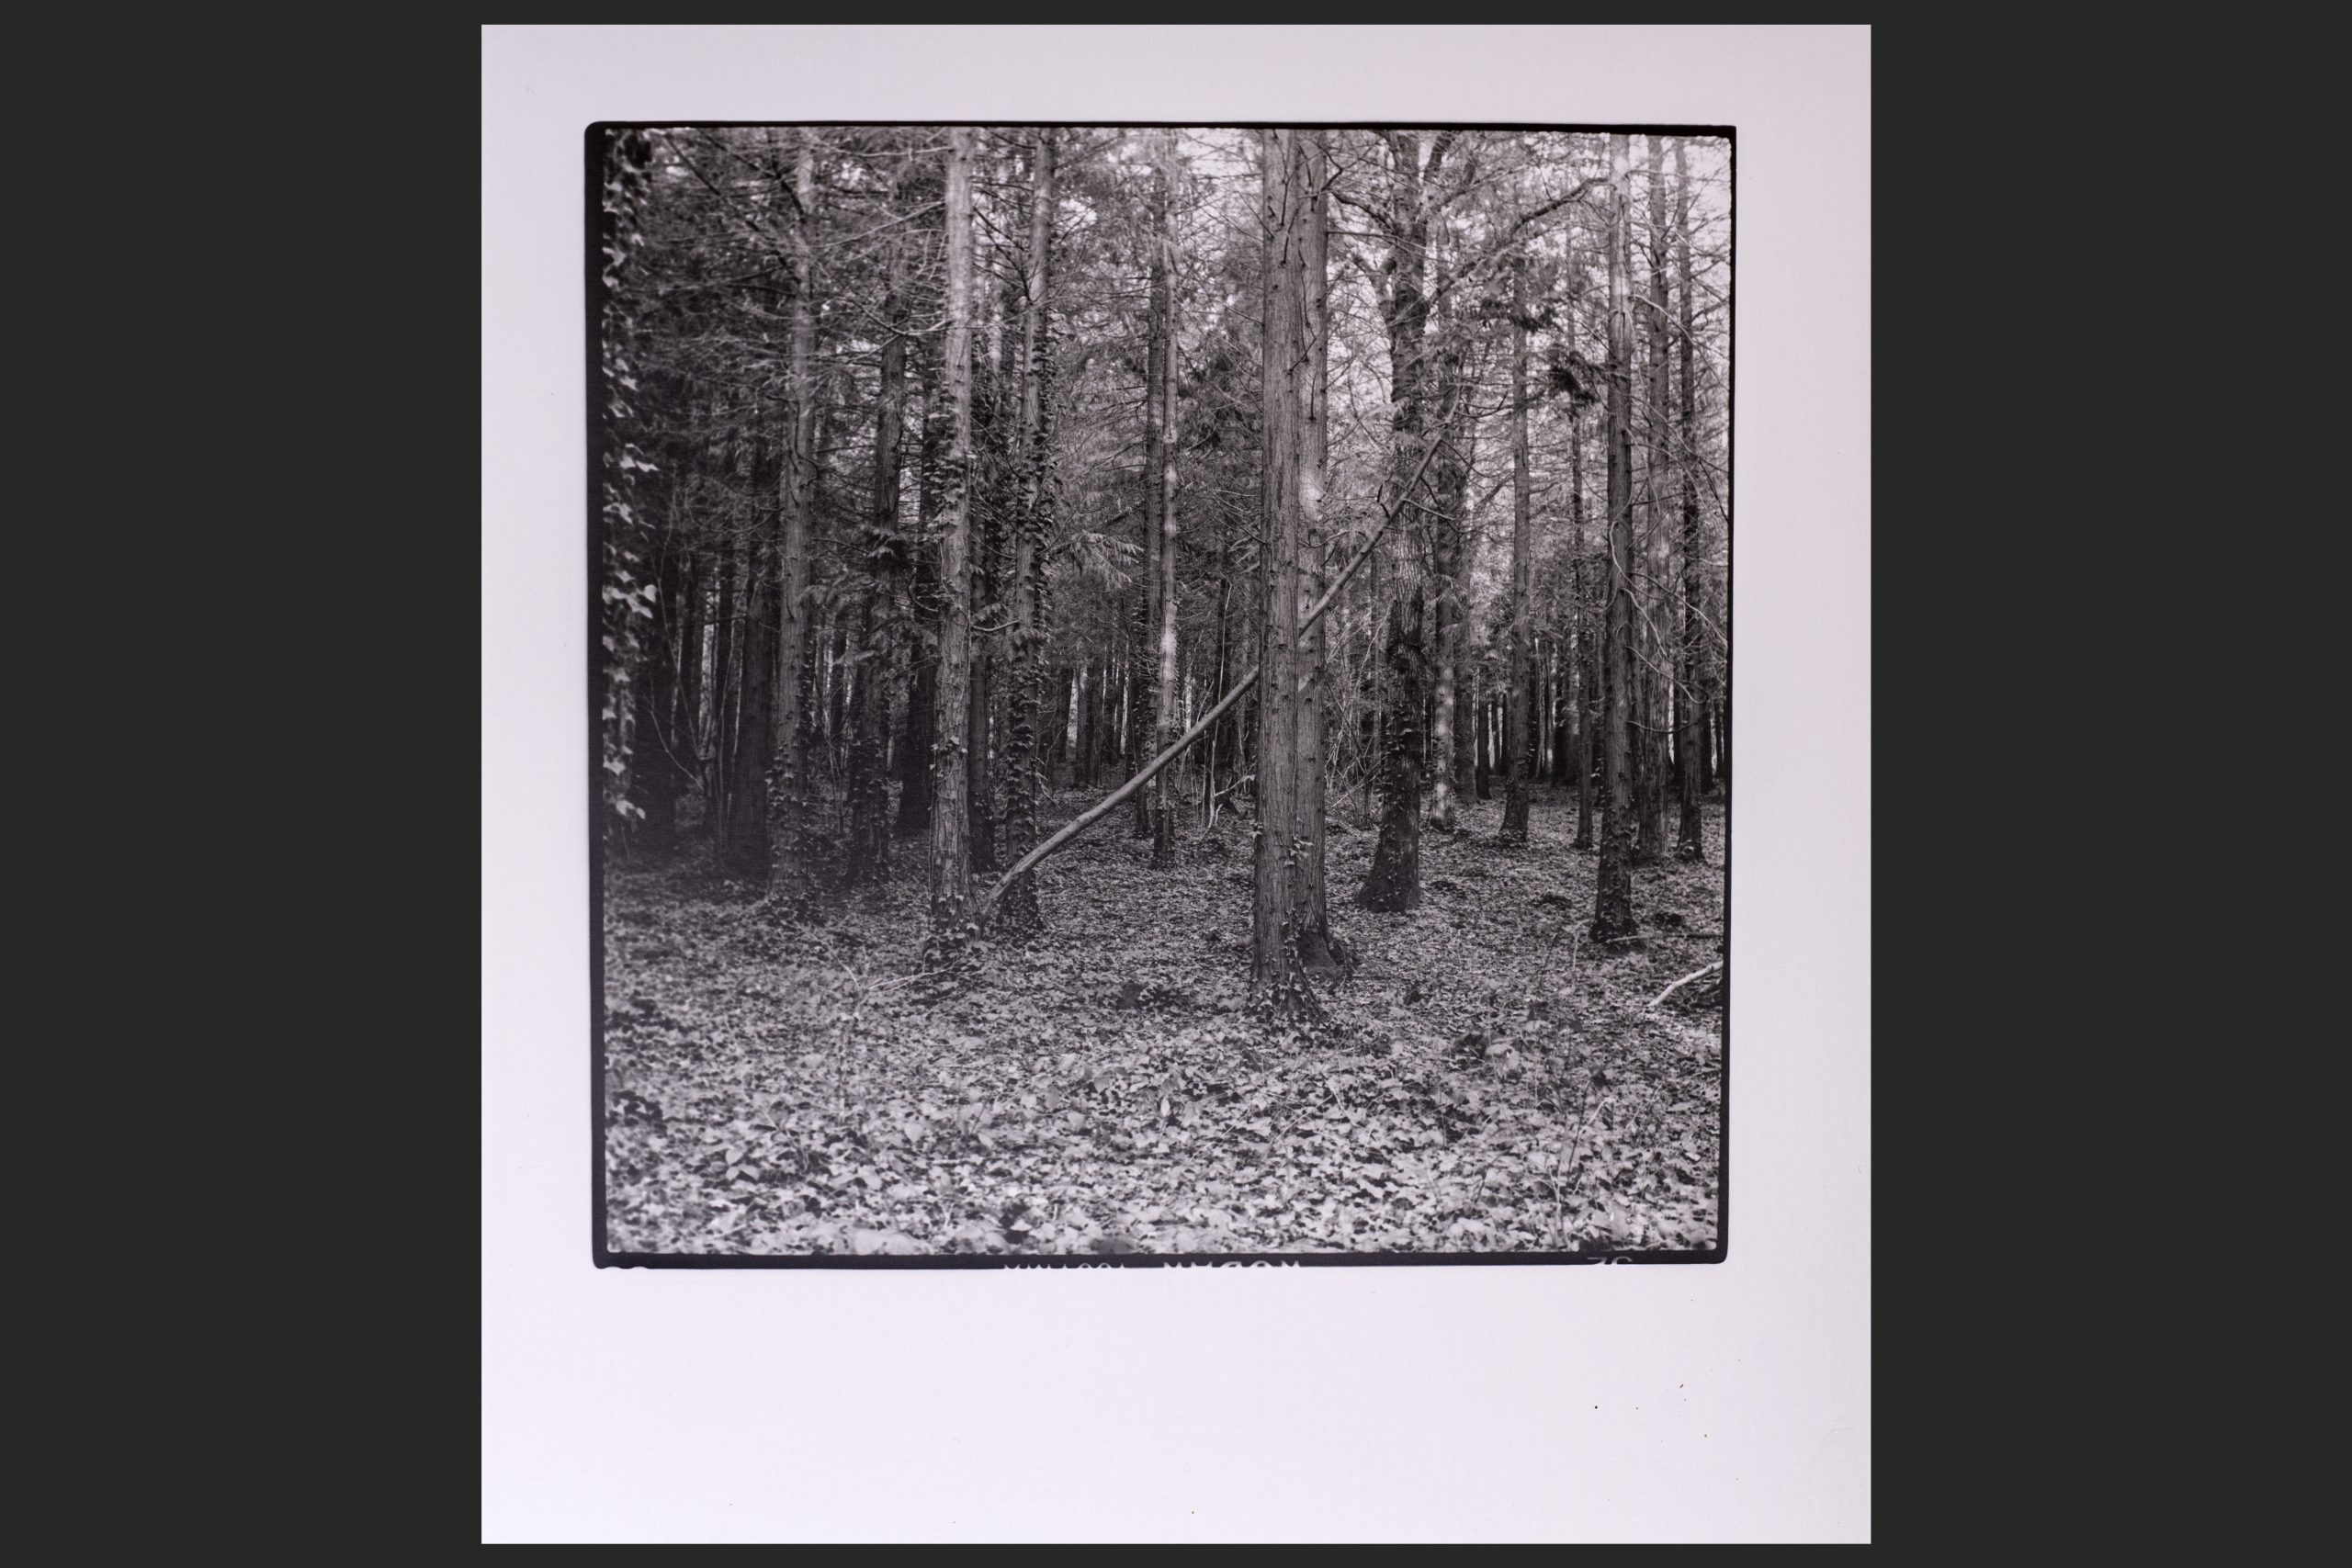
8×8 Print on Kentmere VC Select Paper. Turned out nice after a bit of split grading.
And here are the scanned images.


Astrhori AH-M1 a Tiny Light Meter
Surely this won’t be accurate?
I never thought I would see the day when I would use one of these tiny light meters!
I have seen them becoming popular over the past few years but always thought they were just a fancy gadget made in China that would appeal to film shooters that were either in need of an alternative inexpensive light meter or just love having these fancy gadgets in their bag.
We all love a gadget, right!
Check out the price of these light meters
I use a Sekonic Zoom Master L508 light meter for most of my work. It is a lump to carry around for your everyday style of Street/Urban Photography but for my Medium/Large format Scapes, Portraits and Still Life it has proved to be a must have in my bag. Most of my Street/Urban I shoot 35mm and most of my 35mm cameras have excellent built in meters. But, I do have a few that I use now and again that don’t have a meter inside. With those cameras I either meter by sight and wing it (400 Speed Film and F8 don’t be late) or use a phone app for a quick guide. I don’t take the Sekonic with me.
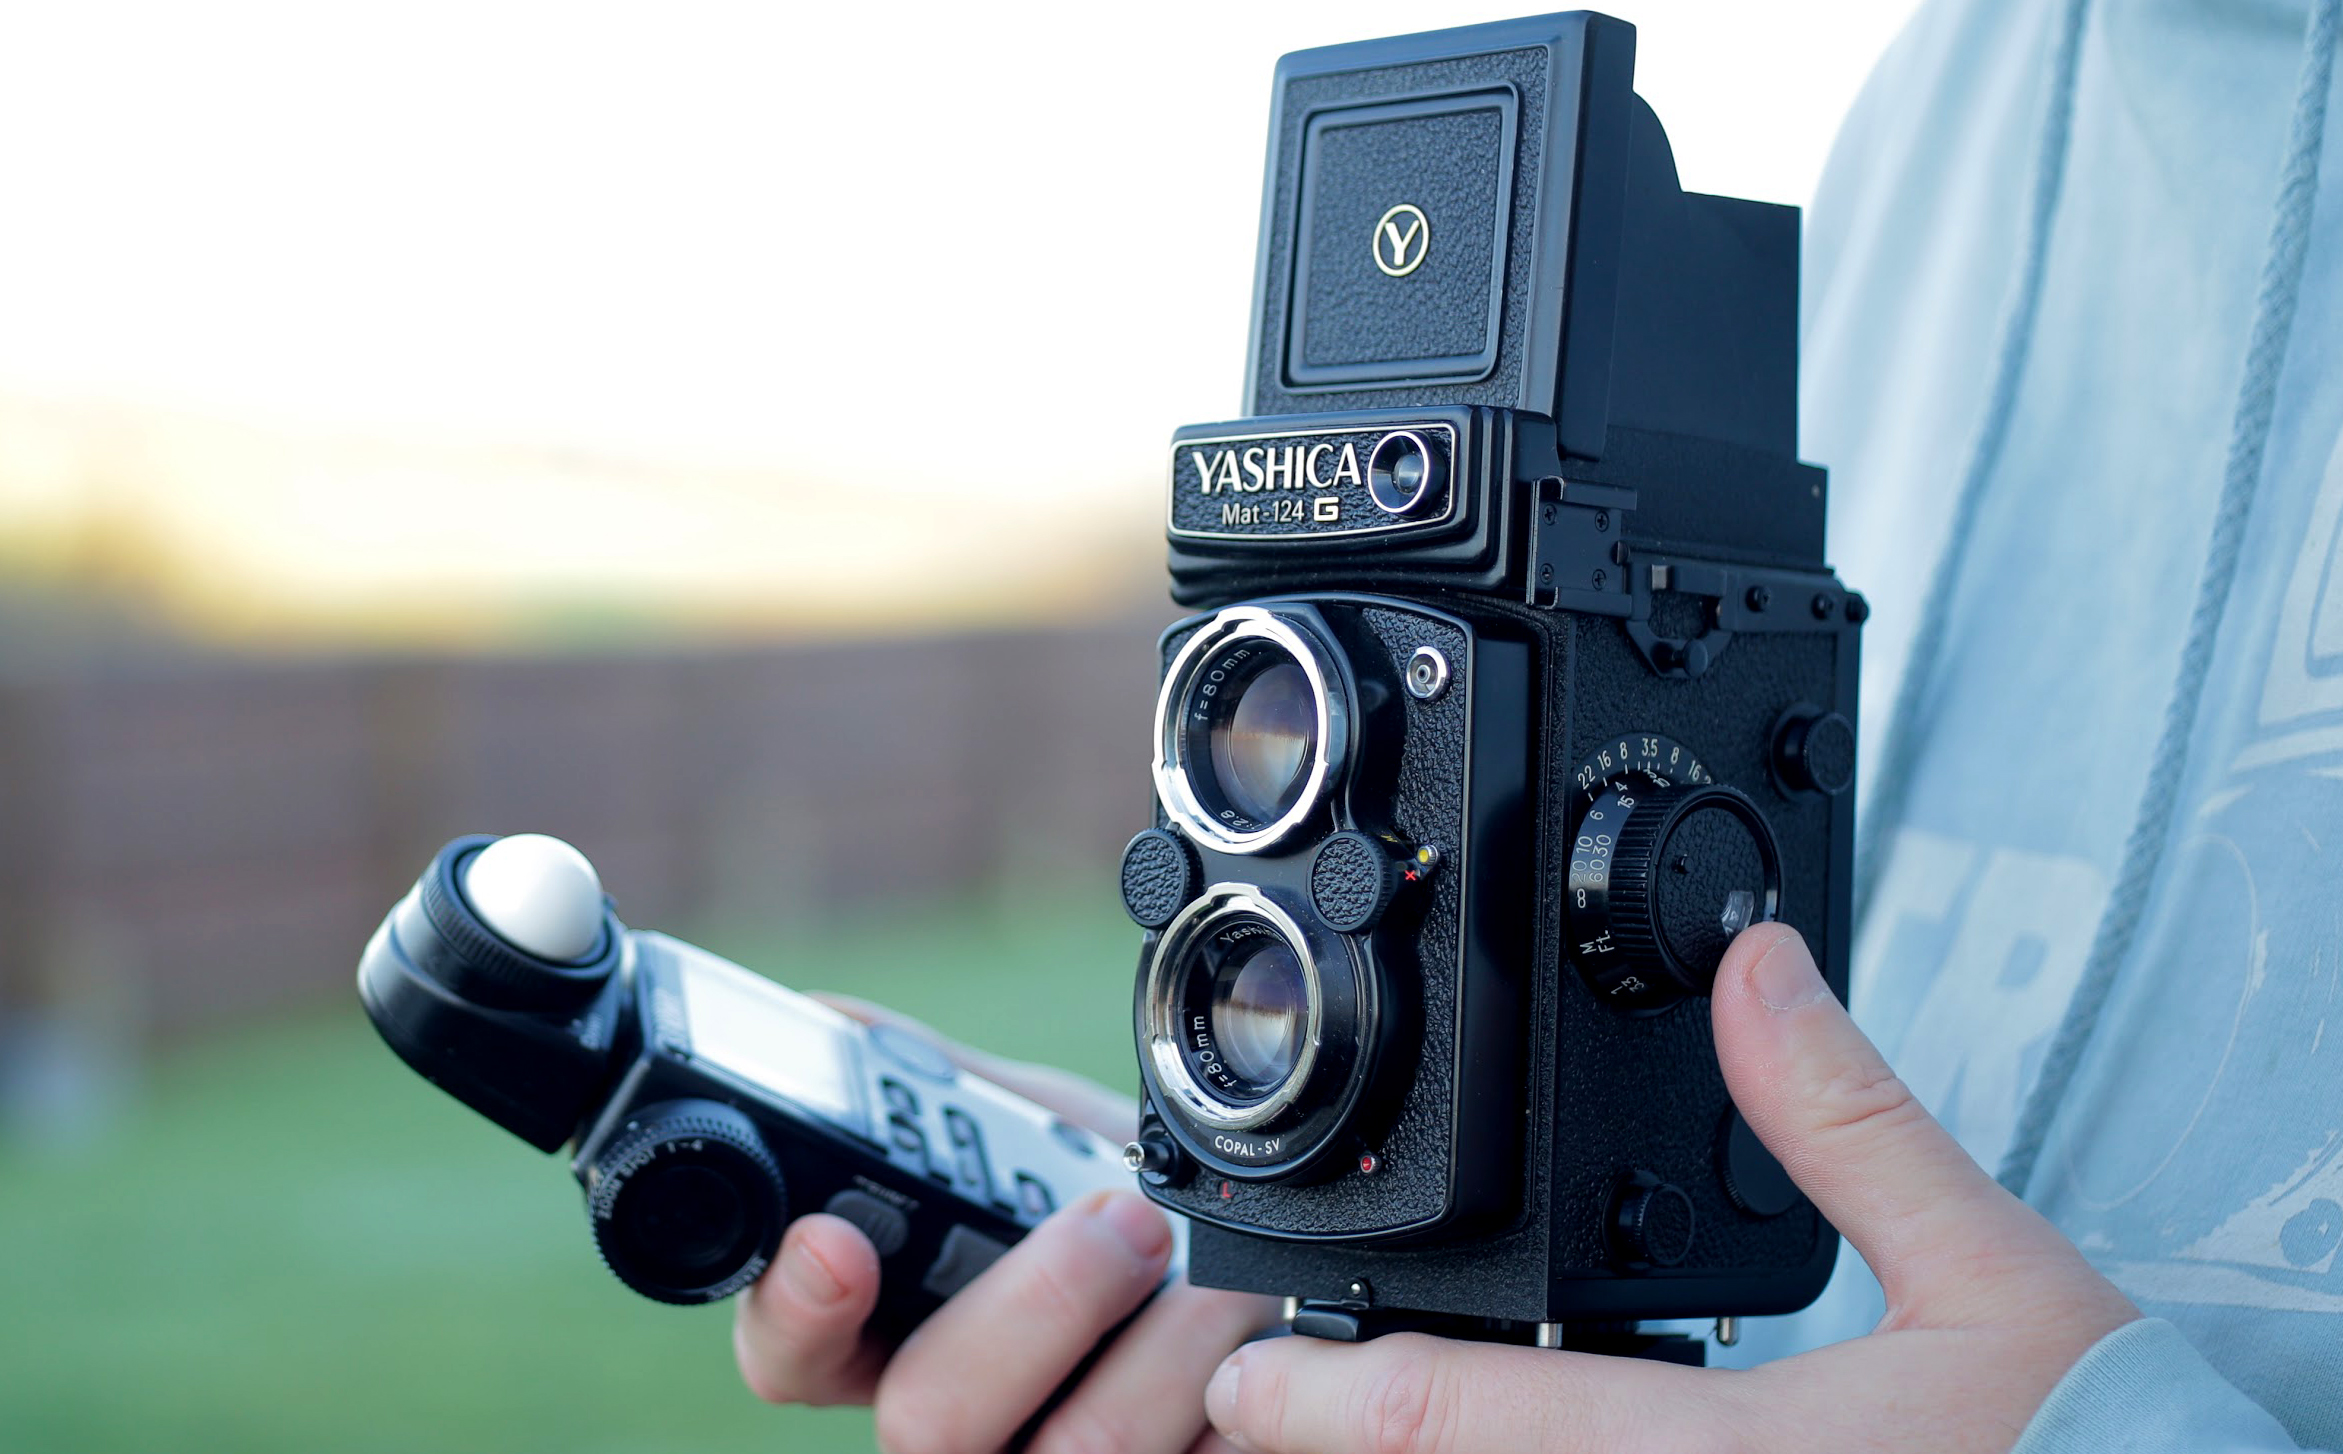
My friend, Nick, came to see me from the States and we went for a photo walk together and out of his bag he pulls out this tiny little light meter. I had never seen one in person before. I put it in my hands, had a fiddle with it and gave it back. Expecting my friend to put the meter onto his cameras shoe he measured the light by using it in his hand, pointing it at the scene and then put it in his pocket and cracked on taking pictures. I spoke no more of the subject. I was thinking it was no more useful than a phone app. Thats not to say phone apps are no good. I use one occasionally. But just as a rough guide.
A few weeks later a company, Pergear, in China asked if I would like to review a Light Meter. And it was only the exactly same one as my friends! The Astrhori AH-M1.
Whats the chances of that! So I accepted.
I only accept products that I think would benefit the Film, Photography and Video Making Communities so I was excited to see if I was right about this little tiny gadget. I was wrong! And it works very well and is very accurate! Certainly a better offer than the office desk I was asked to review. Or the latest gaming app. Not to mention the latest sun glasses! As a YouTuber you do get some strange requests.
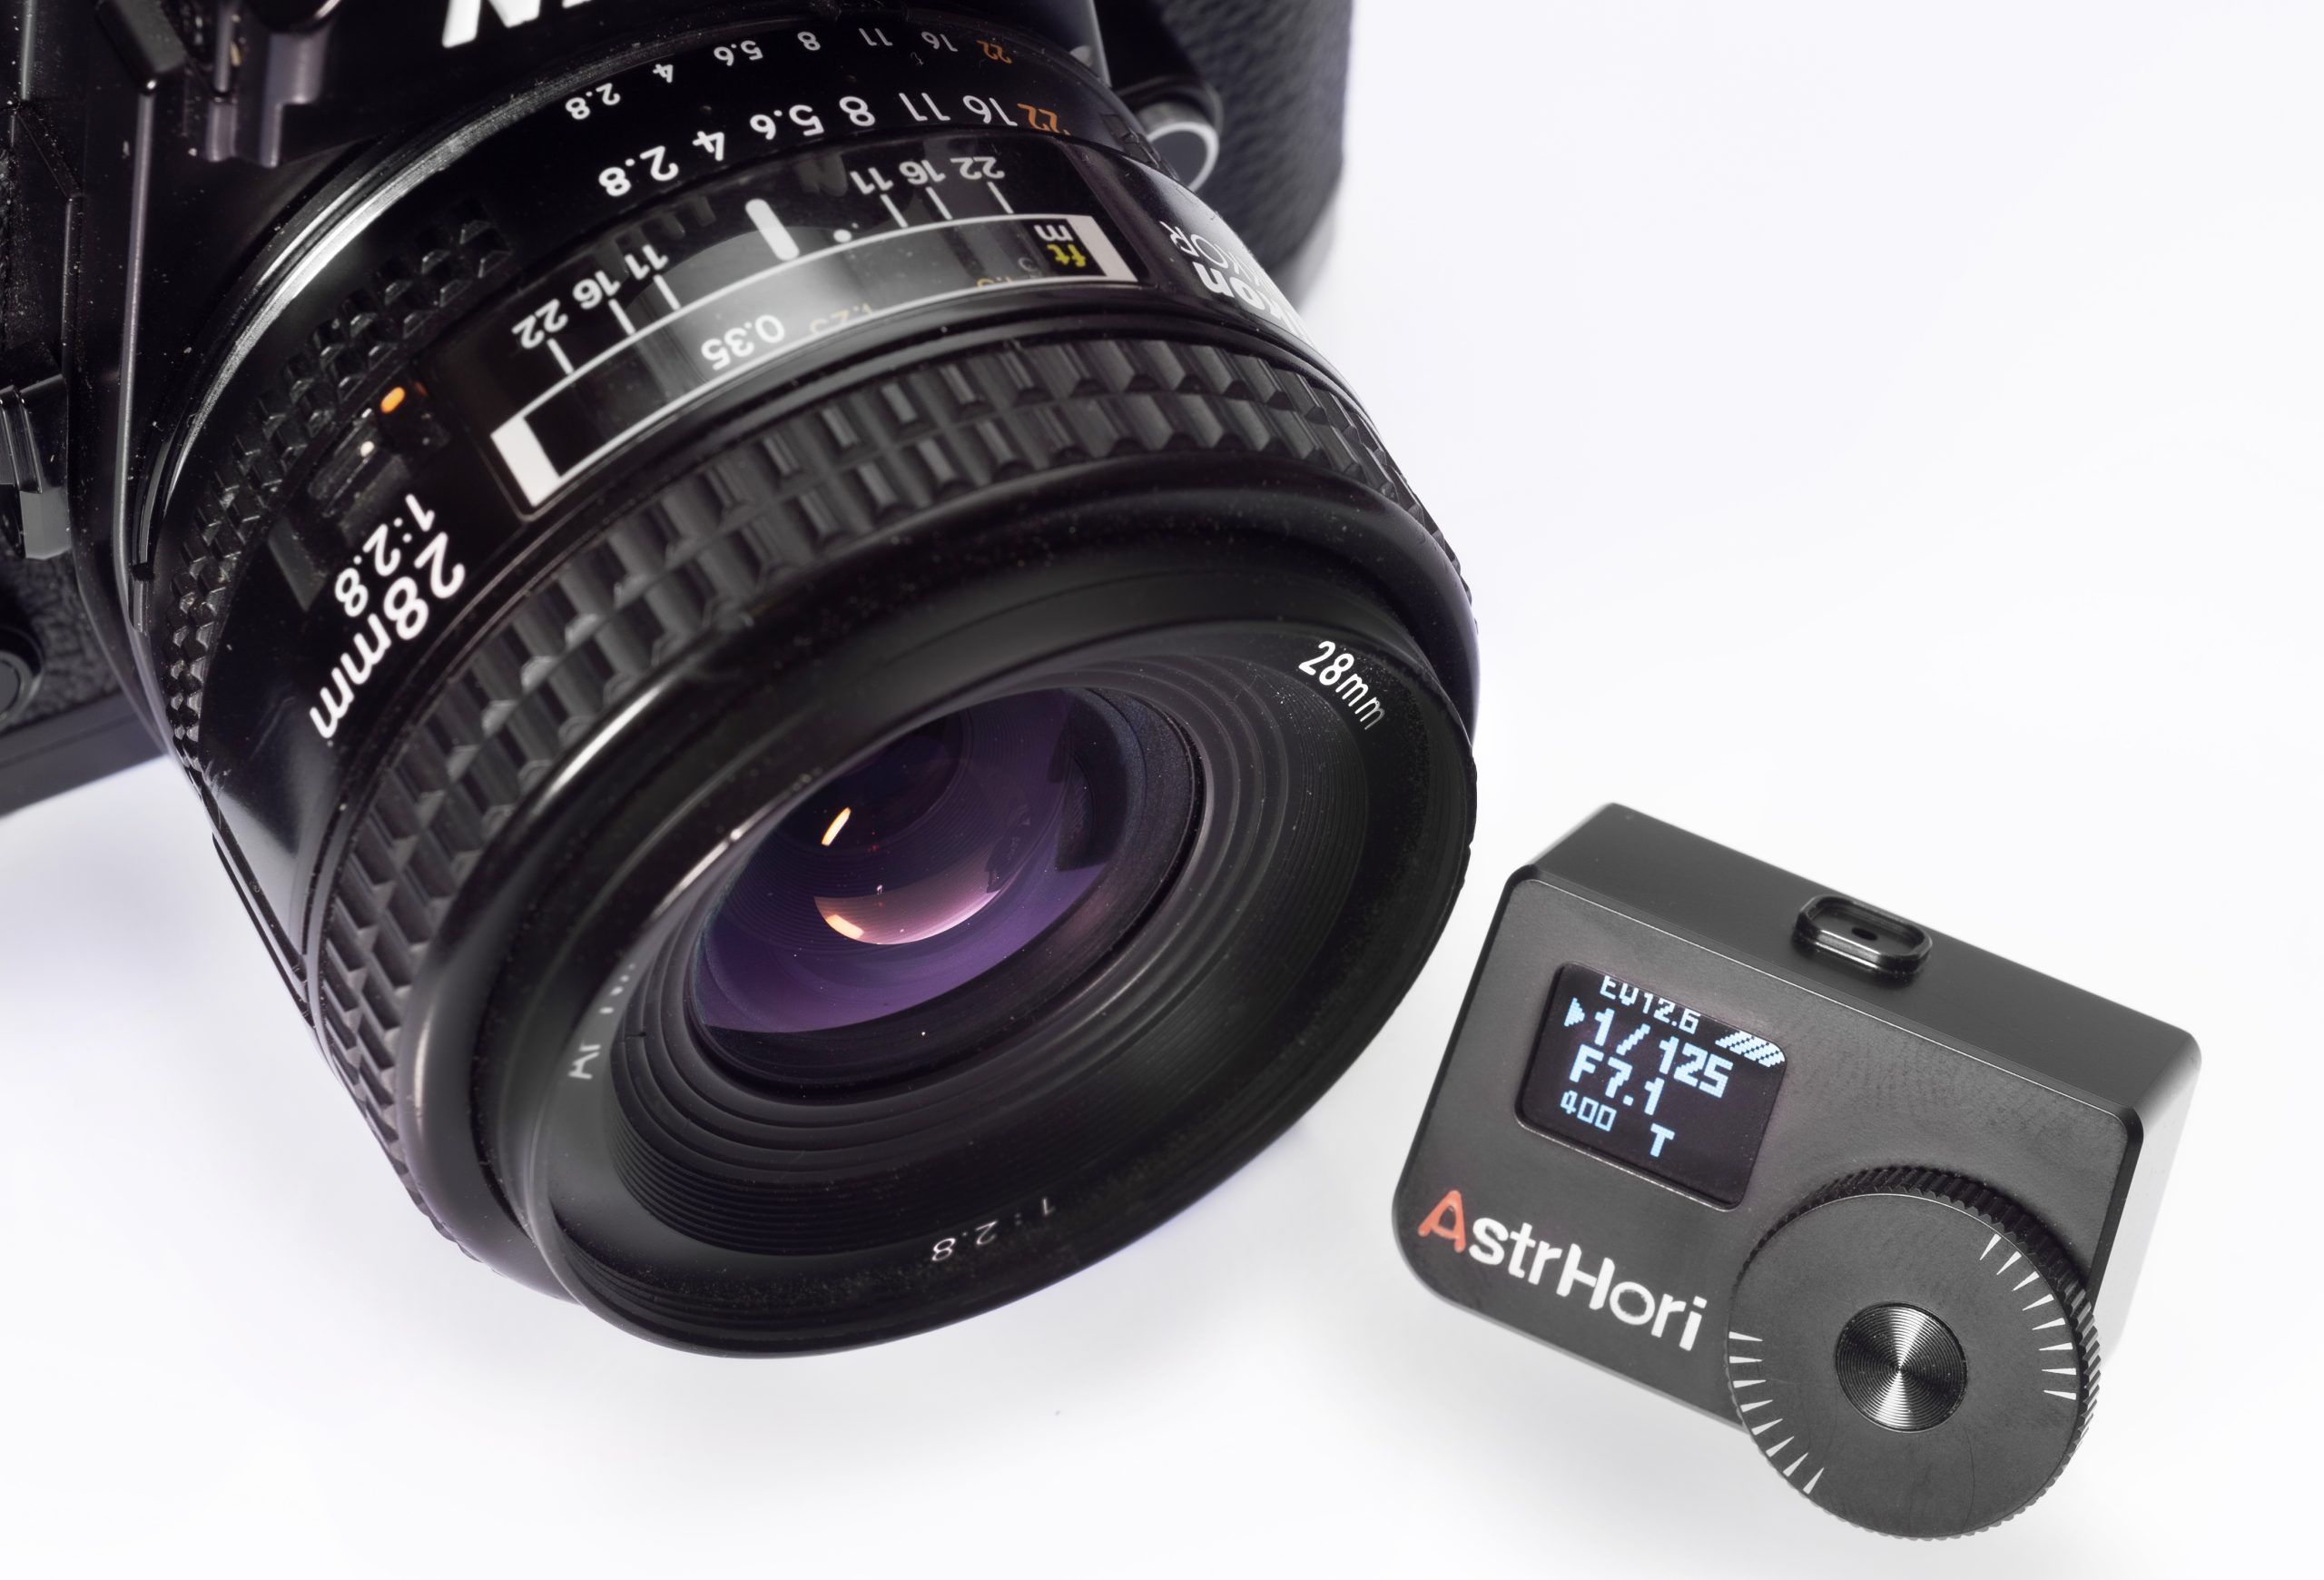
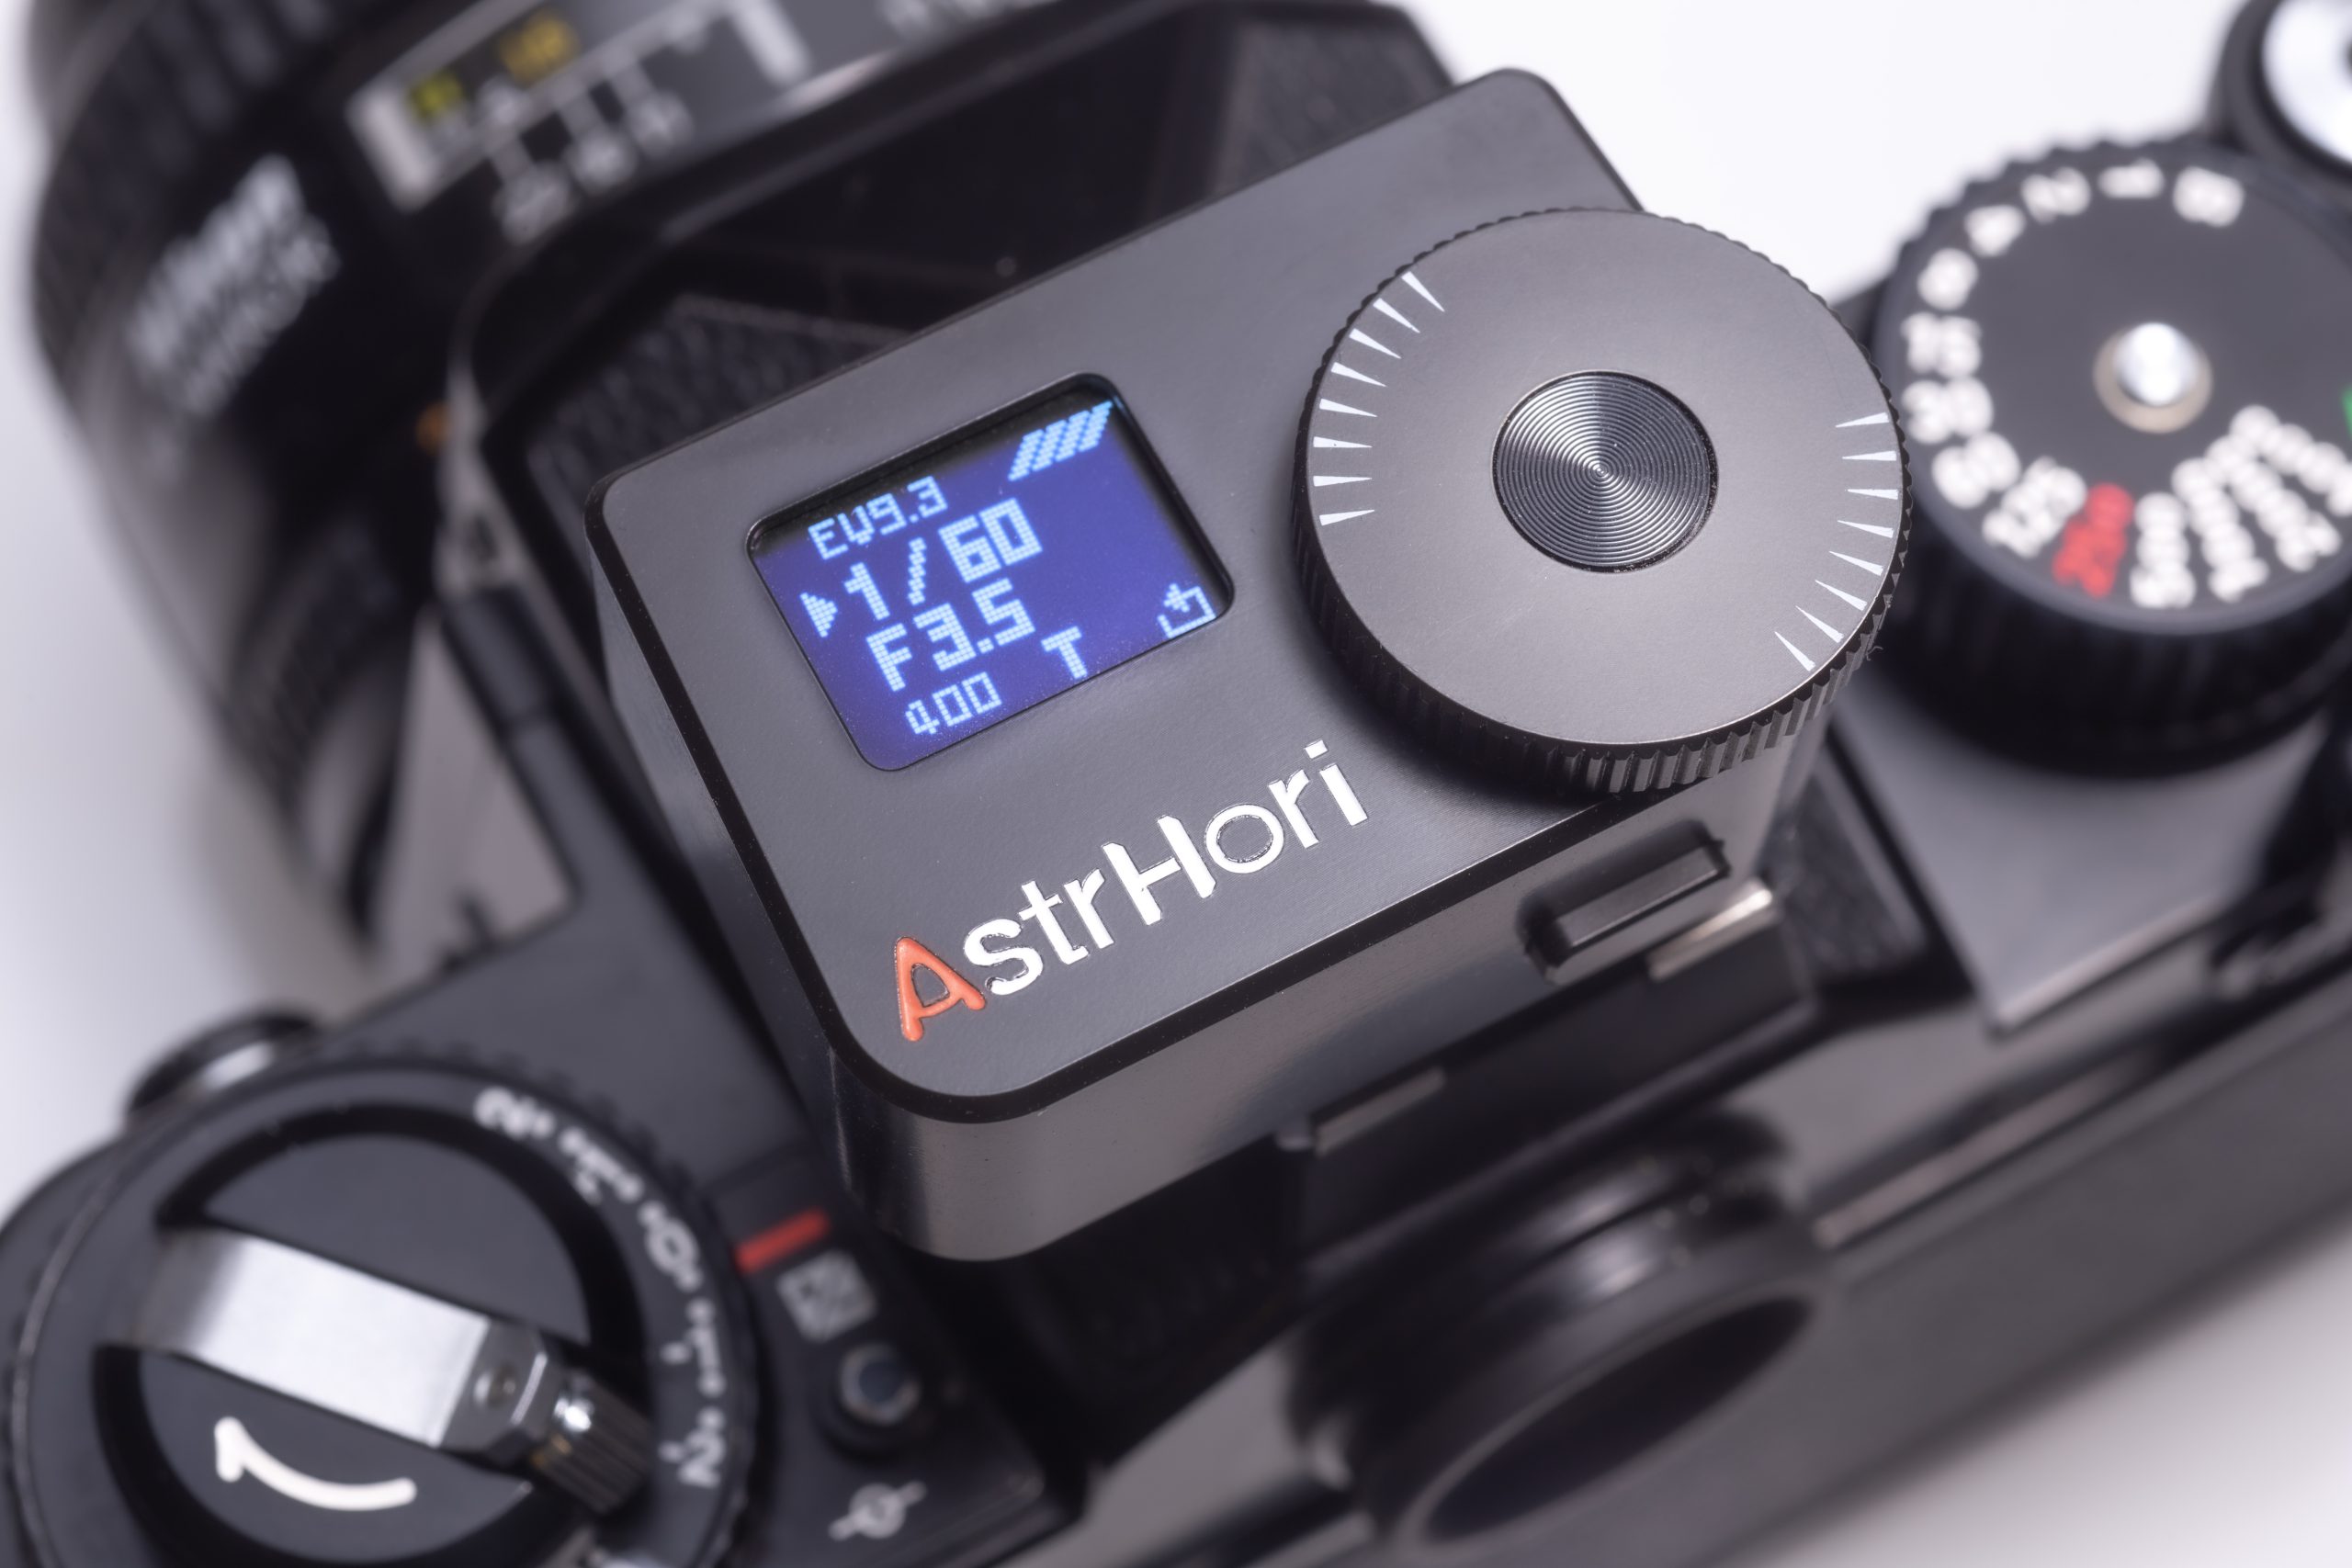
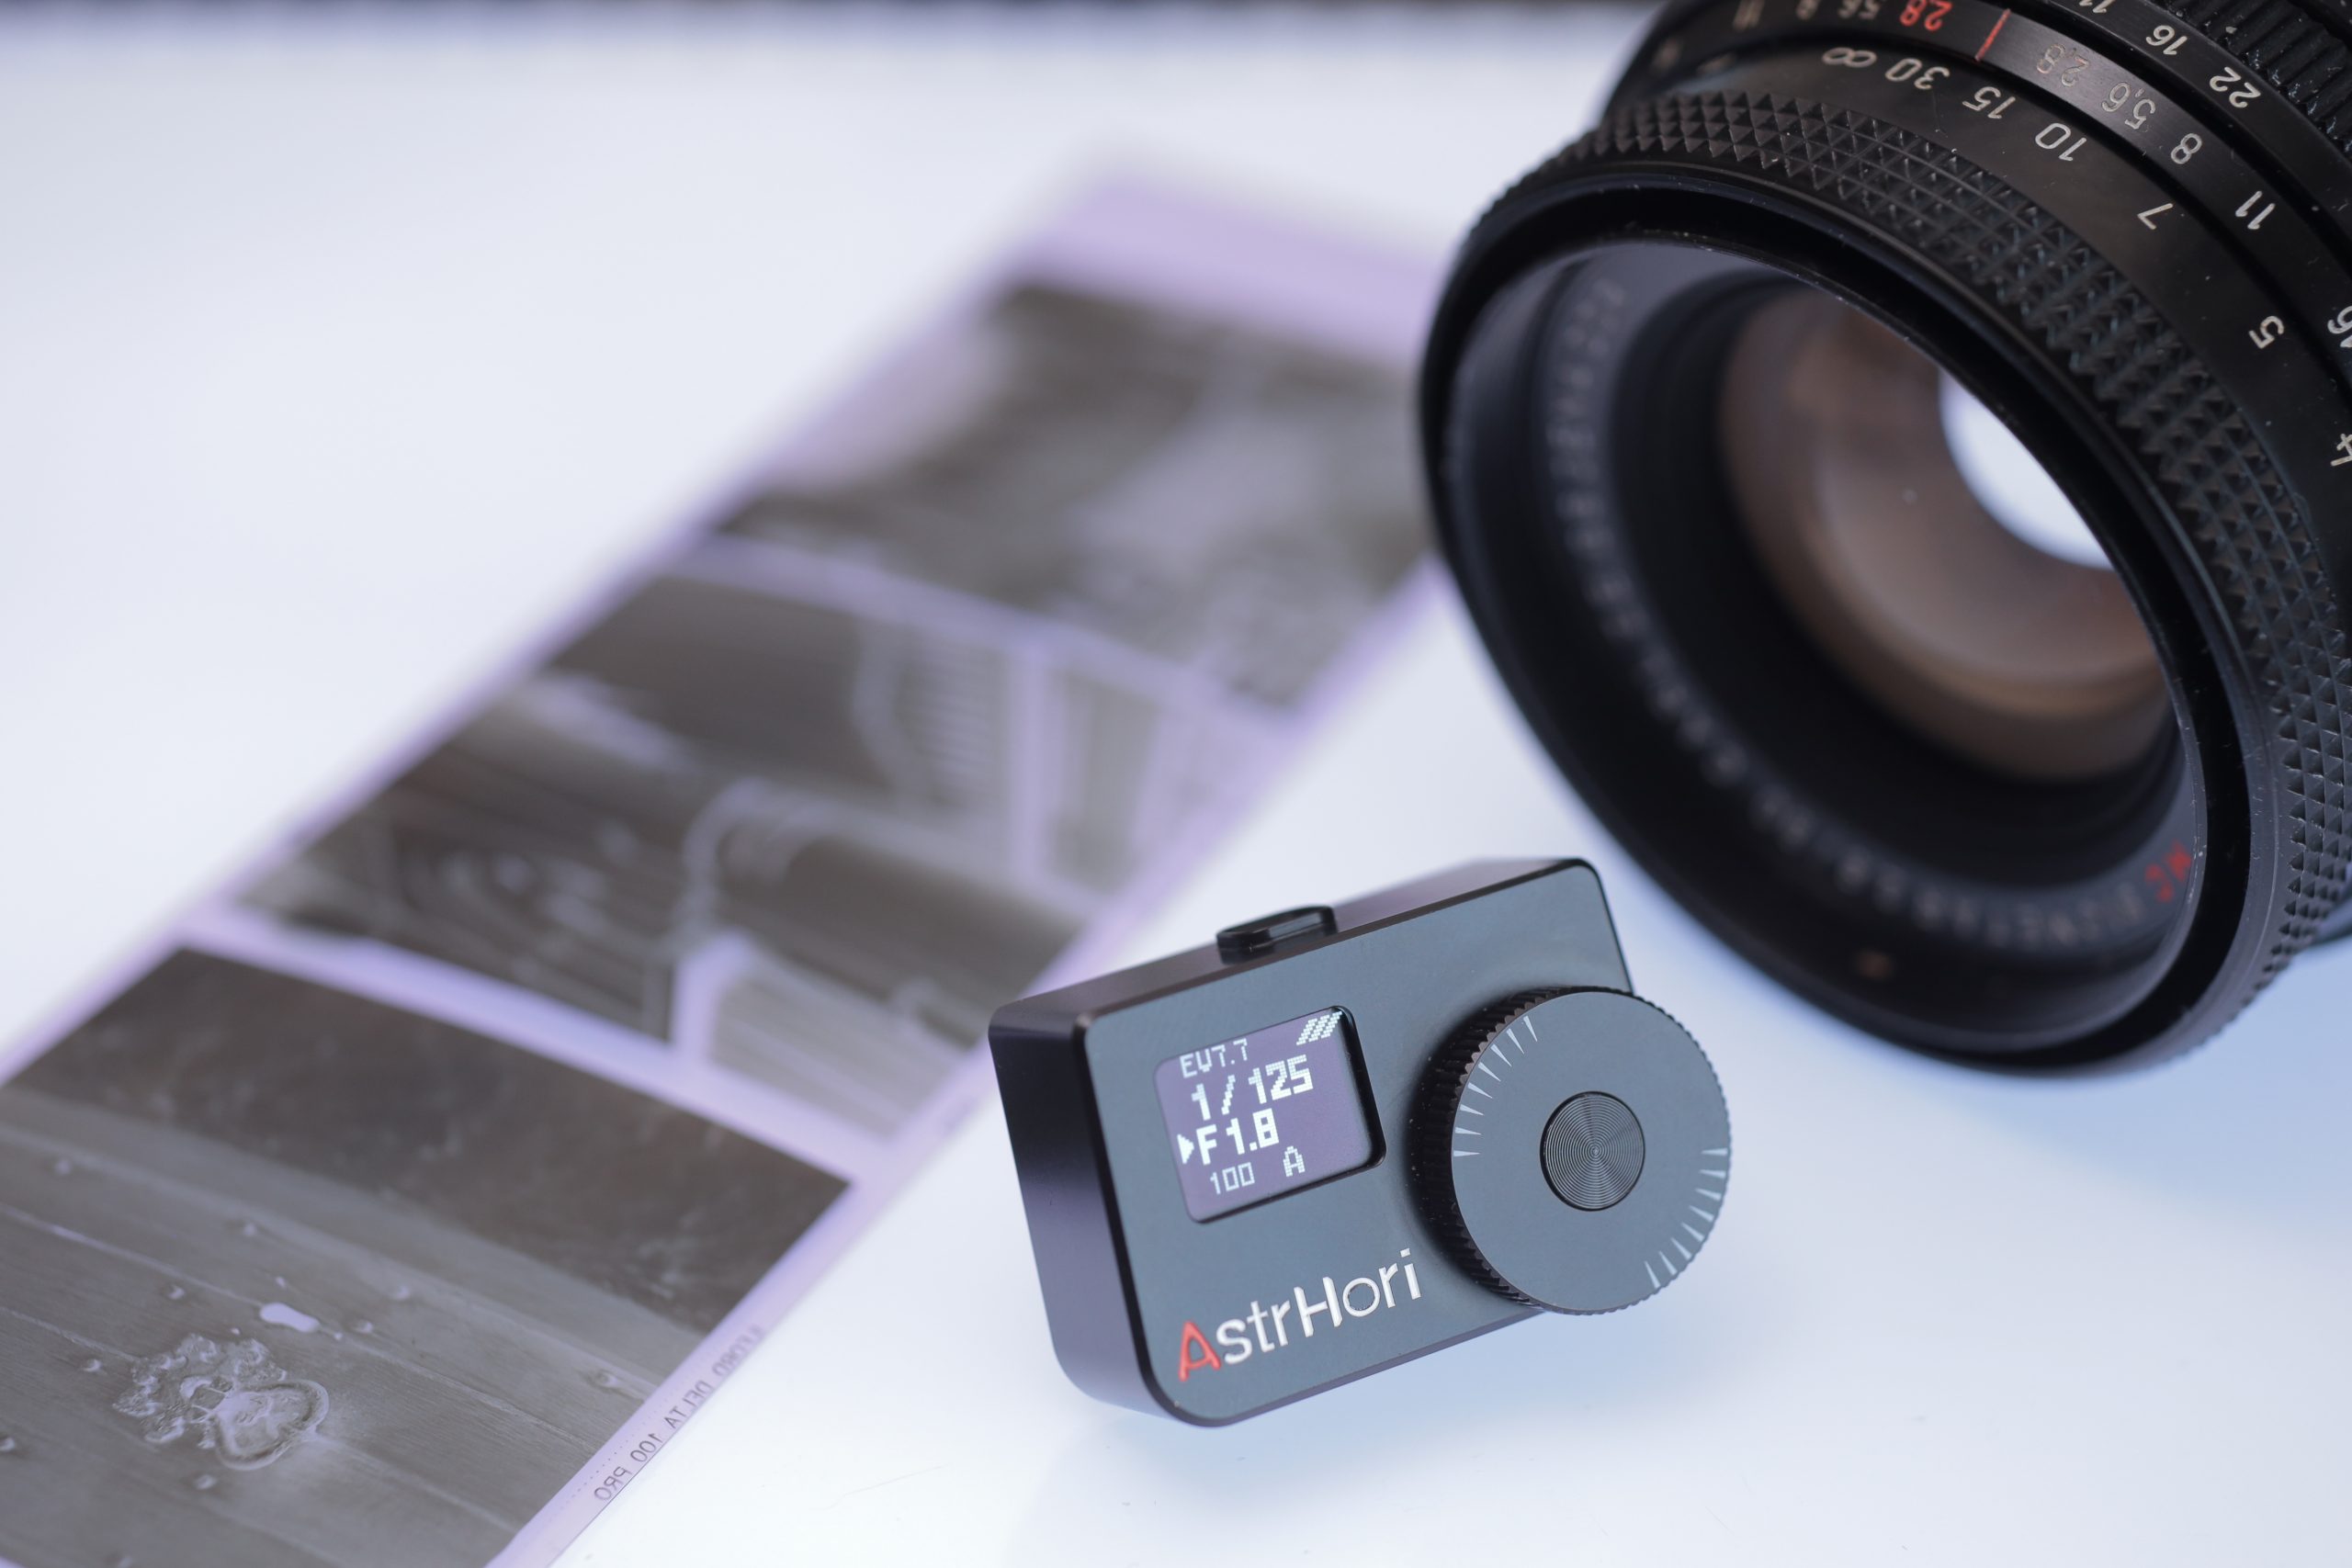
Functions
Using the function button you can change the ISO, metering mode (Aperture or Shutter Priority), Lock the exposure and also use continuous metering or single metering. Continuous meaning the meter changes value automatically as you point it to different light sources, single meaning you have to point the meter at your subject and press the function button for a reading.
To access the functions you use the one function button in various sequences which sounds a faff but it’s really quite simple.
It also shows an EV reading and Exposure Compensation. The exposure compensation is what you would use to calibrate the meter.
The shutter speeds go from 30 seconds all the way to 1/8000 of a second. The ISO goes from ISO 5 to 6400 and the Aperture goes from F1 to F32.
There is also a battery level indicator.
Build Quality
It feels quality! A solid metal case, could be brass. The photo on the Pergear website shows the bracing effect.
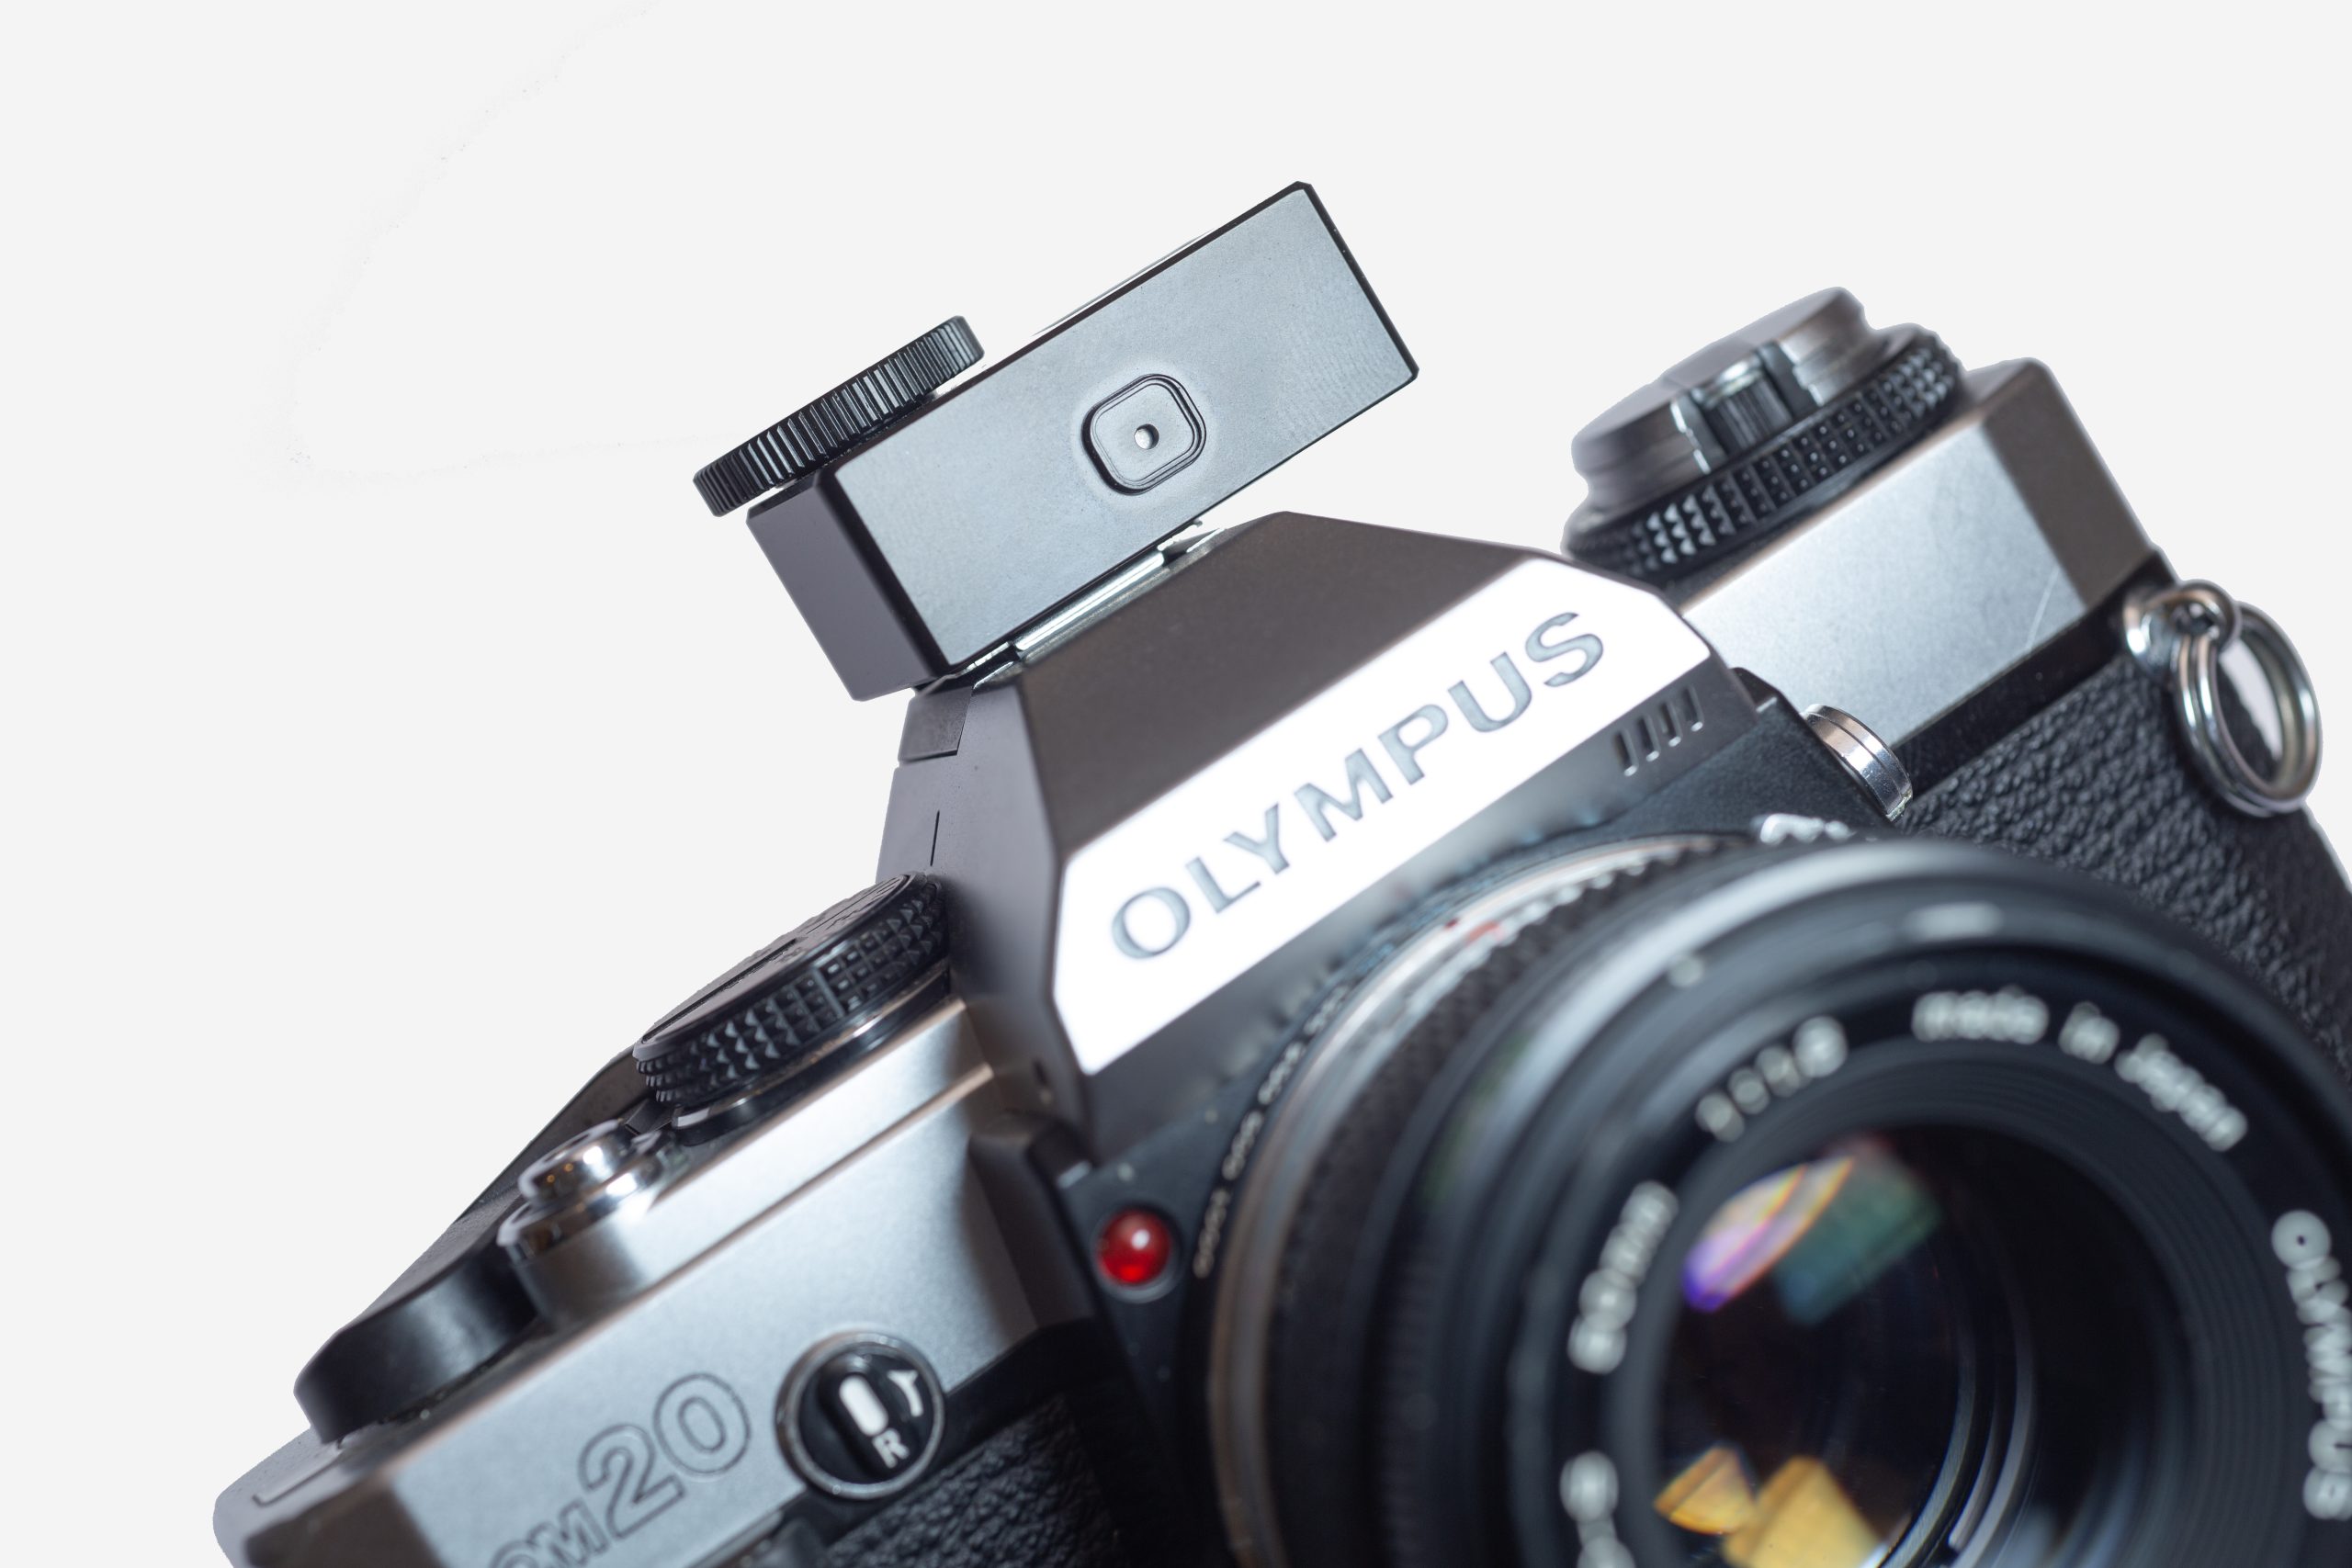
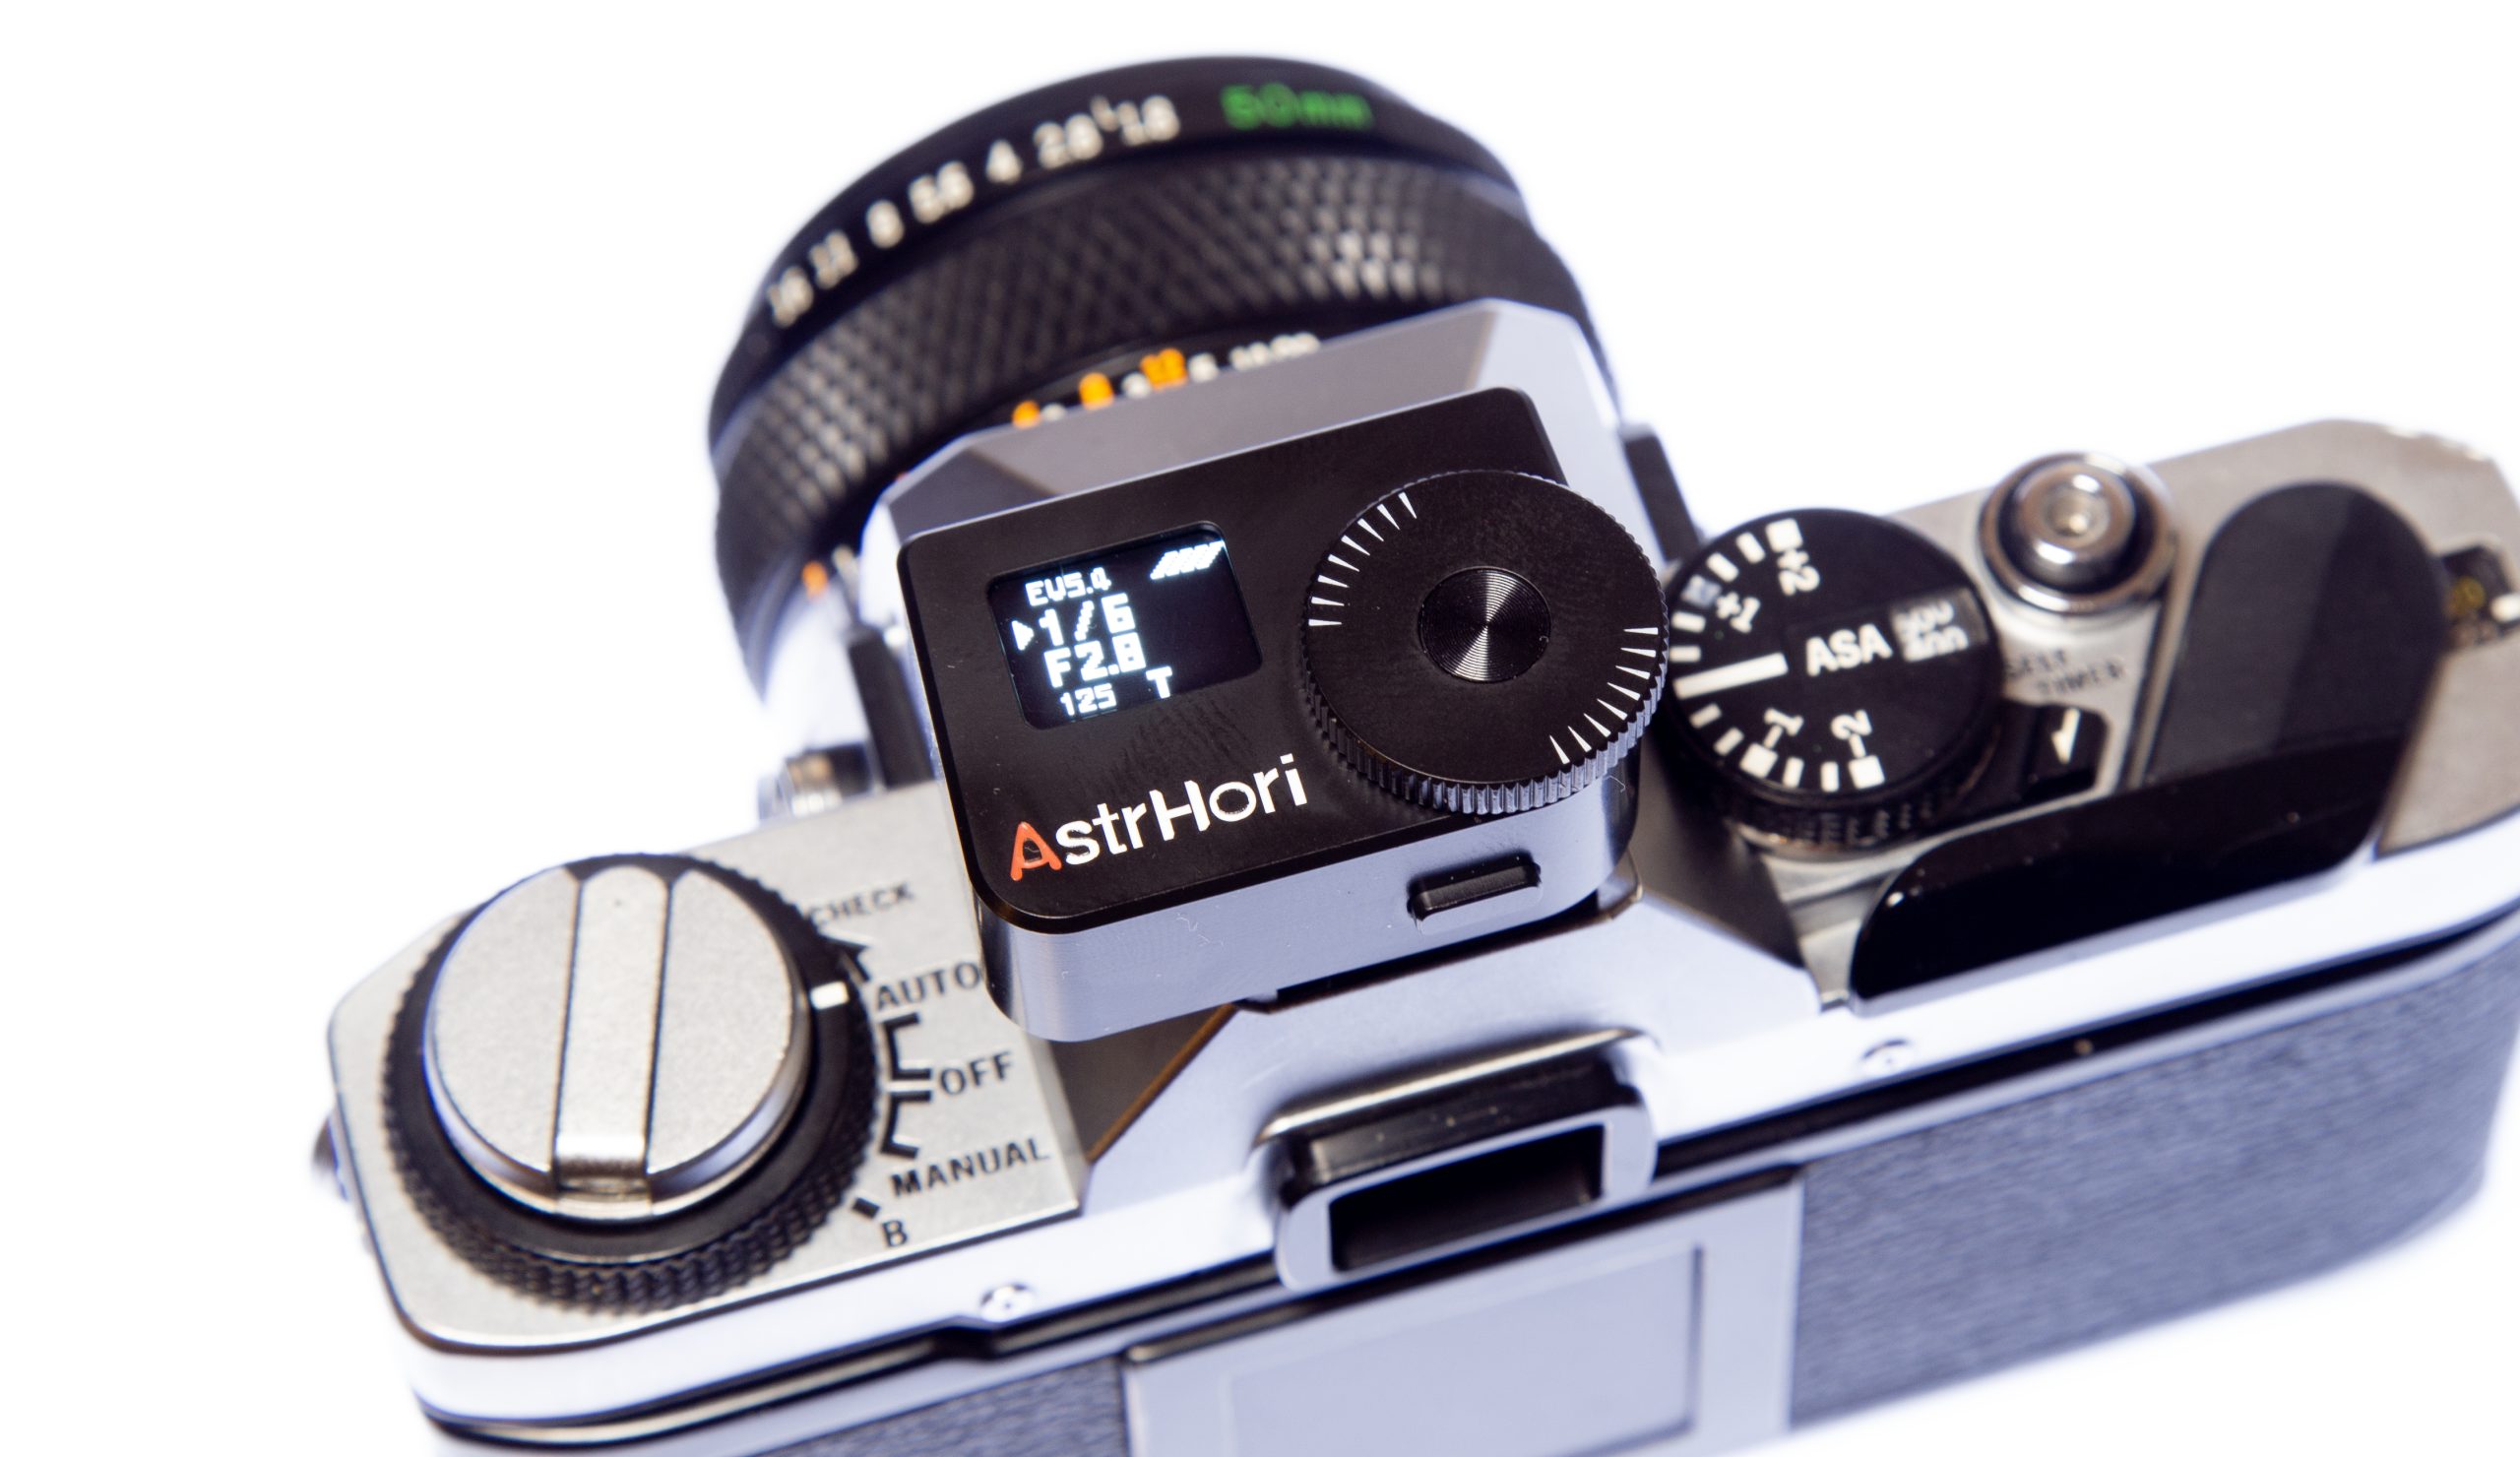
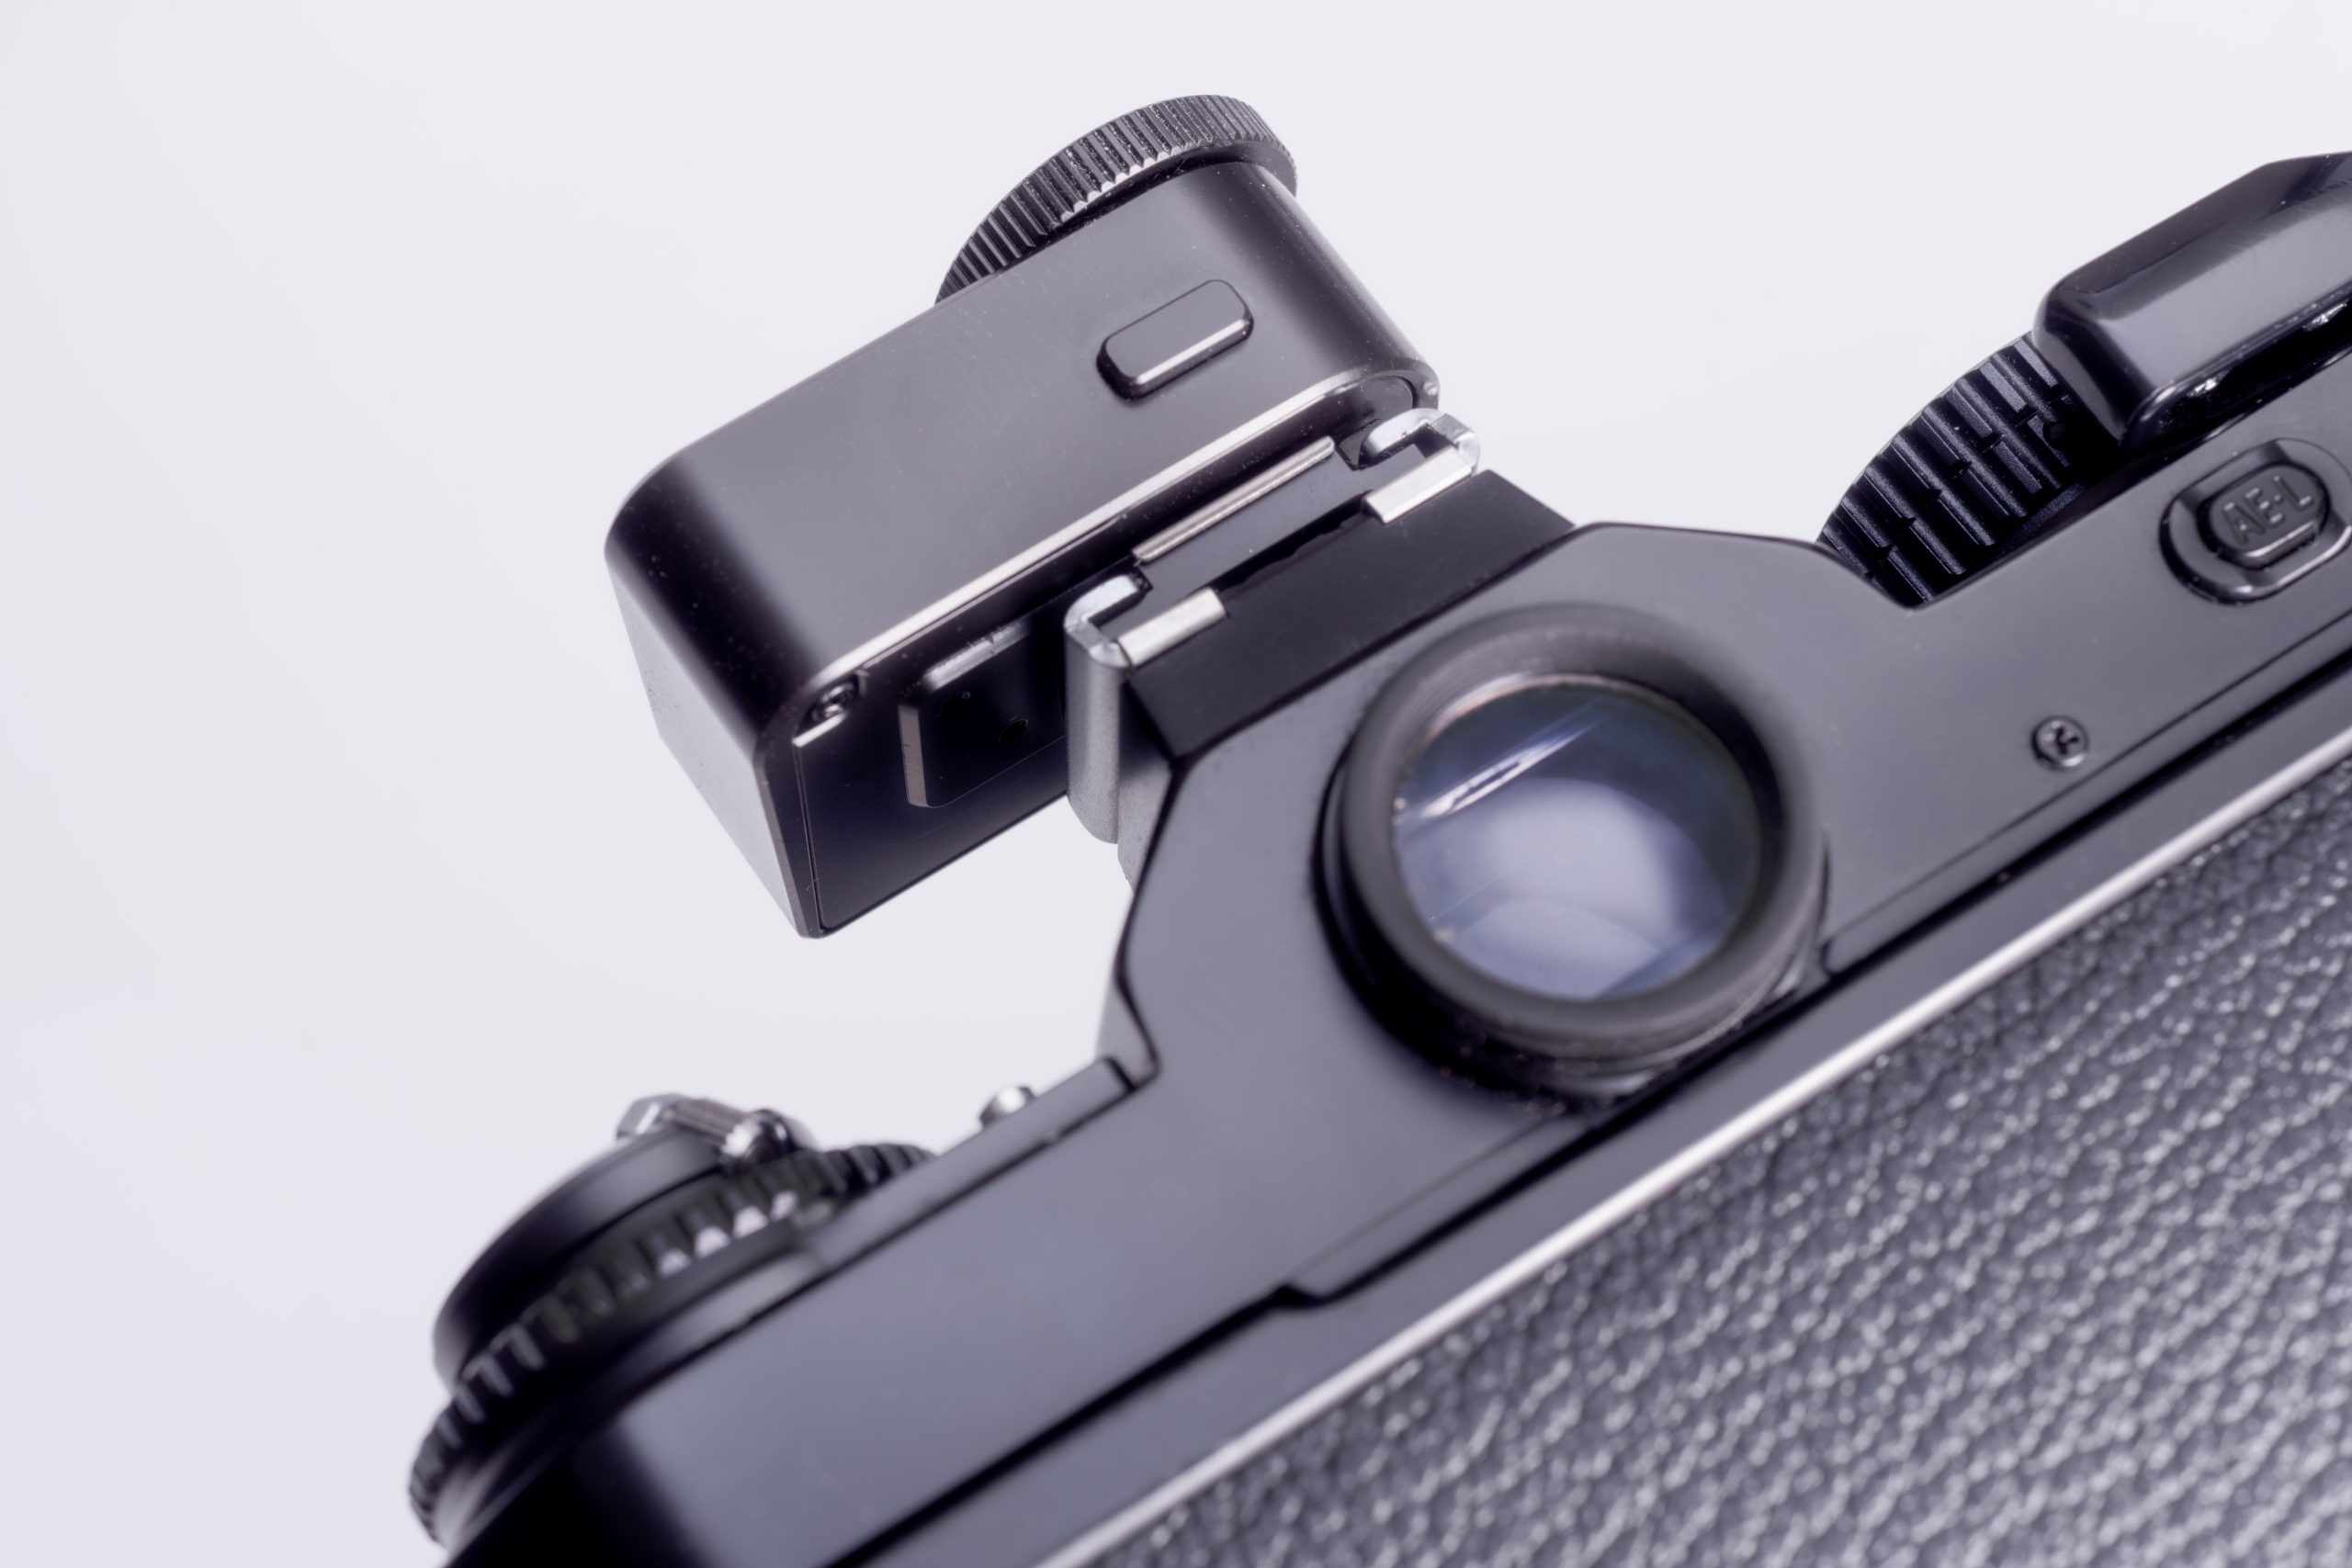
It has one function button, a jog wheel, a USB C for recharging the internal battery, which I have seen lasting all day long! And, of course, a pinhole light sensor. It also has a cold shoe for mounting to your camera that can be adjusted to shift left or right so the meter doesn’t cover your cameras shutter speed dial. Although, you have to unscrew the cold shoe using the Allen Key provided which is a bit fiddly.
On my one the USB connector is a bit wonky and the OLED display is probably half a mm off centre but it doesn’t affect its performance. Just if you are OCD like I am! And the OLED is very bright which is easily visible in daylight.
The display is also not protected by any glass or plastic so be careful if you are out in the rain! I can see water droplets easily seeping into the unit via the USB or Display.
If I could make any changes to the unit it would be to put the display on the back where the function button is. It would change the design a bit in size maybe but it would be easier to see as you are taking photos but no big deal! Also, a small loop fixed to the unit so you could attach a lanyard to put around your neck as it is so small I kept misplacing it.
What would I use it for?
It certainly wouldn’t replace my Sekonic. And I wouldn’t use it for my cameras that have good working internal meters. But, I do have cameras where the meters are either not that accurate and some without a meter at all. It would be especially handy when I take my folding cameras out for some Street/Urban Photography.
I’m not sure though if I would use it on camera or just put it in my pocket as my friend did.
How did I test it?
I used my Leica Q2 Monochrome. That camera has an outstandingly accurate light meter inside so I fixed the Meter to the cameras hot shoe and compared the exposure readings on various subjects, indoors and out doors. The Astrhori was reading about 1 stop over exposed compared to the Leica’s meter so I changed the Exposure Compensation on the Astrhori to -1 and BINGO. Every where I pointed the meter indoors I was getting the exact same reading on the Lieca. It was hit and miss a few times but only by one third here and there.
I then used my Sekonic in incident mode using the Lumisphere and again the Astrhori hit the spot. Give or take a smidge.
Being a reflective meter, meaning it reads light that is reflecting off a subject the same as your cameras internal meter, it will be touch and go with bright scenes such as scapes and sky. I will more than likely read the sky and then read the ground where there is detail and go in between.
I am not sure of the angle of metering but I have heard it is 30%. But from my tests if you point the meter to your subject at a reasonably close distance the reading returns an accurate exposure. It is sensative, meaning, if you are outside and point the meter a bit up towards the sky the readings change, as expected. Which is good.
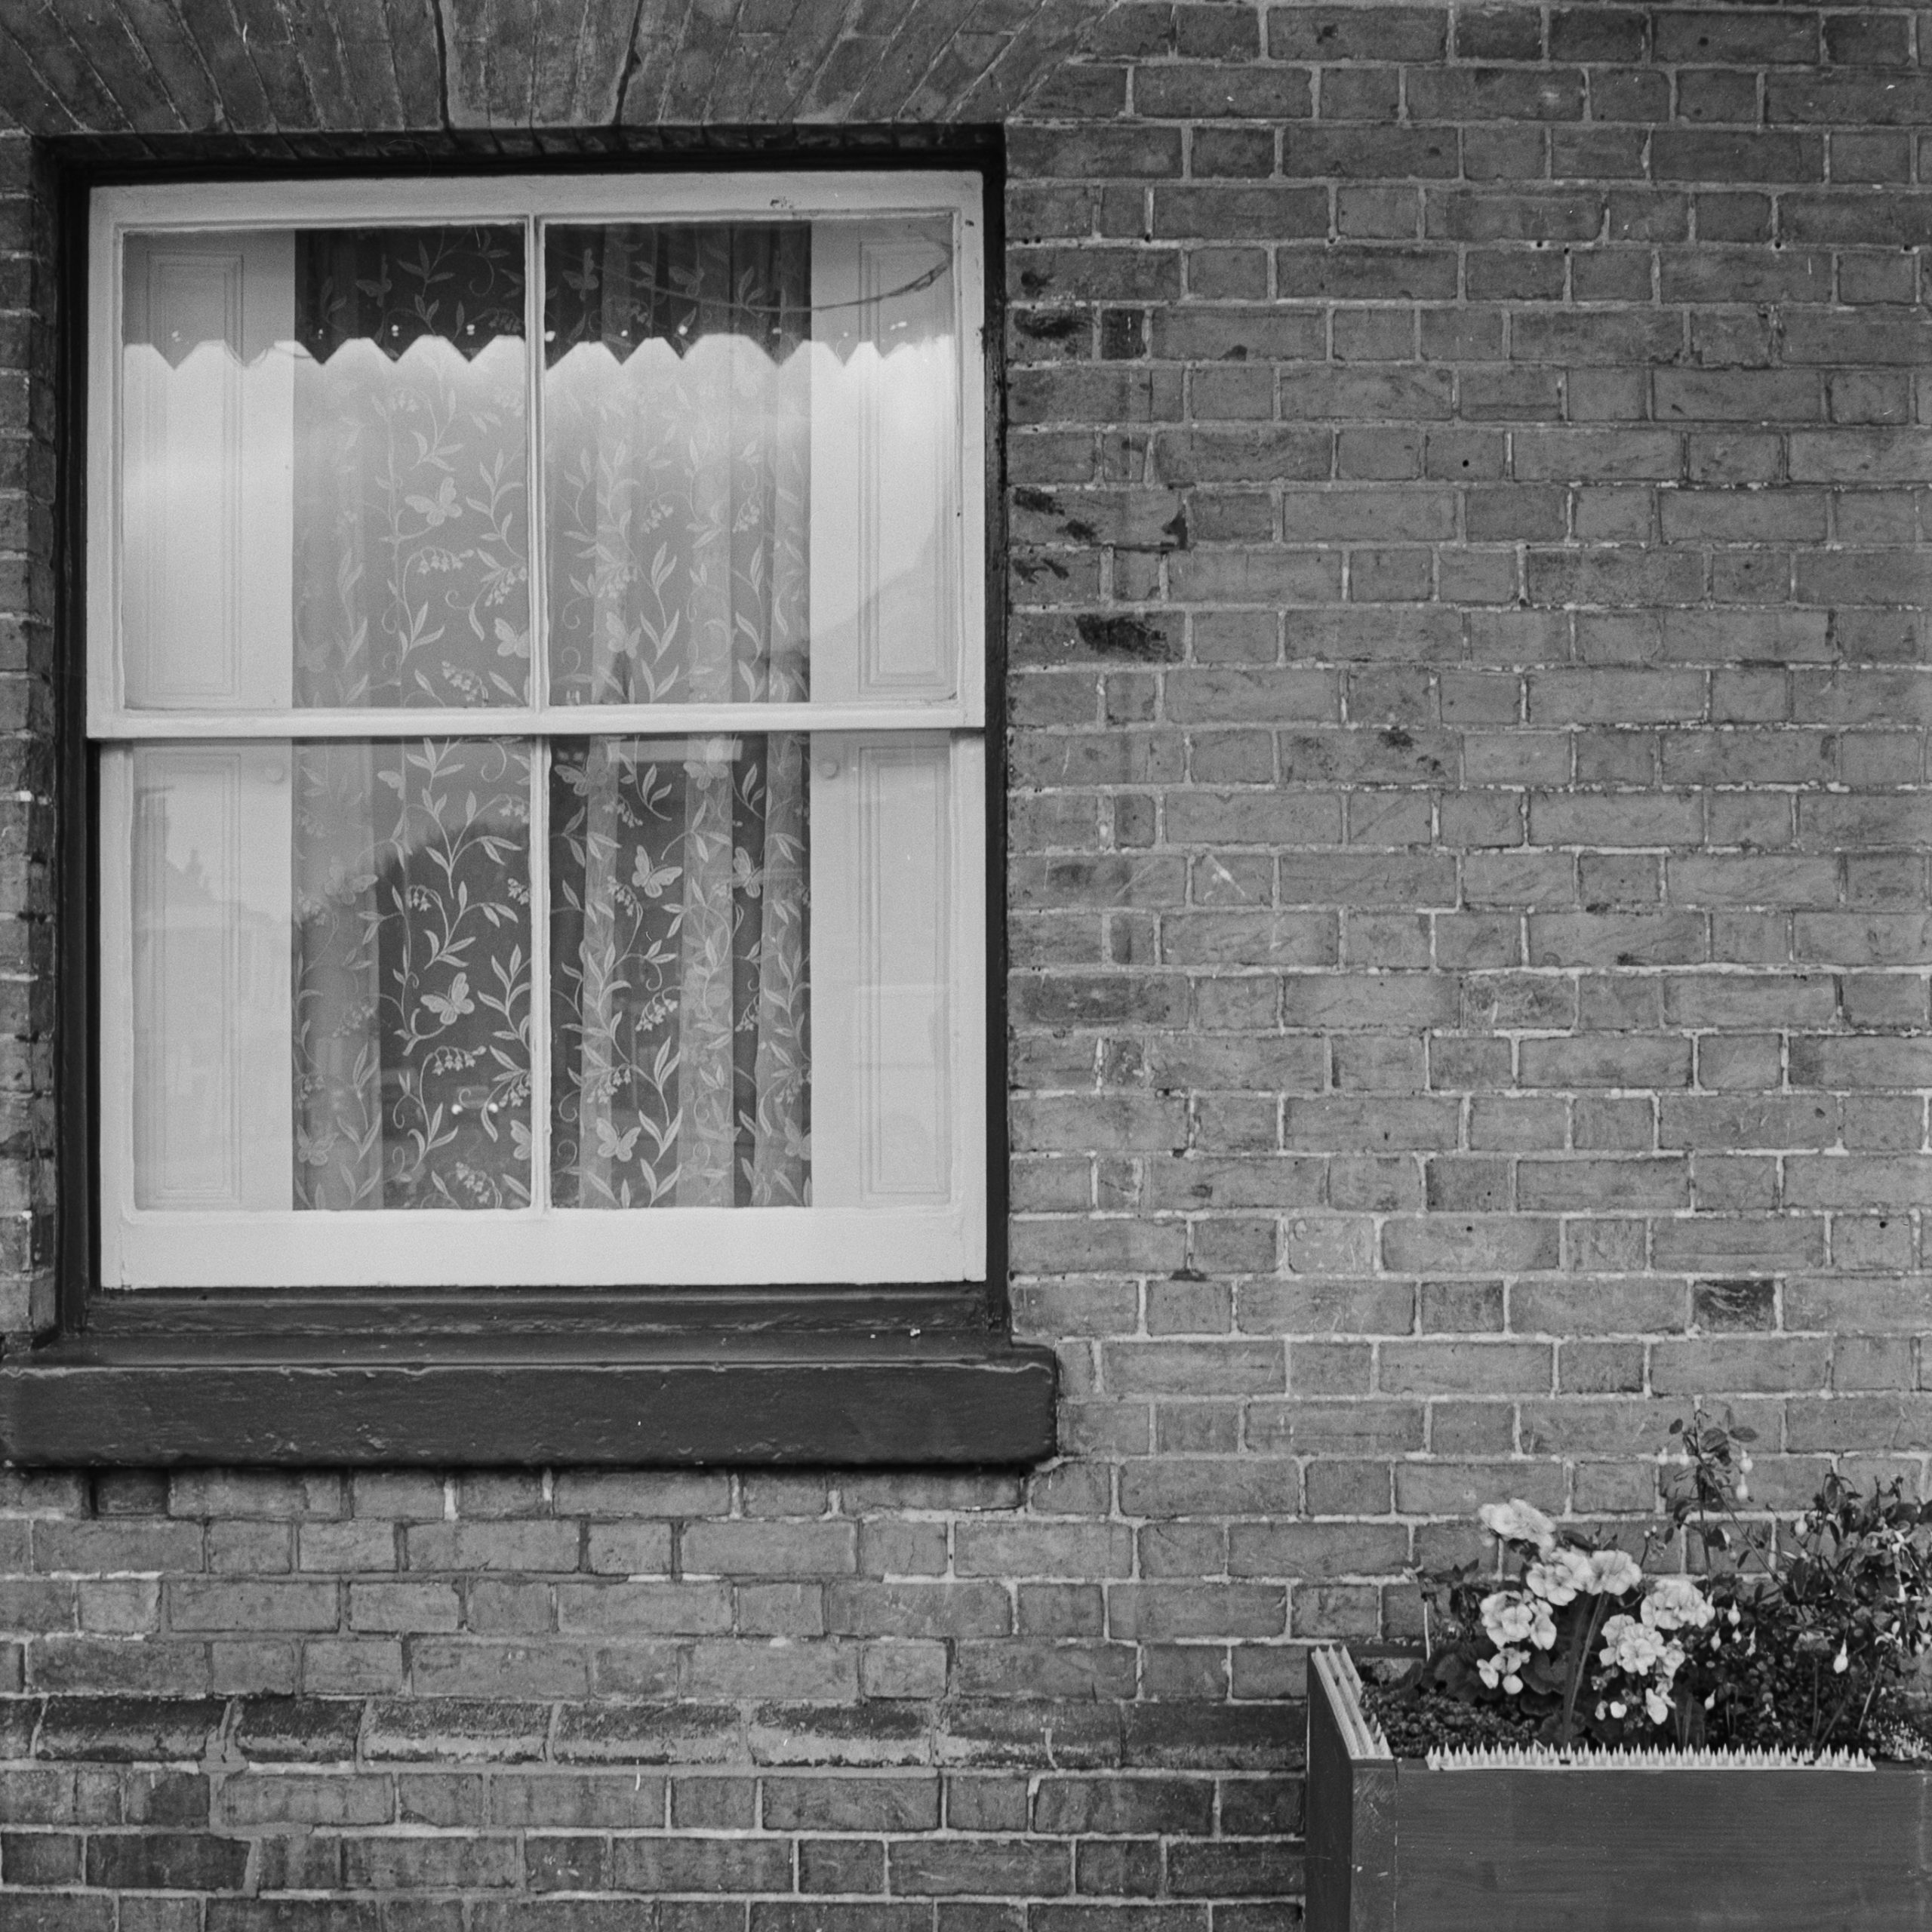
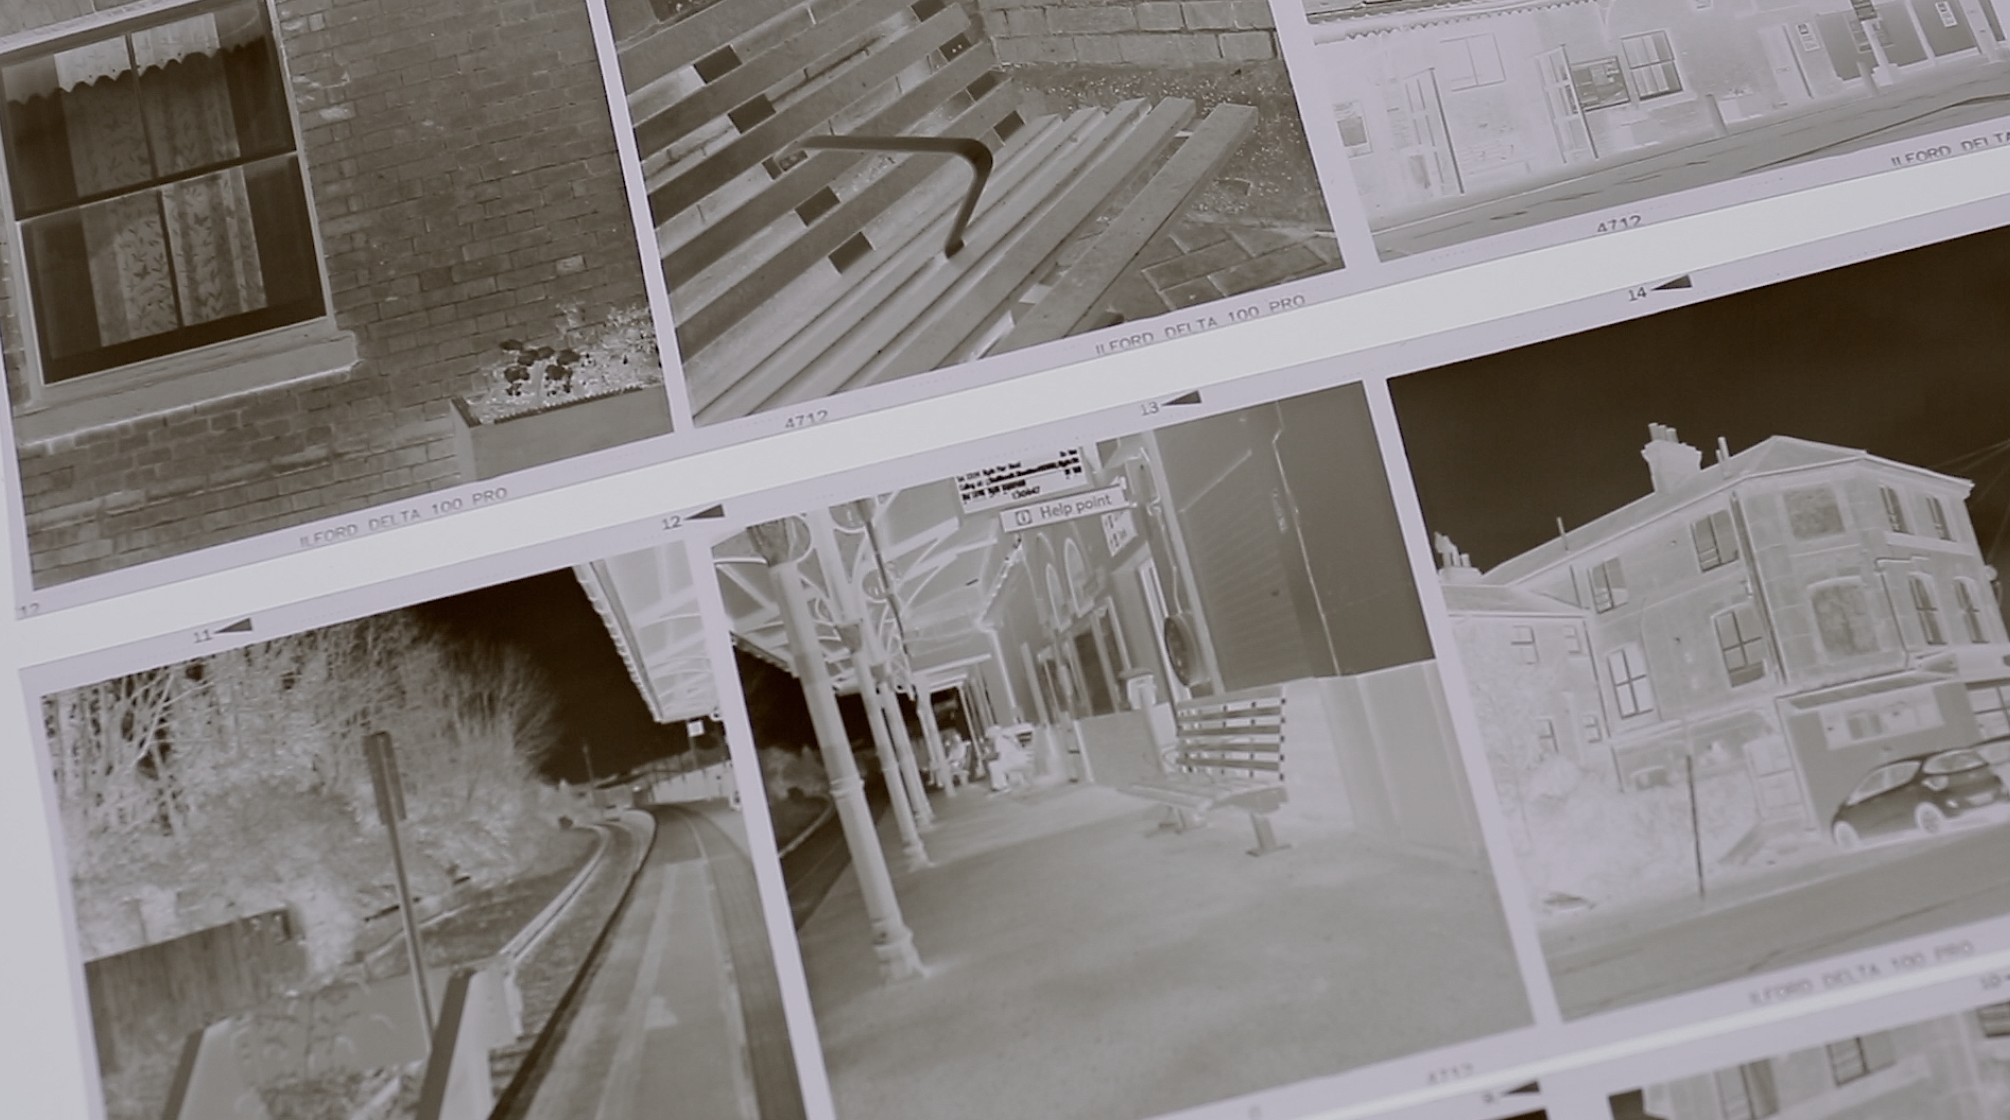
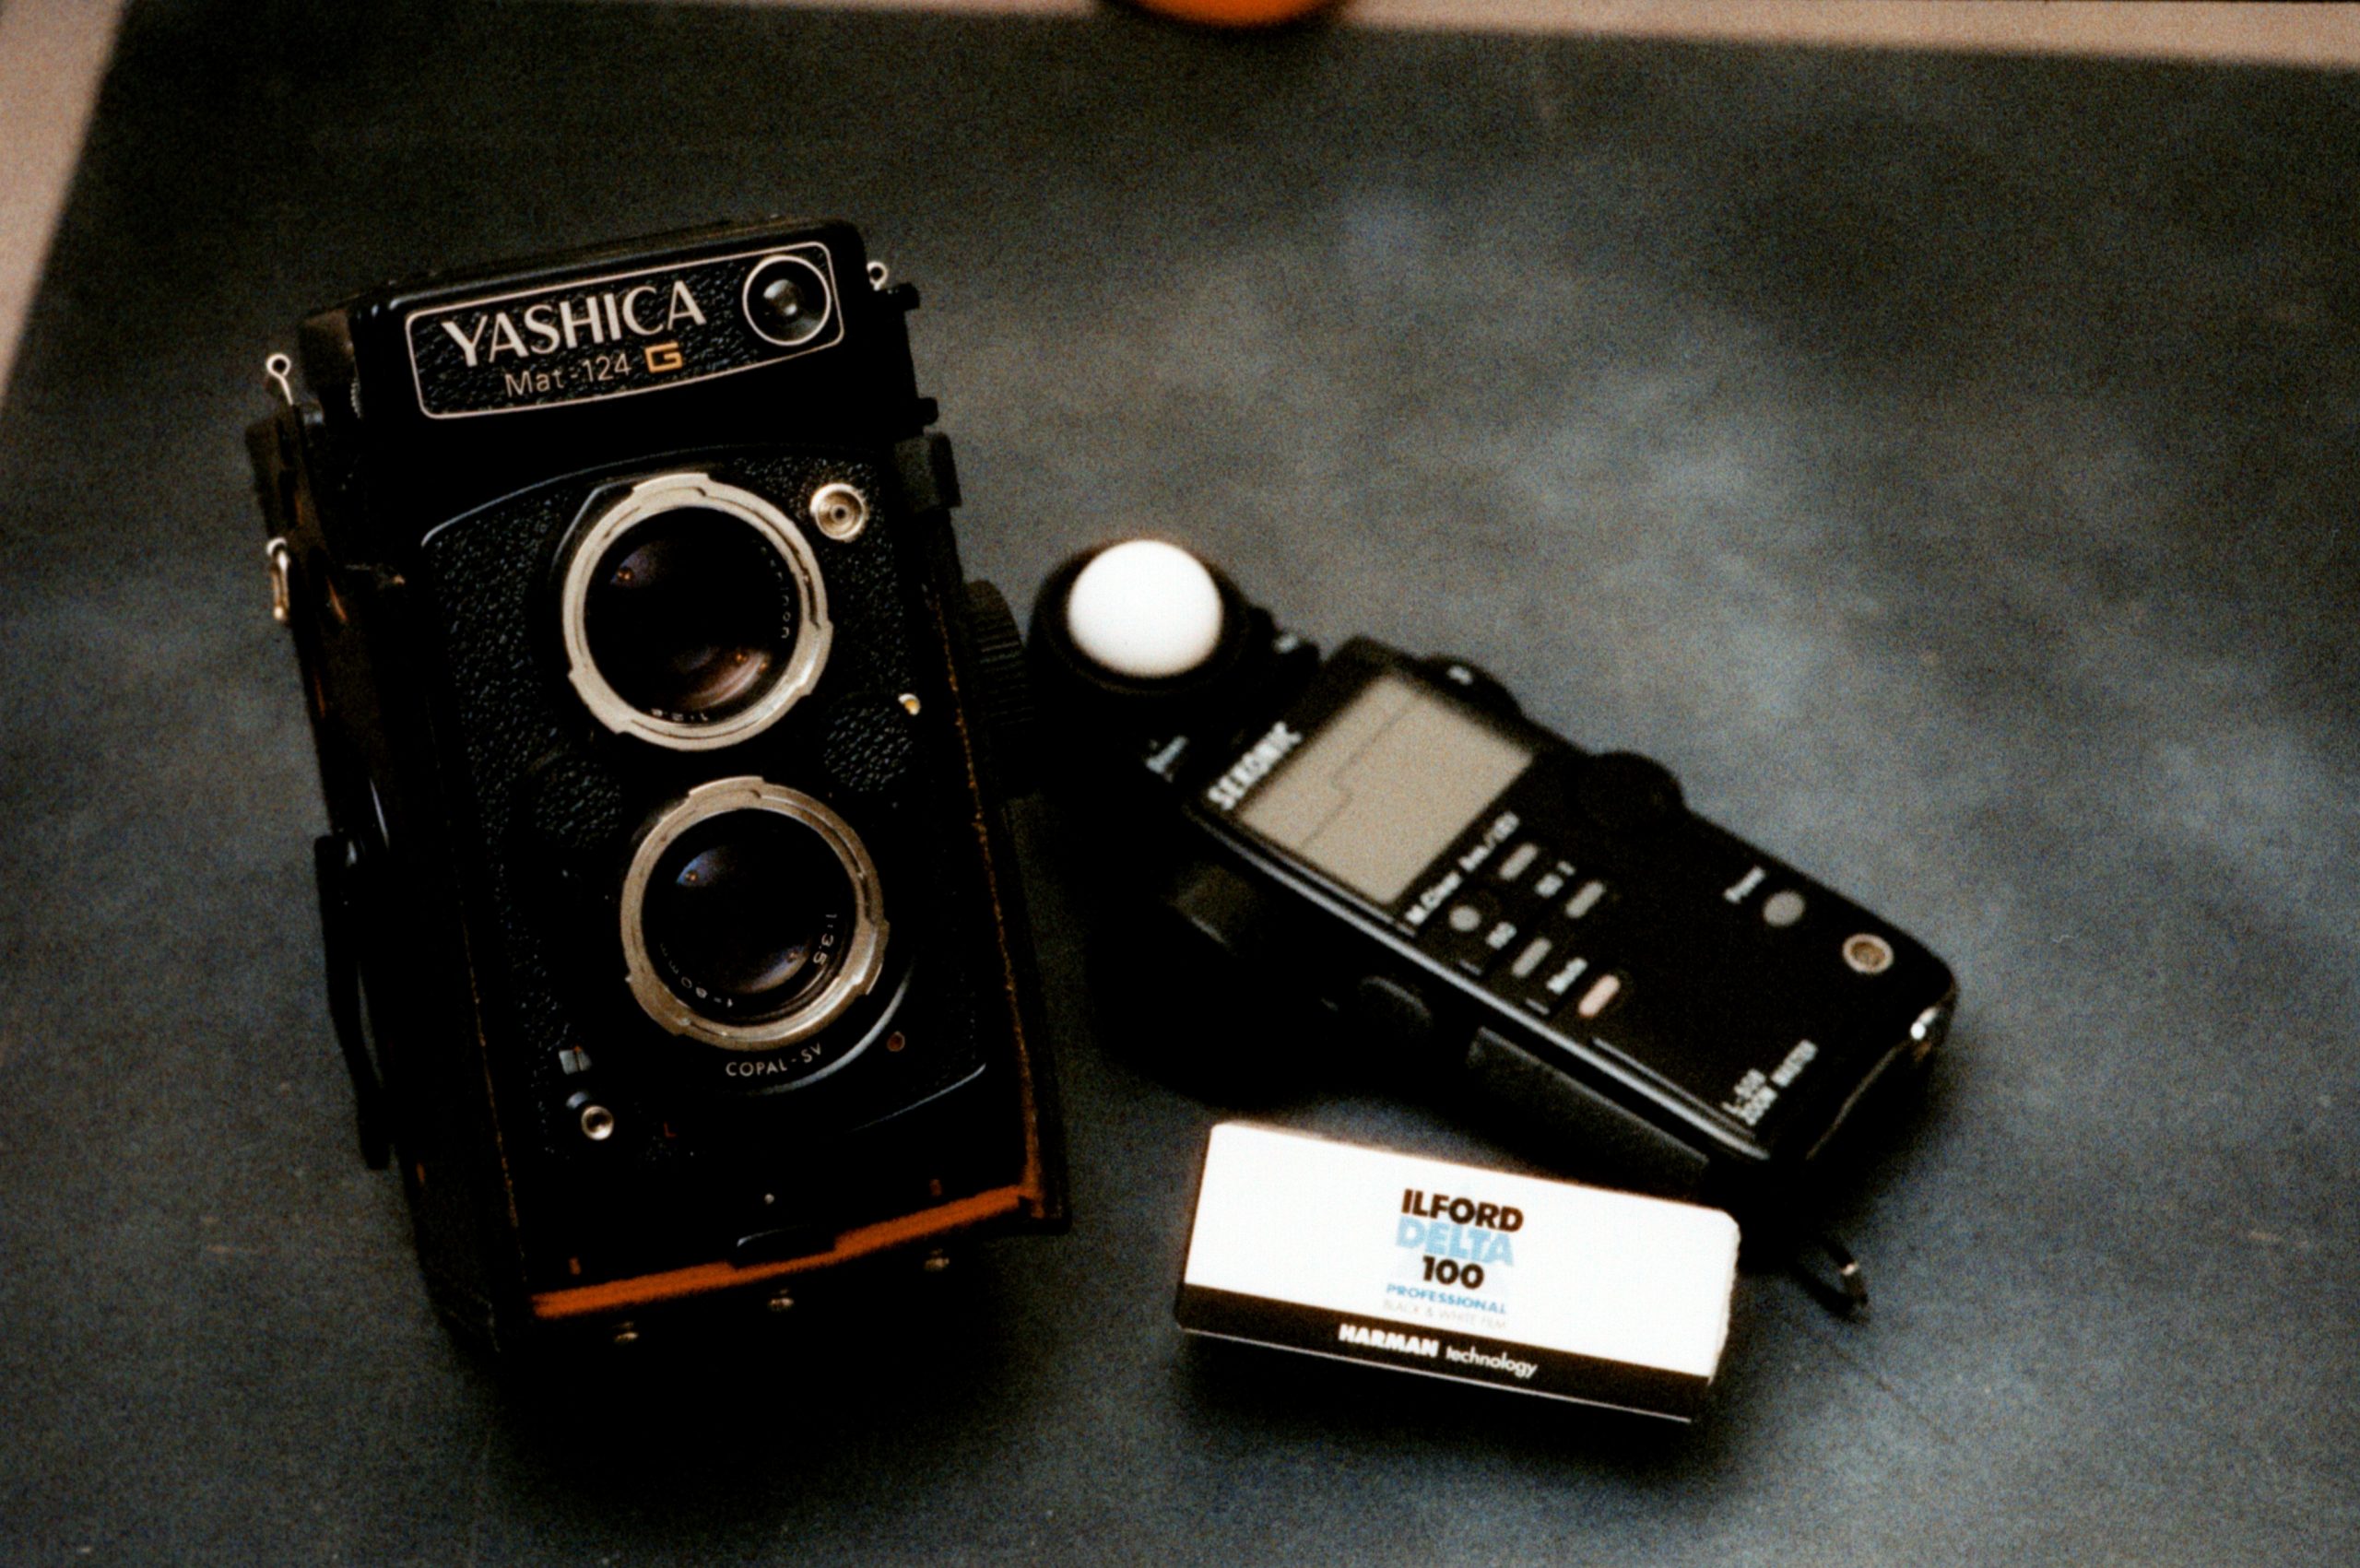
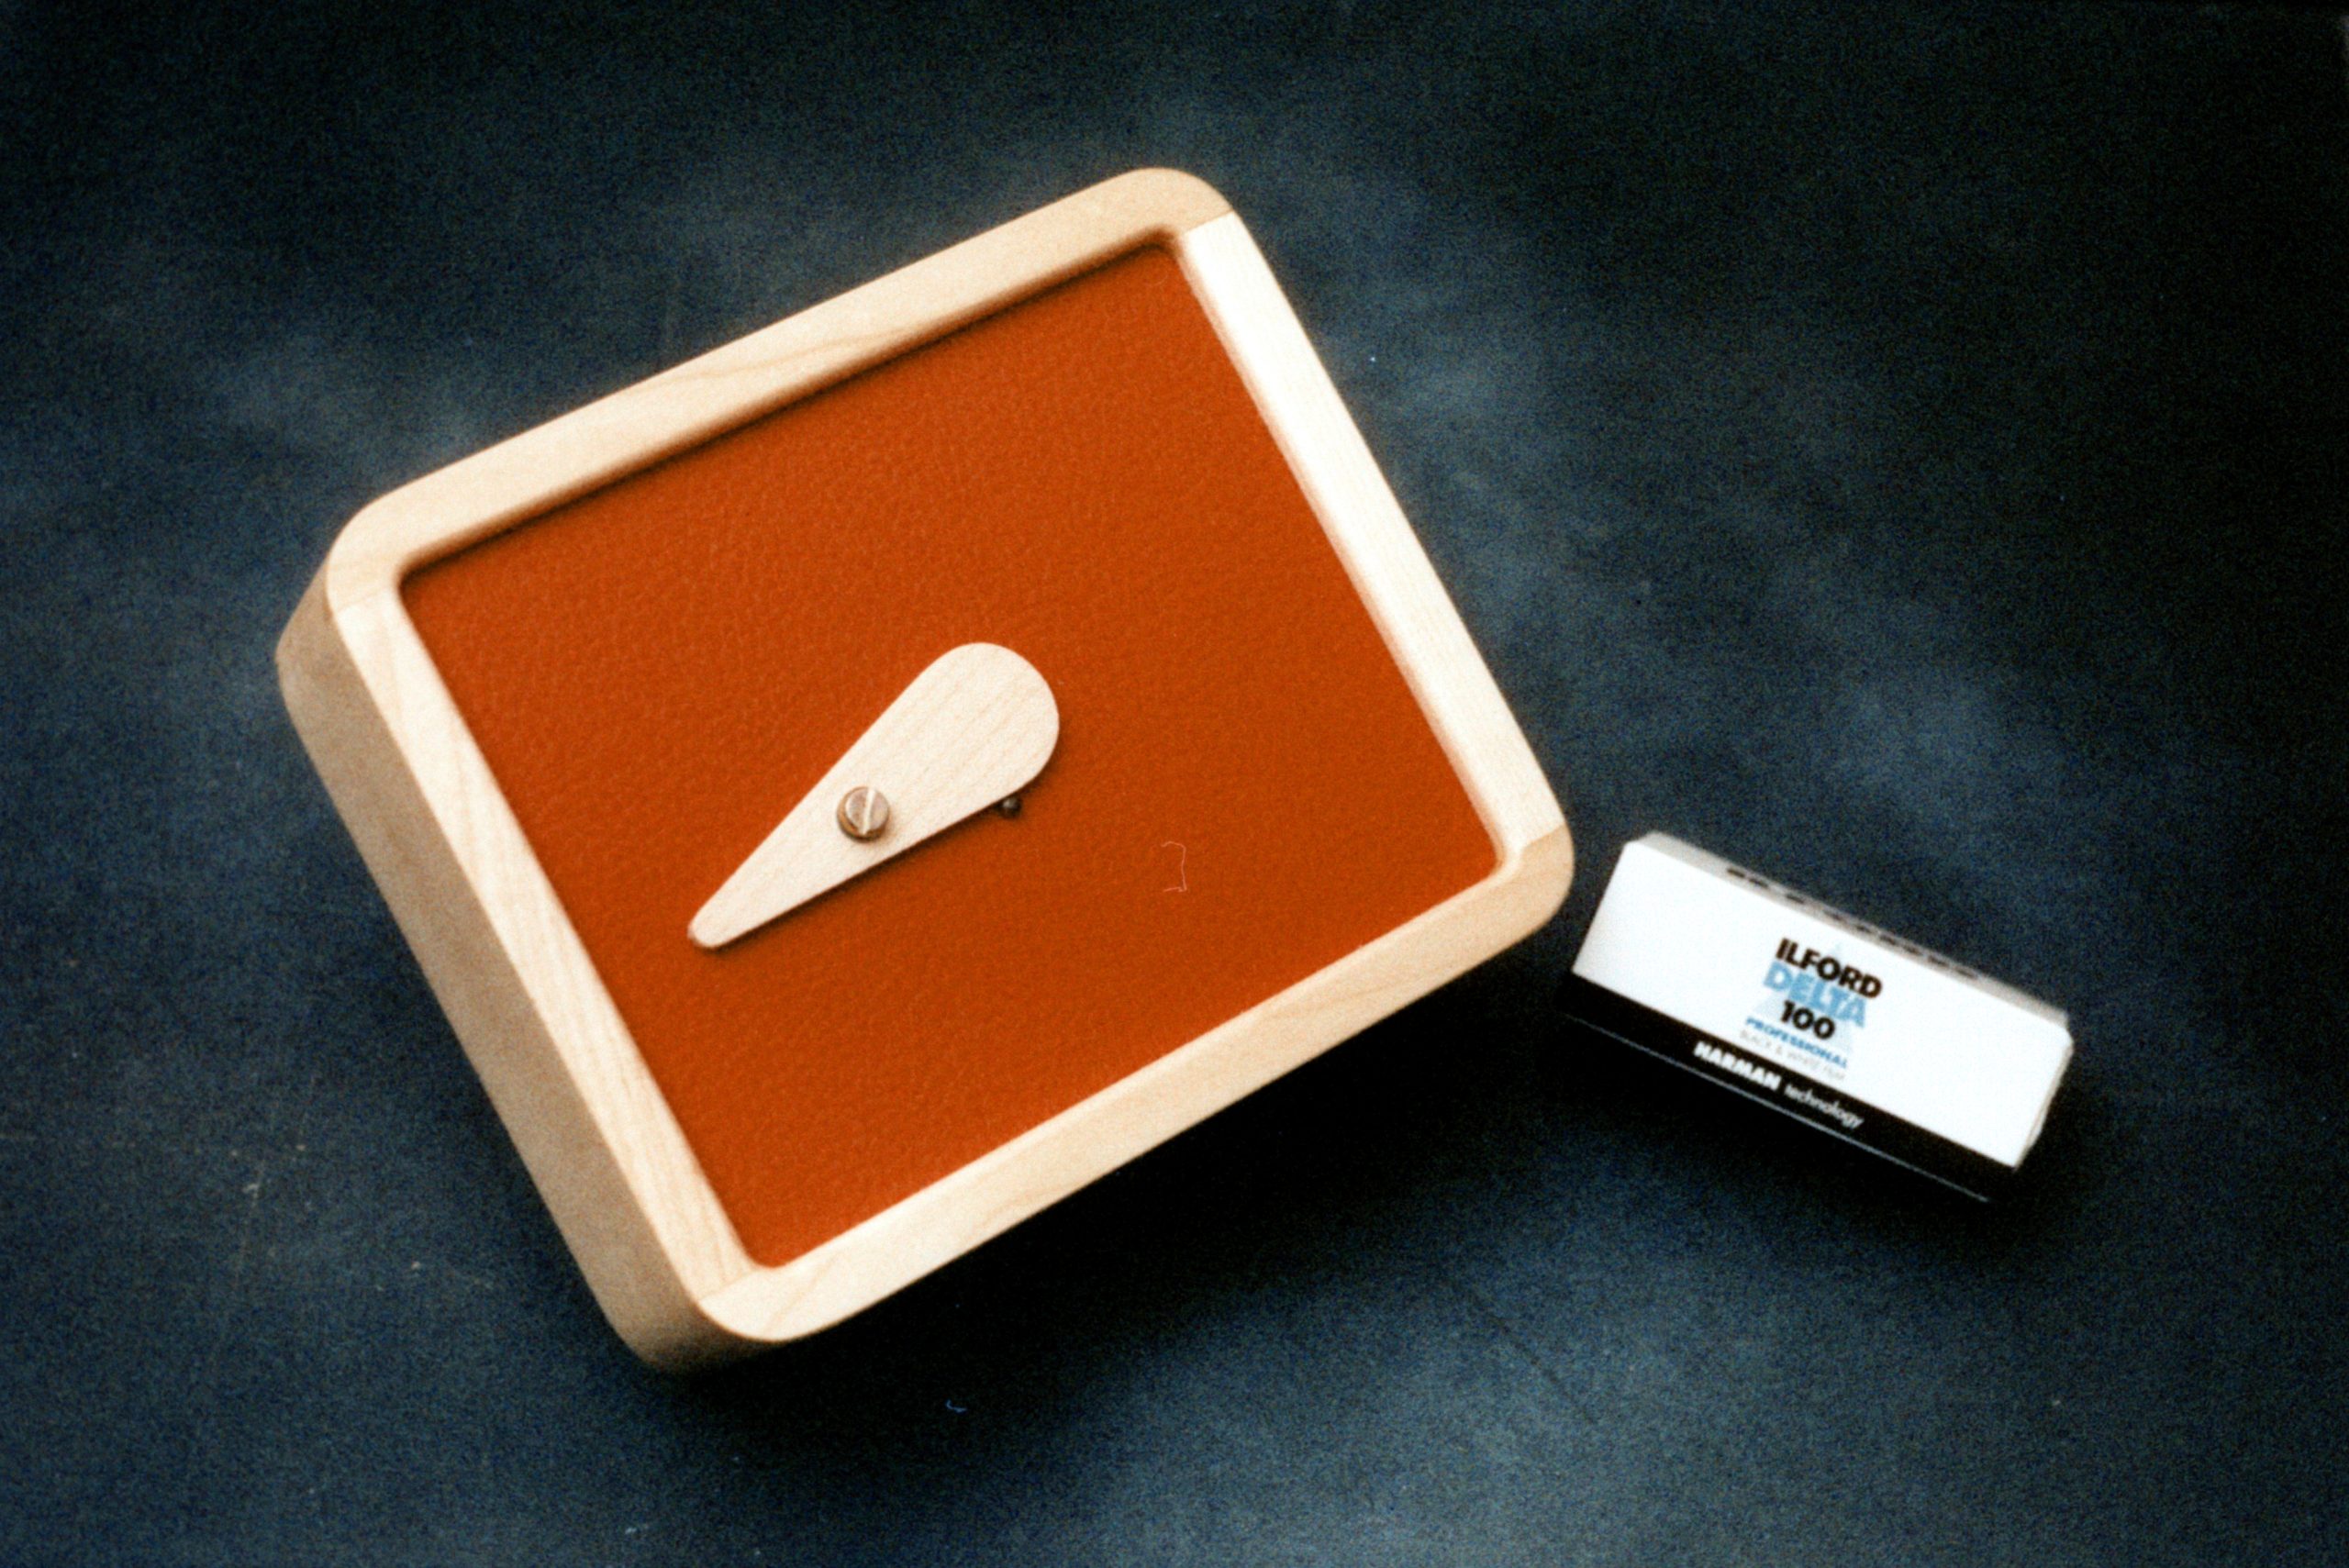
FILM ILFORD DELTA 100
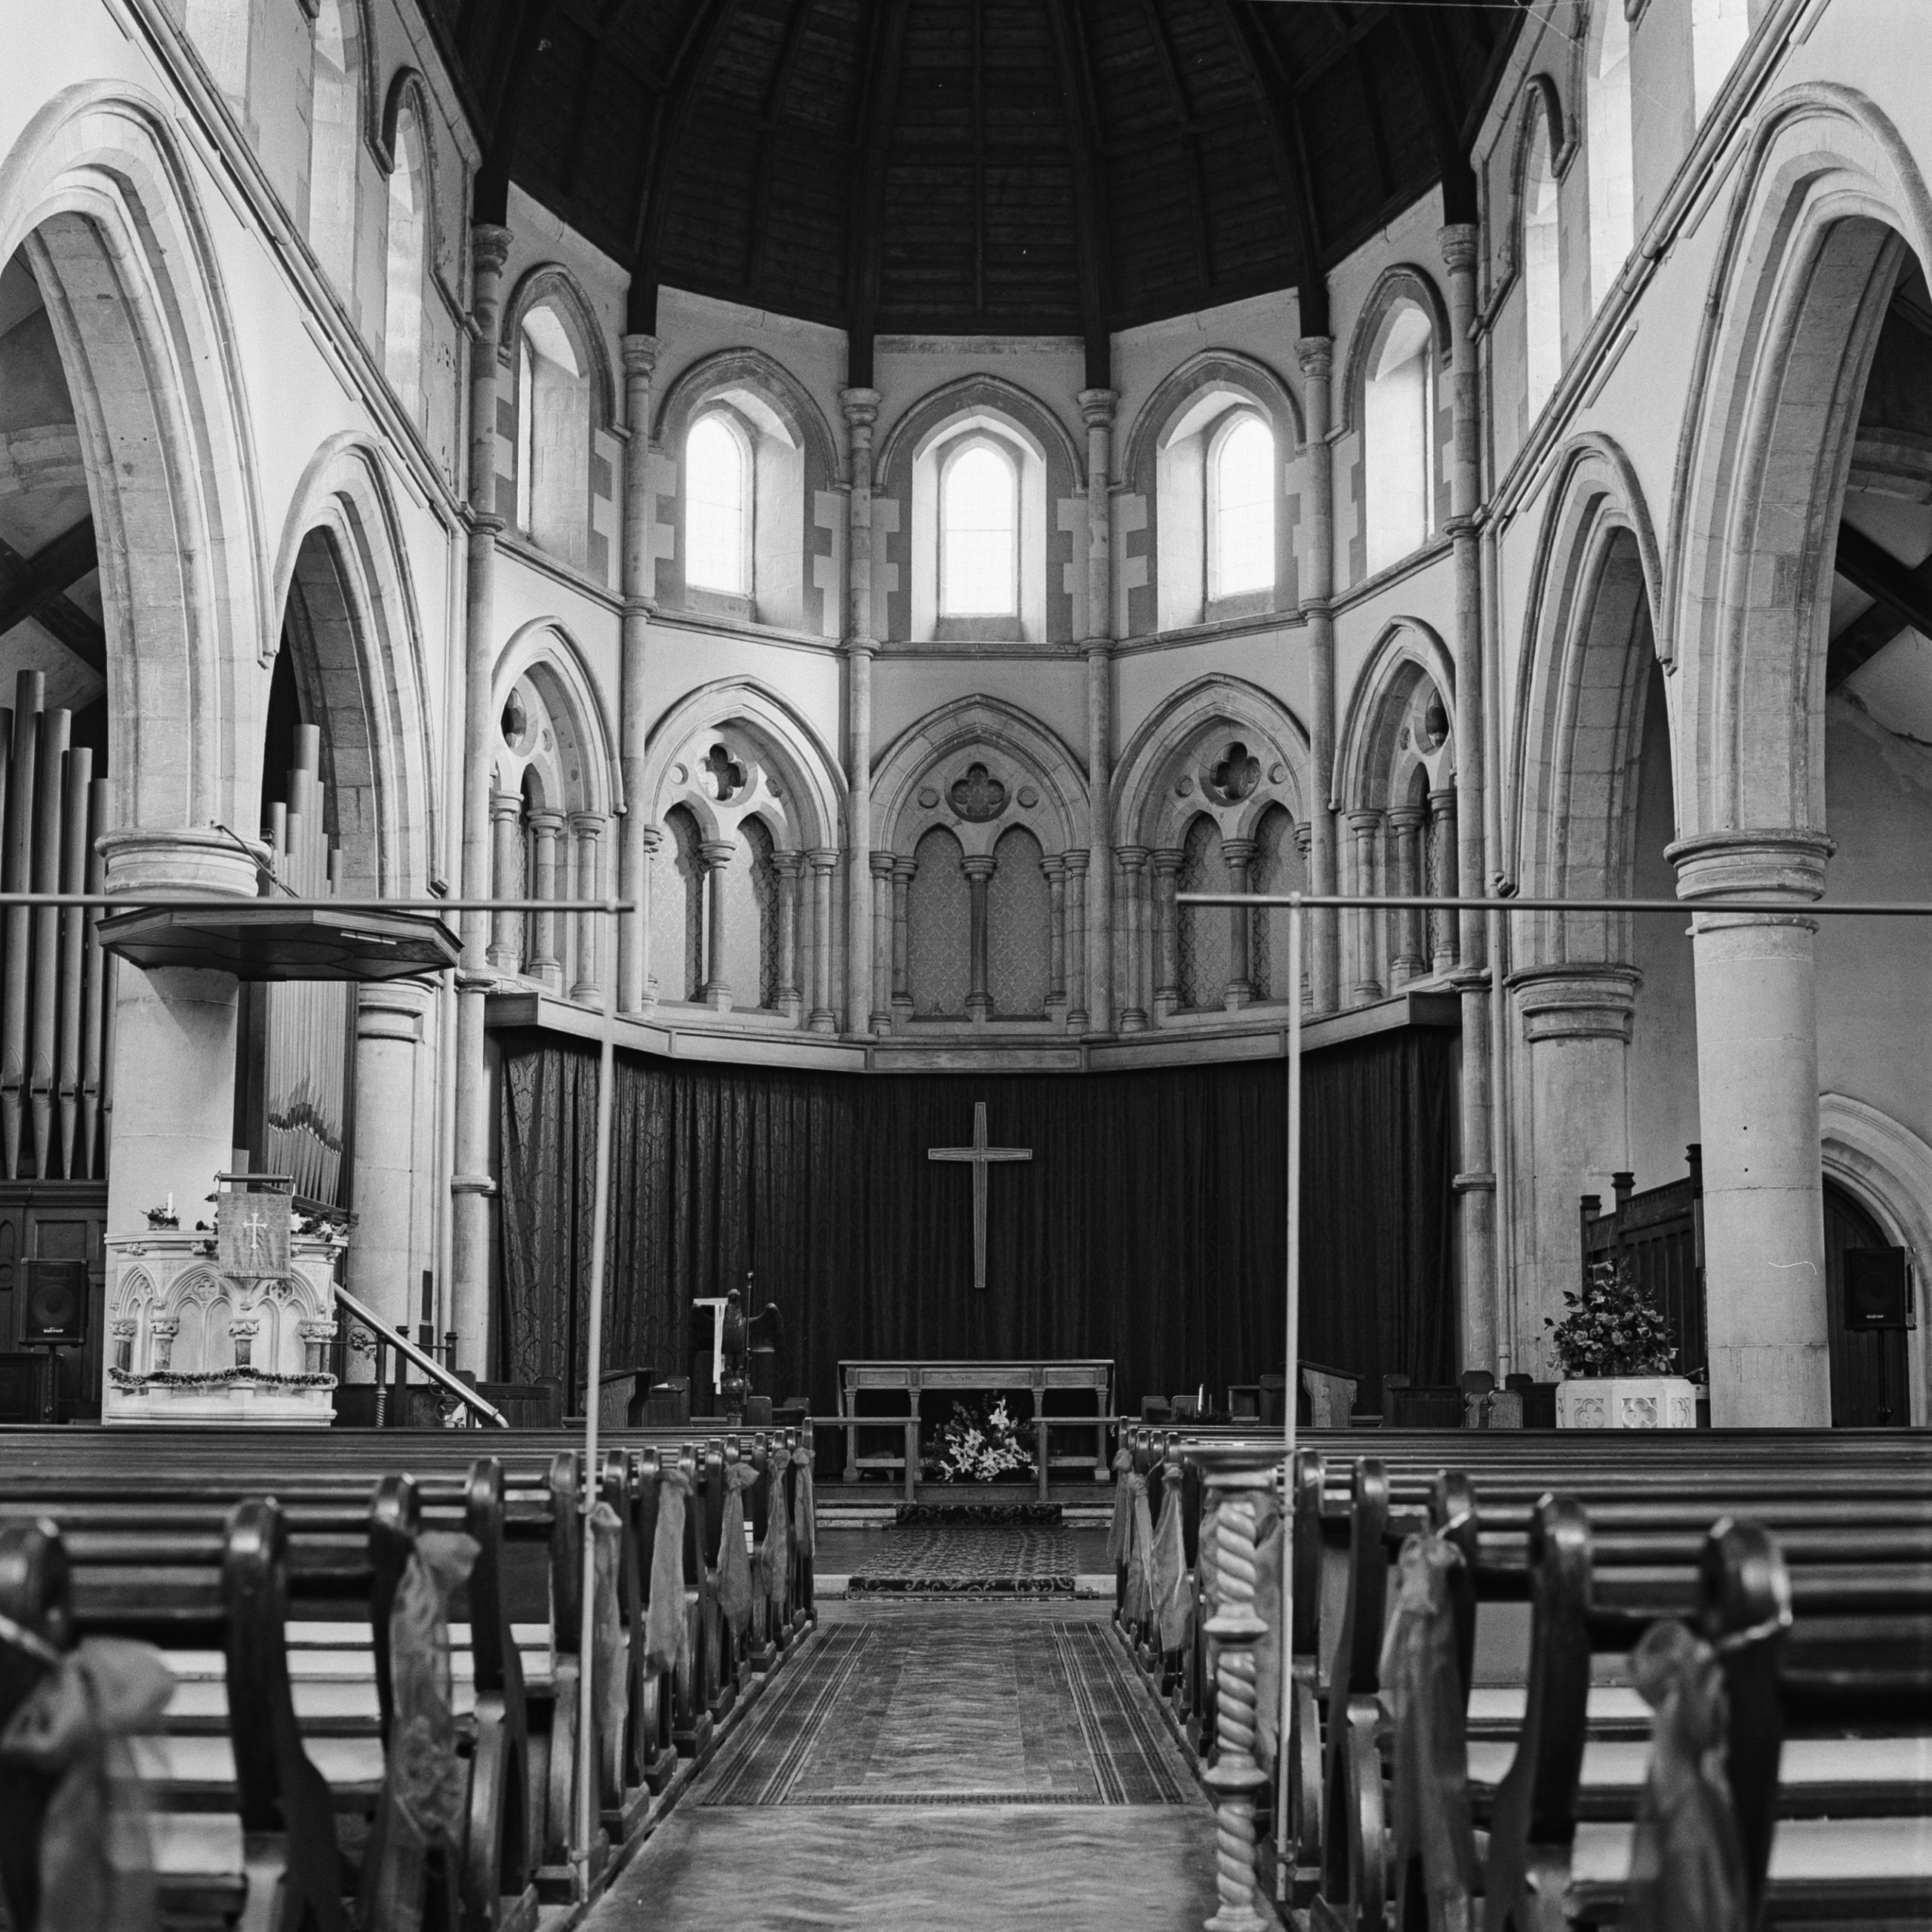
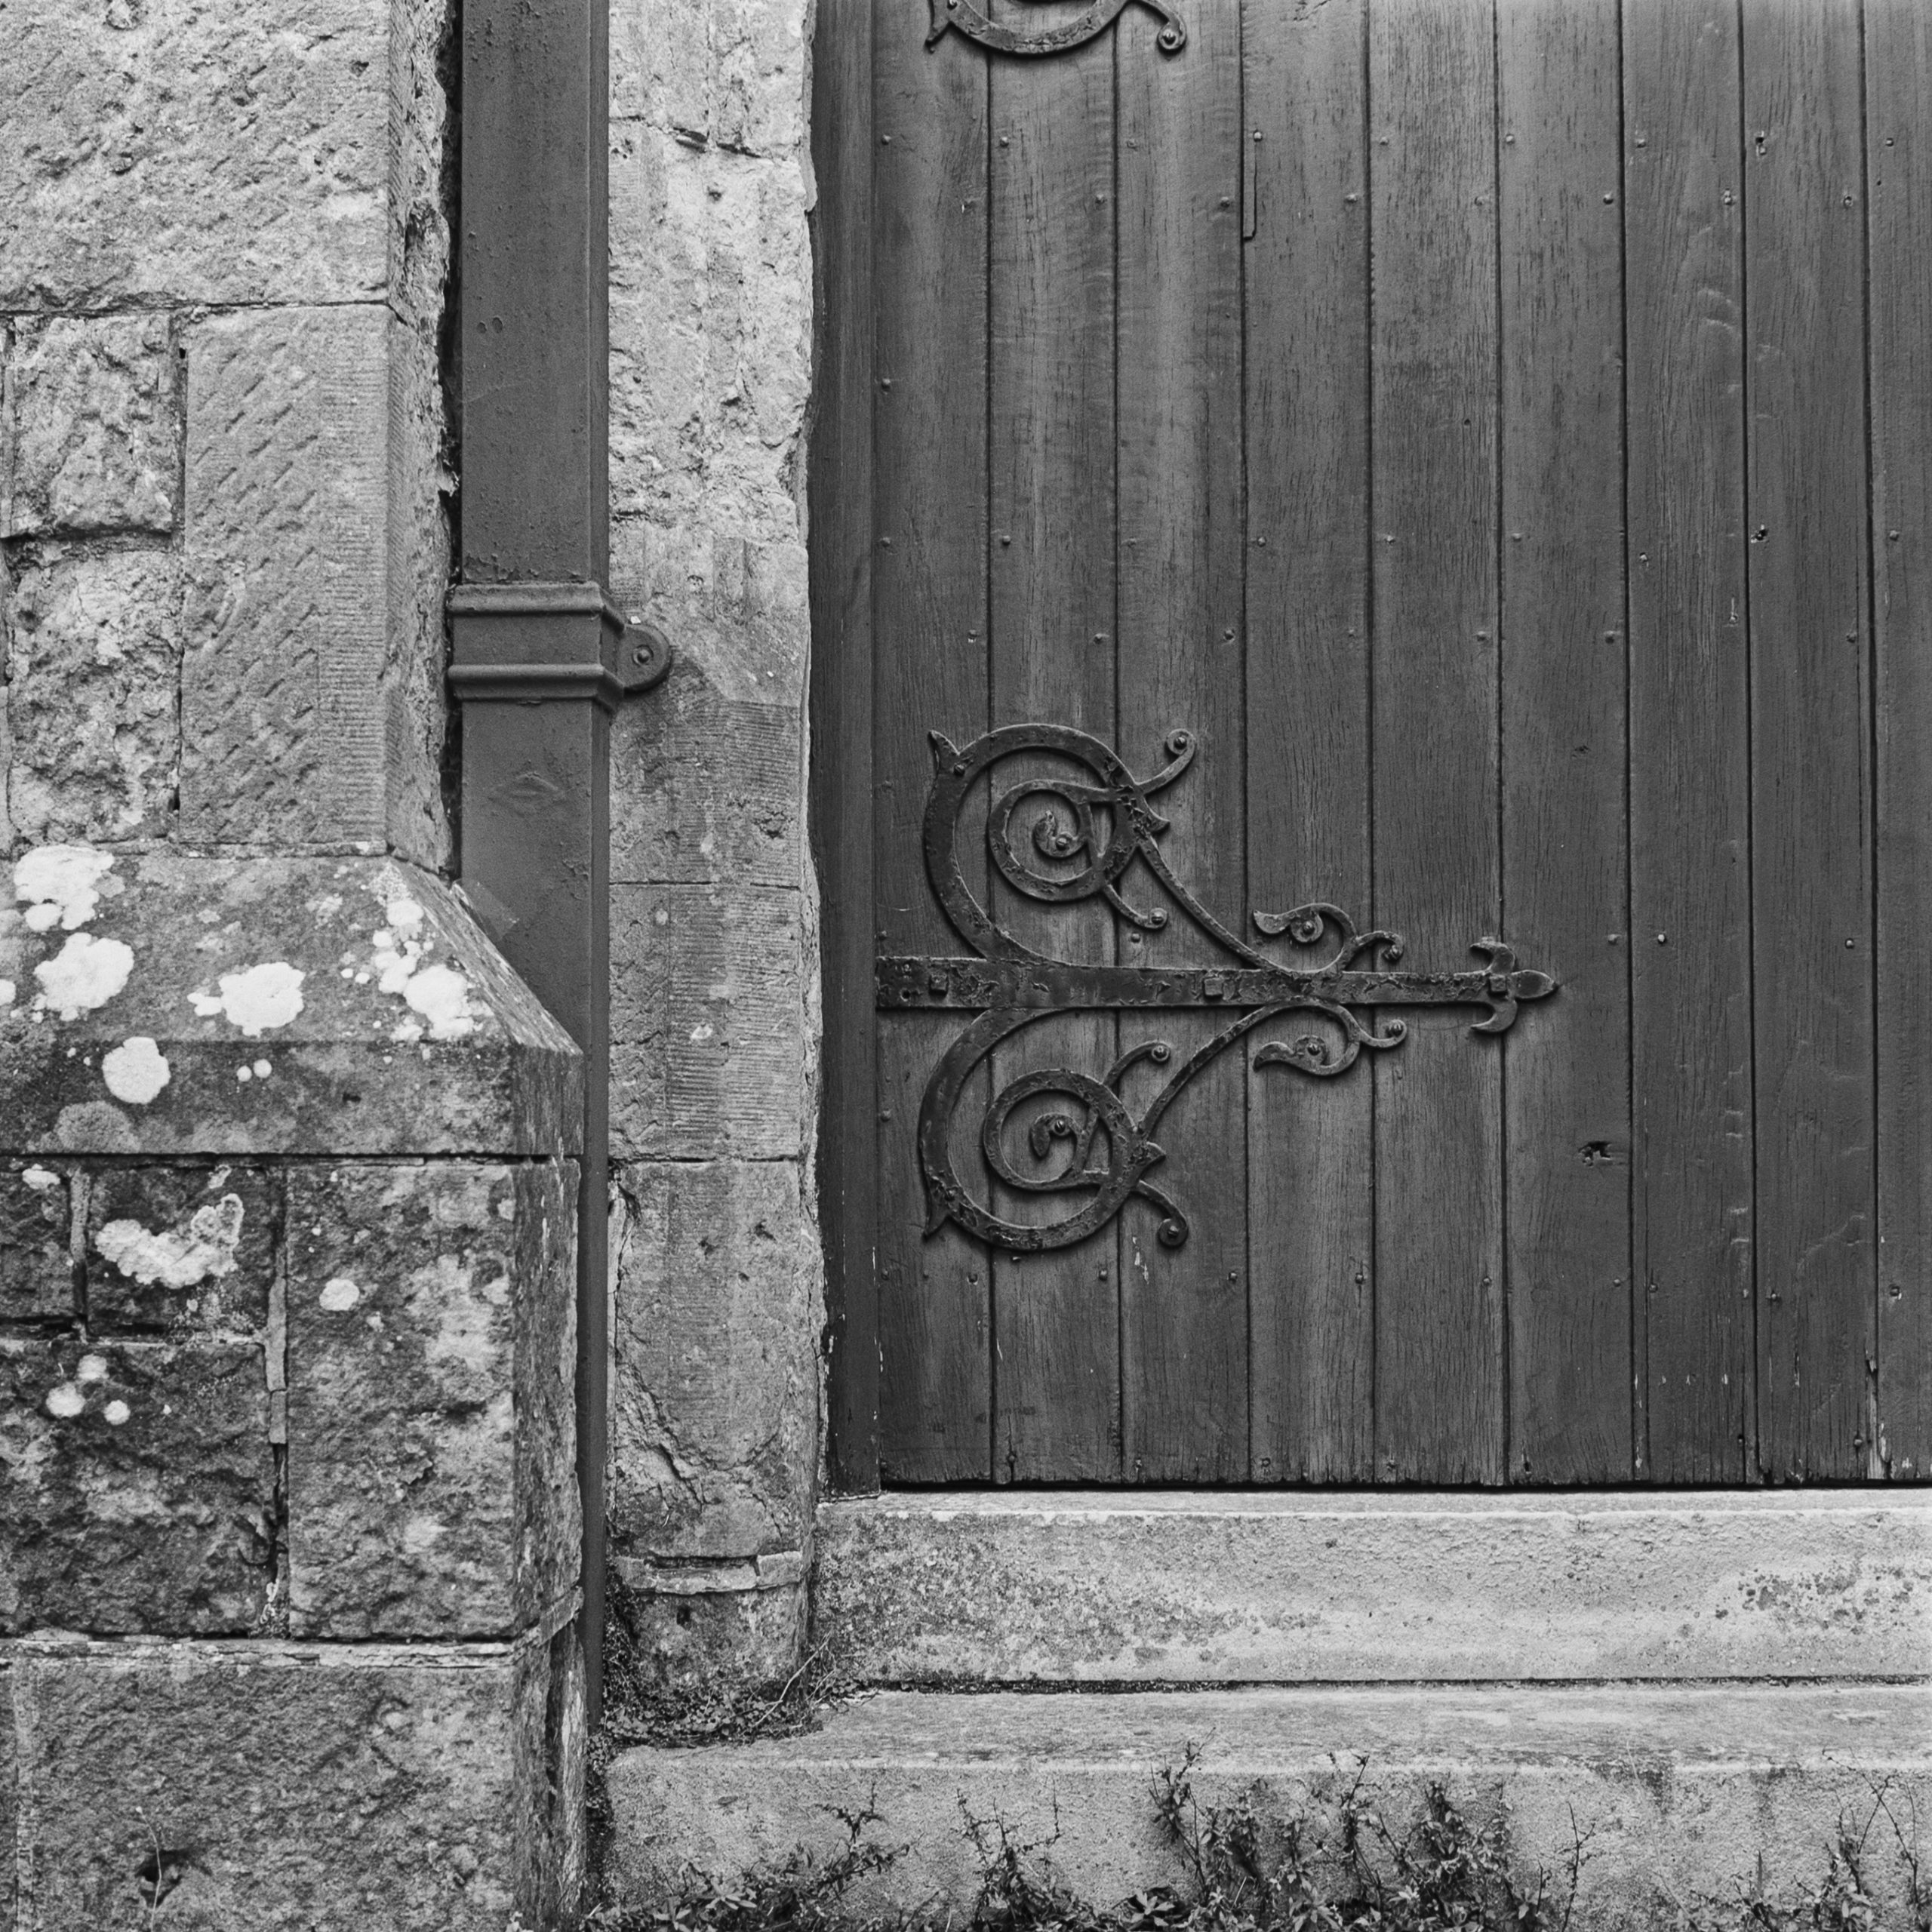
I went out with a Pentacon Six and a roll of Ilford Delta 100 to test the light meter on film and also made a vlog showing the tests, and the meter worked well! Here are some photographs I shot using the meter after developing in 510 PYRO.


Going Forward
I will definitely be using this light meter occasionally on camera but will more than likely put it in my pocket or bag every time I go out taking pictures. It is so small it would be a crime not to carry it about. You never know!
As I said it won’t replace my Sekonic for an accurate reading but for certain cameras and subjects it will be ideal and I am so pleased I got this product to test. I now know they work very well.
Harman Phoenix 200 Film
A NEW Colour Film!
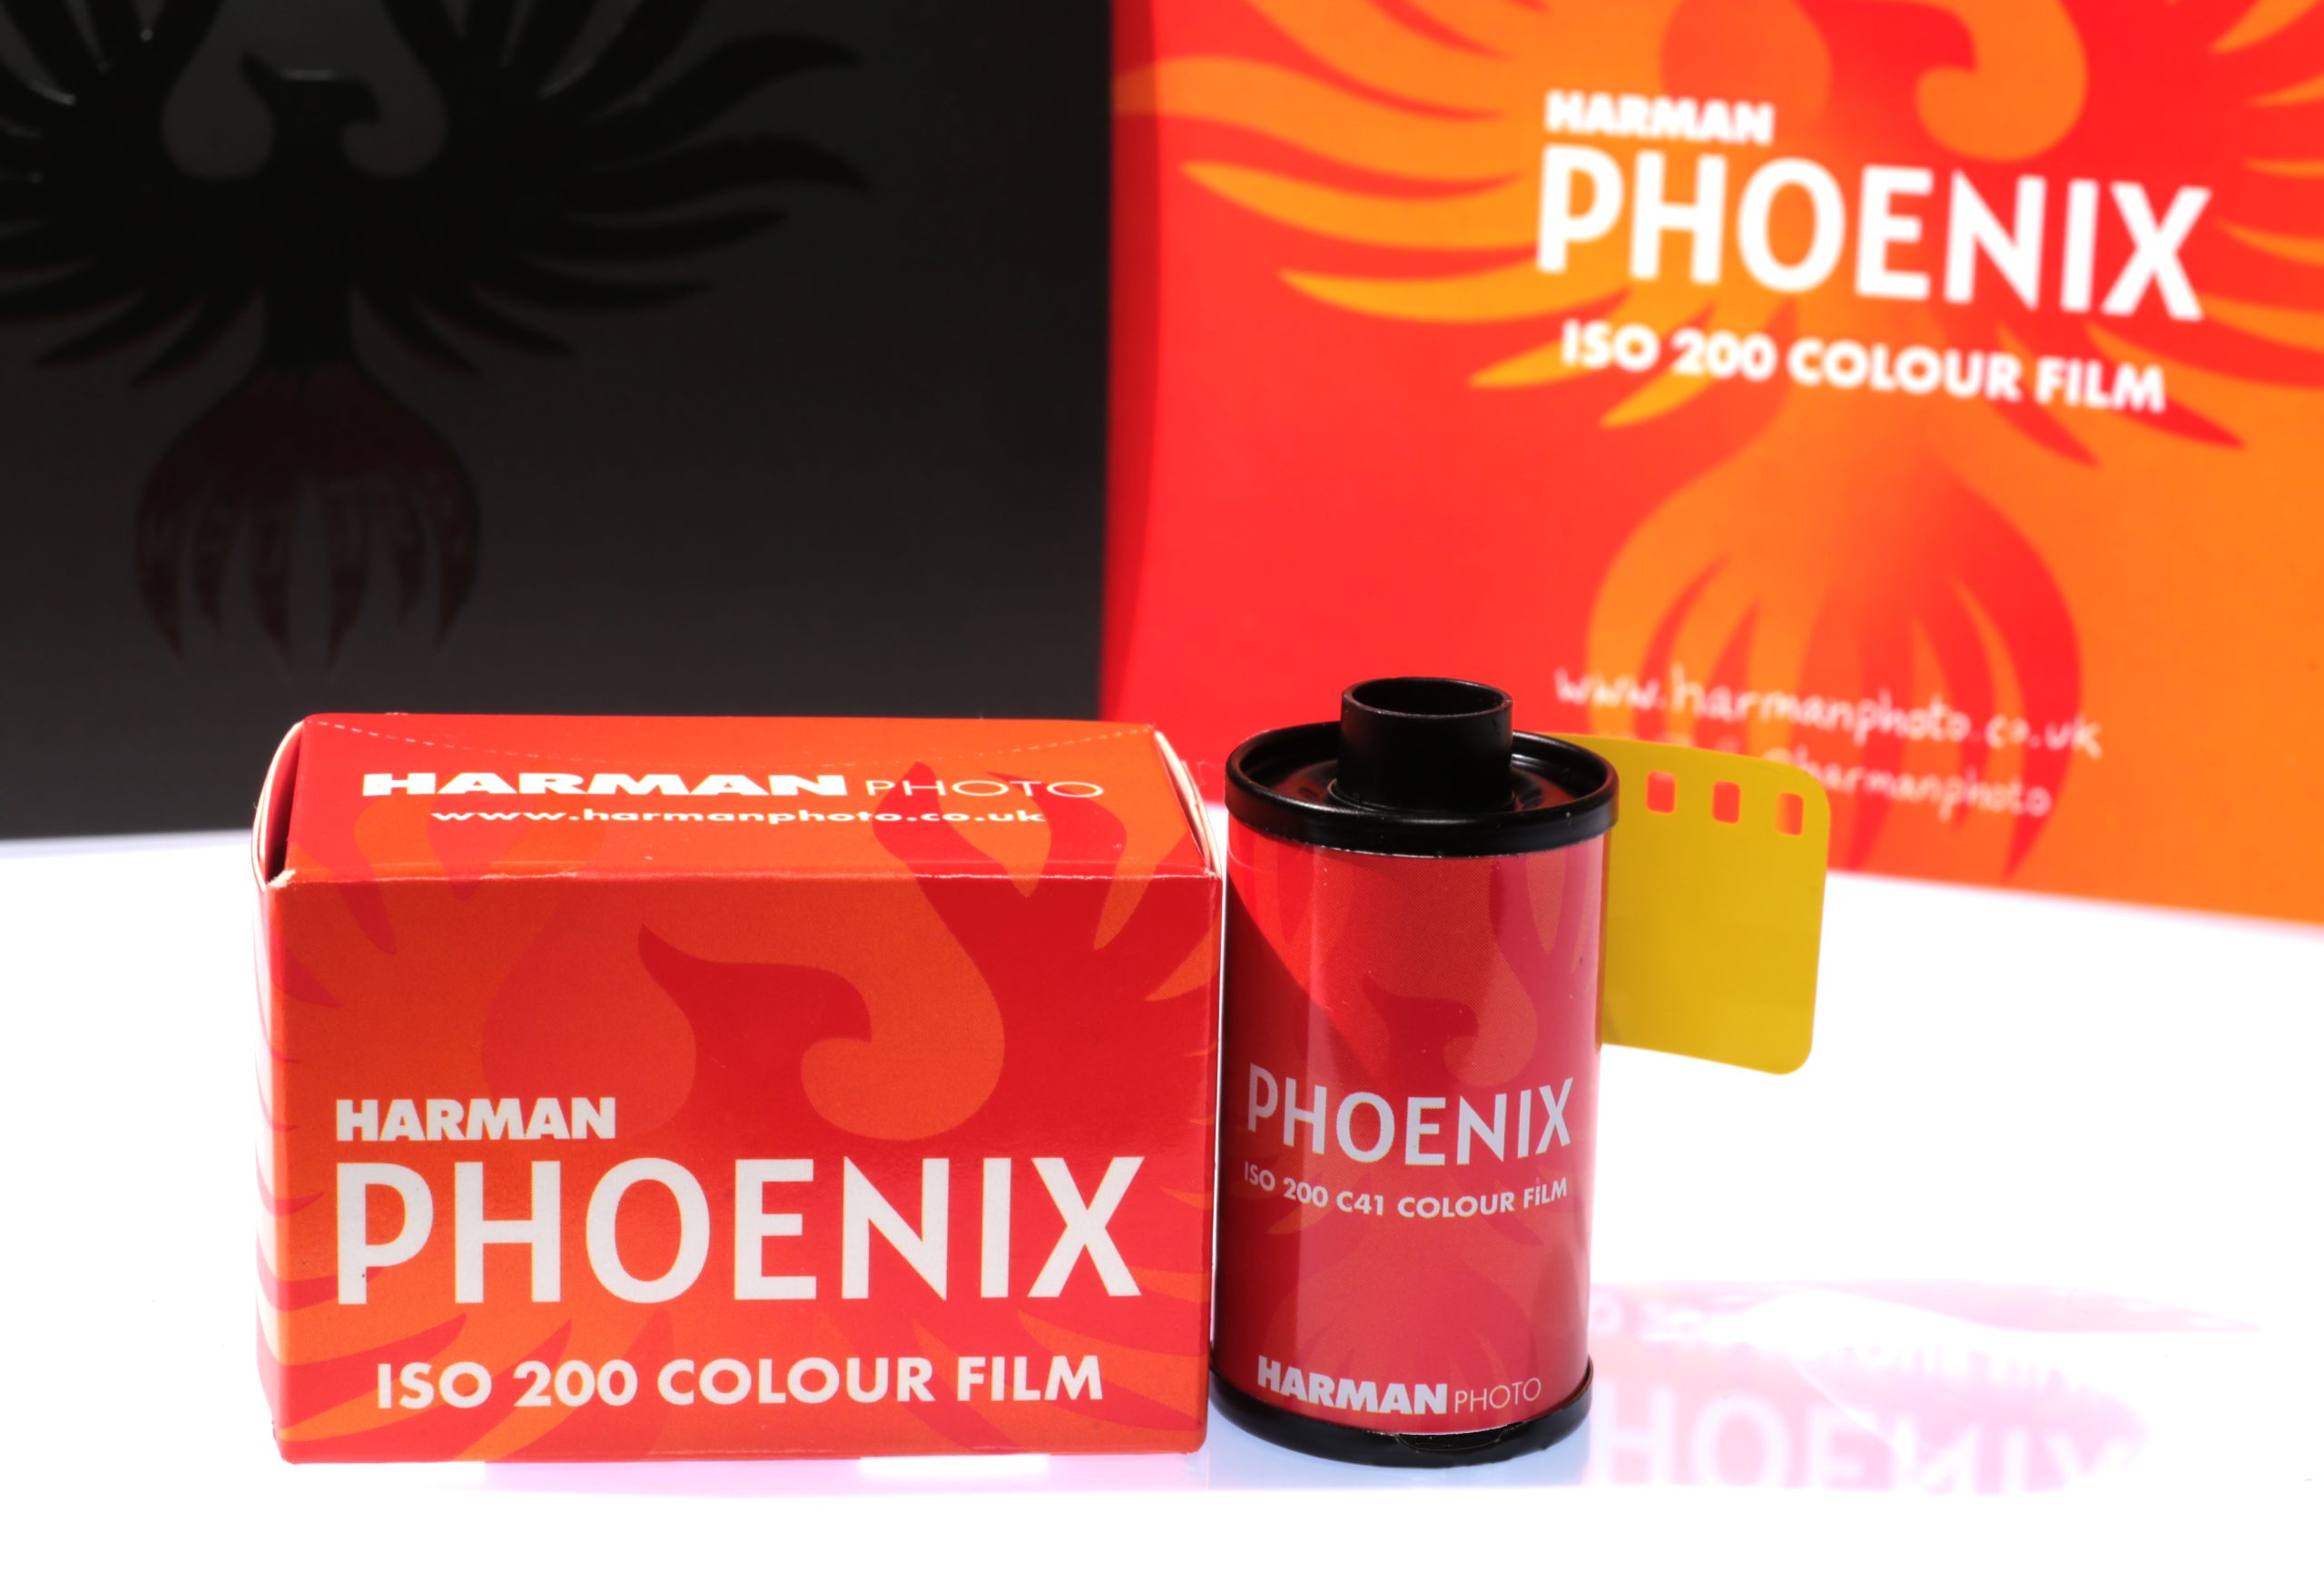
Harman Technologies have been busy since late 2022 making their own branded colour film and were very excited to, after a very good and teasing coming soon campaign, release the film to the public on the 1st of December 2023. And I was one of the lucky few to receive a few rolls of the film to try out!
You can see my Video Review here.

Me and Colour Film
Most of you know I am a Black and White Film shooter, that dabbles here and there with colour film. And when I do I just go off and shoot anything I see that I see would look nice in colour. Get back to my darkroom, develop the film myself and the buck stops there! I don’t have a colour head in my darkroom to make colour prints. Well, I do have the Intrepid Enlarger if I want to set it up but then I have to have the chemicals and paper also and for the amount of colour I shoot I am just happy to shoot and scan. But, I do enjoy seeing the results after shooting, developing and scanning, so I was excited to see what this new Harman Phoenix 200 can do. And I liked it!
My go to for anything colour is usually digital. I photographed a Ford dealership a while back for the company website and I shot Digital and Film. Kodak Portra 160. After pulling the film out of Photoshop I literally couldn’t tell the difference between the film and digital shots. Not much fun in that. But with Phoenix 200 I could not match with digital without the use of some funky Photoshop Filters.
Phoenix 200
Hold the negative thoughts for now. Harman say this is an “Experimental” Film, for us and for them. It is their first attempt at creating a brand new colour film at their plant in Mobberly, UK. I can’t imagine the amount of sleepless nights their tech boffins had making a colour film from scratch. Let alone all the testing, boardroom meetings, financing and everything else that goes on behind the scenes bringing a new product to the market. Especially the Film community. It is relentless! After all, if we are going to spend money we want quality, right?
My first attempt
I loaded the film into a Nikon F6 with a Zeiss Milvus 50mm f1.4 lens. My car was having a new windscreen fitted so I had time to walk around this industrial estate taking photos. The lighting conditions was Light overcast and looking for colour on a cold winters day was limiting.
I developed the film in Cinestills C41 Kit in a rotary processor keeping all the temperatures up to standard. I then scanned using my DSLR andput the imaged into a NEW software from Filmomat called “Smart Convert”. I just pressed the Auto Button and the software did it all for me. Lazy, I know! But I got good results.


Wow. I was amazed… I had pictures!
Were they the best colour pictures I’ve seen? No. But then to be honest, I’m not one for being a colour film connoisseur. I’m just looking to make sure my colours look right and I have sharpness and detail. And there is plenty of that.
Grain? It’s there. Surprisingly strong for a 200 film but it’s nice. It tells you are shooting film, enjoy it ad embrace the grain. Unless you don’t like grain. But that is part of its character.
Harman say the film is contrasty and quirky. And it is.
Next Roll
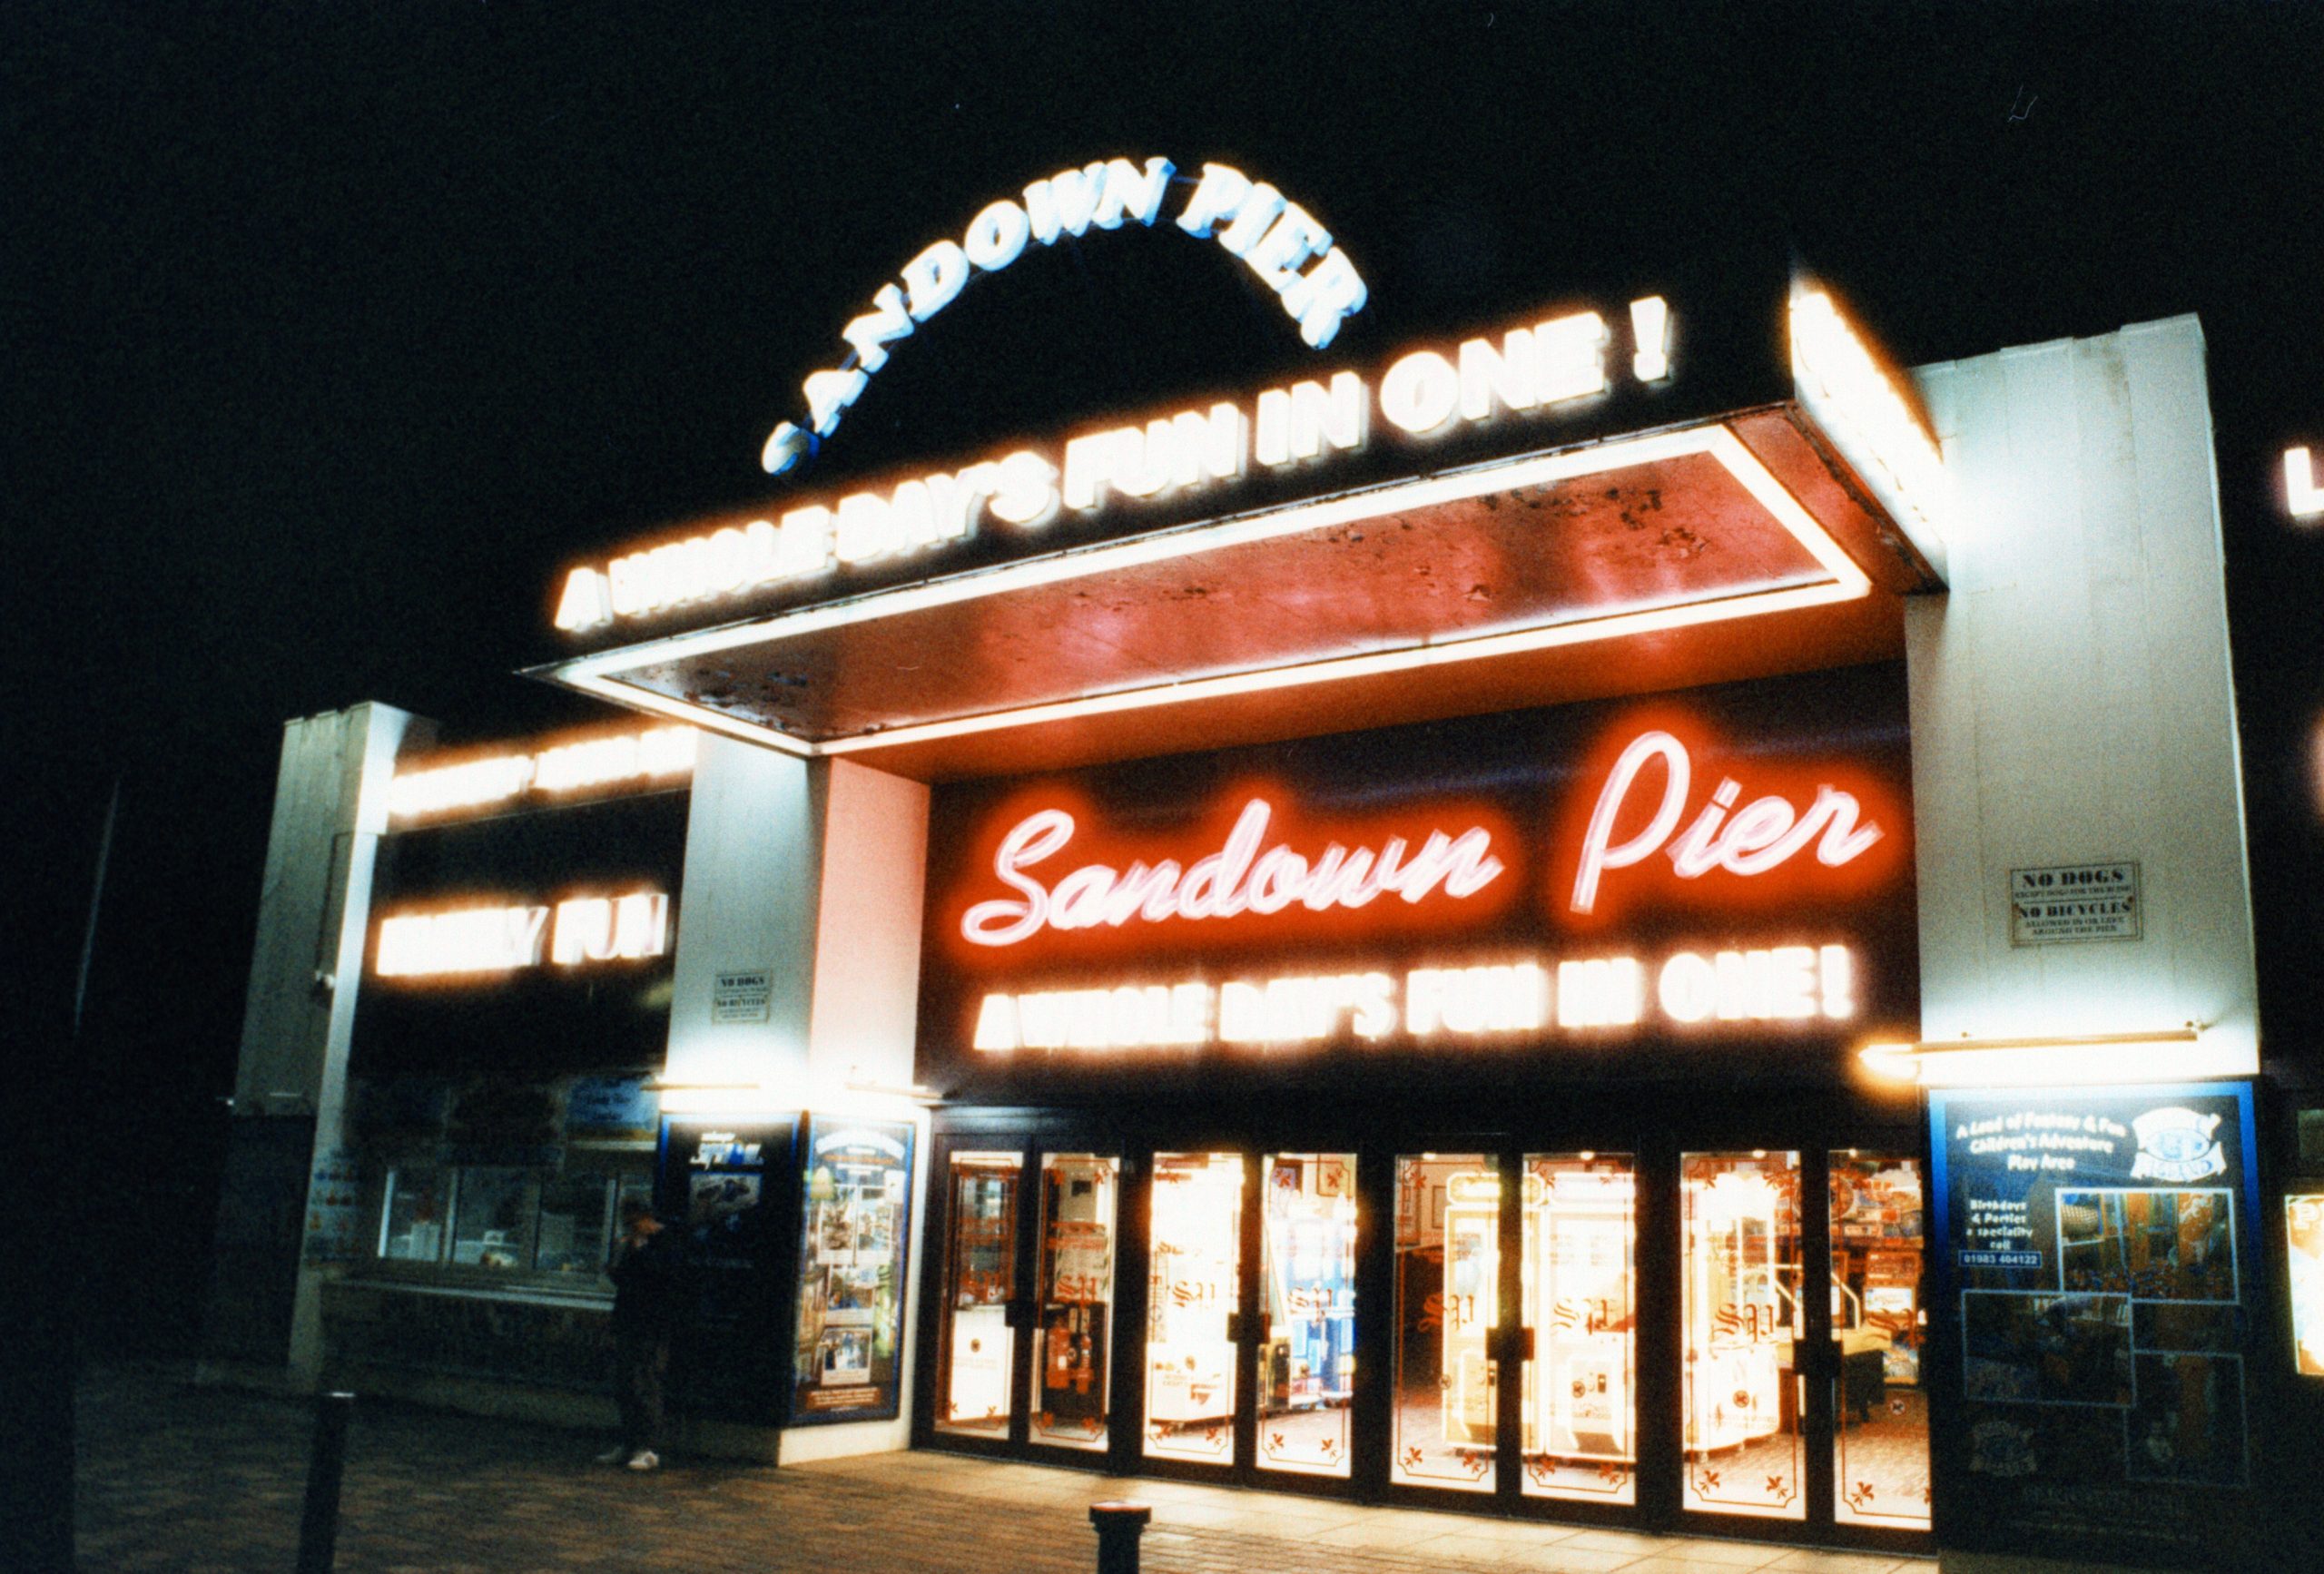
I wanted to see how this film performed at night. Something I rarely do is night photography so I went to places where there would be lots of light, and not living in a City I am left with petrol stations and fast food places.
I changed cameras to a Nikon FM3A with a 28mm Lens and a tripod and cable release.
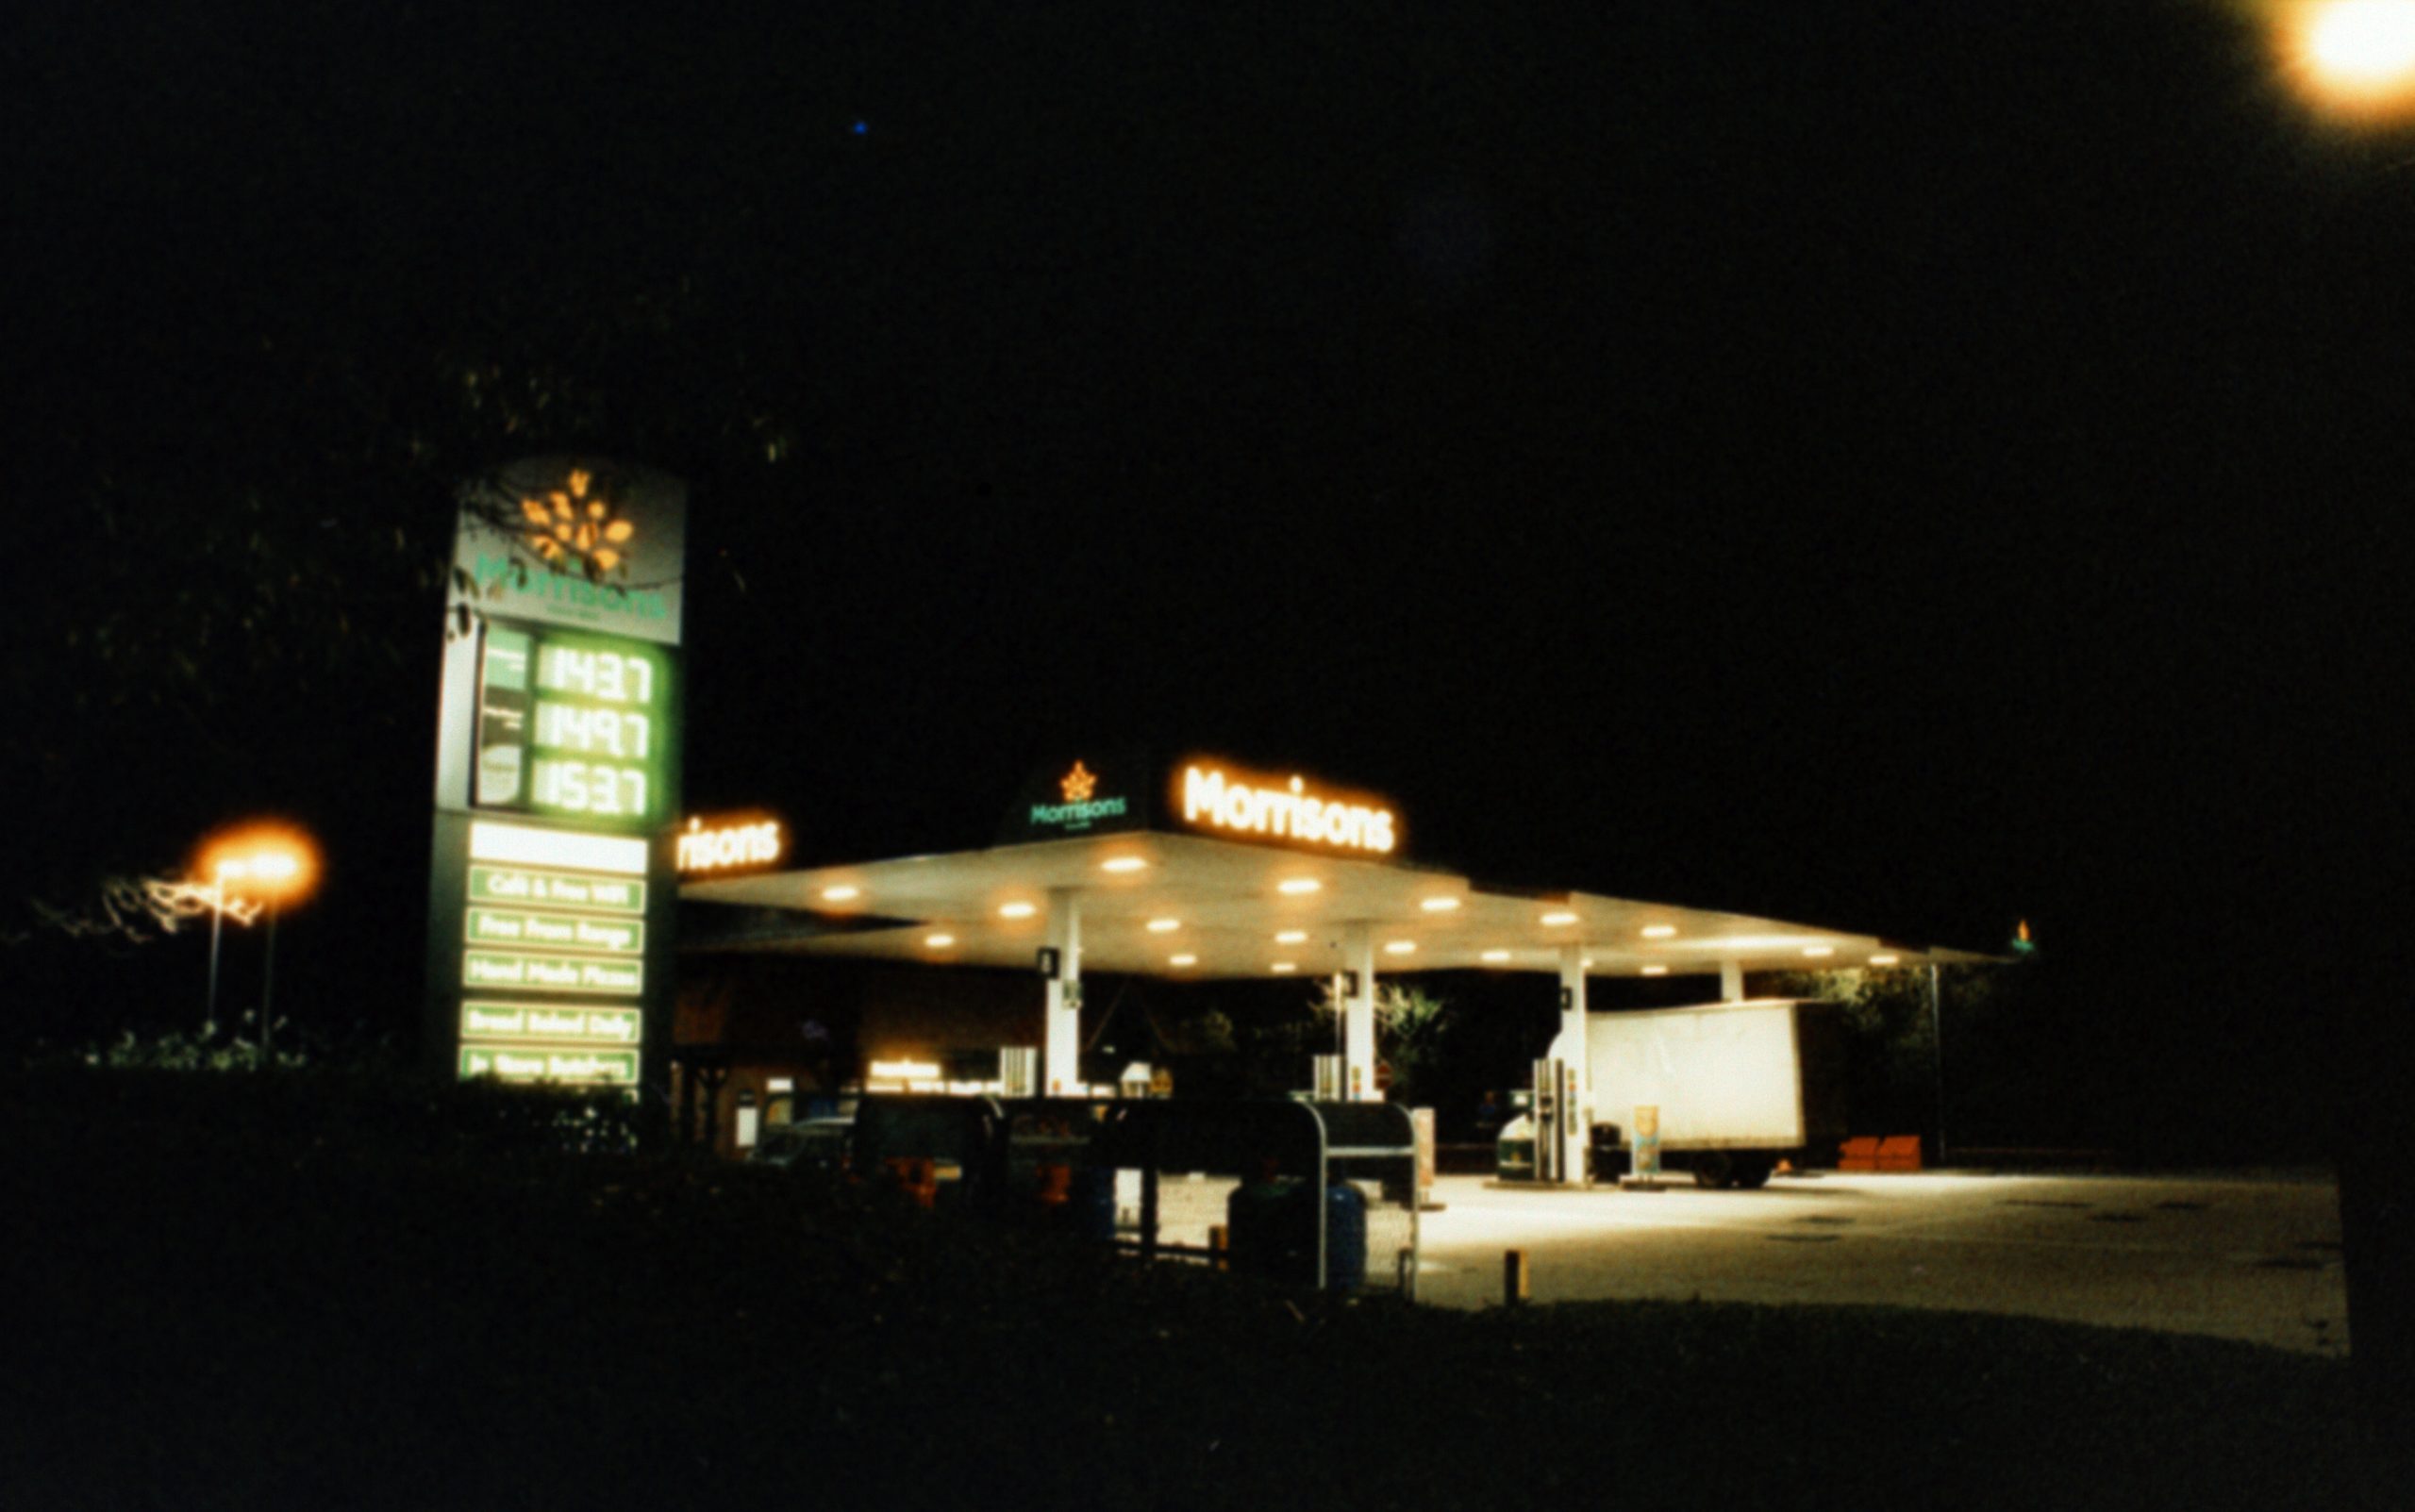

Well that was interesting!
Harman do say this film gives halation in the highlights. Very bloomy!
These were around 2 second exposures at f11.
The next day my car was in for its annual MOT, where I had a couple of hours to walk around and shoot the rest of the roll. This should have been easy but I was overthinking for colour, and being winter, there was not a lot of colour about.

Above, 180mm Lens

I gave up outside and decided to shoot the rest of the roll indoors on various subjects which was interesting as I am now looking for colour as apposed to shades of grey.
Contrasty eh!

Portrait of my Daughter, Jess. Her face is pale but maybe that was due to the silver reflector I used for some bounce. The reds are so vibrant and her blue eyes.
Final thought
I liken film to food. Whats nice to some isn’t to others. These are the photos I took and developed at home. Do I like them? I don’t think I would risk shooting a wedding on this film, however, it is, as Harman say, quirky! Nice visible grain, vibrant, contrasty and appears sharp too!
If you put it against digital you will see the difference. And as I said about shooting Kodak Portra 160 at the Ford dealership, I can see its film! Big time! And I guess thats why we enjoy shooting film over digital. For the look. Some will like the look of Phoenix 200 and some will not. Thats choice.
As film photographers we all have a fantastic choice out there to choose from when deciding how we want our prints to look. Films, developers, toners, papers. It’s all there to show a different look and feel to our photographs without looking for a quirky filter to make our digital photos stand out.
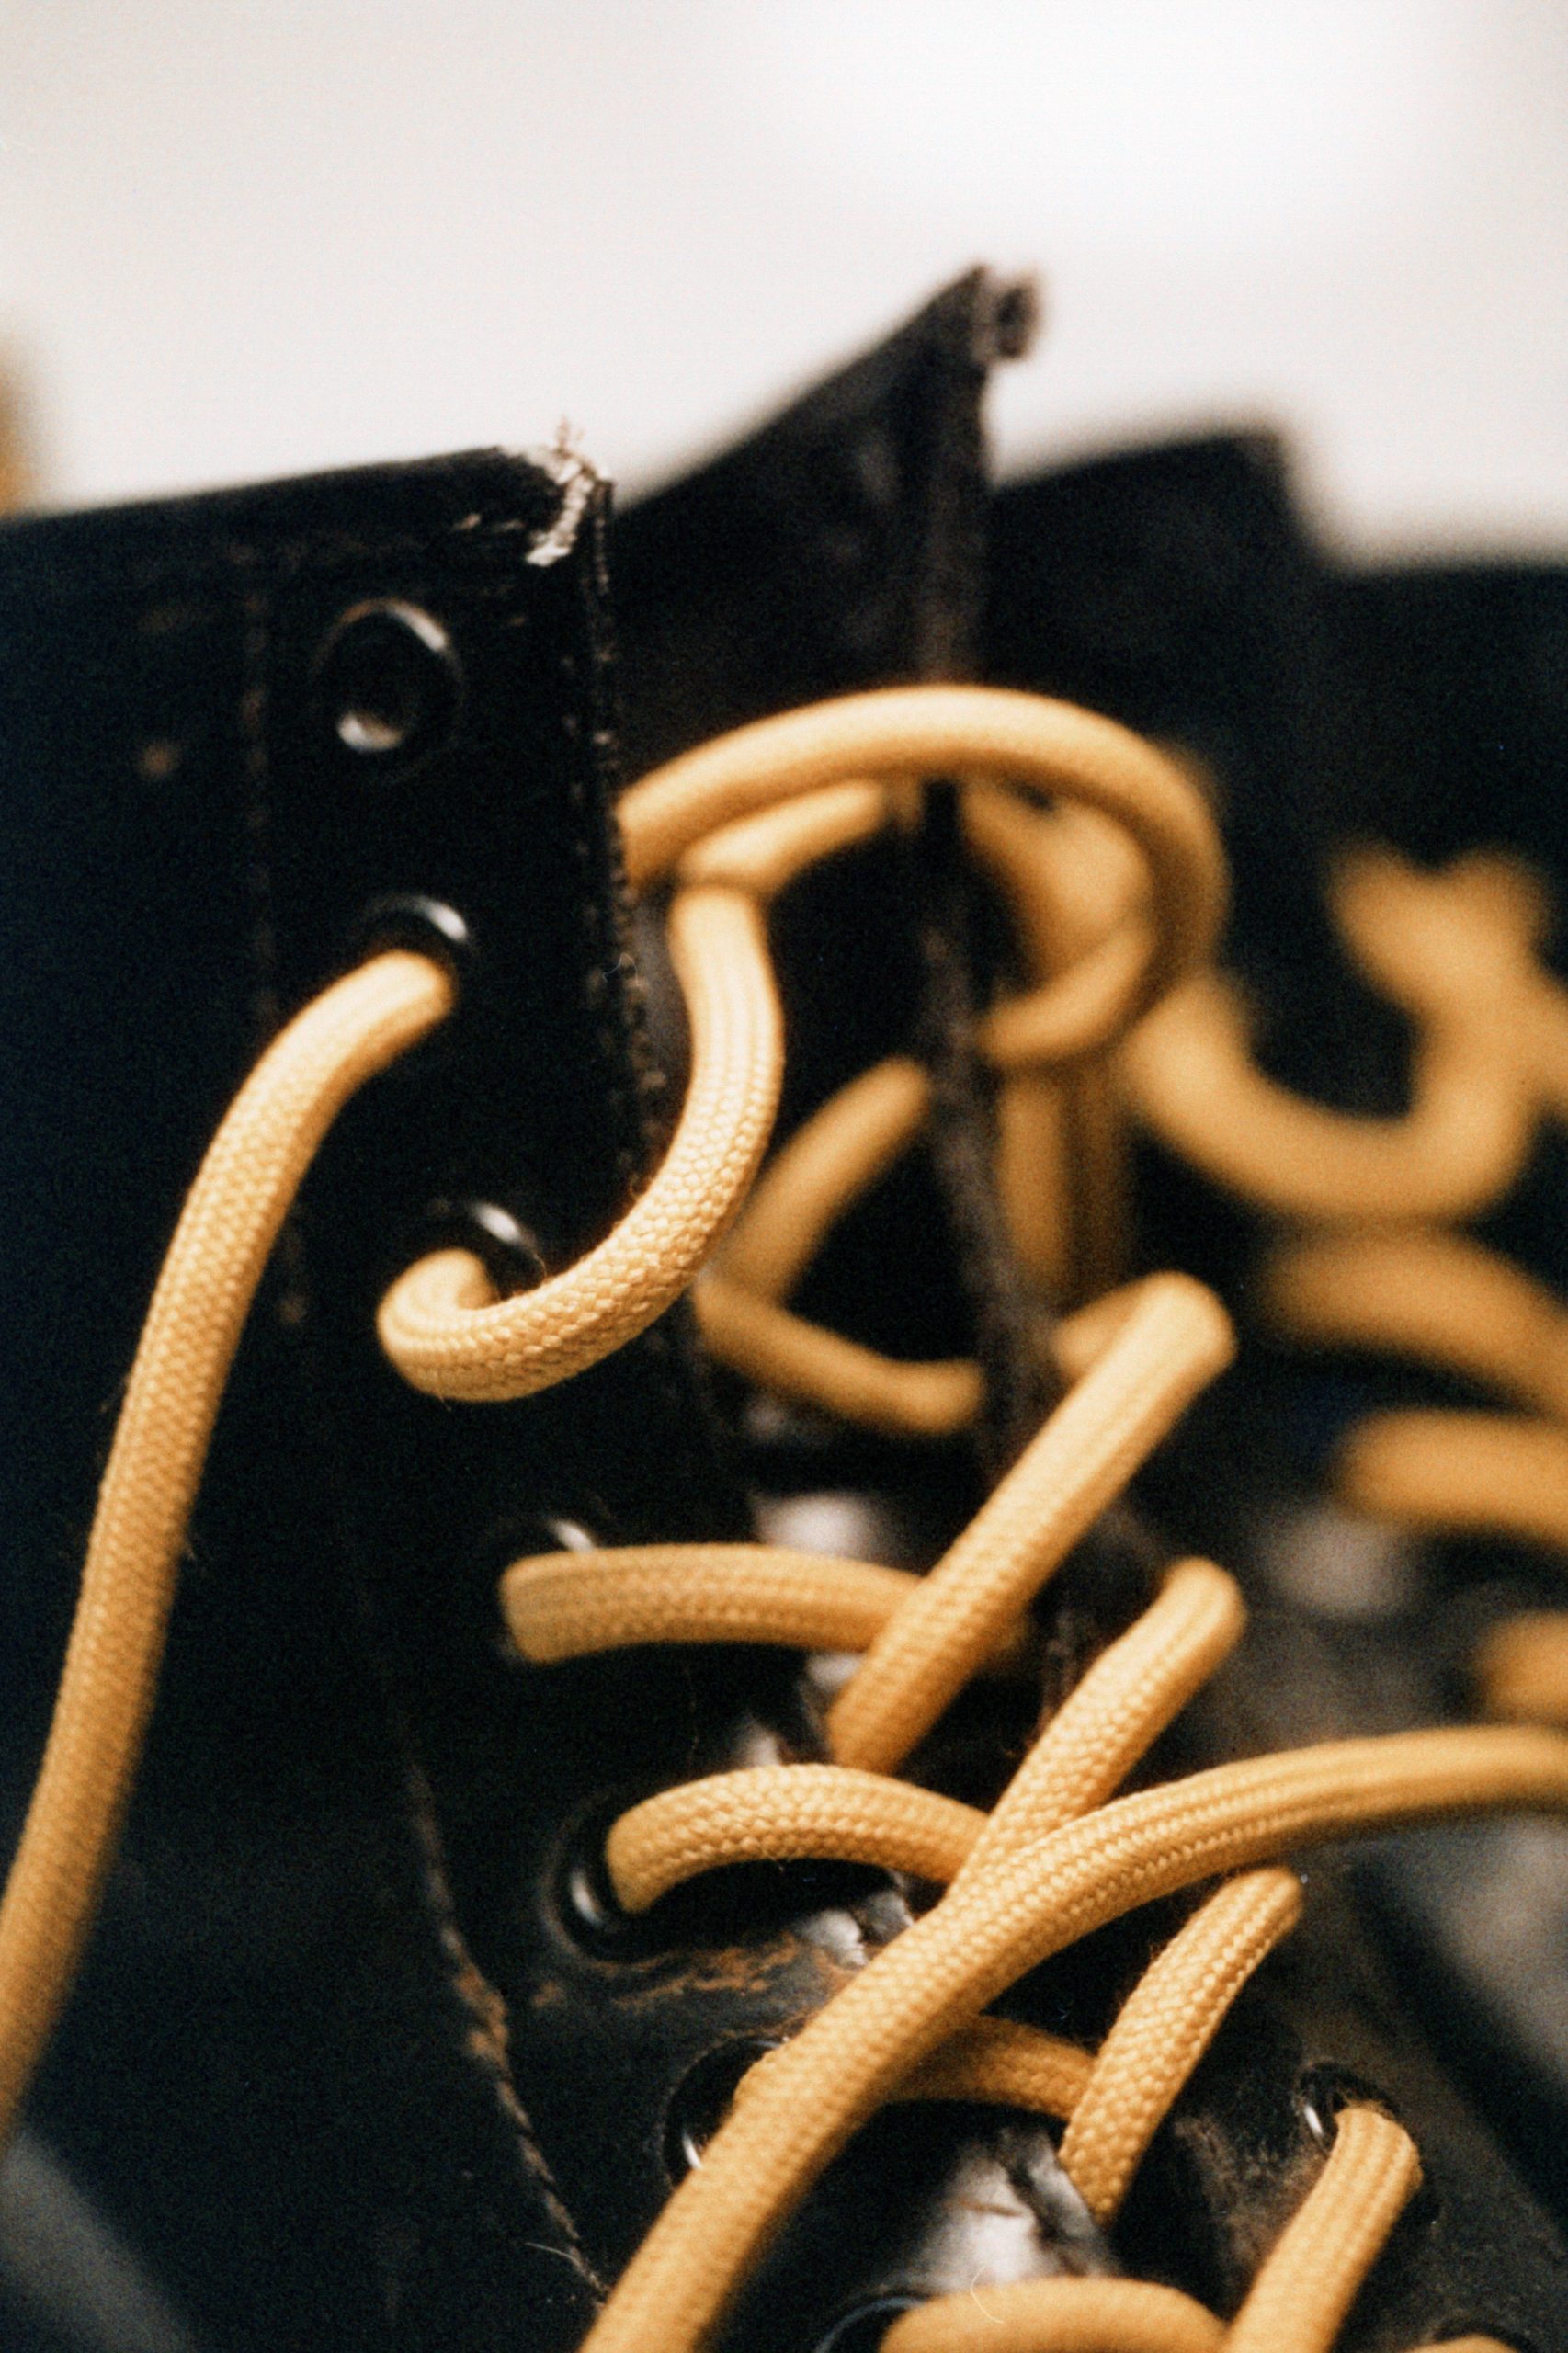
Take a project for example. Whatever it may be. Shooting an entire project on this film wouldn’t be a bad idea at all. A gallery displaying your selected prints of fruit, portraits, boot laces or whatever. They would all have that similar unique look. Spectators would admire the collection if the subject, lighting and photography was good and maybe some would get curious as to what film was used. Some would know nothing of film and enjoy the art of your work.
I would love to shoot this film in the summer possibly at a car show and as an added bonus would love to make prints from it.
Above all I think this film is exciting news for the film community that manufacturers such as Harman have that confidence in the community to invest in making a brand new colour film when they are already ticking along nicely with their black and white products. And let’s face it, we thought film was on its way out a decade ago.
So well done to Harman for bringing this film onto the shelves. No doubt they will receive much feedback and listen to the community and make tweaks if necessary. And if all goes well look to manufacturing other colour films for the future in 35mm and 120 formats.
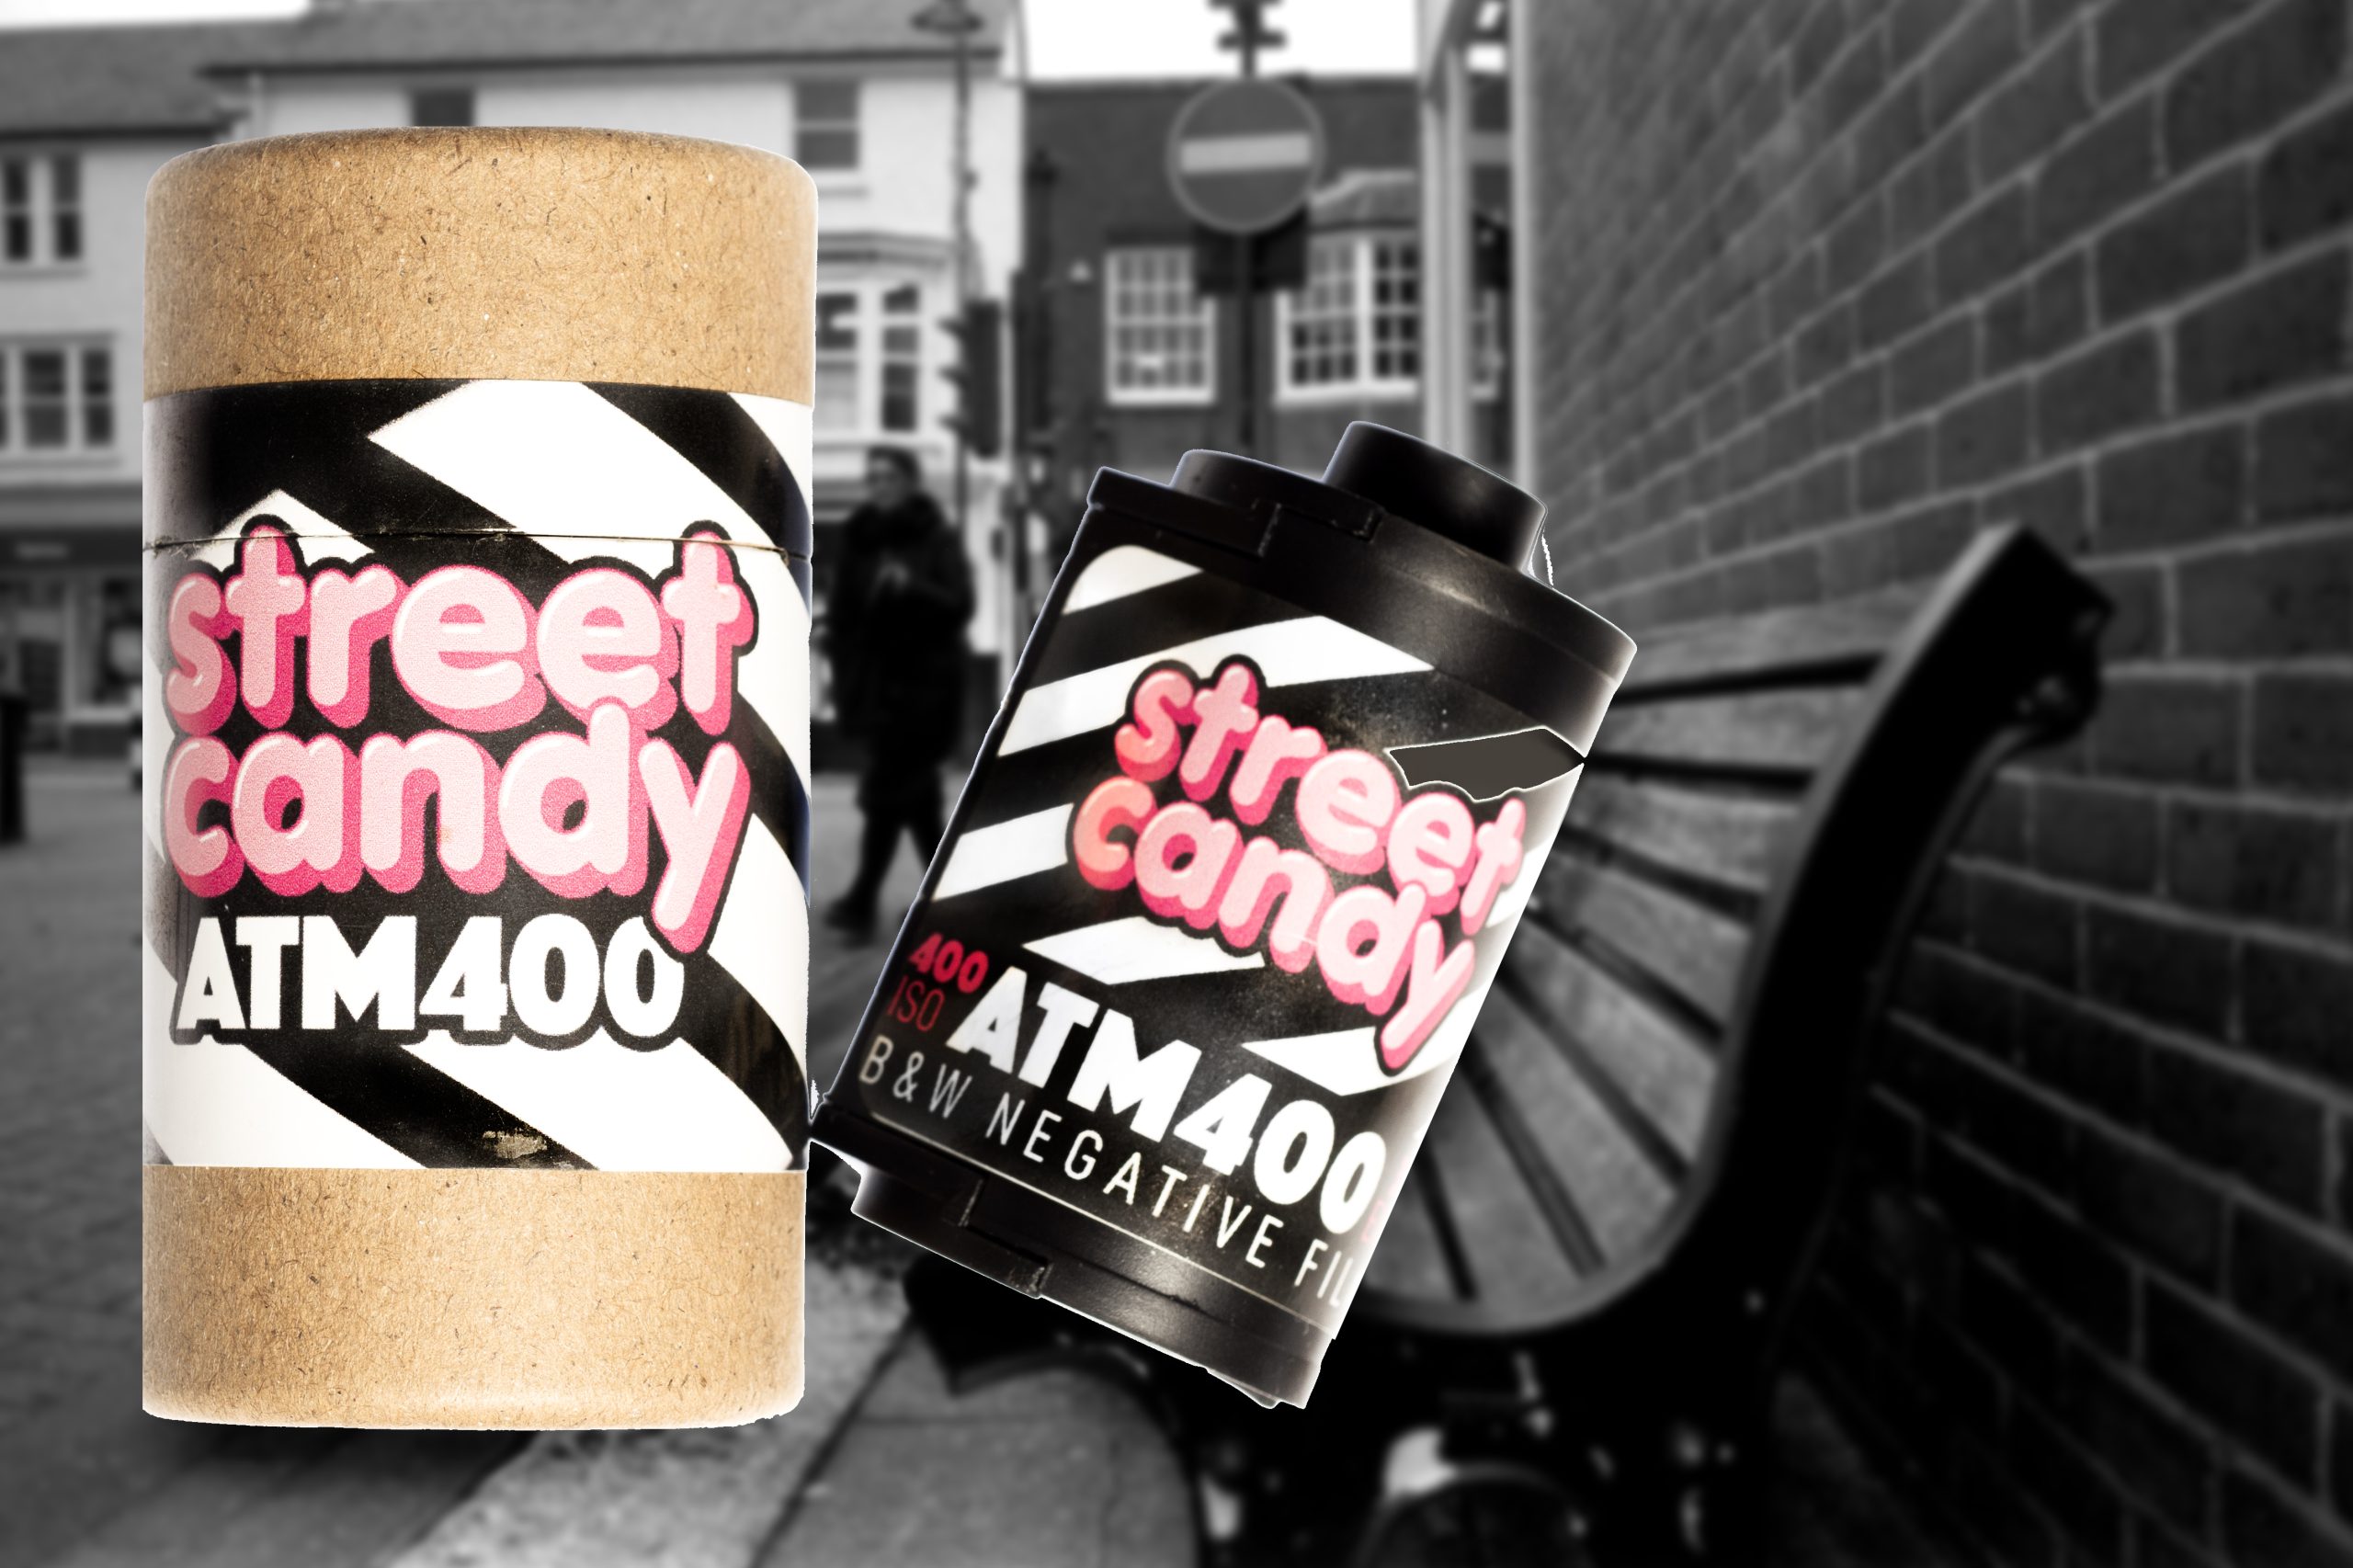
Street Candy ATM 400
With so many funky Black & White films on the market today it’s almost too tempting to grab a roll and see what the fuss is all about.
With only a few factories actually making film today you sometimes wonder if the films you are buying are a repackaged film that already exits in an otherwise boring jacket or one of the funky surveillance films, X-Ray films or CCTV films that were used before everything went digital that are being snapped up by the 1000ft roll and spooled into 35mm cassettes for us to play with.
Street Candy ATM 400 is exactly that. And Street Candy make no hype about it not being so. They state on their website that their ATM 400 Film IS a film that was used back in the day at ATM Cash Machines.
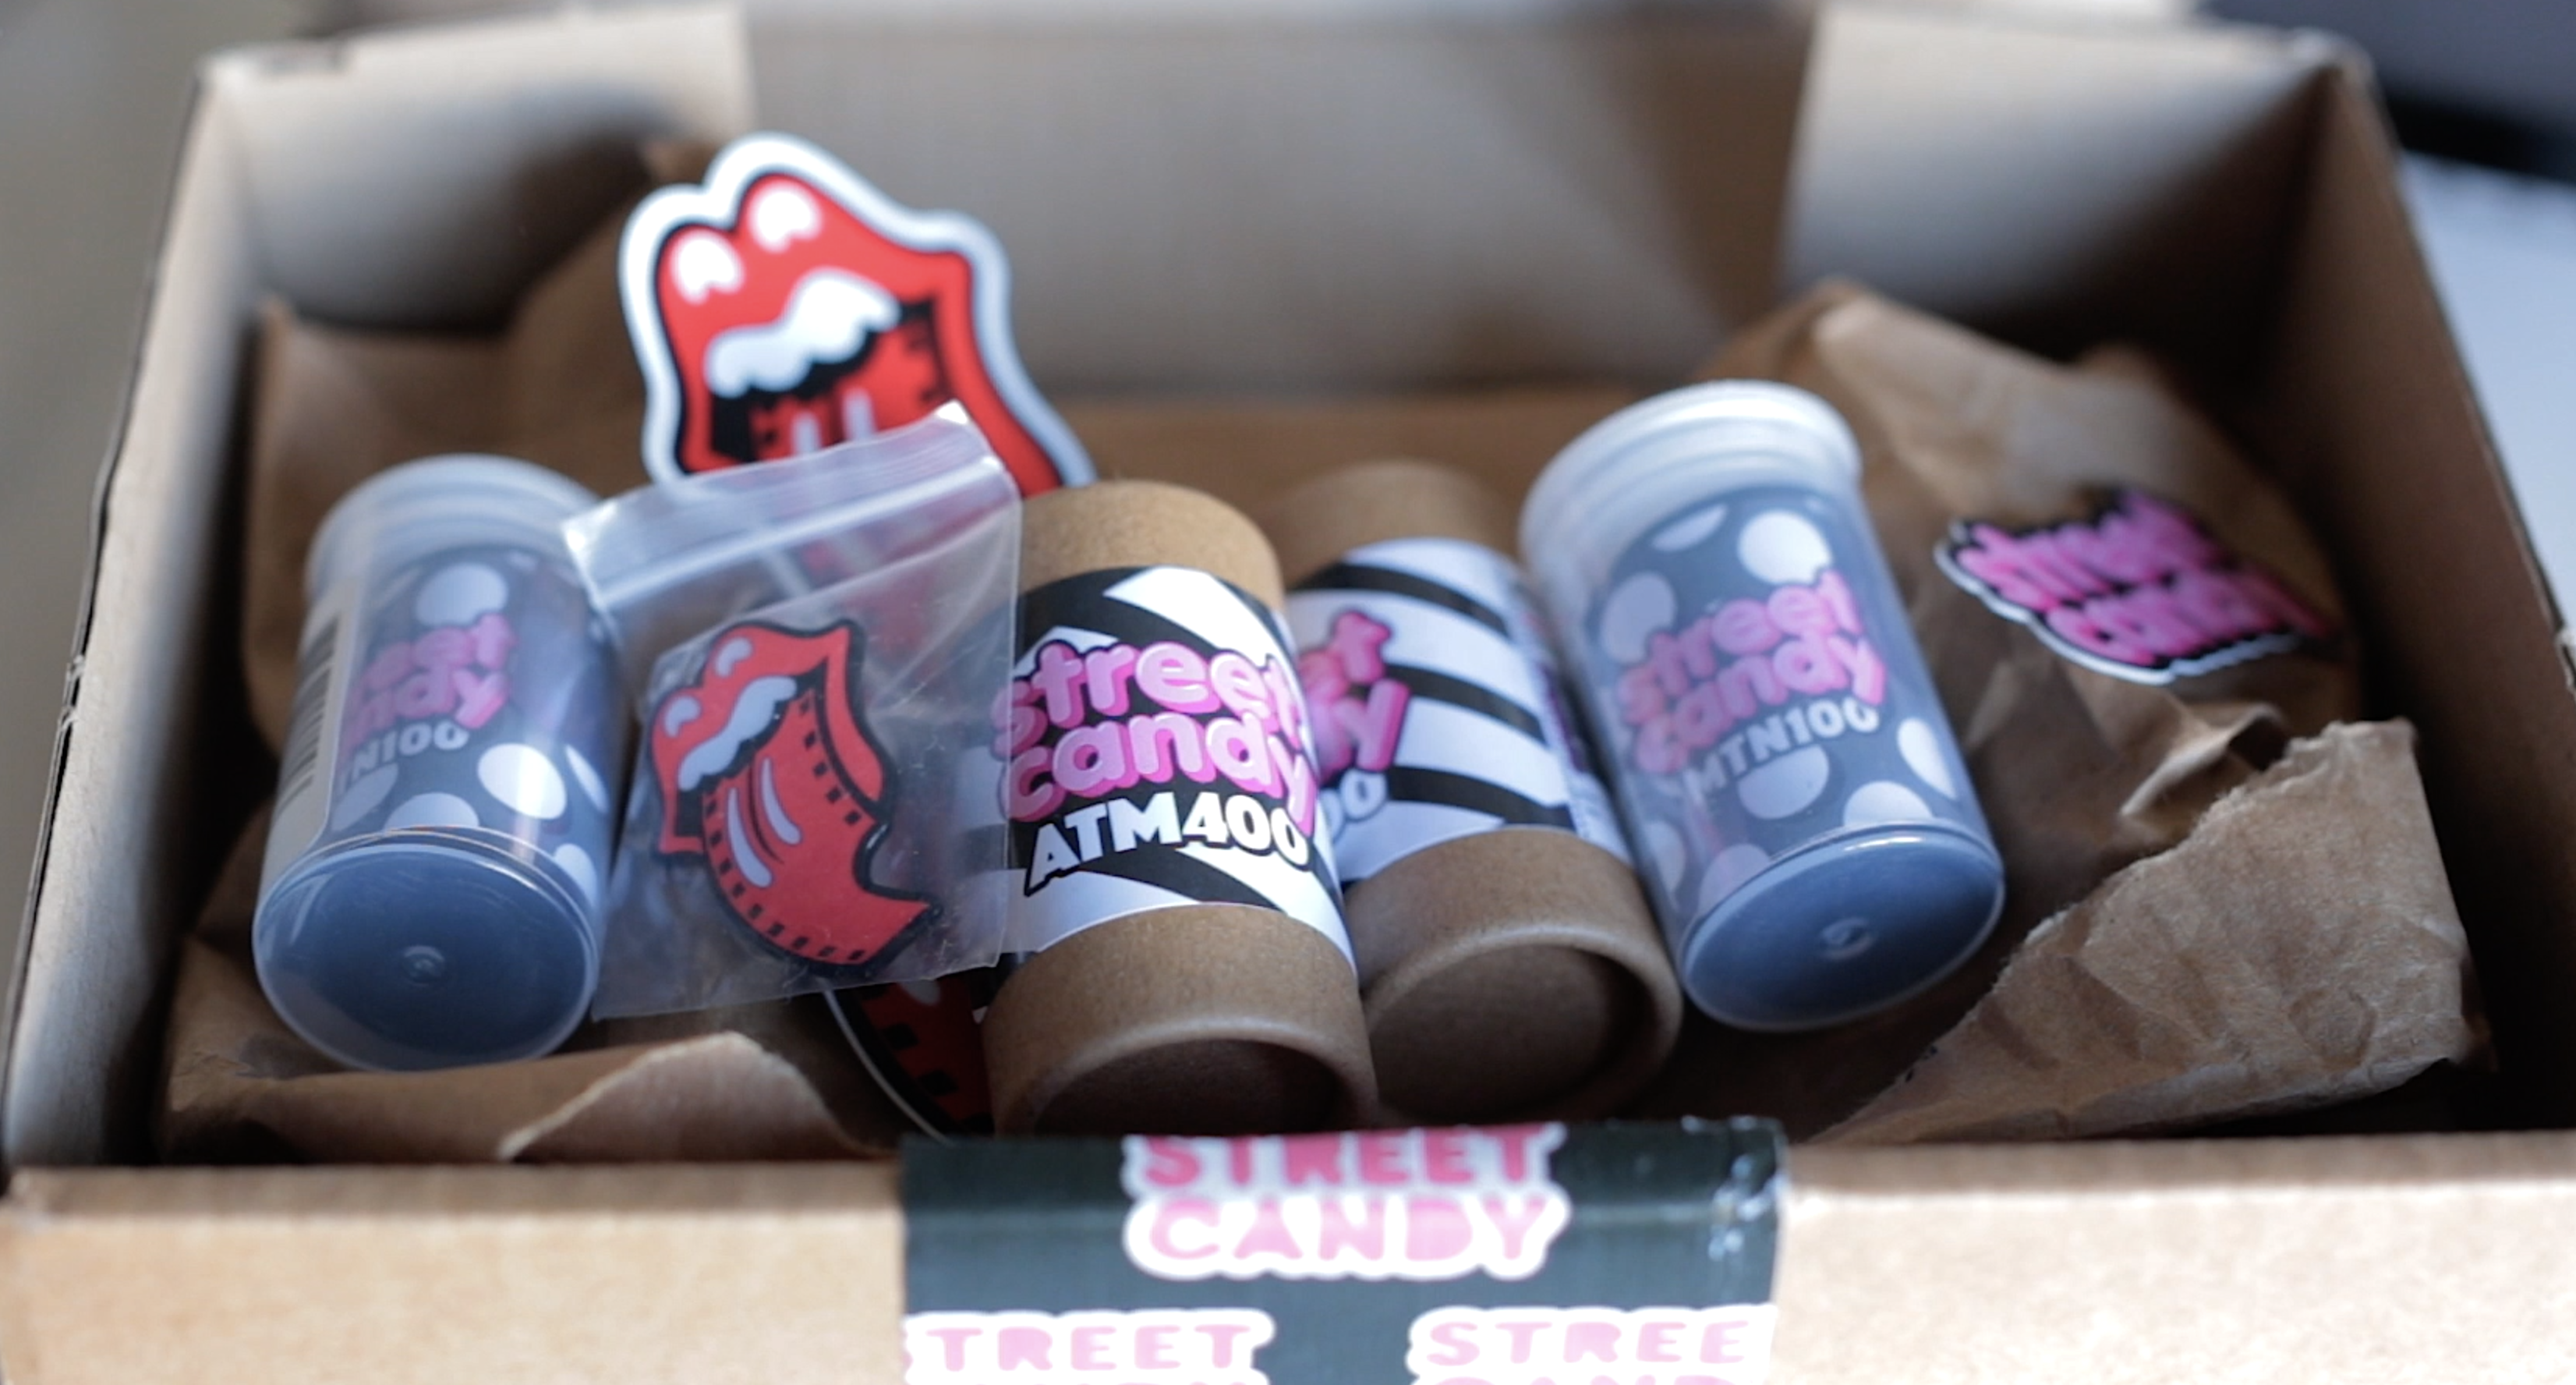
And they sent me a couple of rolls to play with! As well as some of their cool branded stickers and badges. And also a couple of rolls of their MTN 100 Film.
I must admit I don’t shoot these kind of films often and usually stick to the usual suspects Ilford, Kodak etc. But when they do land on my lap I am always eager to try them out.
So, I had two rolls. And the first roll I went out with a Leica MP and a 50mm Lens on a bright (intermittently) sunny day.
Here are some of the photographs I took which I developed in 510 PYRO for 8 minutes with regular inversions. I shot the film with metering at 400.
Roll One
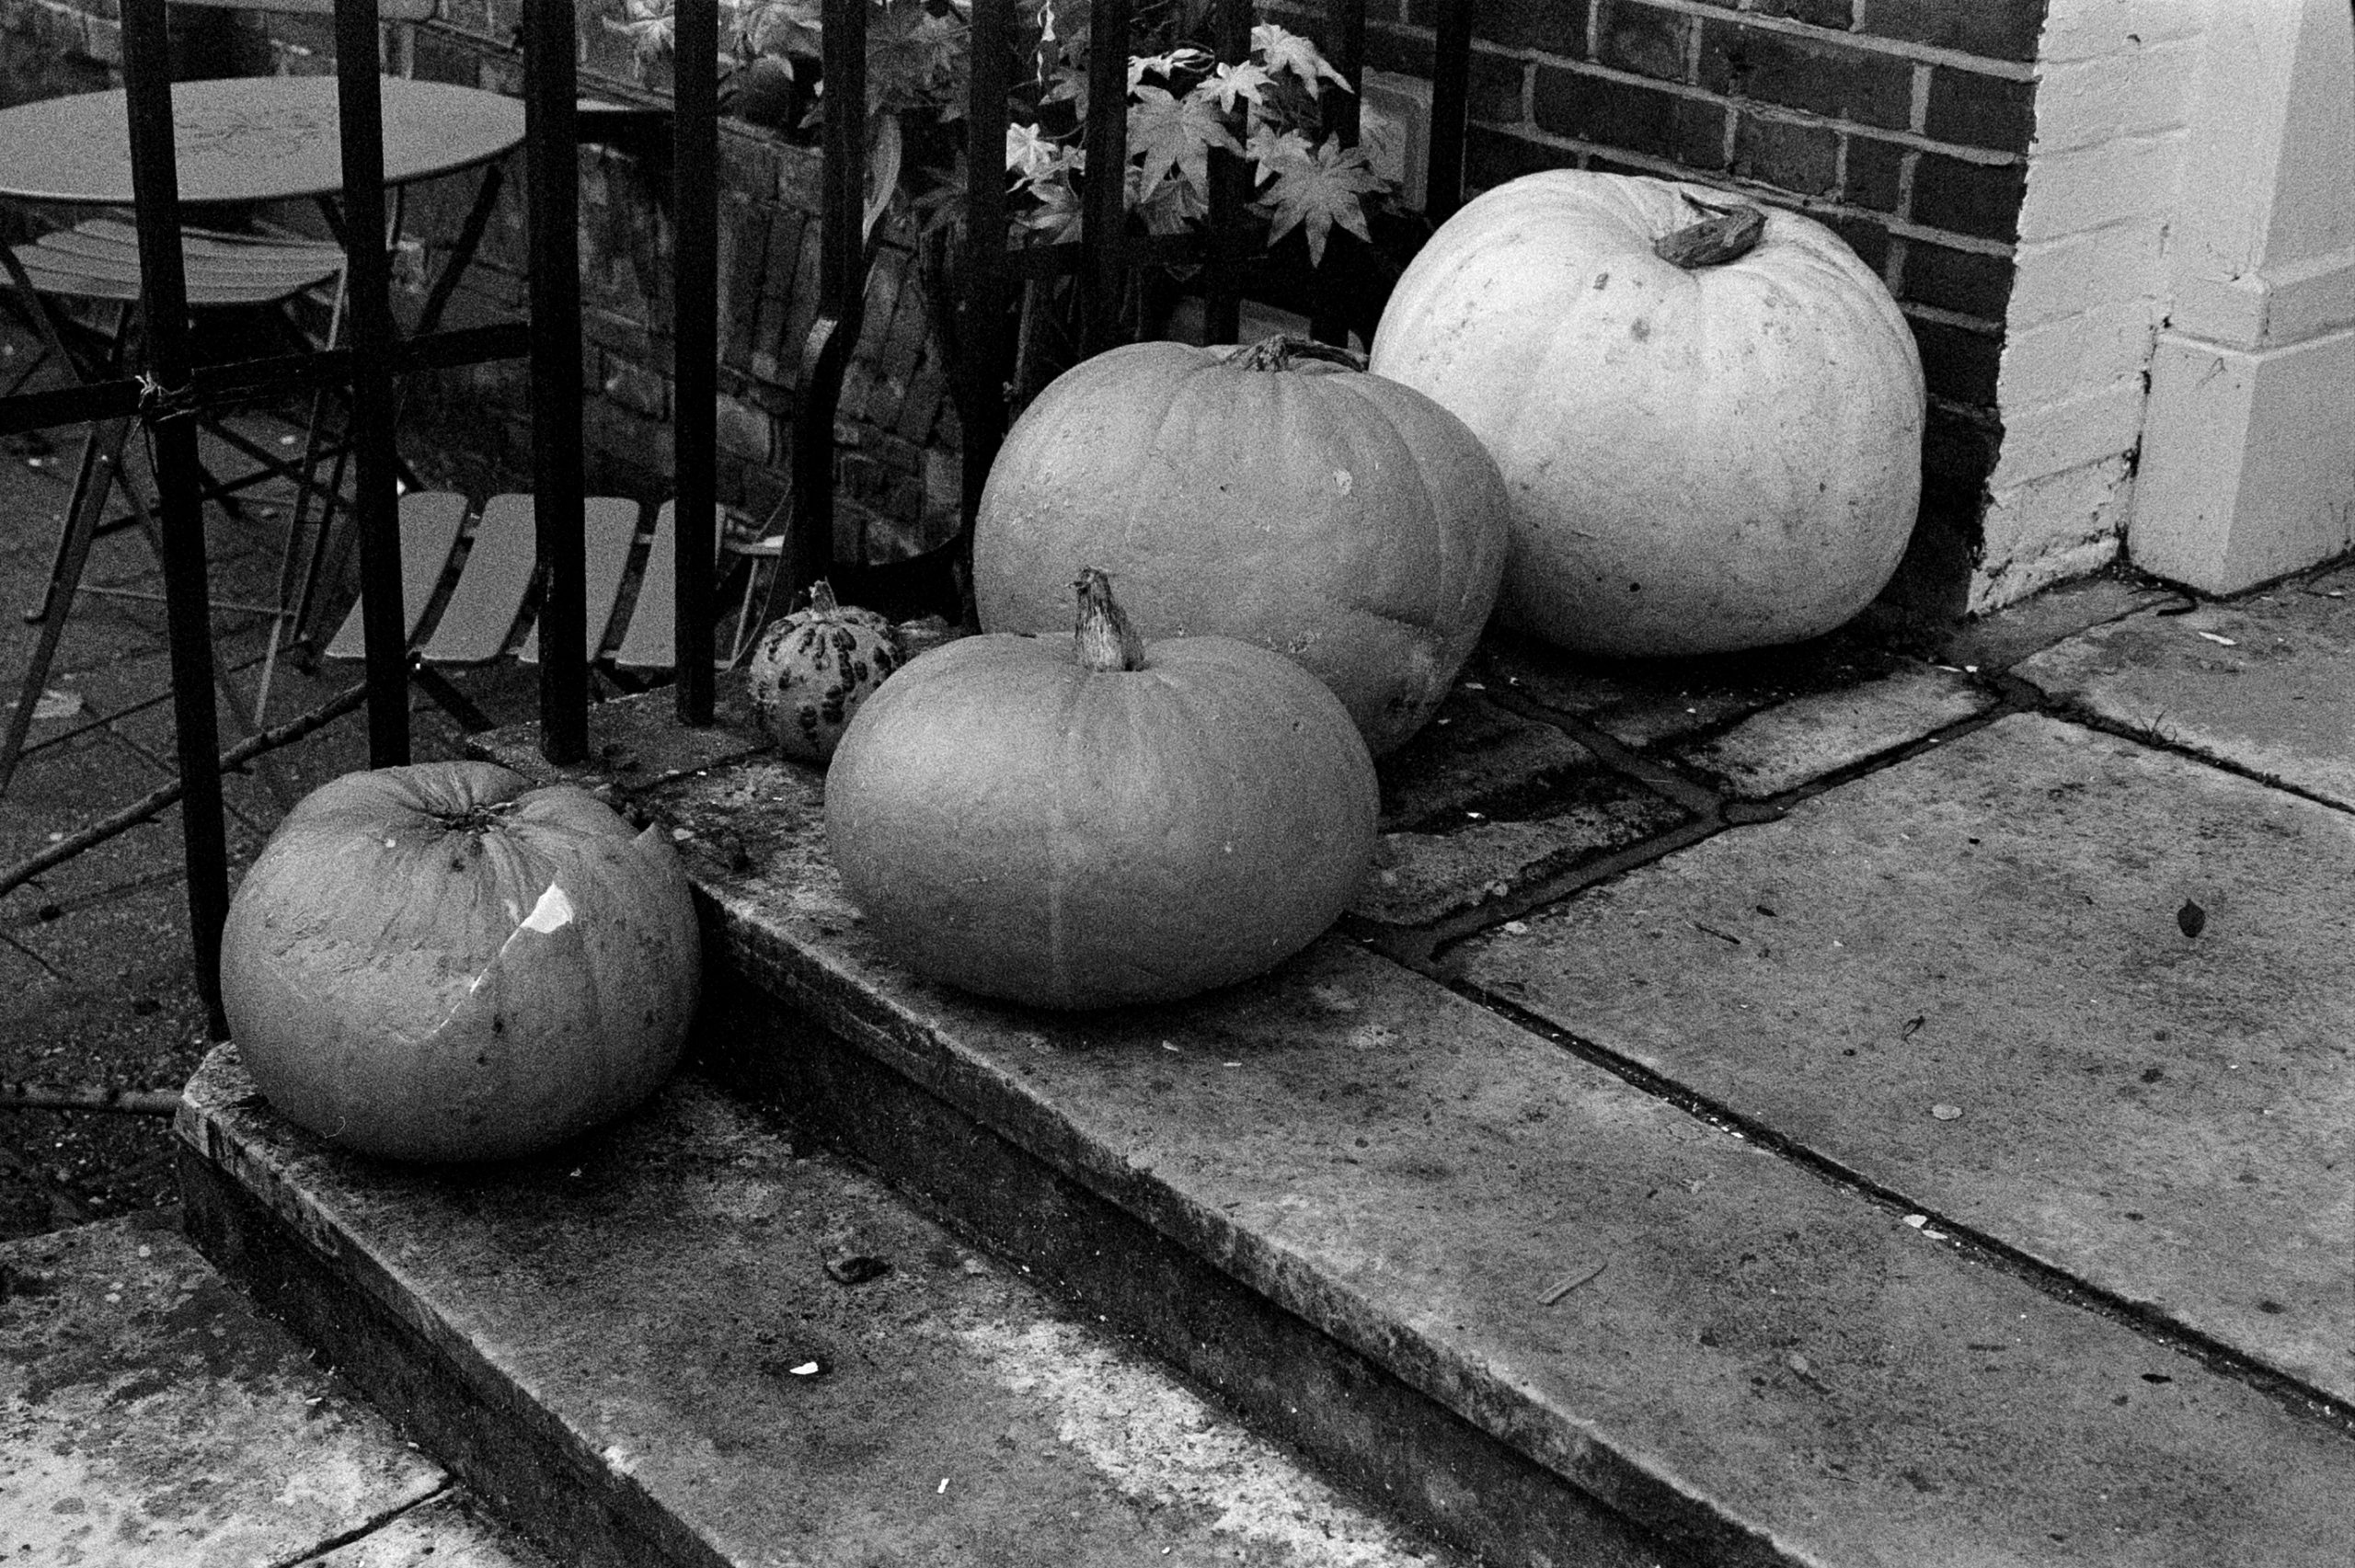
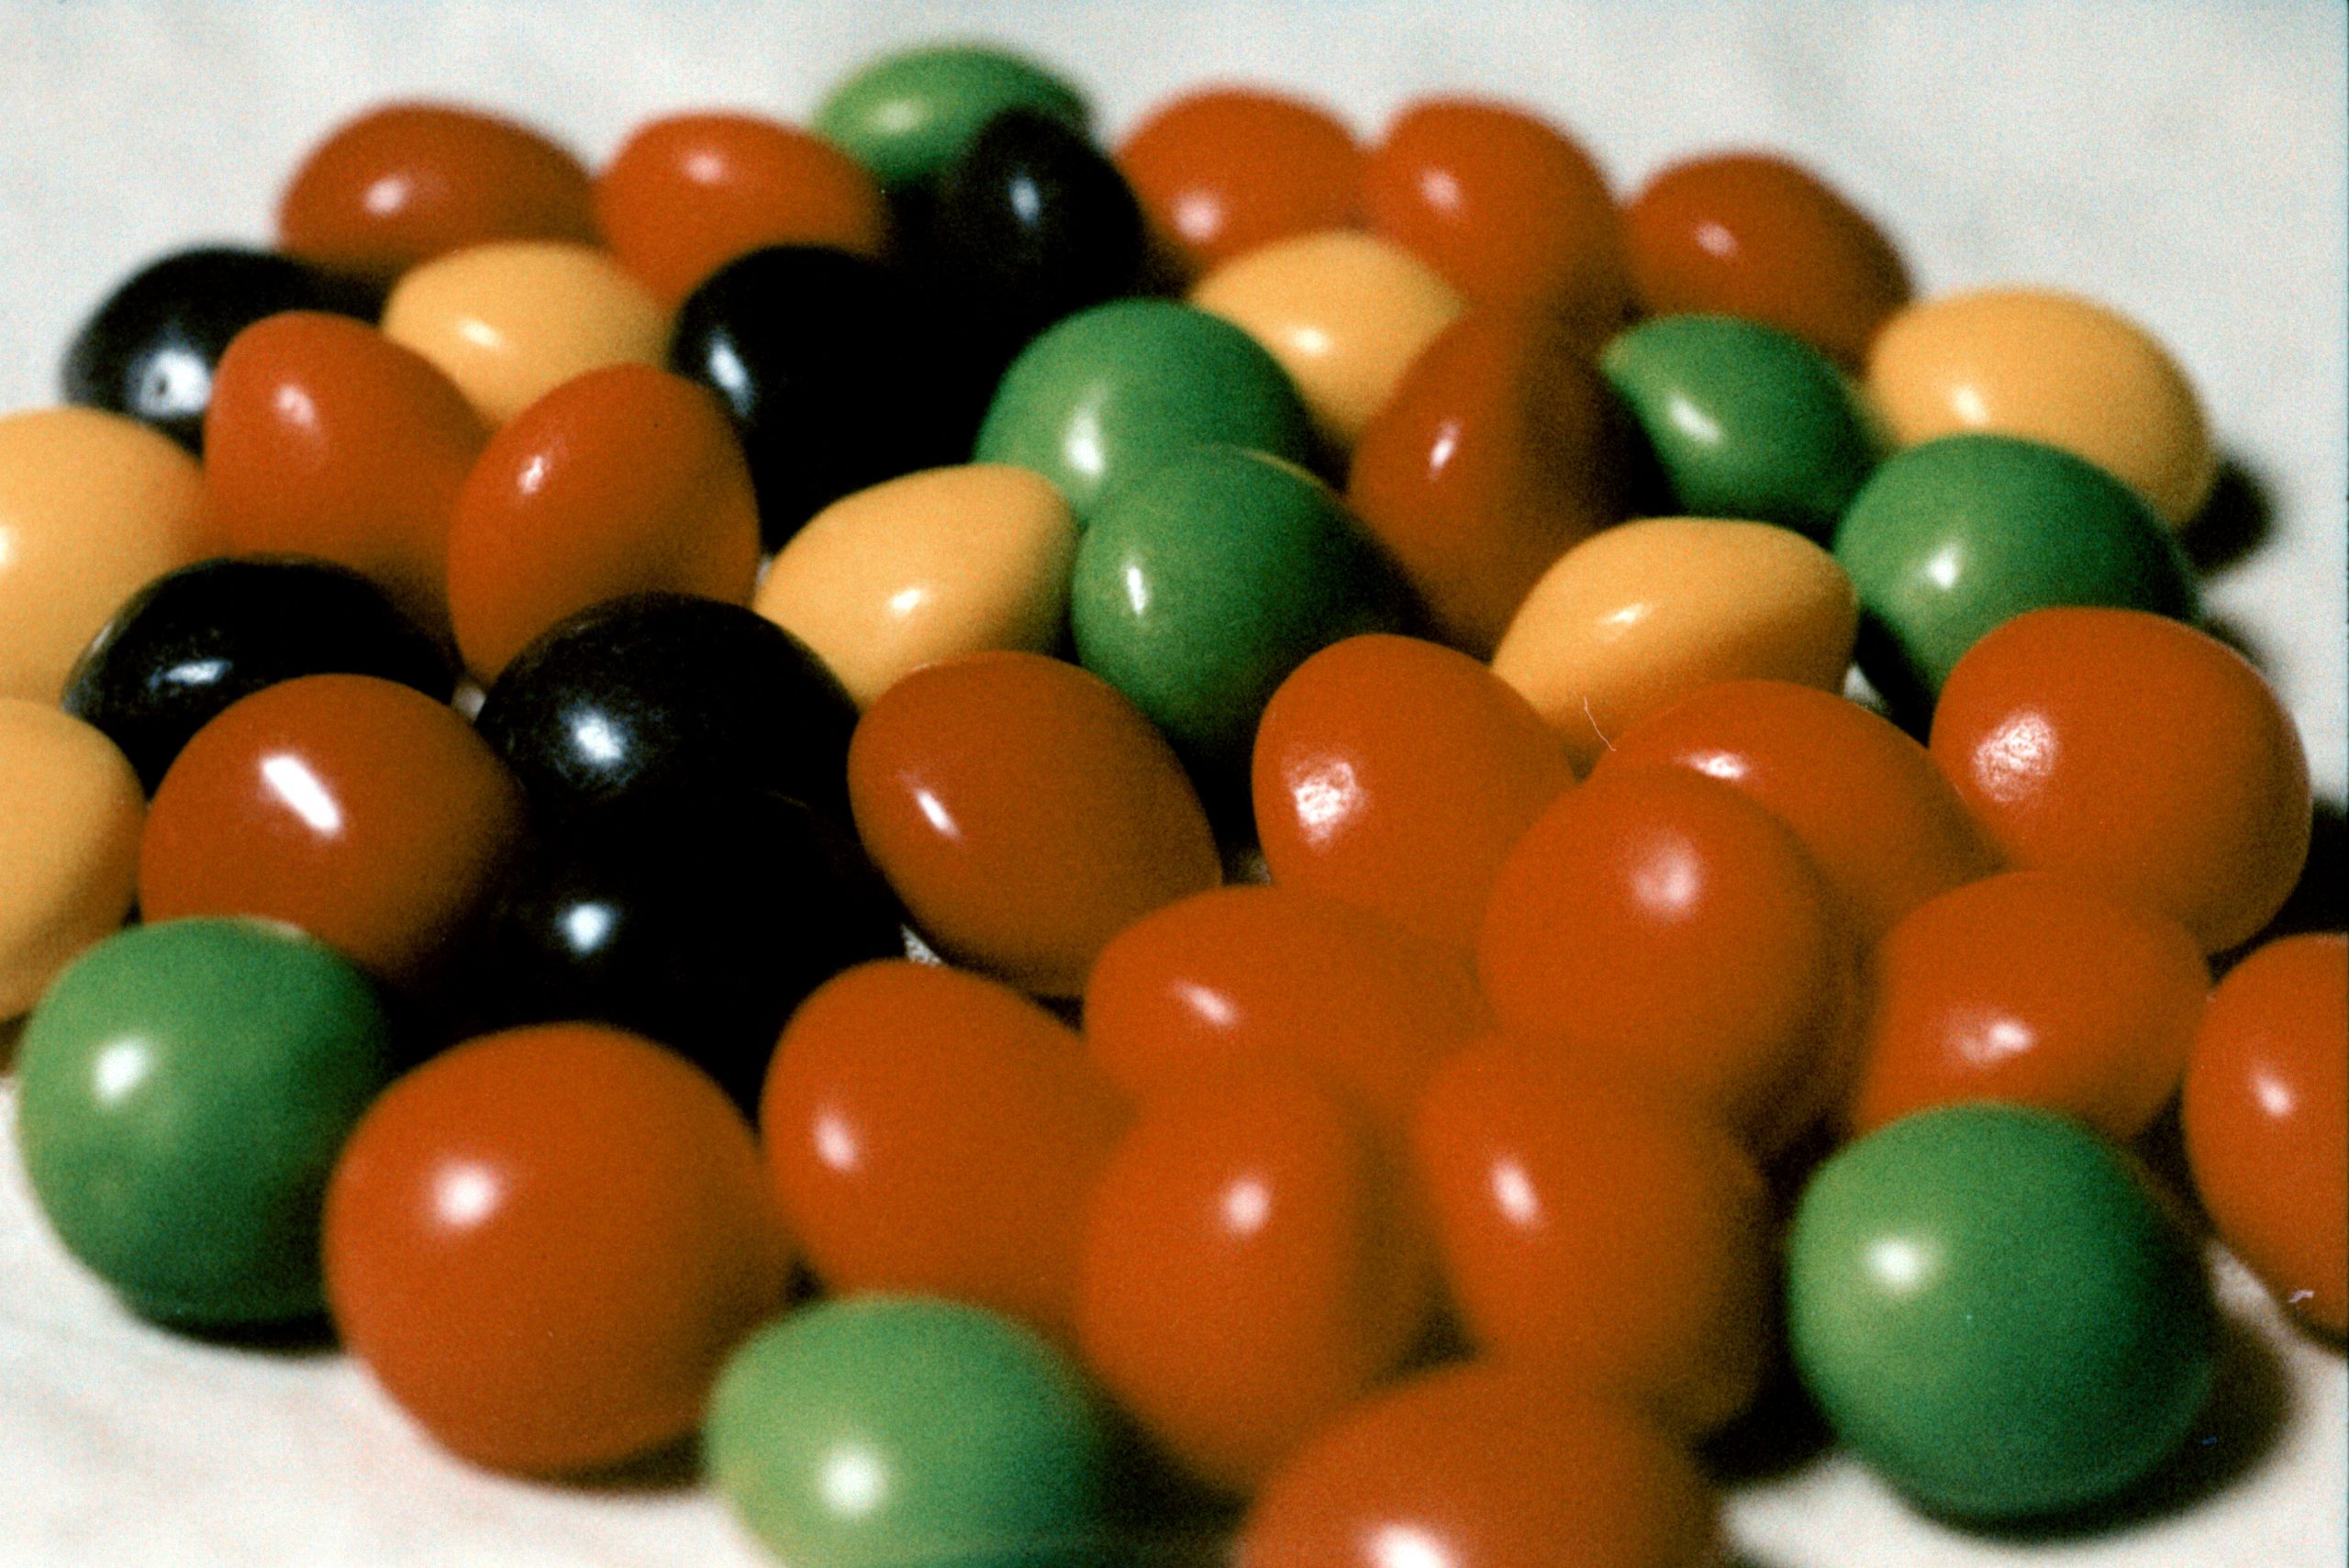
Pumpkins. This was taken when the light was low and overcast. As you can see the film has nice contrast in this type of lighting.
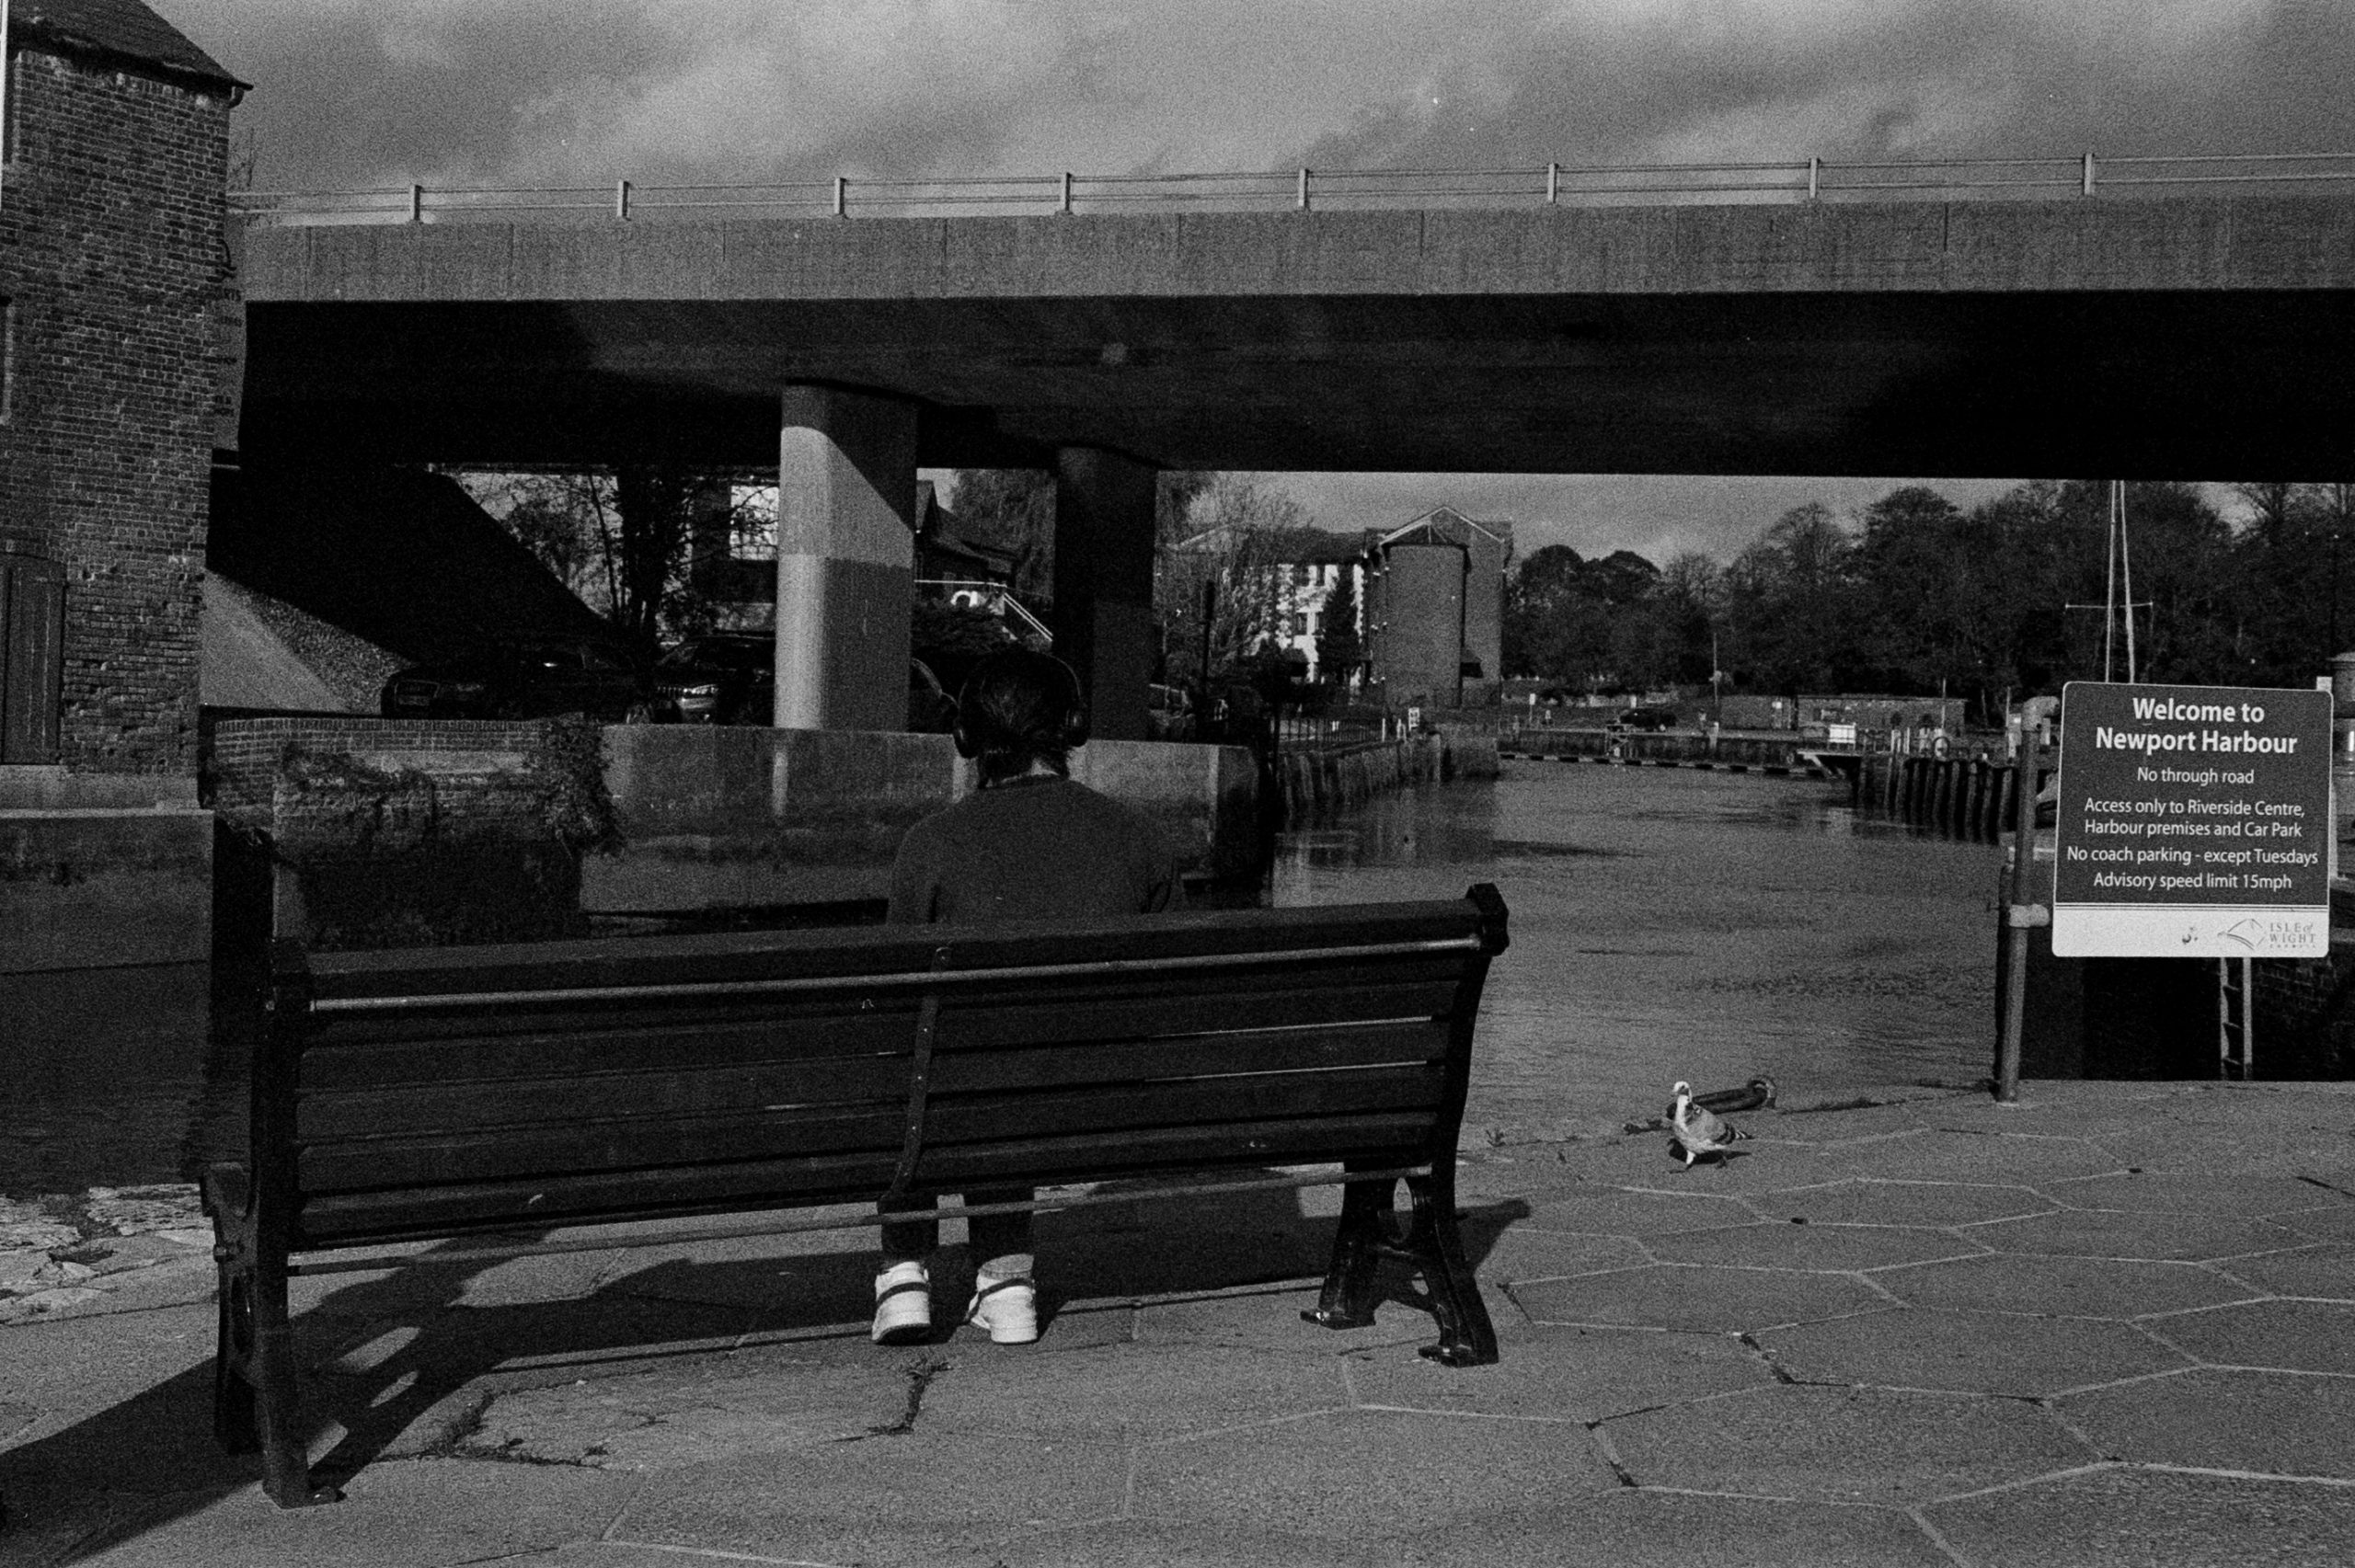
Lady on Bench. This was taken when the sun was out and bright. It appears the film needed more exposure.
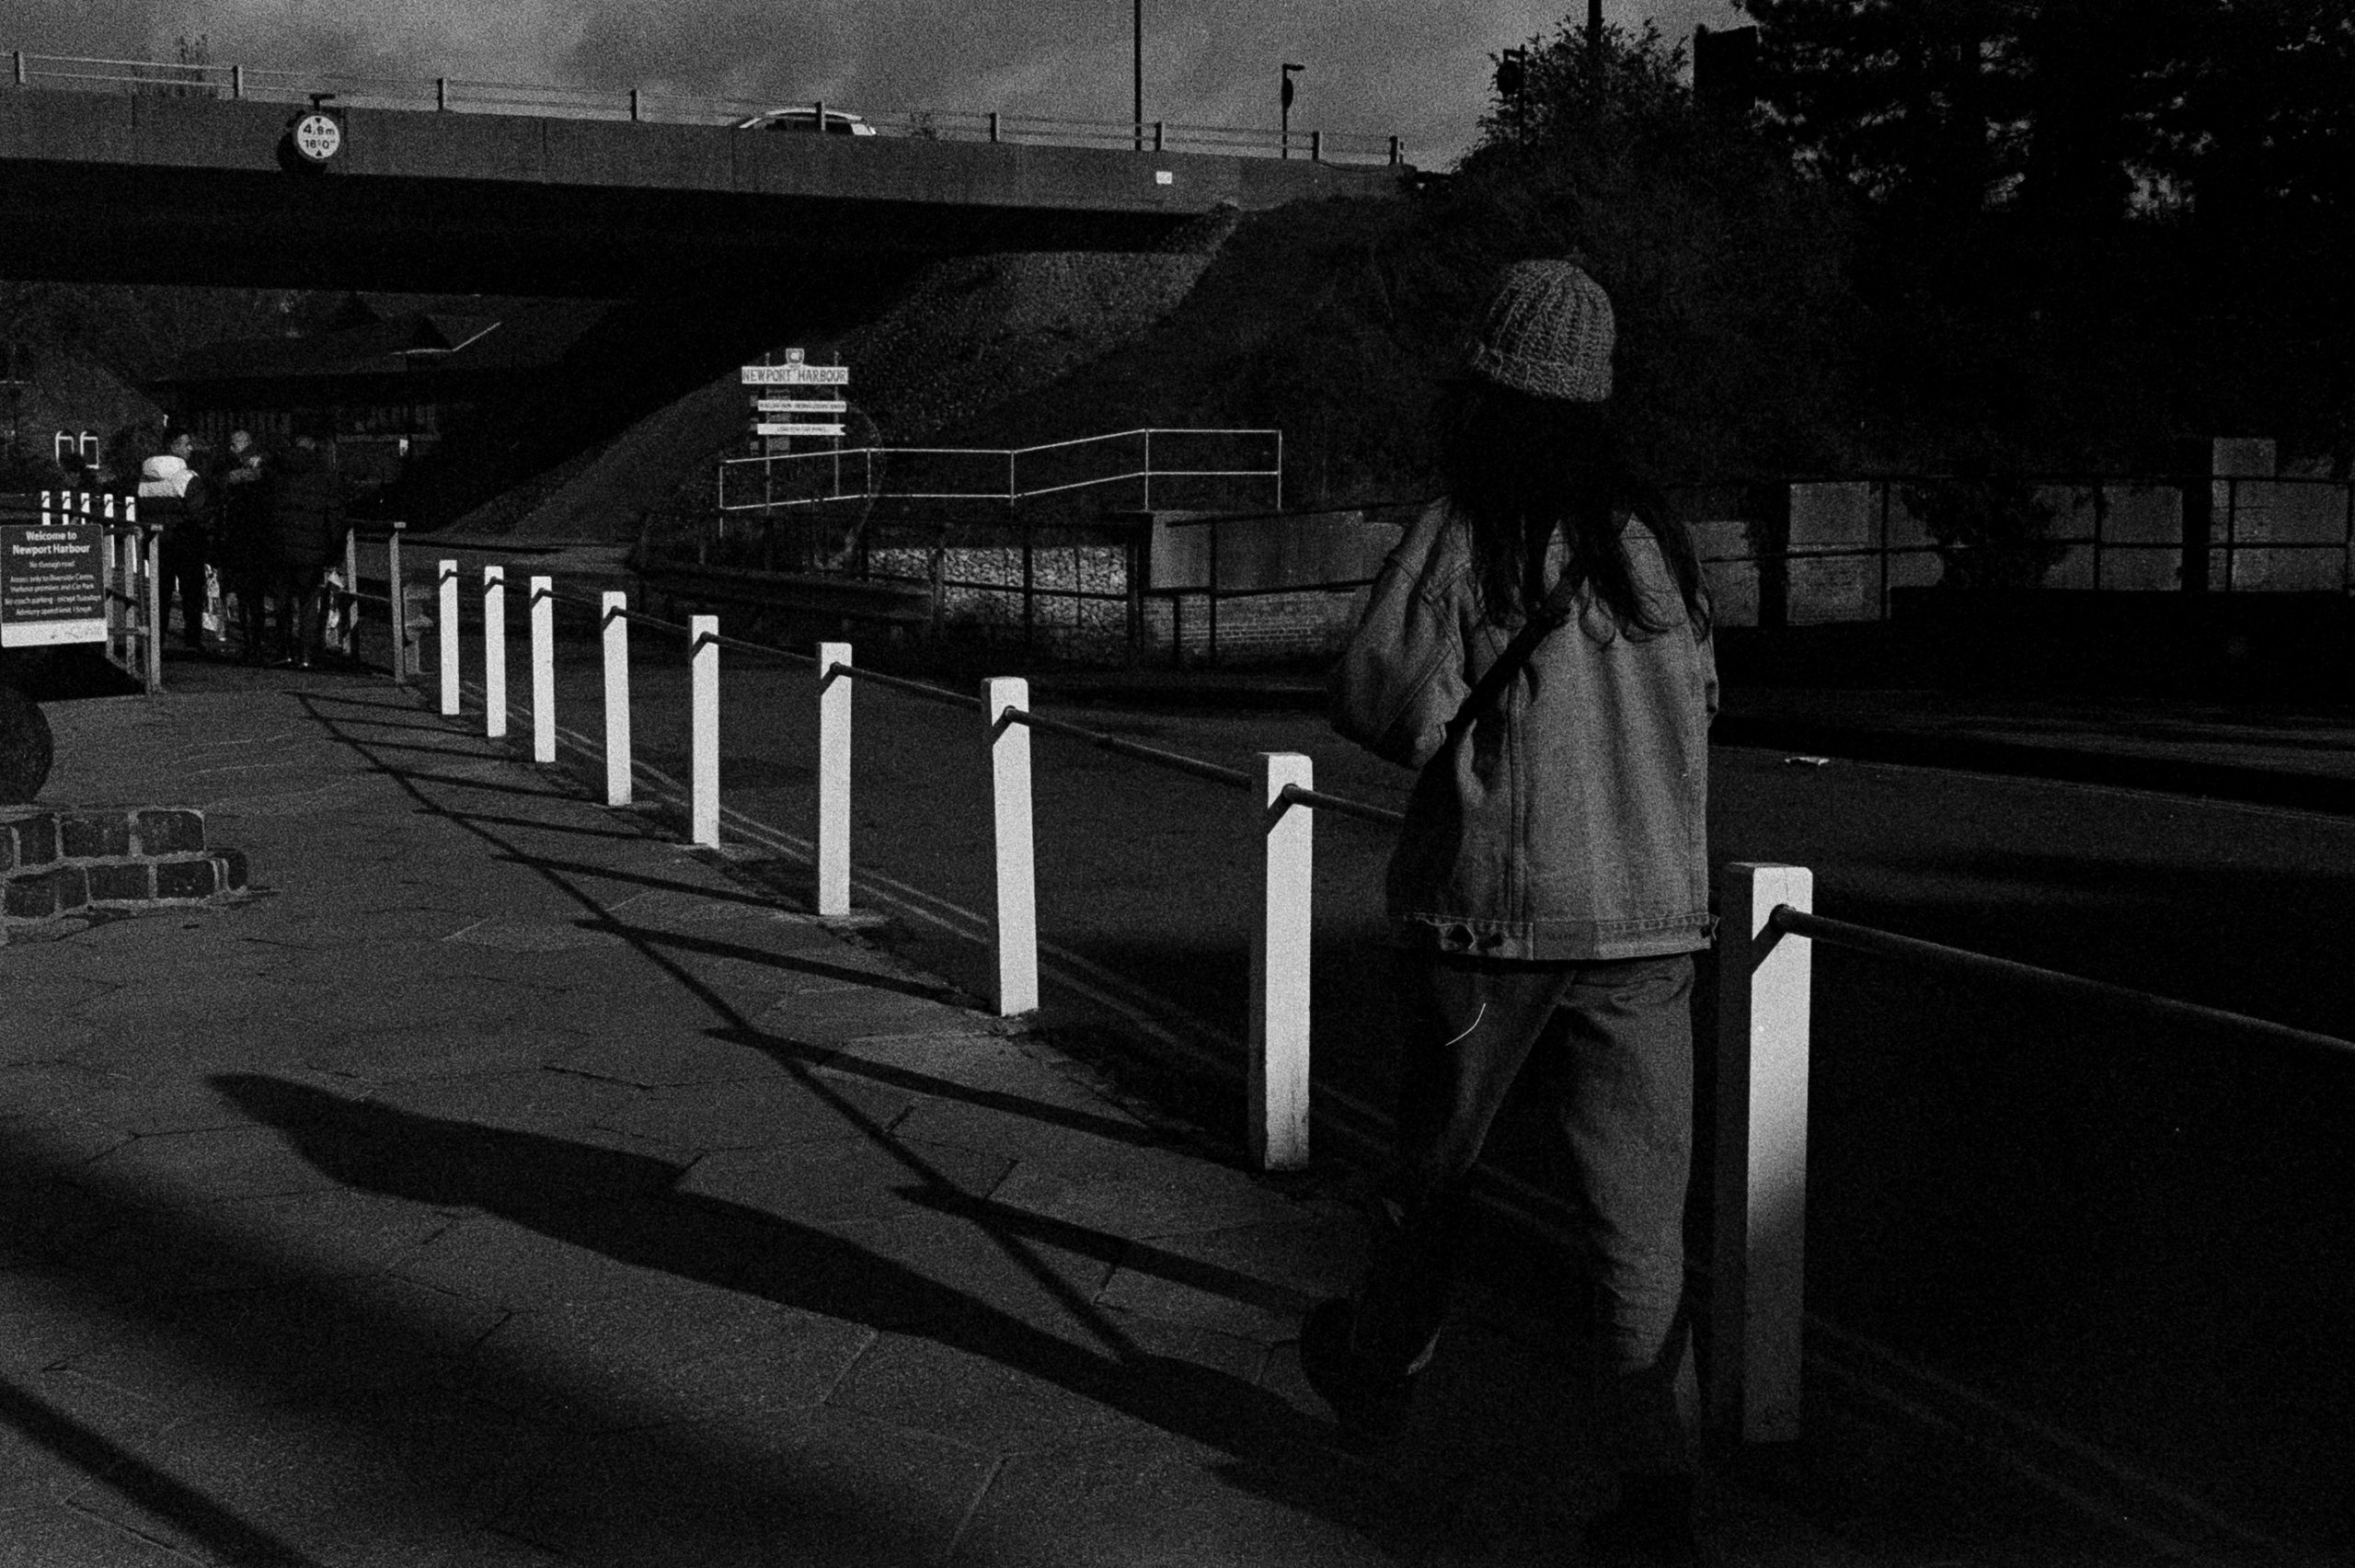
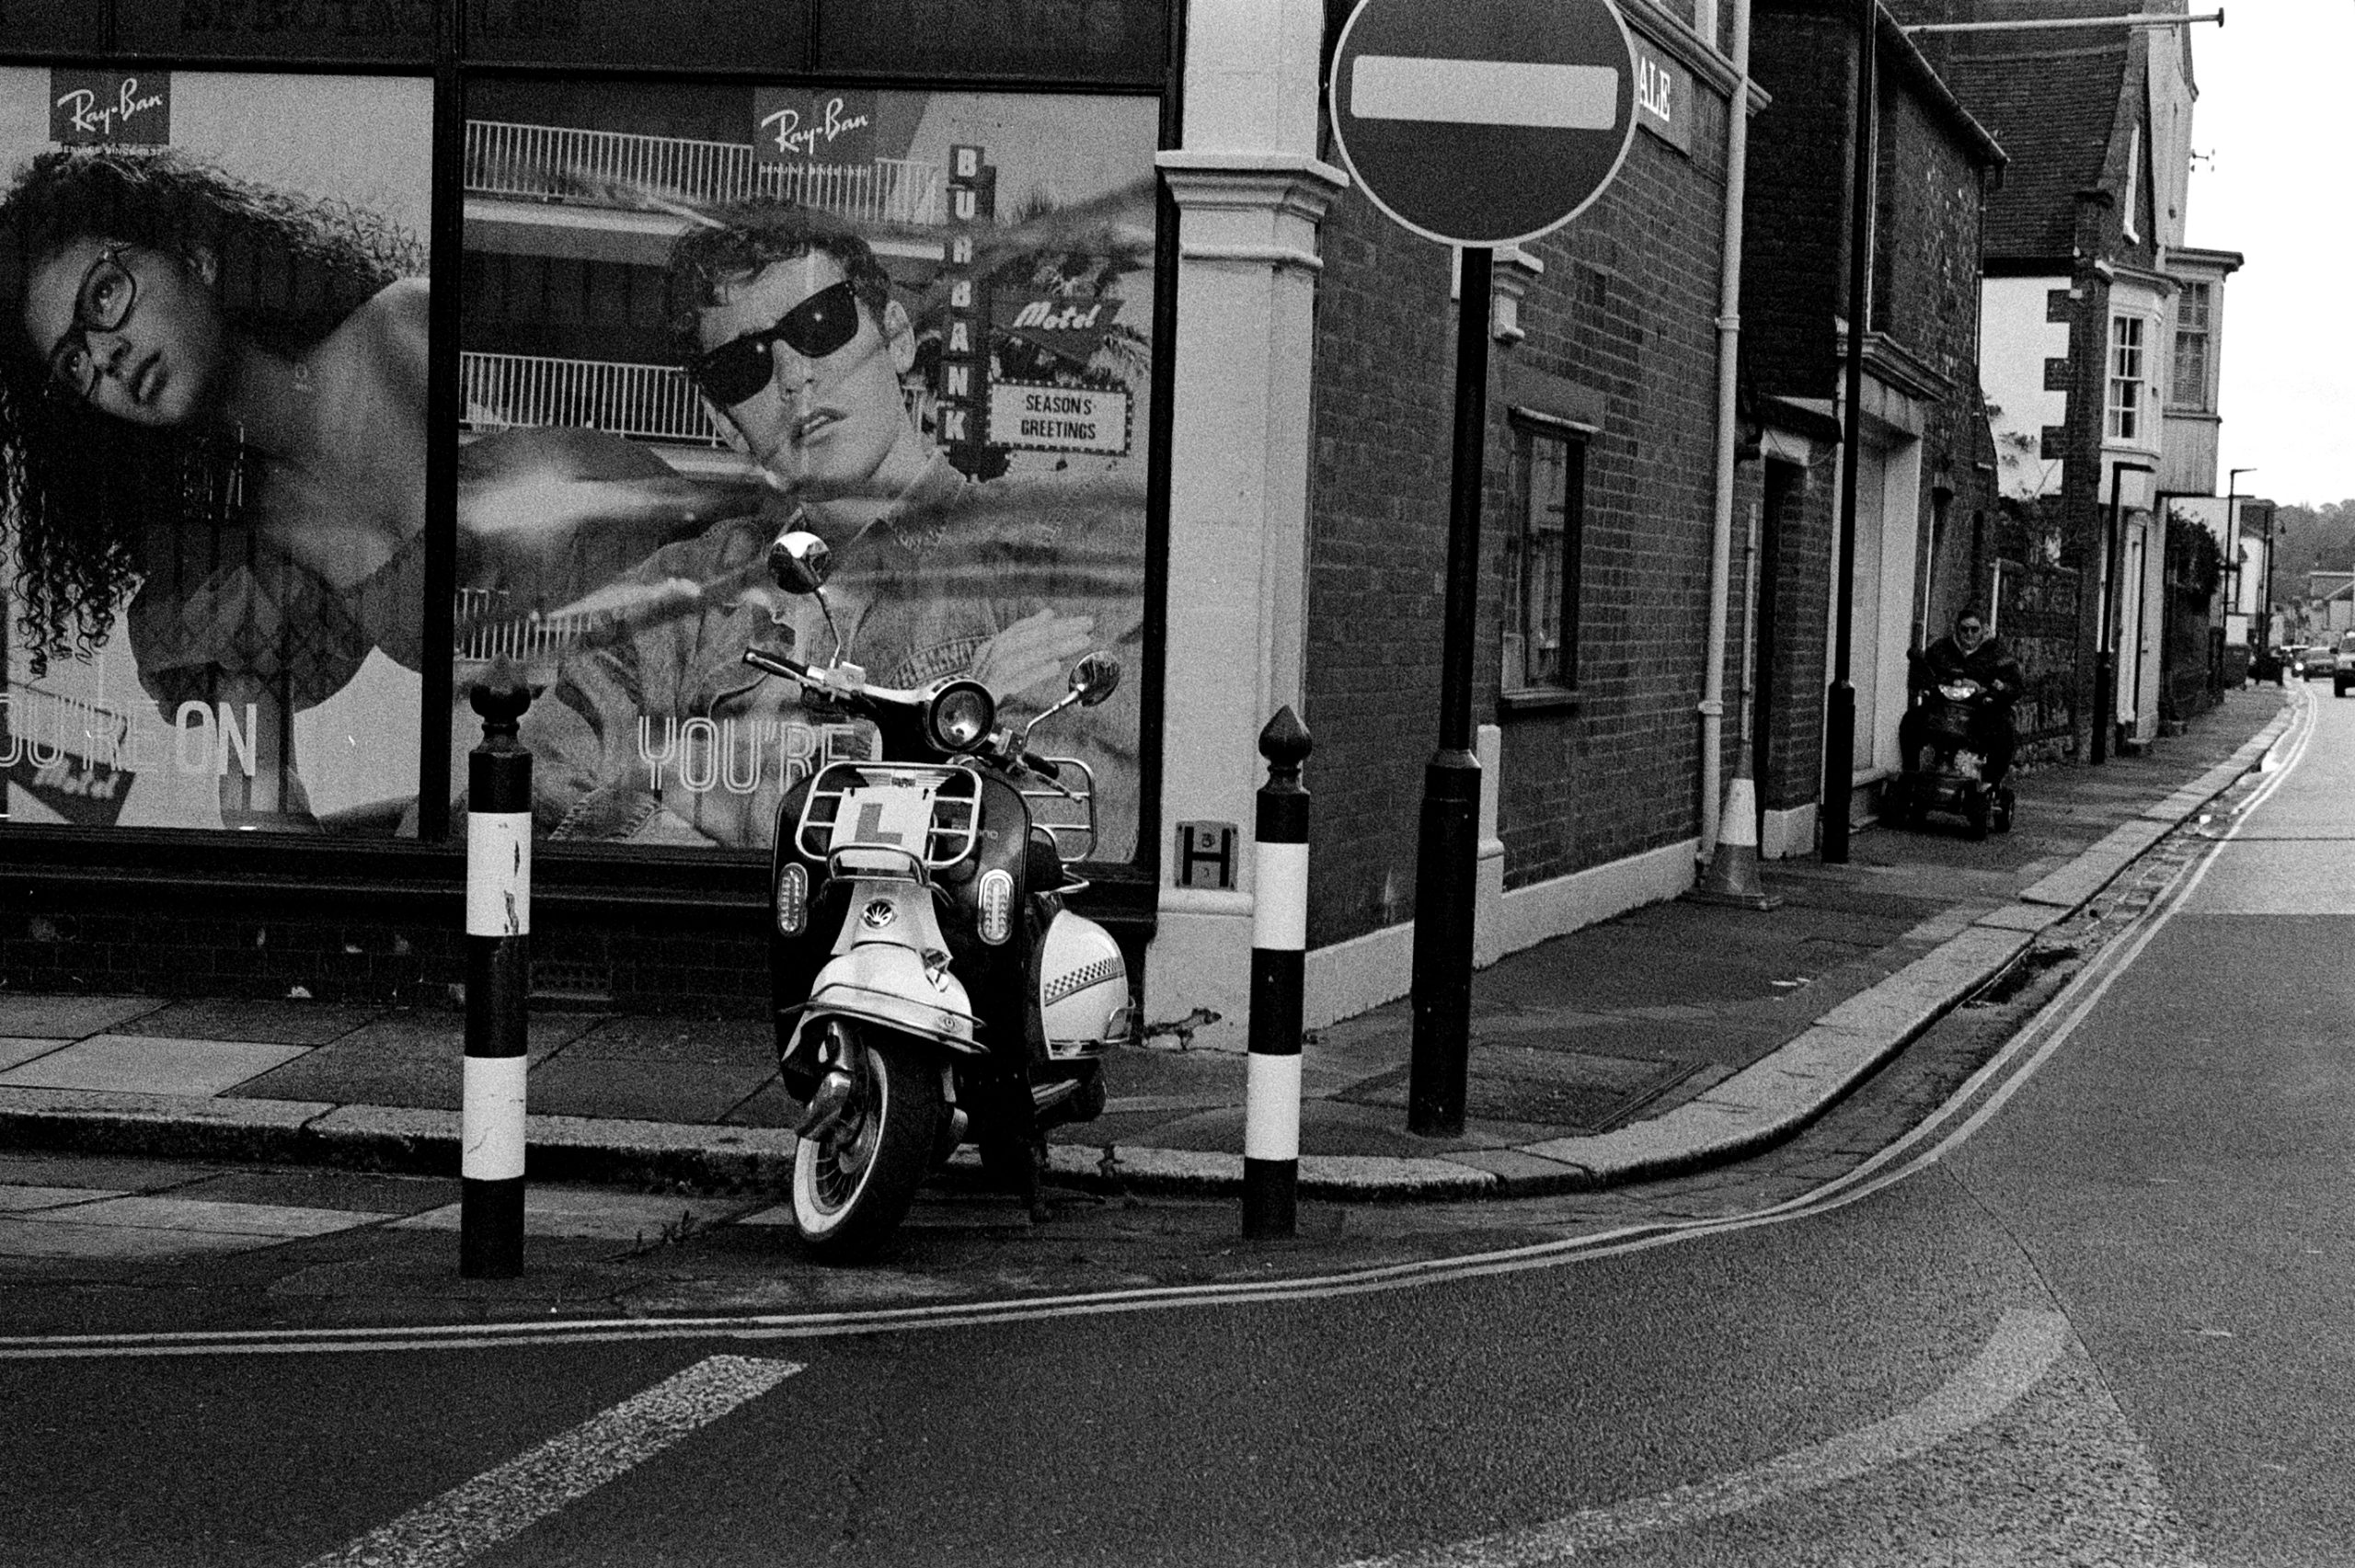
Lady Walking. Again, bright sunlight and the cameras meter has taken into account the white posts and knocked the exposure down resulting in a high contrast looking photo.
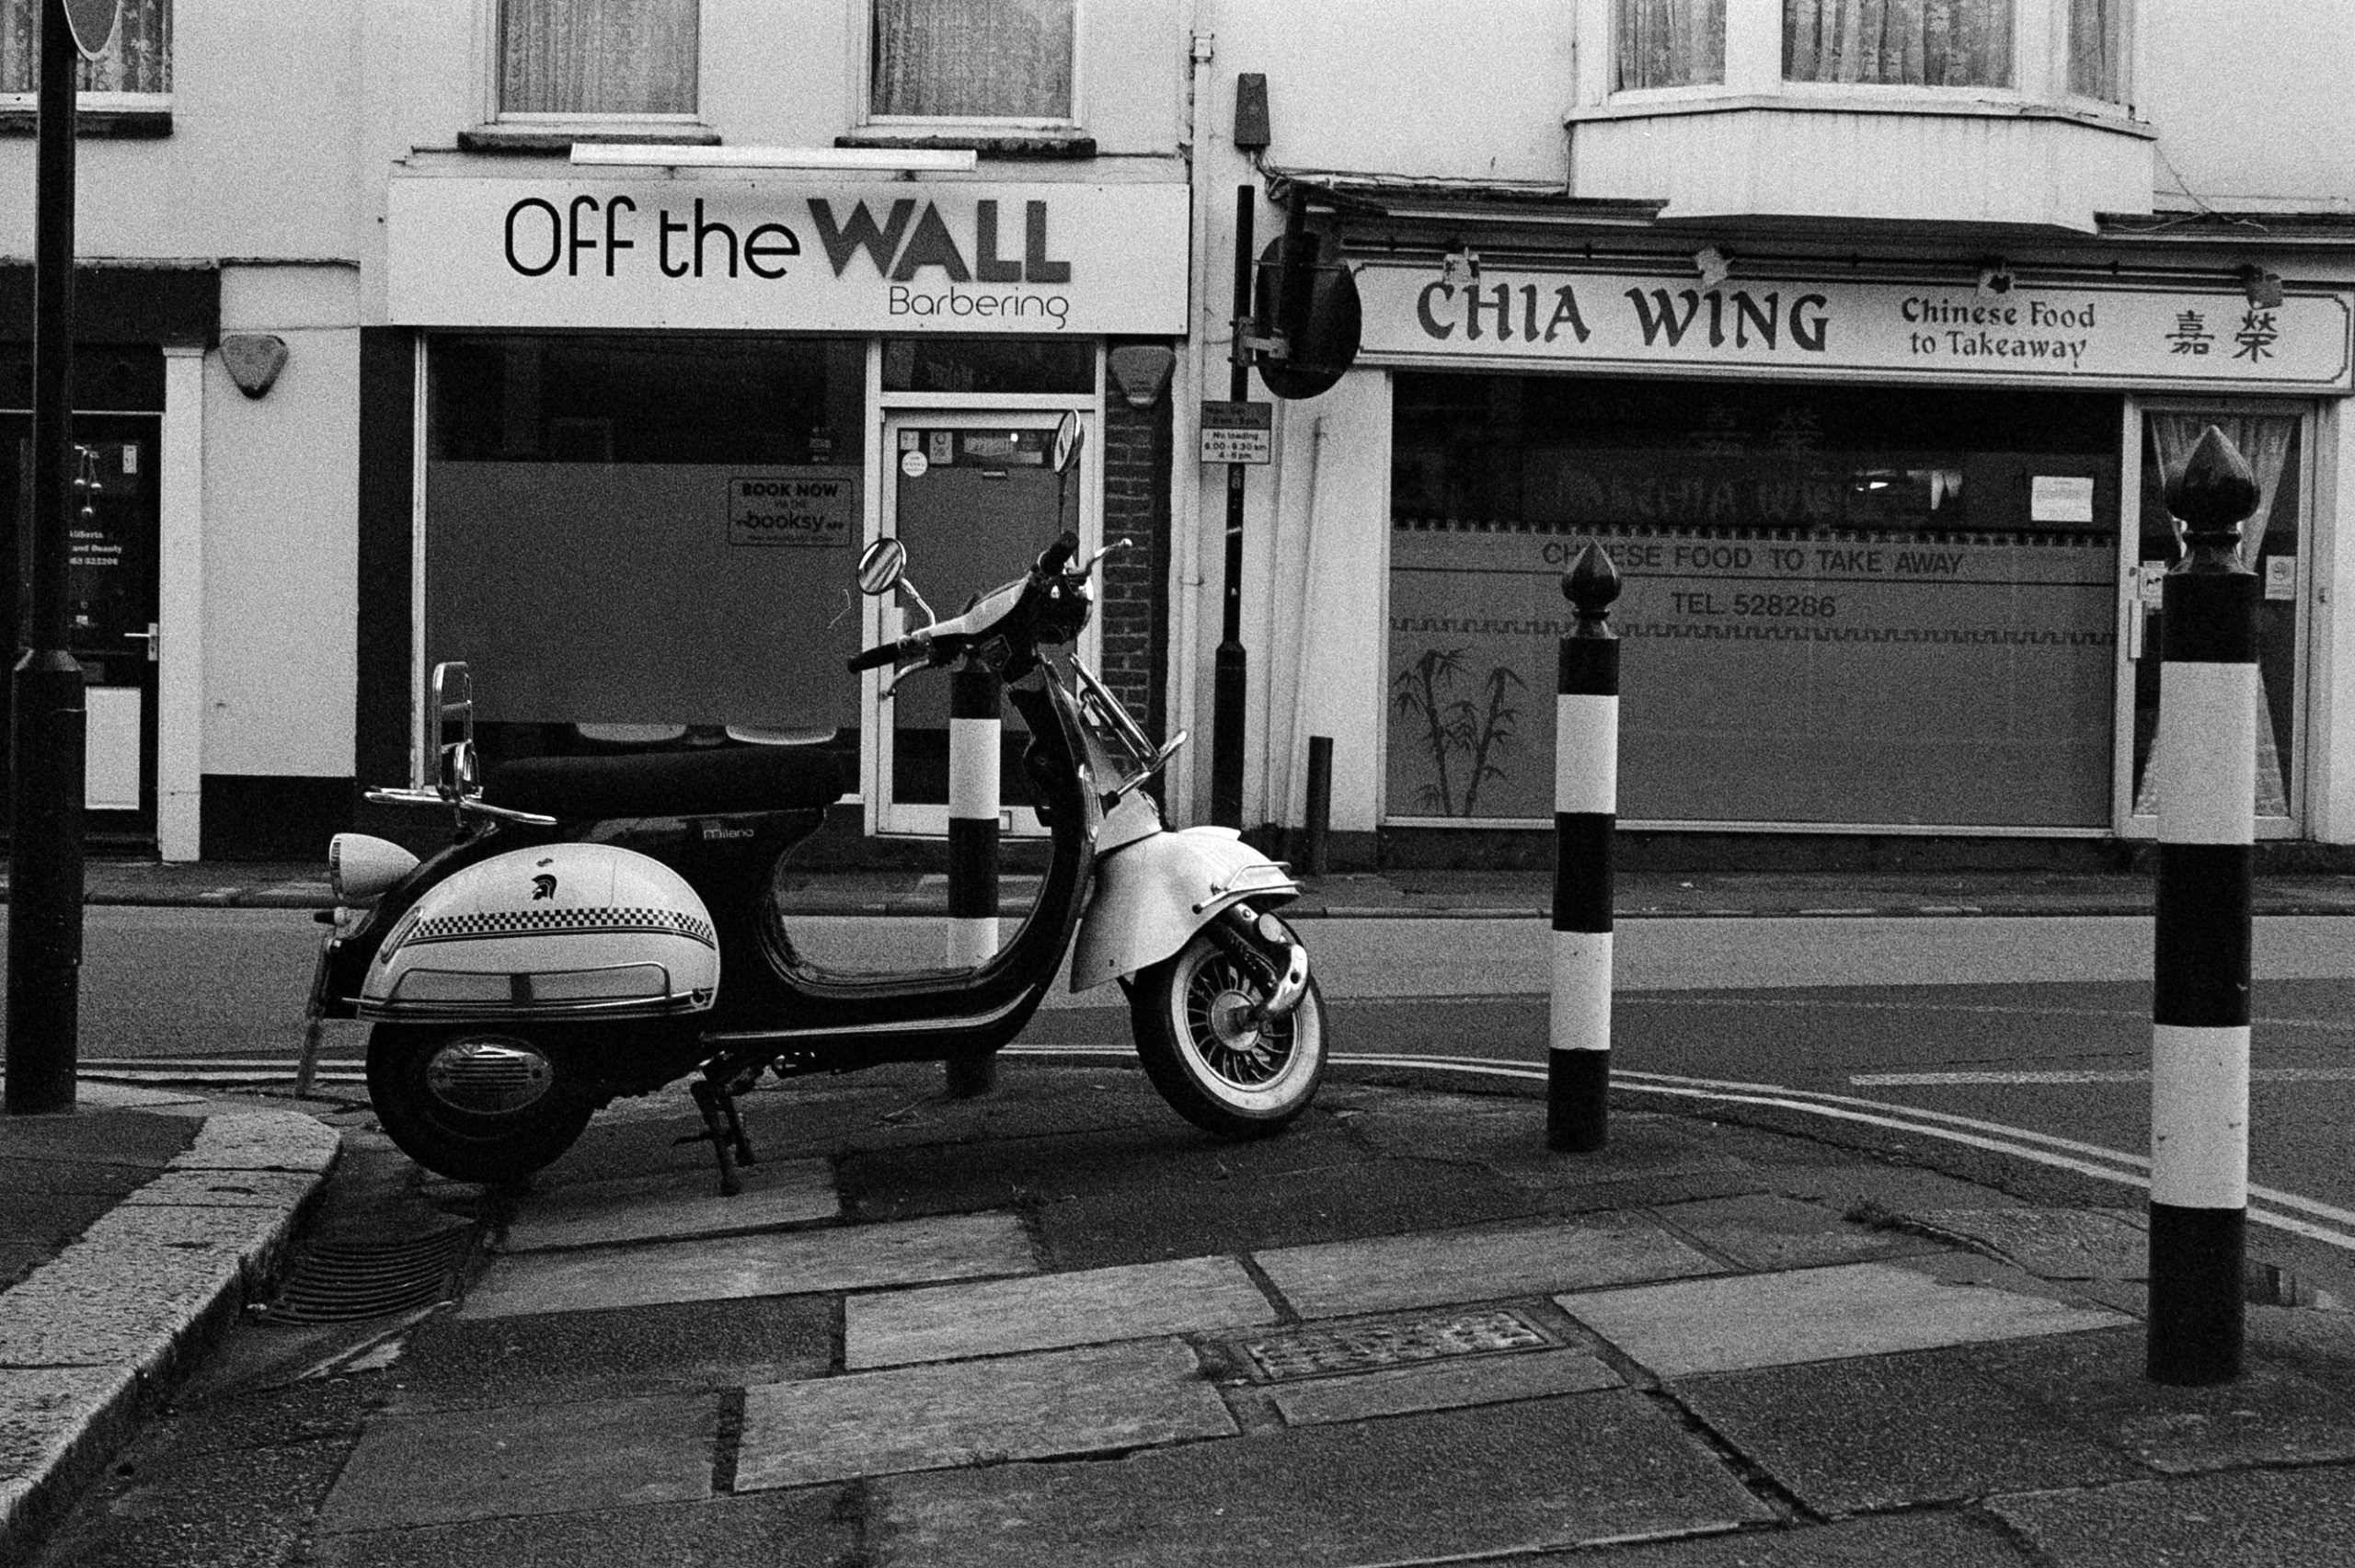
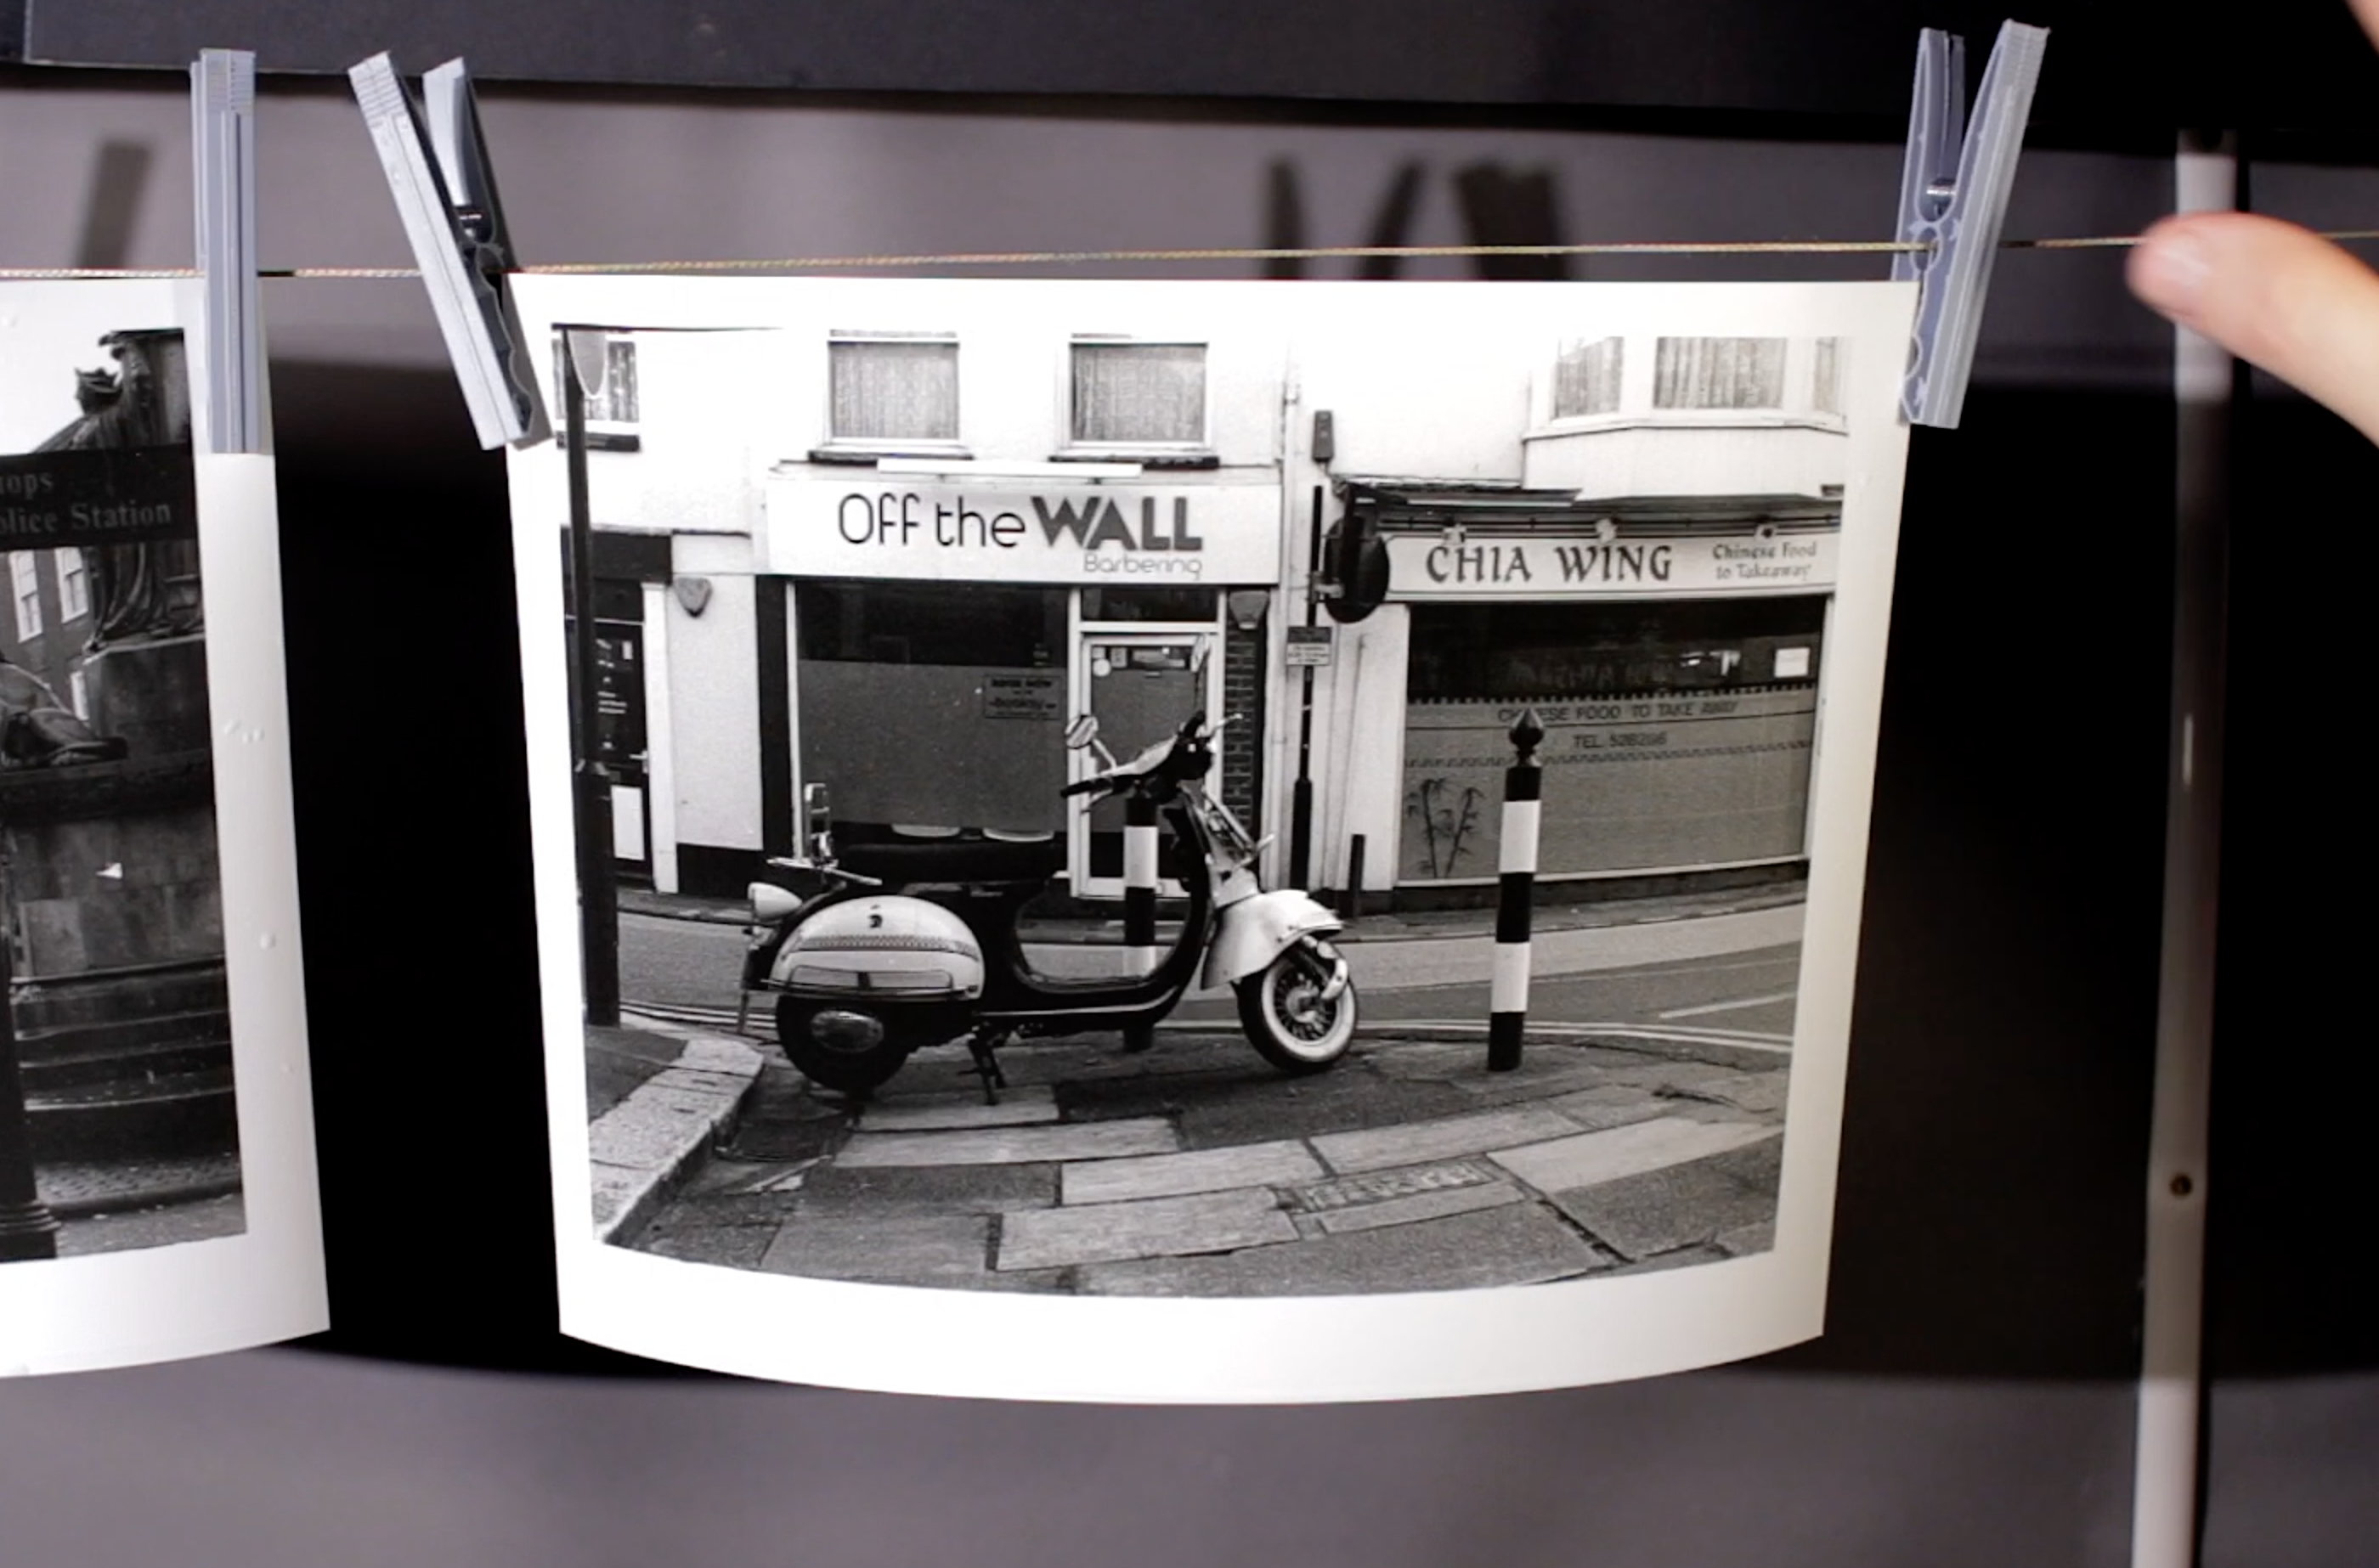
Scooter. This photo was taken later in the day when it cast over. Much more detail in the photograph similar to the pumpkins. I actually printed this photograph and it printed well with a grade 5 filter.
And another when it was light overcast.

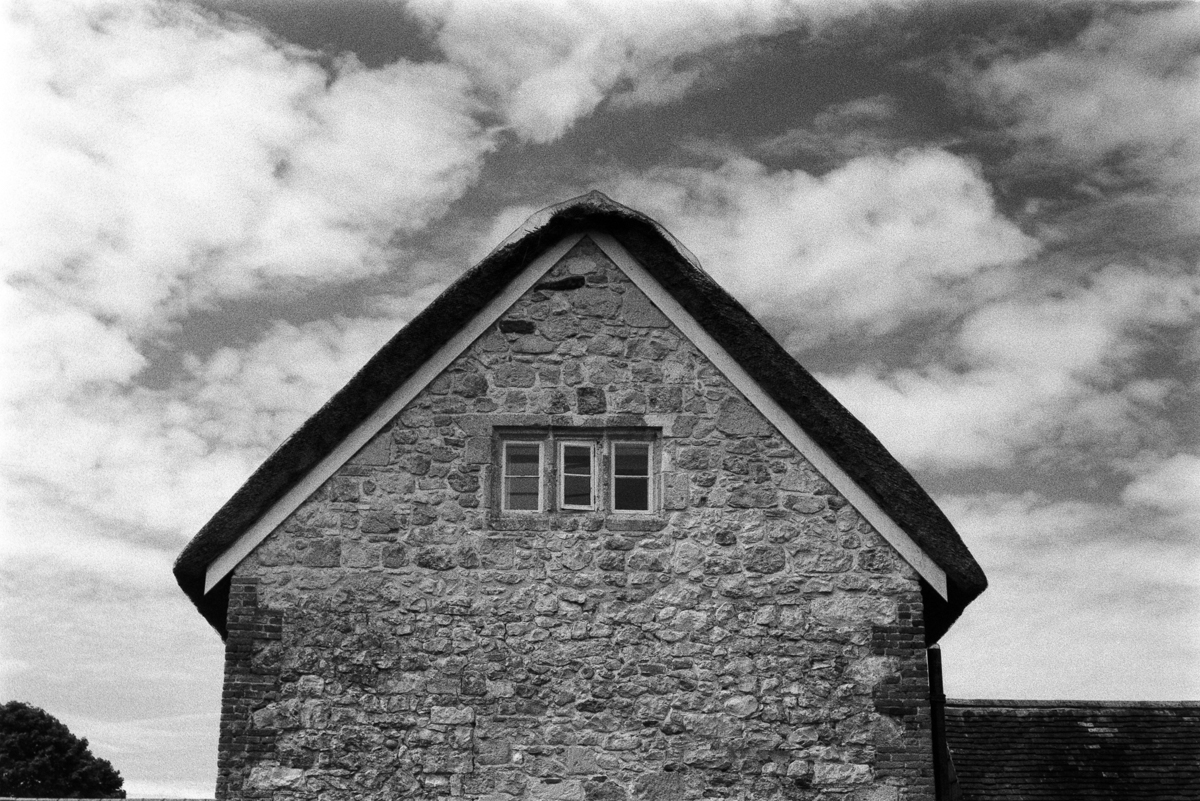
And another in bright sunlight looking at this old building.
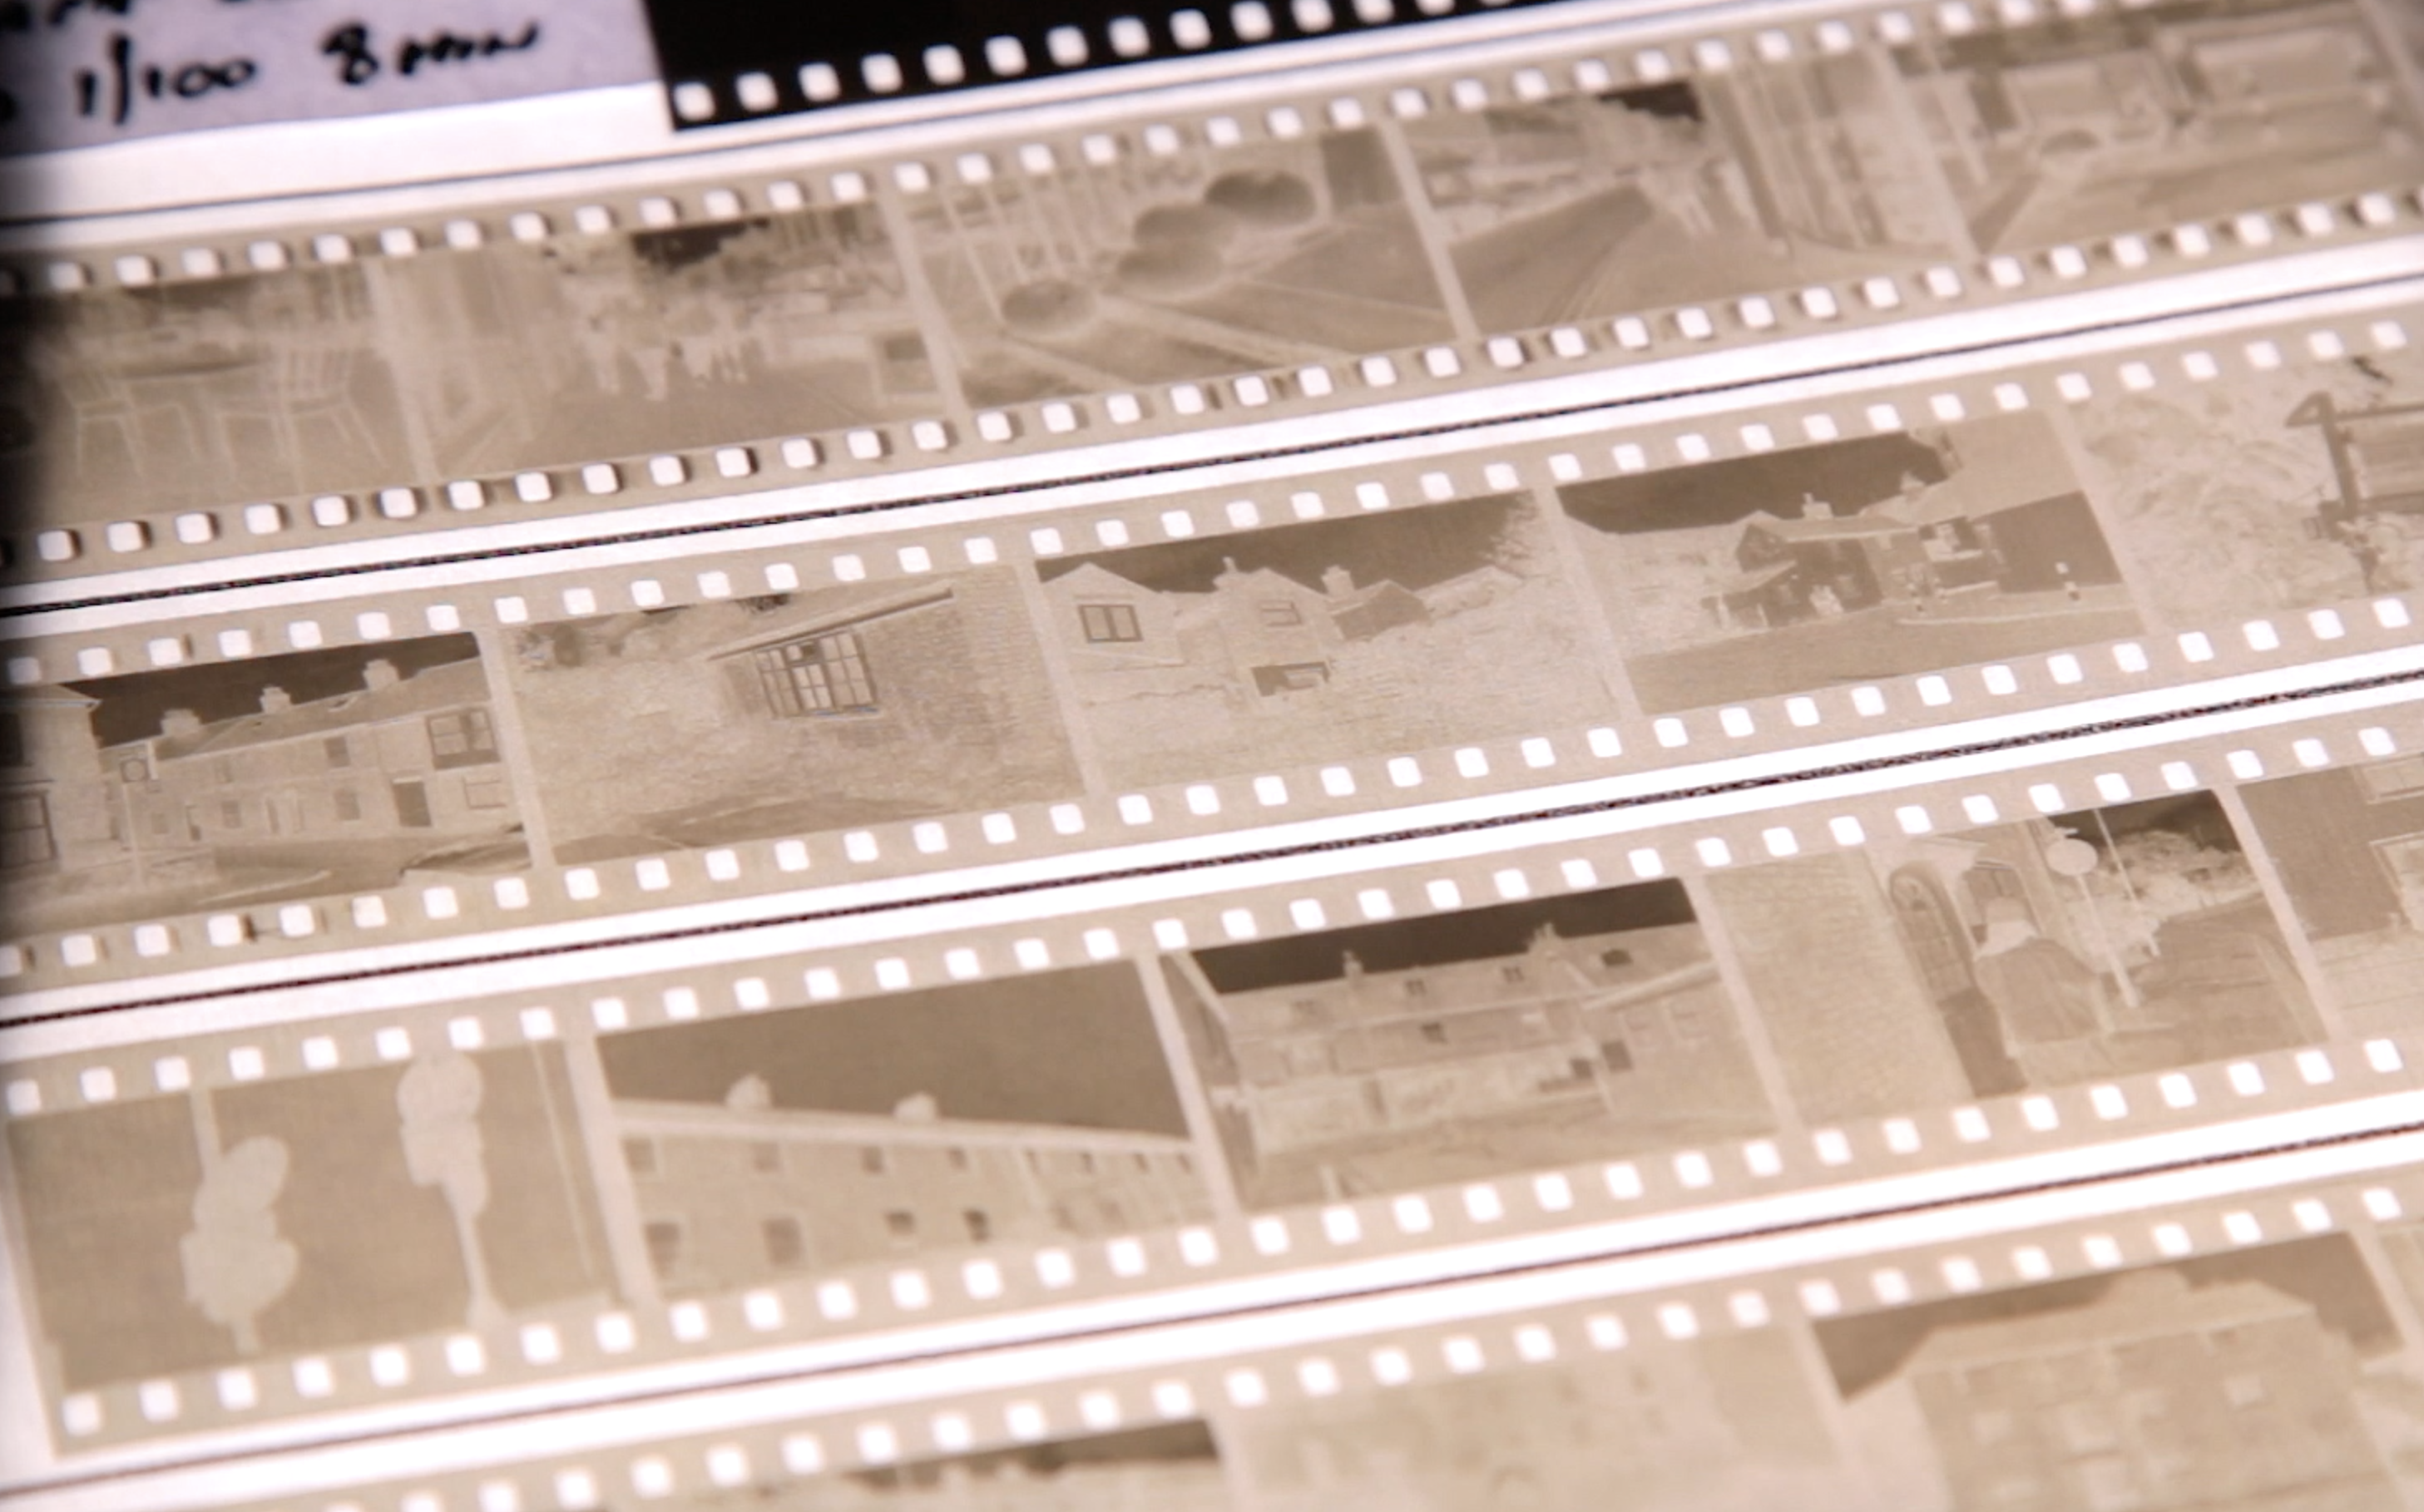
The Negatives
And after developing the film in 510 PYRO they appeared to be thin! Maybe a bit longer than the 8 minutes I developed for would have helped but in saying that, my bright highlights would have been super bright with longer development.
Grain & Contrast
If you like contrast and grain this film will certainly guarantee that on a bright day. It reminds me of JCH Street Pan 400 Film which is also a surveillance film.
So with these photographs looking very punchy I decided to shoot the next roll of ATM 400. This time I metered for 200 and developed in Kodak D23 developer. And I used a different camera, A Chinon CE-5 with a 28mm lens.
I was much more pleased with the results from this combo.
Roll 2
This day was a light overcast day, which I feel suits this film for better tonality and still leaving a rich contrast.

My Thoughts
So did I like this film?…
Yes I did, but I would need to shoot many rolls to settle down with a developer and situation (project) combo. I liked the Kodak D23 results metered at 200 far more than the 510 PYRO and 400 metering.
And the film certainly does have a unique look with its harsh but not ugly grain and its undeniable contrast and bright highlights (in bright sunlight). But it is a CCTV film and I would imagine they didn’t make these films as high quality as general photographic films. They probably contain less silver on the emulsion than conventional films but as long as it could show a face at an ATM machine or a number plate on a speed camera then that was its job done.
Would I buy and shoot this film?...
I have to say I would, however, not for my every day photography. It would have to be on a project where I wanted this type of look for my prints with contrast and grain expectations. I can definitely see it belongs on the street, or even for certain strong portraiture work.
Above all Street Candy is a family run business in France. And I have always said that these fun and funky films make the film community a bit more exciting for newcomers. As long as the price isn’t off the scale, especially the rebrands. And ATM at £10 a roll at the time of writing this post isn’t bad at all!
So well done to Street Candy for continuing to find these emulsions and putting them into film cassettes for us to enjoy.
Kodak Brownie Model D
Kodak Model D 1946 – 1957 620 Film Camera:
Thanks to my friend Gary Geezer for sending me this camera and film. Gary is a creative “nude and boudoir photographer in London. Check out Gary’s Instagram
A Review
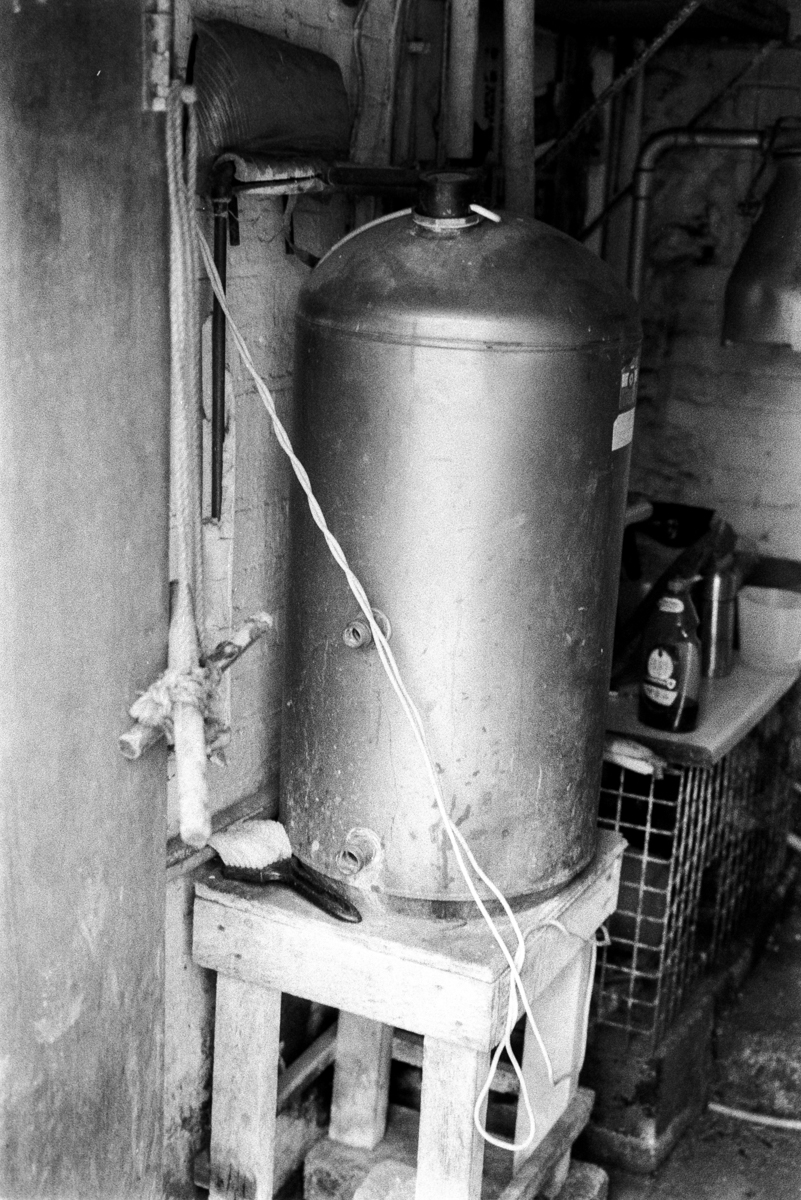
The Kodak Model D 1946 – 1957 620 film camera is a classic box camera that was produced by Kodak in England for over a decade. It is a simple and easy-to-use camera that takes 620 film, which produces 2 1/4 x 3 1/4 inch negatives (6×9). Or a tad bit smaller if you actually measure the back.
The Model D has a single-blade shutter with two speeds: B (bulb) and I (instantaneous). And the speed of the camera is just 1/40th of a second, or there about! Which makes it difficult in some situations to hold and keep steady. I found that by using a strap I can pull the camera tight around my neck to steady it more in the hand.
The shutter mechanism is surprisingly simple.

The lens is a meniscus f/11 100mm lens with a portrait lens attachment which is covers the back of the lens when you pull the slider out. This allows you to take portraits within a 3 to 6 feet range. I found 5-6 feet to be best for sharpness. You can see the close up lens half way across in the image below. Also the slider that pulls the close up lens across and the switch between Bulb mode and instantaneous.


The camera also has two viewfinders. One for portrait and another for landscape. And these are very bright! They work using the two view finder lenses and if you remove the front panel you can see the mirrors.


The Model D is a well-made camera with a metal body and a grained imitation leather covering. It is also relatively compact and lightweight, making it easy to carry around.
How the Kodak Model D was made
The Kodak Model D was made using a variety of manufacturing techniques, including:
- Stamping: Metal parts for the camera body were stamped out using dies.
- Casting: Metal parts such as the lens mount and shutter were cast.
- Machining: Metal parts such as the winding knob and shutter release button were machined on lathes and milling machines.
- Assembly: The various parts of the camera were assembled by hand.
The Kodak Model D was a relatively simple camera to manufacture, but the quality of construction was high. The camera was also very affordable, making it accessible to a wide range of consumers.
Who the Kodak Model D was meant to be used by
The Brownie Cameras were for anyone to use back in the day. And the large negatives were made as contact prints (6×9) which were often put in family albums. You have probably see these albums and prints in antique shops. I intend to do just that with my collection of Brownie Negatives.
It was designed to be a simple and easy-to-use camera for anyone who wanted to take pictures. It was particularly popular with families and amateur photographers.
The Kodak Model D was a popular camera for many years, and it is still used by some people today. It is a classic camera that is known for its simplicity, durability, and affordability.
Loading the Camera
The camera takes 620 Film. You can still get 620 Film today but only from specialist suppliers that roll your regular 120 films onto the 620 spool. 120 Film will not fit into this camera but you can do some DIY and cut the 120 film spool to size, and it’s easy to do.
The main difference is the circumference of the spool ends. 610 is slightly smaller but with scissors you can easily cut away the excess to fit 120 Film into the camera.
The original 620 spools were metal and are quite popular today. You usually can find one still in the original camera but if not you can easily get these online.


So you would use the metal spools as the take up.
To load the film you take the Film Unit out of the Camera.

And load your adjusted 120 film onto the side that says “Key Side”.


And pull the film over the rollers onto the metal take up spools.

“Key Side” is the notch that allows the advance knob to advance the film. It’s easy to do. And once your Film Unit is back inside the camera, push the advance knob in to secure the unit and also to catch onto the 120 spool. From there you make sure it is pulling the film tight and then close the back of the camera and continue to frame number 1. You get 8 shots.

You can tape over the red window if you are worried about fogging the film inside but I never have and never had any leaks from it.
The only leaks you will possibly get is when you take the film out of the camera because you have trimmed the edges. Just make sure you load and remove in subdued light.
The camera appears to be very secure from internal light leaks.
Shooting the Camera
As the camera is 1/40th and F11 I use a 100 speed film inside the camera on sunny days. If it is too bright you may get over exposed negatives but only a couple of stops which isn’t hard to deal with. But light overcast days it is perfect.
With the single meniscus lens anything over 10 feet will be in focus. With the close up lens pulled out you will be able to shoot nice portraits between 3 and 6 feet, but I like to be around 5 feet for close ups.
Sample Images
Here are photographs I have taken with the camera so far.
Ferrania P30 Film. ( I got my friend Gaz to dress up!)


Accidental Double Exposure!
I found that if you advance the film straight after exposure and get into that habit you won’t double expose by mistake.

Ilford XP2


Not bad are they! For a camera that is so basic.
Cheers Guy’s!
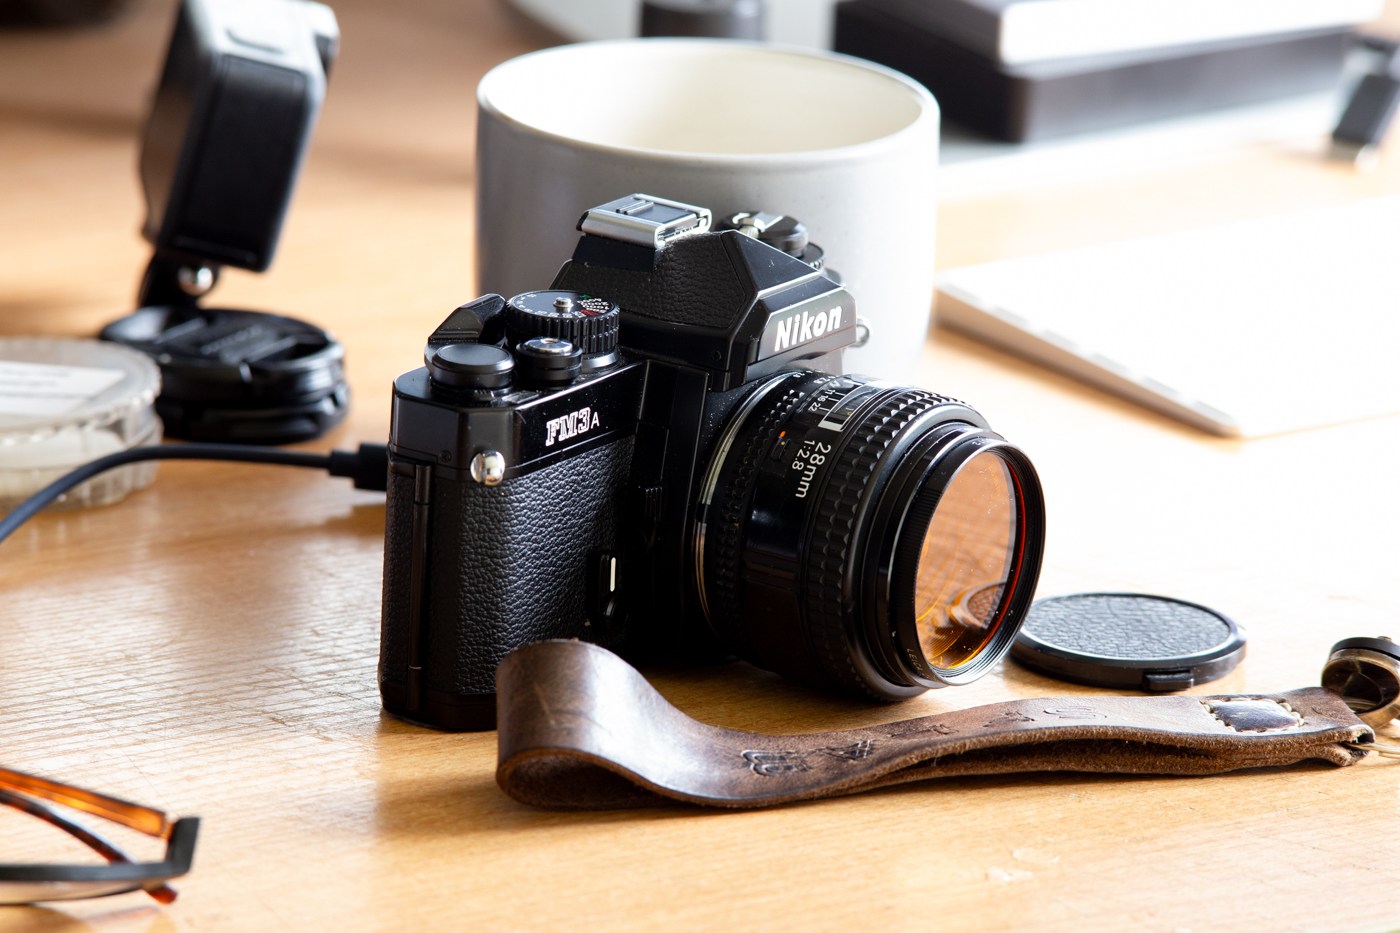
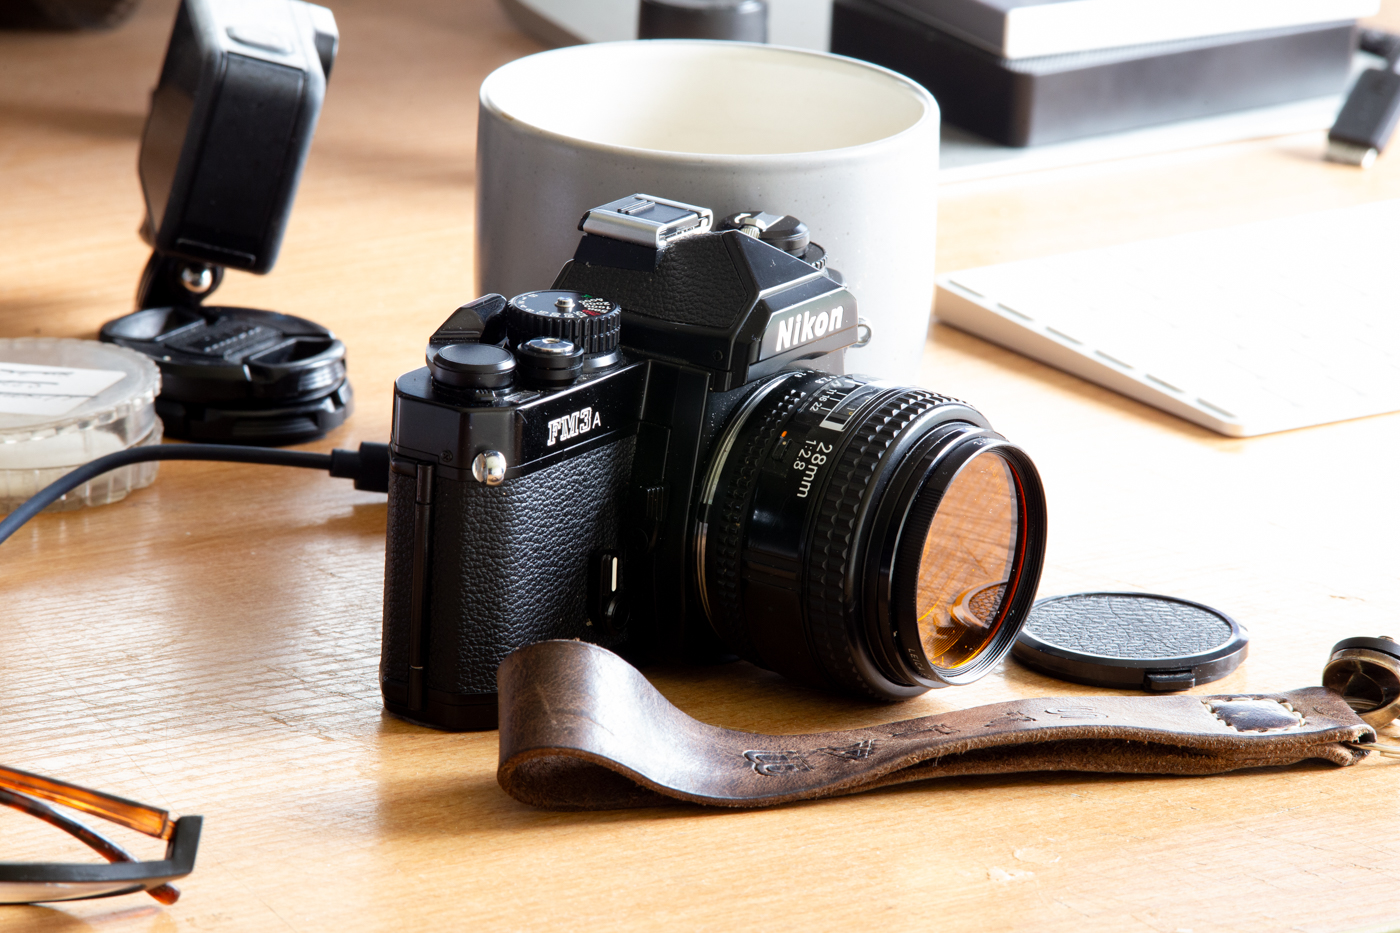
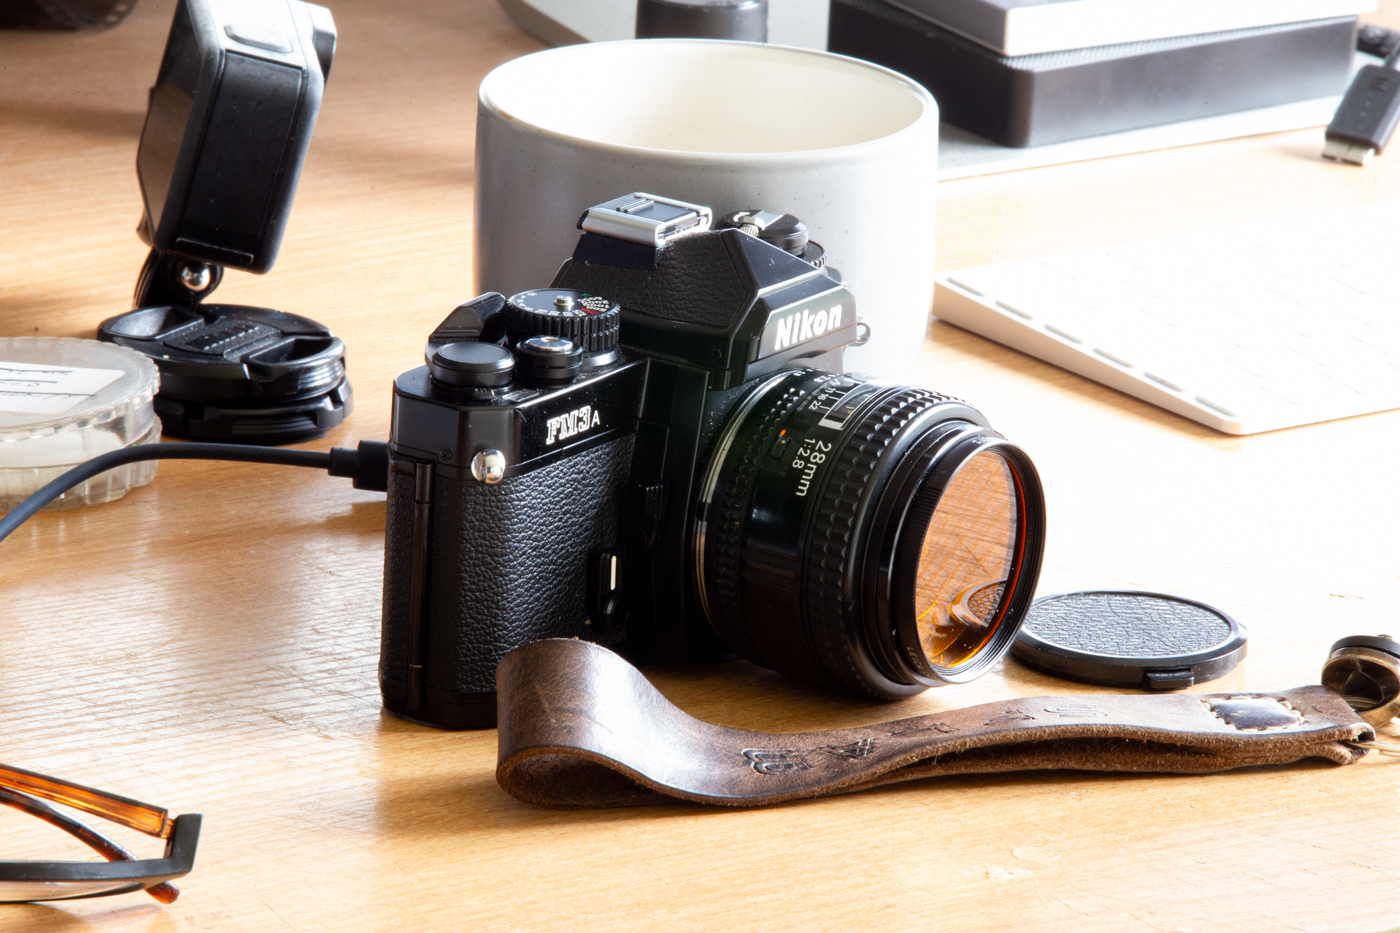
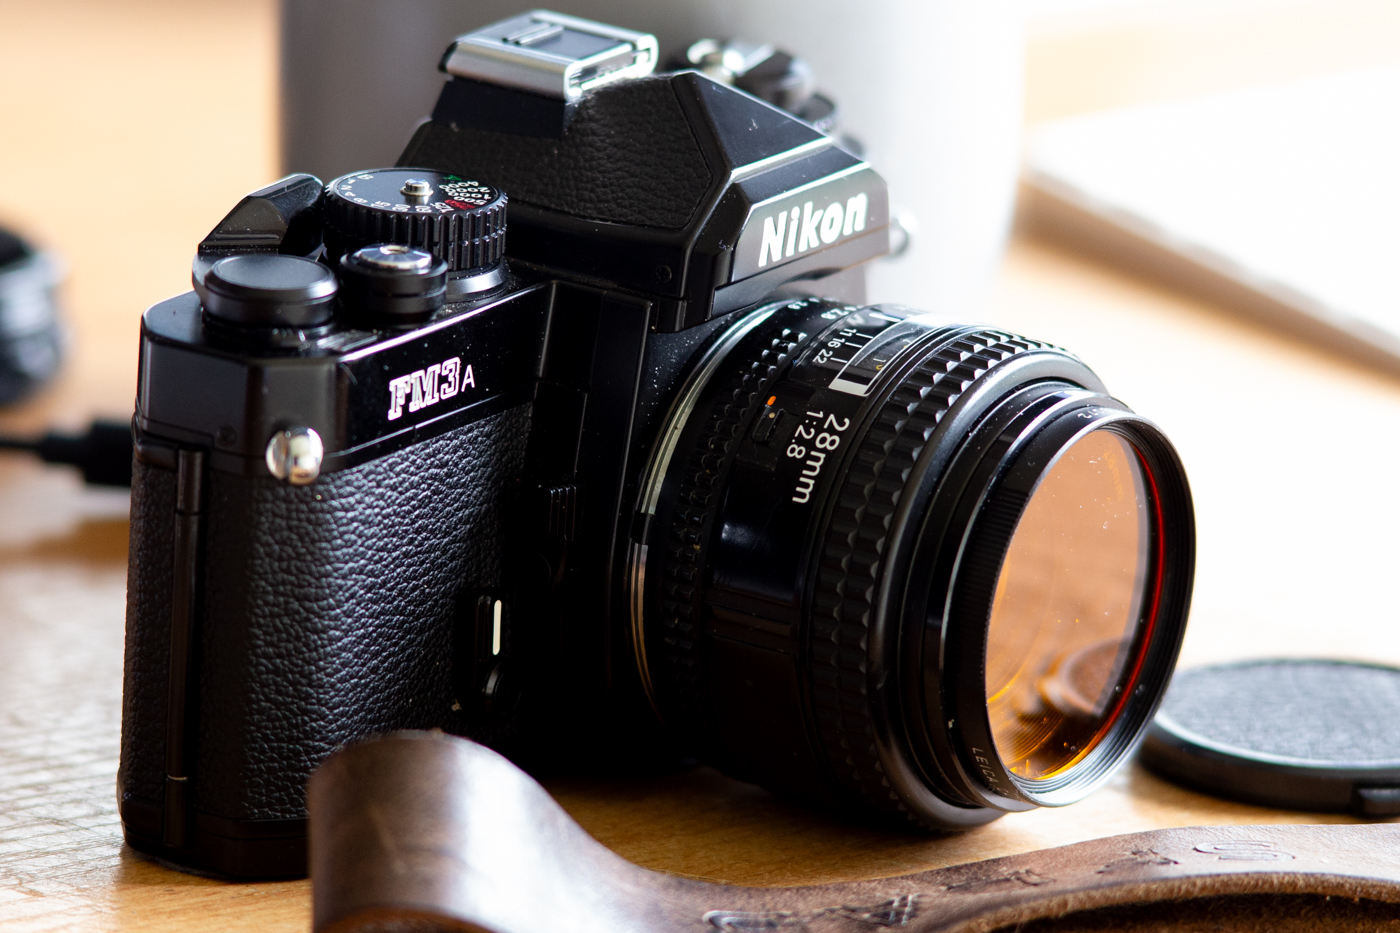
Nikon 180mm NIKKOR ED F2.8
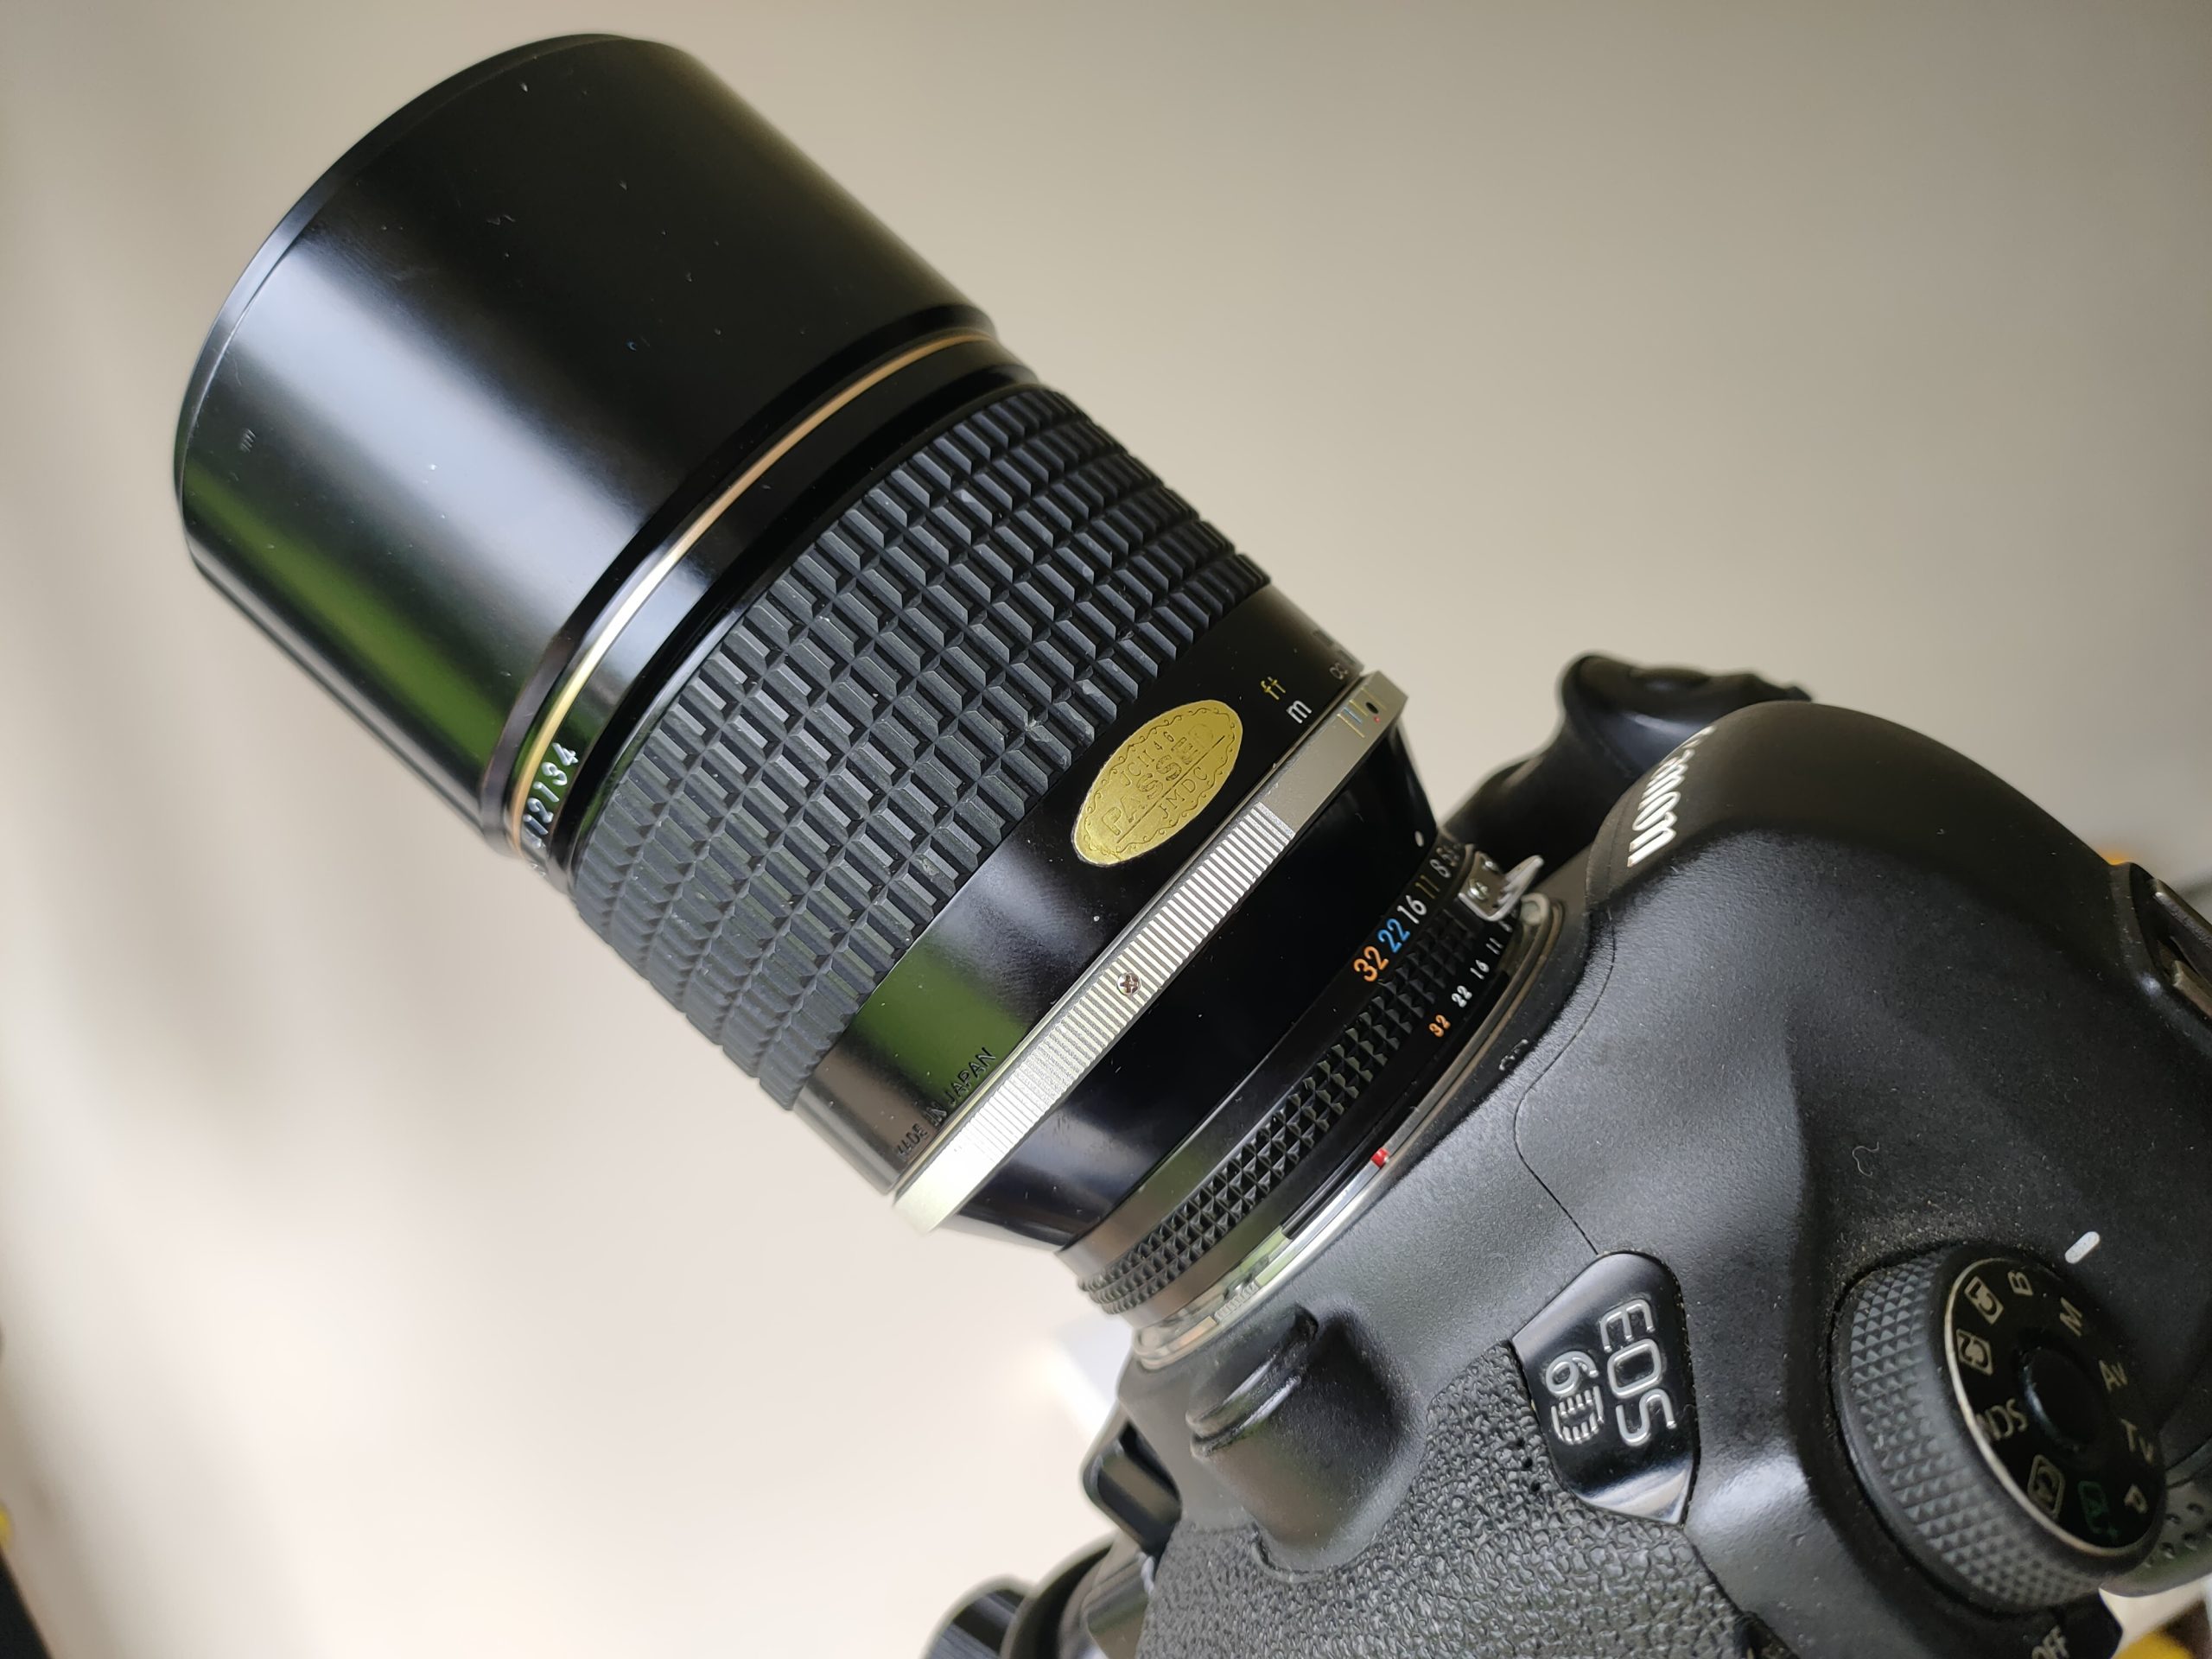
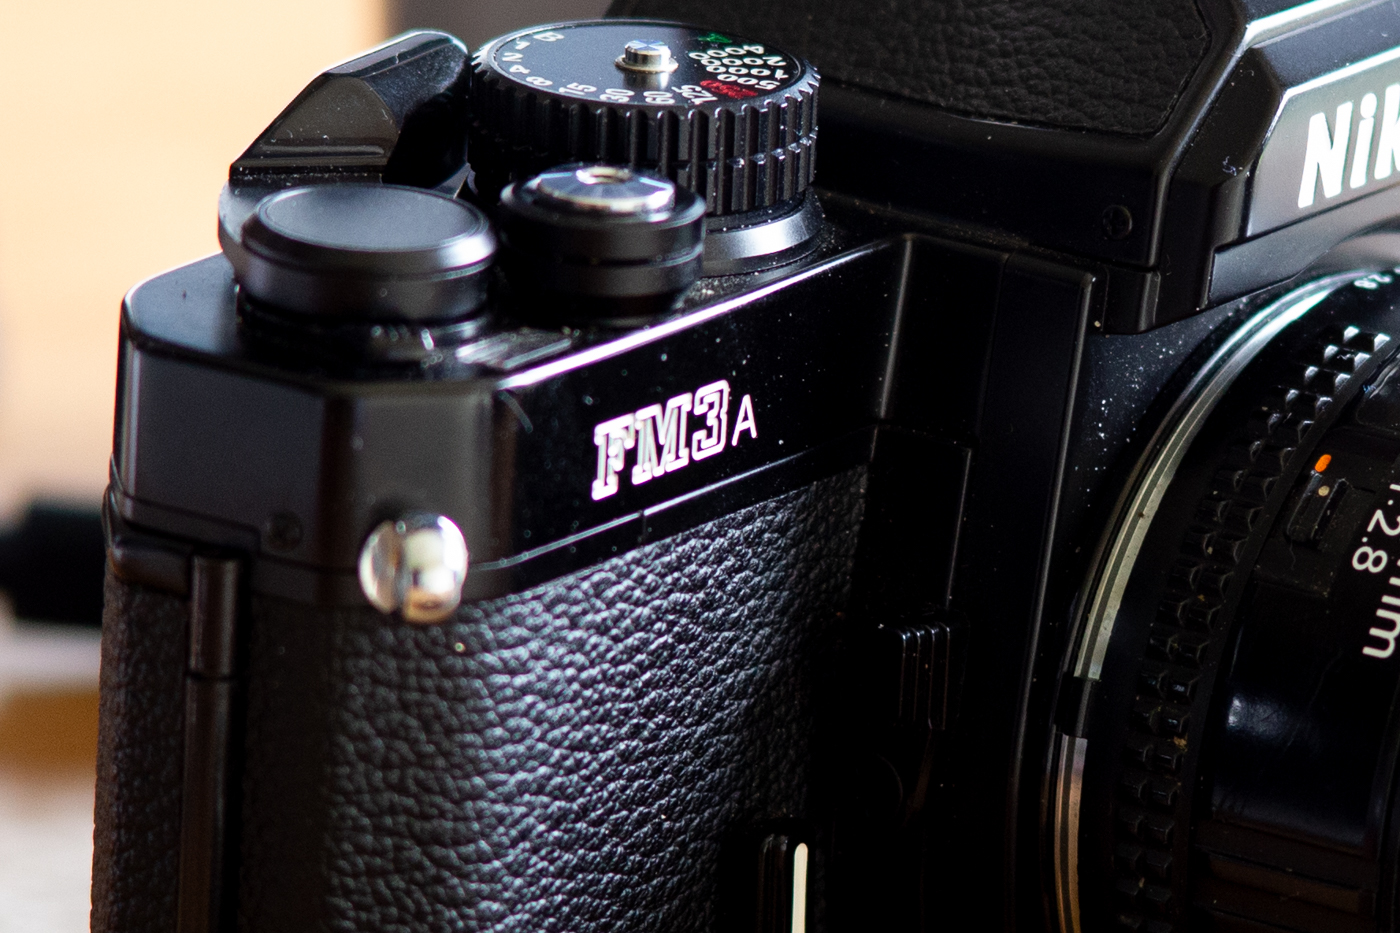
This is the Nikon 180mm F2.8 AIS ED F2.8 Lens from the 80s I recently got and I wanted to do a quick test using my DSLR to find its sweet aperture spot! Here I am looking at sharpness and Chromatic Aberrations. I went through all the apertures on a simple scene near window light.
Watch the Video!
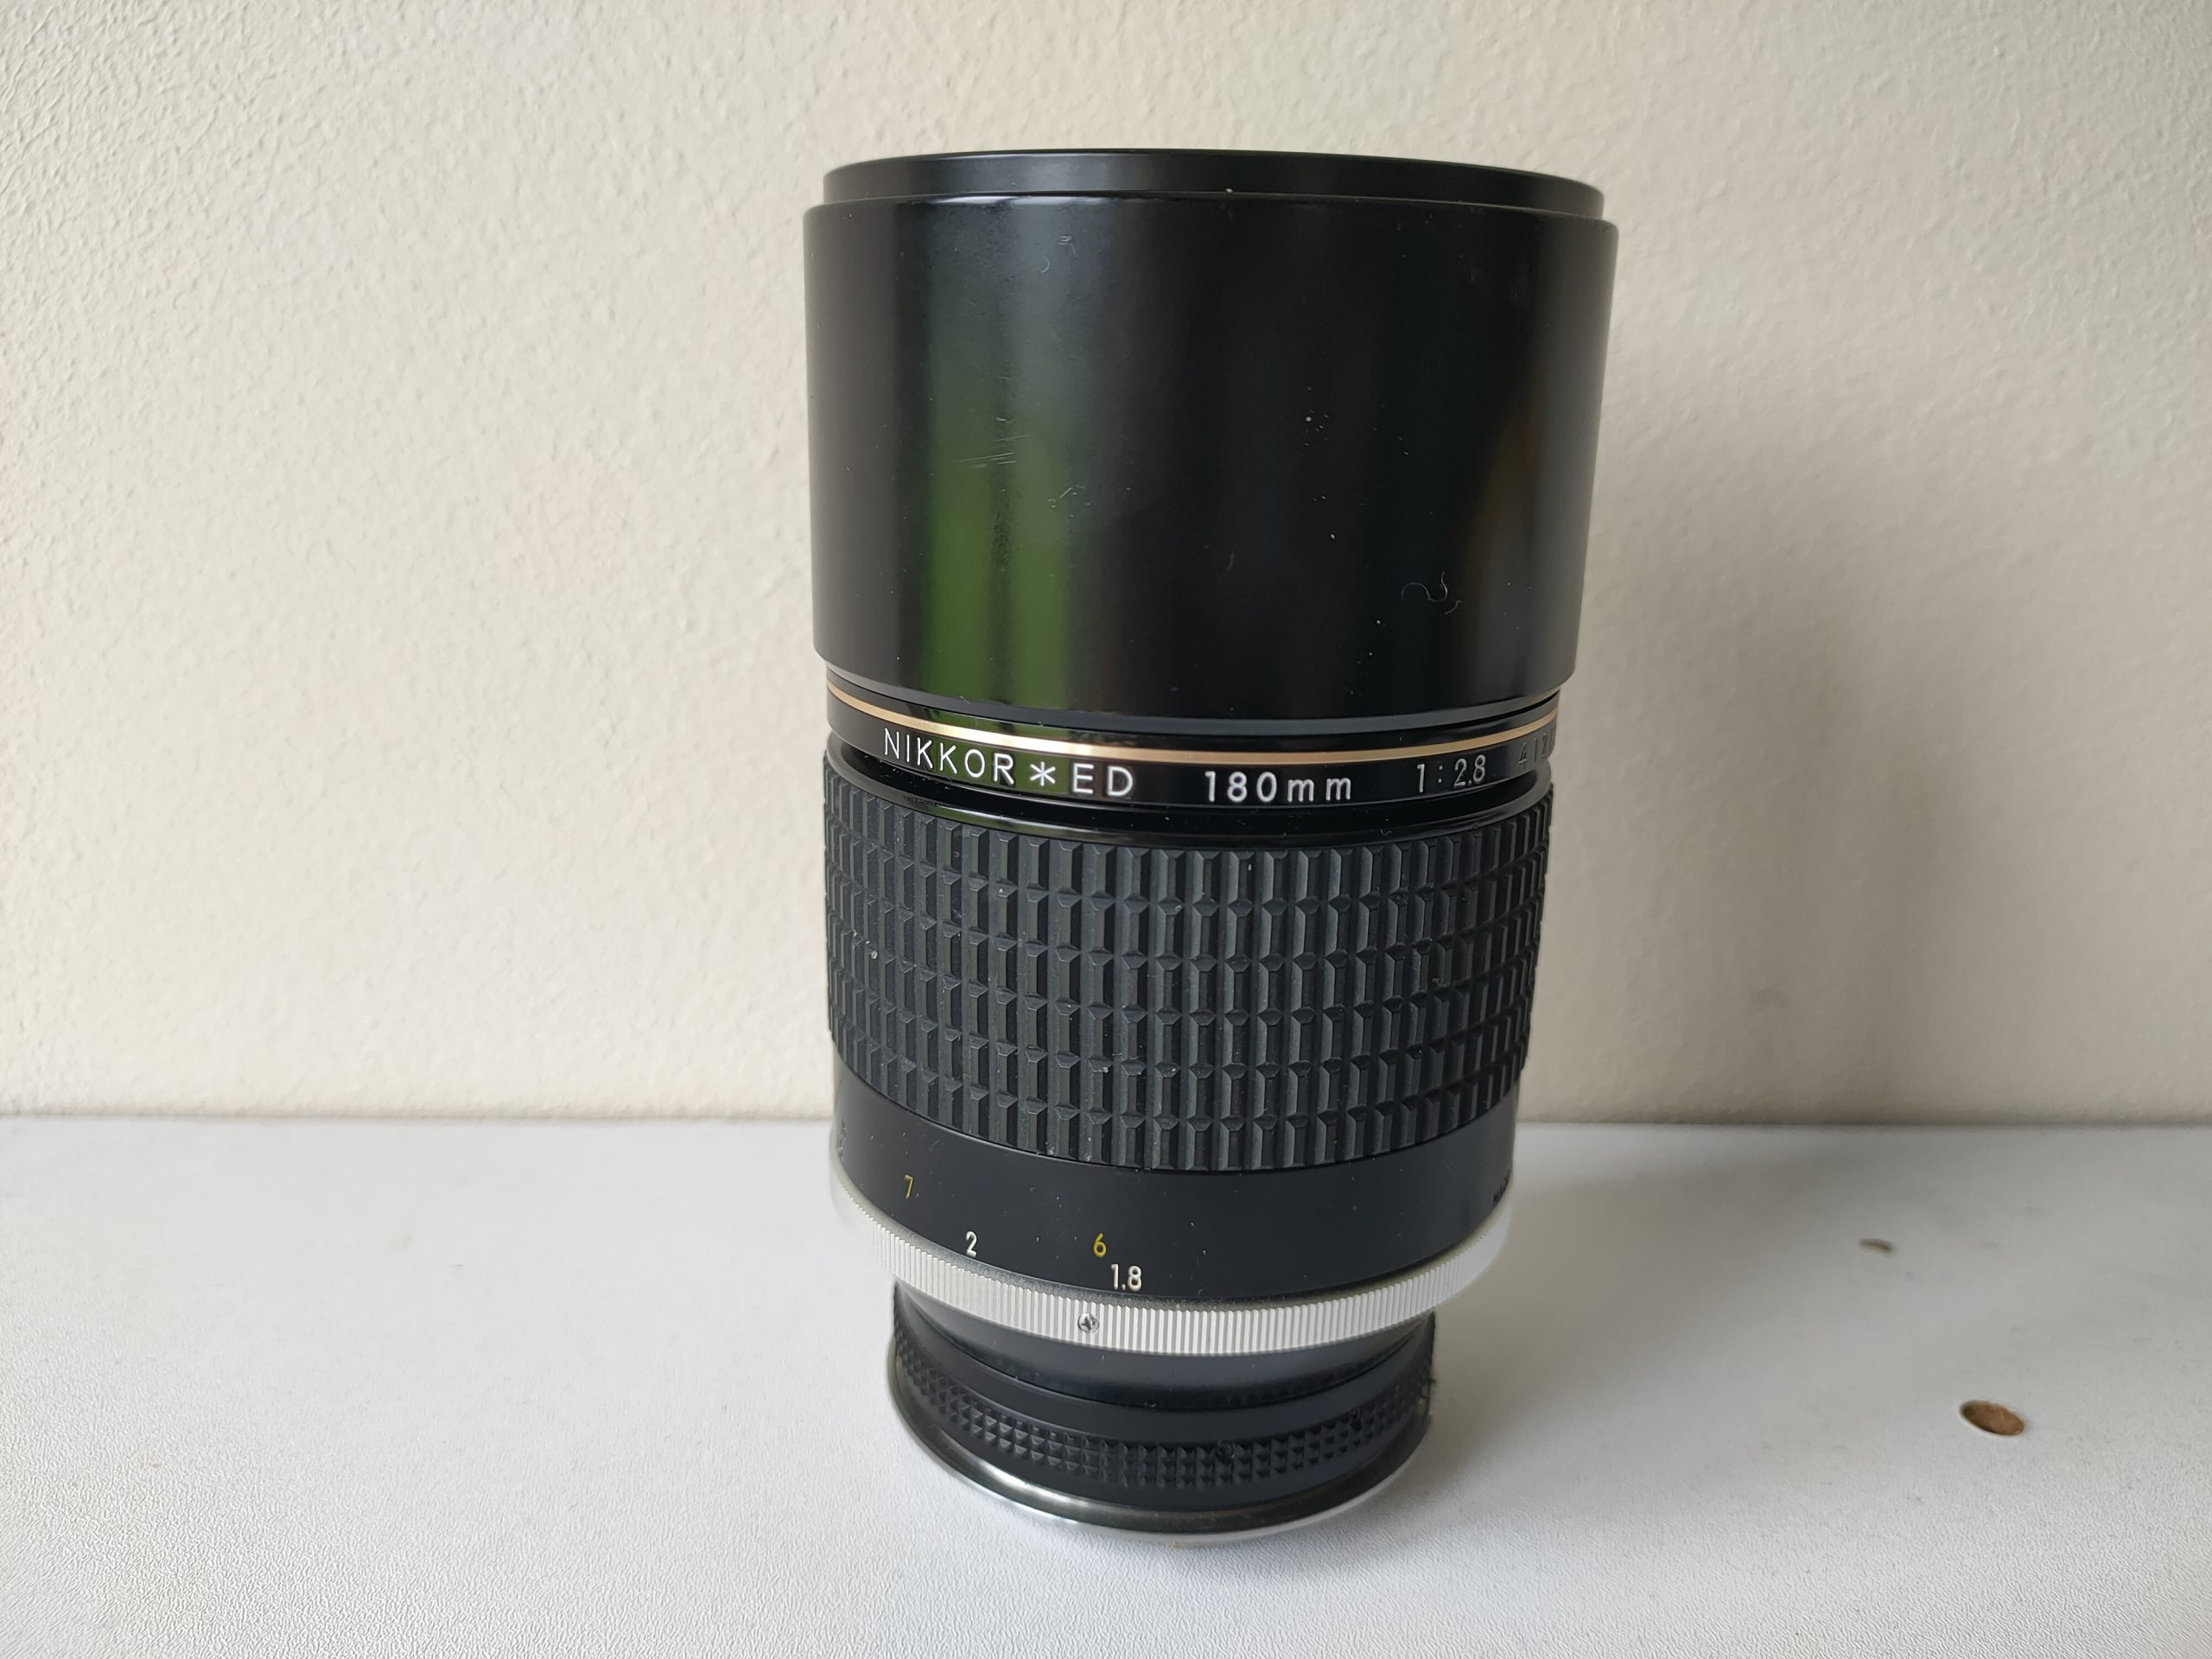
Full Frame (My focus spot was the 28mm lettering on the lens)


32
Sweet Spot
Normally a Lenses “Sweet Spot” is 2 stops down from its widest aperture. In this case f/5.6.
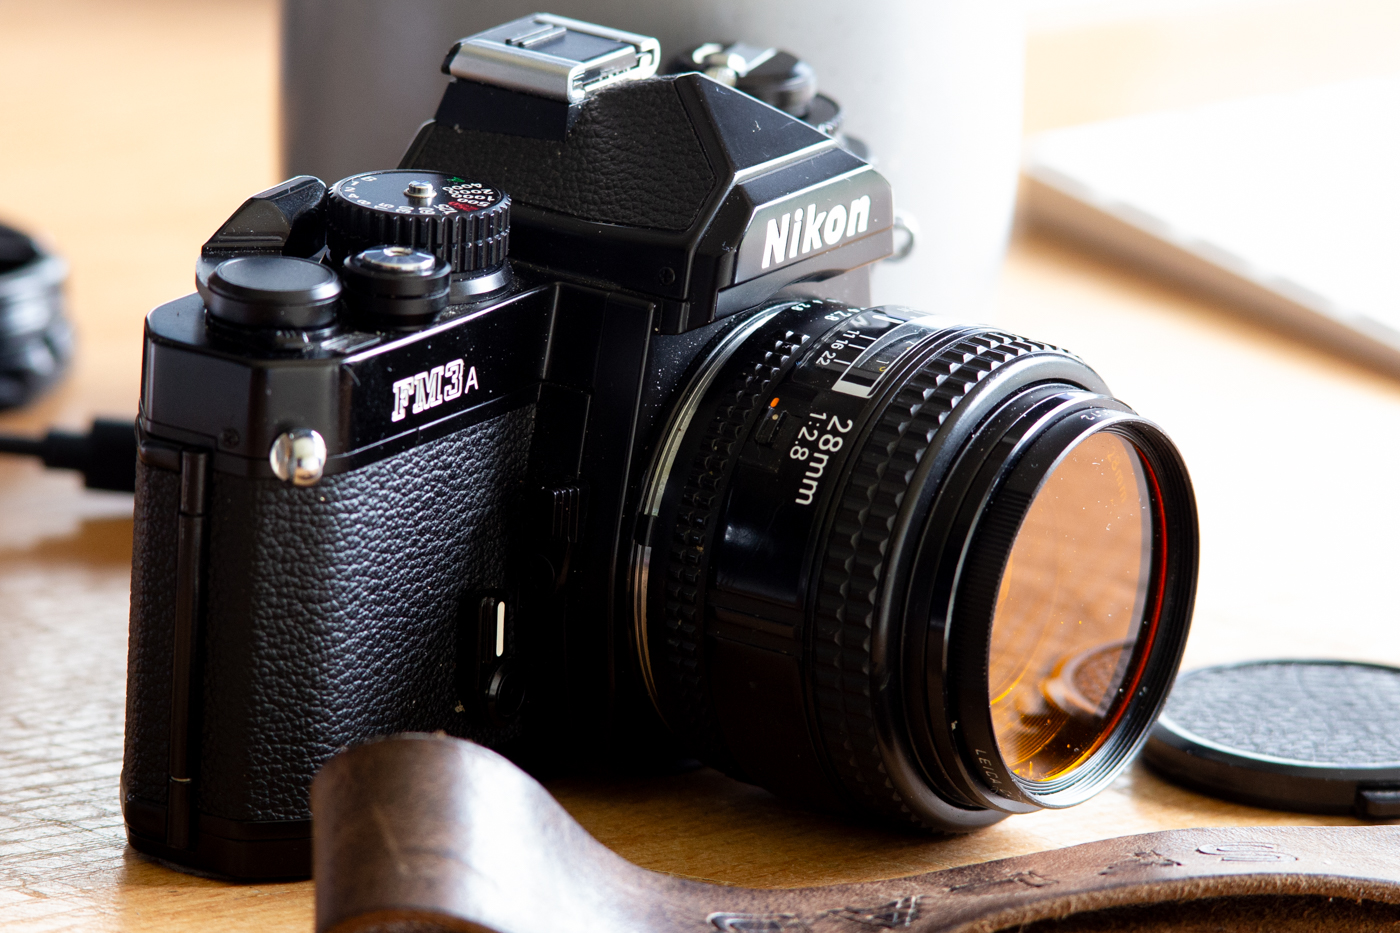
So for me this lens is best at f/8 at the closest focus distance.
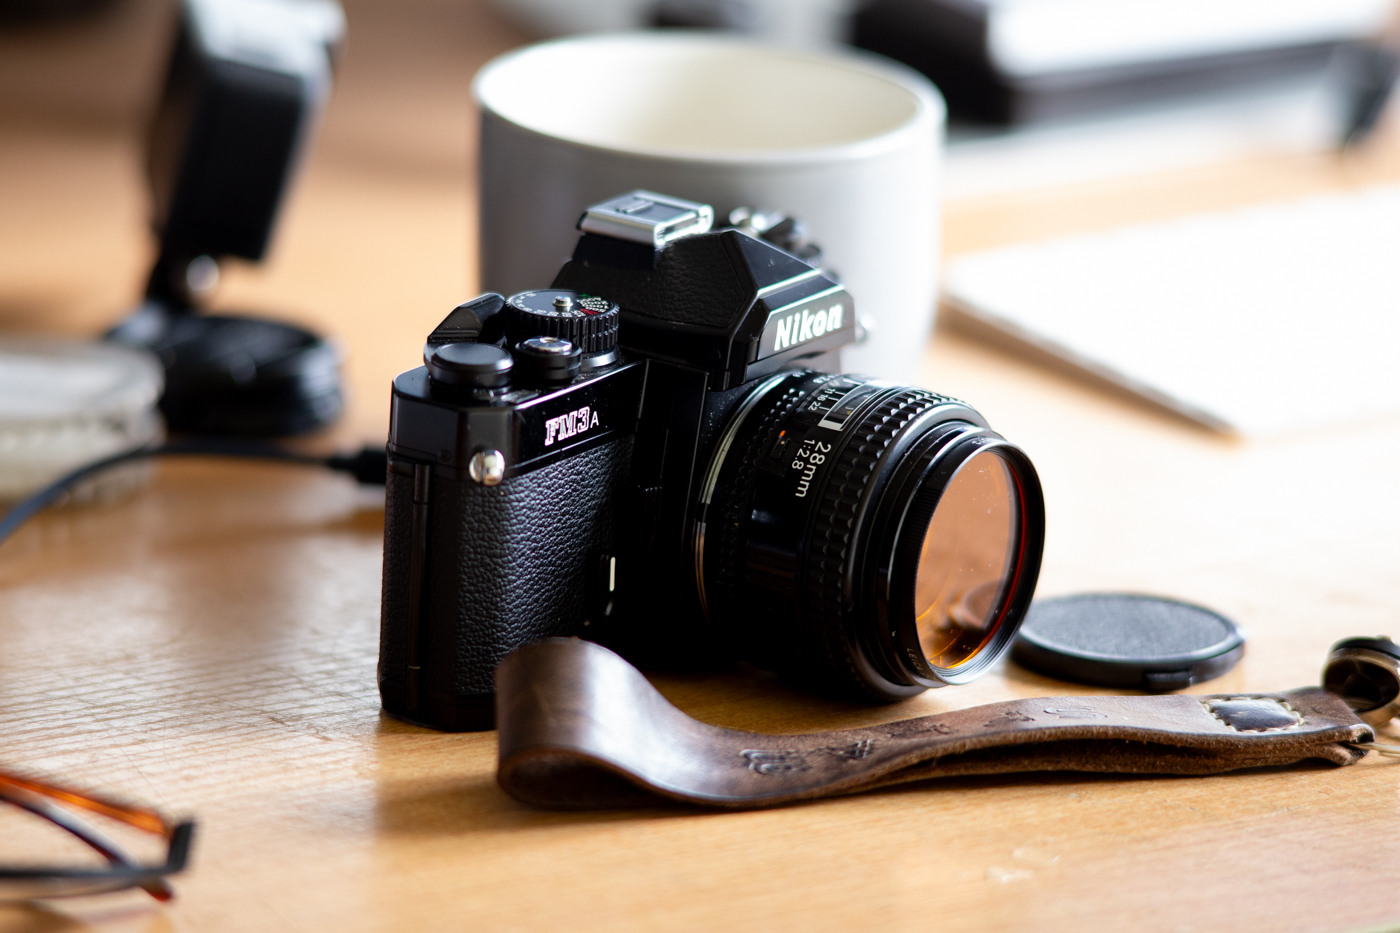
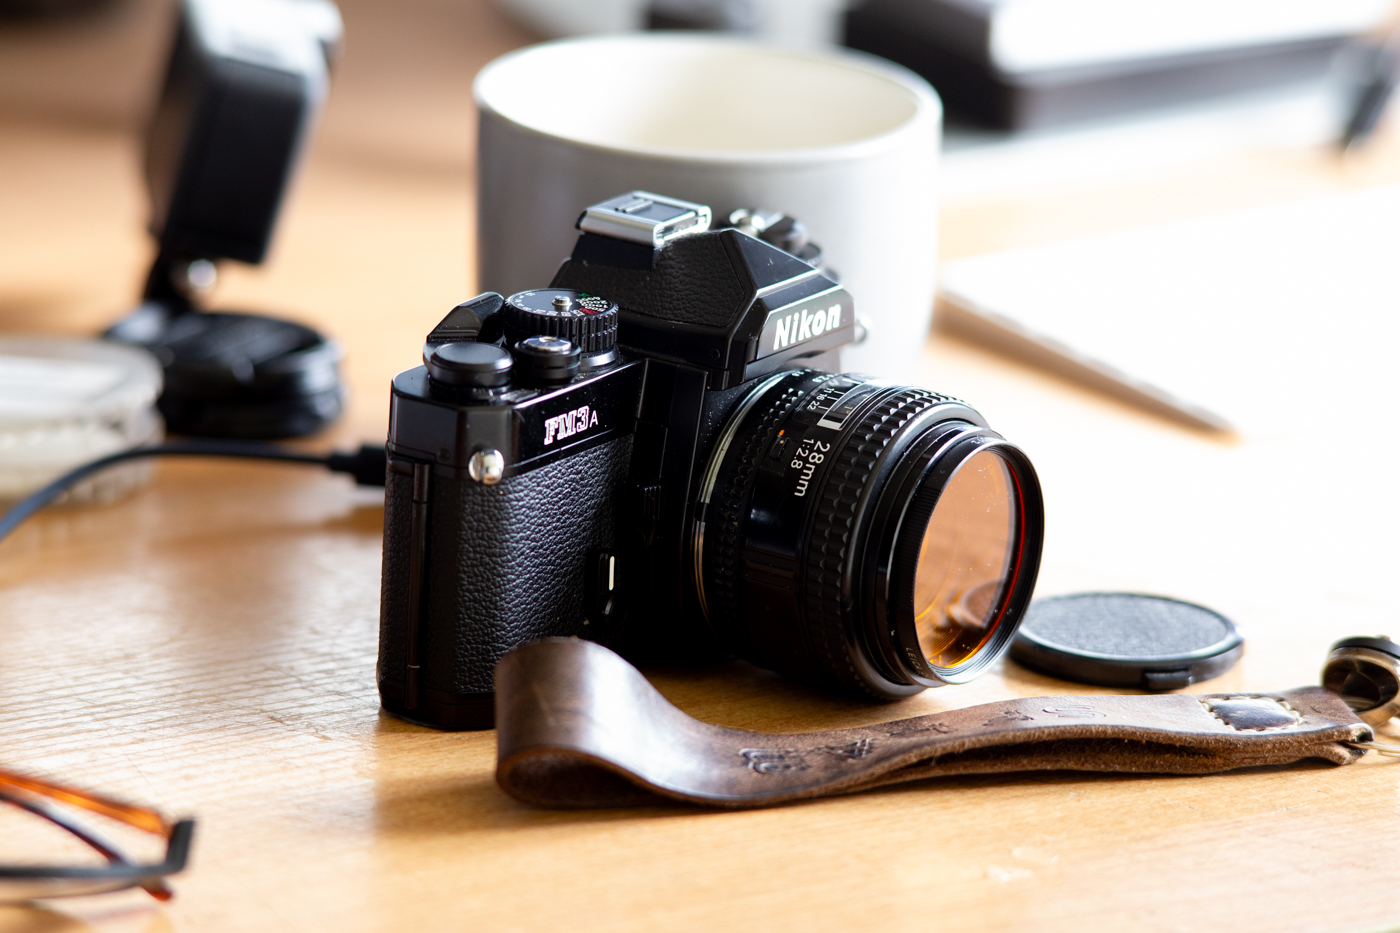
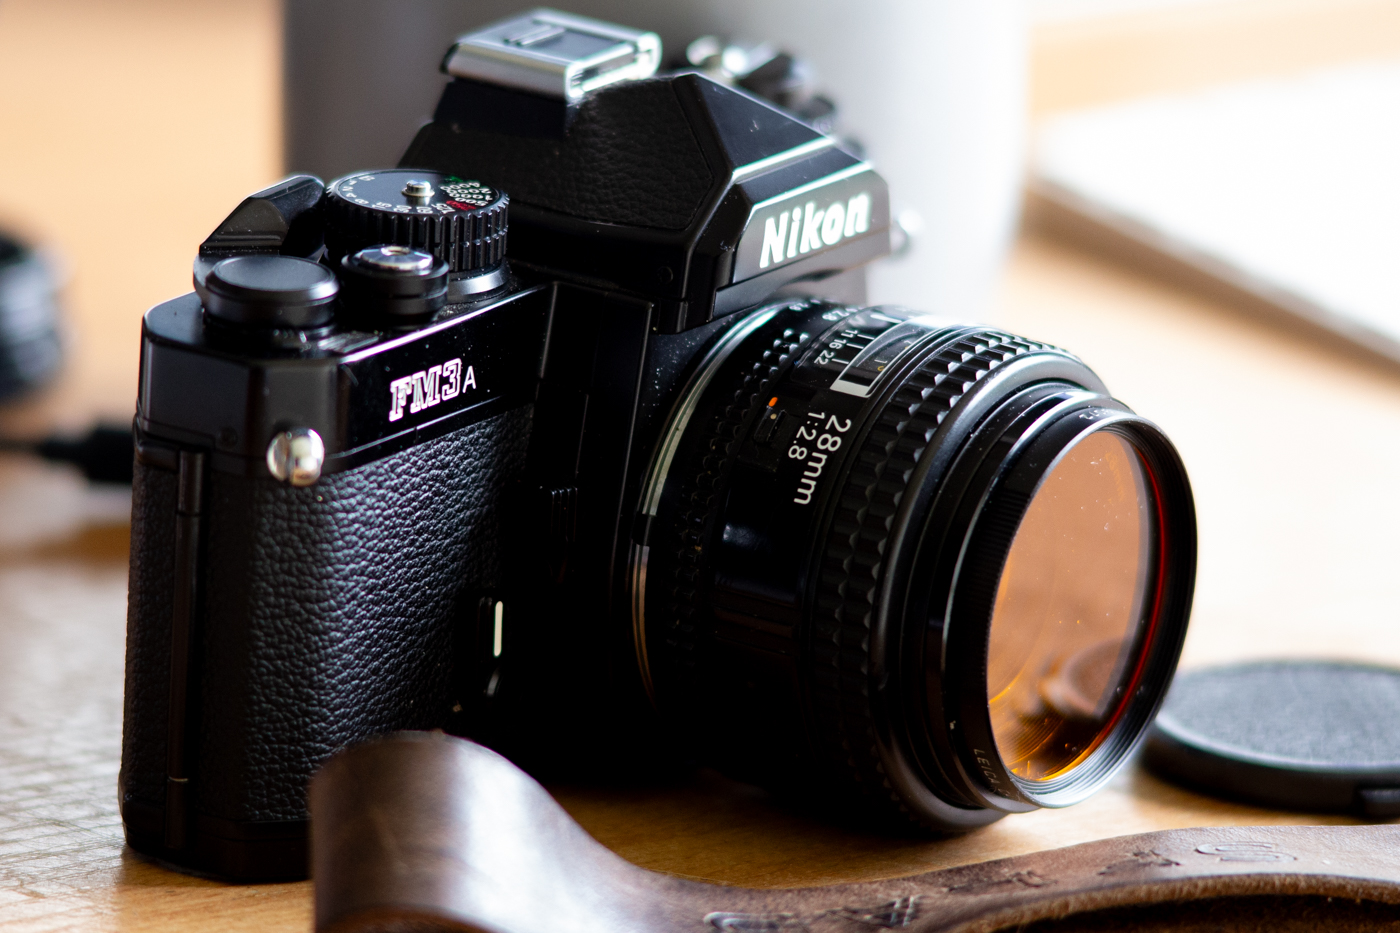
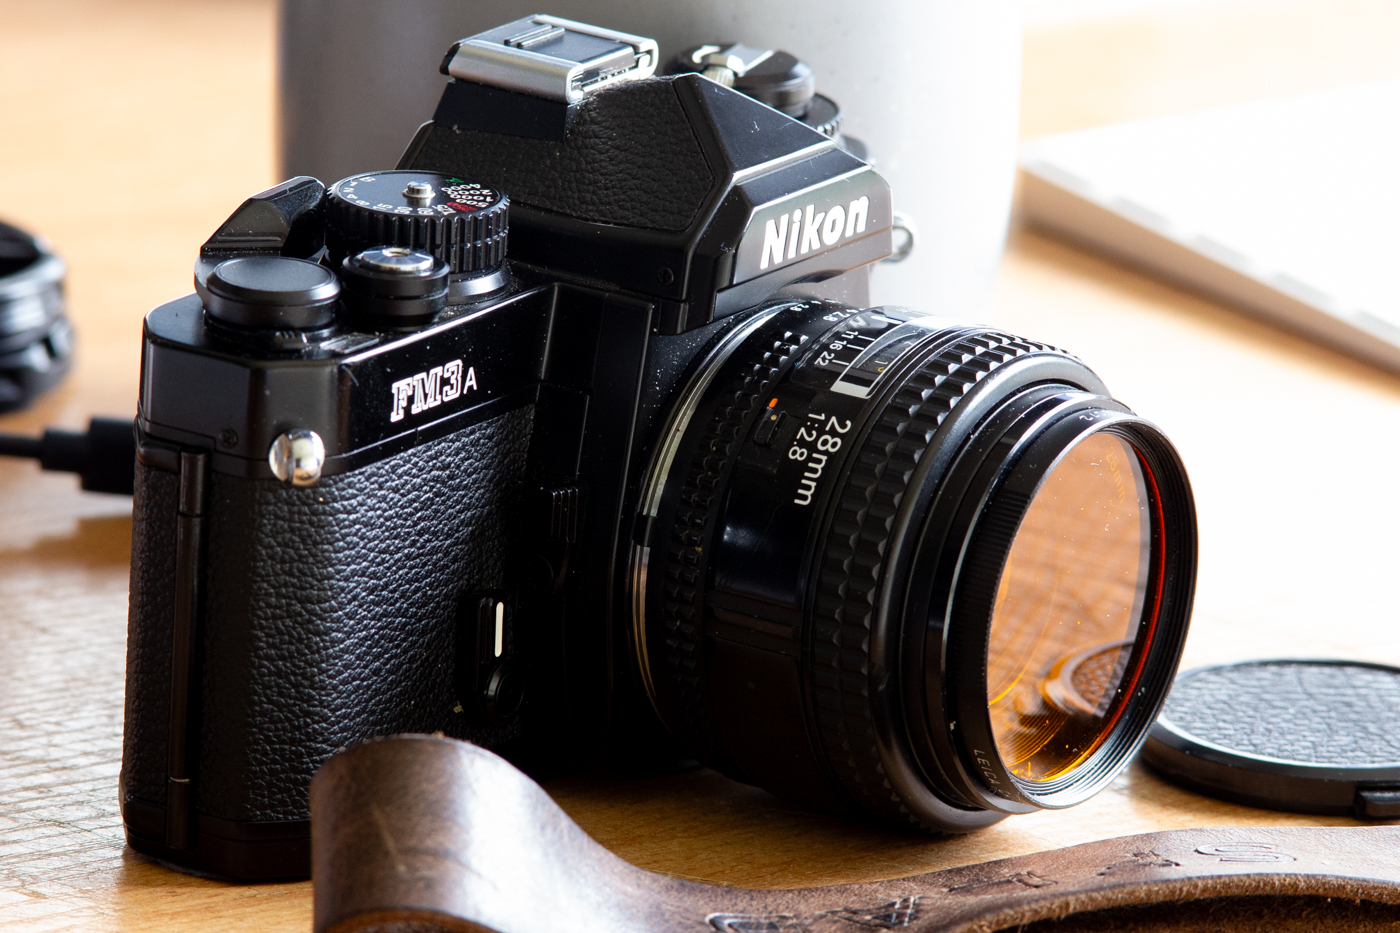
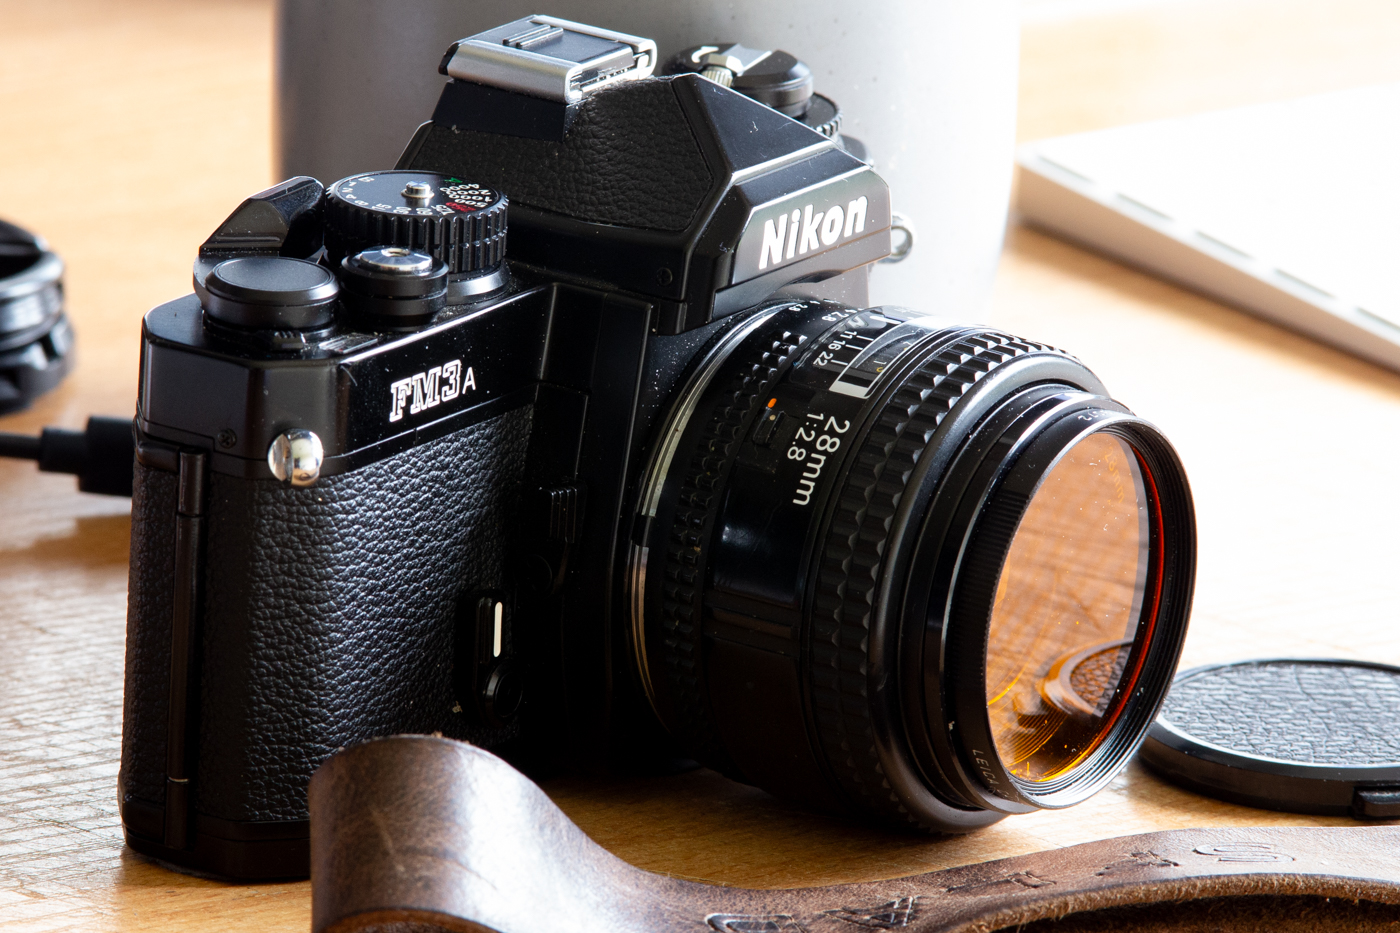
Chromatic Aberrations.
Nikon say “Chromatic aberration is a phenomenon in which light rays passing through a lens focus at different points, depending on their wavelength.”
You can see it in these images real close. Like a purple edging.
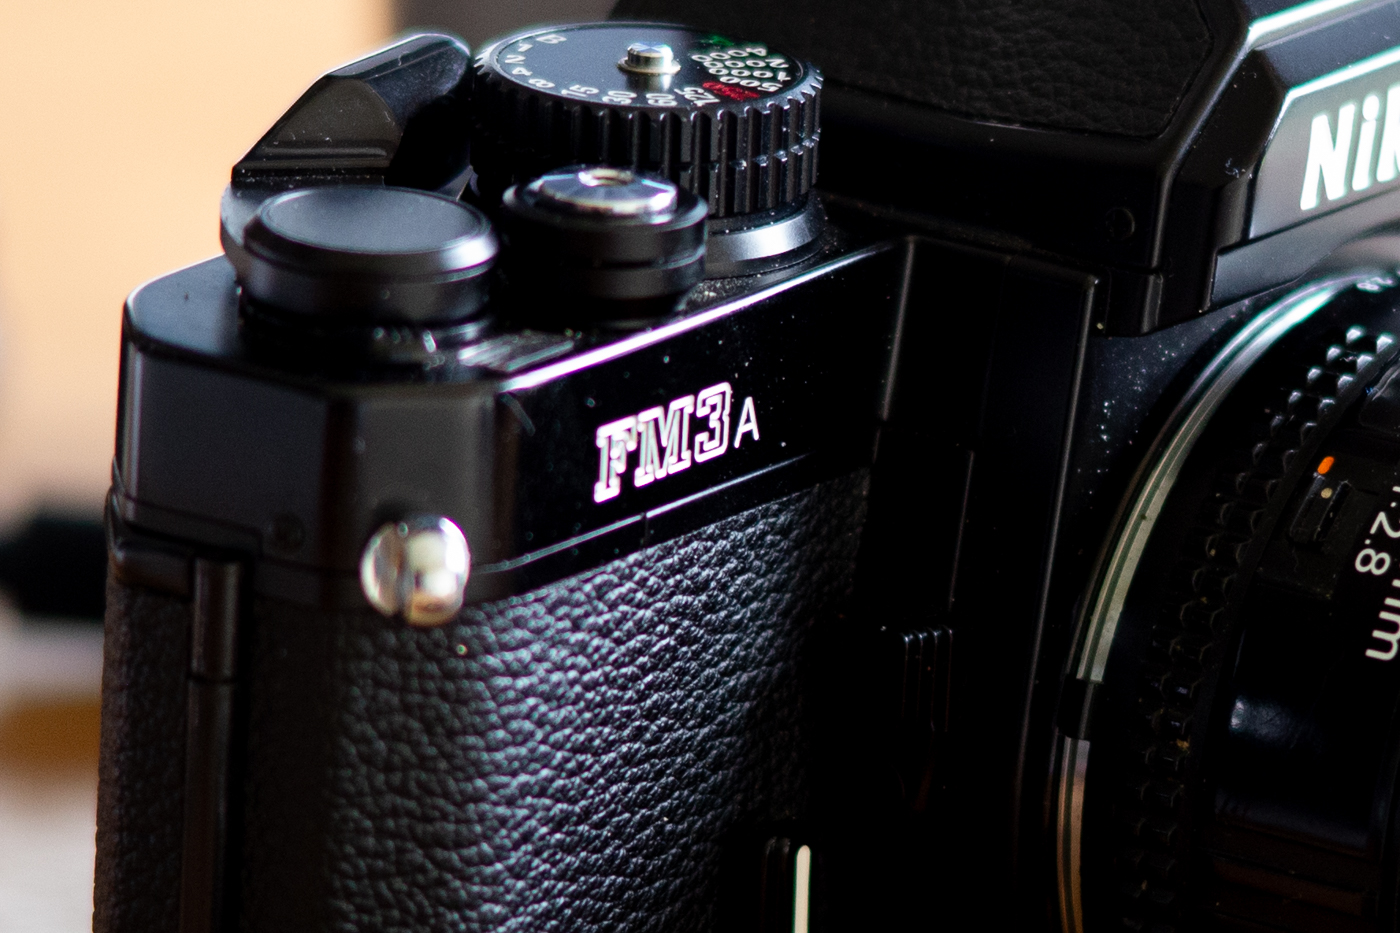
f/2.8. You can see the purple banding on the FM3a logo and the strap clip and also along the top plate.
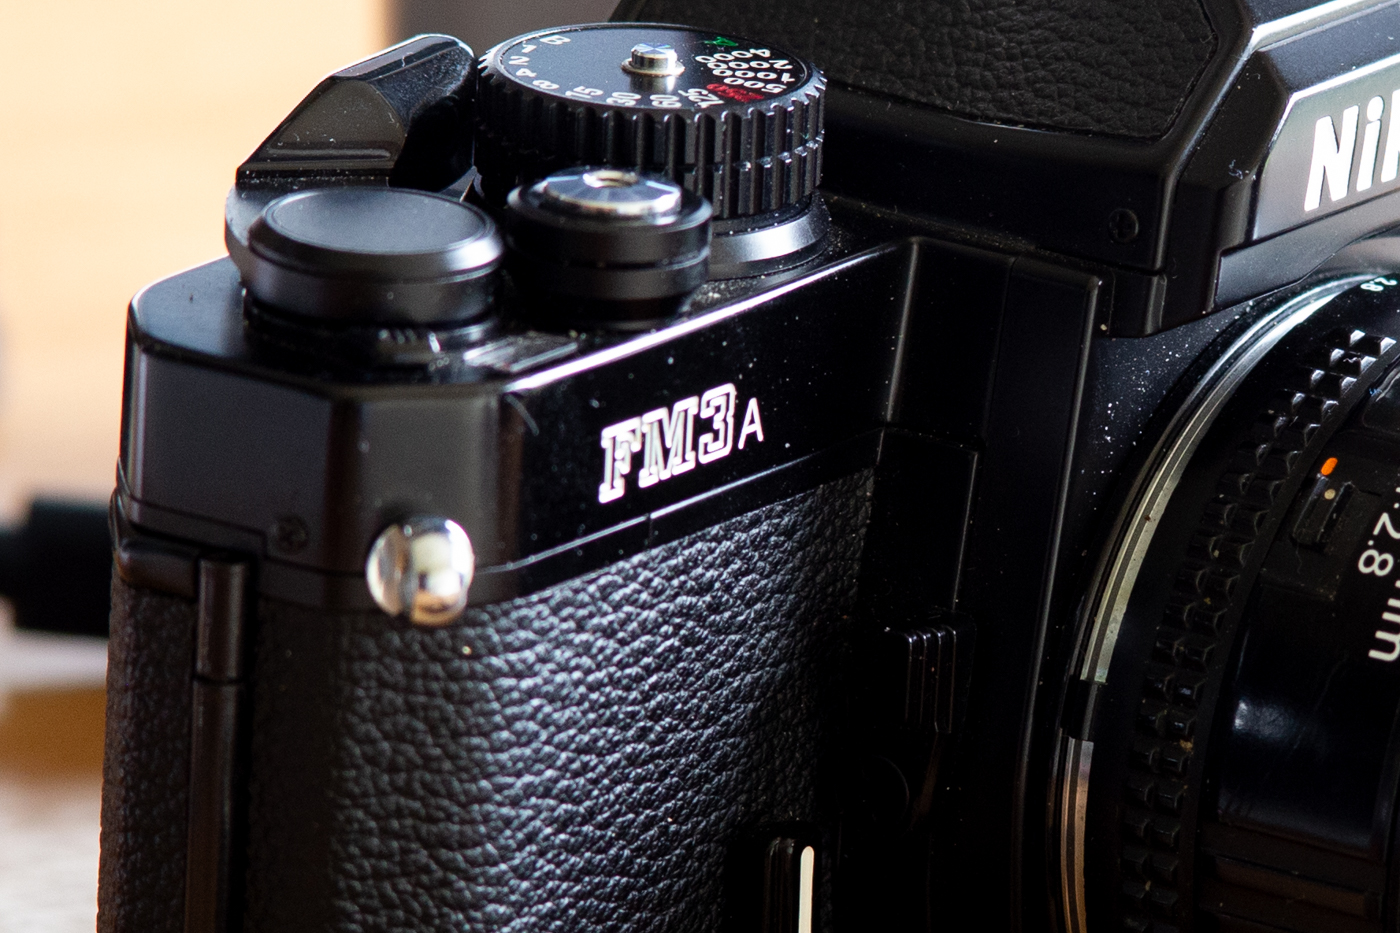
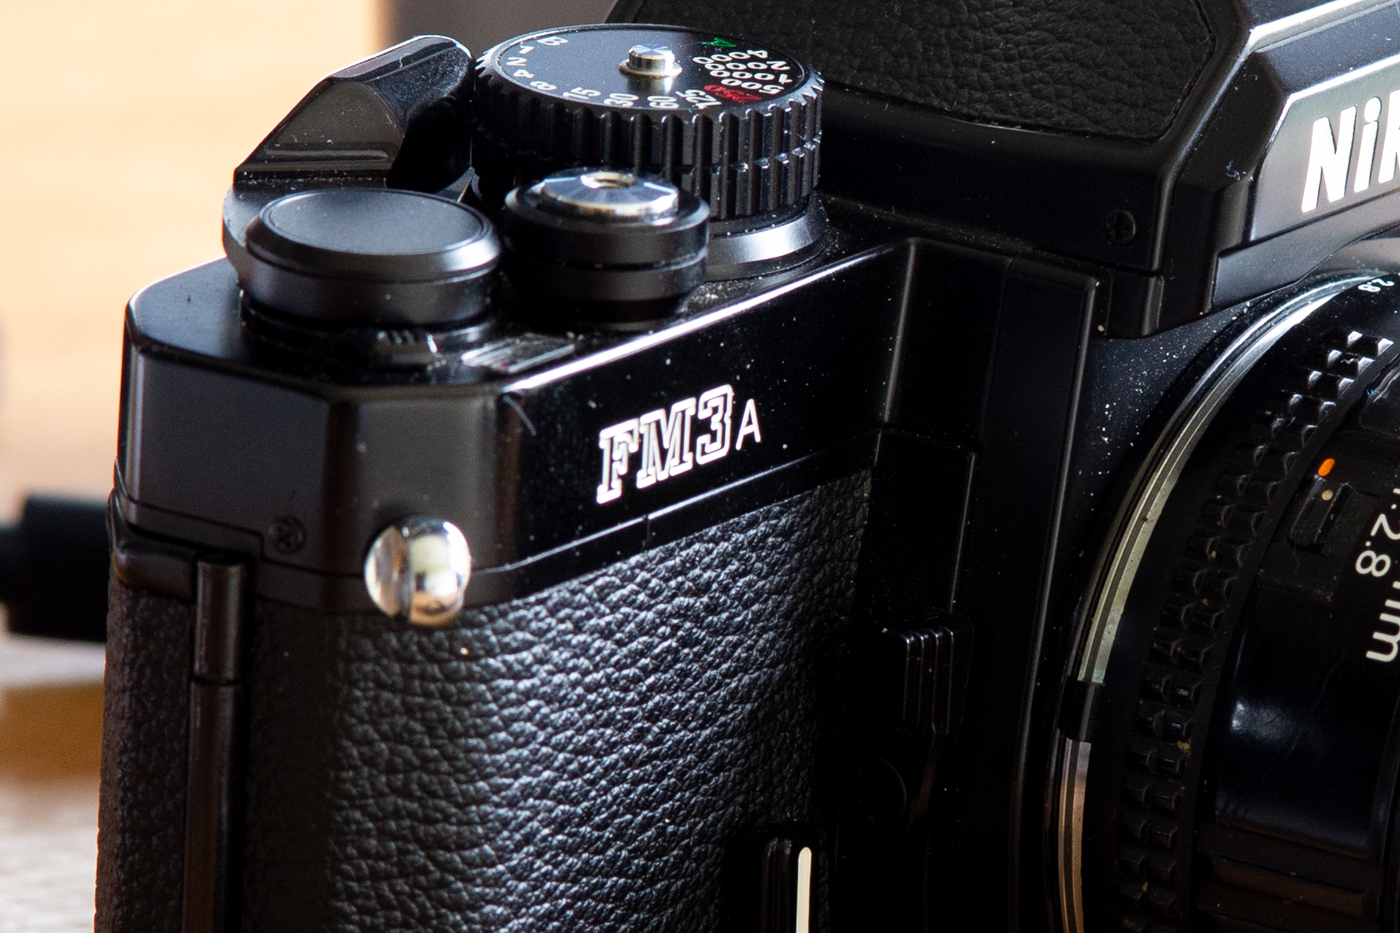
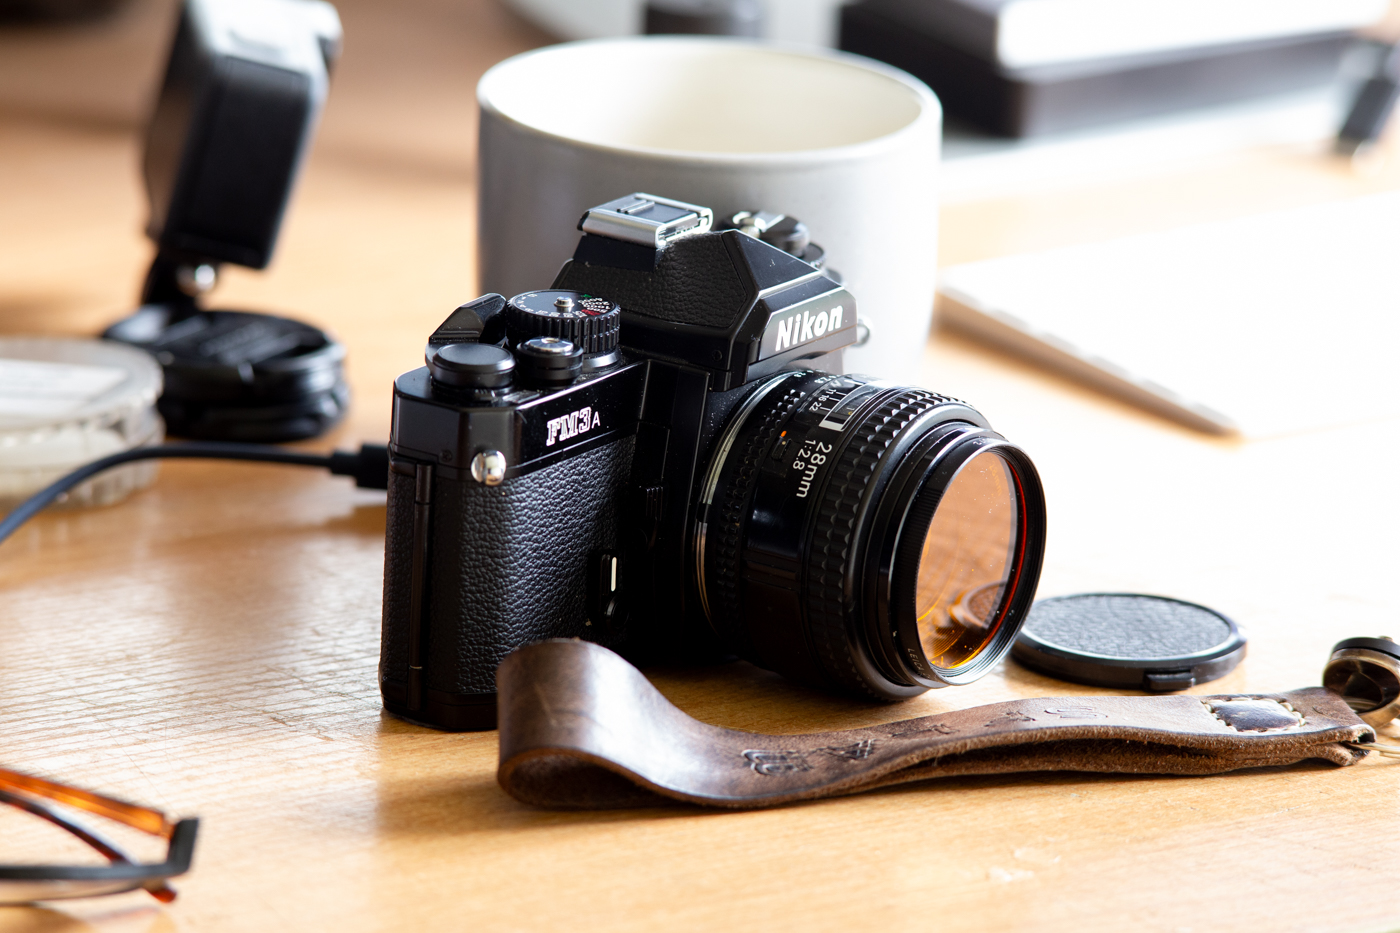
So I would definitely say my sweet spot for this lens and camera is f/8. And I shall remember this for using this lens on other cameras knowing safe that I can still shoot F/5.6 with still quality results.
Even at f/2.8 and f4 were good.
Fomapan 200 rush
As prices of film, chemicals and paper continue to increase for us film lovers I thought I would see how Fomapan 200 grabs me by buying a 100ft tin of the stuff! Thats going to give me enough role to experiment with to see if I like it enough for a go to film. And with loading the cassettes myself I can decide how many shots per roll I want to shoot. I’m loading on average 20-25 exposures per cassette.
I did make a video about a year ago on the Fomapan 200 where I got good results but when my brick ran out I continued on with my favourite films.
The developer I am trying to settle in with is my own made D23. It’s a bit like Kodak D76 but it has no Hydroquinone or Borax. Just two chemicals. Sodium Sulphite and Metol. Easy to make!
I settled on shooting the Fomapan 200 at 100 and 7 minutes development time in a rotary processor at 1 part to 1 part and at 20°. I’m not pulling the film. I’m just giving it a bit more exposure.
I recently made another video where I took Photographs of a Corn Field using the Nikon F6 and a Zeiss Milvus 50mm f1.4 Lens. And the results were not great! Mainly because the film I handled bad and I had a scratch all the way along. Probably from scanning or maybe the cassette had a bit of grit inside. But, onwards and upwards.
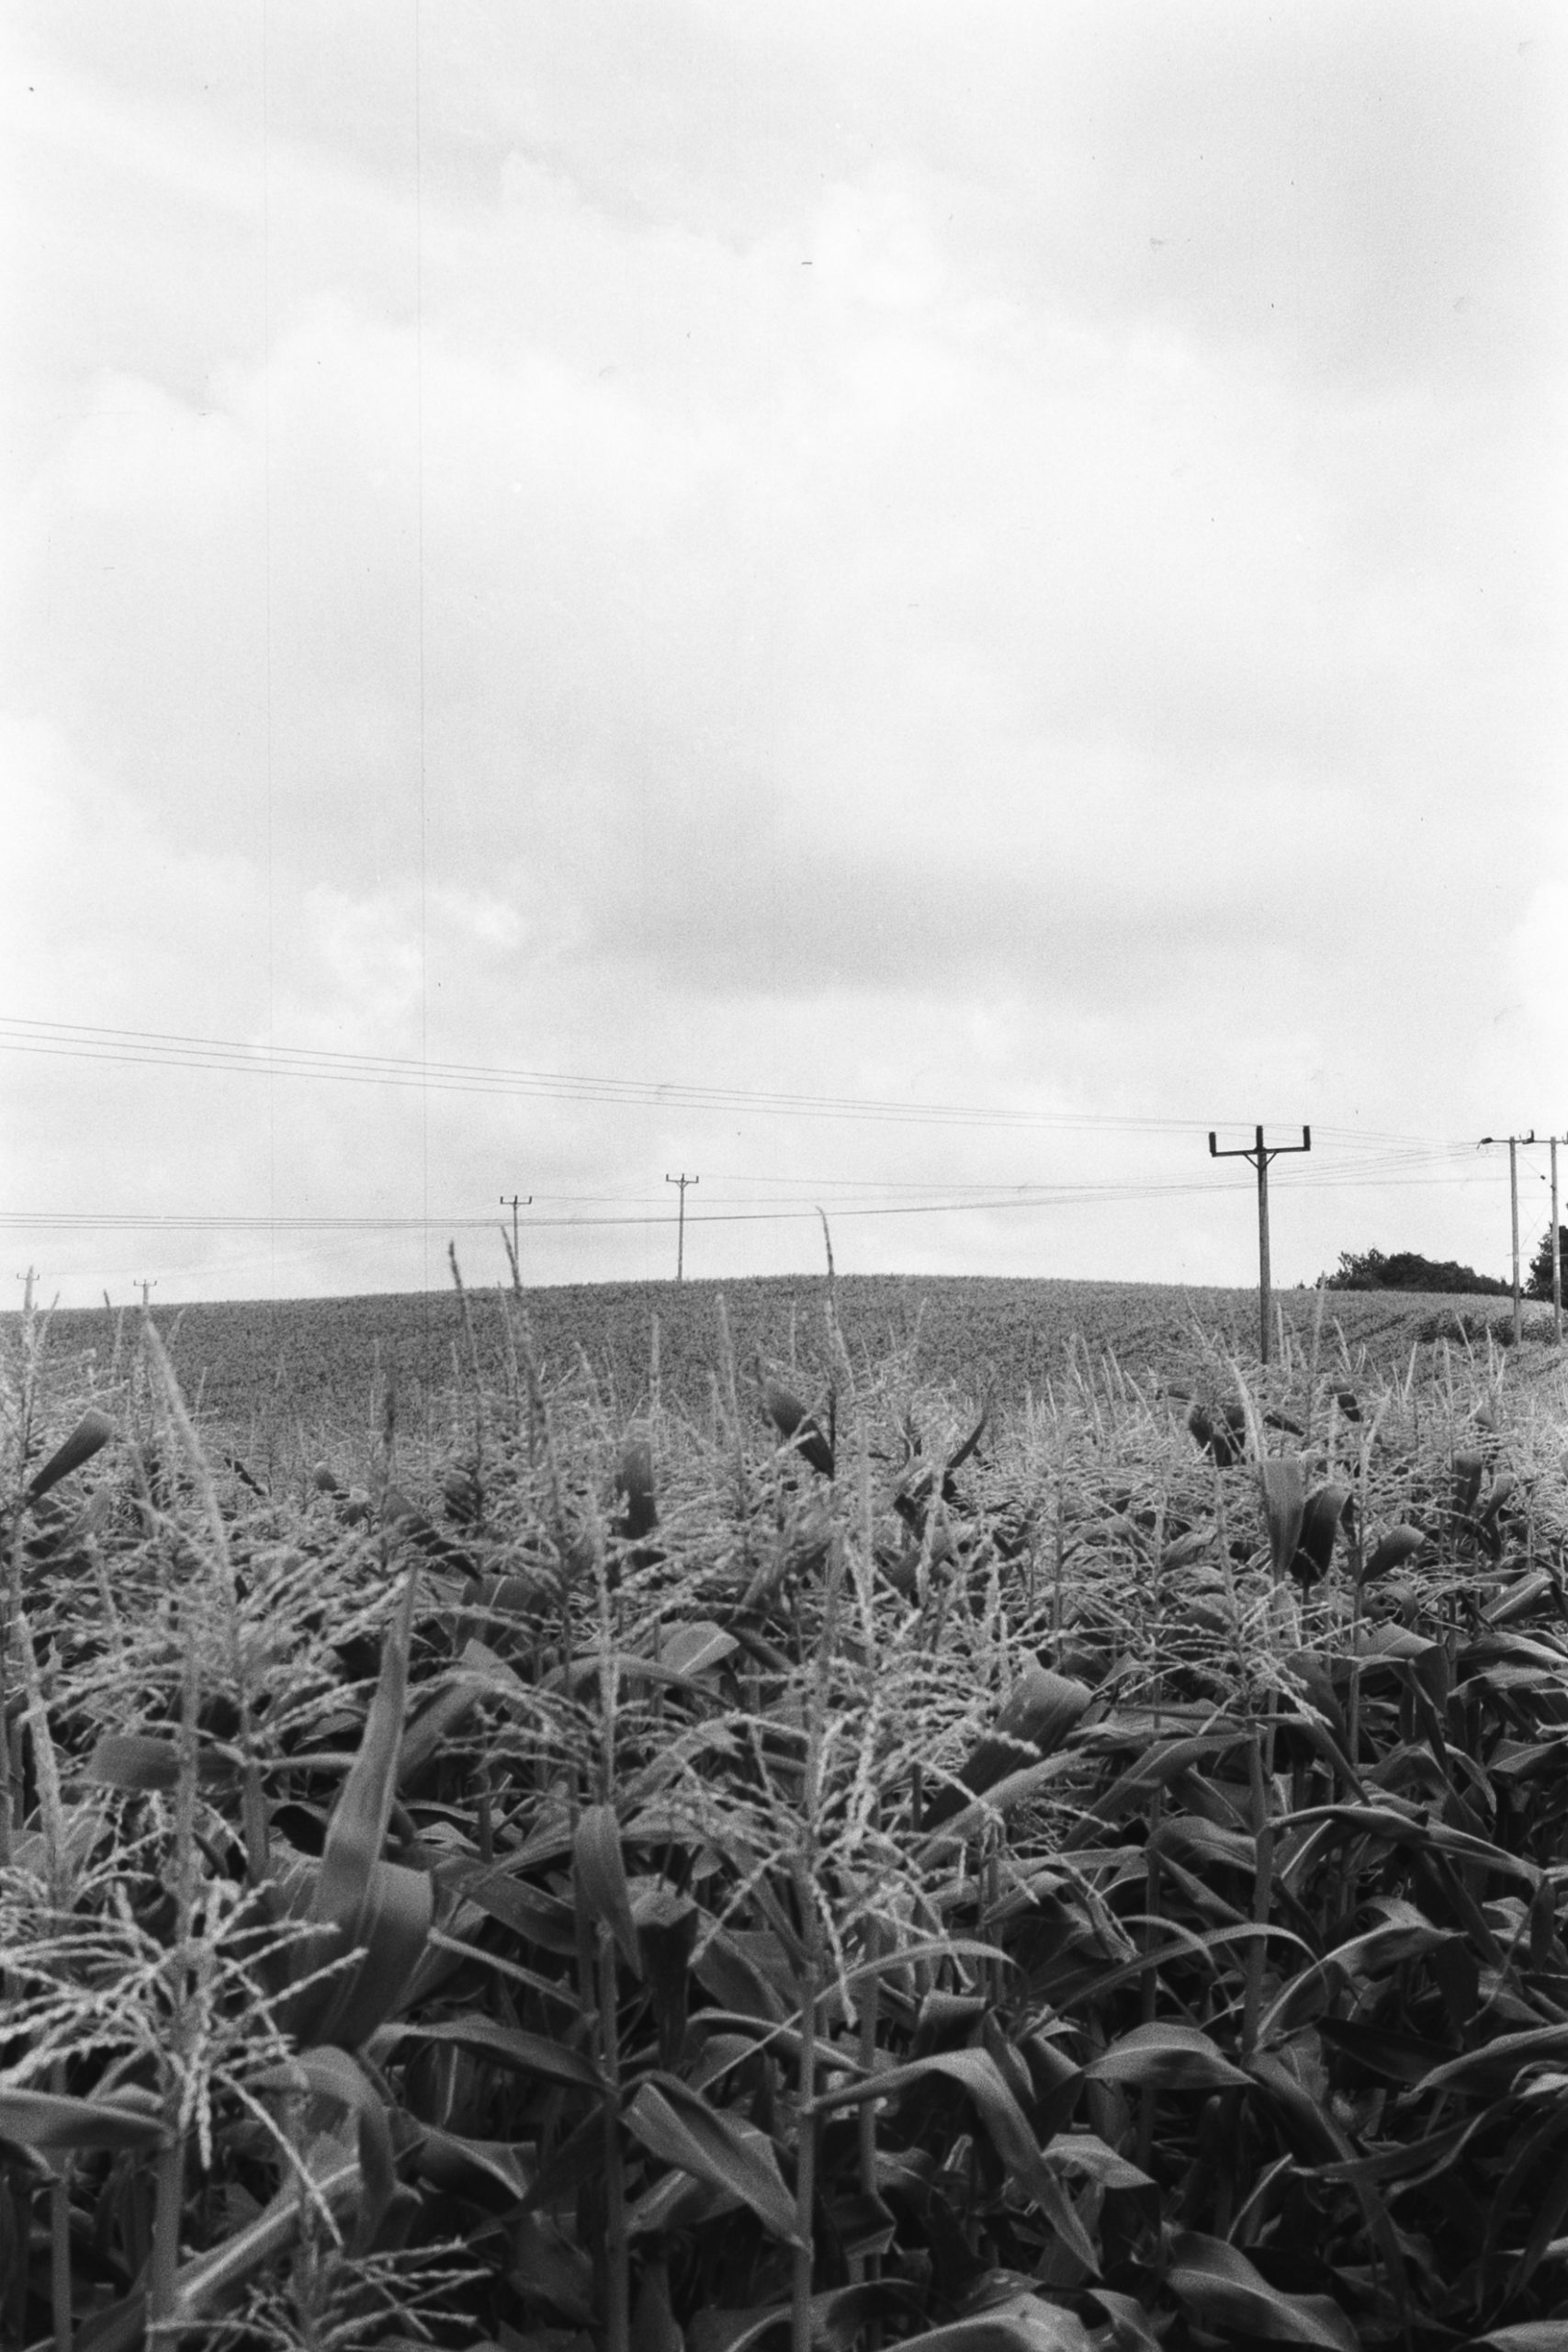
The above was developed for 6 minutes which is when I thought I could add another minute to the development for a bit more punch. I like contrast!
So on my second attempt I went back to the Cornfield. This time with a Nikon FM3A and a 28mm lens. I also packed an Orange, a Red and a Polariser Filter. And this time I developed for 7 minutes.
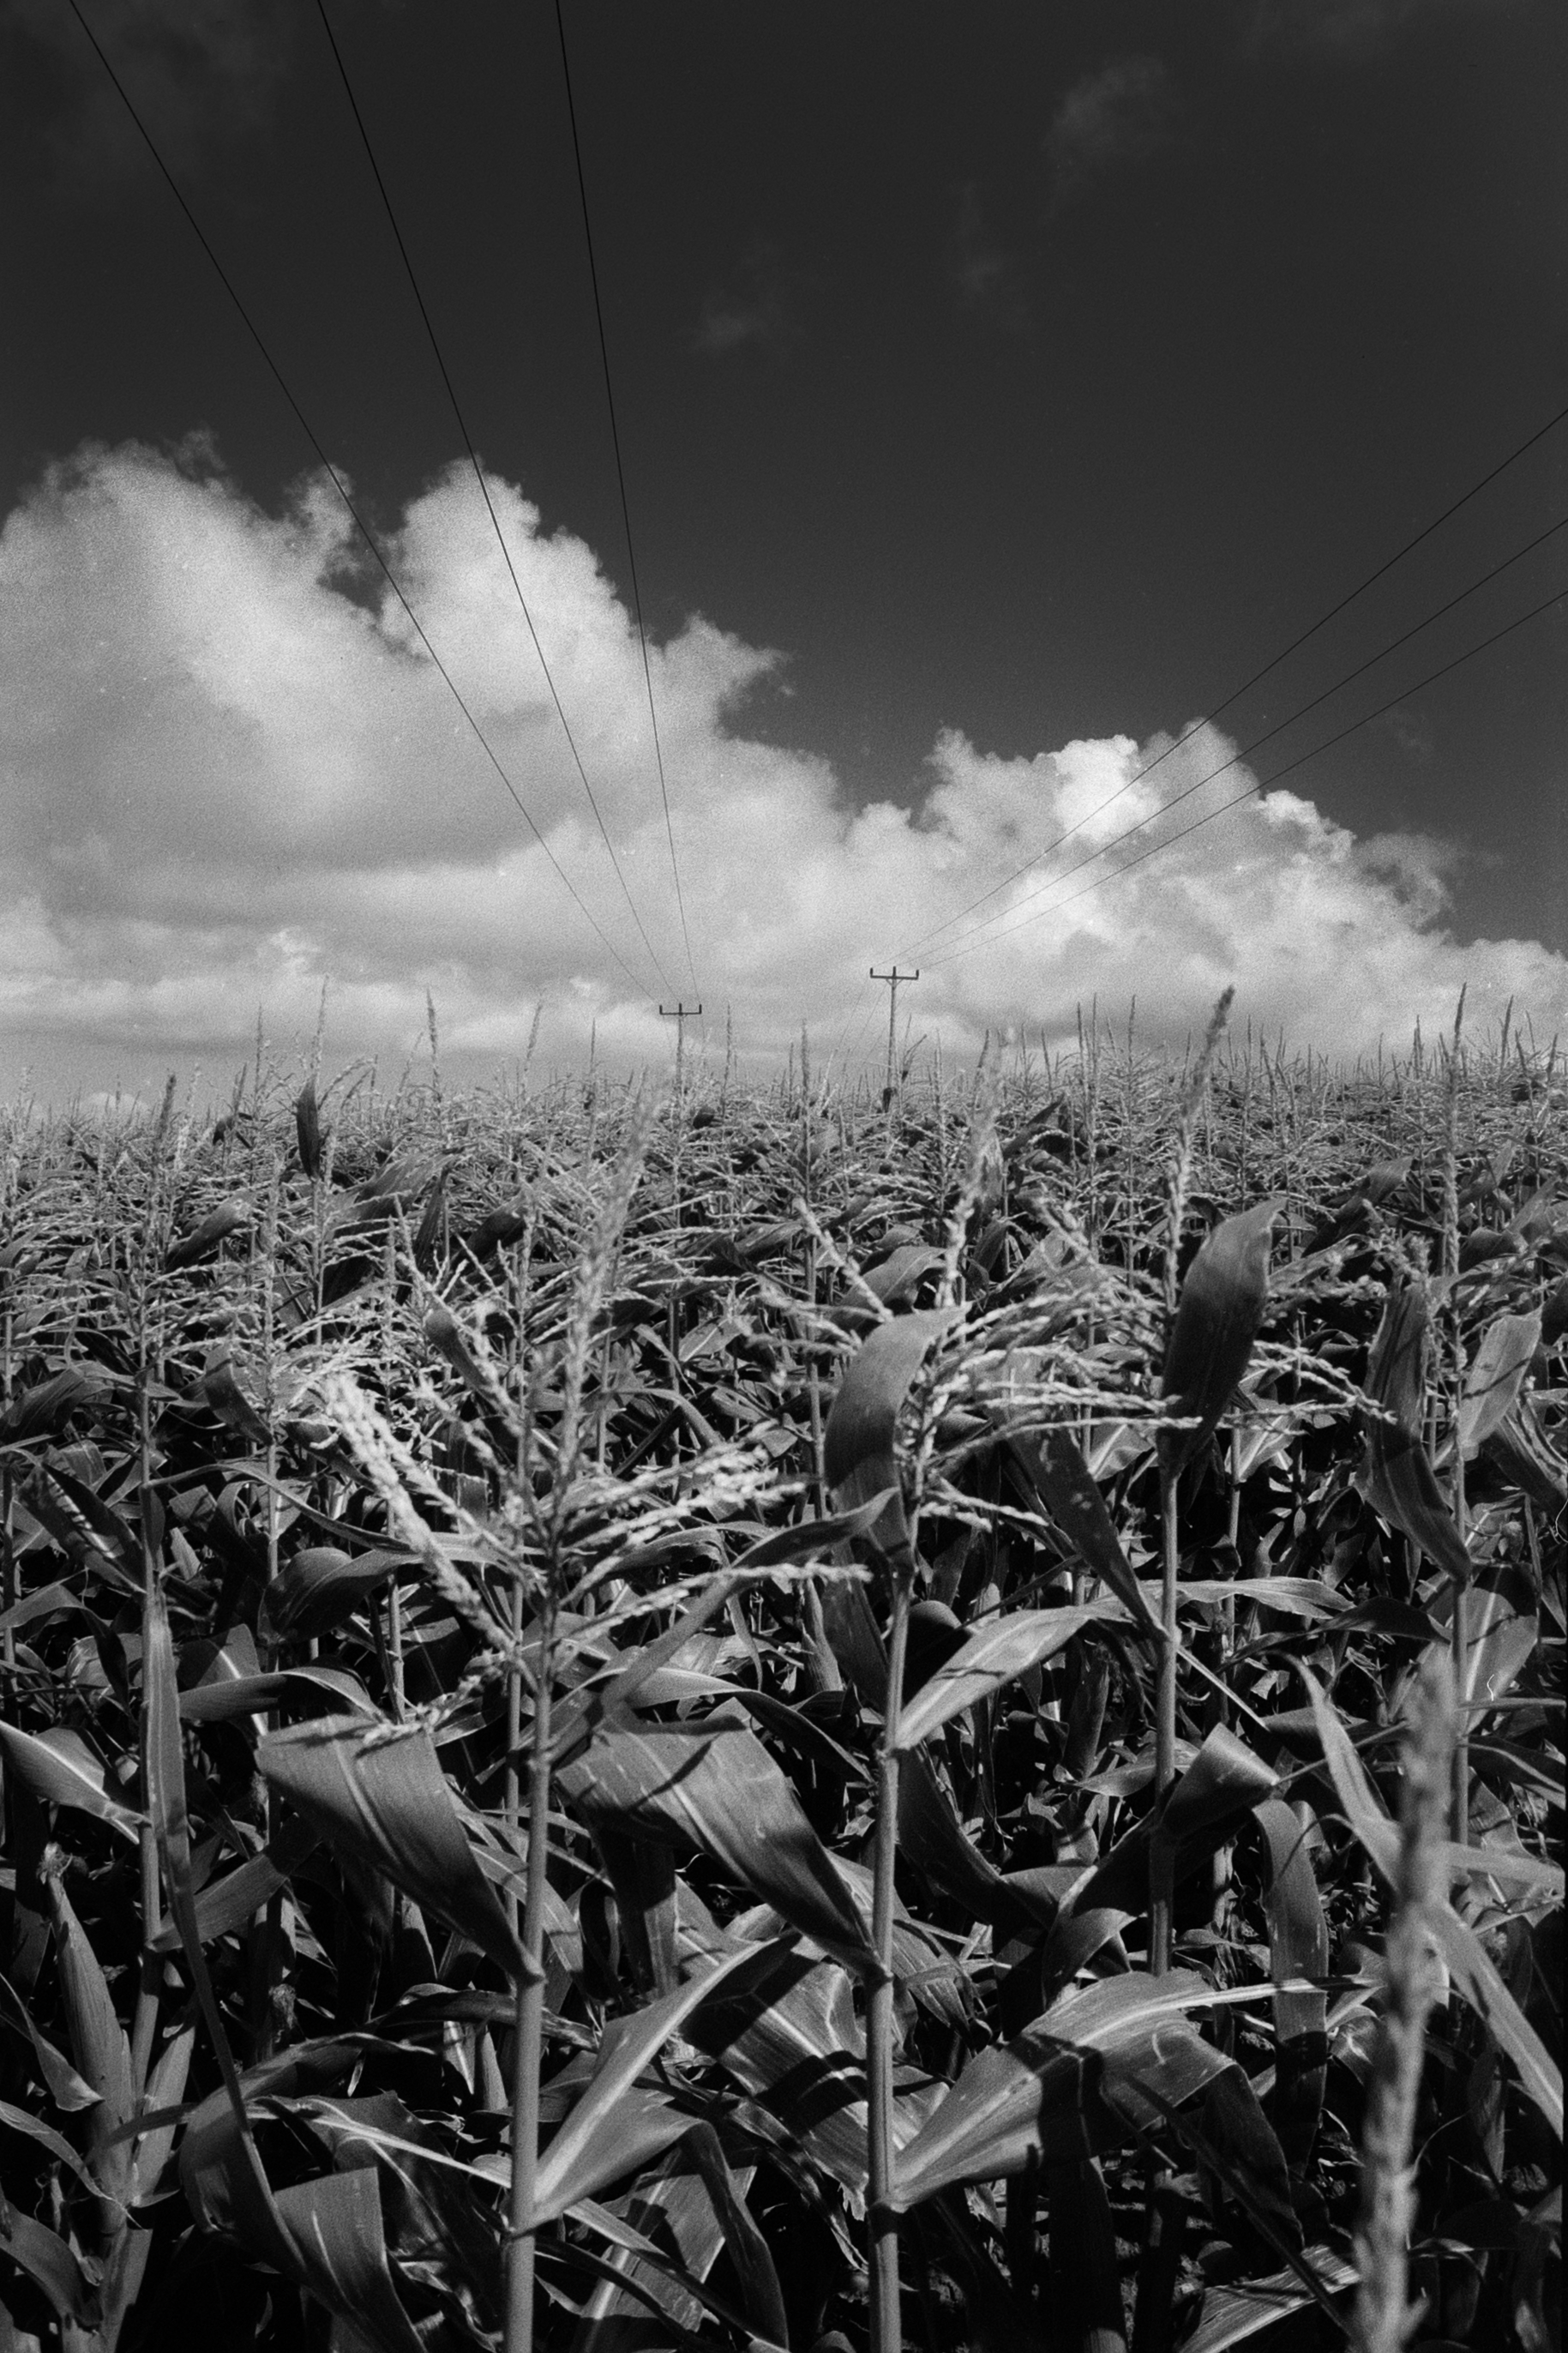
The conditions were much better with nice blue sky and fluffy clouds. Ideal for the filters. The above was with an Orange Filter.
I was happy with these results which took me into the darkroom for prints.
My next shoot I wanted to try some street (people) photography so I doodled along to the local “Pride” event which was a great day full of happy people and good entertainment. The best part about taking pictures at events where people are usually dressed to impress is that you don’t get questioned why. You can just take pics and people are happy for you to do so.
This time I took the Leica MP with a 50mm Voigtlander f2 APO lens. And I used the same development, however, I shot the film at 200! It was a bright day.

The contrast in this image I like! And the grain is there but it’s not awful. Its nice.
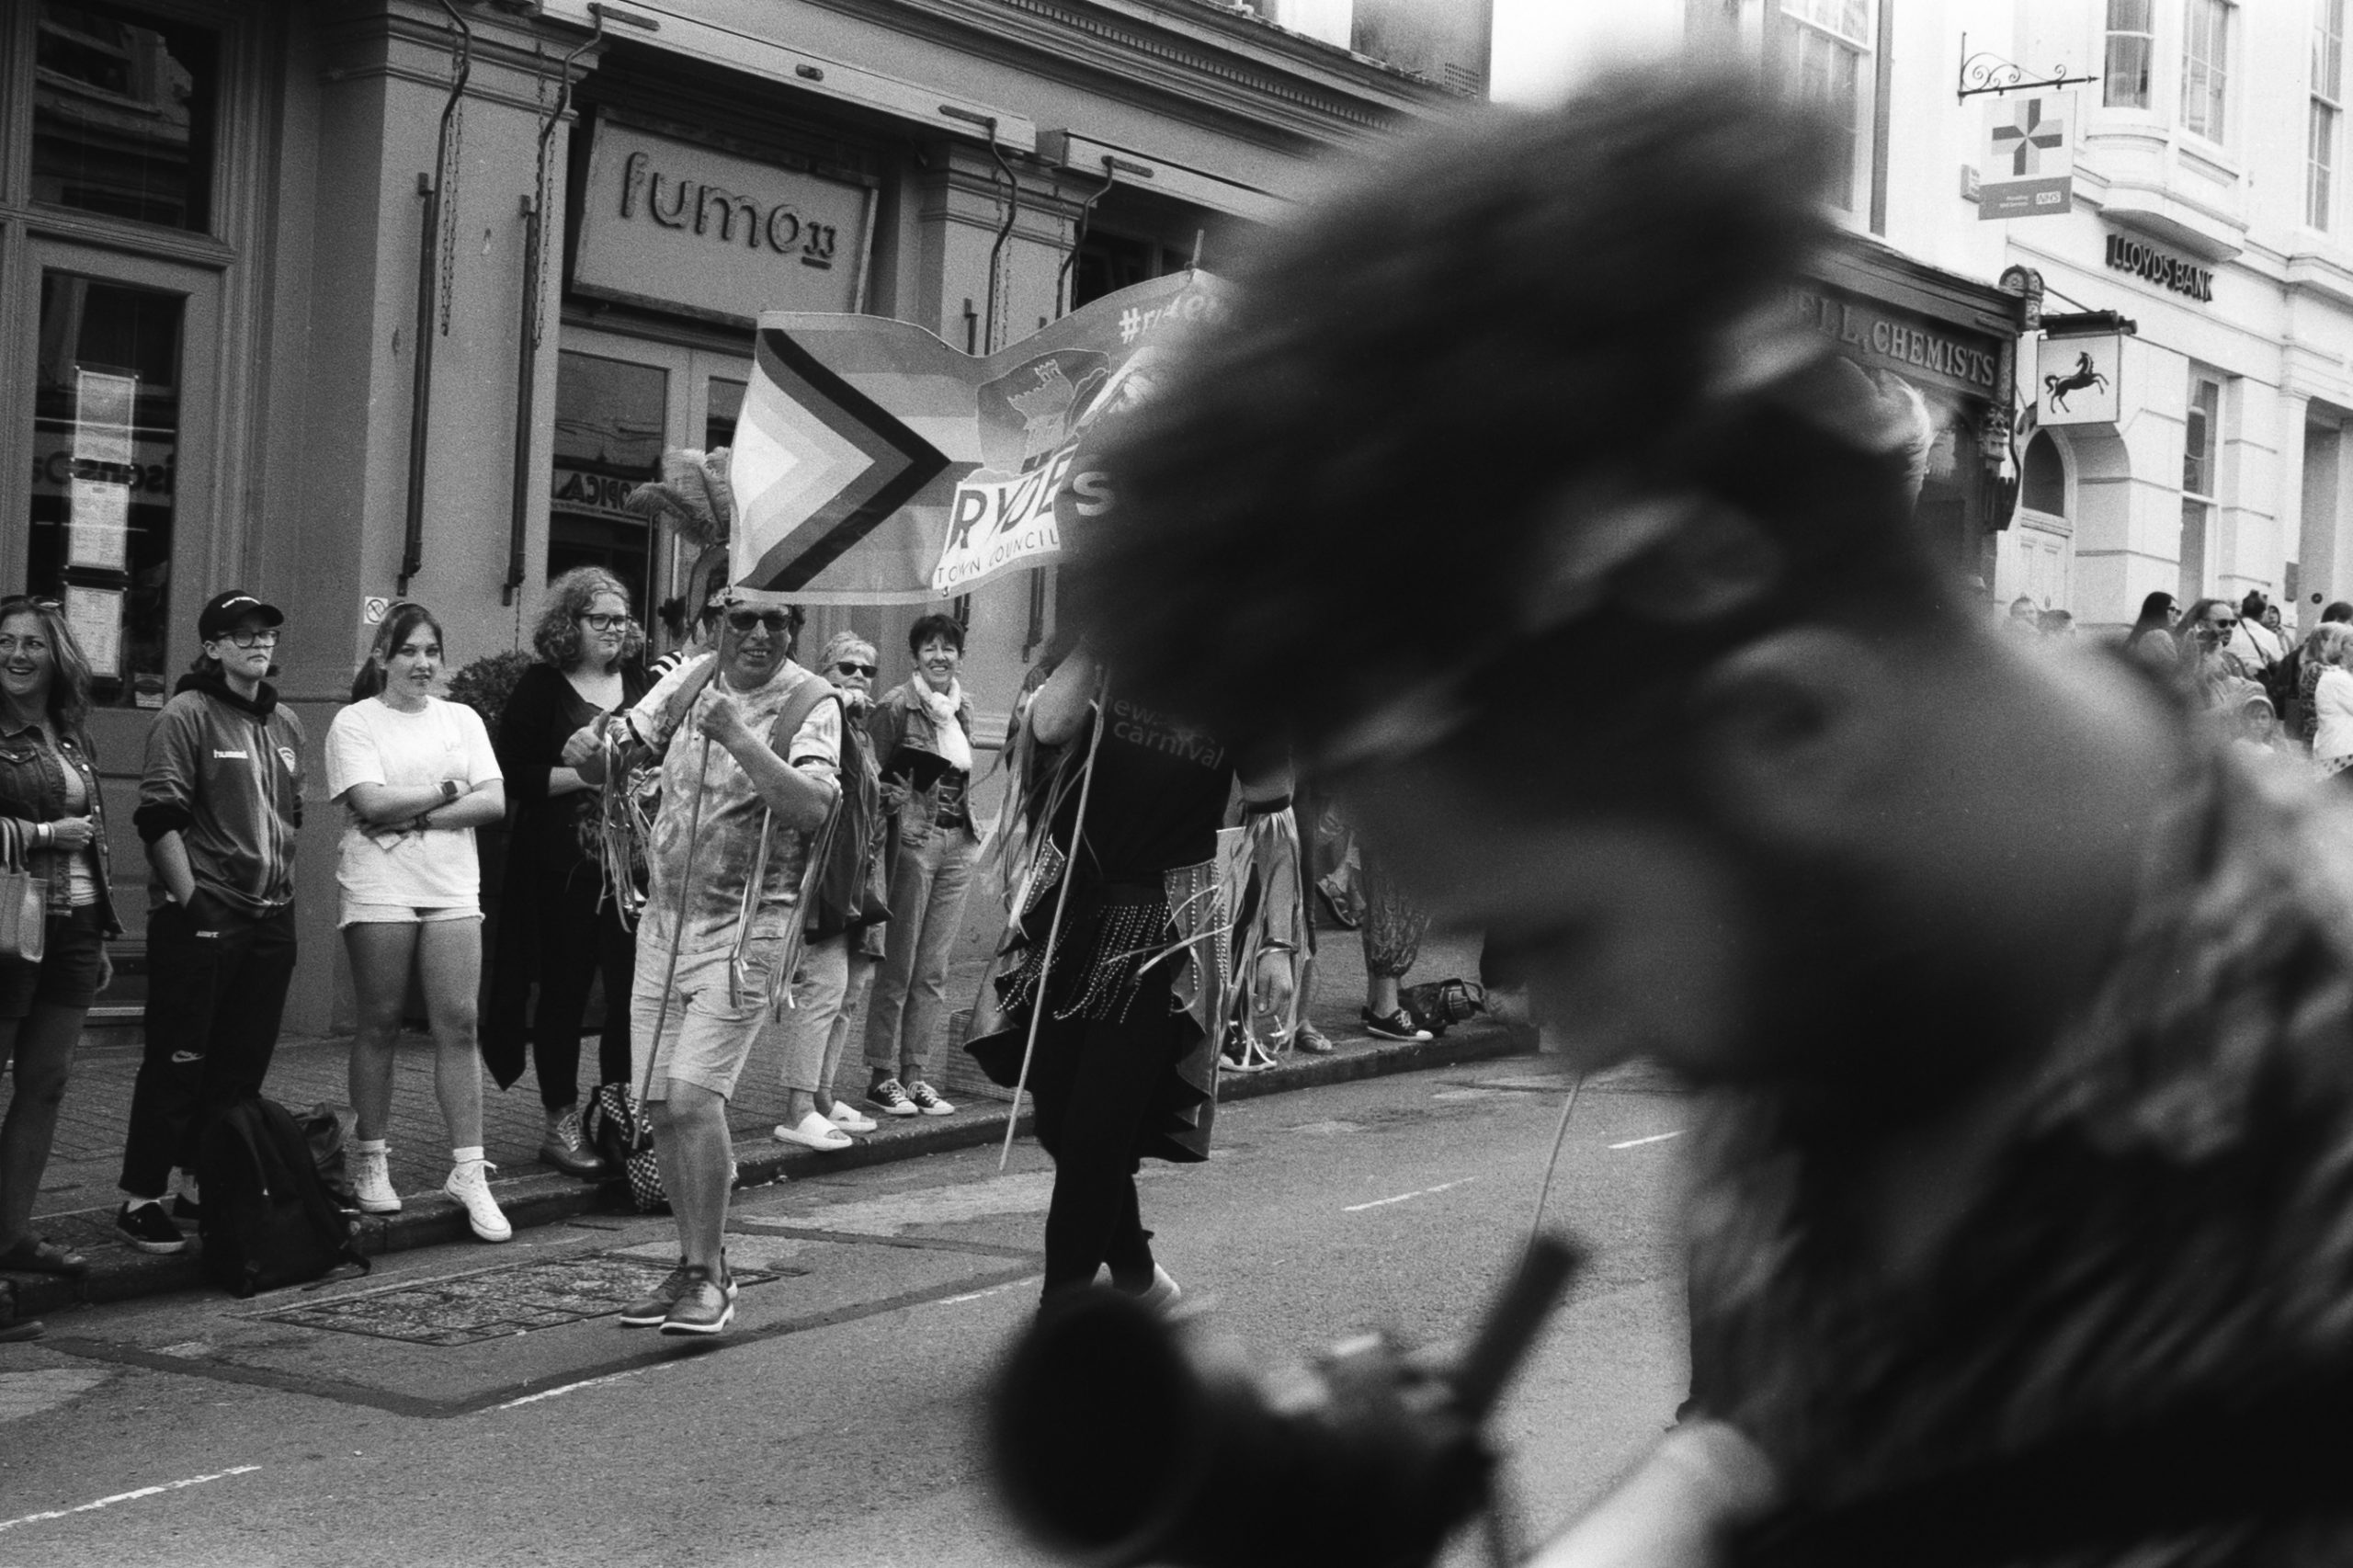
The moment another Photographer walked into my shot. Looks cool though!
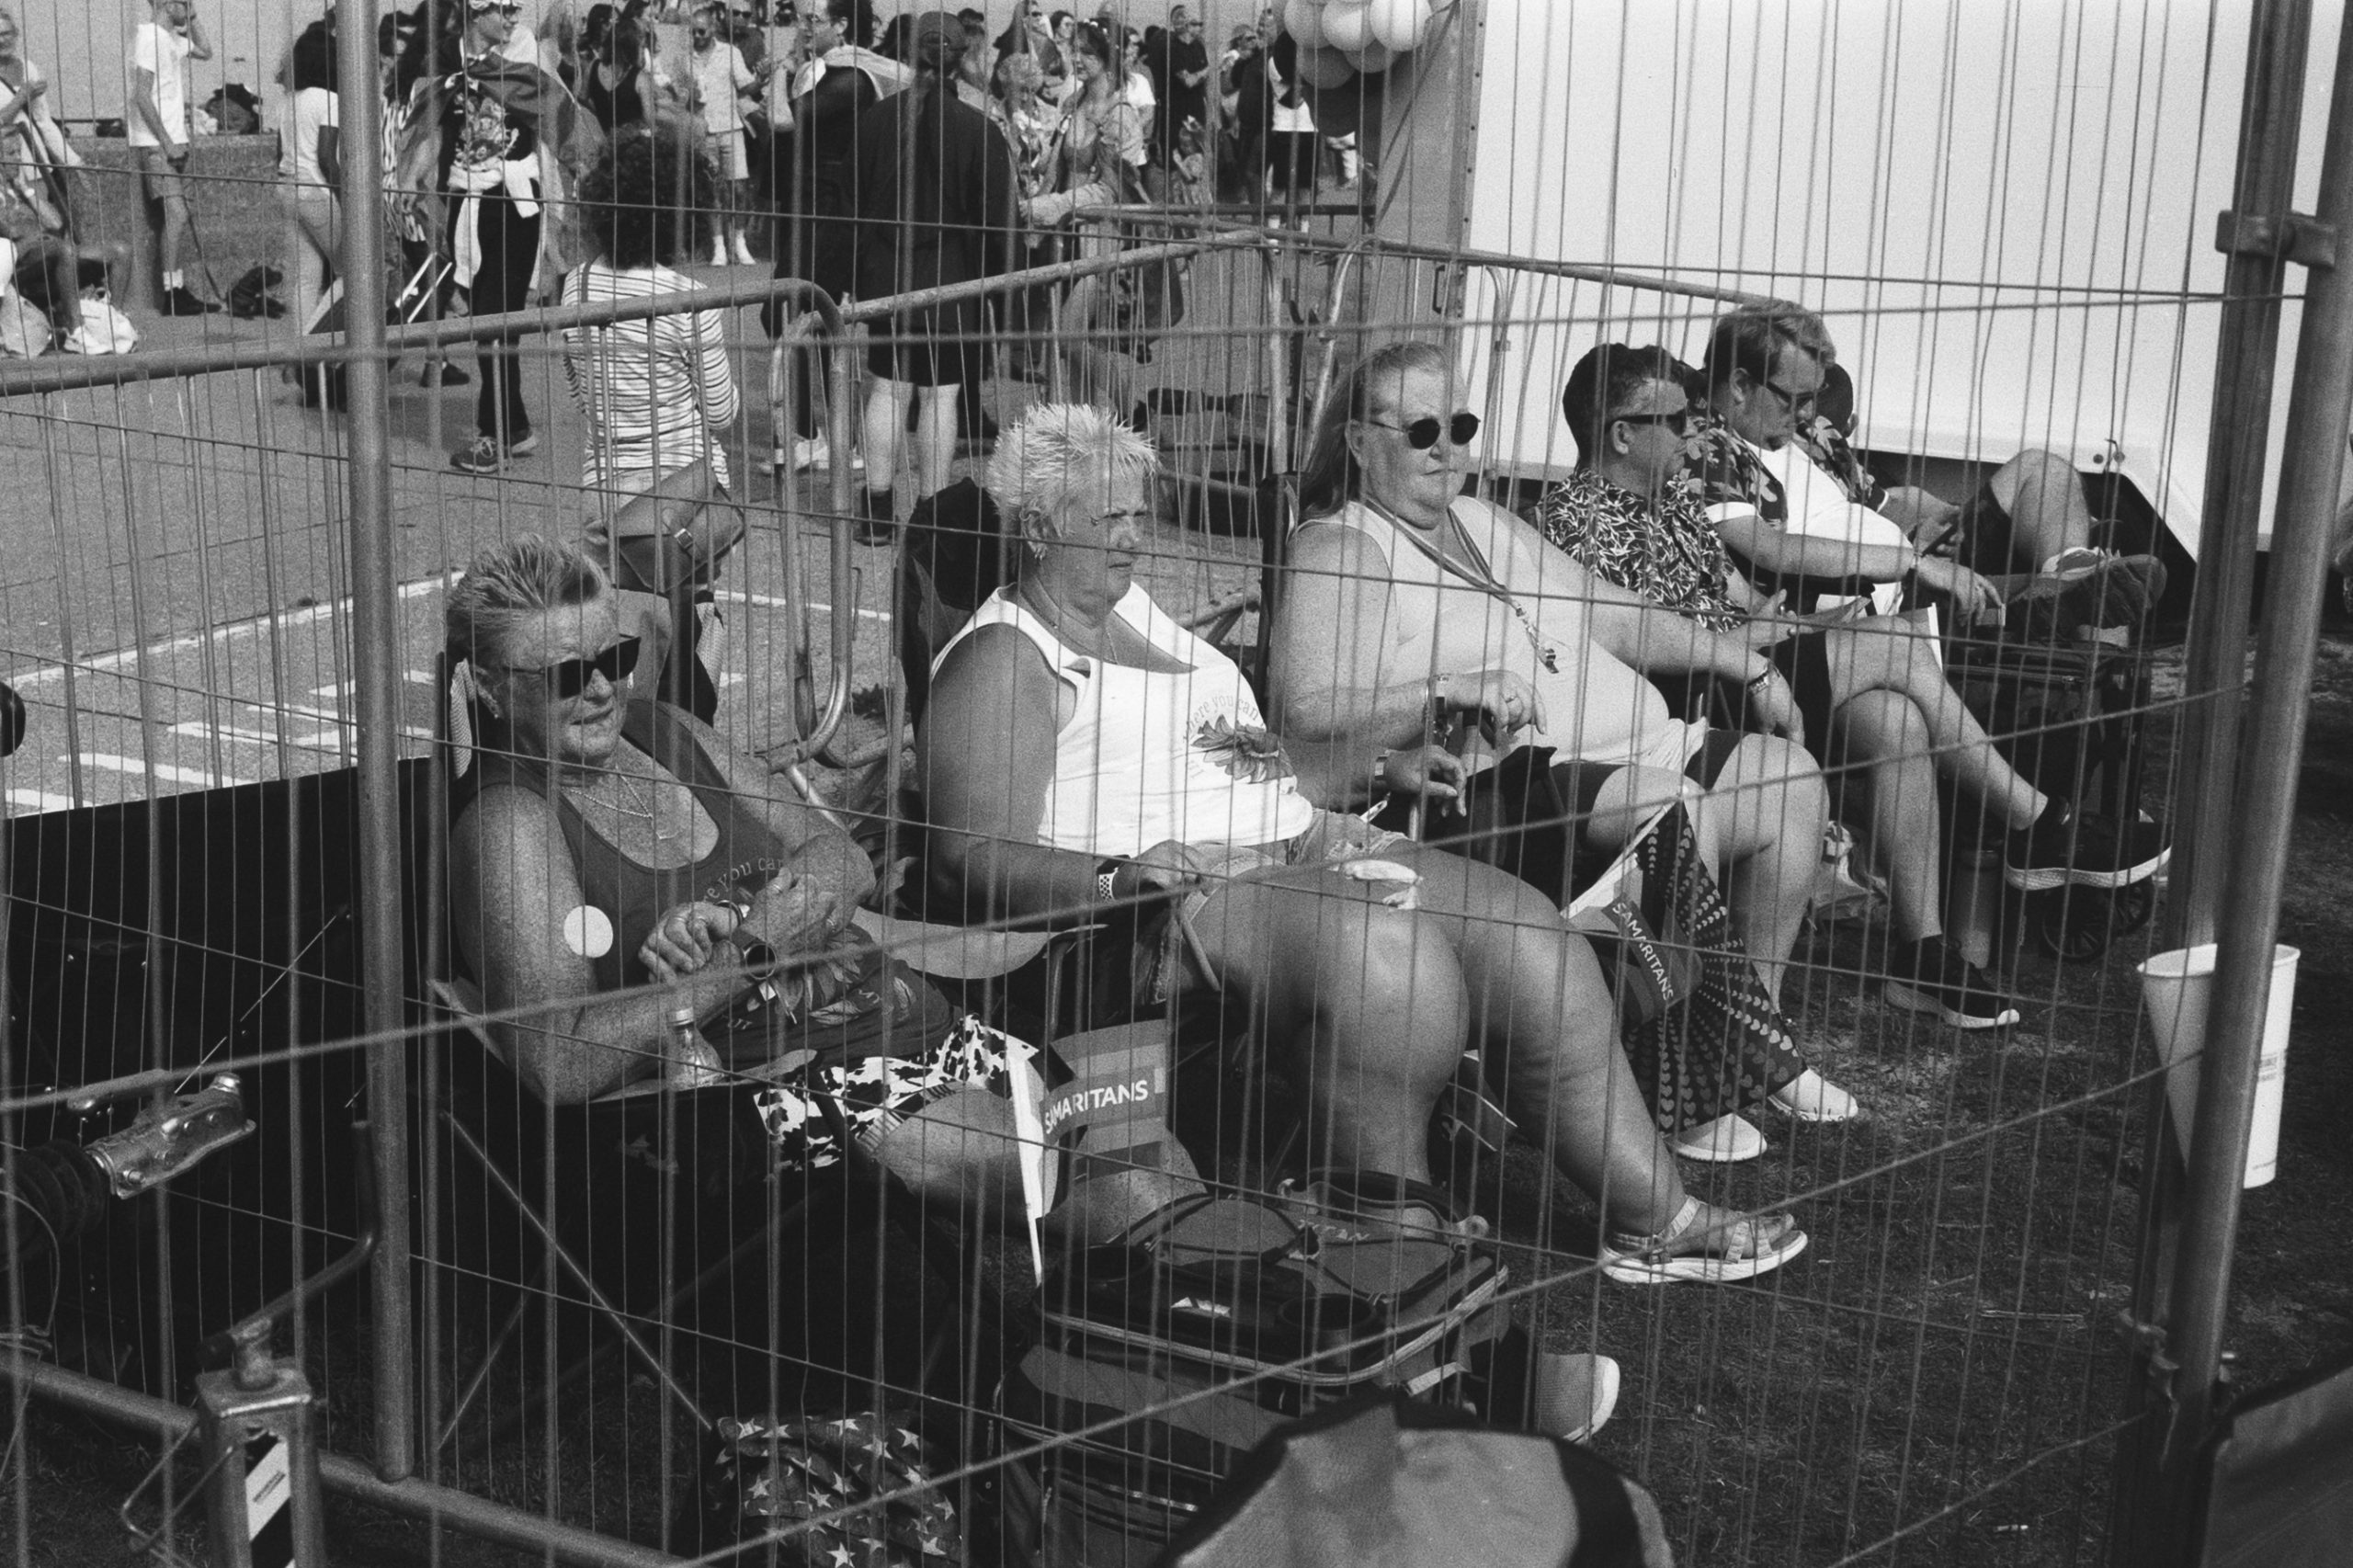
Showing through the fence for effect.
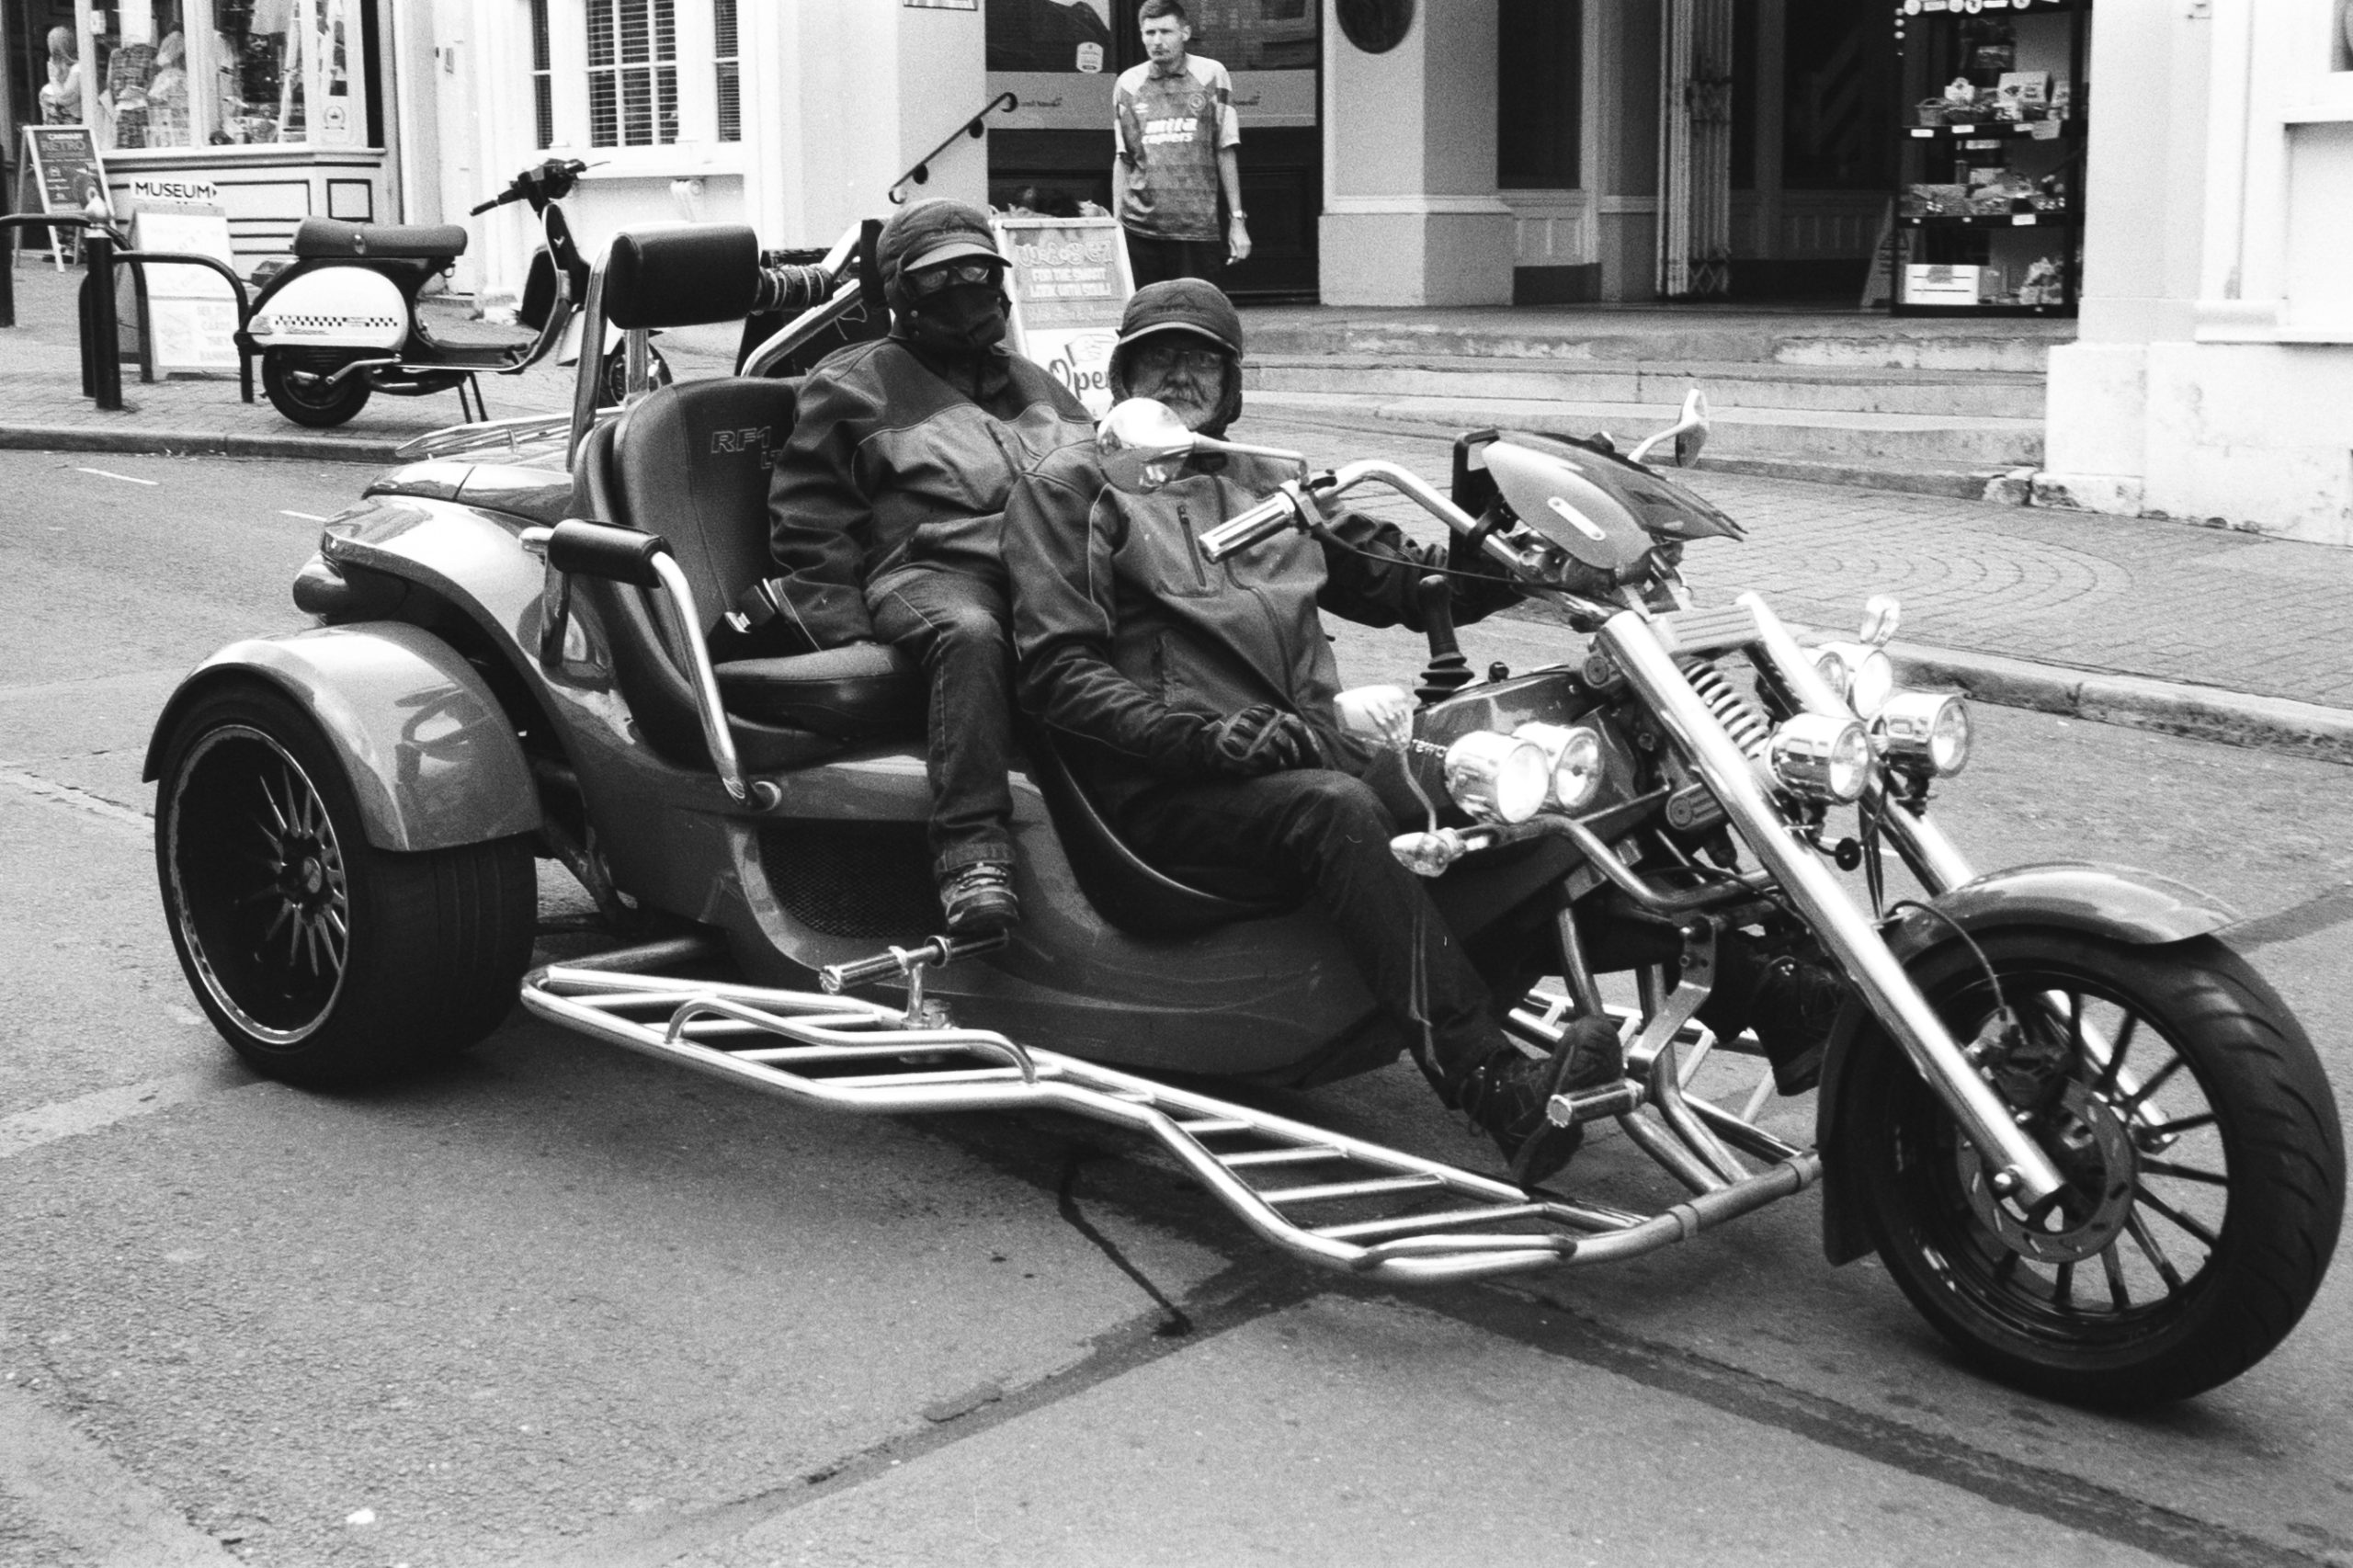
A loud trike!
I also had with me the Rollei 35LED camera. With this camera I developed the exposures in Rodinal at 1:50 and used the Rotation Processor for 7 minutes. I found these images to show more grain and a tad less contrast.

A mother swinging her child around.
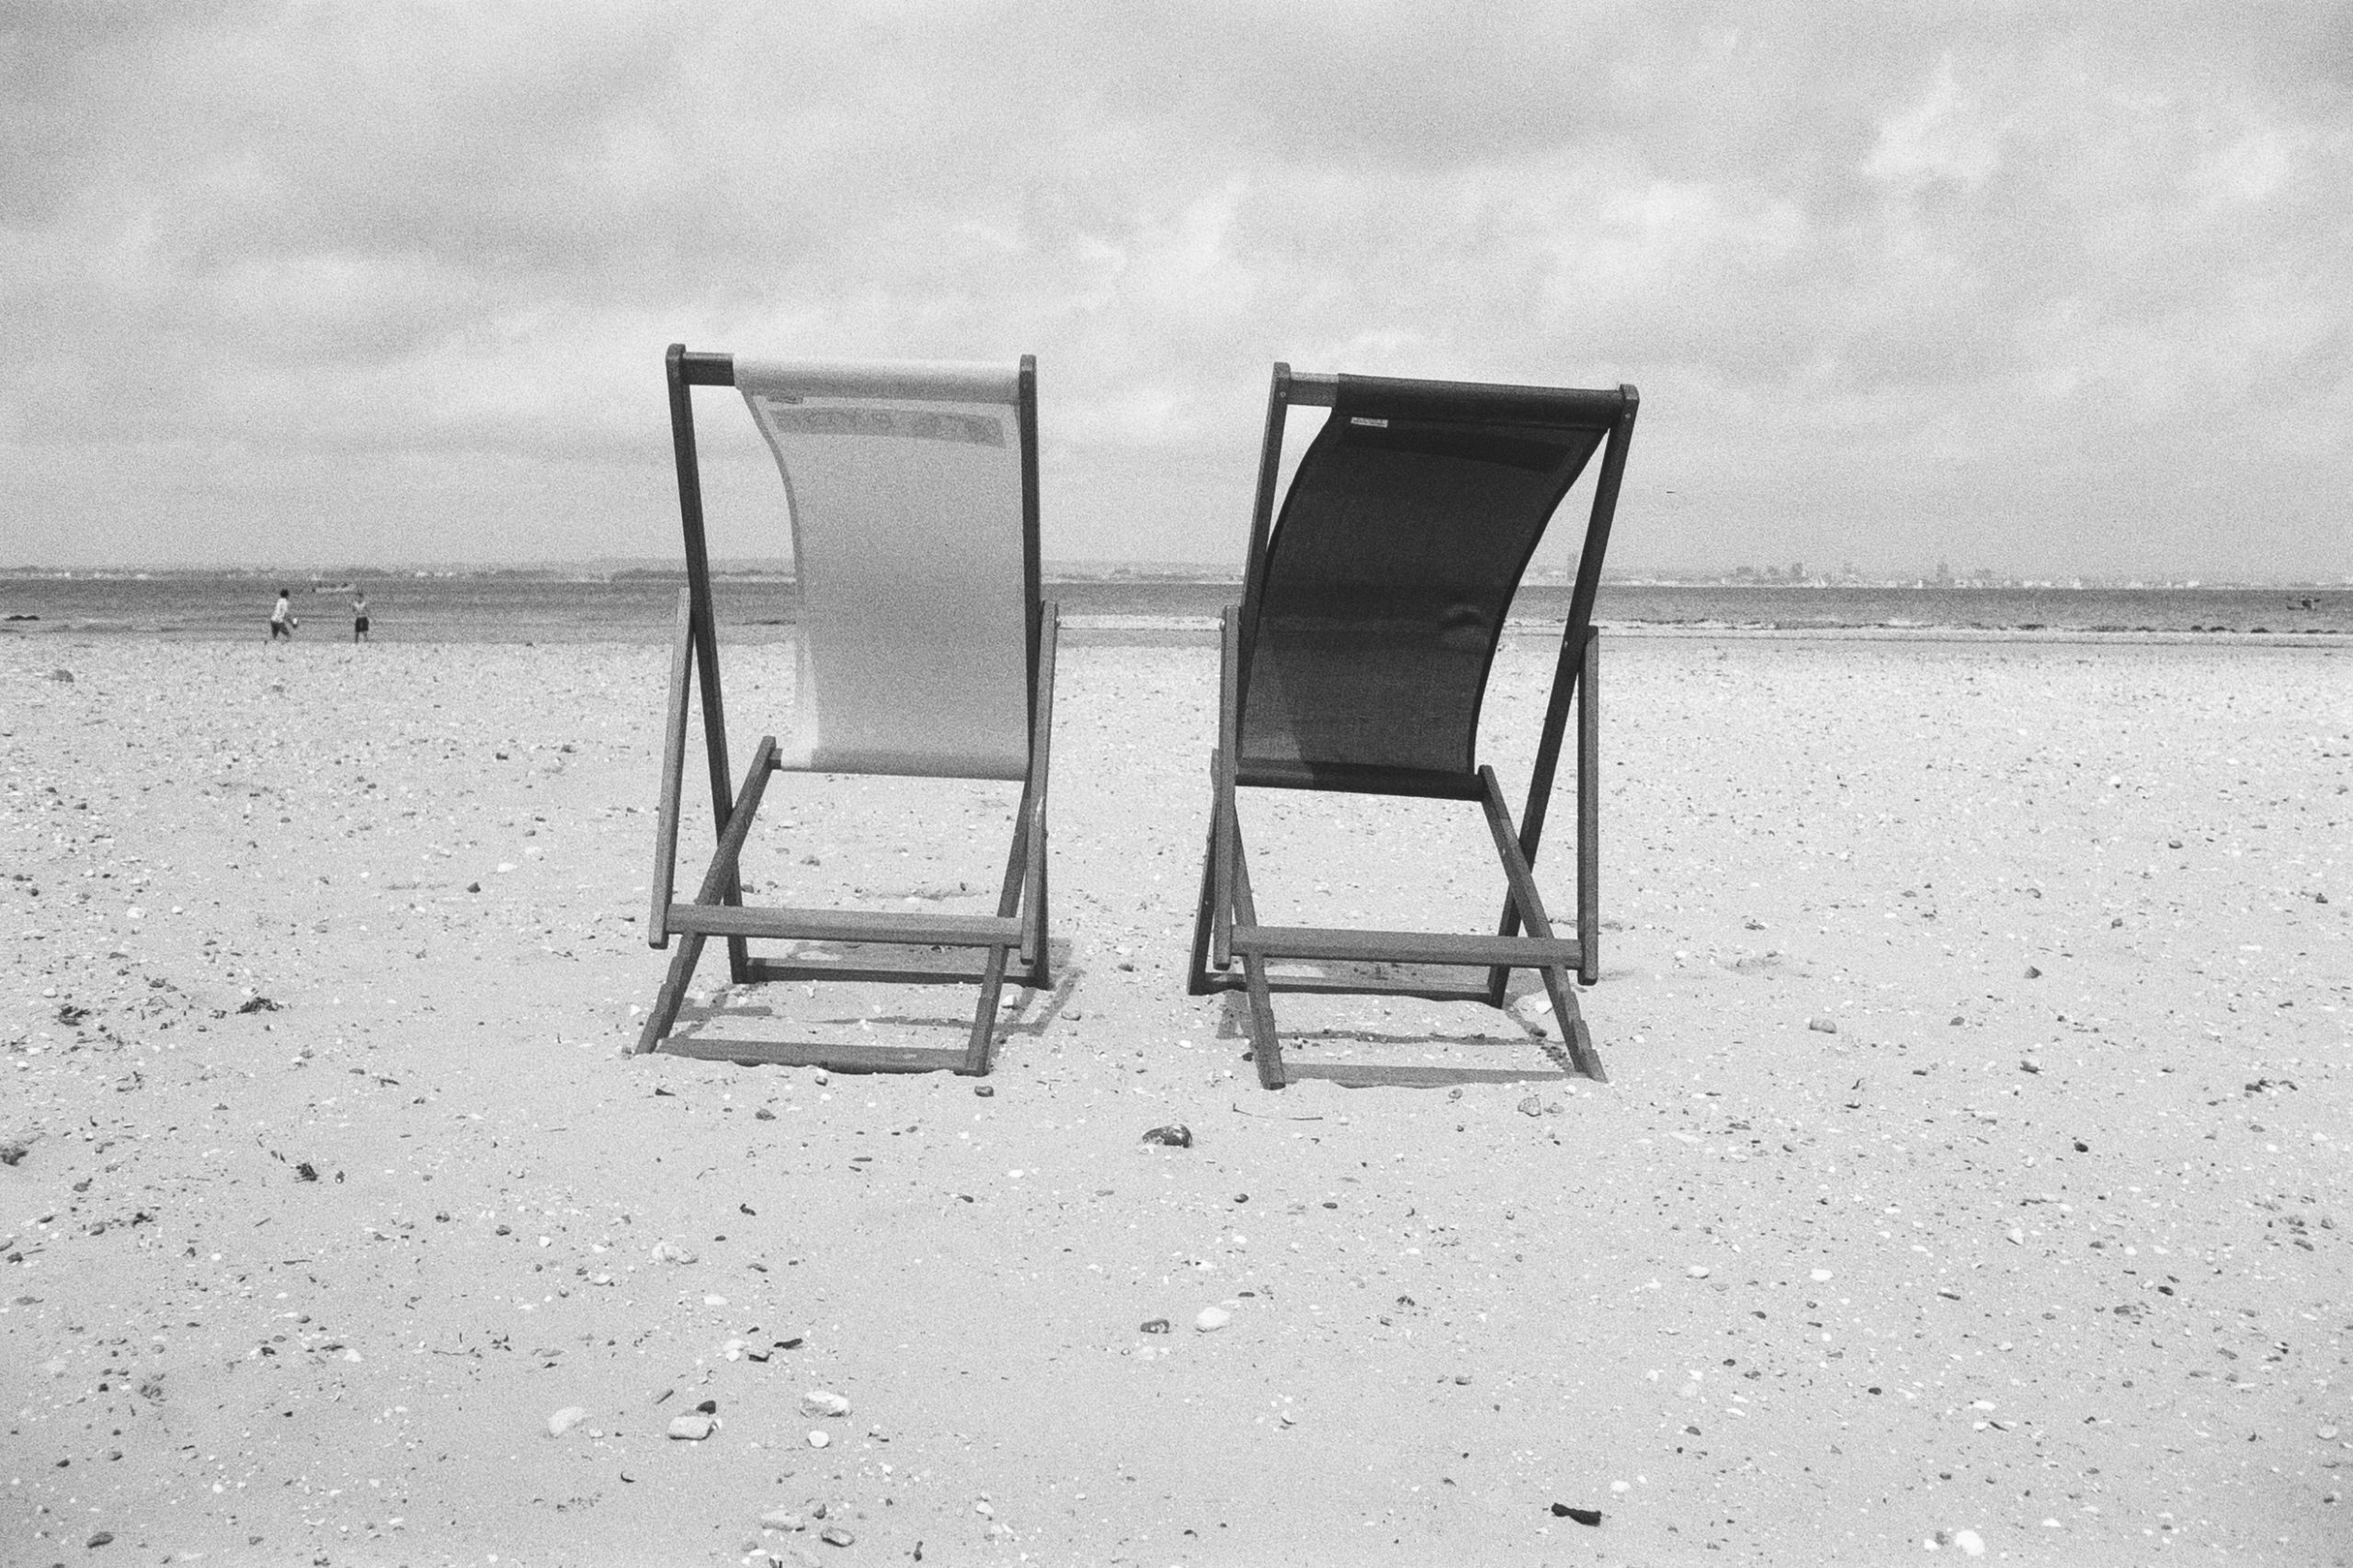
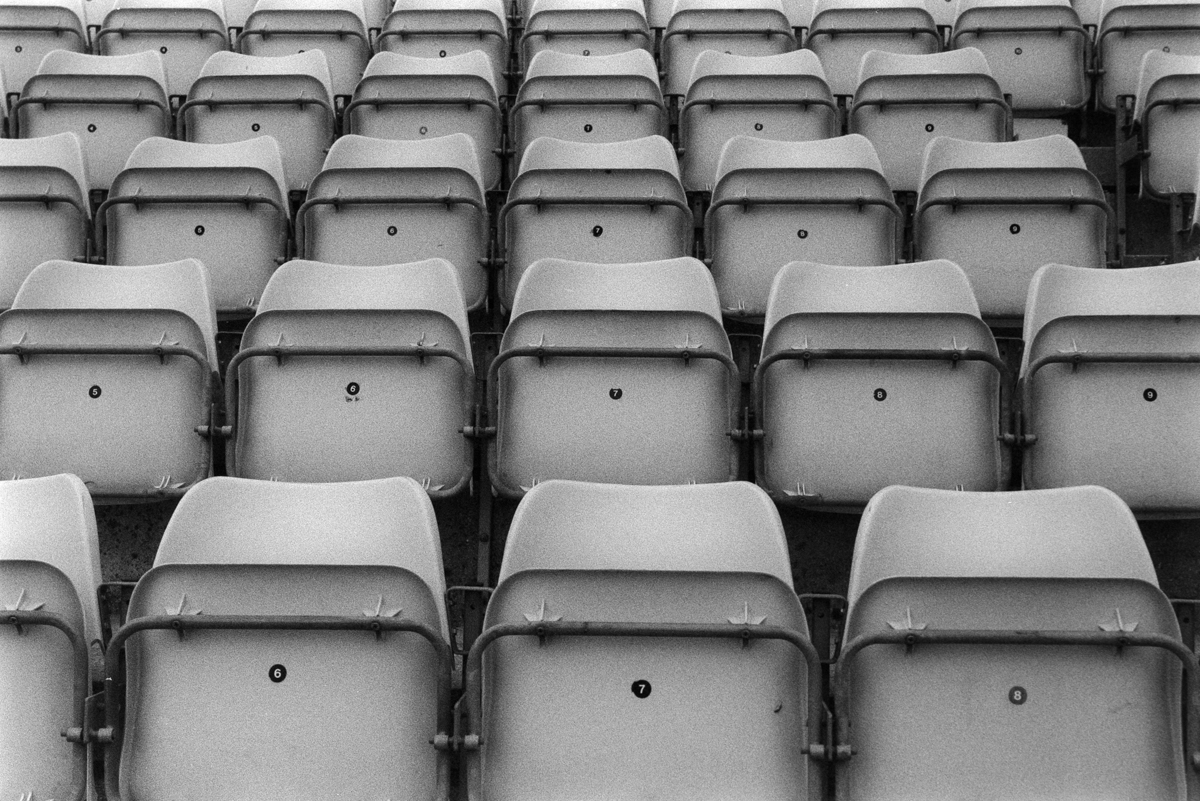
A random photo I took of these Deck Chairs on the beach.

A couple posing for me. The women in the background!


All of these images turned out well and are easily printable in the darkroom.
So far I am happy with the Fomapan 200, as long as I handle it with care for the soft emulsion is easily scratched! Of course it is not on the same par as Kodak Tmax 100 or Ilford FP4 / Delta but it is a cheaper film especially if you are buying in a tin!
You can see the video from the Pride Event here.
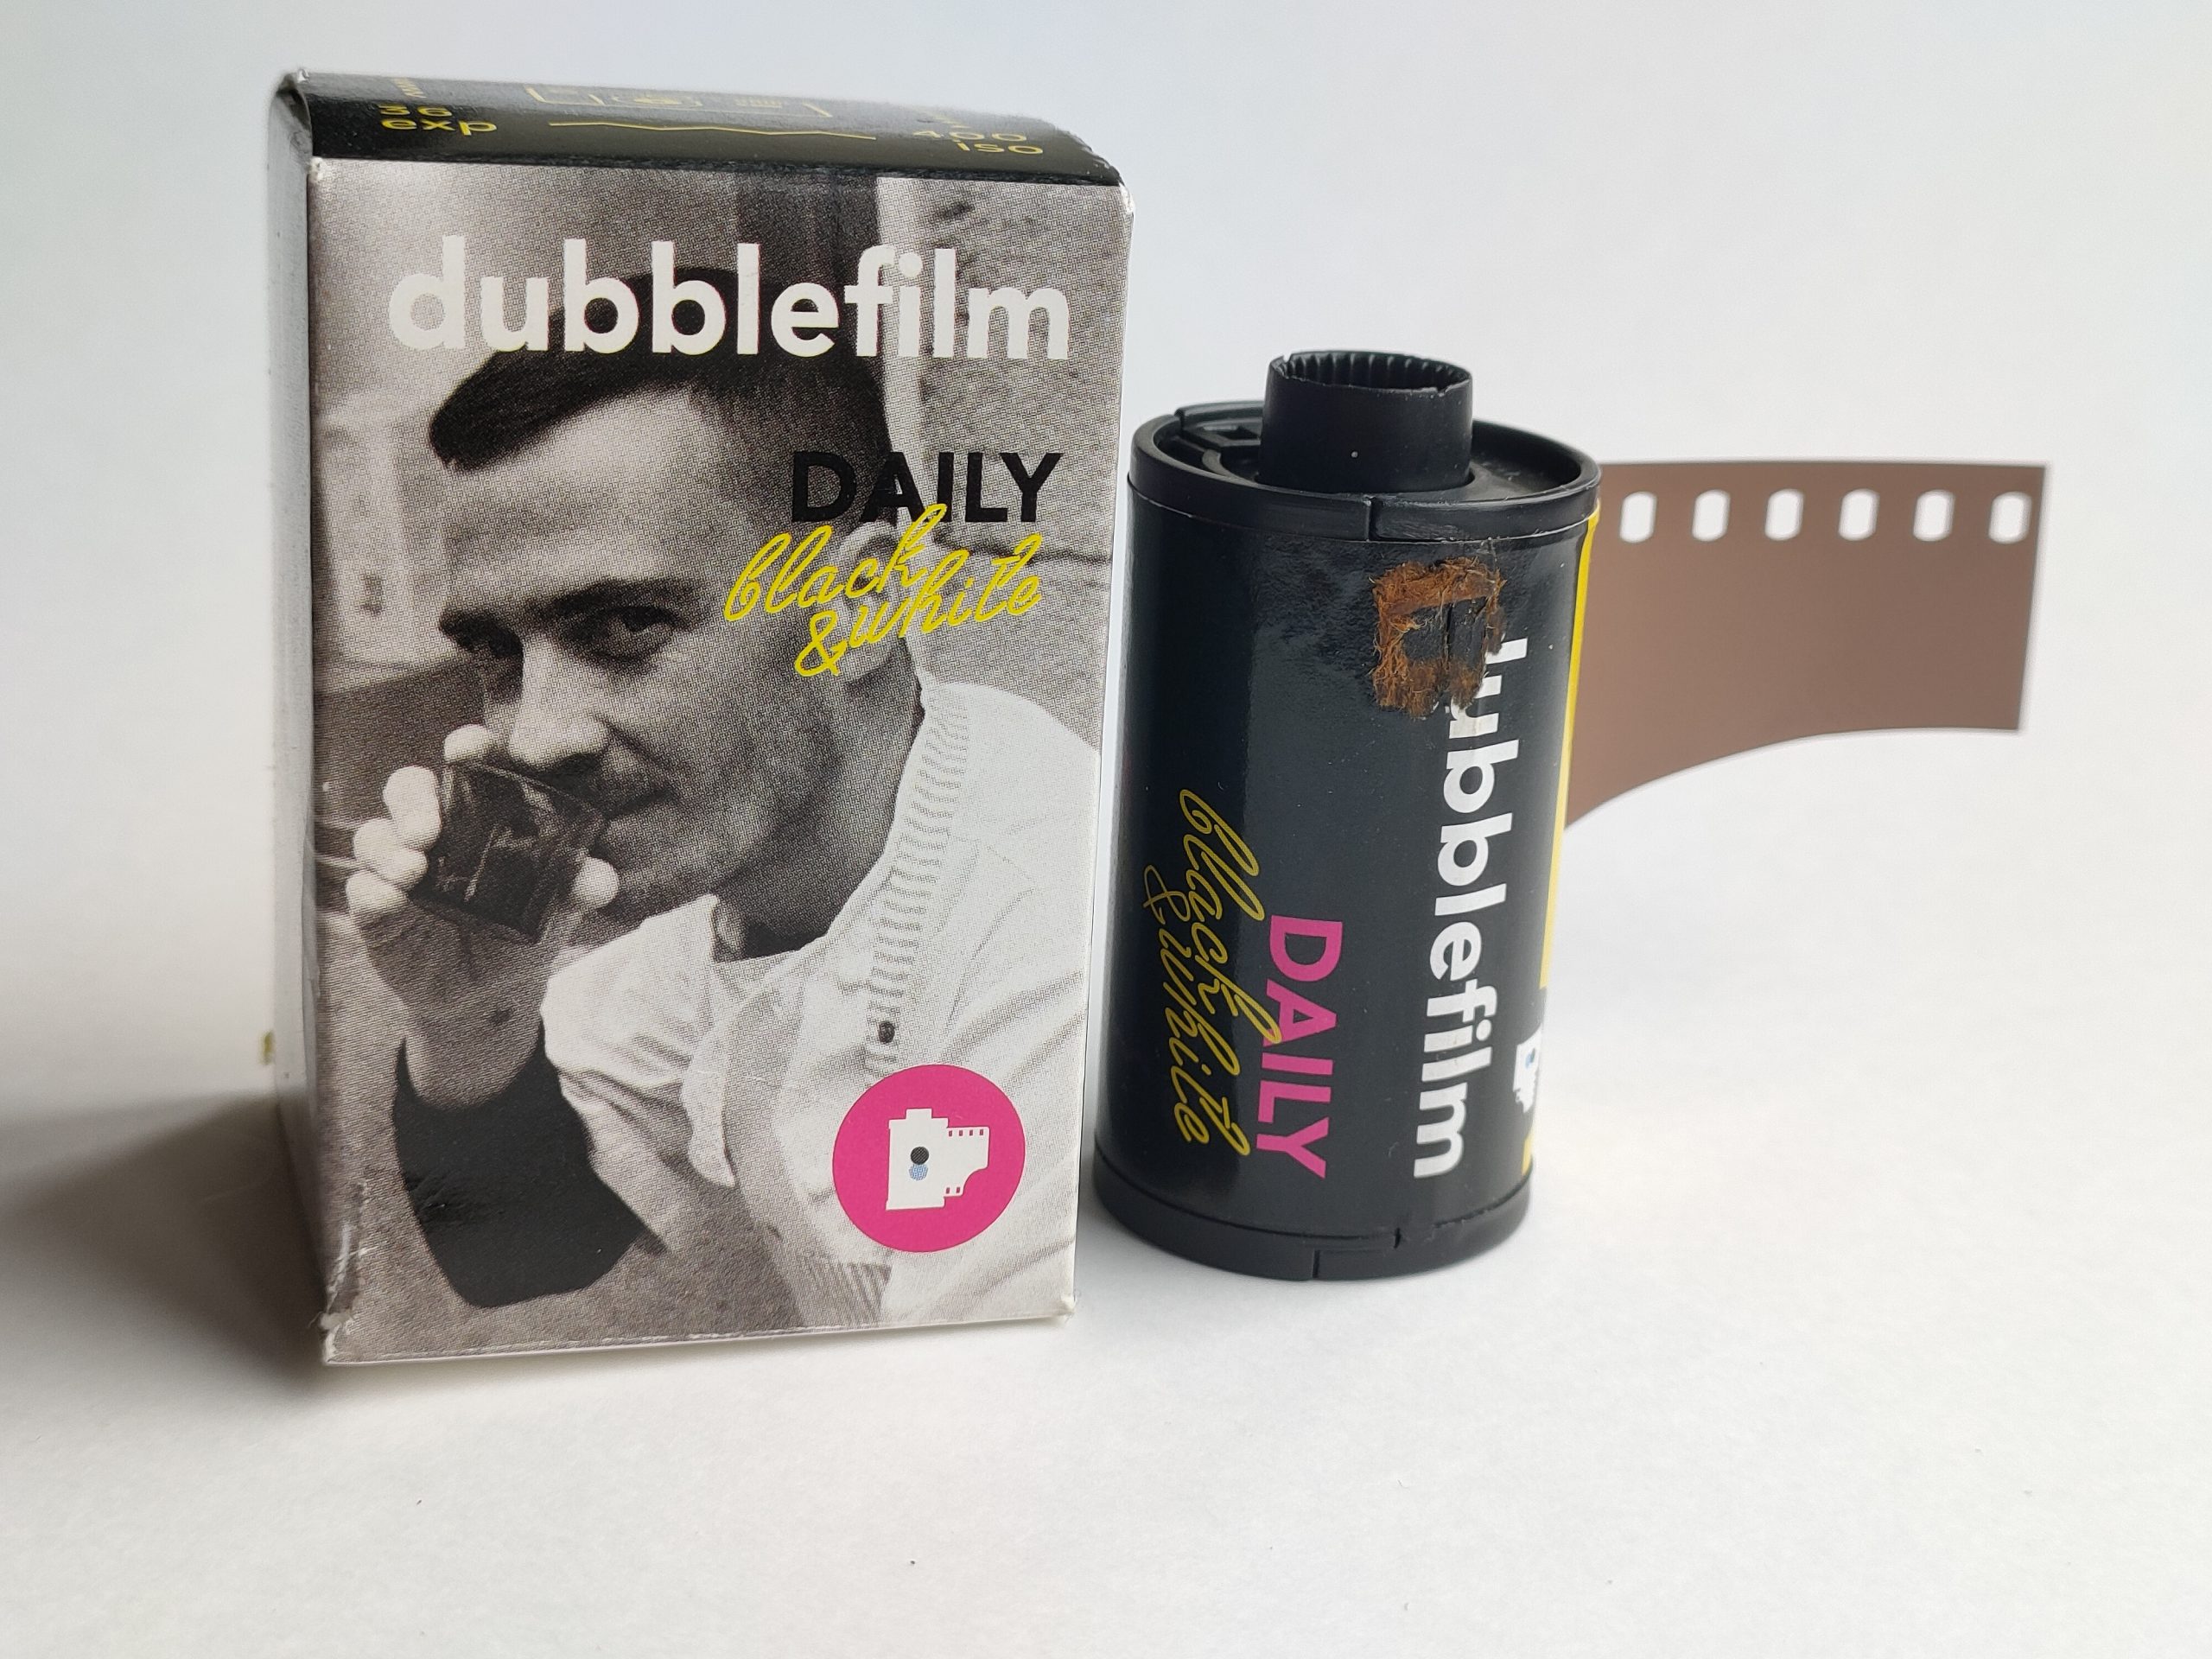
dubblefilm Daily 400
What on earth is this film?
I was sent this roll of 35mm film to play with by Keith Sharples, who is an SFLaB follower on Instagram.
Keith had already sent me some sample images that he got with this film and with so many variables to shooting and developing film I thought I would give it a go.
What is that guy doing on the box? Drinking coffee? Sniffing a sample of some substance? He looks a bit shifty!
dubblefilm
It is produced by a company in Barcelona called, wait for it… dubblefilm. If you look at their website they produce a variety of weird and whacky films in Black & White and Colour too. Who knows where they get the film stocks from, but no doubt they are finding them from somewhere in large quantities and rolling them up for us to have fun with. And the price isn’t bad either with this film I am playing with around £7 a roll of 36 exposures.
My Shoot
So, what did I do? I shot the s**t out of this roll rating the film at 200 ASA with my Leica MP, a 50mm Voigtlander APO lens and then I developed the film in 510 Pyro at 1:100 at 22° using my Rotary machine because I can be a lazy git sometimes. I developed for 13 minutes in the Pyro.
Why did I rate it at 200 and not shoot box at 400? Well, I had a feeling it was some sort of surveillance film and in my experience that are contrasty!
There was no times for the 510 Pyro so I winged it and used Fomapan 400 times which recommended 17 minutes but I took some time away for rotary processing. Looking at the leader of the film after developing I think I could have taken another minute or so away but all in all the negs came out looking nice.
So, here are some of the photographs I took.
This was a Cricket Stadium on a dull day. Even in the Pyro the grain is very noticeable and we have some nice tones going on, although this scene doesn’t stretch the dynamic range.
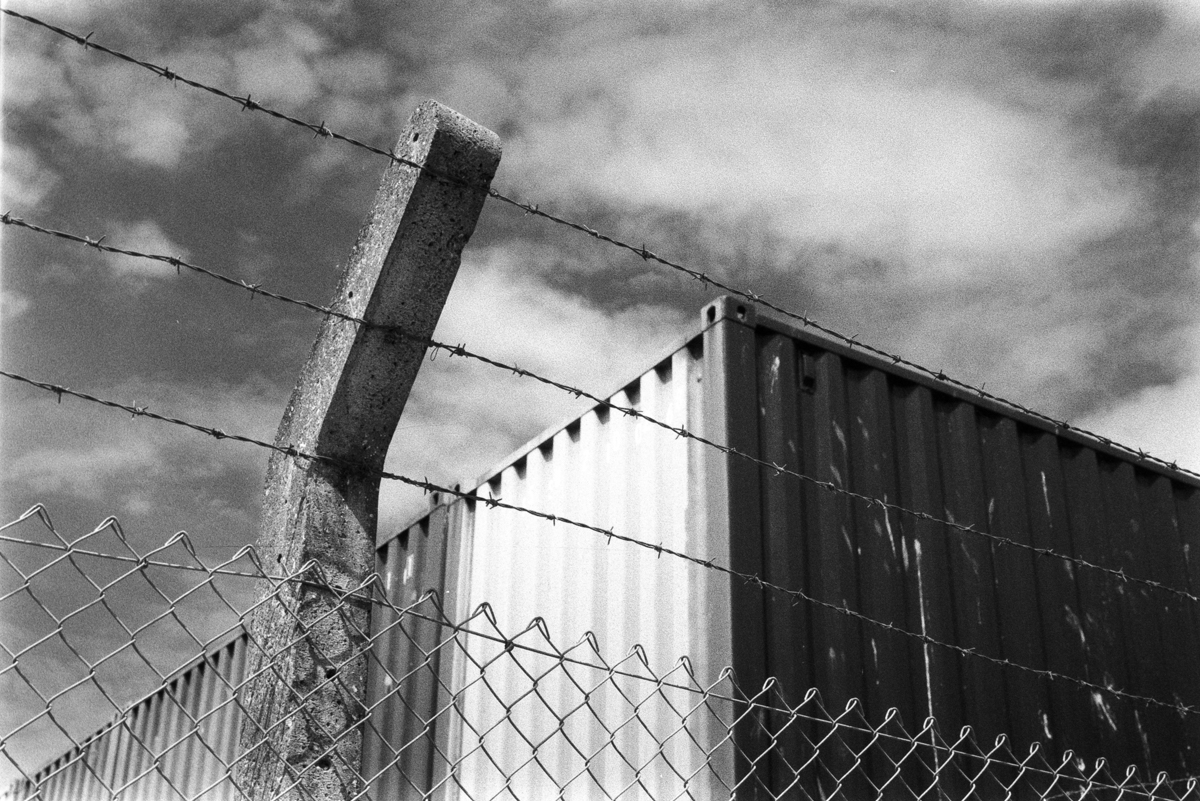
A different day, with an Orange Filter on the lens. Showing some sky the grain is now very noticeable. And I don’t like that sort of grain on my Skys. Contrasty too, probably because of the filter.
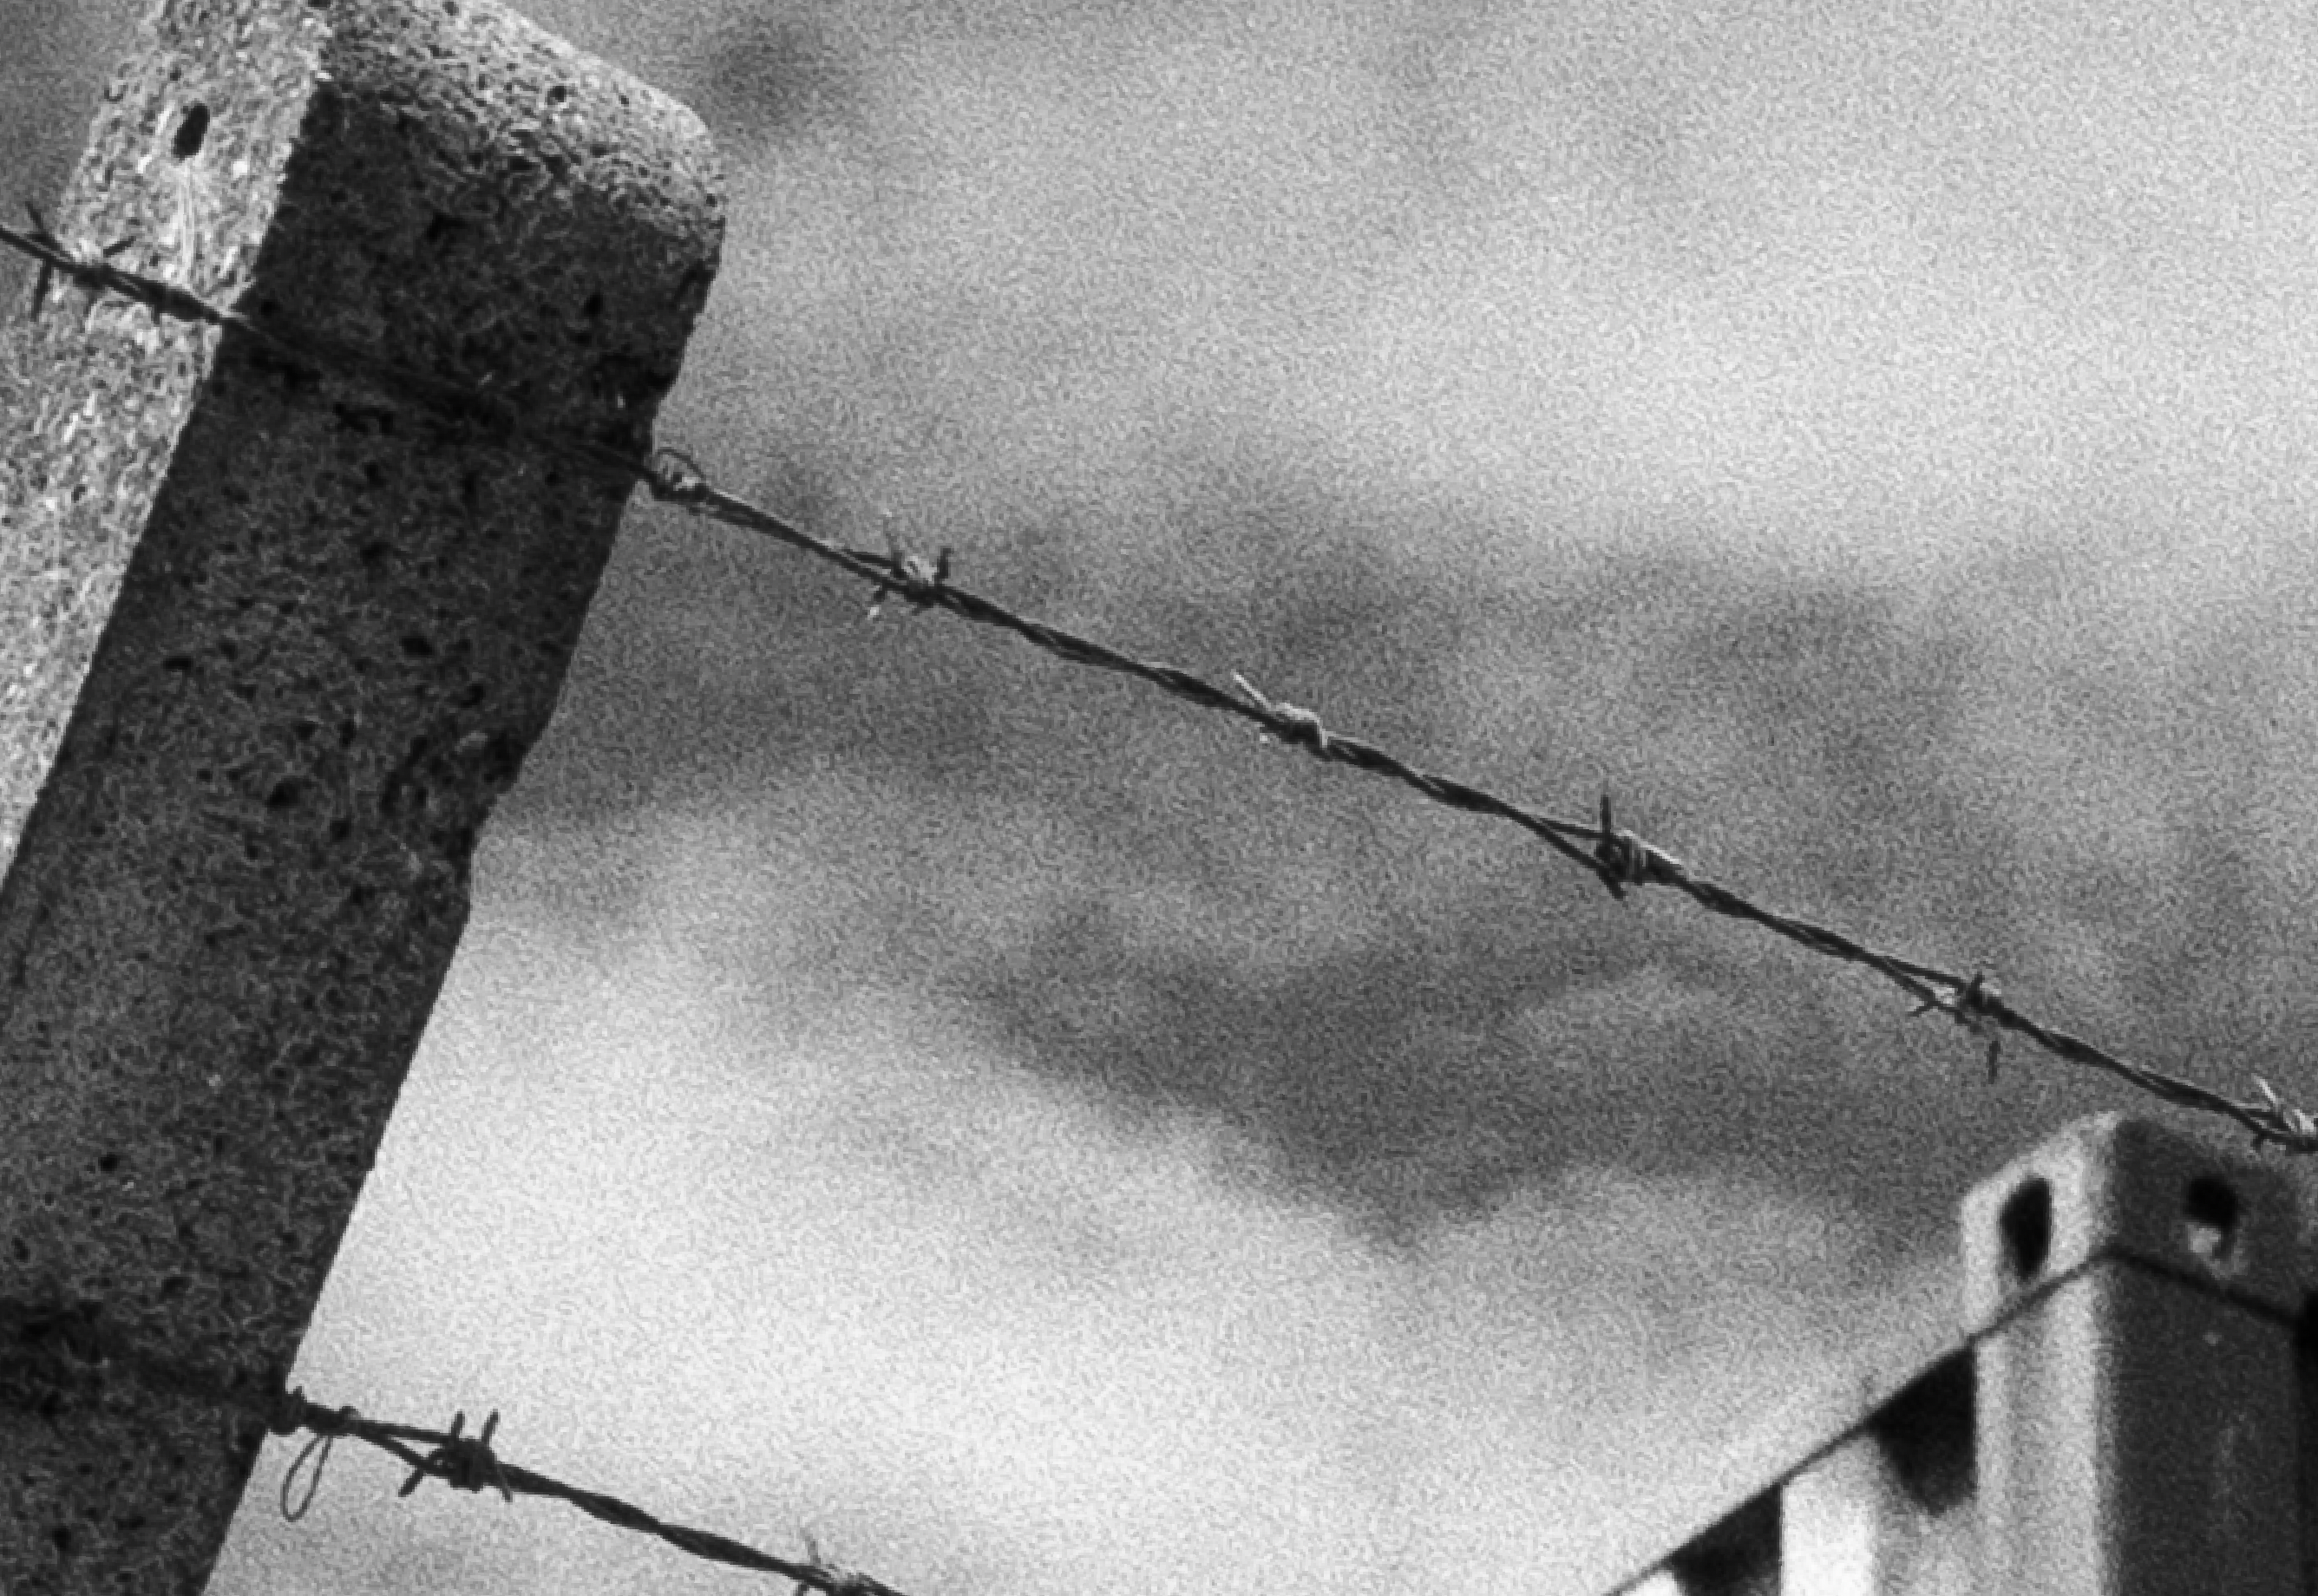
If we zoom in to that container photograph we can see the grain more.

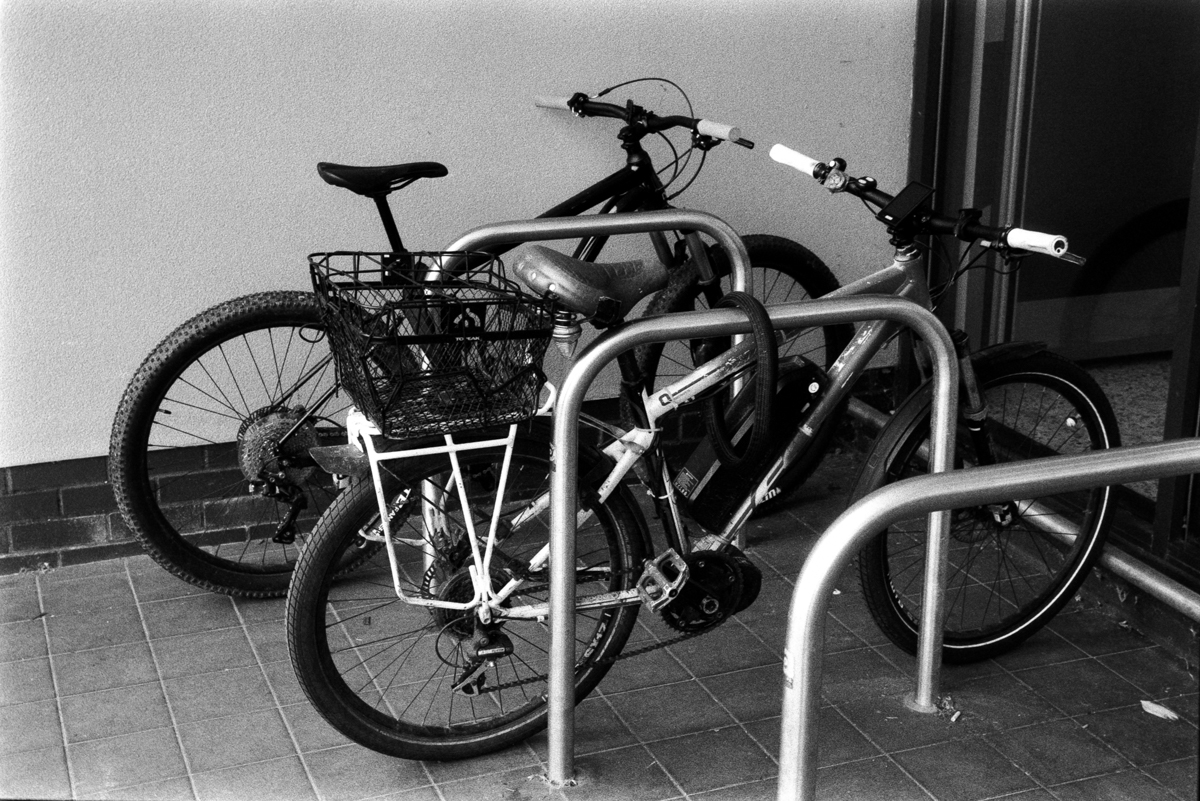
These bikes were in the shade. Another contrasty looking photo.

And finally Ferns. This actually looks really nice! The blacks are awesome and the highlights are well controlled, probably due to the 510 Pyro doing its thing but still. It complimented the film well.
Final Thought
To be honest I am not one for getting all excited over these kind of films. I have my go to favourites but when they arrive on my desk for some fun it is interesting to see the results and I must say I actually like it! Whatever it is?
We know that dubblefilm don’t have a plant for making emulsions and I very much doubt their films are rebrands from Fomapan/Kentmere. Initially I did wonder if it was Fomapan 400 but it is totally different. It more reminds me of JCH Street Pan 400 Film which we all know is a Surveillance Film. So maybe this double daily 400 is a Traffic Camera stock/Surveillance Film Stock.
The grain structure reminds me of Kodak Tri-X 400 which is a beautiful film for street photography and quirky looking edgy portraits. Having developed this in 510 Pyro, which usually makes good of grains films, makes you wonder what a developer such as Rodinal or D76 would have done to the grain. Probably exploded it into the abyss!
Anyway, thanks to Keith for sending me the film and also let’s applaud dubblefilm for punching out these films for us to dabble with and keeping film alive. Horahh!
Using a CPL Polarising Filter
This is one filter that I rarely use but really it should be a filter that I always take out with me on a shoot!
The Circular Polarising Filter (CPL) works like magic on sunny days getting rid of unwanted reflections on water, glass and other surfaces as well as making blue sky a deeper blue if you are shooting colour and giving a nice separation between the sky and cloud.
It’s also great for out door portraiture if you’re shooting in bright sun taking the shine of your subjects skin. Not that you would want to shoot a portrait in bright sun! But the option is there.
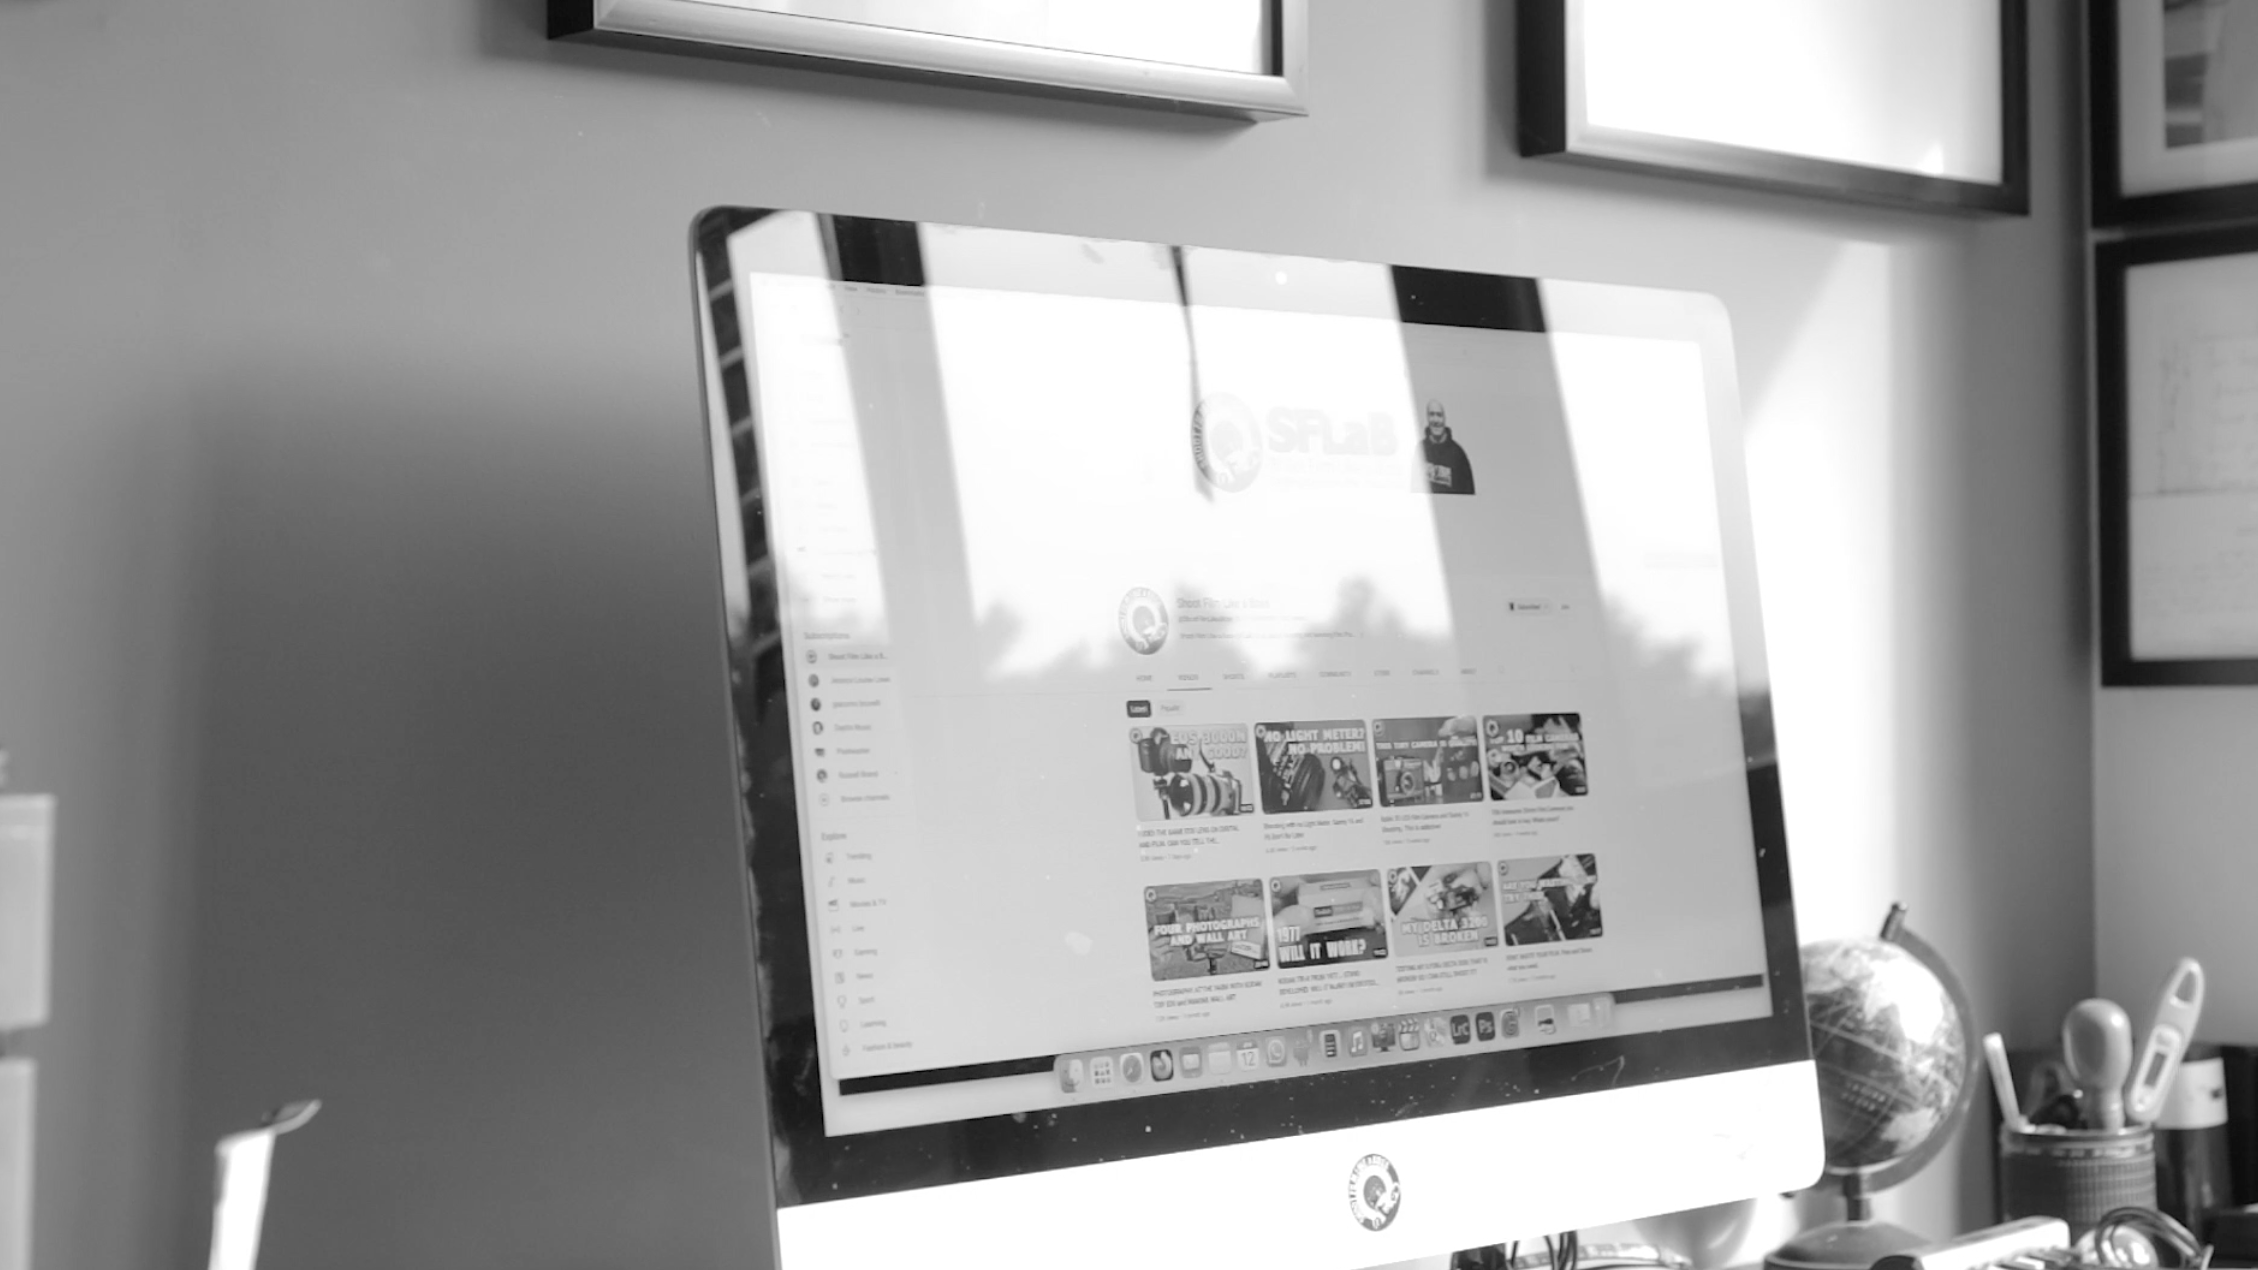
Here is a still taken from the video where I had the polariser on. No shine on my head. I then turned the polariser in the opposite direction and you can see the difference.


The filter works best when your subject is at a 90° angle from the sun. So you have to keep this is mind when you are taking your pictures. And if you are shooting scapes and you are not at the right angle you will start to see uneven graduation in the sky. Such as this image below. The sky is darker on the right side than the left.
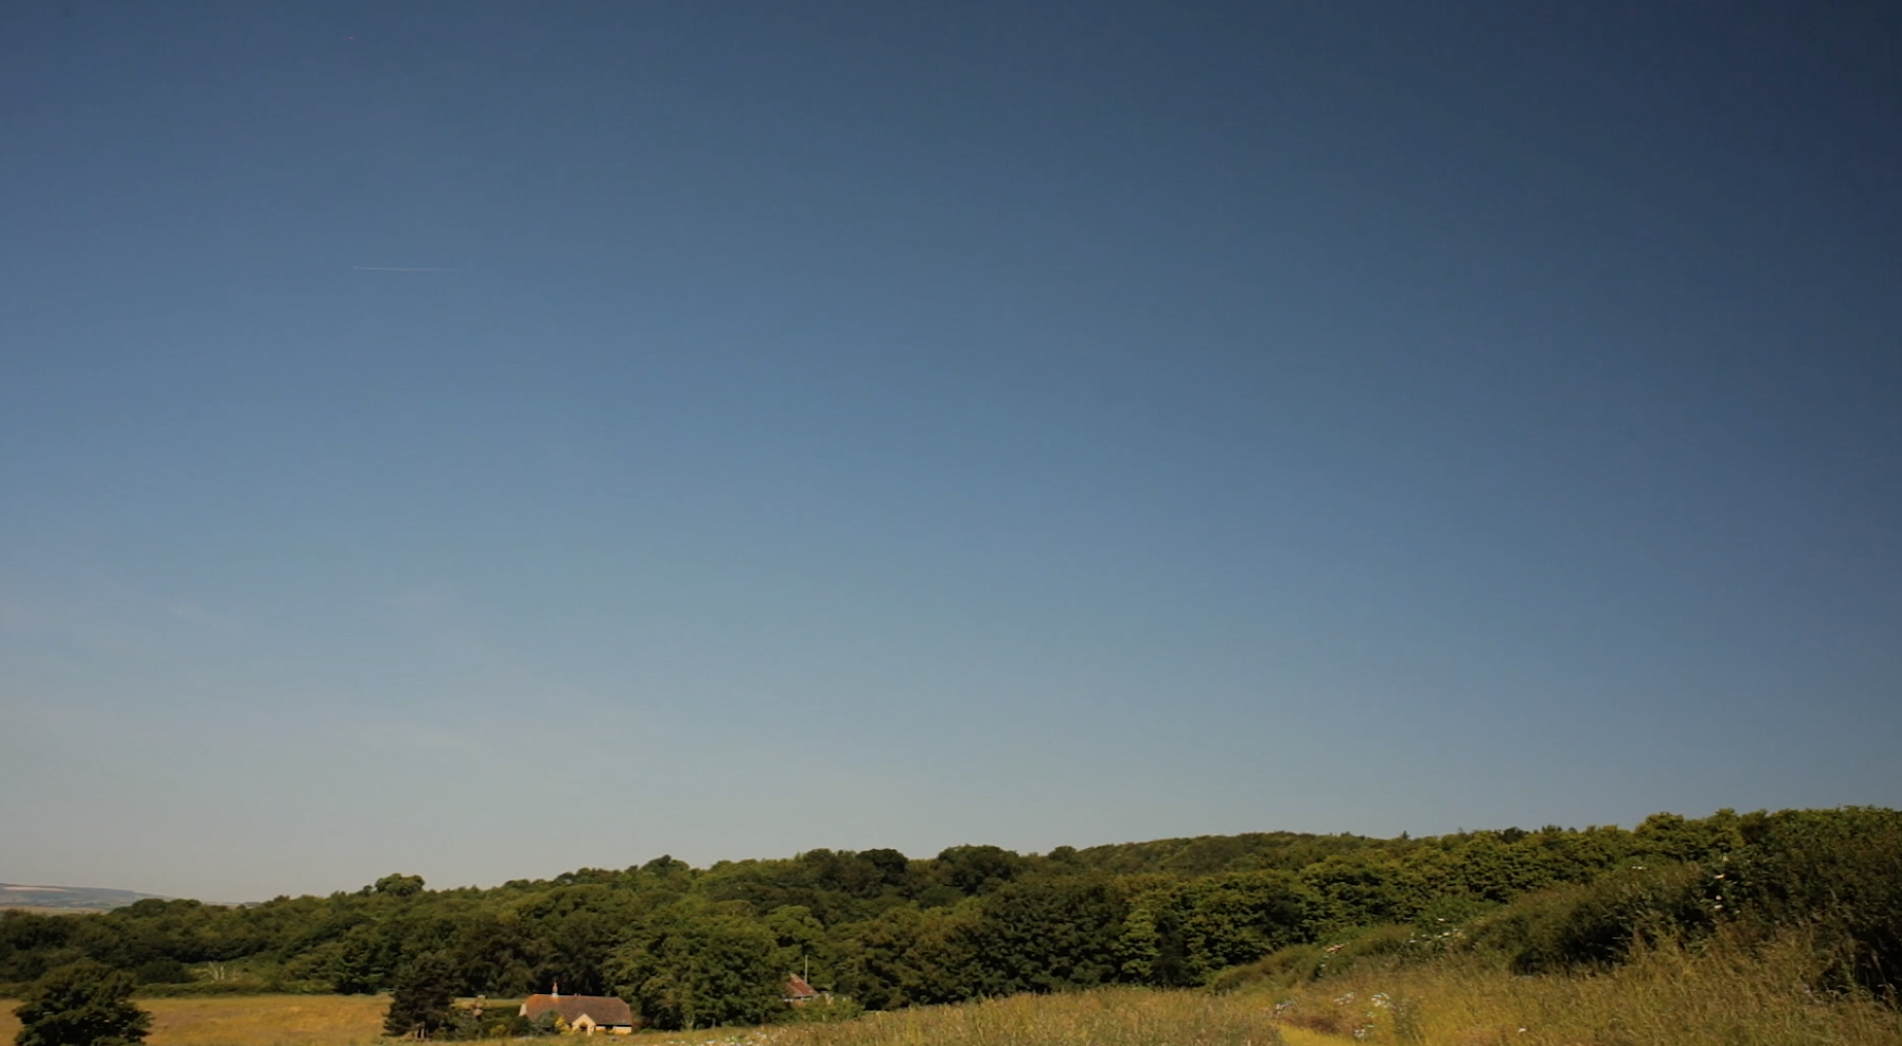
It does look a bit odd so maybe this is a time when you decide not to use the filter. But if you are at the correct angle for maximum effect you do get some wonderful gradient in the sky. Especially if clouds are present.
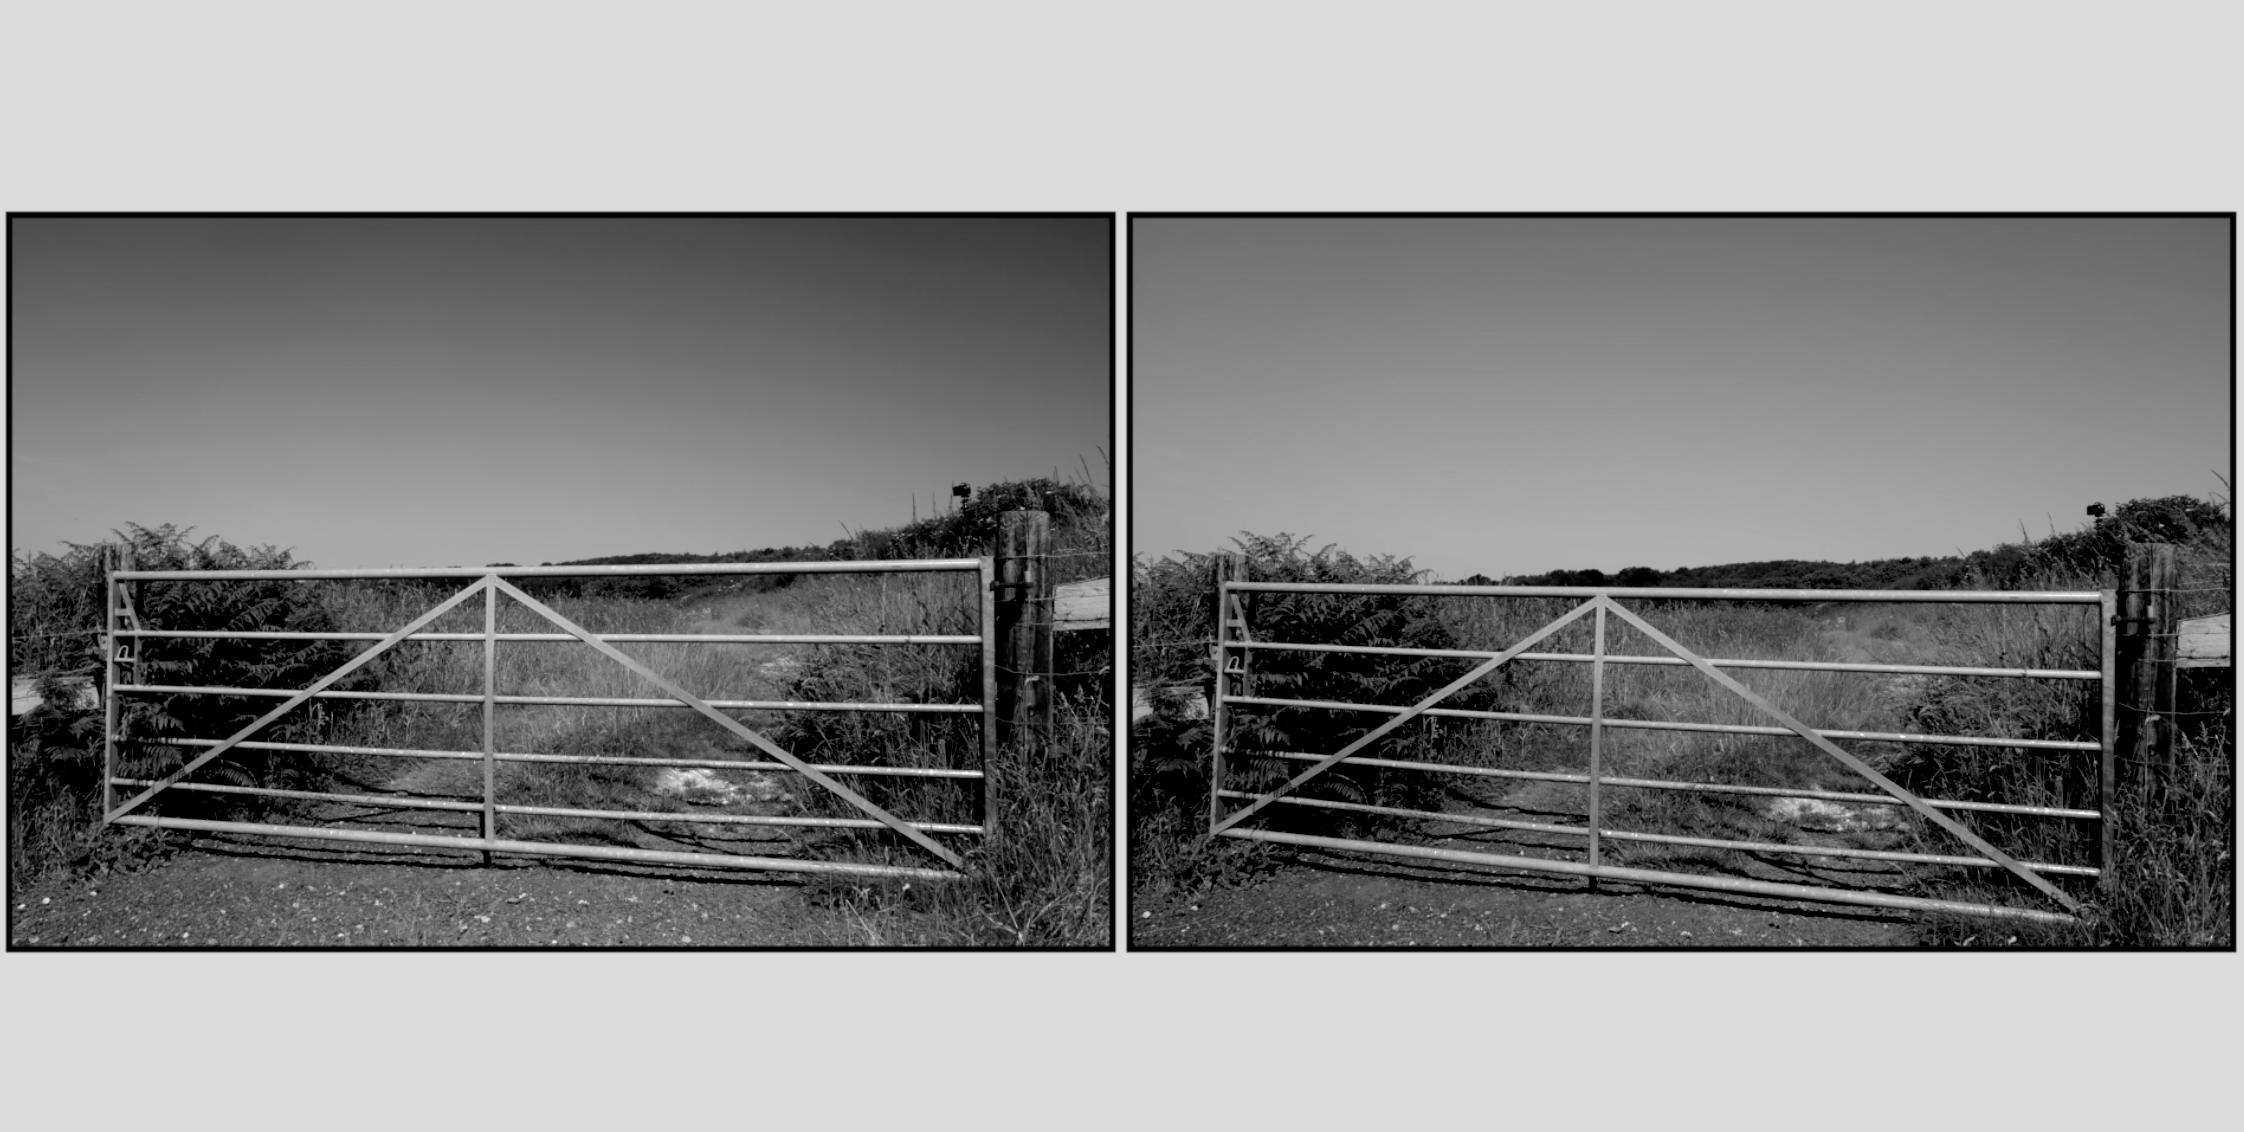
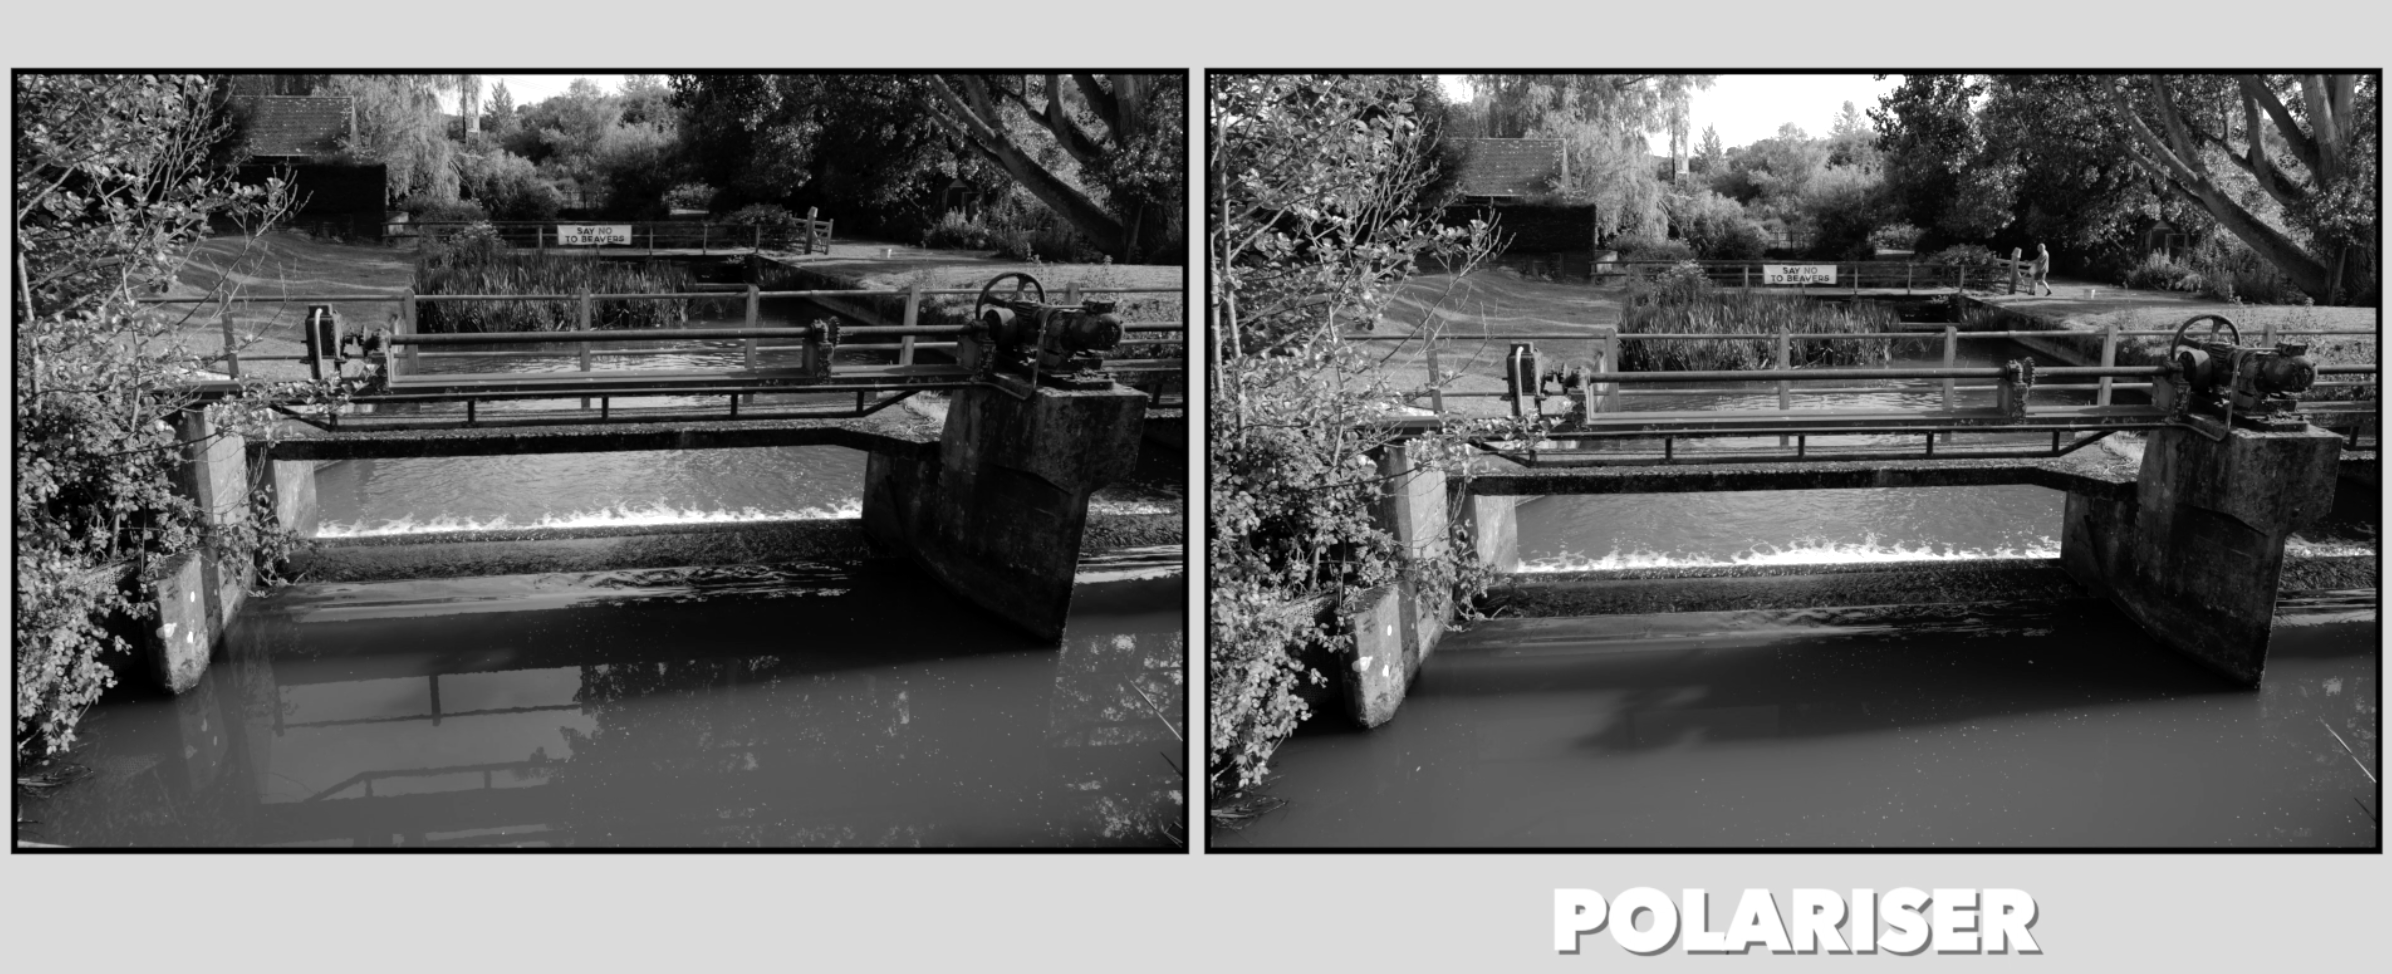
The left image is using a Polariser Filter and the right is no filter.
And here is another scene where you can see how the filter has worked with unwanted reflections in the water.
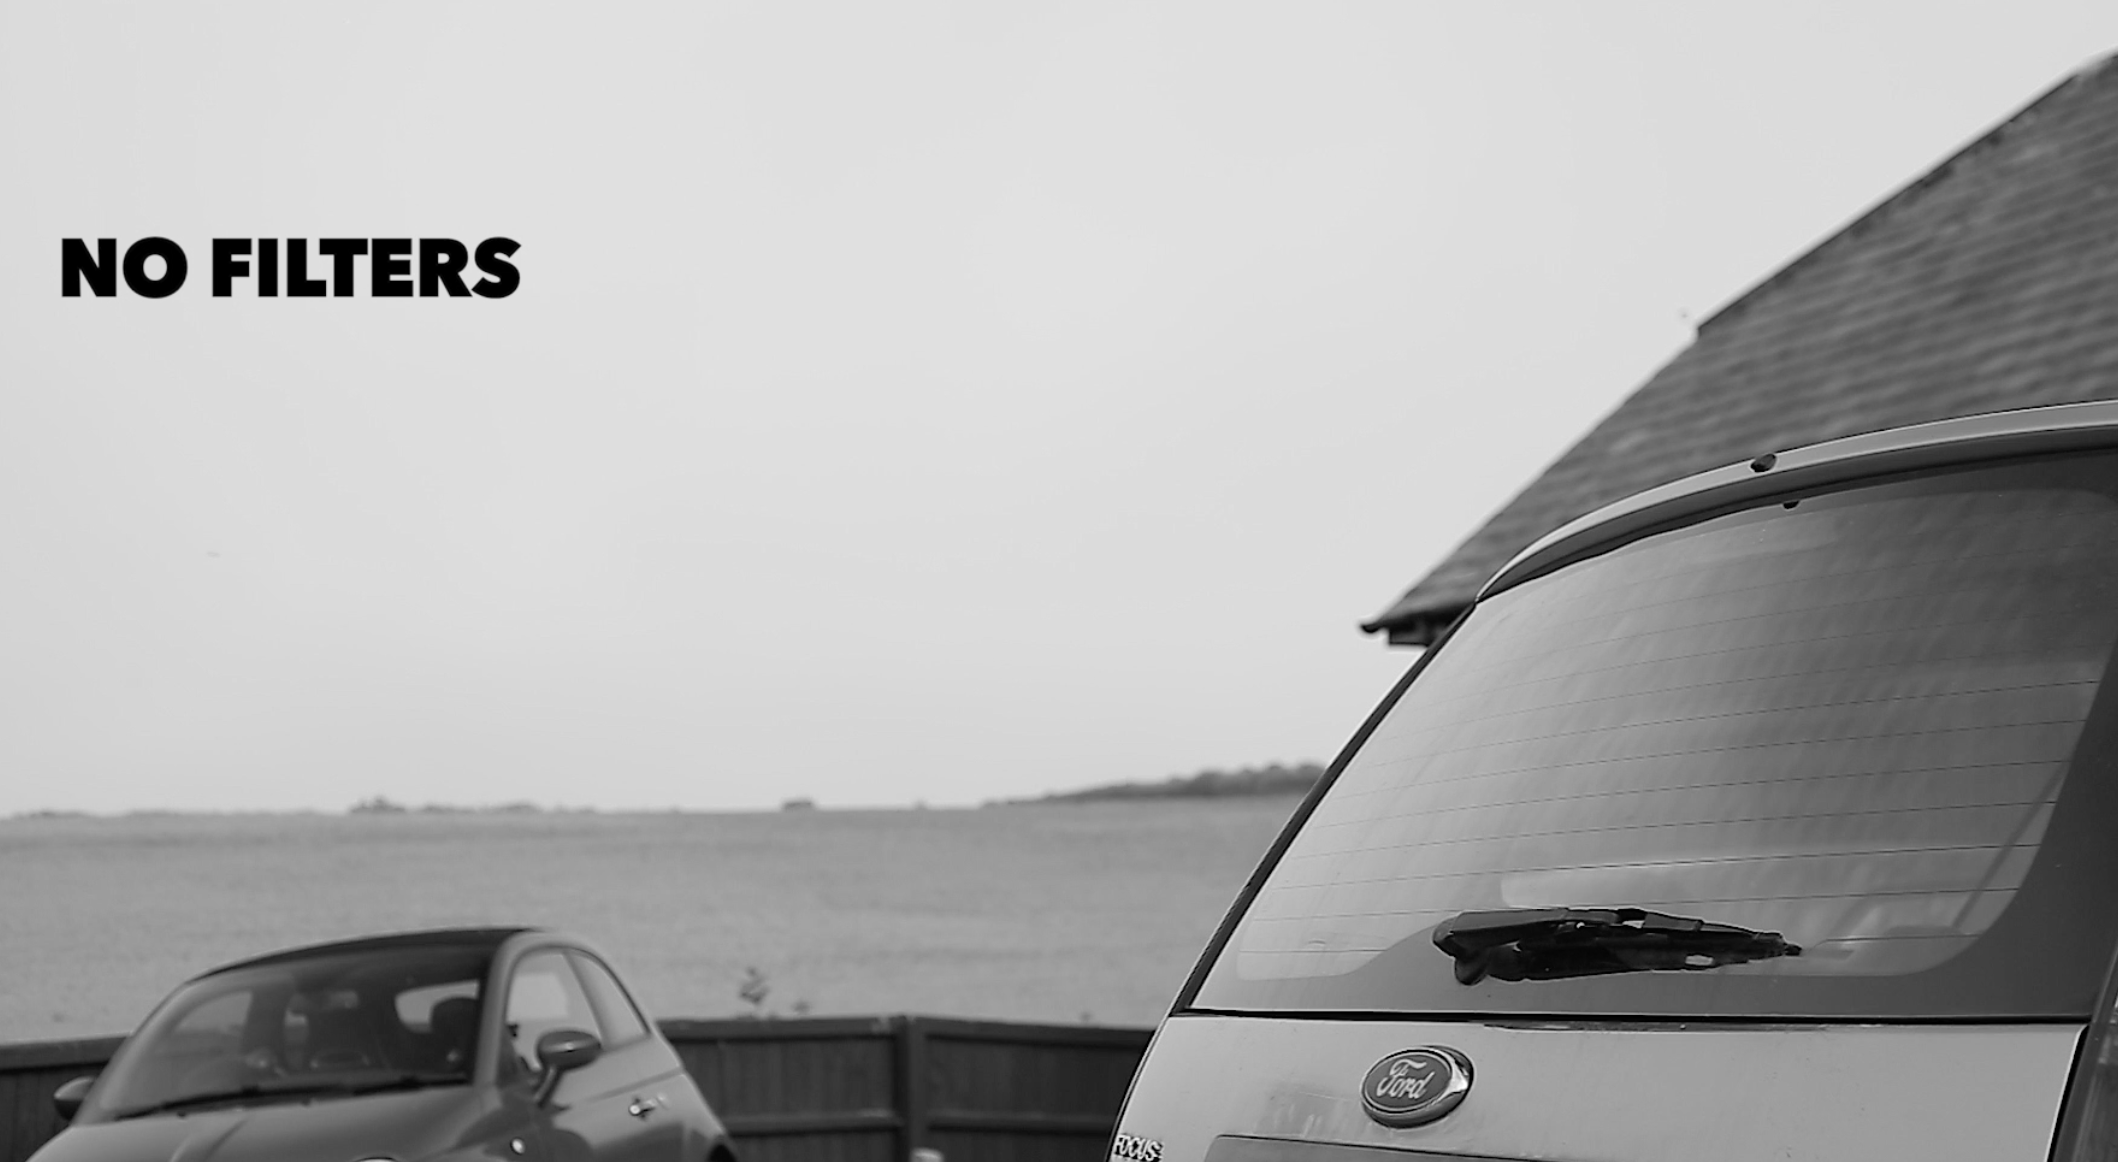
Another screen grab from the video, with a UK/US grammar quote, you can see how it works on glass and in particular, cars. Good to remember for you car show photographers.

As for the science behind how it works you can read this up online. There are plenty of articles on how polarisation works that explain it far better than I could. But to be honest, I don’t need to know how it works as I can see how it works when I am using the filter. As long as I am using an SLR.
If I am using a Rangefinder where I can’t see what is going through the lens then it’s just a case of looking through the filter with your eye and then using the indication mark on the filter as a reference.
That line on the filter is an indication of where to position the filter. It should be in line with the direction of the light source, thats where I have found it to work best. So you can use this as a reference for your rangefinder. But, not all filters have this line. Which is fine, if you’re doesn’t then you can make your own line on the filter with some typer fluid or white pen.
Probably the only thing you need to know is that it works best when your subject is a a 90° angle from the light source. And also you will lose light using the filter. My one is 2 Stops. Others may vary depending on the brand and quality.
Here is a list on what I found this filter to be able to control in my own photograph.
- Water Reflections
- Surface Glare
- Cloud and Sky Separation
- Unwanted skin glare from light sources
- Glass Reflections (Think car show, shop windows, home interiors)
- Vegetation Glare
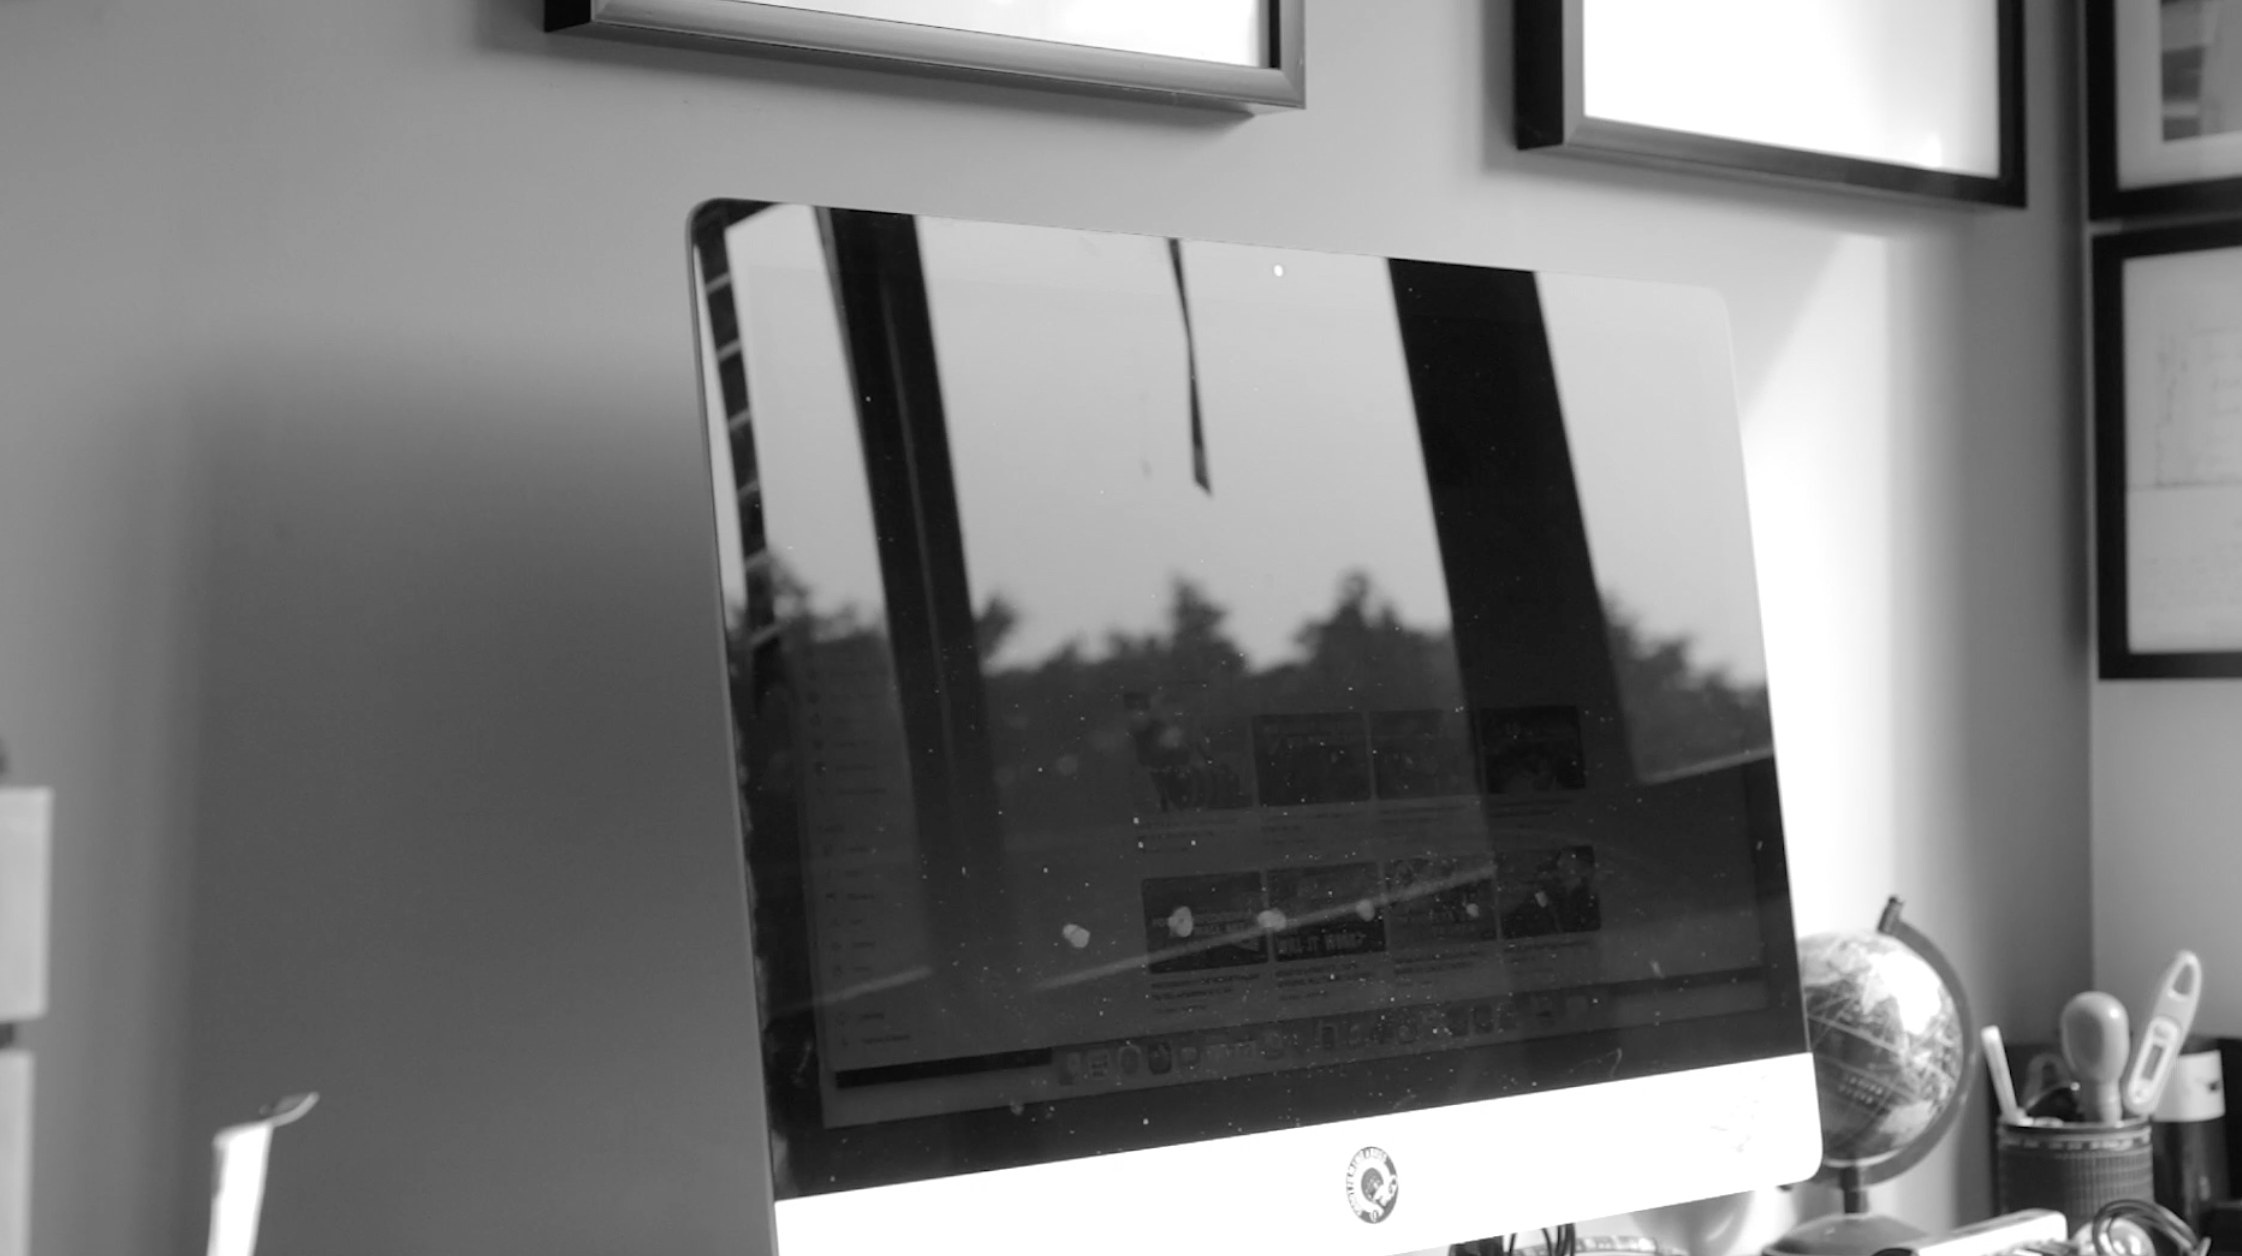
Also, if you need to shoot interiors for an office the filter will also turn LED screens black! Very handy if you are shooting interiors that have these screens such as an office.
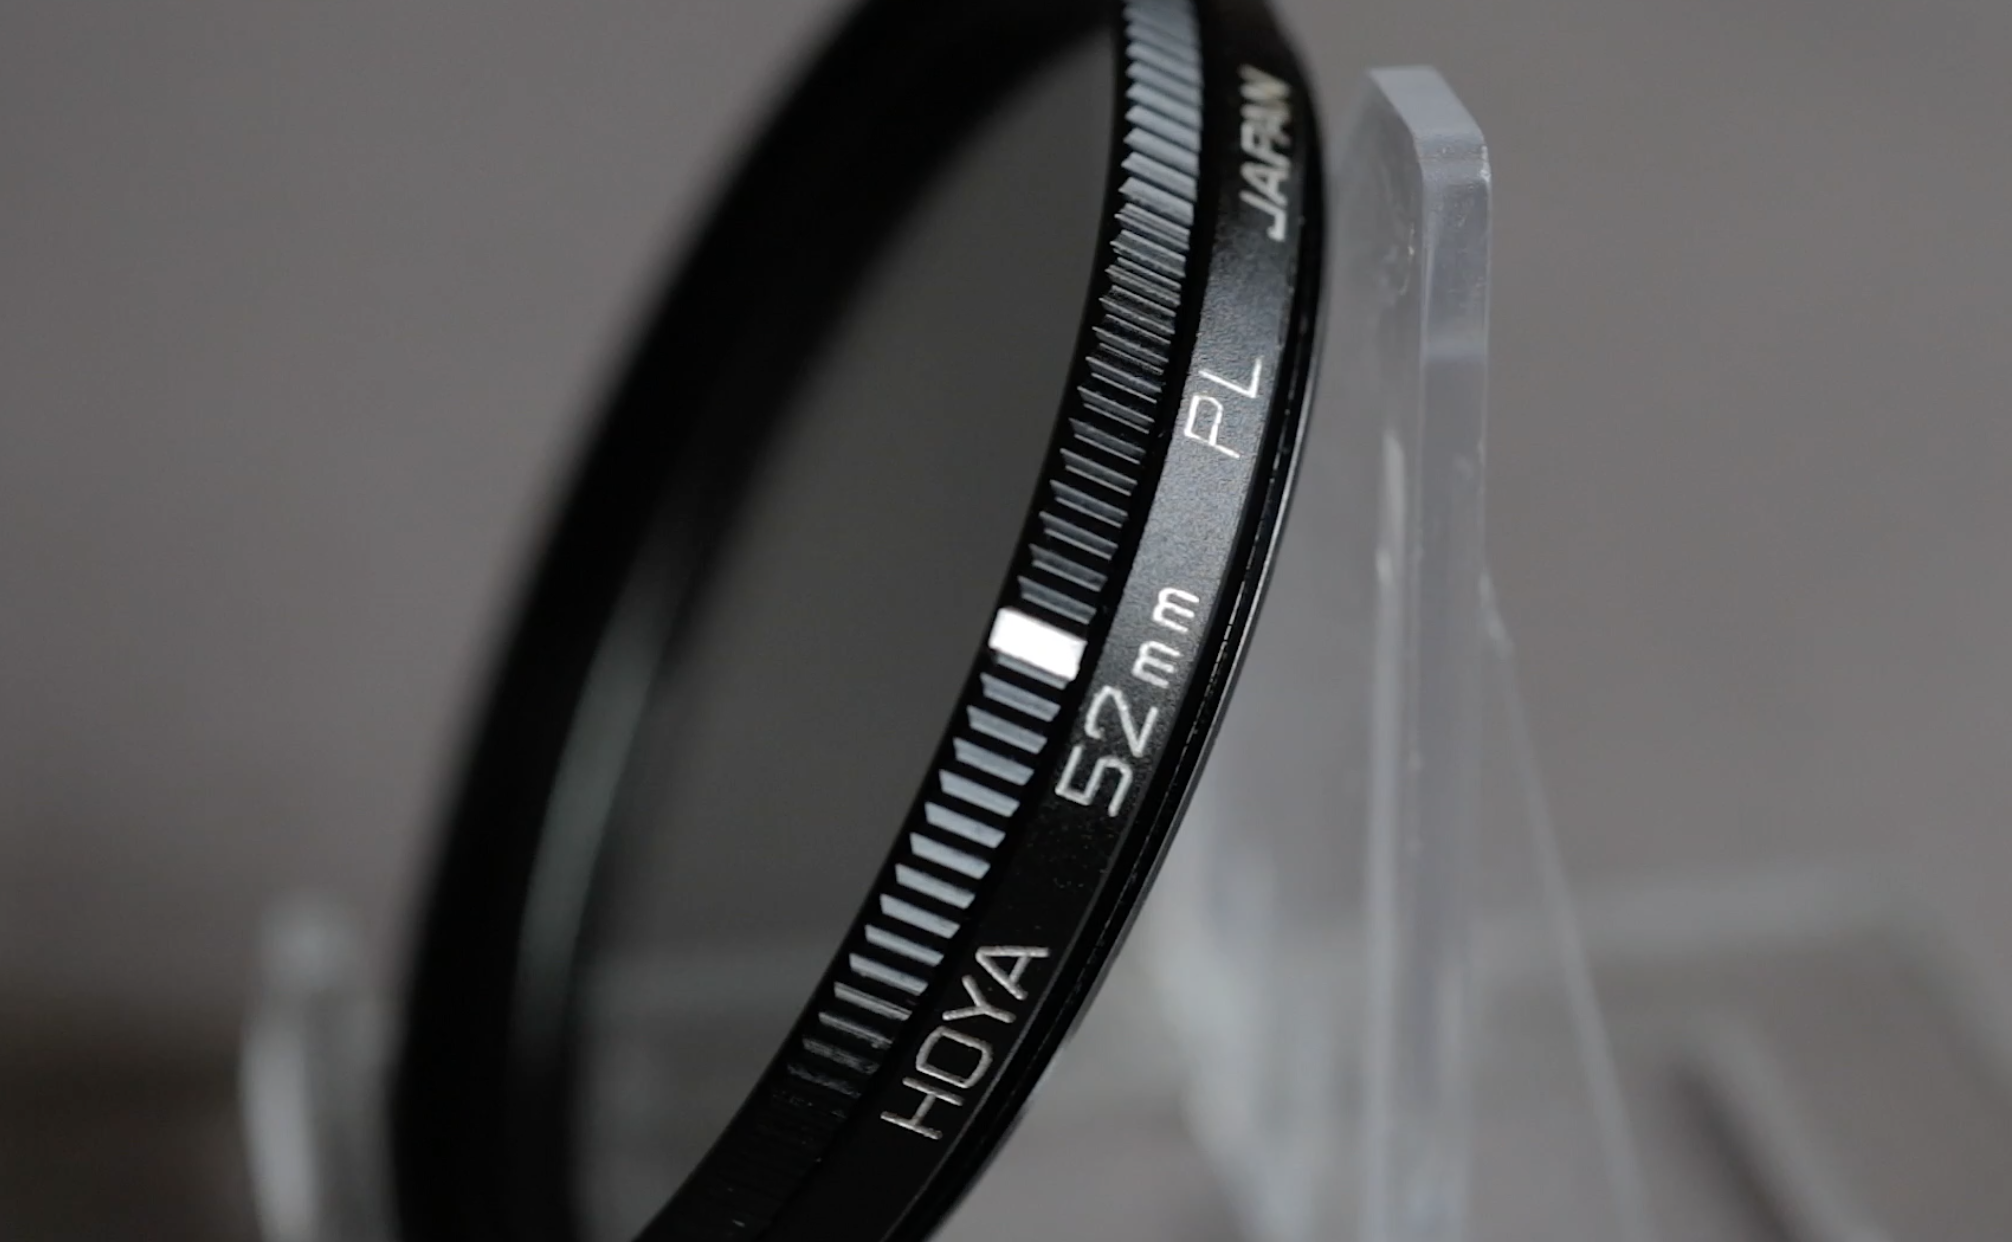
There are many brands of CPL. I have the Hoya Brand which work pretty well, but there are brands that are more expensive and probably work better and brands that are cheap that probably work okay.
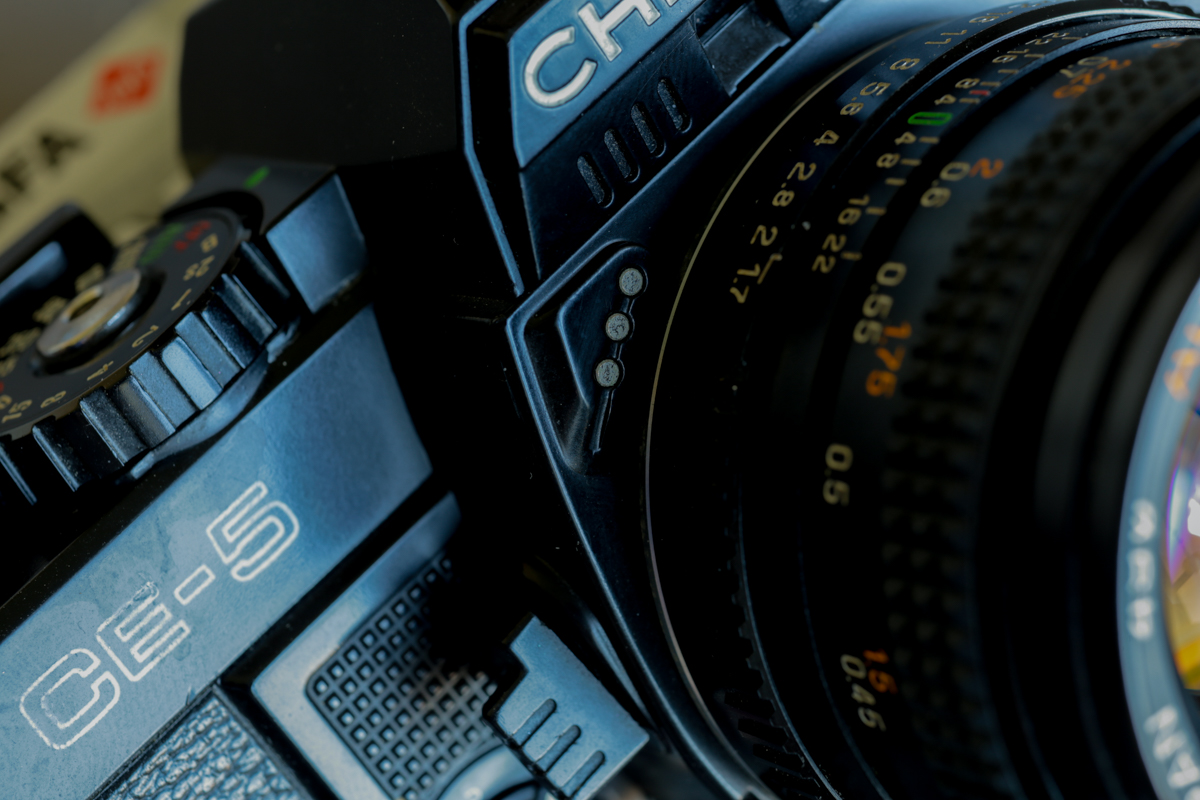
Chinon CE-5 is Under-rated
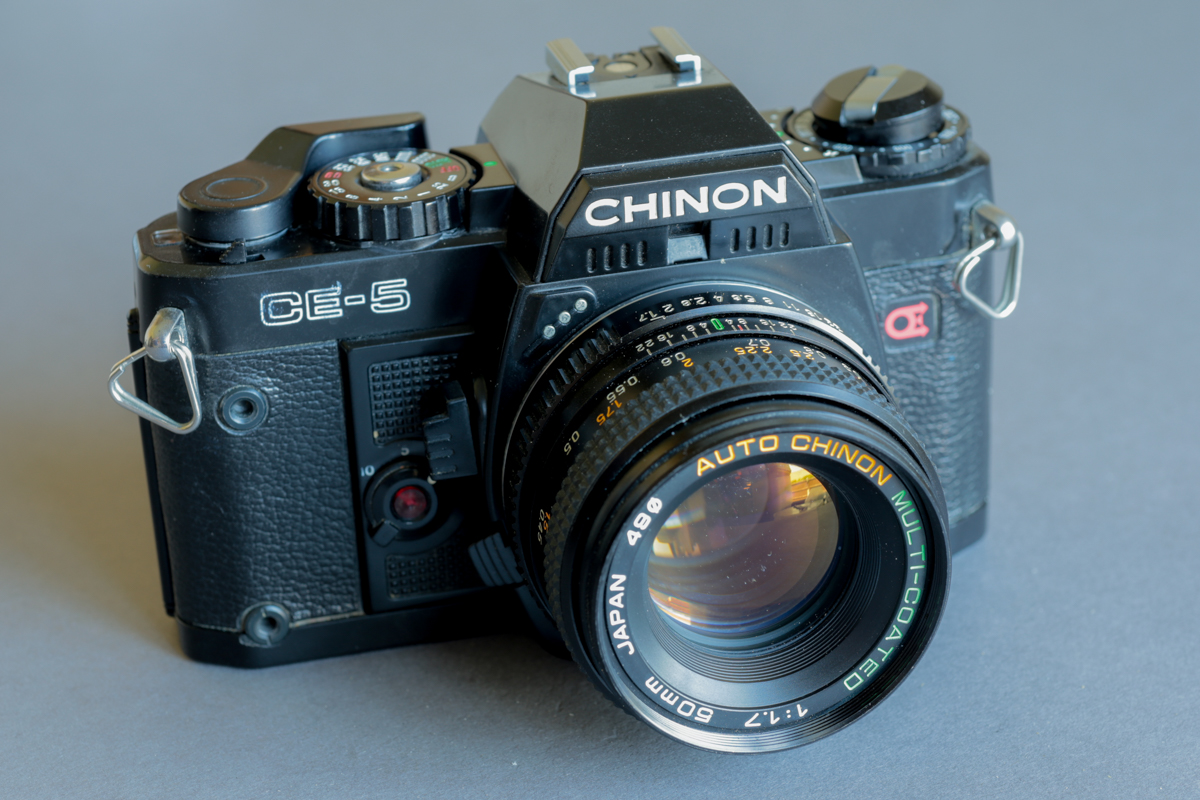
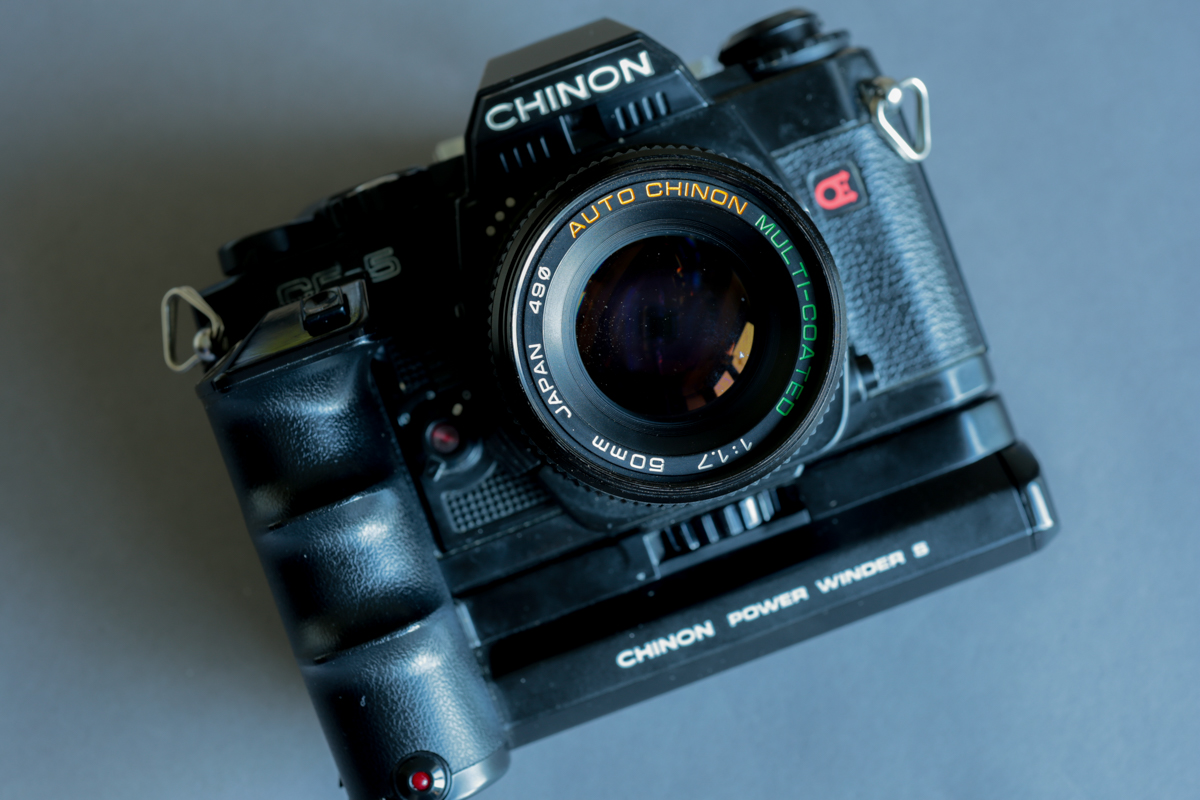
Here is a sweet SLR Film Camera from 1981.
The Chinon CE-5.
This camera was sold in a time when SLR Cameras were at their pinnacle of forward thinking with Canon, Nikon, Pentax and Olympus dominating the market with model after model of fantastic cameras for the consumer.
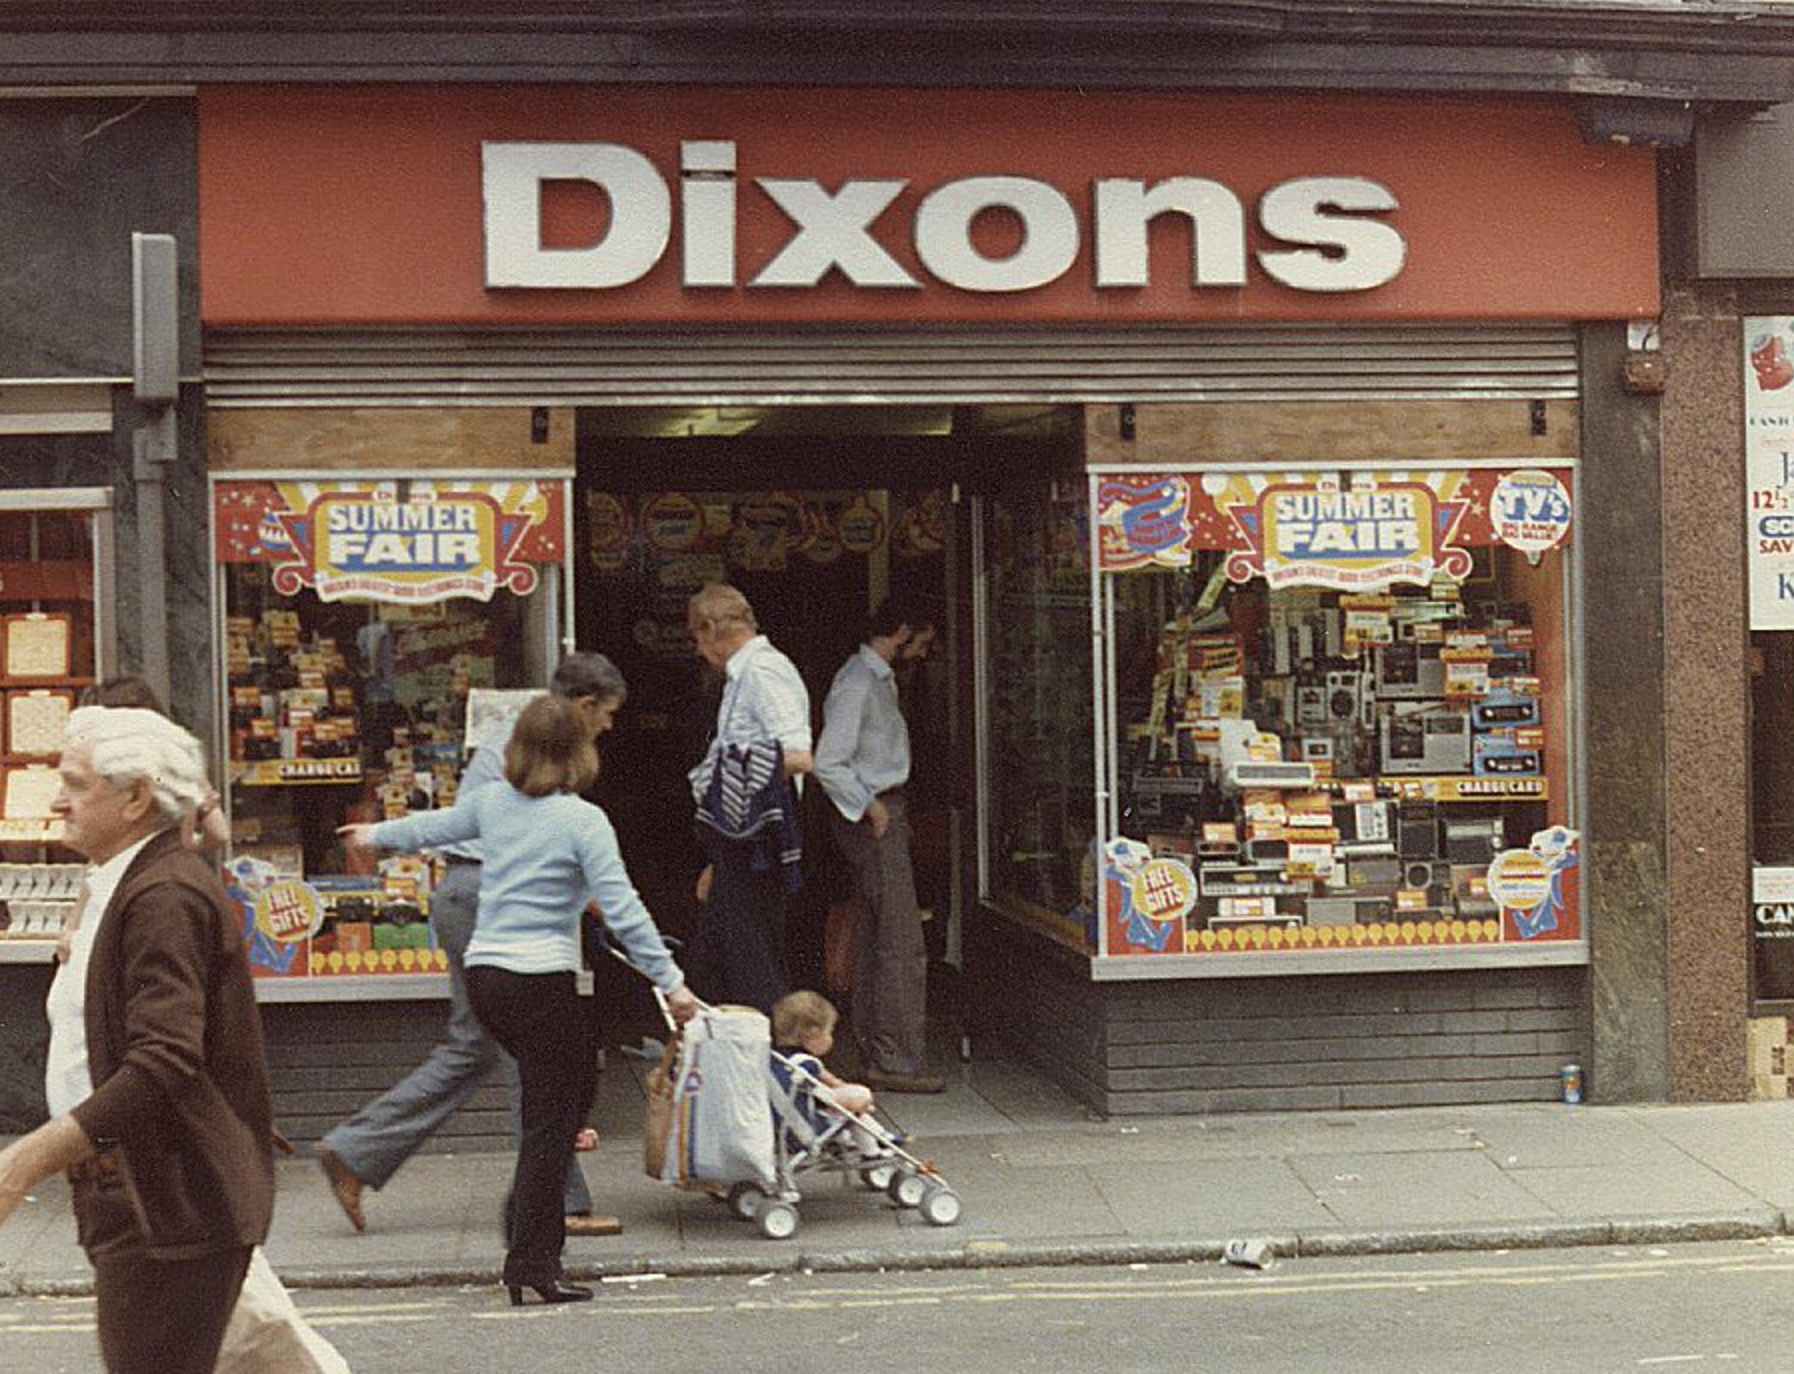
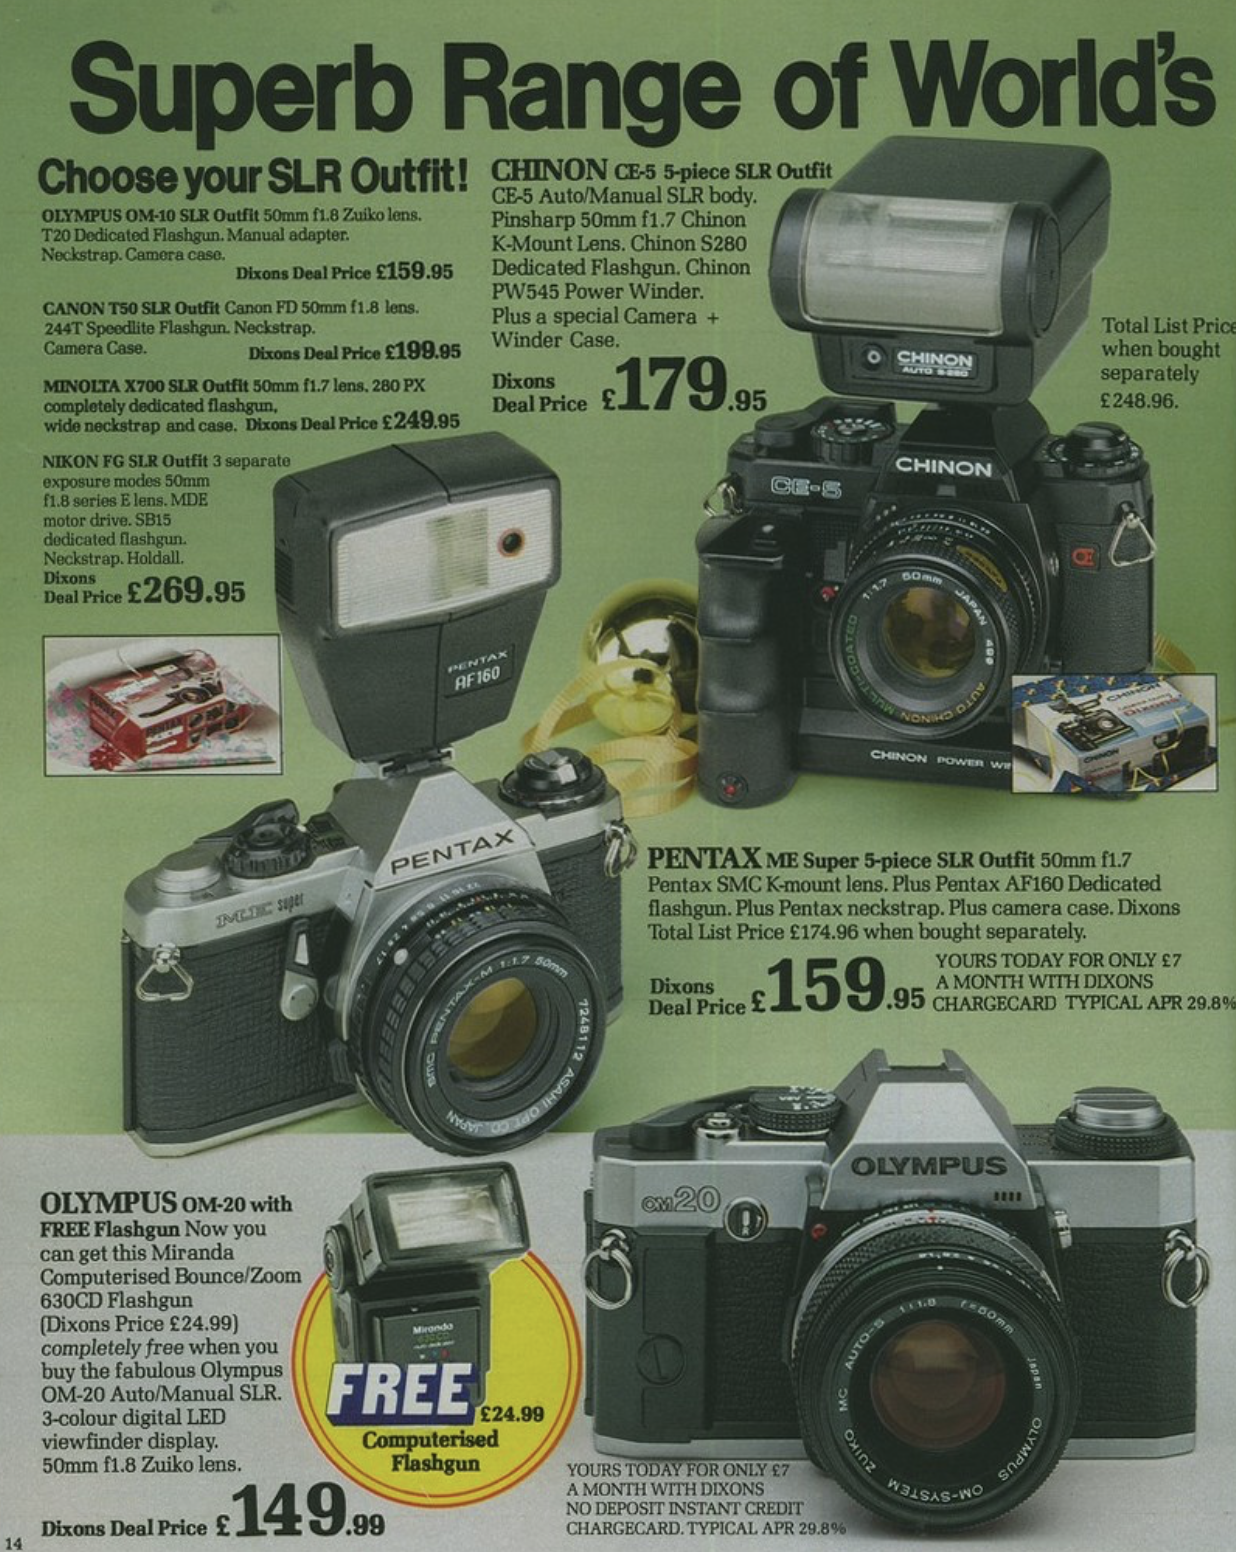
Back in 1981, the Chinon CE-5 could be seen in every Dixons Store in the UK, often boxed with a fancy bundle of a Lens, Flash, Power Winder and Camera Bag.
It was cheaper than the Nikon and Canon Cameras at the time but more expensive than the Olympus OM20 and Pentax ME Super, However, I can only imagine it was less popular. Maybe the bundles were attractive! Or the hobby photographer of the day wanted a more popular name.
I have the OM20 and the light meter is a bit fragile now. The Chinon CE-5 is still accurate after all these years!
Bradford Timeline, Flickr
I got this Chinon CE-5 a few years ago for just £50. And after not using it for the past year or so as I thought the electronics were dead, even with new batteries, I recently gave it a good clean with Alcohol on it’s circuits and it jumped back to life and is as good as it was the day it was in the shop! Which was Dixons!
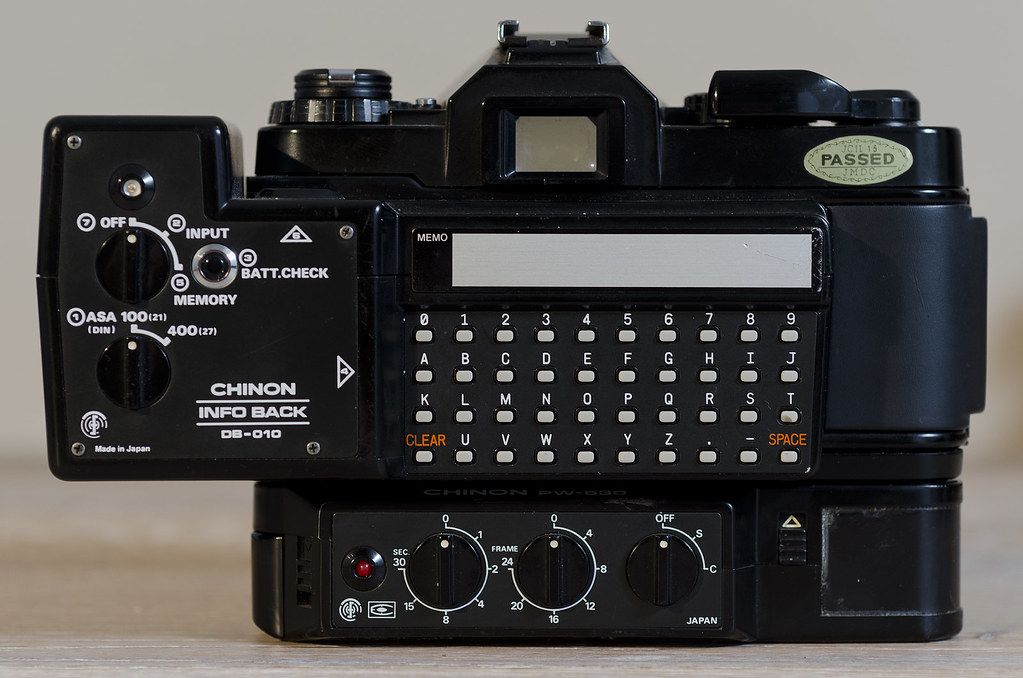
It doesn’t look or feel as quality as the other cameras of the day with its plastic exterior, drop it and it will crack, but it does have some neat functions and works a treat! And it has some really weird accessories. Like this data back for stamping memo’s or details on the negative!
Prior to the CE-5 Chinon, in 1980, released the CE-4 for which they switched over to the Pentax K Mount system. Their cameras prior to the CE-4 were M42 Screw mount.

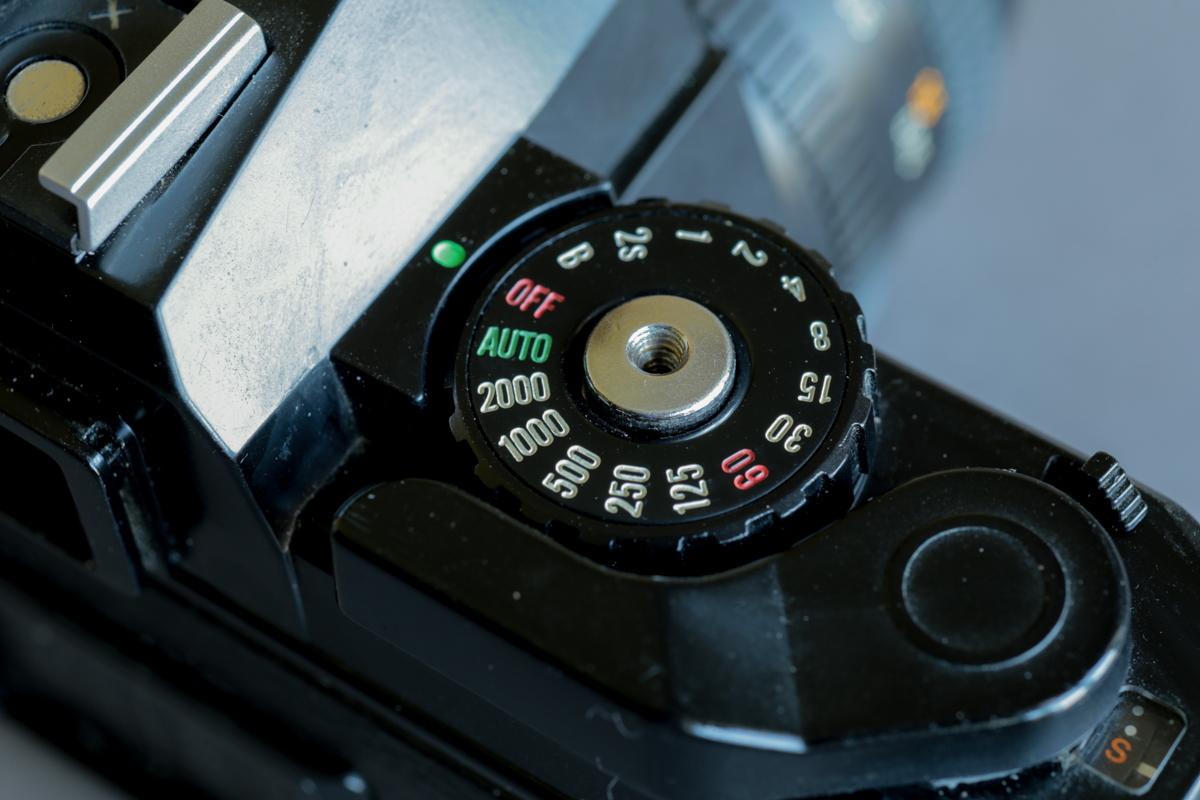
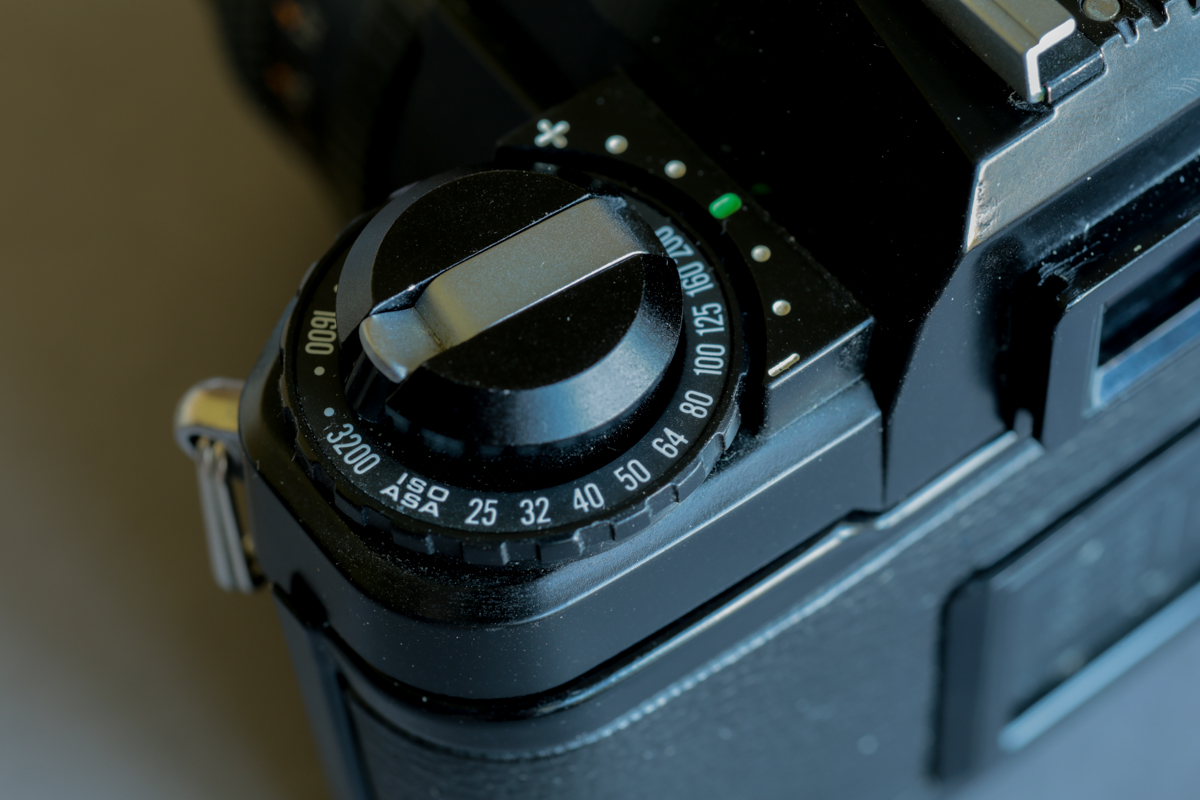
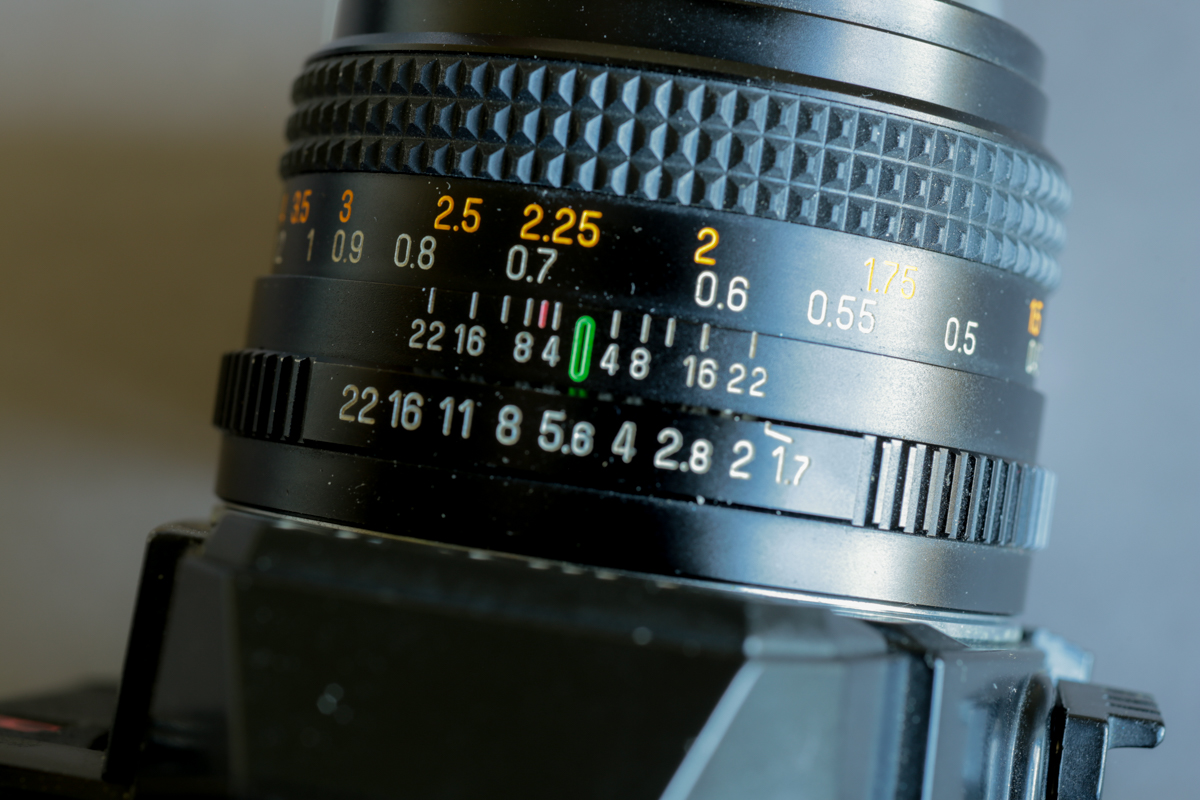
The camera has shutter speeds from Bulb, 2 Seconds to 1/2000th and ISO Range from 25-3200.
You can either shoot the camera in Aperture Priority mode or Fully Manual. However, the downside is it won’t function without two LR44 batteries!
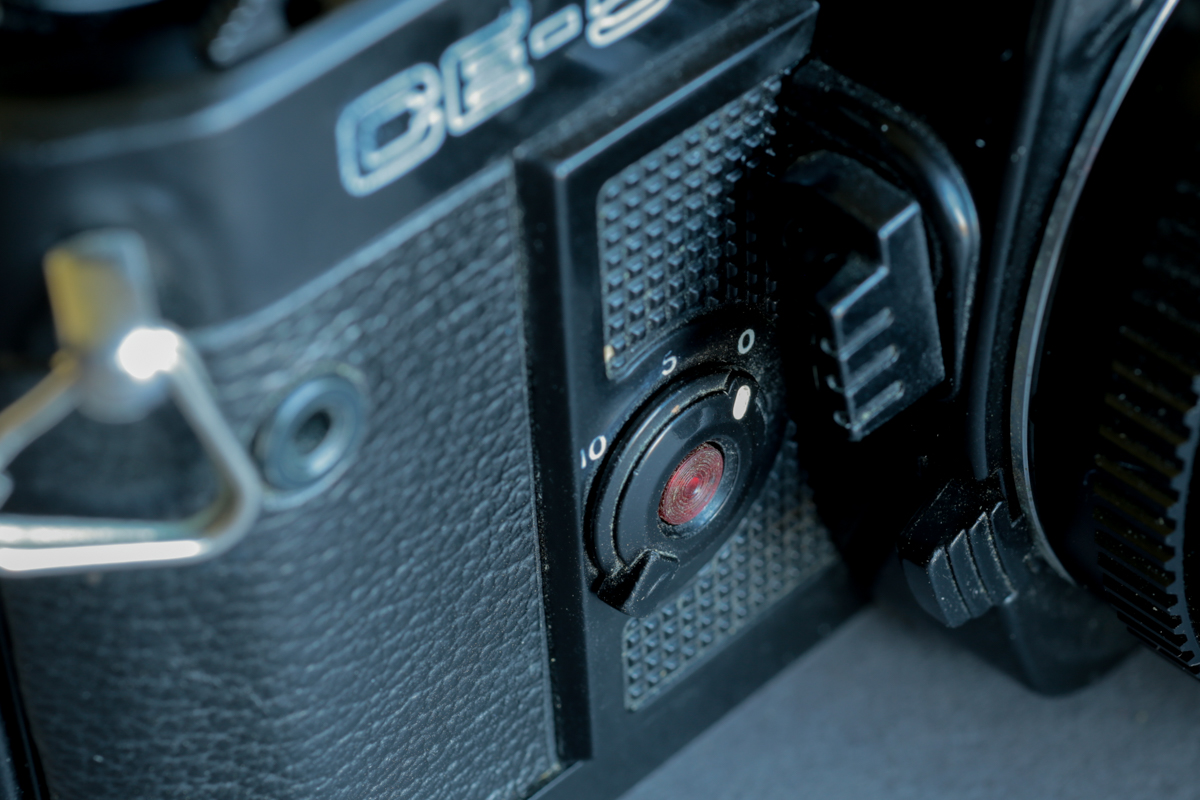
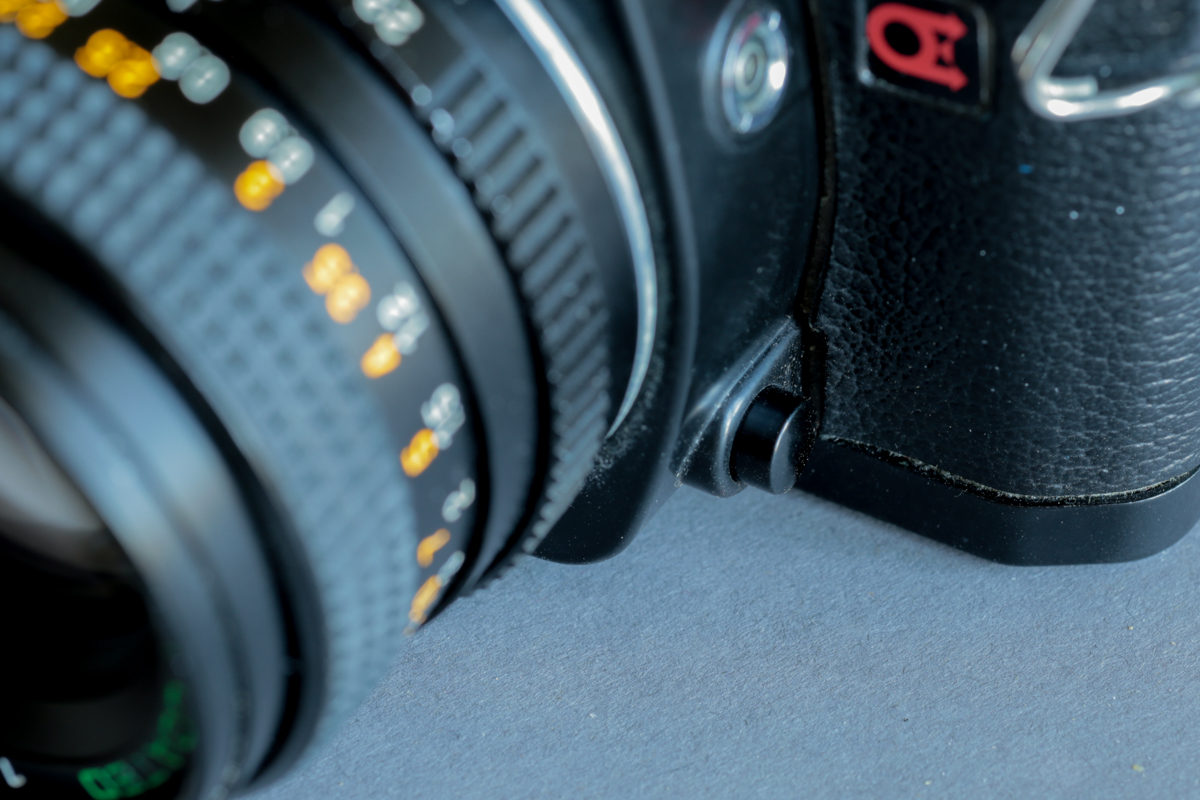
There is a Self Timer of 5 or 10 seconds, and a Depth of Field Preview.
And also an Exposure Lock button, which Chinon call a Exposure Memory Button.
A Hot Shoe for your Flash and also a X Sync Port. And the Flash Sync Speed is 1/60th.
There is also three “Auto Focus Pins” on the front of the camera for AF Lenses, which there were only two made and look like a total after thought.
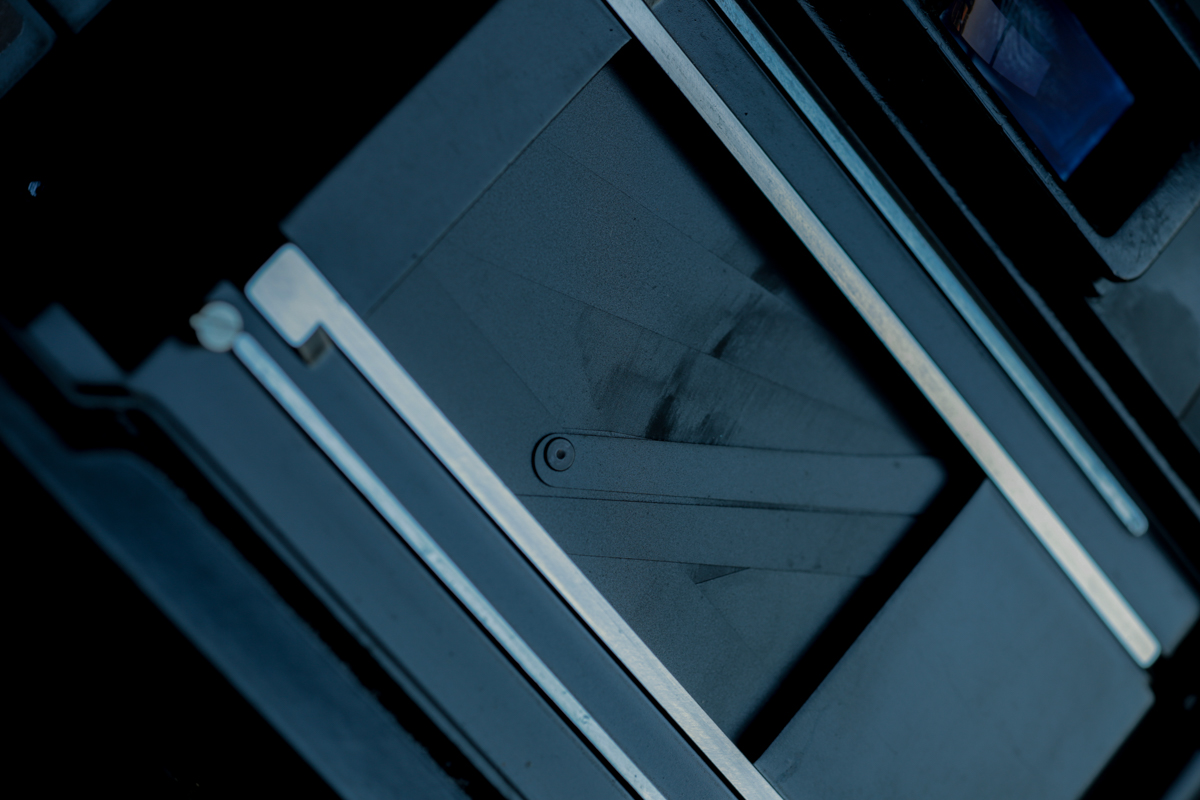
Instead of a fabric curtain Chinon added a Seiko electromagnetic metal focal plane shutter and the view finder has a split image range finder and a microprism collar to aid focusing.
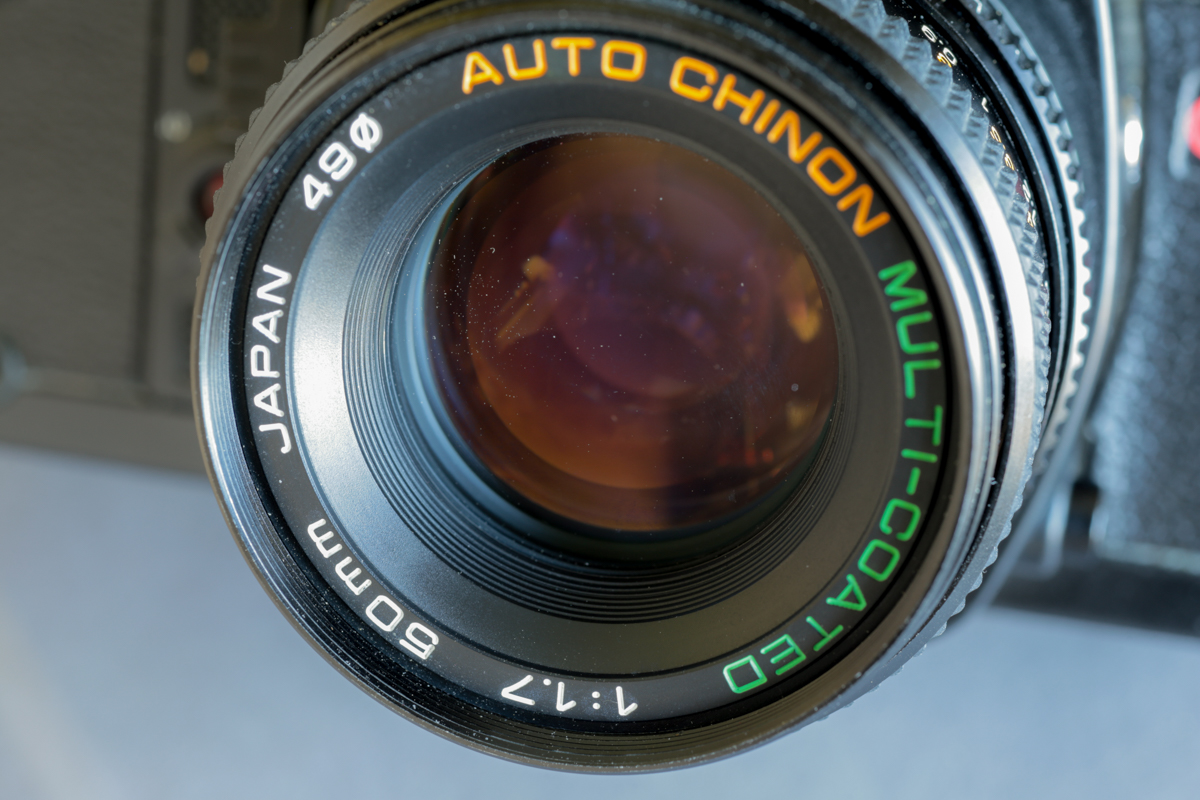
This camera came in a bundle with a 50mm f1.7 Multi-Coated Lens which is breathtakingly sharp! And the multicoating helps keep lens flare down. And for Filters it takes 49mm size.
Accessory wise, Chinon, came out with some crazy ideas! Like the back that you could print messages or notes directly onto the film.
And another back that enabled you to stamp the time and date onto the film.
Also crazy looking shutter release unit.
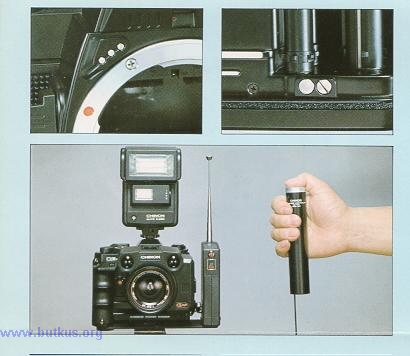
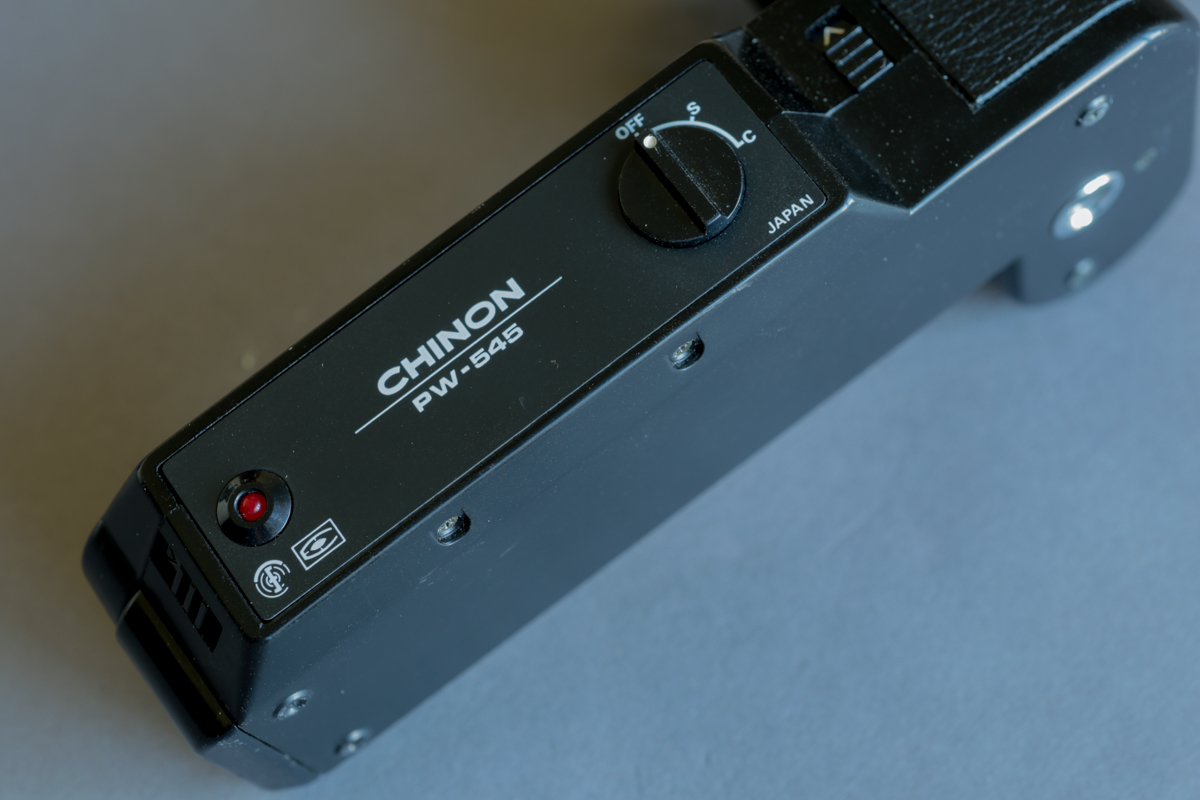
Mine came with this Auto Winder, which works really well and makes the camera feel better in the hands when shooting as it gives you something to grip.
So if you are looking for a SLR Camera that just works and won’t cost a fortune have a look for one of these! Like I said the only downside is that it won’t work without batteries! So if the electrics fail, as mine did, try cleaning the electrical contacts. Luckily it was just dirty contacts. (I had to take off the bottom plate and clean the soldering parts). And make sure you pack spare batteries when you are out shooting!
Finally here are some images I got using this camera and lens.