Home » Uncategorised (Page 4)
Category Archives: Uncategorised
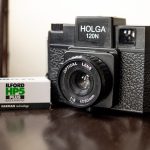
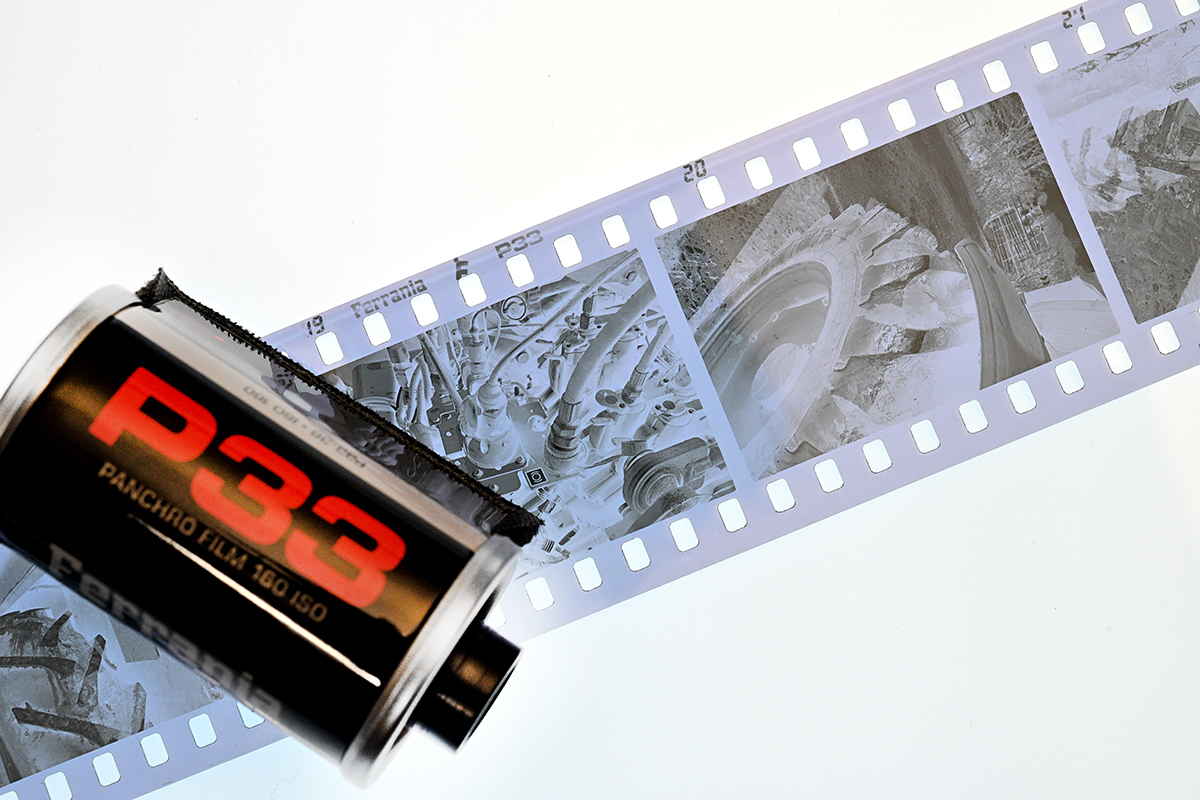
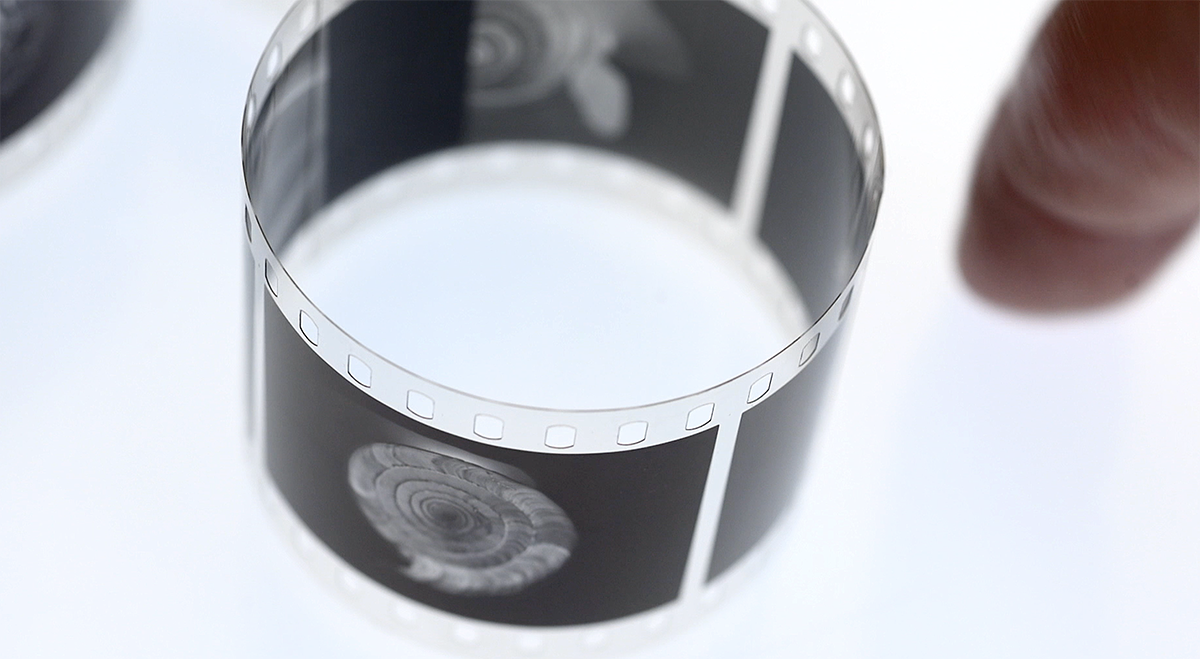
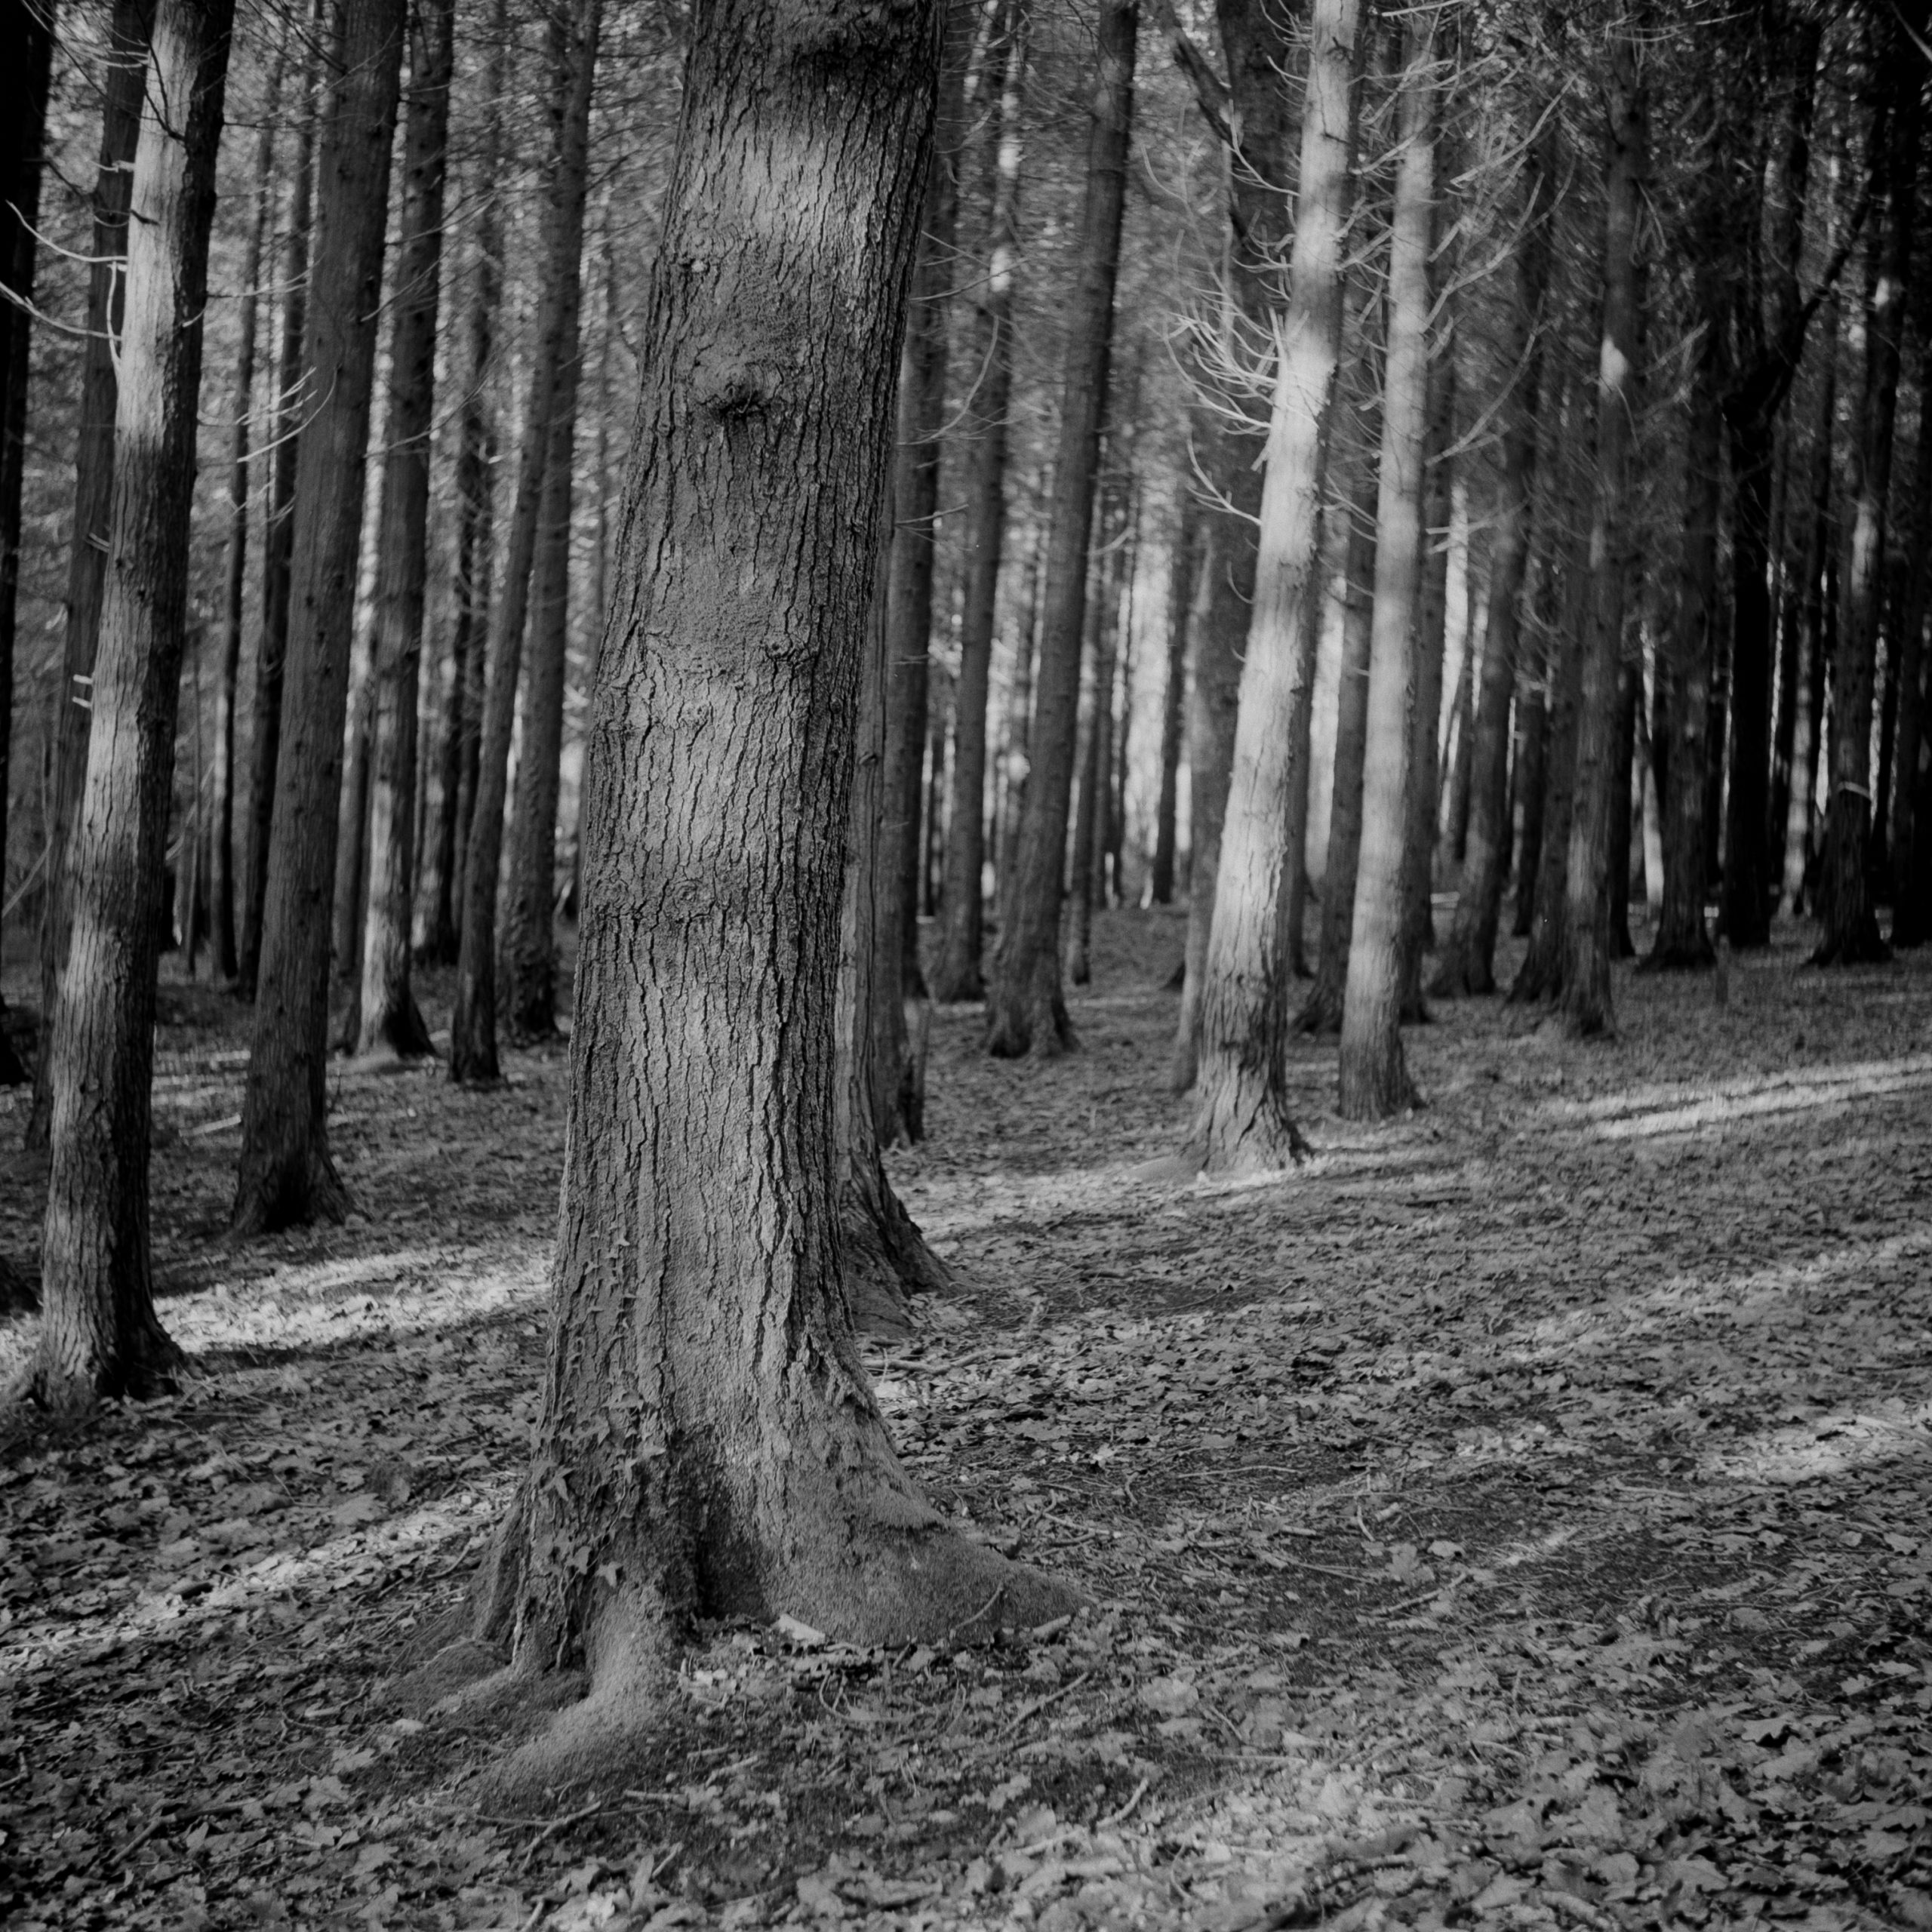
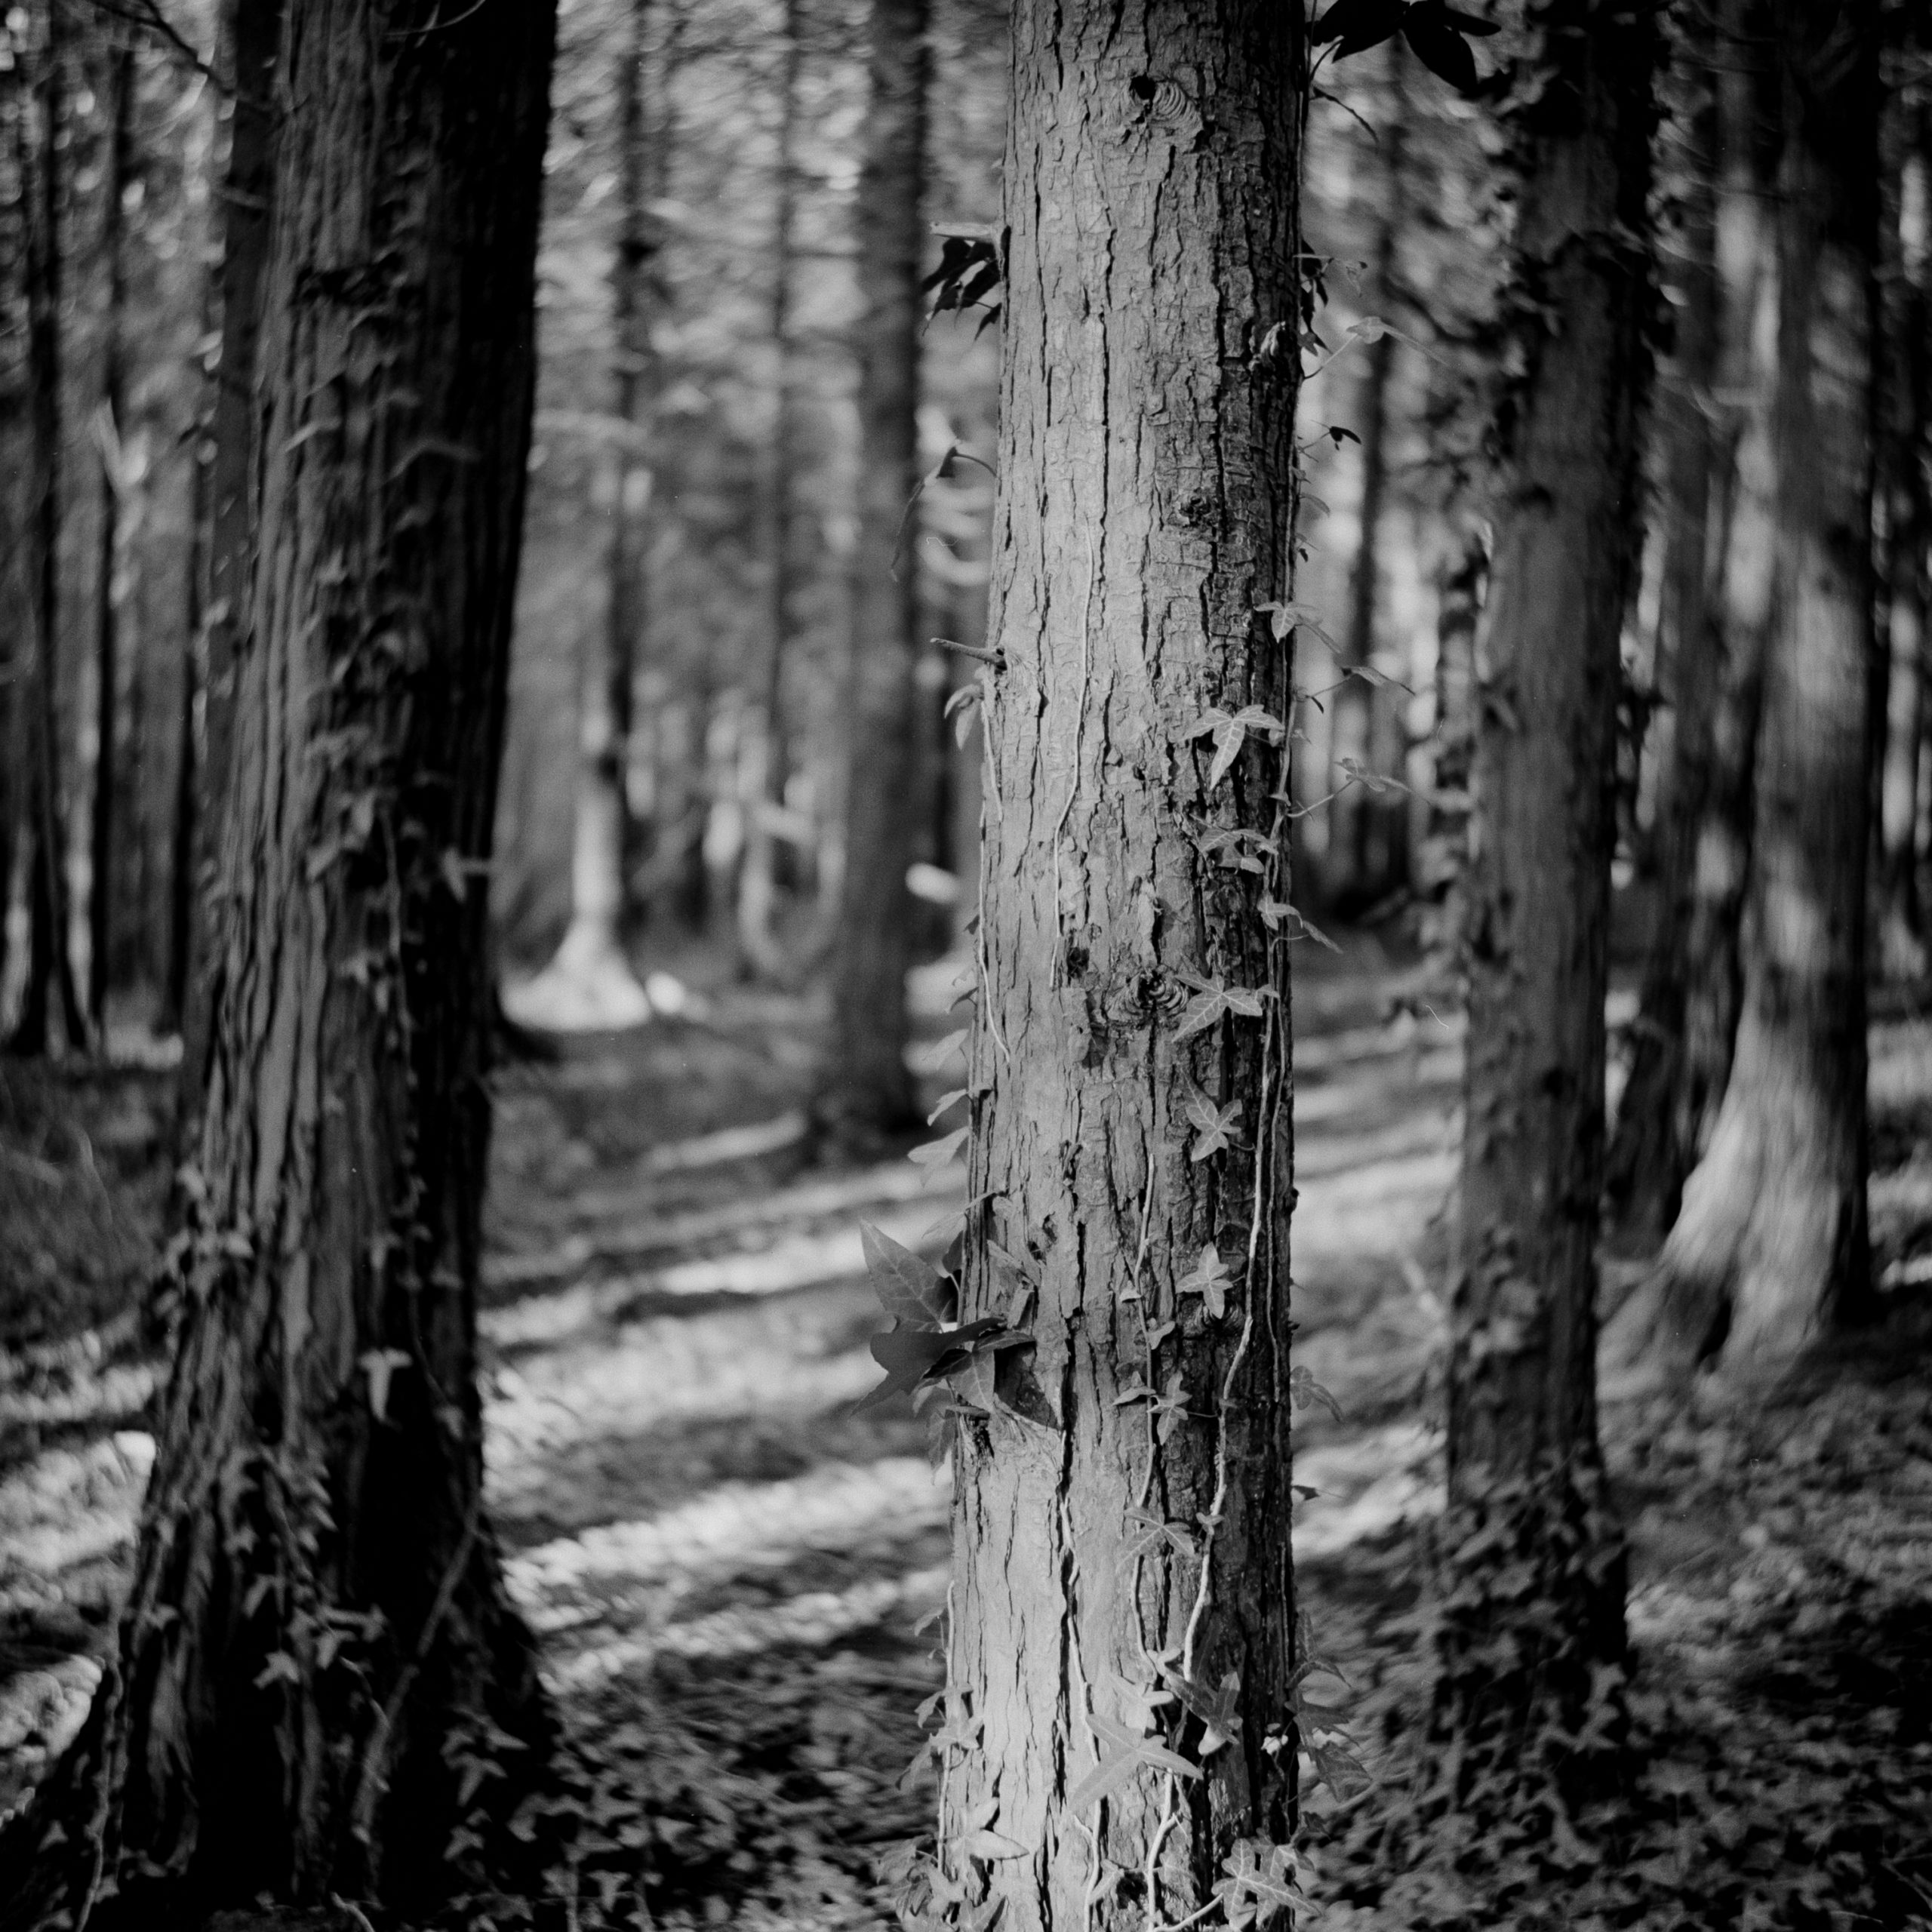
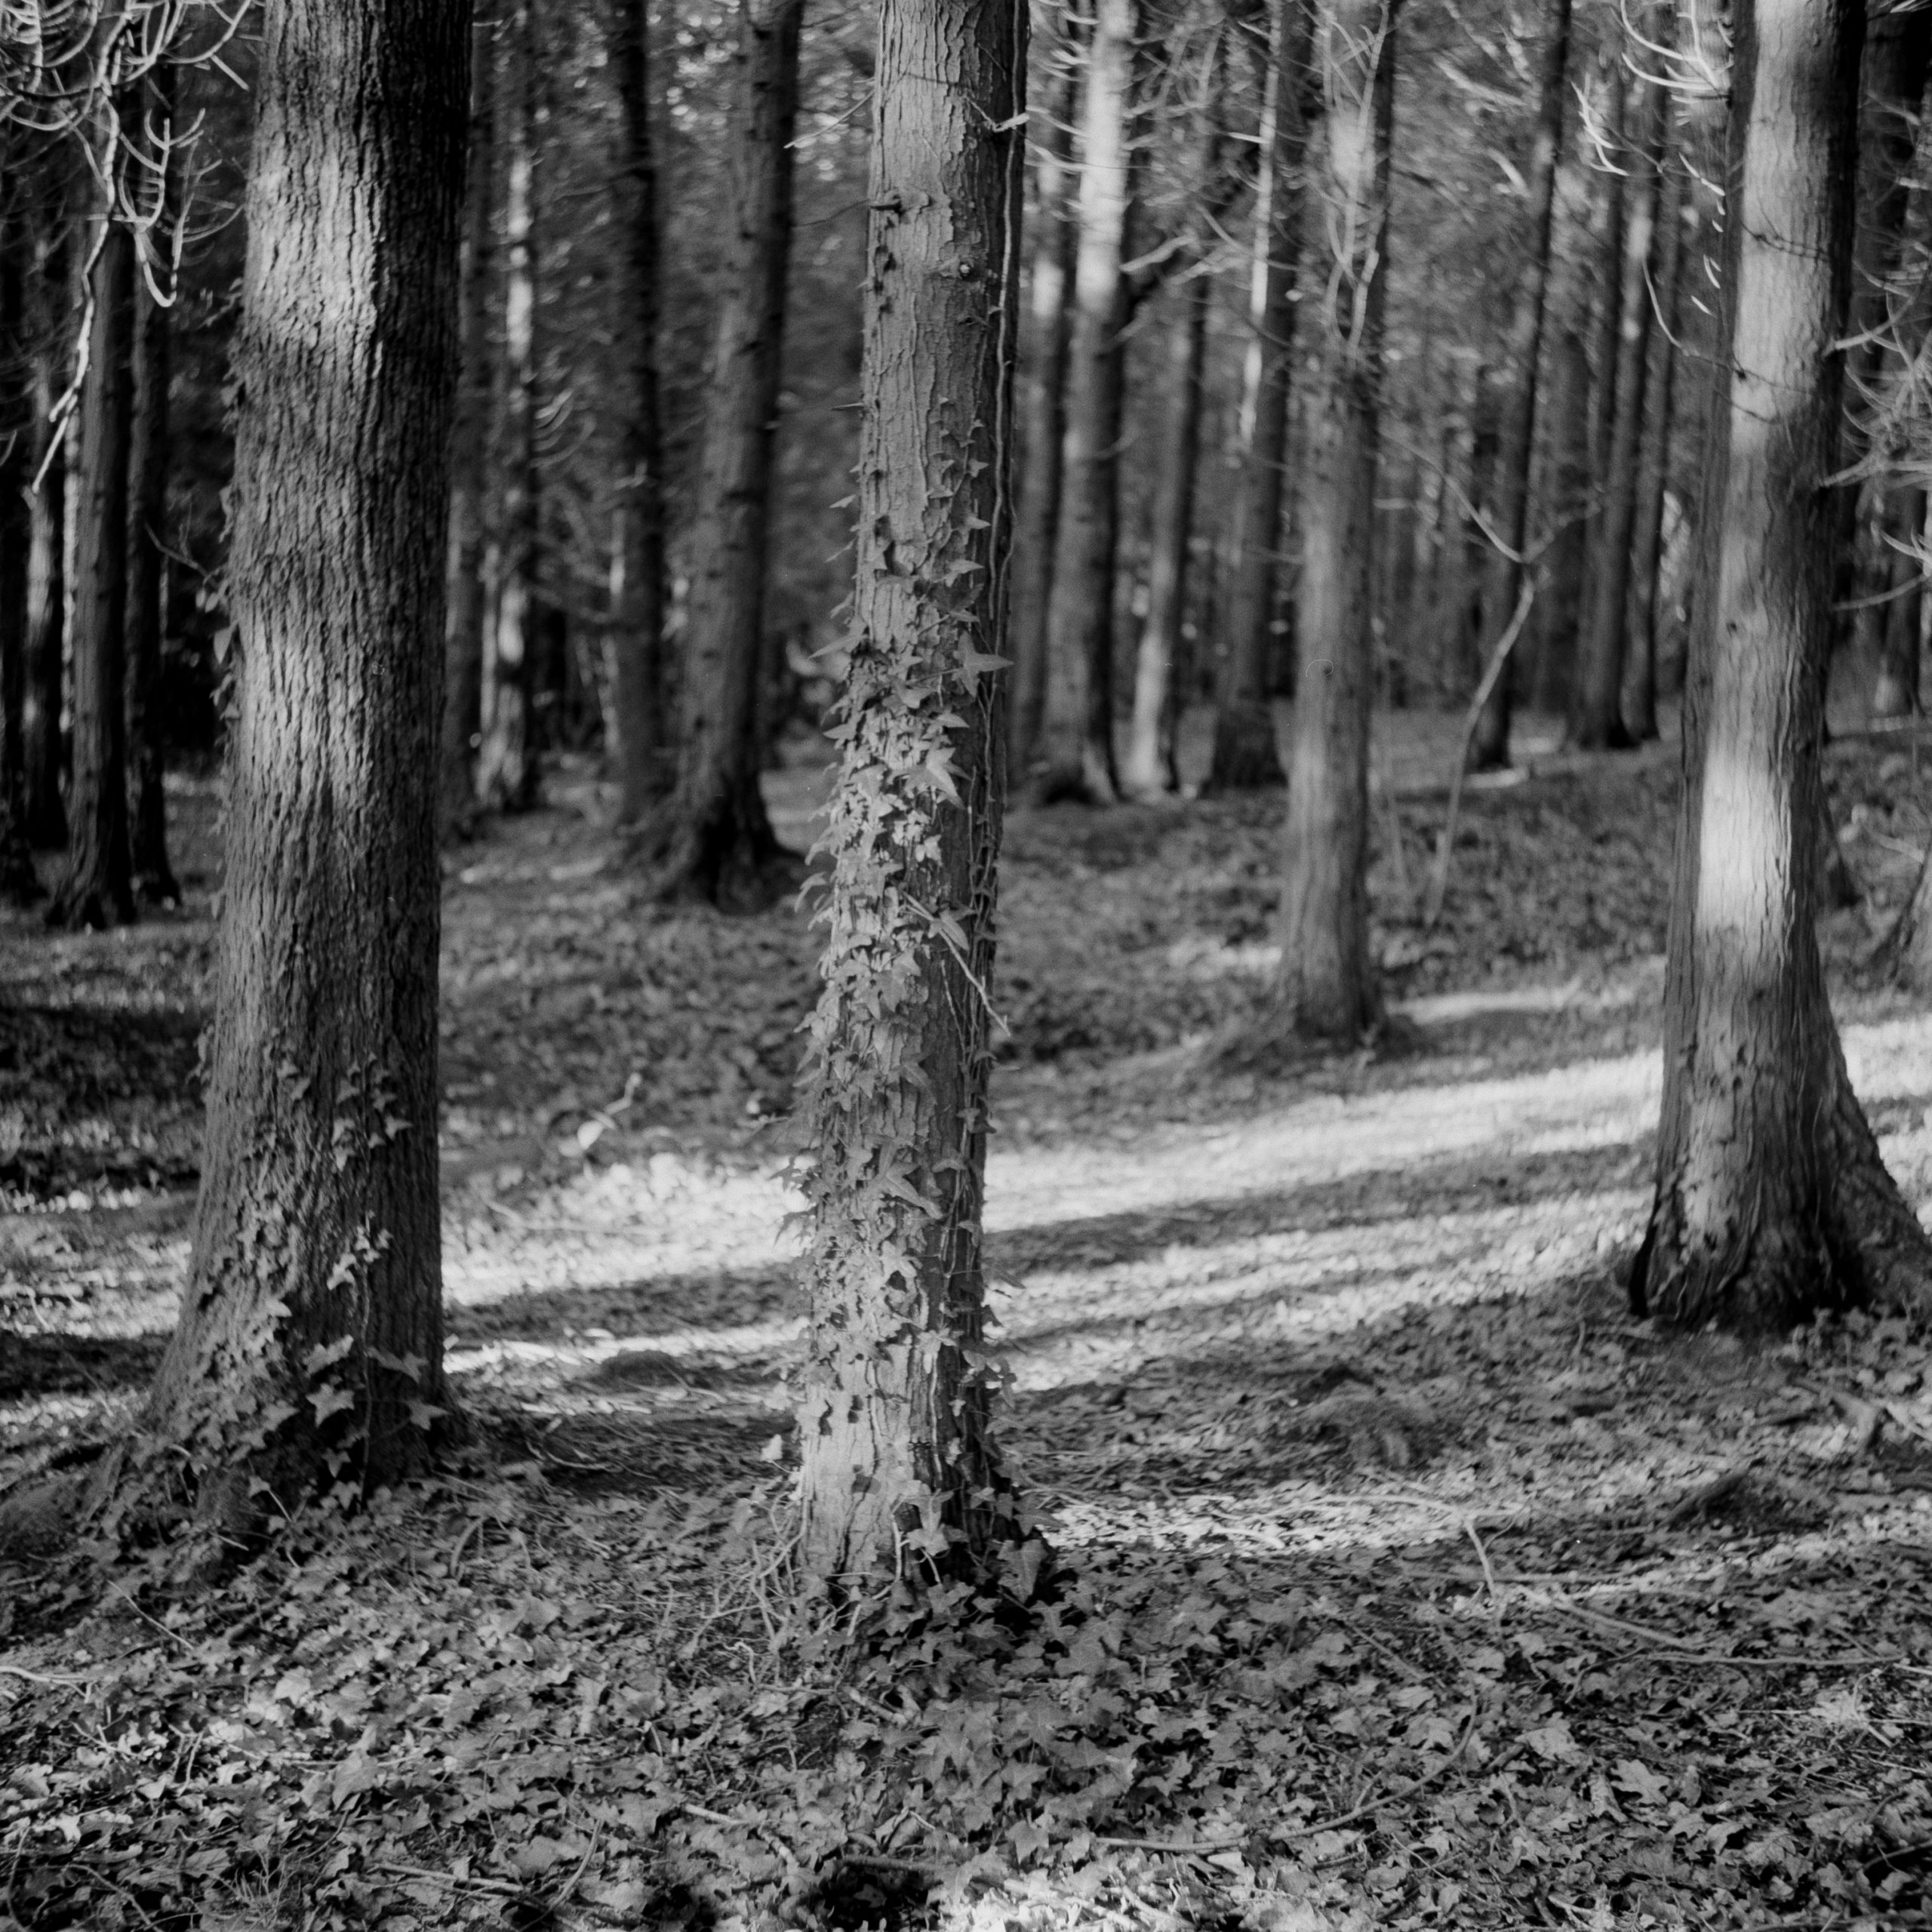
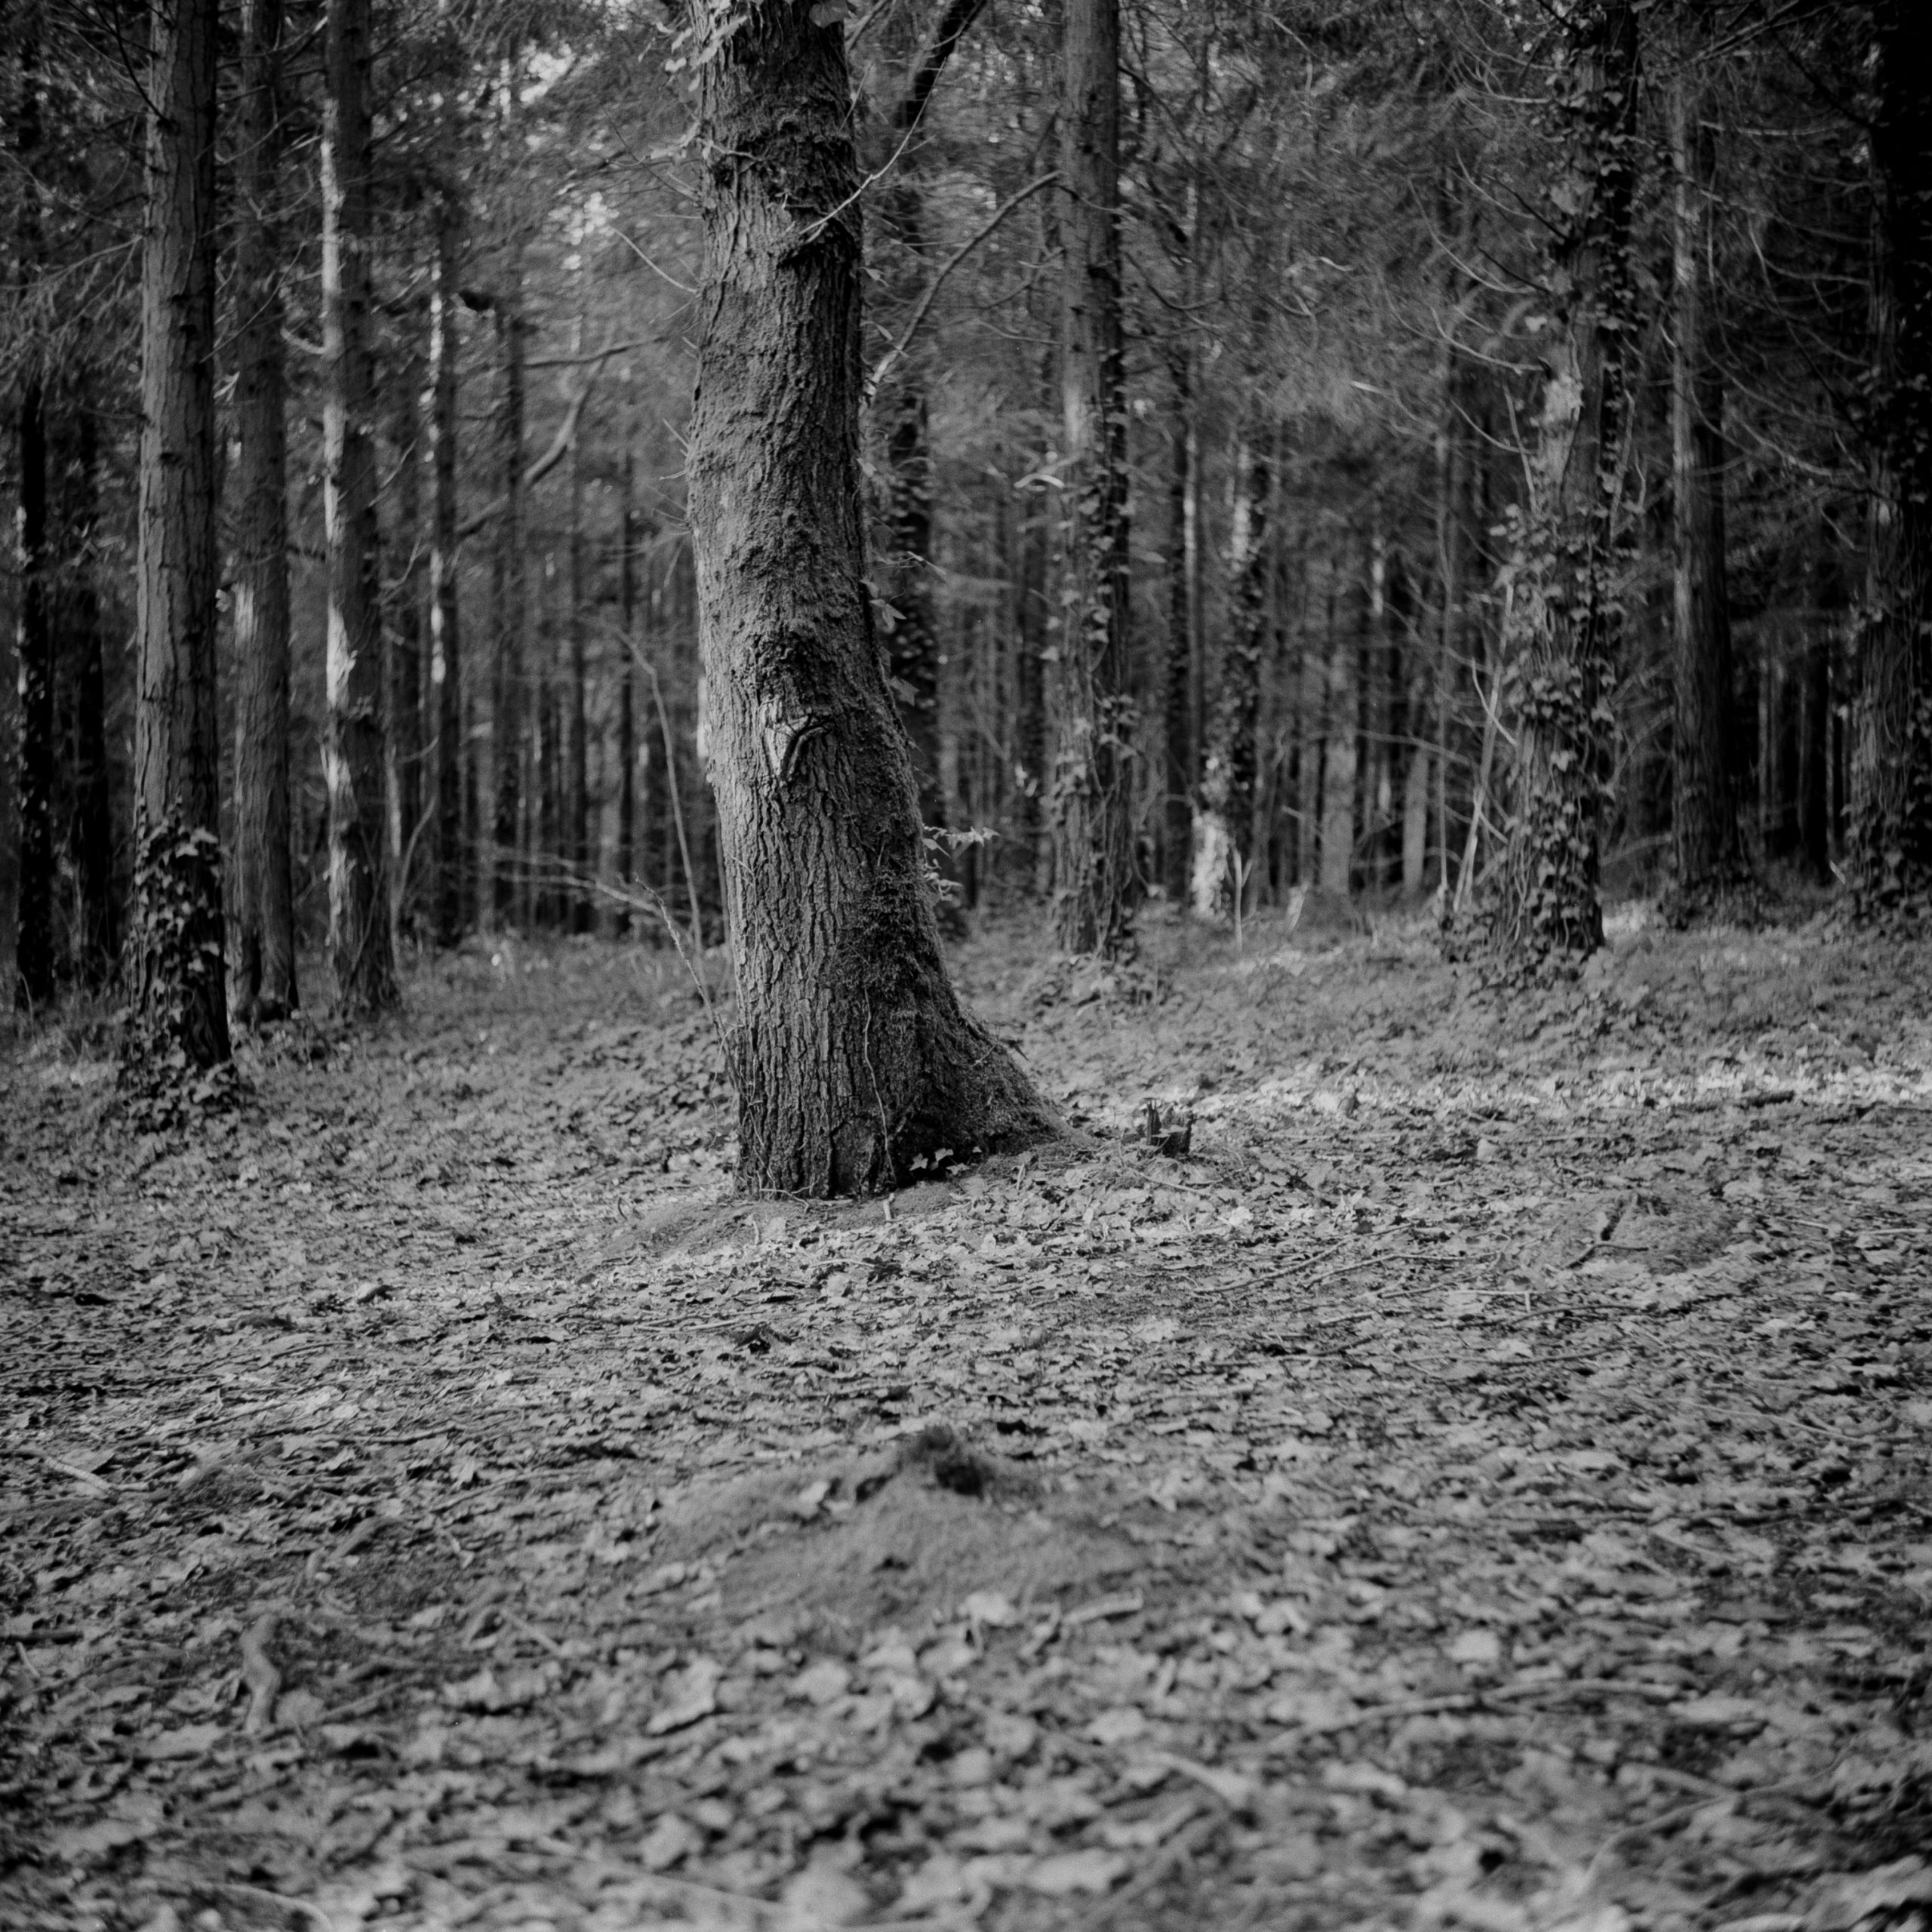
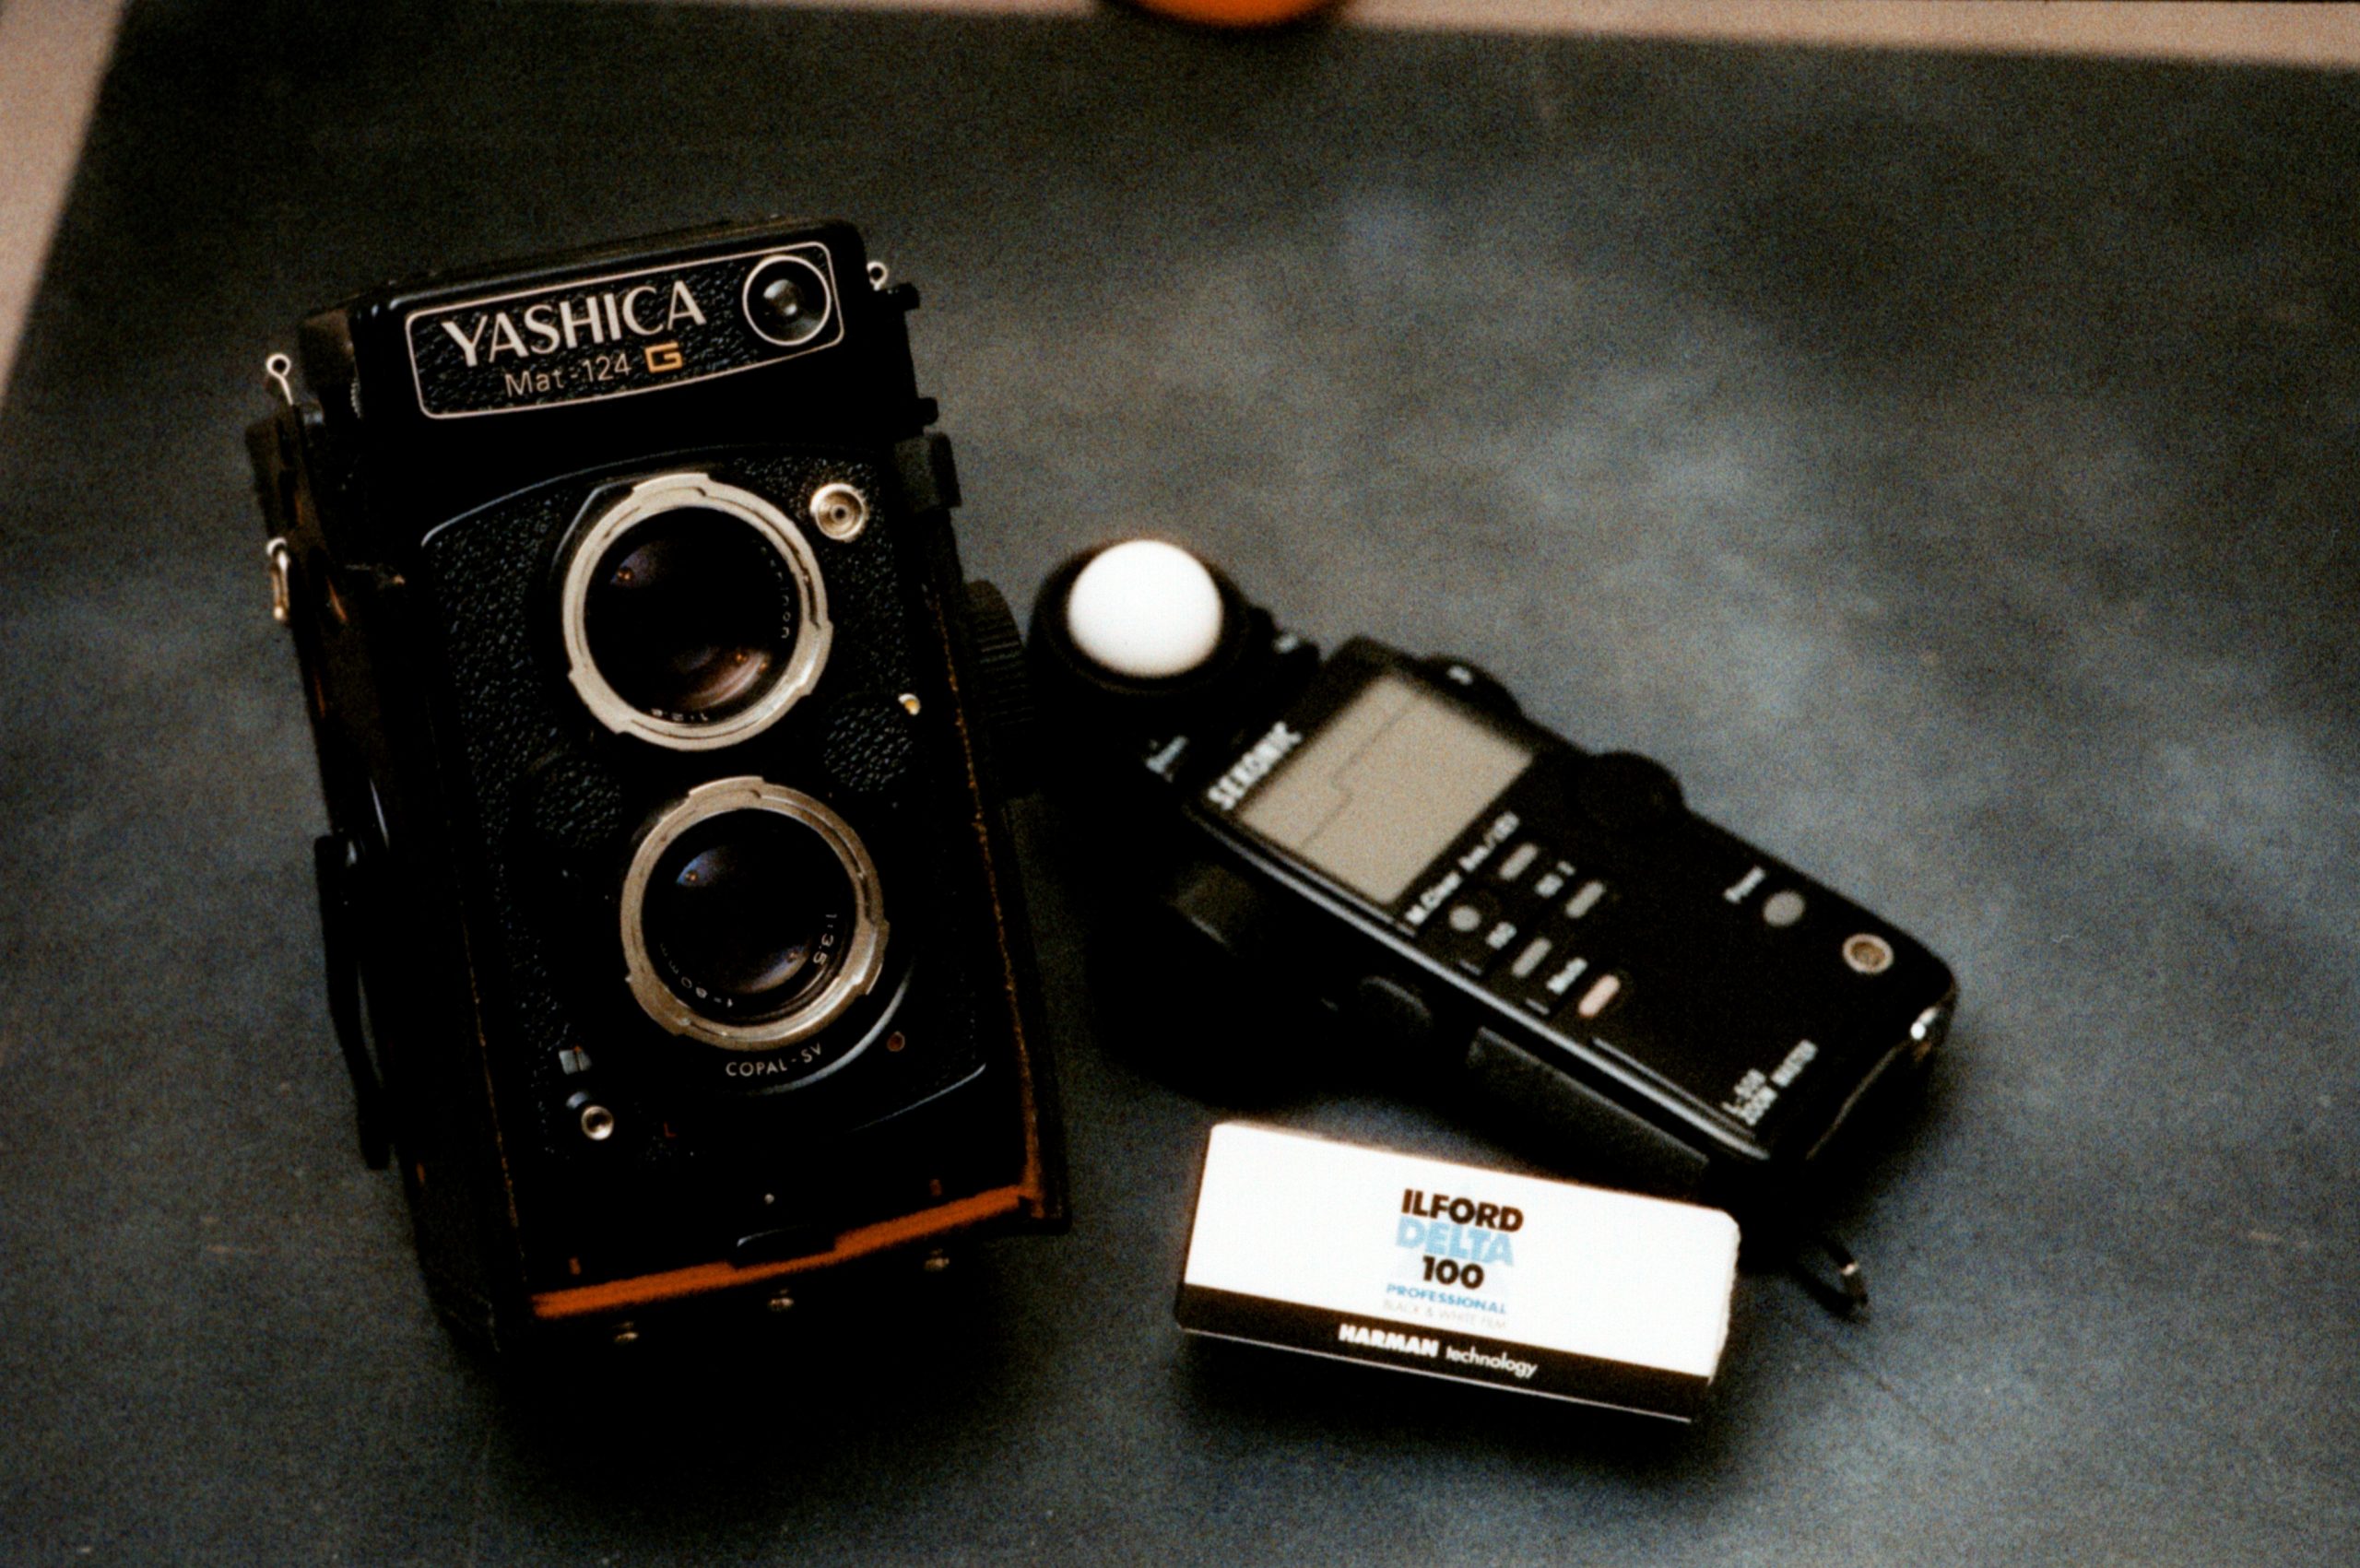
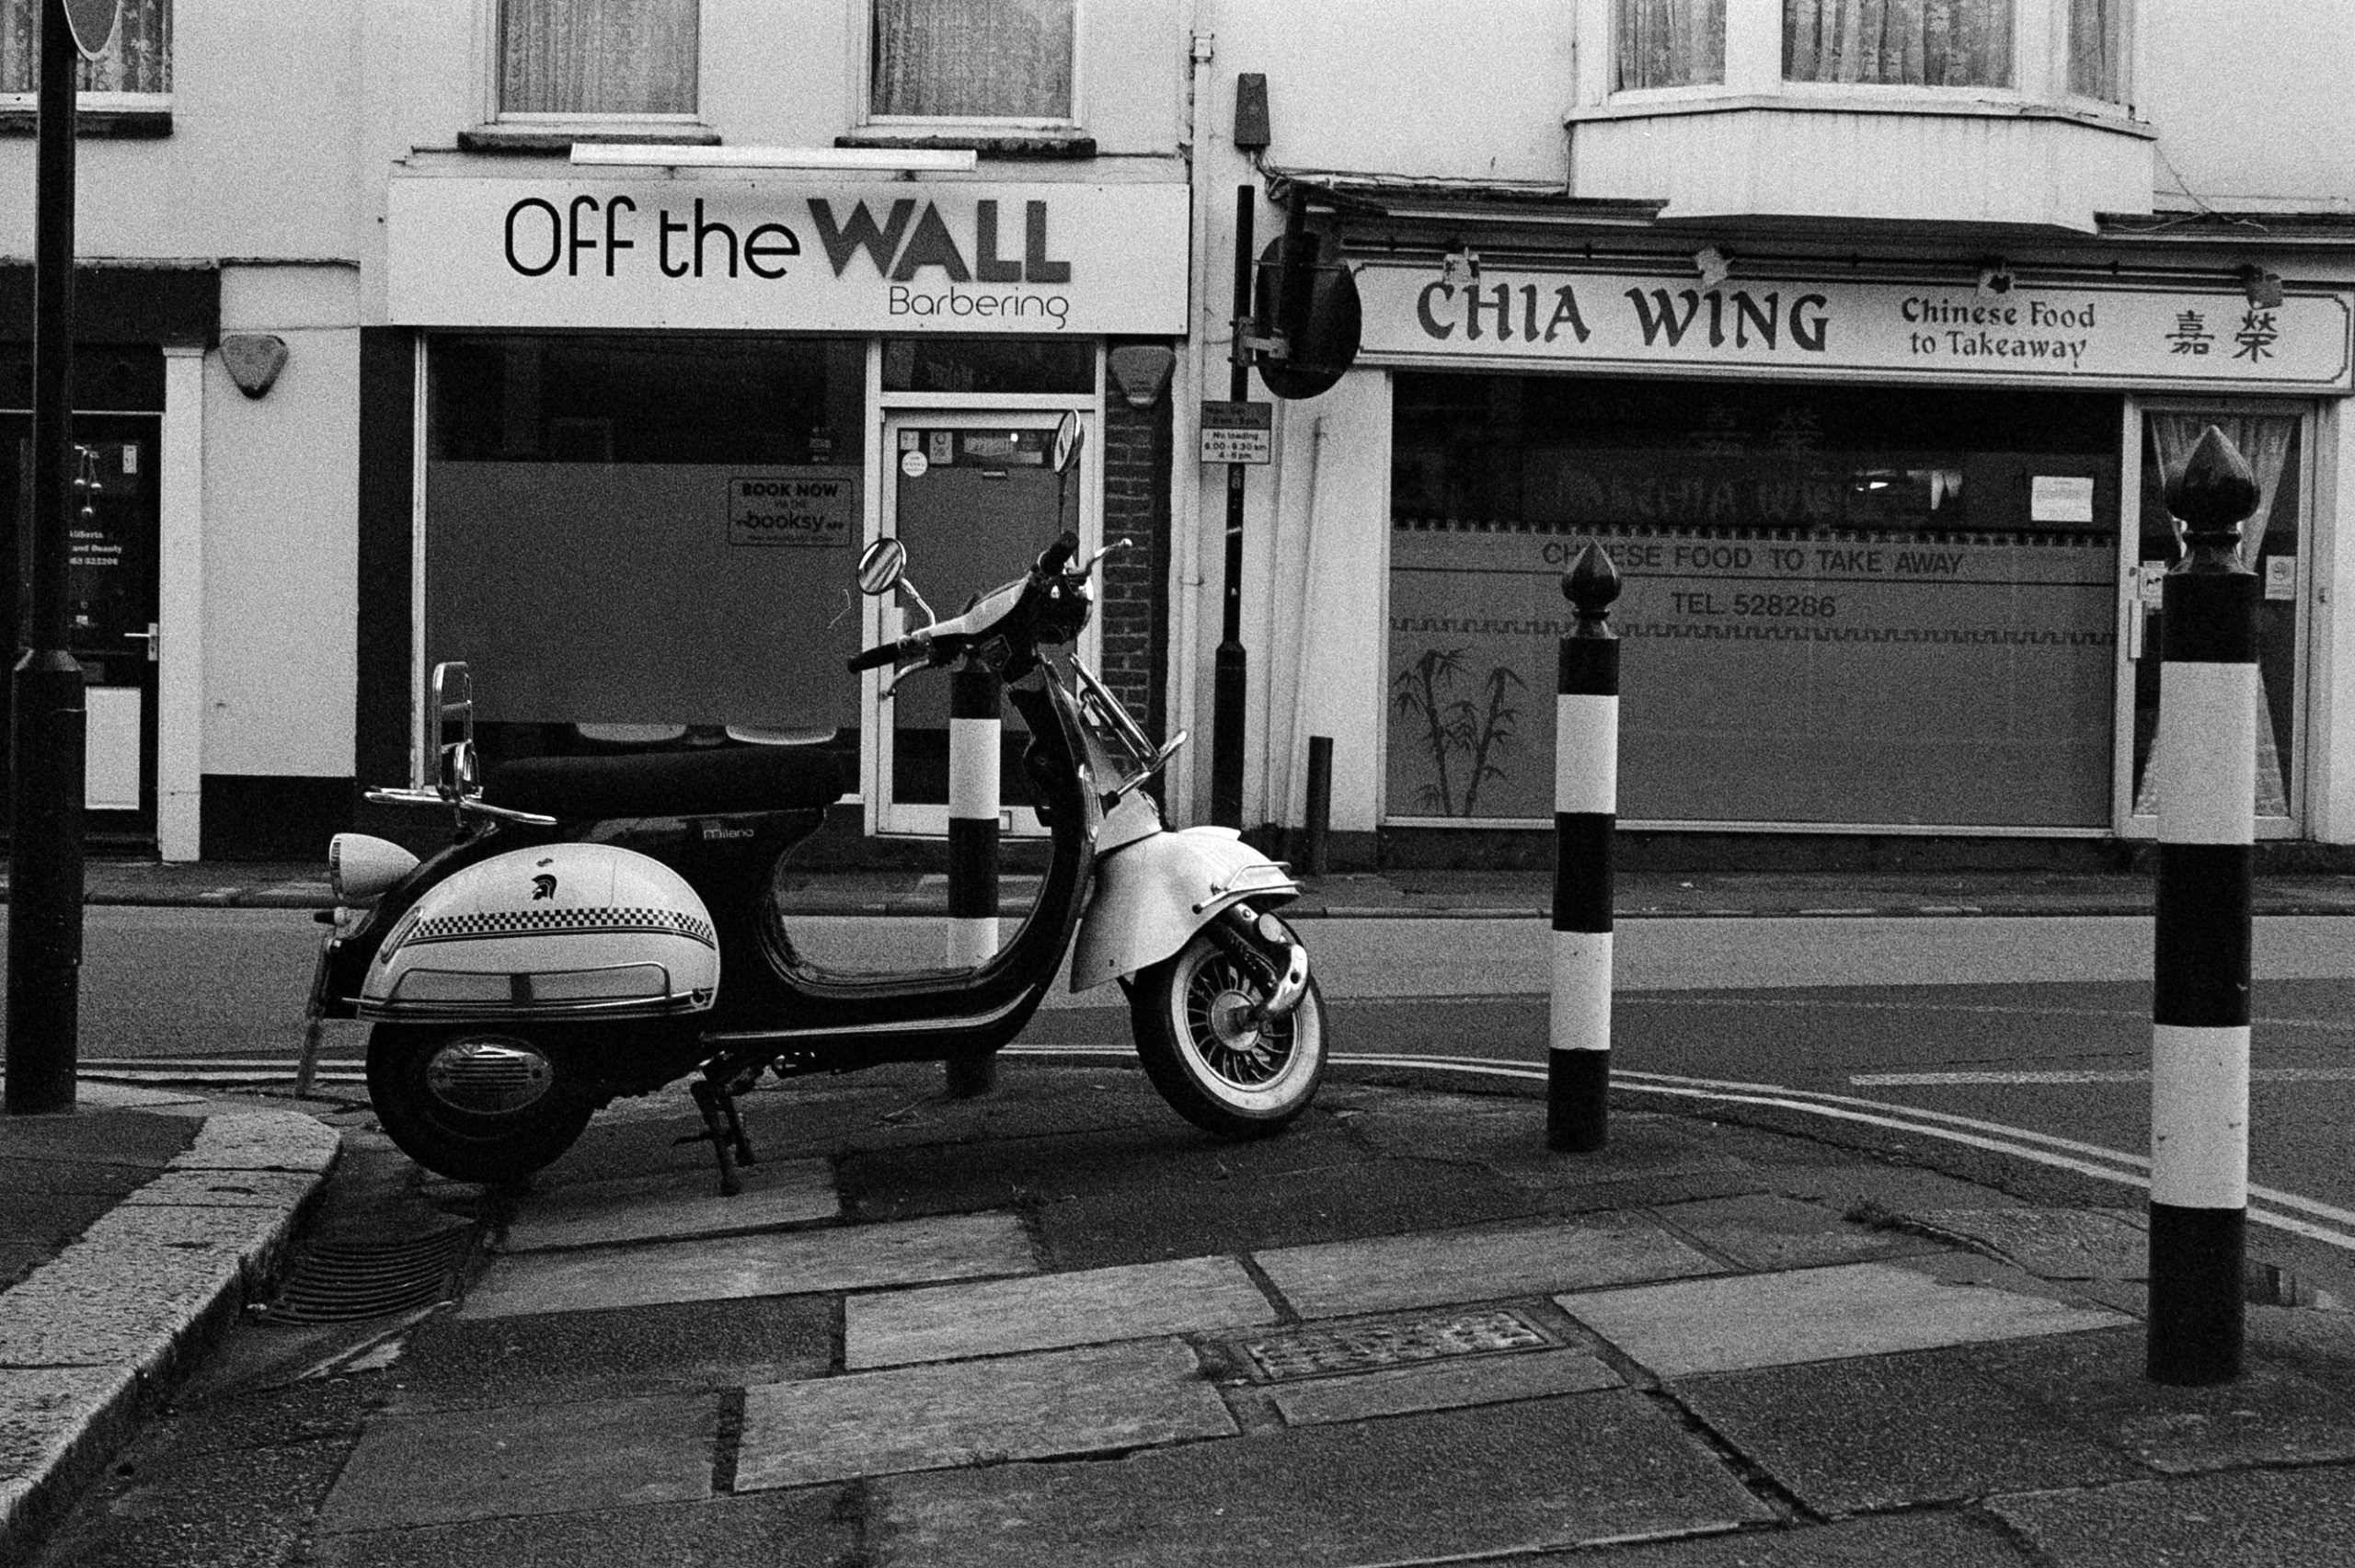
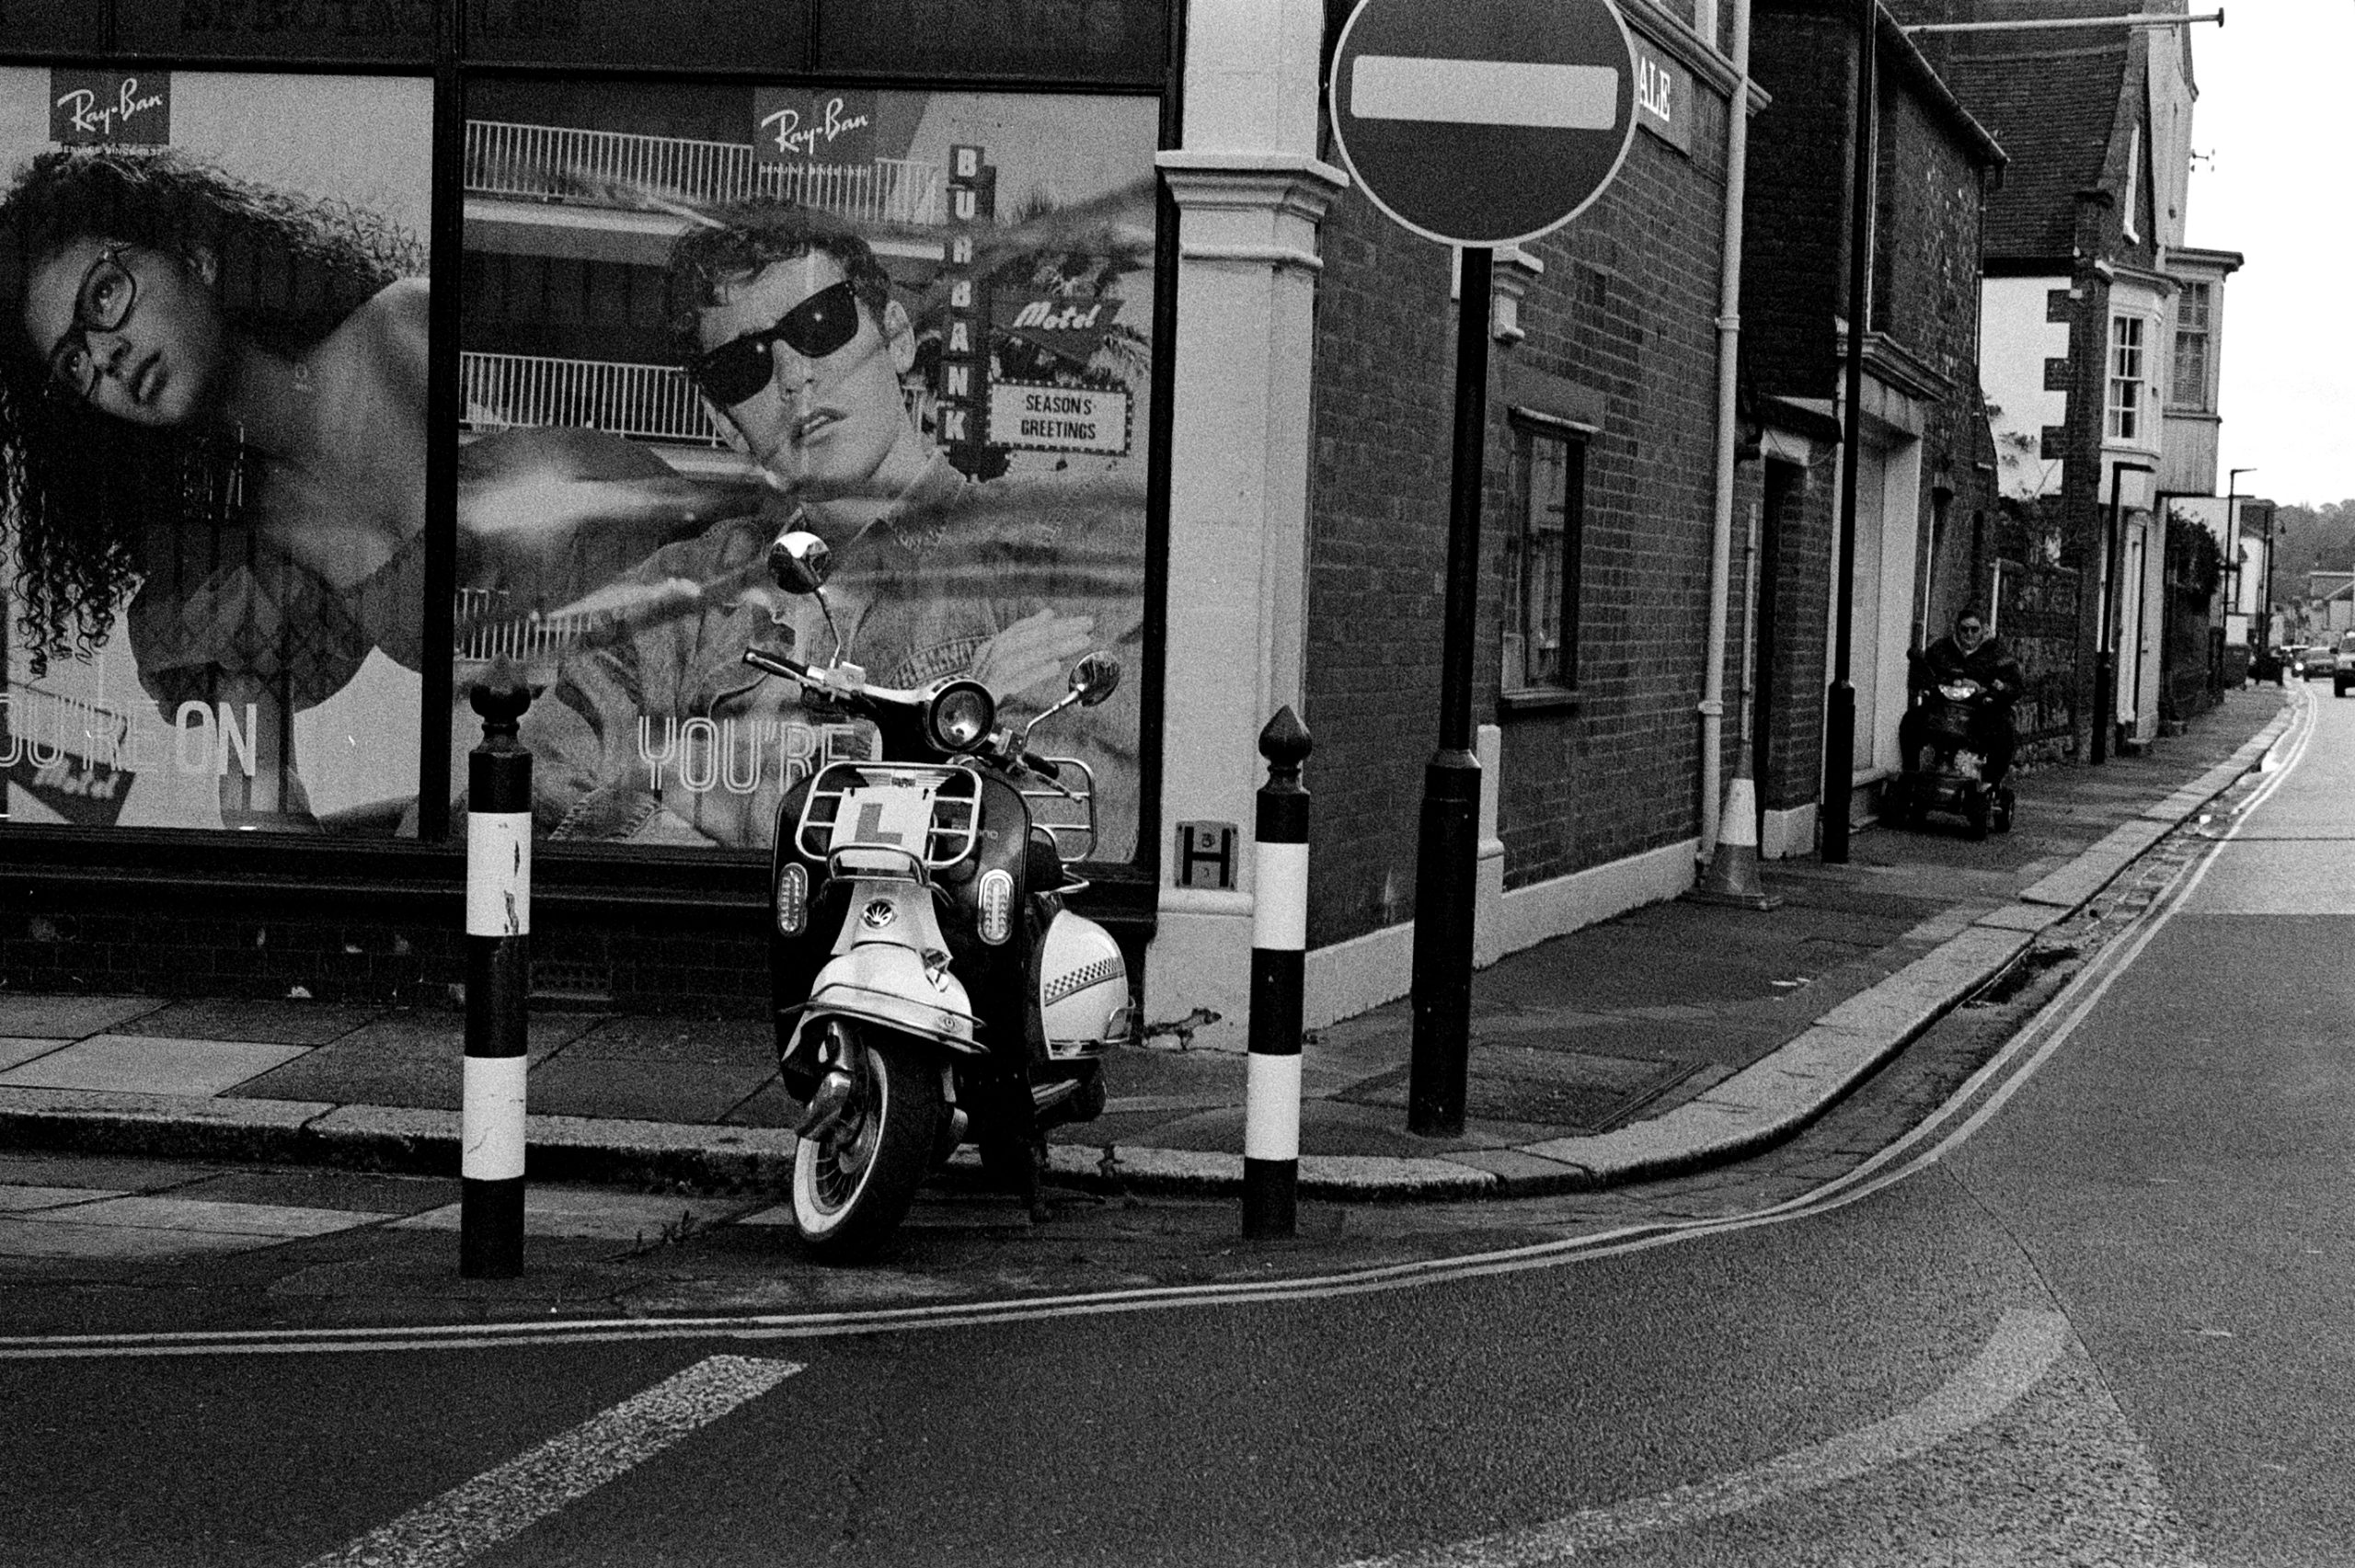
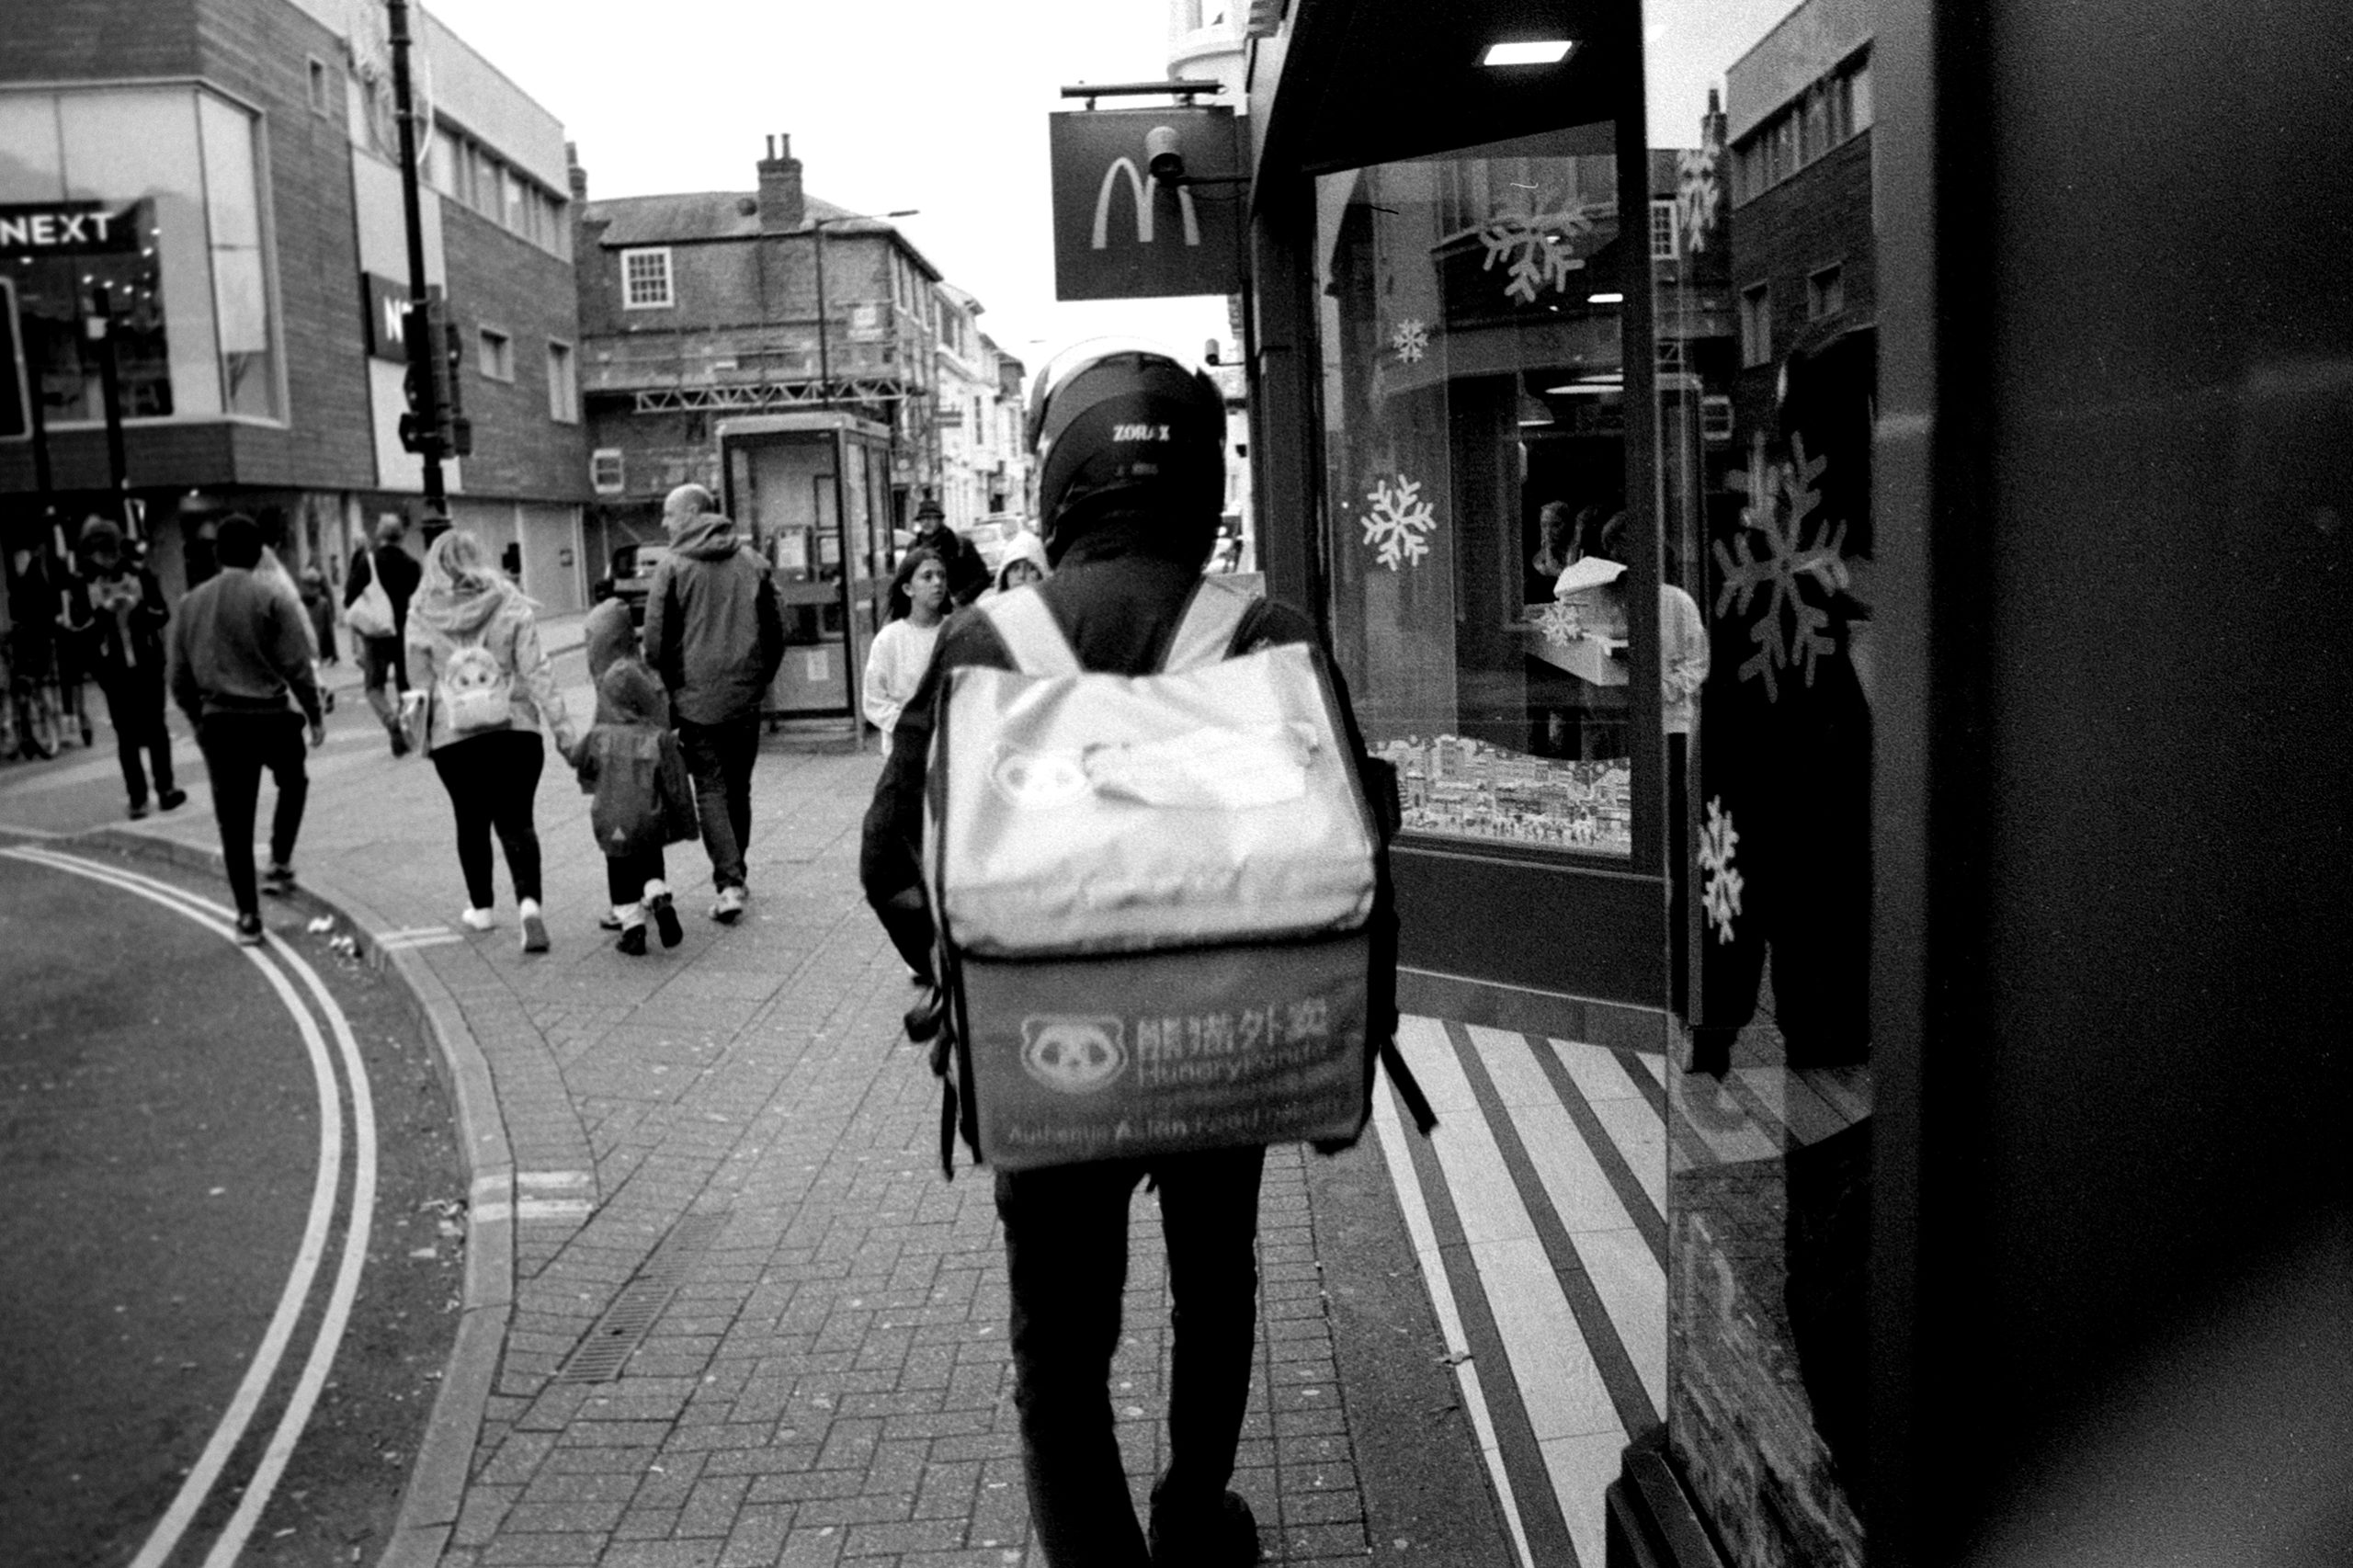
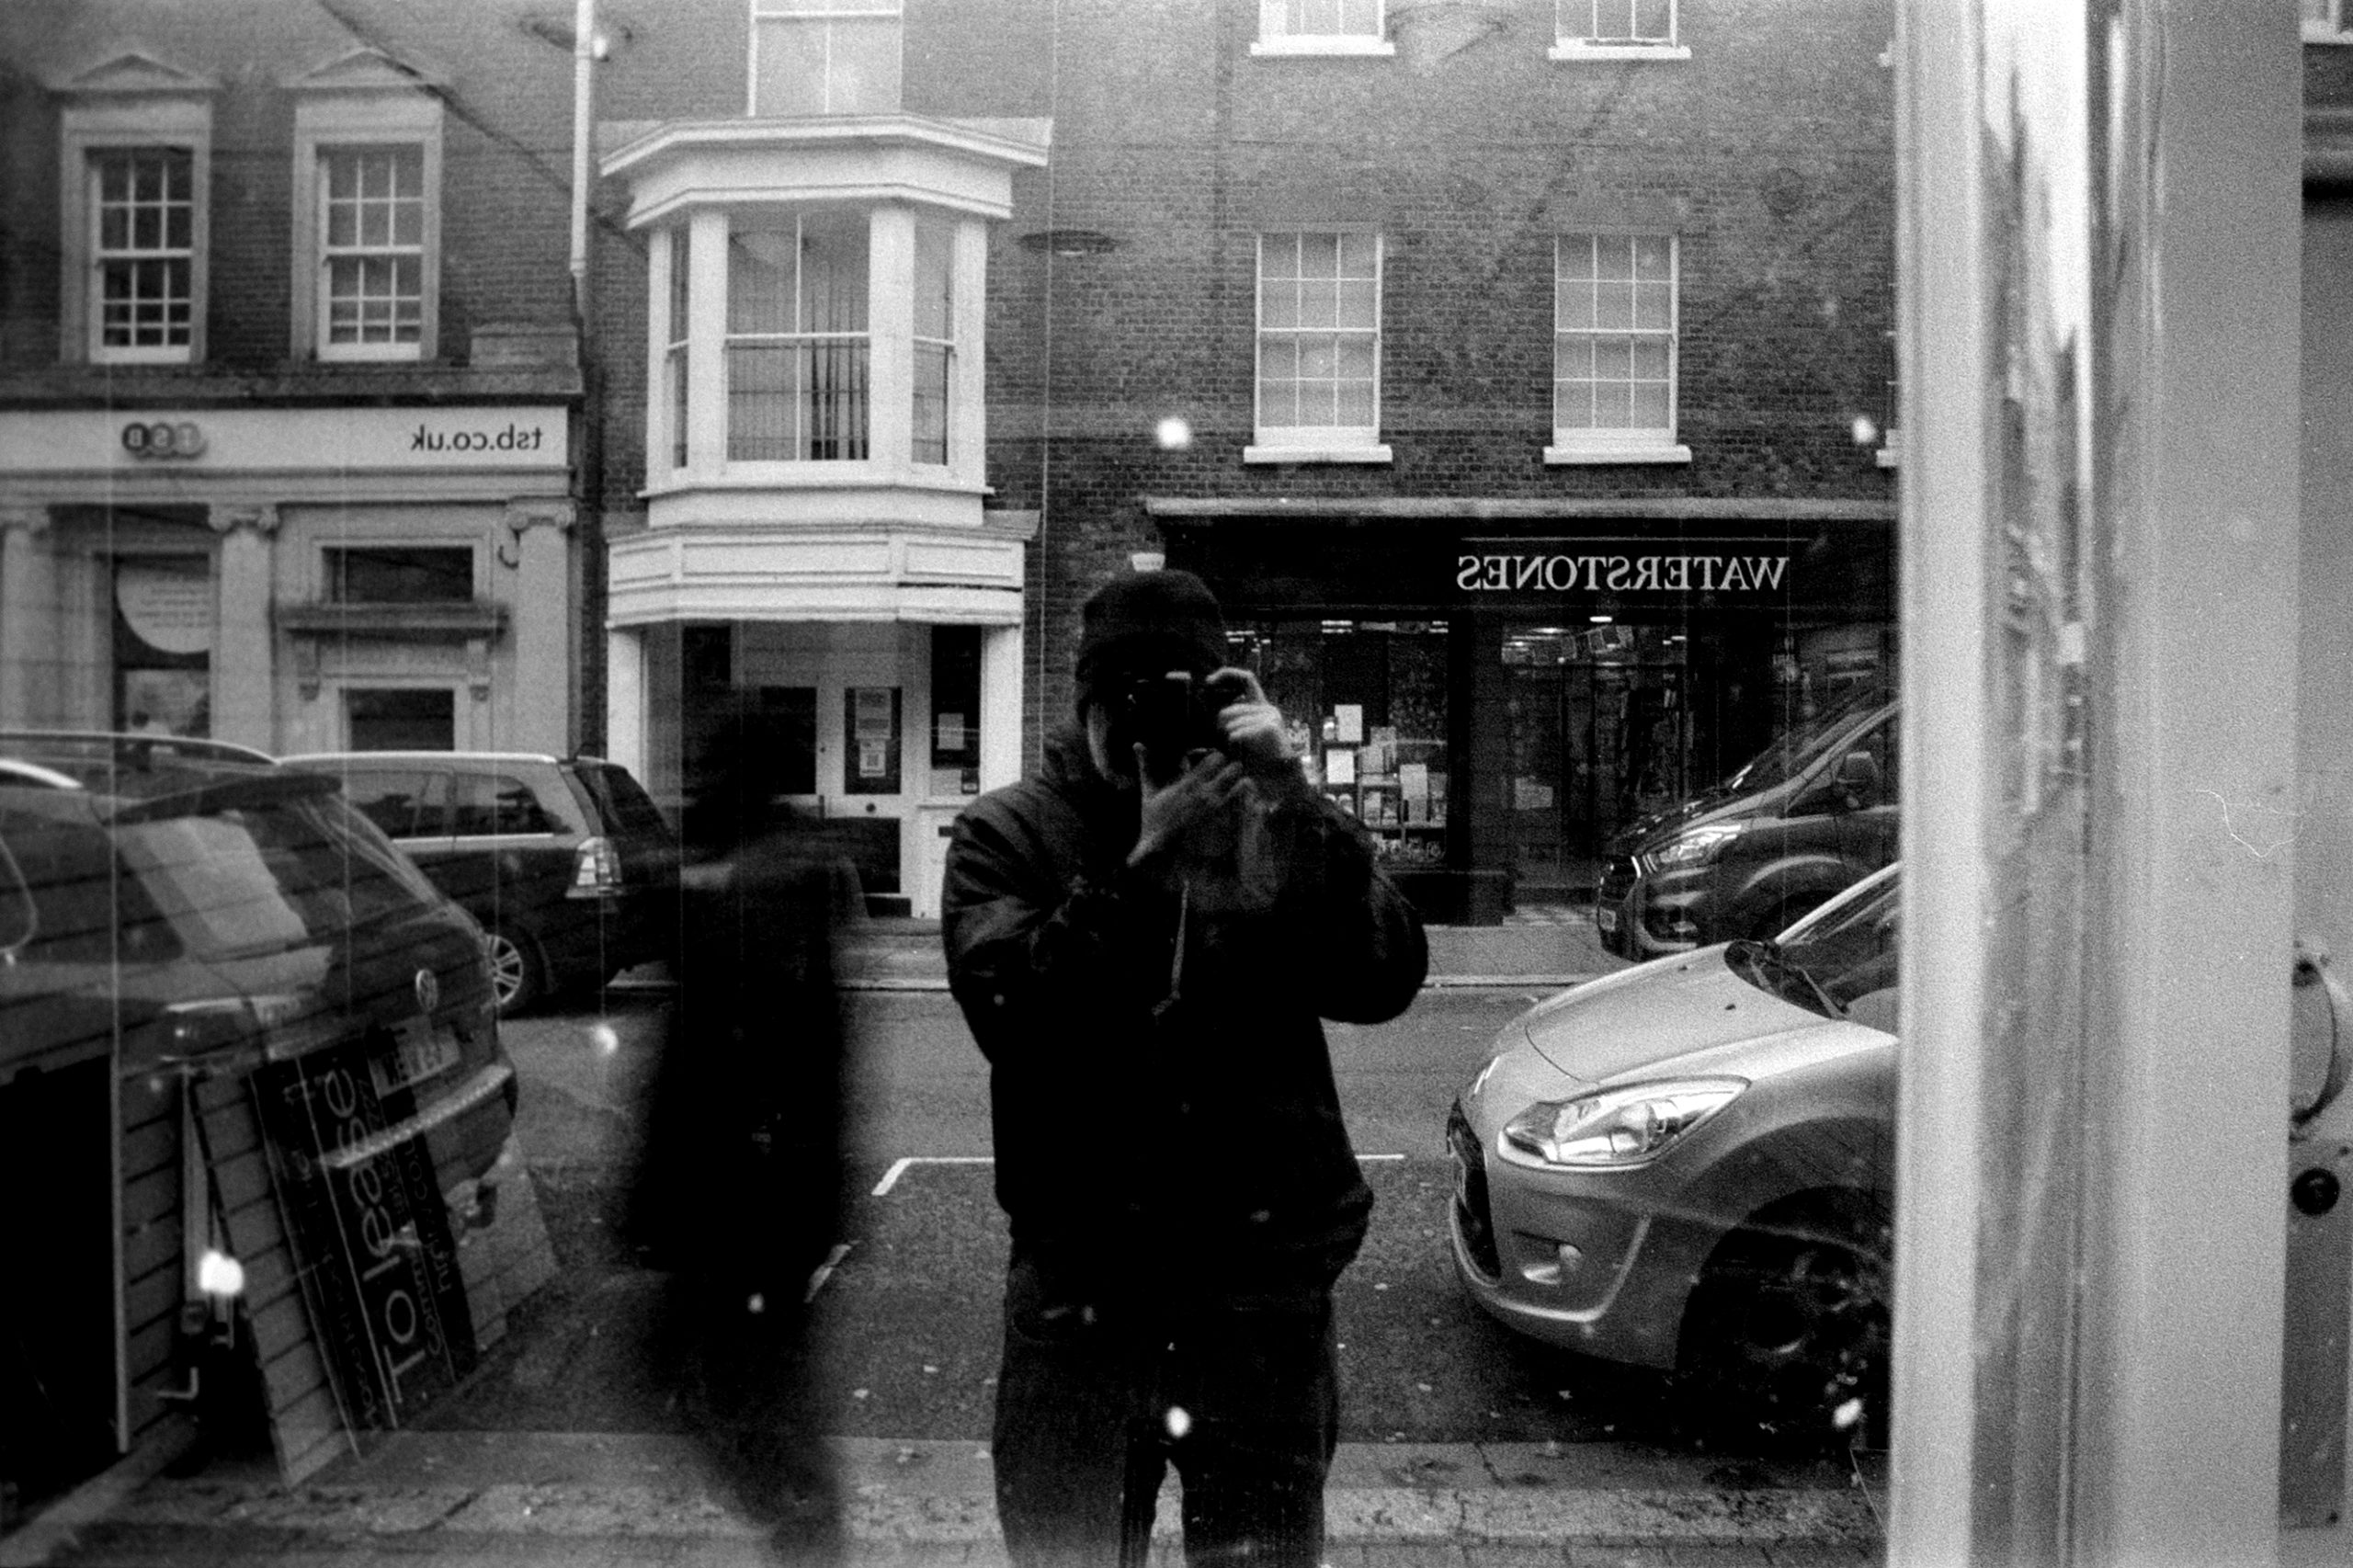
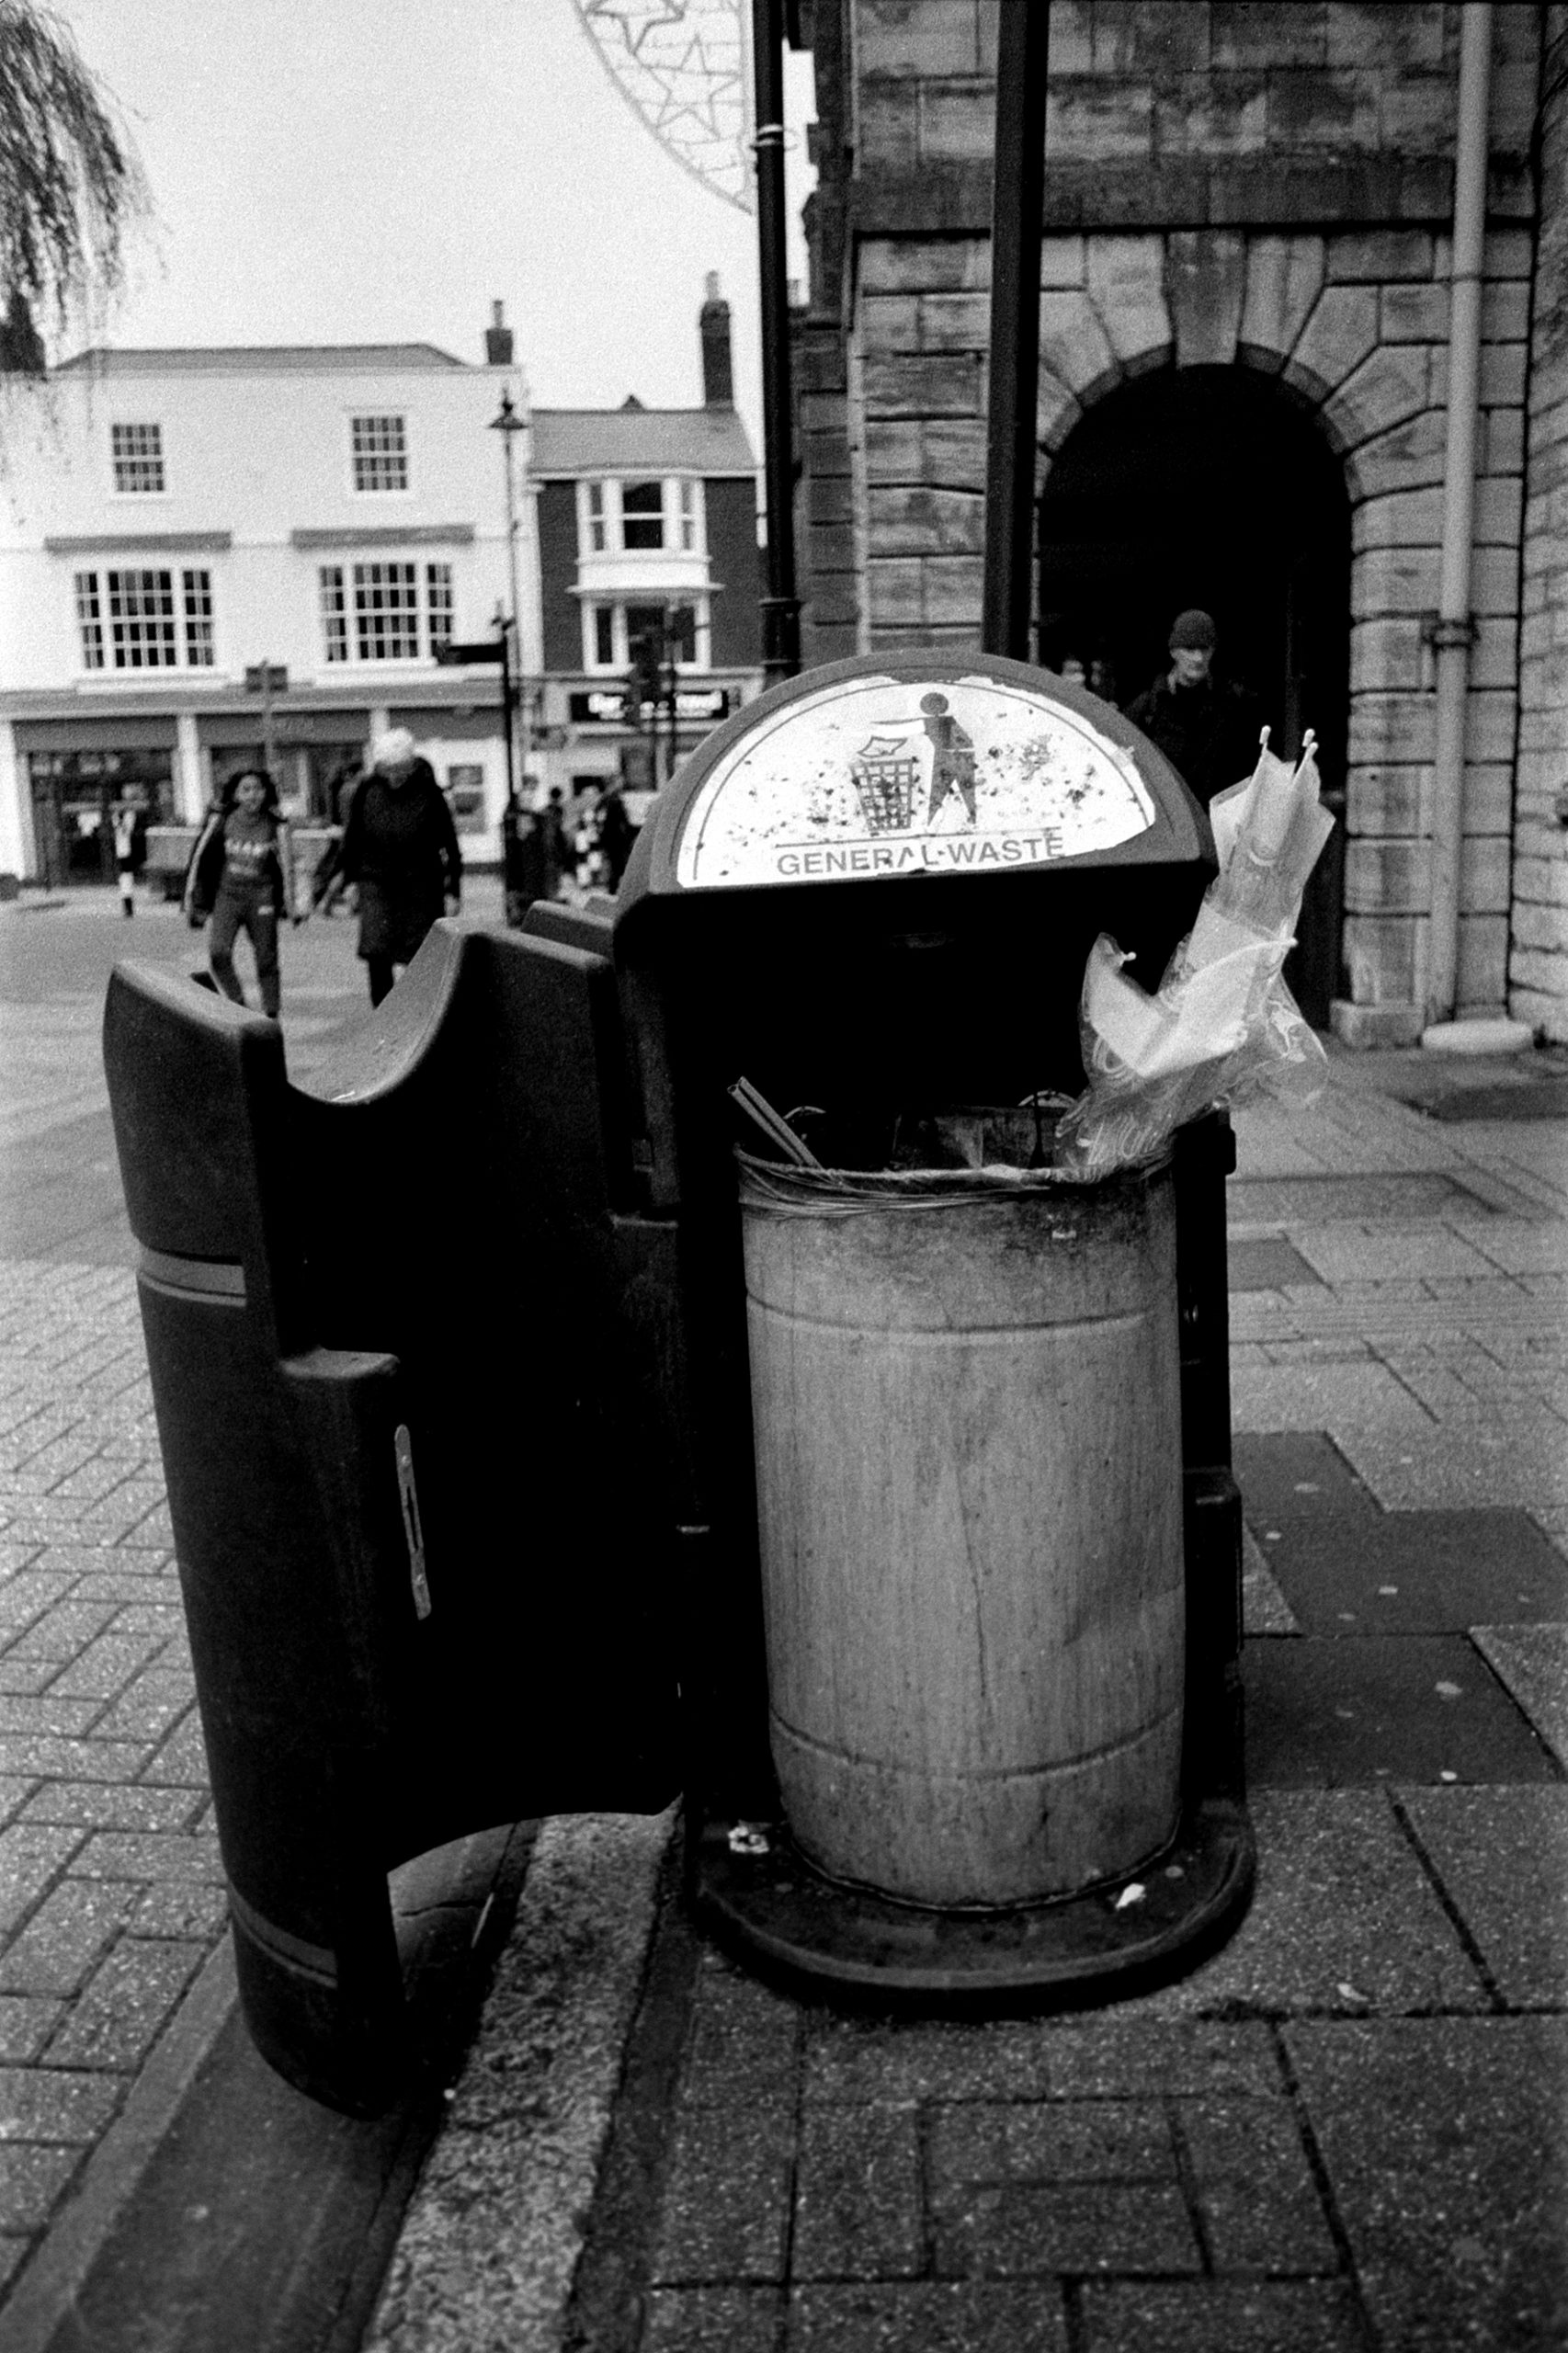
Film Ferrania P33
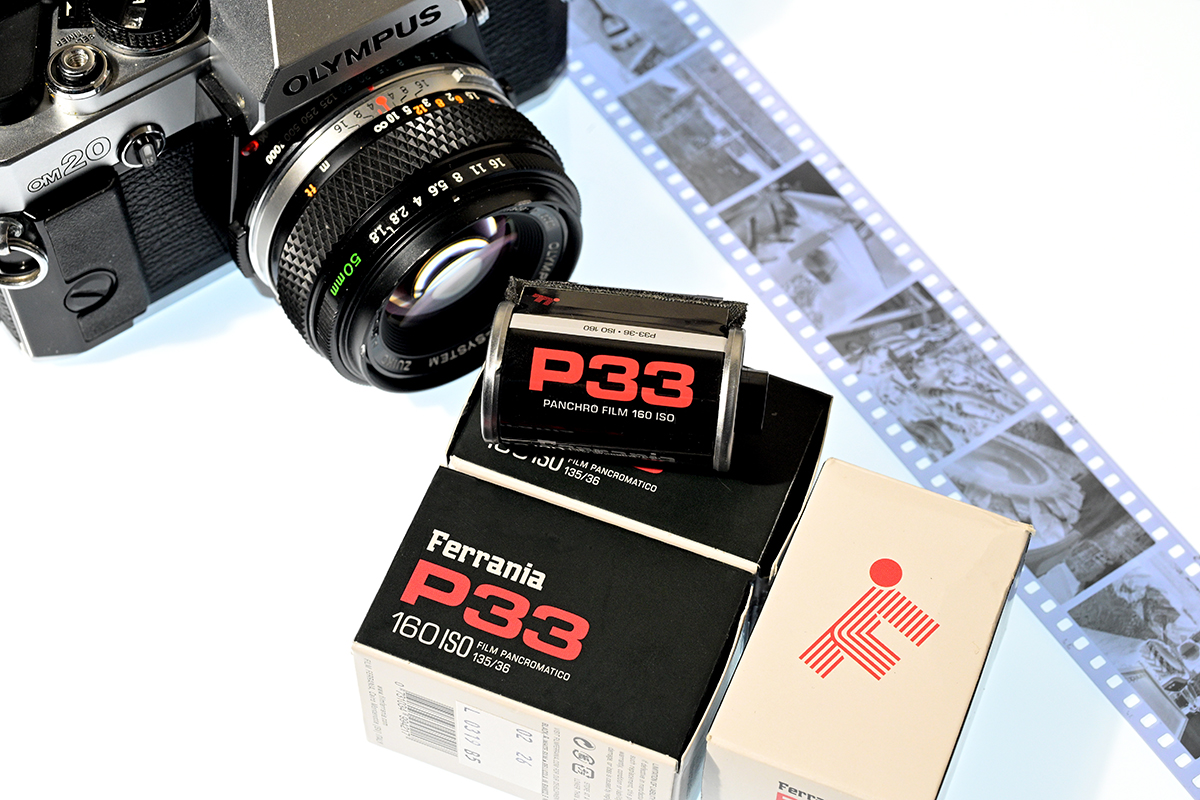
Film photography enthusiasts, rejoice! Film Ferrania, the resurrected Italian film manufacturer, has added another gem to their lineup – the P33, a black and white film with a unique character.
This is what I read up about the film.
What Makes P33 Special
- Fine Grain & Detail: The P33 delivers beautifully fine grain, allowing for incredibly detailed images. This makes it perfect for capturing intricate textures and subtle nuances.
- Tonal Range: Expect gorgeous tonality, with smooth transitions and a wide dynamic range. Your photographs will have a beautiful depth and classic black and white aesthetic.
- Improved Usability: Unlike its predecessor, the P30, the P33 is designed specifically for easier development and printing, giving you more flexibility in the darkroom.
- 160 ISO Versatility: The medium speed of ISO 160 makes the P33 suitable for both sunny outdoor scenes and well-lit indoor situations, providing a great balance.
And I was lucky to get my hands on a few rolls from The Little British Camera Company
I was eager to try this film out having shot many rolls of the popular P30 Motion Picture Film that Ferrania have had out for many years now and see if P33 was similar. In that I mean if it is as contrasty as P30.
And here are tow YouTube Videos I put out recently using this film:
For my first roll I used Rodinal and I had to do some tests first as on their data sheet Ferrania recommend 1+25 for 5 minutes. I thought that was a bit short for a 160 ISO Film, and after doing some tests I was happy at 10 Minutes. Double the time they suggest. My 5 minute tests were very thin.
As expected good ole Rodinal tells no fibs and I was greeted with nice negatives, easily printable and with a pleasing grain for the photography I was shooting, Street.

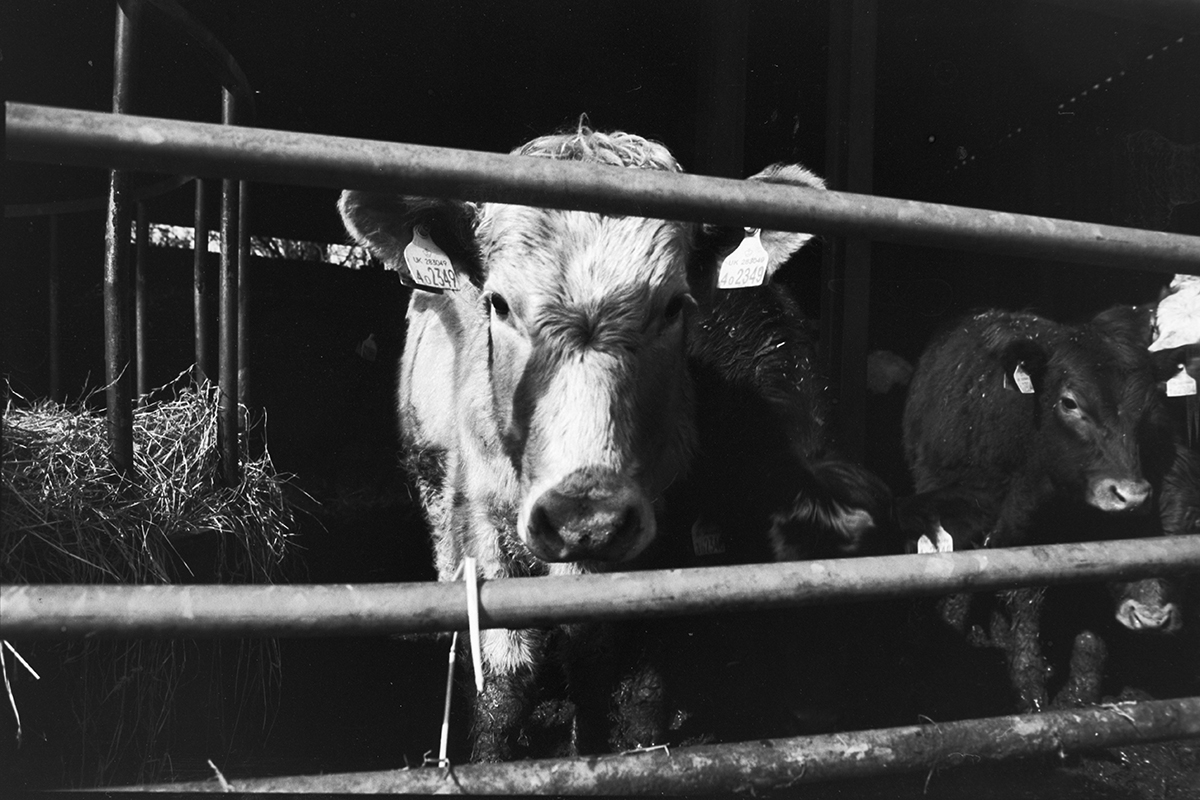
I didn’t find the contrast as punchy as their P30 Film, except when I shot my second roll at the local farm I used the Rotary Processor. Ferrania recommend Hand Process only for this film. And I used a new developer that I am testing at the moment from Zone Imaging (due to be released soon).
Rotary Process:
Noting the contrast, which was more evident on the negatives I shot another roll and used the same developer with a bit more time and this time hand developed the film. I managed to get much better detailed negatives, still with contrast, but with more detail. And as for the grain, it’s very fine indeed!
And you have to excuse me for not printing these negs and others recently. The Darkroom is a tad bit damp!
But this film certainly does seem to have a unique look with the highlights appearing slightly bloomy, nice tonality and a deep contrast. But as we all know the look of any film is controlled in development. I’m thinking how this film would looked pulled! Something I may try another time. Or even in 510 Pyro! I’m not sure I will venture with Rodinal with this film again though. I felt that was a bit harsh.
But with so many films on the market I am wondering if this new P33 film would be great for my street photography or even portraits. There’s no harm in trying out and experimenting with different films to see if they could work with your regular work be it portraits, street or scapes and give a different feel.
Whether I use the film again and experiment you have to admire the dedication and, no doubt, tremendous effort Ferrania have put into this, actually very nice, film and their other films, and keeping film alive for the community to enjoy.
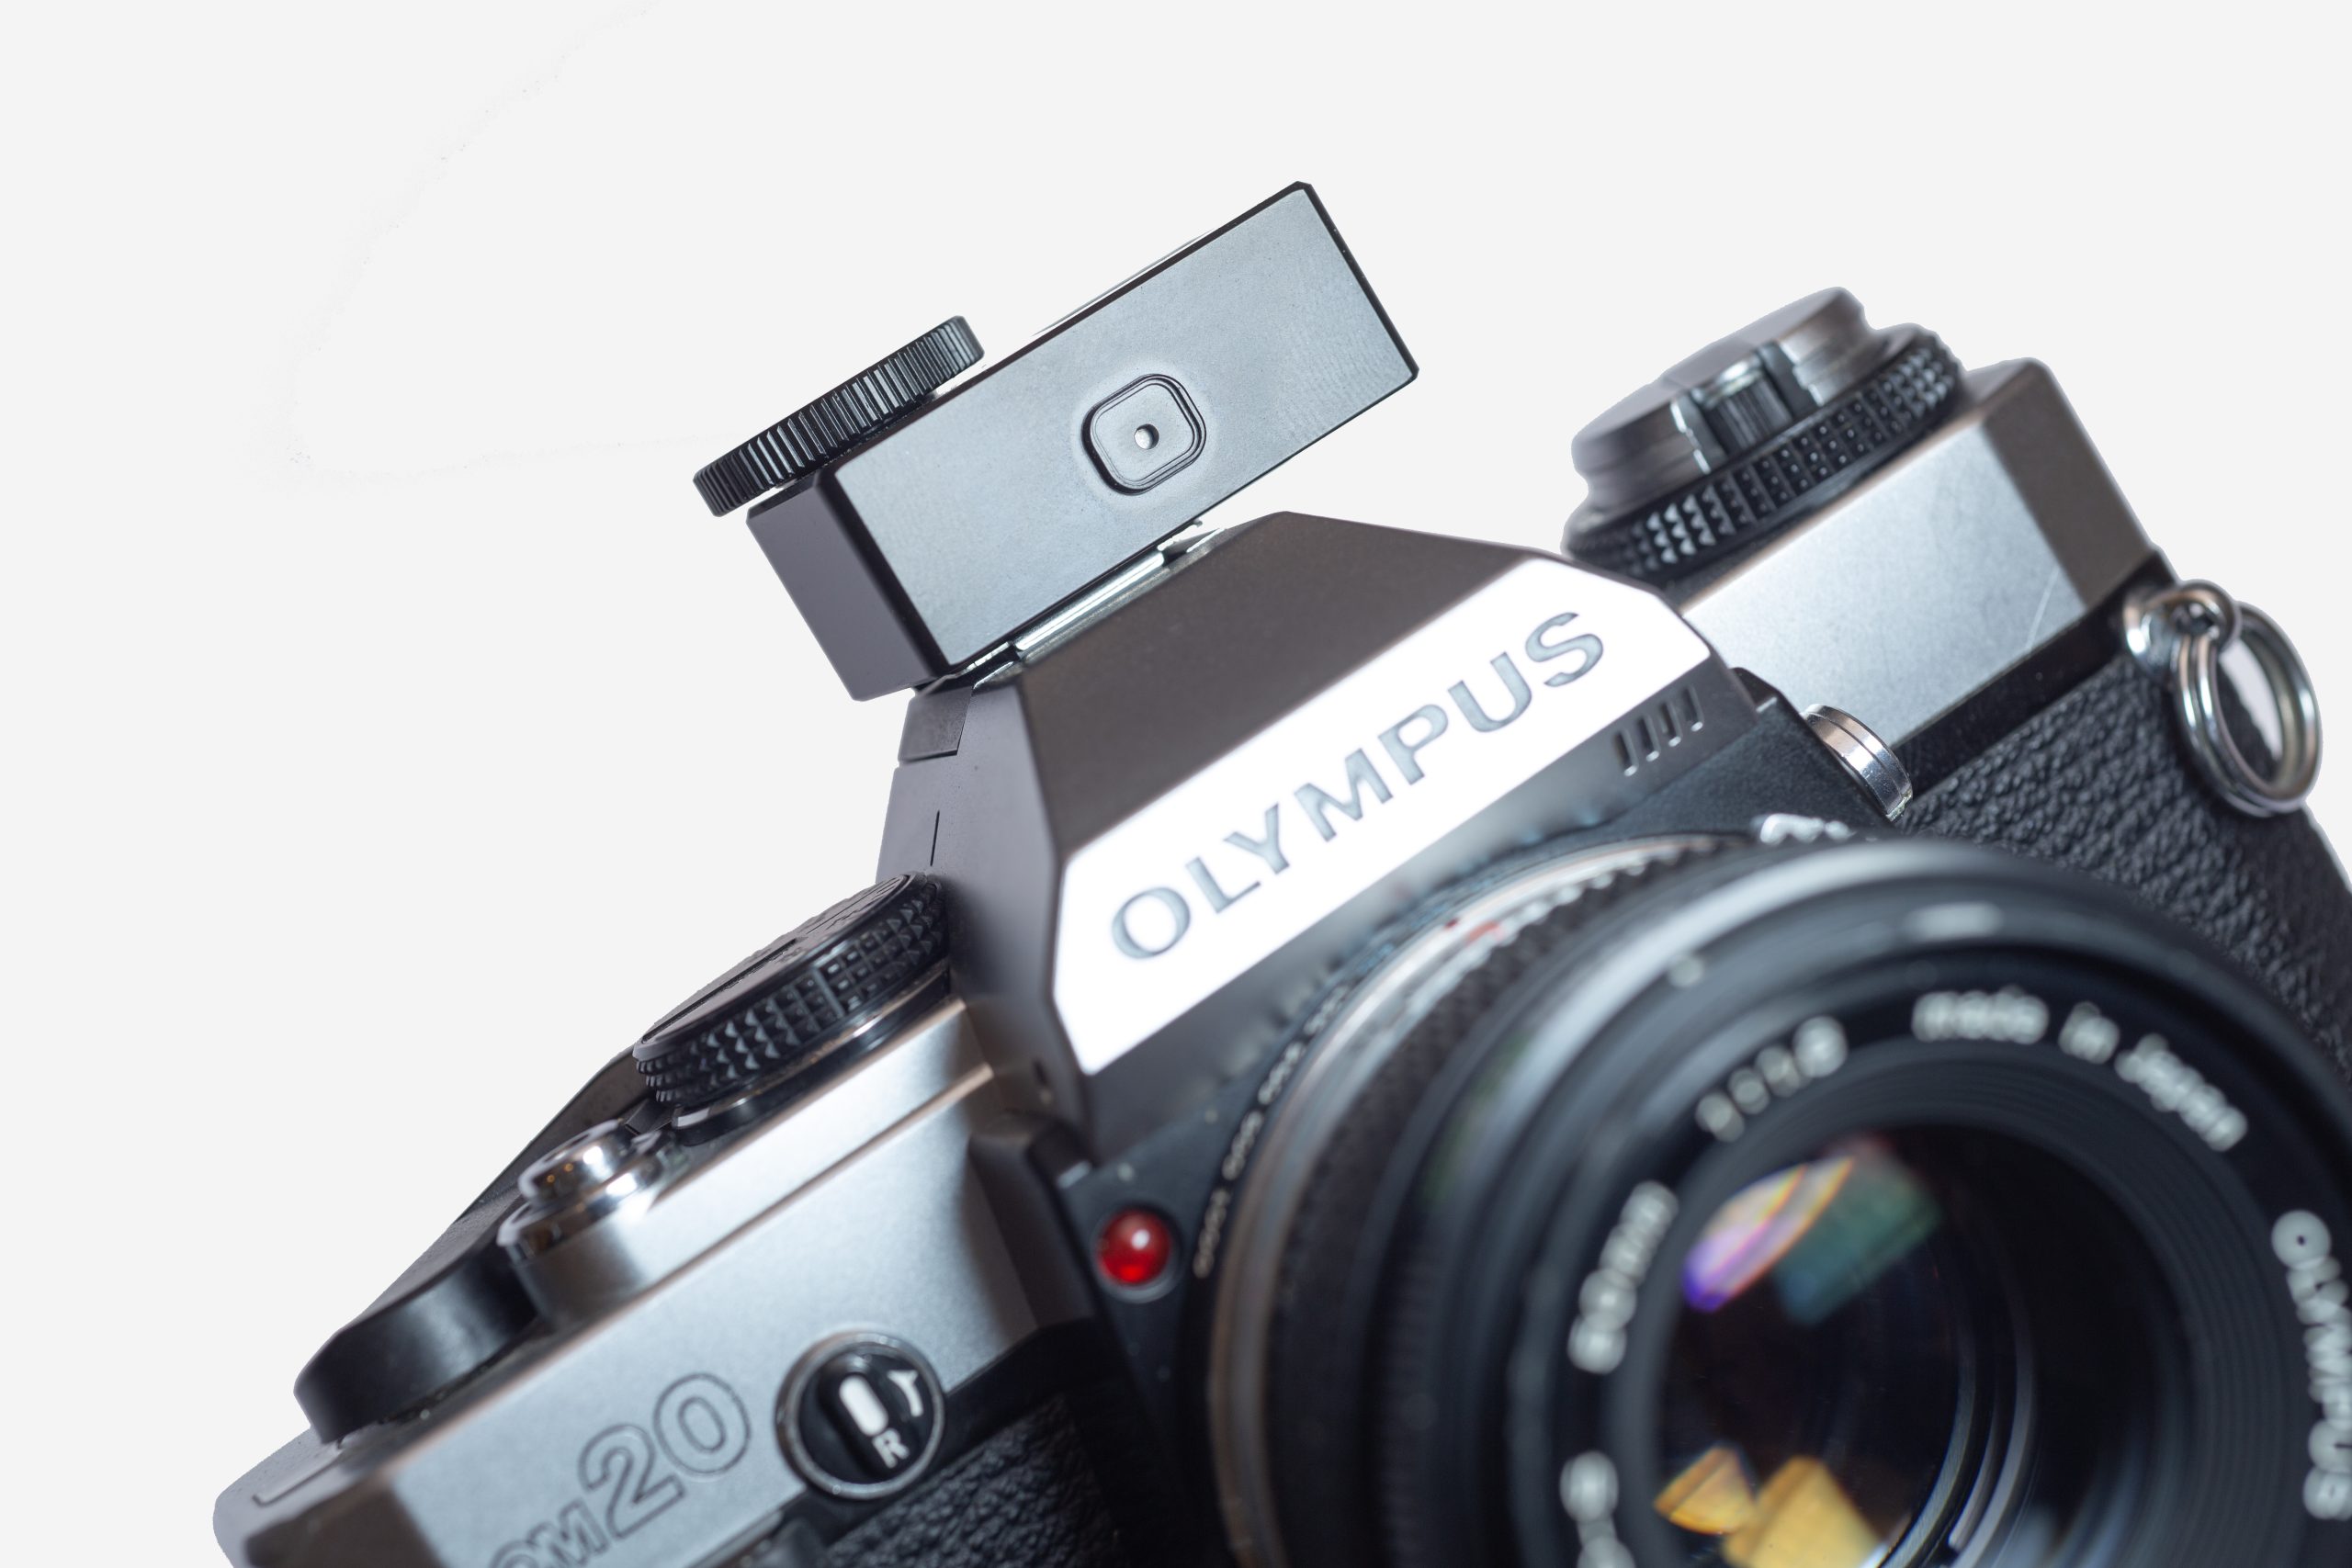
Why the Olympus OM-20 is so underrated
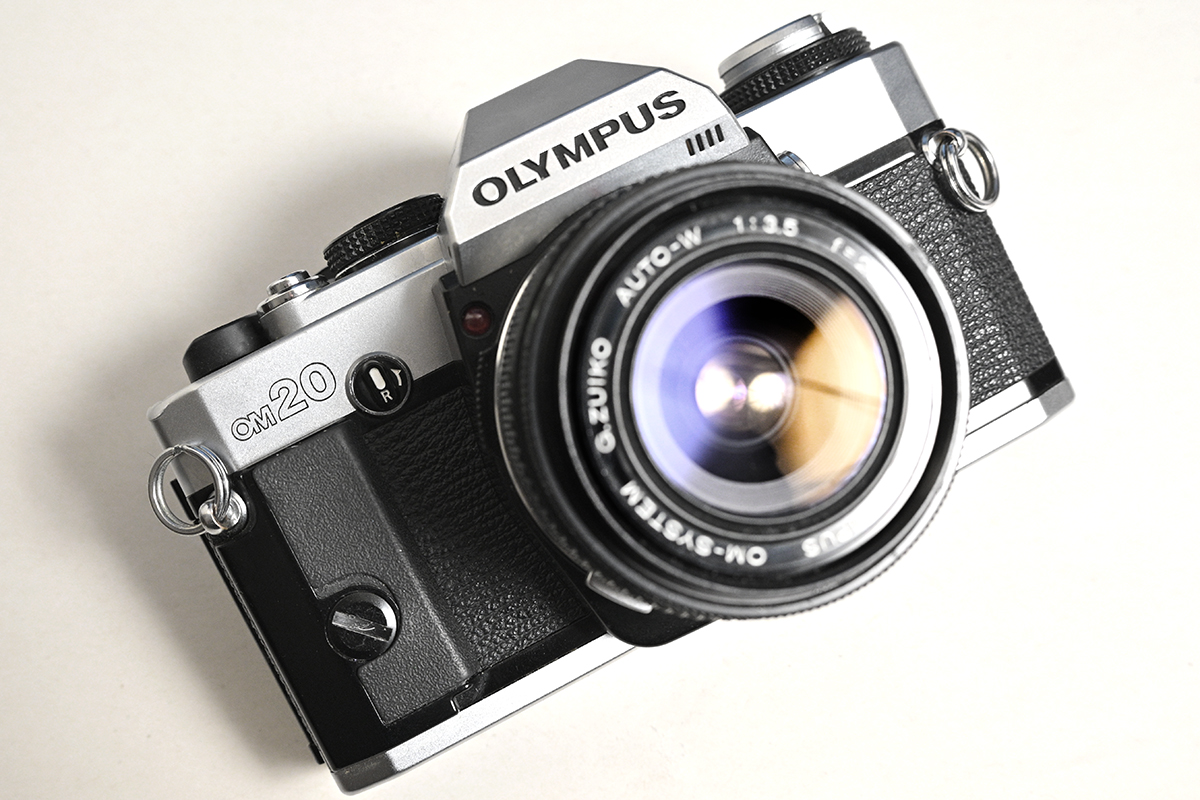
A camera I hardly see being mentioned is the fantastic Olympus OM-20.
Recent YouTube Video on this camera:
It has all you need to take great photographs on film, especially for beginners, and it does so with elegance and charm weighing in at just 430g. But why do you see so little of this camera with its older brother, the OM-10, taking most of the limelight?
Olympus stunned the photographic community back in 1972 when it unveiled its new OM System of camera, the OM-1. It was then, apparently, the world’s smallest 35mm SLR. It was originally called the ‘M-1‘ but the Germans got the hump as they already had the Leica M1. So a year later in 1973, no doubt after a costly and lengthy court battle, Olympus had no option than to put the letter ‘O‘ in front of it, and the OM series was born! And it went on through the years.
- OM-1 1972/3-1979
- OM-1 MD 1974-1979
- OM-1N 1979 – 1987
- OM-2 1975 – 1979
- OM-2N 1970 – 1984
The OM System went from strength to strength with many OM’s being manufactured from the 1970s all the way into the 2000’s finishing with the OM-2000 but the flagship of all was no doubt the OM-1. A classic still to this day that can fetch a pretty penny on the used market.
But let’s jump back to 1979 when Olympus released the mighty OM-10, a camera that is still sort after today with a decent price tag for such a brilliant camera. And before you wonder, there was no 5, 6, 7, 8 etc. Olympus finished the OM-2 in 1979, and in that year started the OM-1N, the OM-2N and a new concept, the OM-10.
The OM-10
Olympus designed the OM-10 with a specific type of photographer in mind:
- People who wanted to step up from simple point-and-shoot cameras but were intimidated by the complexity of traditional SLRs such as the OM2.
- Photography students looking for an affordable, high-quality camera to learn the fundamentals on.
- Hobbyists wanting a more serious tool for creative expression but who didn’t necessarily need top-of-the-line professional features.
The OM-10 was easy to carry and less intimidating to use. Its simplified controls and focused on the essentials.
It retained the excellent build quality and the renowned Zuiko lenses of the OM system, making it a fantastic value proposition as well as offering automatic exposure allowing users to choose the desired aperture (Aperture Priority), while the camera automatically selected the correct shutter speed for a well-exposed image. Although targeted at beginners, the OM-10 could be expanded with a shutter dial accessory for full manual control.
The Olympus OM-10 was a massive commercial success, selling millions of units and earning a reputation as an accessible gateway to serious photography. It helped usher in an era of more user-friendly SLR cameras that appealed to broader audiences. Many people who started their photographic journey with an OM-10 fondly remember its role in developing their skills and passion.
Arrival of the OM-20
As the OM-10 was still selling to the masses of professional and enthusiastic photographers they must have thought it was time to include a dedicated shutter speed system into the camera and in 1983 the OM-20 was released (OM-G in North America) and I’ve often wondered why they didn’t call it the OM-10s or some other fancy end letter. But they decided to call it the OM-20 but it ran for only a short time. By now the OM-4, which was also released in 1983 continued to run with different variants right up until the late 2000’s. But the OM-20 stopped in 1987. The classic OM camera had pretty much finished and Olympus were trying to keep ahead of the game with the modern designs. Yuk! Just google some images of the Olympus OM-707AF or 707 and you’ll see what I mean.
Maybe Olympus knew they were never going to be able to compete with the likes of Nikon and Canon for high end cameras and put their energies into the compact camera market as they made loads of them and if I remember back in the 90’s those Olympus compact cameras were very popular and very good quality. Just look at how successful the Olympus Trip was! Even David Bailey endorsed it! (I bet he never used one though).

For any film shooter today this camera has it all, or at least all you need to take pictures on film without a heavy price tag and complicated menu system, (thinking of Nikon F5 and 6), and a camera that looks every bit as nostalgic and classy as the usual suspects from the 70’s and 80’s. Plus, it takes those wonderful OM System Zuiko lenses AND it’s small and light weight!.
It’s also a conversation builder too! I’ve had many folk stop me in the street when they see Olympus, then proceed to ask me if film is still made! I love these conversations with strangers.
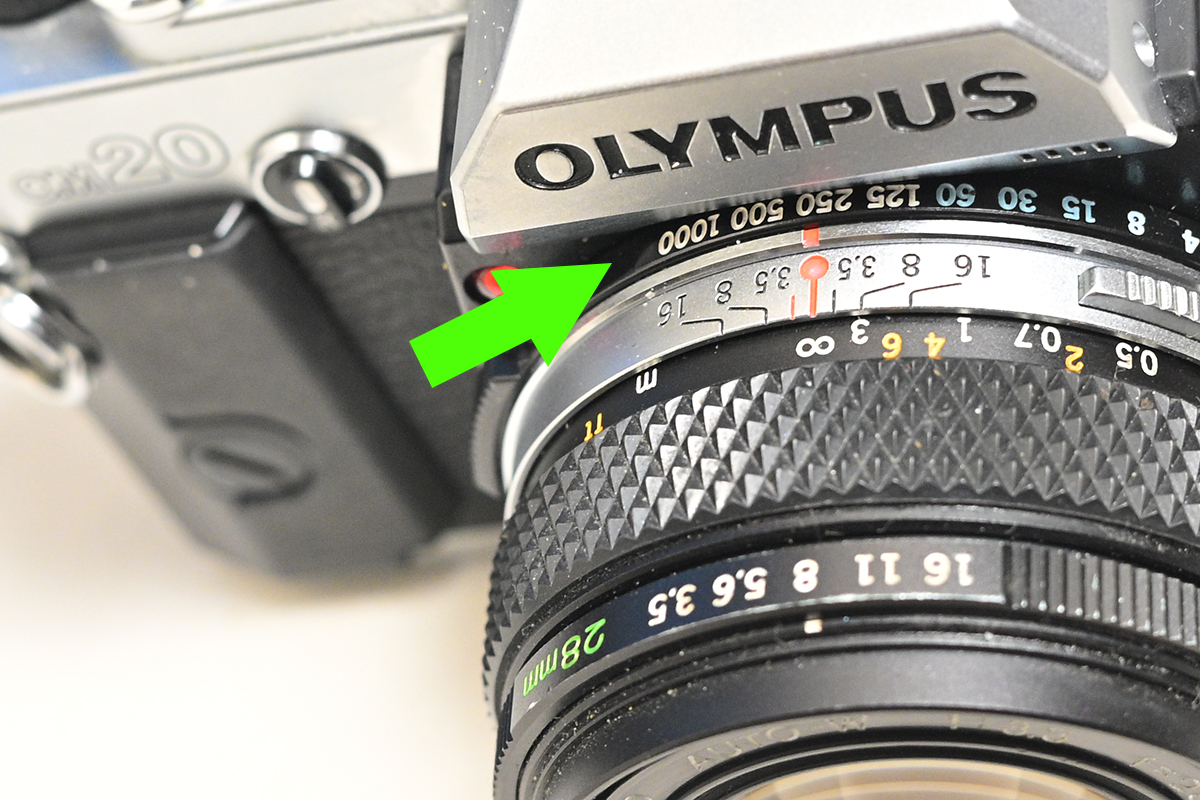
It has the same metering system as the OM-10 which was called OTF Metering (Off The Film) which was supposed to be very accurate where by, in auto mode (Aperture Priority), would take the light reading as soon as the shutter opened from the film surface and change the shutter speed accordingly. I suppose if you think with normal TTL metering the light could change at the instant the mirror lifted. With OTF the camera measured the light at the instant it hit the film surface. The light cell is located just under the mirror pointing toward the film plane.
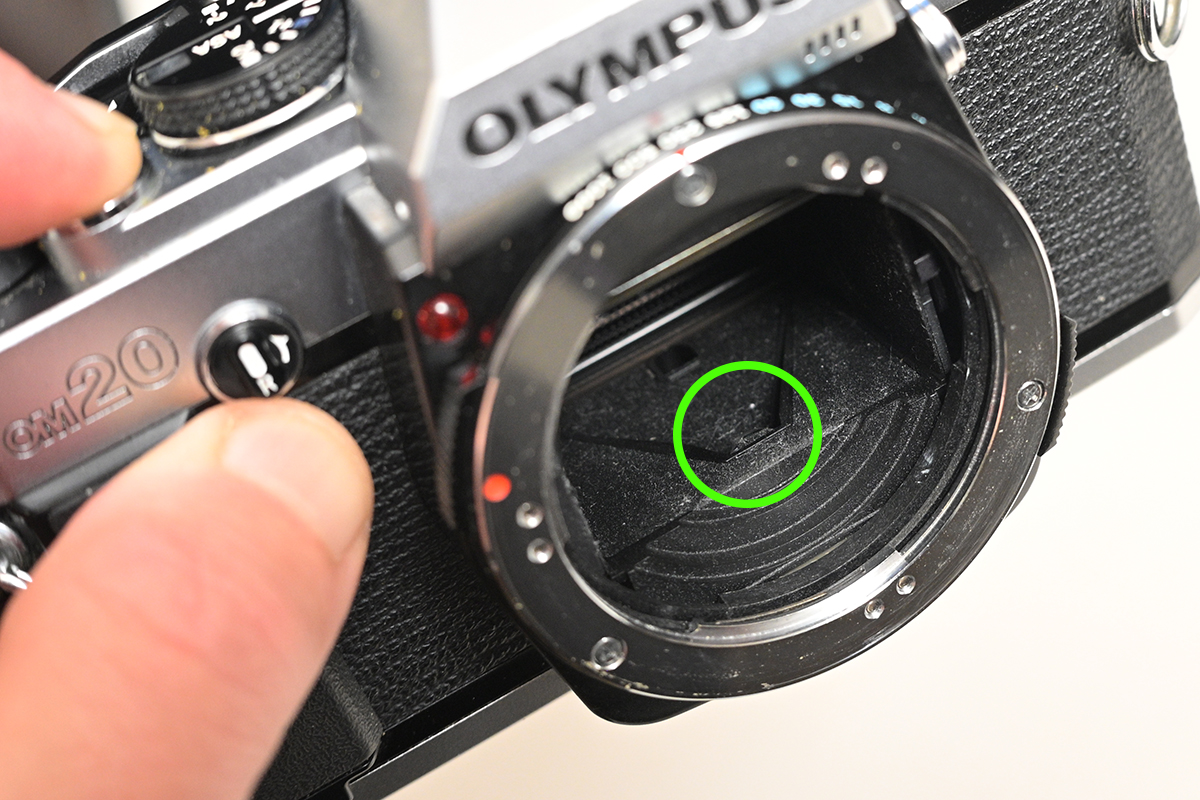
But what Olympus did was to eliminate the use of the shutter dial accessory and included a new shutter speed dial on the lens mount bringing the camera more up to date and inline with other AP/Manual cameras of it’s time.
The cameras were identical apart from a few improvements.
Both the OM-10 and OM-20 have the same ASA range, 25-1600 and the same shutter speed range, 1s – 1/1000th.
The OM-20 included an overexposure warning in the viewfinder and a hot shoe dedicated contact point for standard electronic flash sync (X-sync), making it easier to use modern flashes without additional adapters.
The OM-20 also provided more control and a few quality-of-life improvements for photographers wanting to delve into manual exposure settings. The OM-10 catered more to those who valued pure simplicity in an aperture-priority system.
Why underrated?
So why does the OM-20 have less popularity than the OM-10?
I can imagine back in 1979 for anyone wanting to get into the OM System the less expensive choice would have been the OM-10. The OM-20 would have been slightly more expensive because of the modifications and I would imagine the sales of the OM-10 would have declined, apart from those that would just wanted simplicity then aperture priority was King and would have gone for the cheaper OM-10.
But today it would make more sense to grab the OM-20. I had the use of an OM-10 some years ago and I made a video on the camera. I instantly loved it but after some research I decided to buy the OM-20 and I’ve had it ever since. Unfortunately the timer never worked! And I have noticed the metering is off by about a stop, which is no problem as for Auto Mode I just adjust the exposure compensation dial.
If you look around you will notice the OM-20 is slightly cheaper on the used market and it’s not always guaranteed you will get an OM-10 with the shutter speed adapter, in which case you can expect to pay extra. (maybe £20-30).
Maybe the OM-20 is not as popular because of all the nostalgic blogs and vlogs dedicated to the legend that was the OM-10. And it’s also evident that the price seems to hold better than the OM-20 but in my opinion the OM-20 is a no brainer of you’re looking to use the camera and get the most out of it for your film photography journey.
And finally beware both cameras are electronic shutters and will only work with a battery inside! I remember finding this out the hard way literally half way through a vlog for YouTube I had to go to the shops to get batteries (2xLR44) to unlock the shutter after an exposure! The shop didn’t sell them separately and I had to buy a pack of assorted button cell batteries!
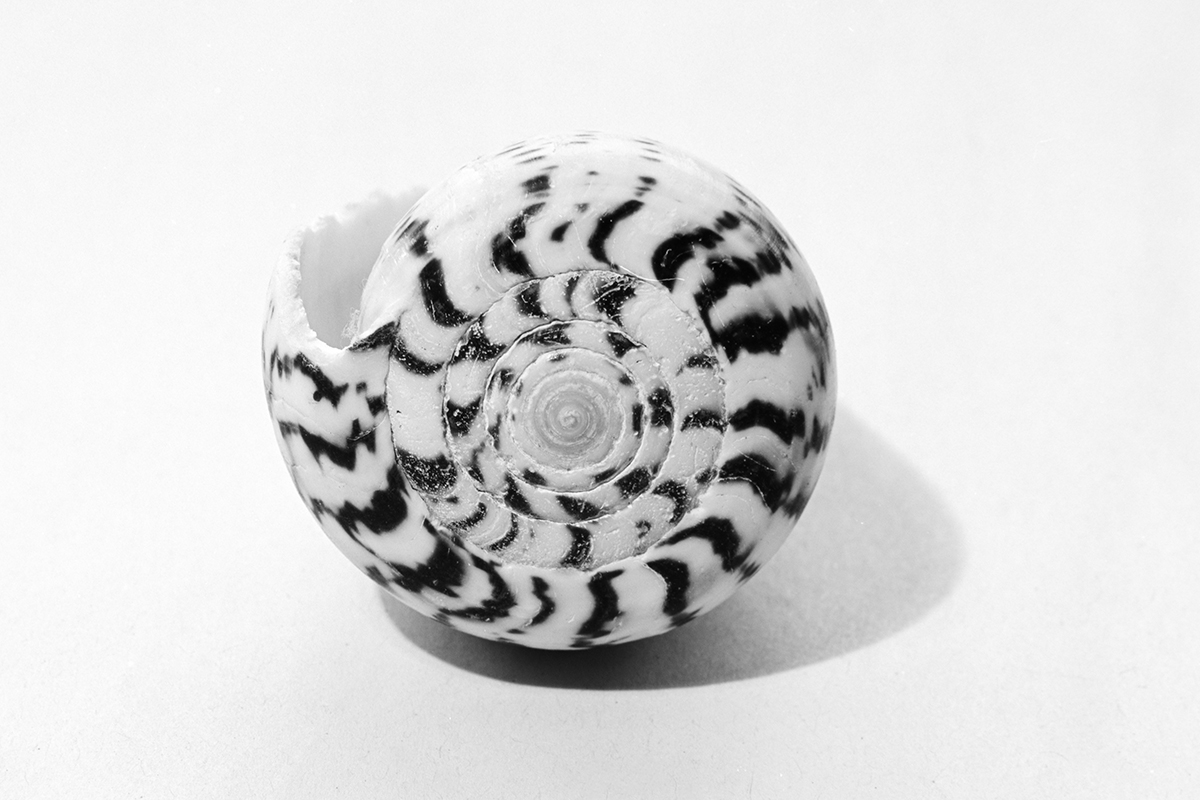
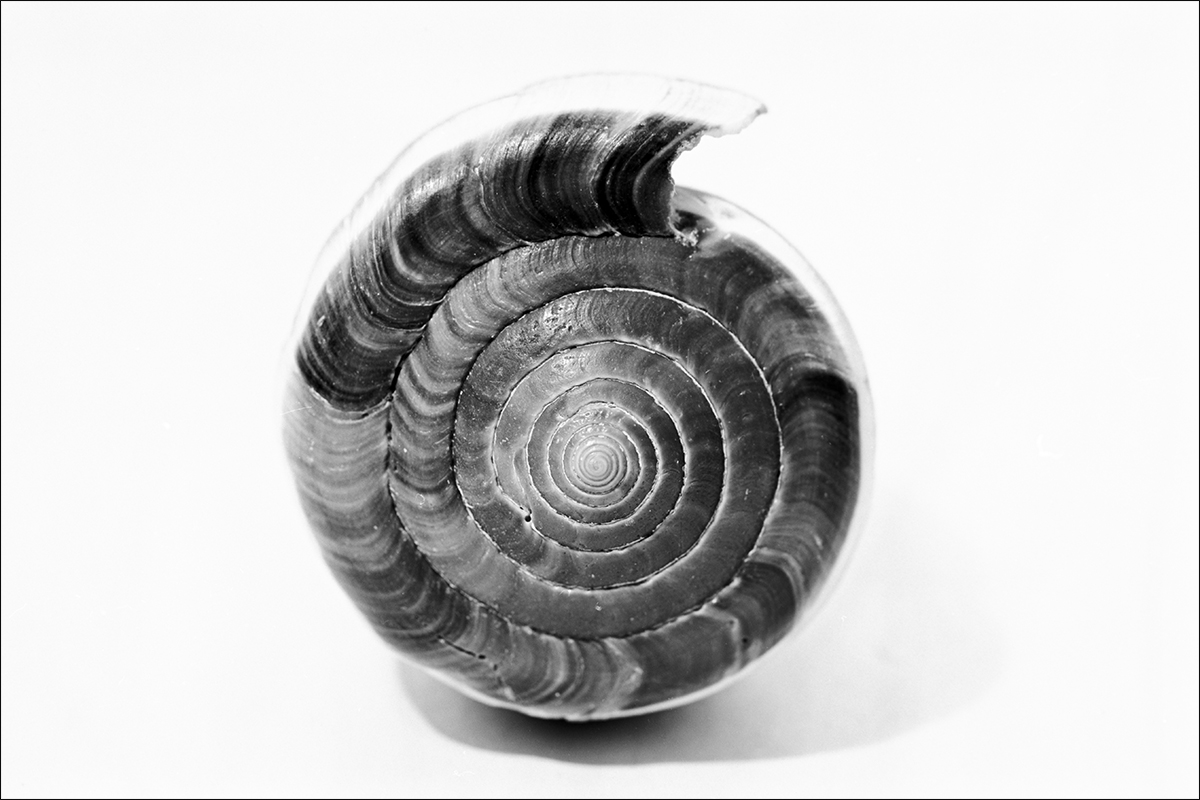
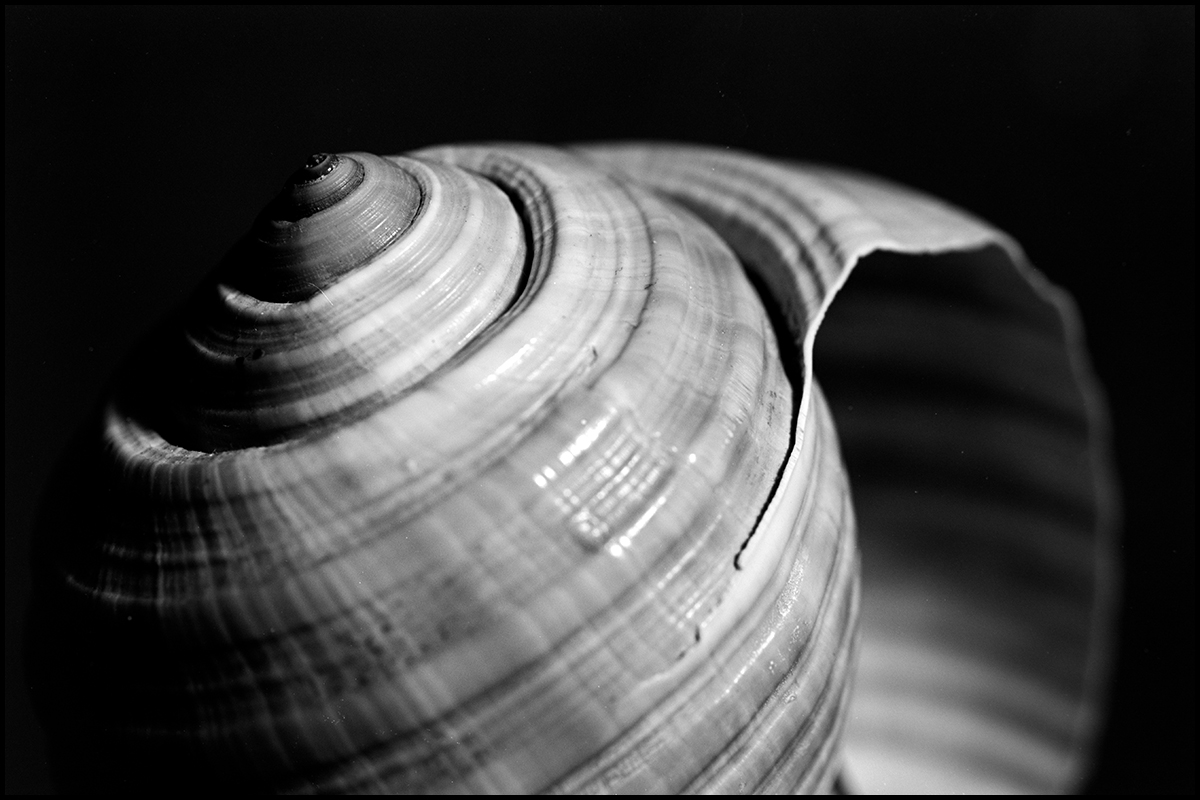
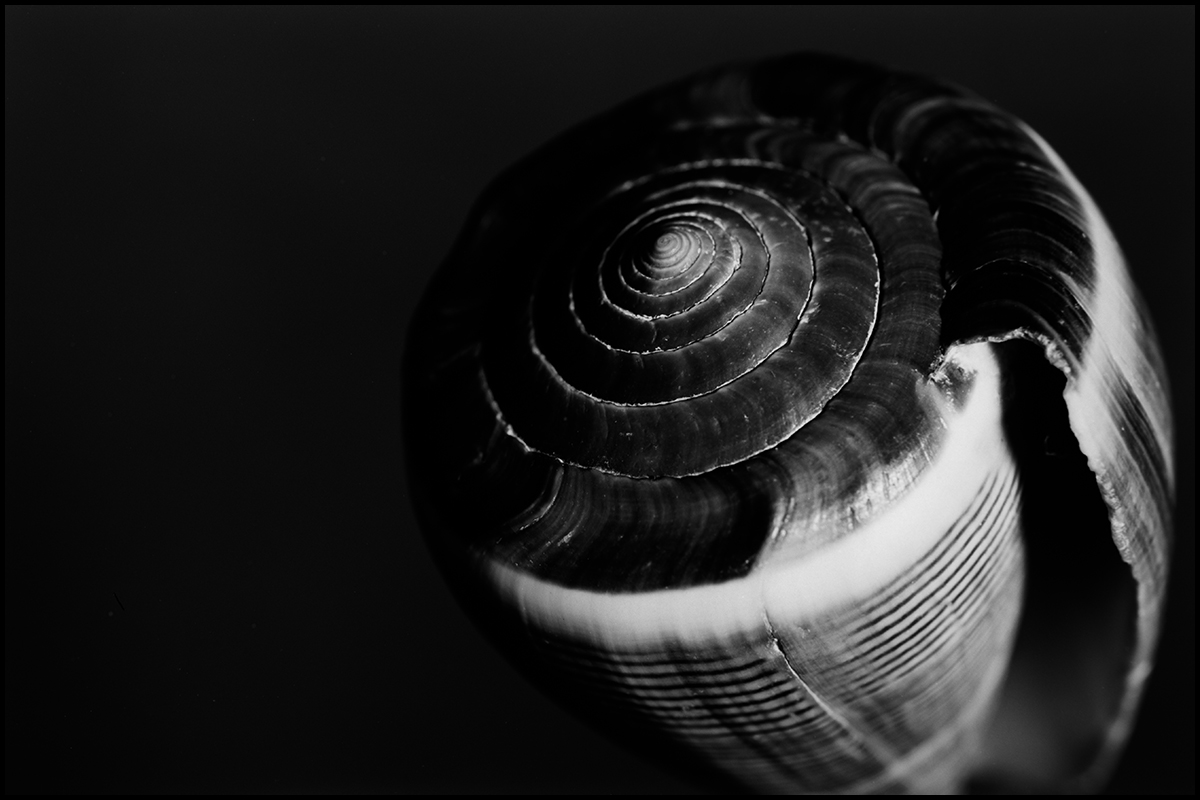
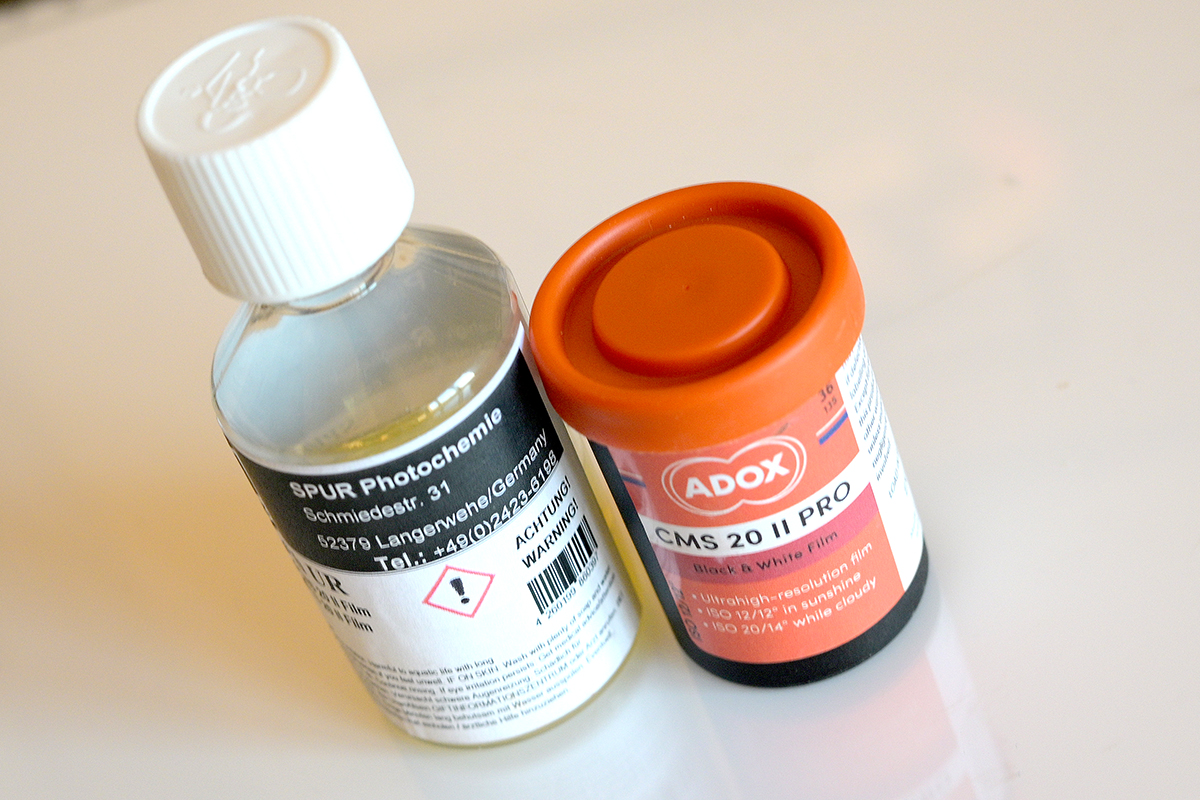
ADOX CMS 20 II Pro
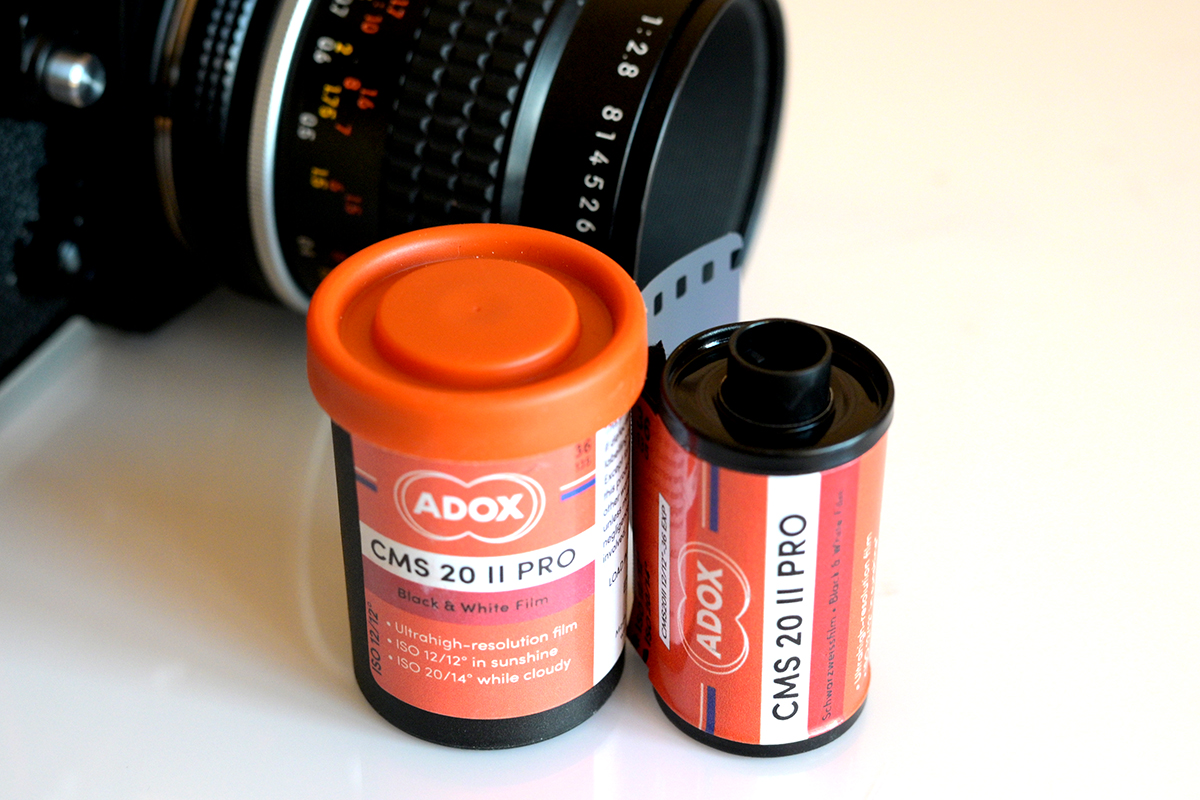
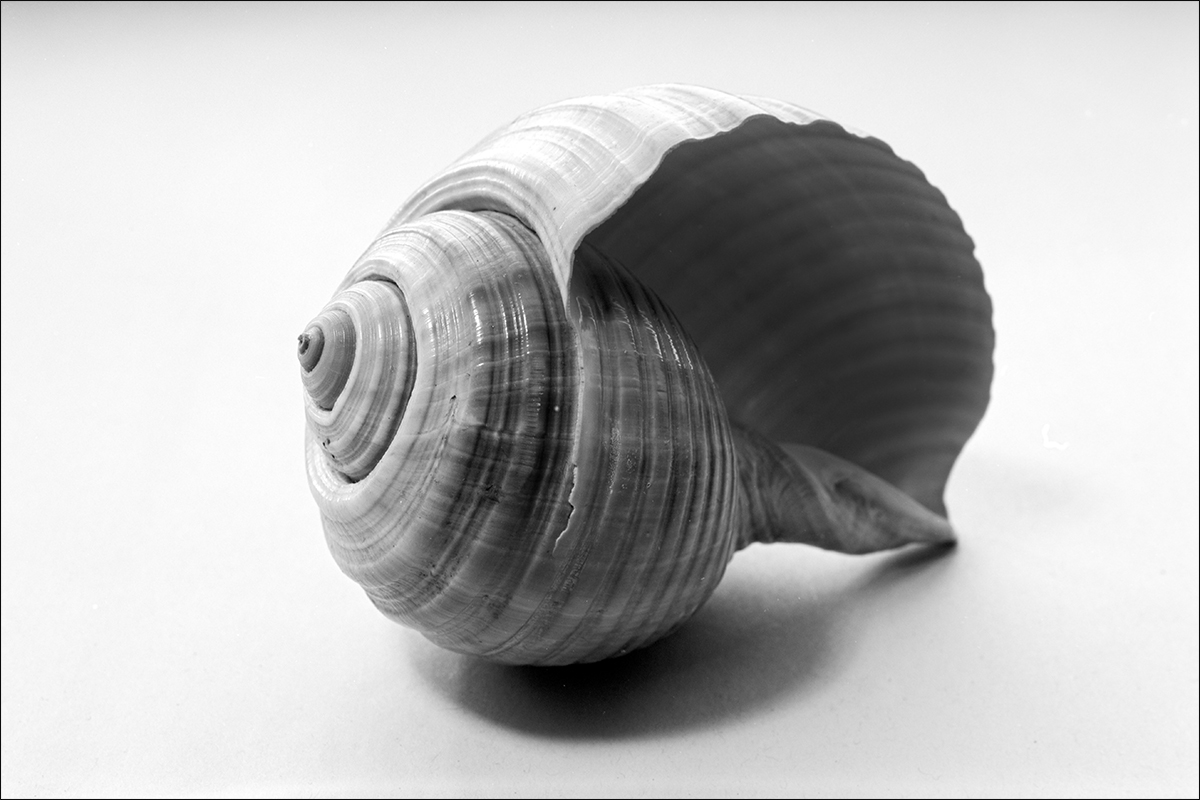
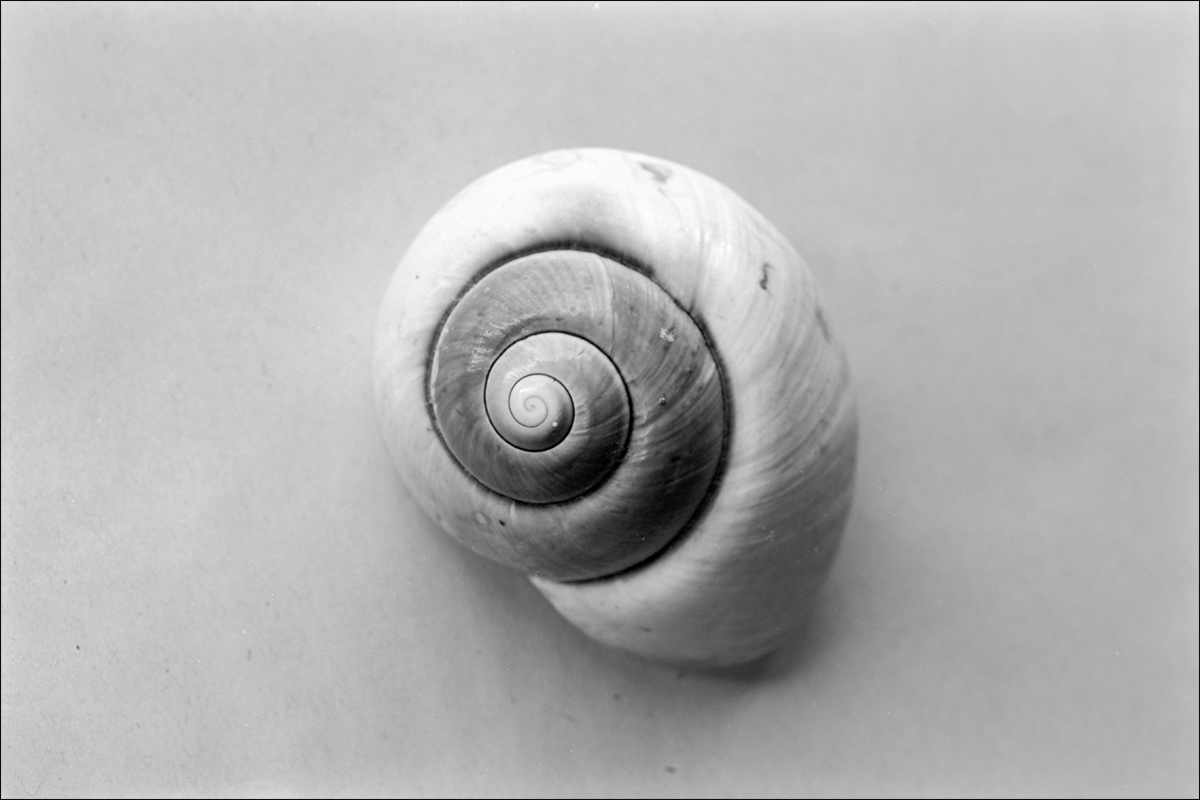
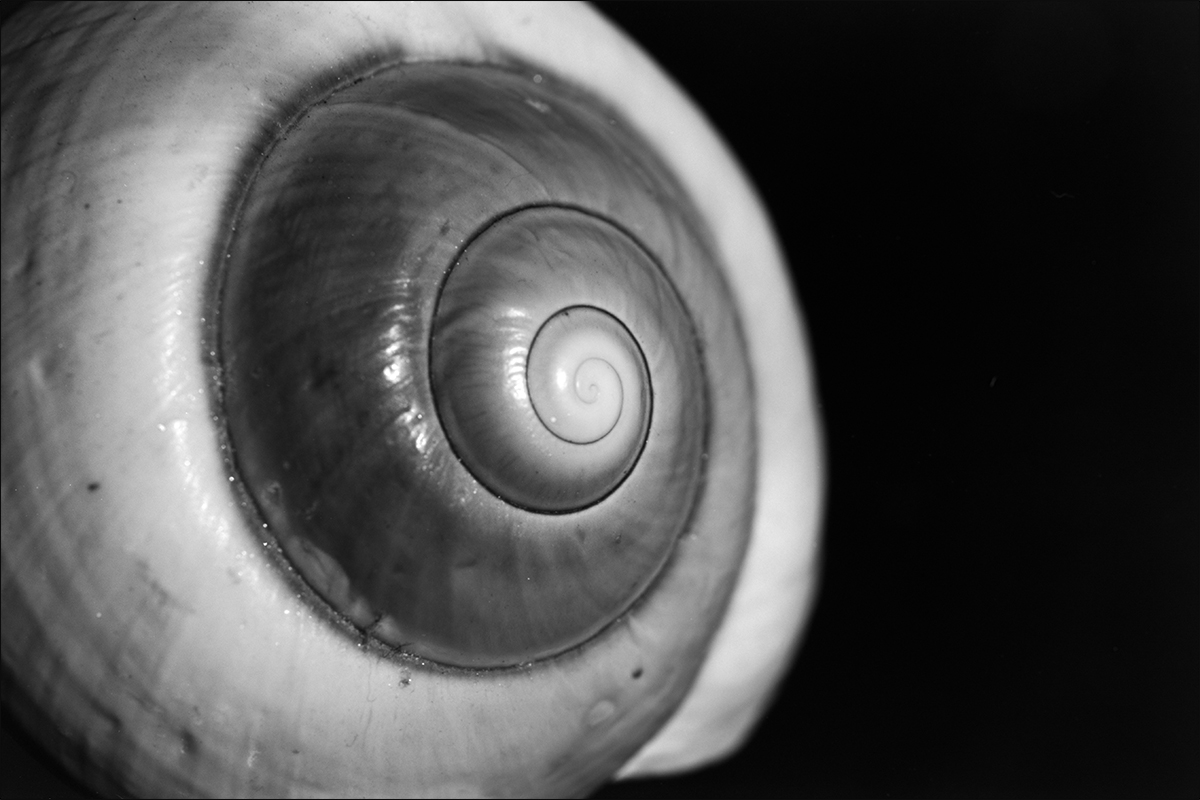
I’ve always loved photographing natural subjects indoors. The way soft window light plays with textures and casts subtle shadows is simply magical. Recently, I wanted to push the boundaries of detail and tonal range in my indoor photography. That’s why I was so excited to try out ADOX CMS 20 II Pro film. This stuff is legendary for its sharpness, fine grain, and incredible resolution.
These low ISO Films were used back in the day mostly for archival work such as taking photographs of documents and artworks and such where detail was paramount. Maybe also for insurance companies photographing fine art detail.
ADOX Claim this stuff to equal 500 megapixels! You can read what they say on their website
And although this is 35mm film don’t get too excited if you think it’s also available in 120. It was, but not anymore! Apparently ADOX’s 120 machine broke down and it’s doubtful (hopeful) they will make it in 120 format again. BUT… They do make it in 4×5 if you are looking for silly resolutions.
You may want to check out the video I made on the channel.
The Setup
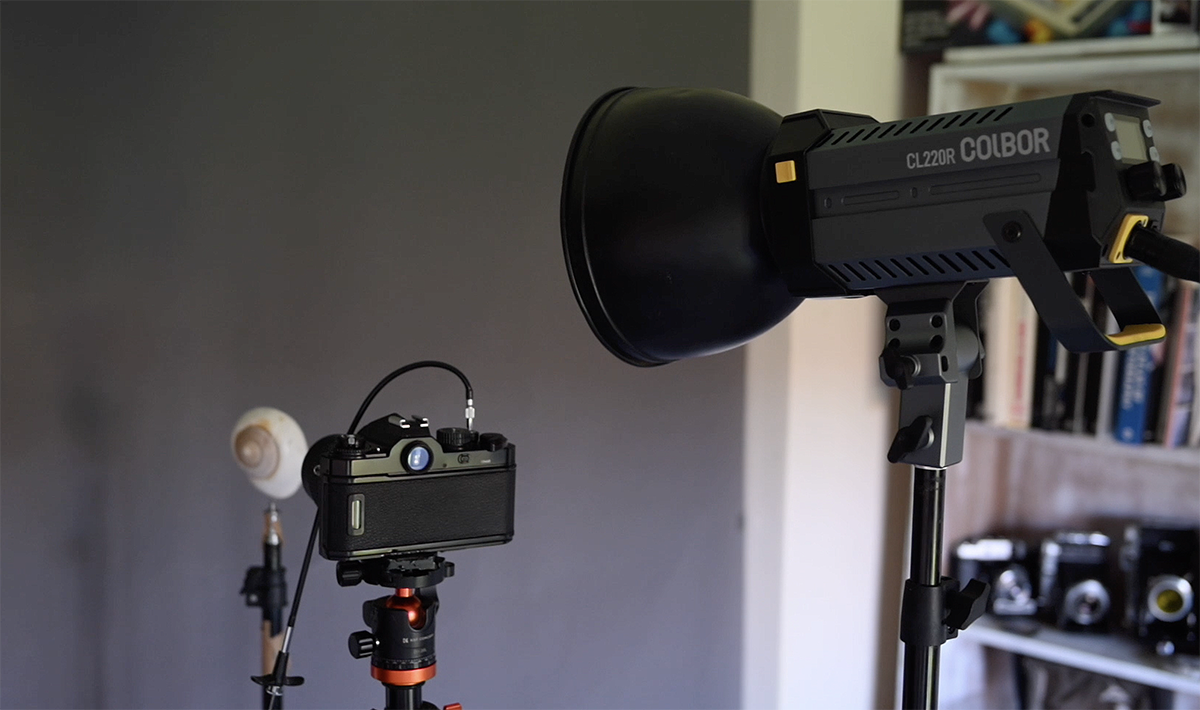
- Camera: My trusty Nikon FM3A, a fully mechanical workhorse.
- Lens: The sharp Nikkor 55mm F2.8 macro lens for close-up detail.
- Subject: A small collection of seashells with diverse textures and shapes.
Why ADOX CMS 20 II Pro?
My friend Neil Legg sent me a couple of 35mm rolls to dabble with along with some Spur R800 Film and also 50ml of SPUR developer.
I was already familiar with the technical advantages of CMS 20 II Pro and had used it in the past but never in a dedicated developer.
- Unmatched sharpness: The hype is real! This film is capable of resolving incredible levels of detail.
- Invisible grain: Even with big enlargements, your images stay smooth and clear.
- Wide tonal range: Smooth transitions between light and shadow, preserving nuance in subtle textures.
It was perfect for my indoor shell project! Natural light isn’t always the brightest, but I knew CMS 20 II would still capture every little detail the shells had to offer.
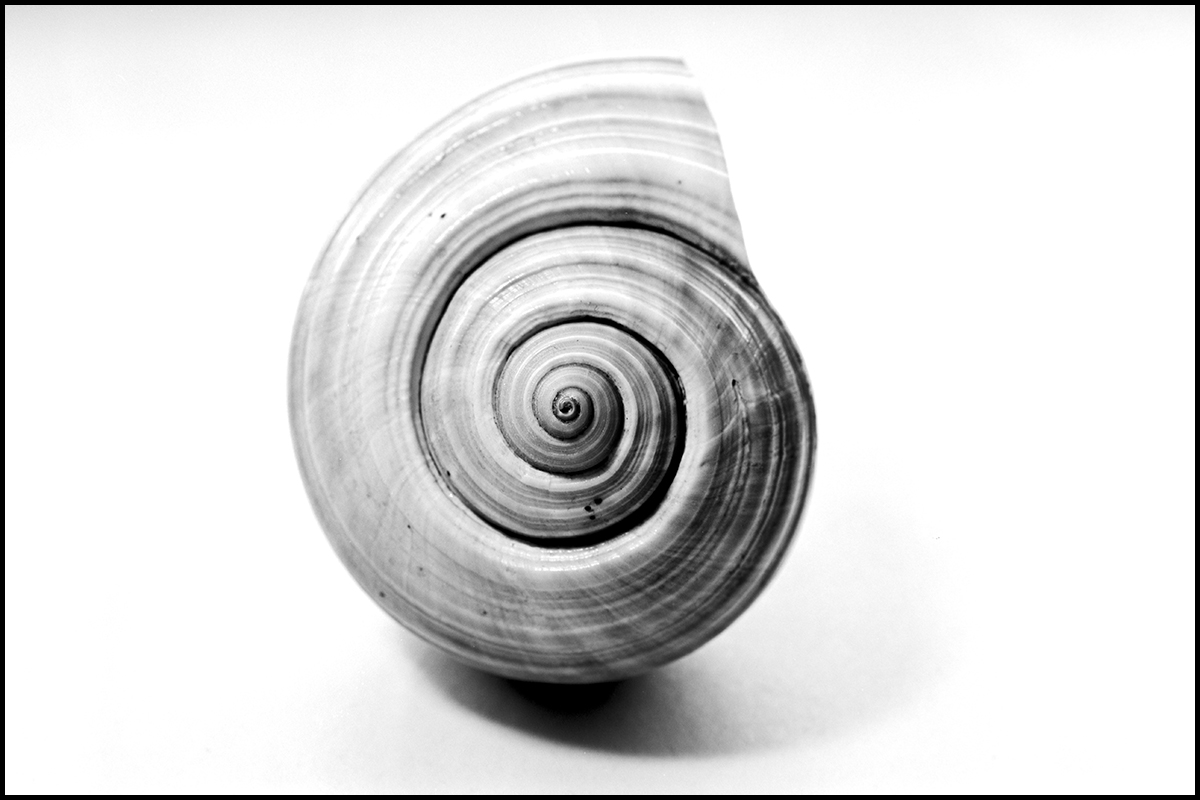
The Shoot
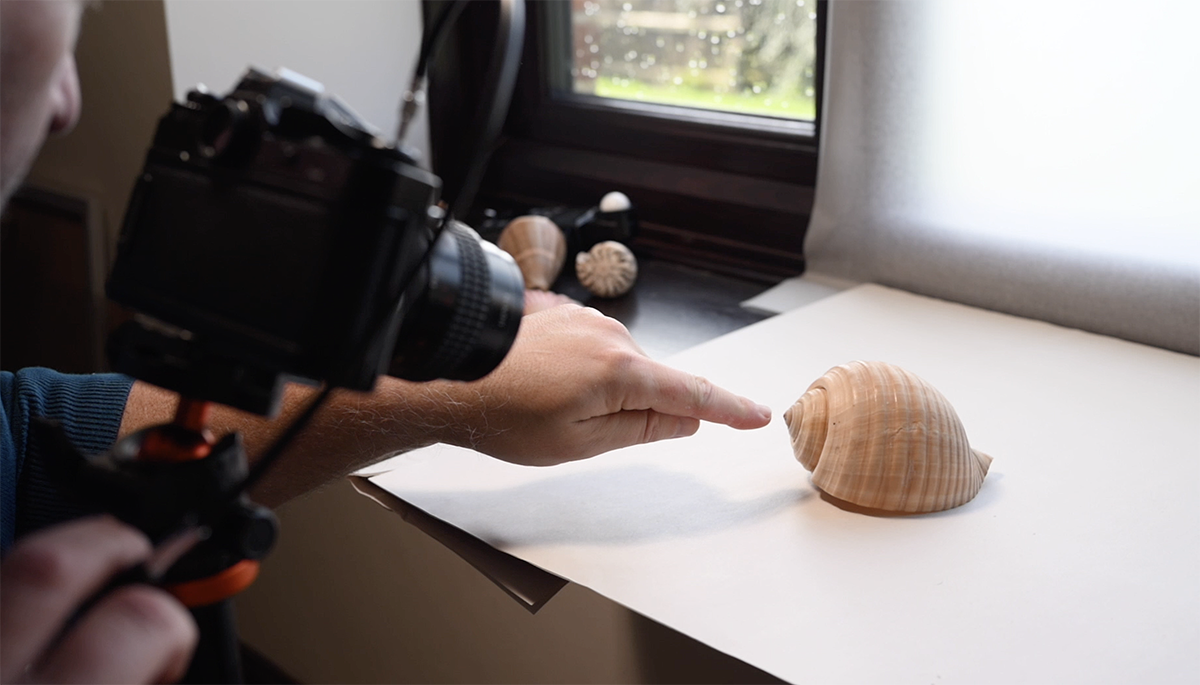
I placed the shells on white paper (It’s actually paper you get from take away food places, fish and chip shops which is off white) on a window sill, and diffused the light coming in using a sheet of parchment paper letting the soft, diffused light illuminate them. Capturing fine detail was my goal, but I couldn’t stop the lens down as much as I wanted because I was spreading hitting 1 second shutter speed and I wasn’t sure of the reciprocity failure times on this film so I stayed around f4 / f5.6, which was fine.
With the FM3A’s accurate metering, finding the correct exposure was a breeze but because the paper was about a stop brighter than the shell I decided to expose a stop over the metered exposure which worked well. I also used my Sekonic handheld meter to measure the light in between shell changes because the light outside was in and out of cloud.
Below is a prime example of why I wanted to get more depth of field.
This film is known for its banging contrast in bright conditions where highlights and shadows are found. I used a Colbor CL220R continuous light against a grey background for the next few photographs just to see how they would look.
The Development
This is where things get important. CMS 20 II Pro needs specialized development to unlock its full potential. I didn’t use the dedicated ADOX ADOTECH IV developer as recommended by the manufacturer. I went with what Neil Legg sent me, SPUR Nonotech UR. Pretty much the same stuff.
Because these films are such low ISO and the times we get to develop for 20 ISO means we are pretty much pushing the film and these developers are formulated for that purpose so we can achieve better tonality from the film being pushed than say using D76, ID11, Rodinal etc. Try to develop in these developers and the curve is diagonal! Contrasty!
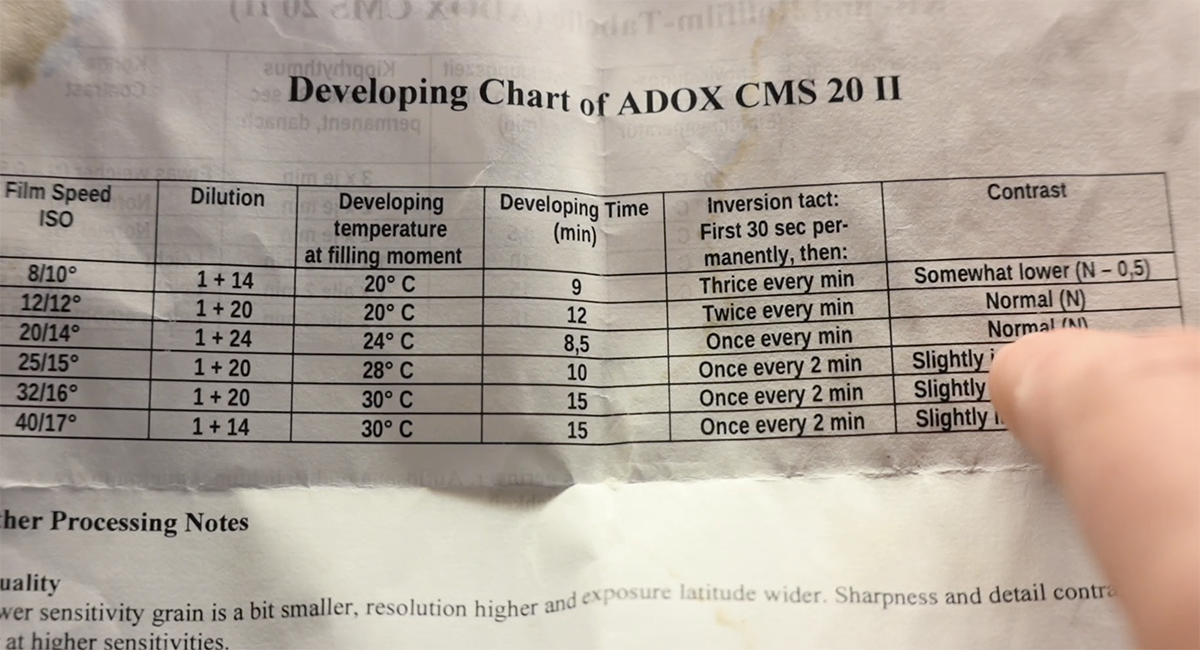
And with only 50ml in the bottle and diluting 1 part to 24 I’m only going to get 4 rolls developed from that bottle so it’s not a cheap way to shoot by any means BUT, for doing this sort of work once in a while and getting 144 photographs it’s not bad at all.
So using the SPUR chart below you can see I developed for 8.5 minutes.
The Results
Blown away is an understatement! I scanned the negatives myself using a Nikon ZF and the same 55mm Micro Lens with a 2x Teleconverter, and here’s what I loved:
- Mind-blowing detail: I could zoom into the scans and see textures even my naked eye couldn’t discern while shooting. The ridges of the shells, the subtle color variations – everything was there.
- Smooth tones: Highlights and shadows transitioned seamlessly. I loved the gentle way the light rolled off the shells’ curves.
- The “feel” of film: Even with all the resolution, there’s that certain organic quality to the images that I love.
I also took the negatives in the darkroom, which you can see in the video, and made a 10×8 Print which also looked fantastically detailed.
Don’t forget, for this shoot I was using a very good lens also!
Tips for Shooting ADOX CMS 20 II Pro
- Steady wins the race: Use a tripod! That detail won’t mean anything if your shots are blurry.
- Learn to expose properly: This film can be a bit unforgiving with exposure. A good light meter is essential.
- Develop with care: Don’t waste this film’s potential! Use ADOTECH IV , SPUR NANOTECH or something similar that is specialised for these films.
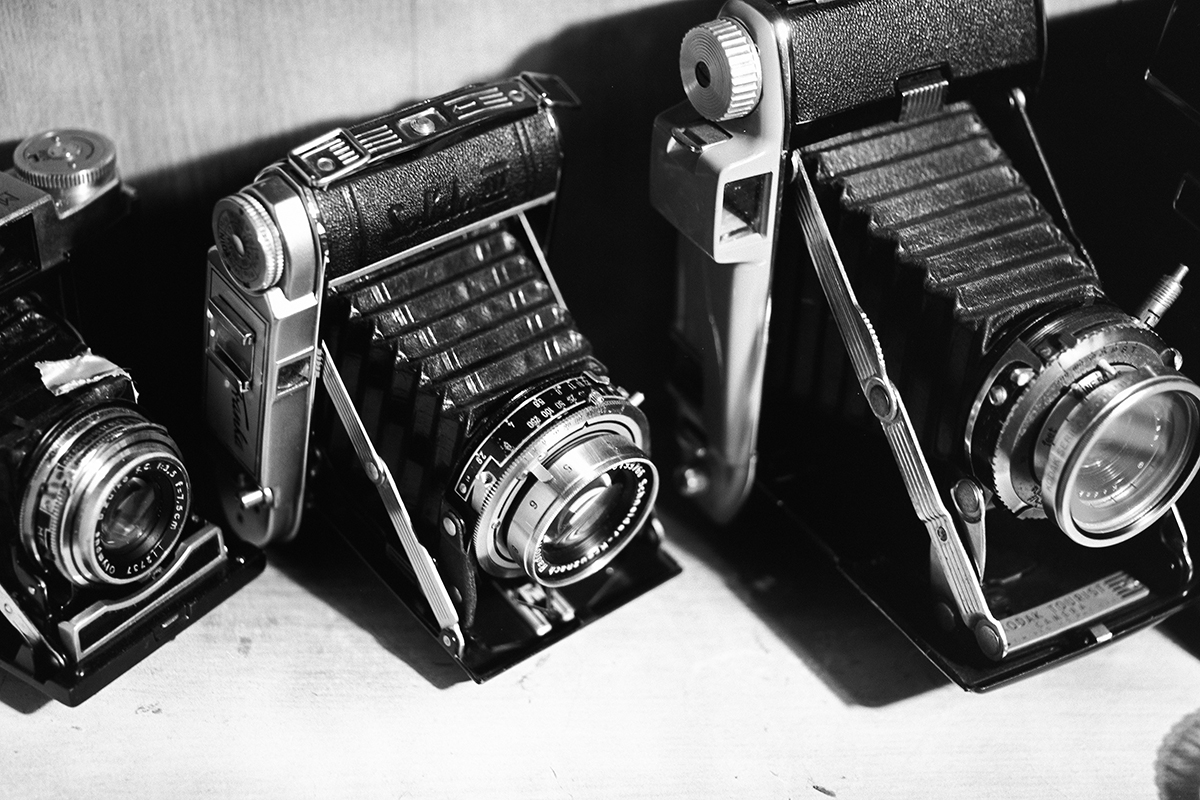
Finally a photograph I took of my folding cameras using the Colbor light.
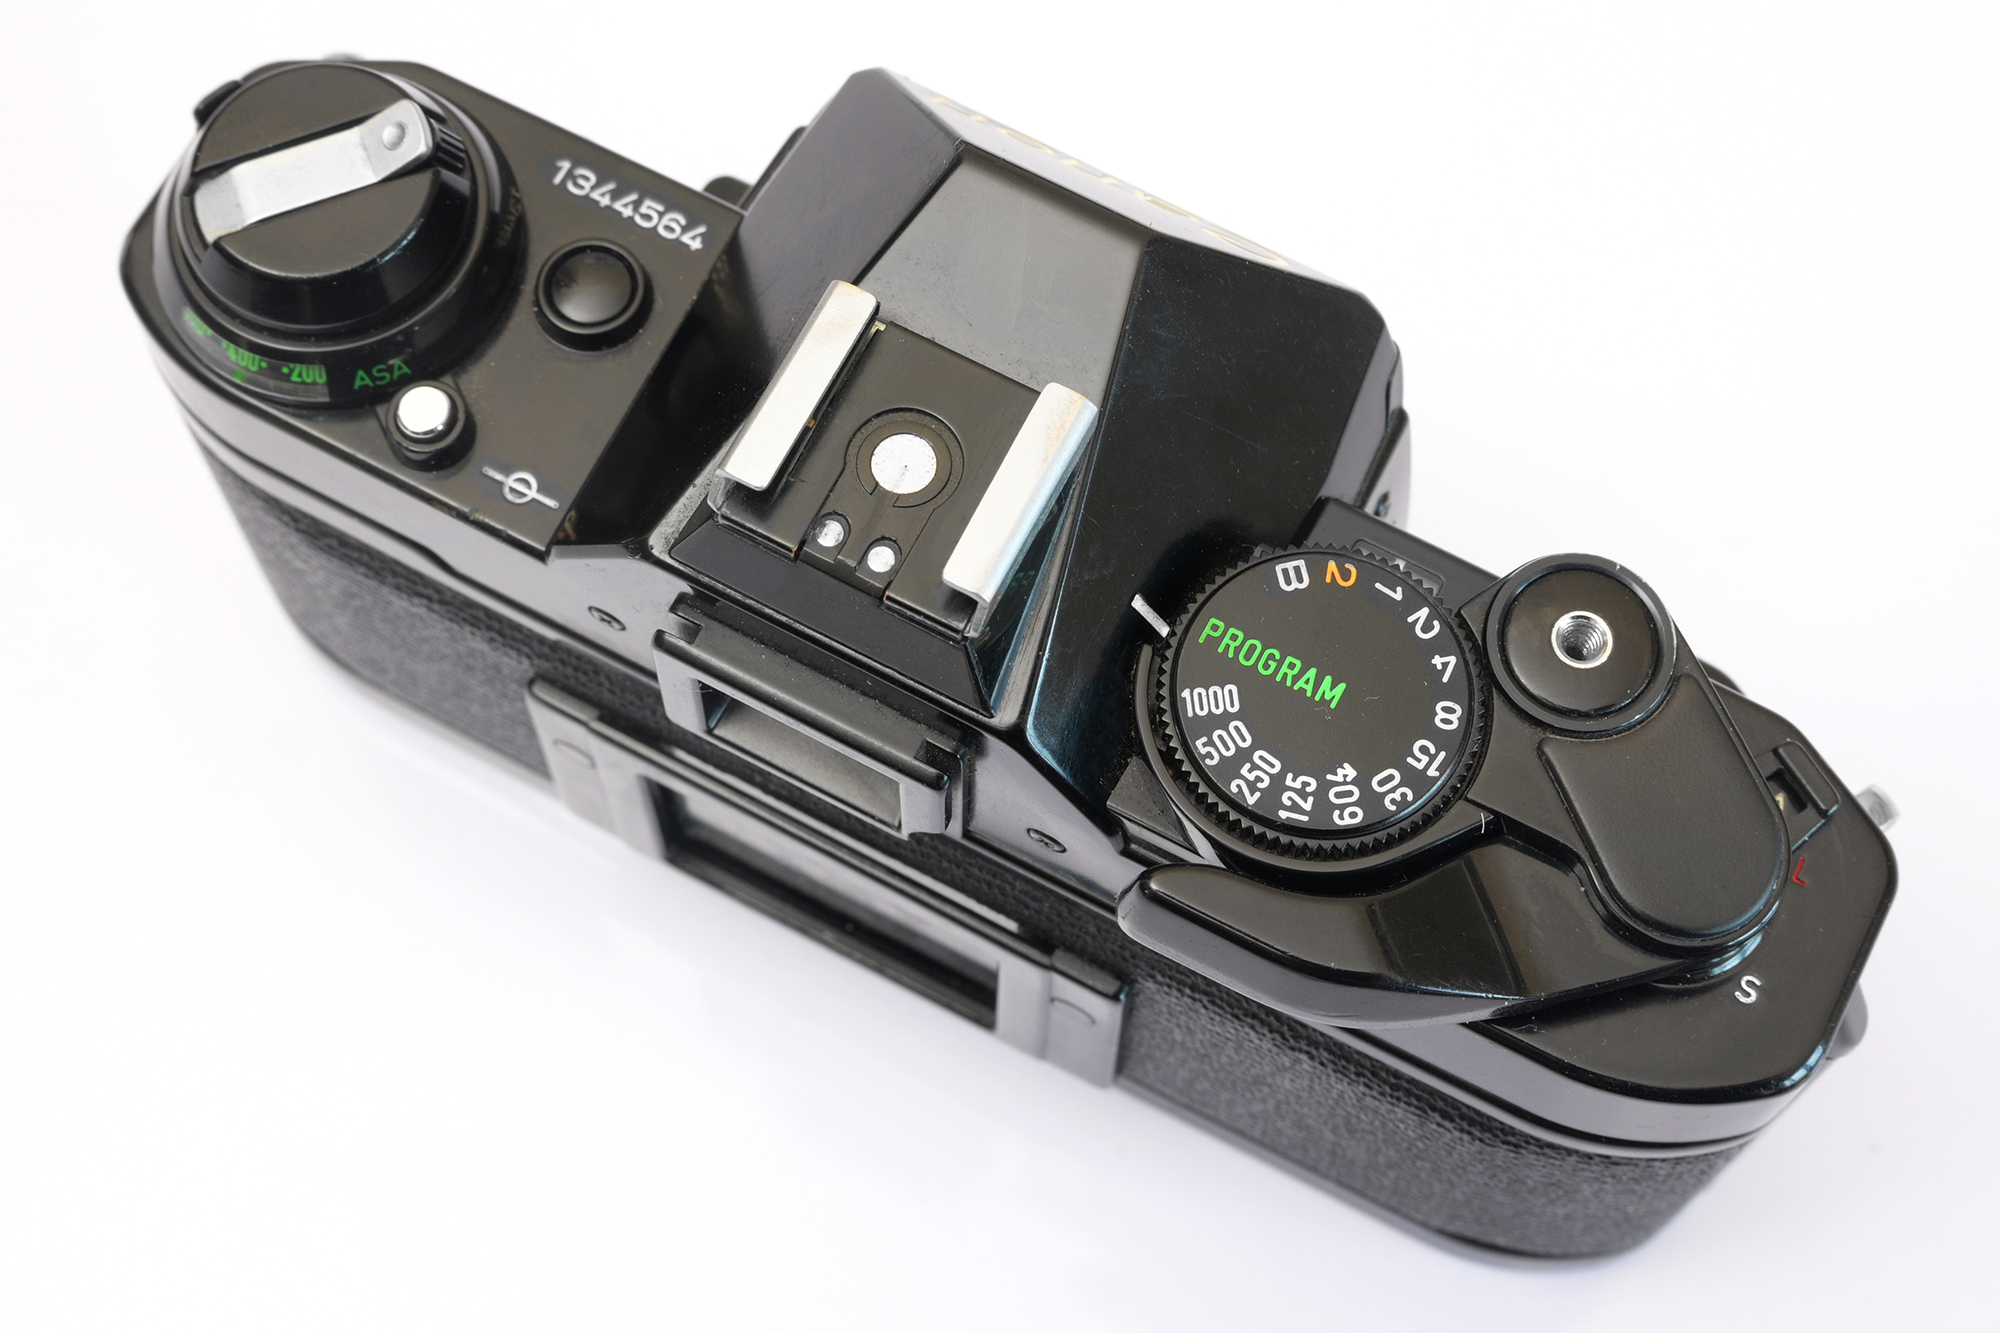
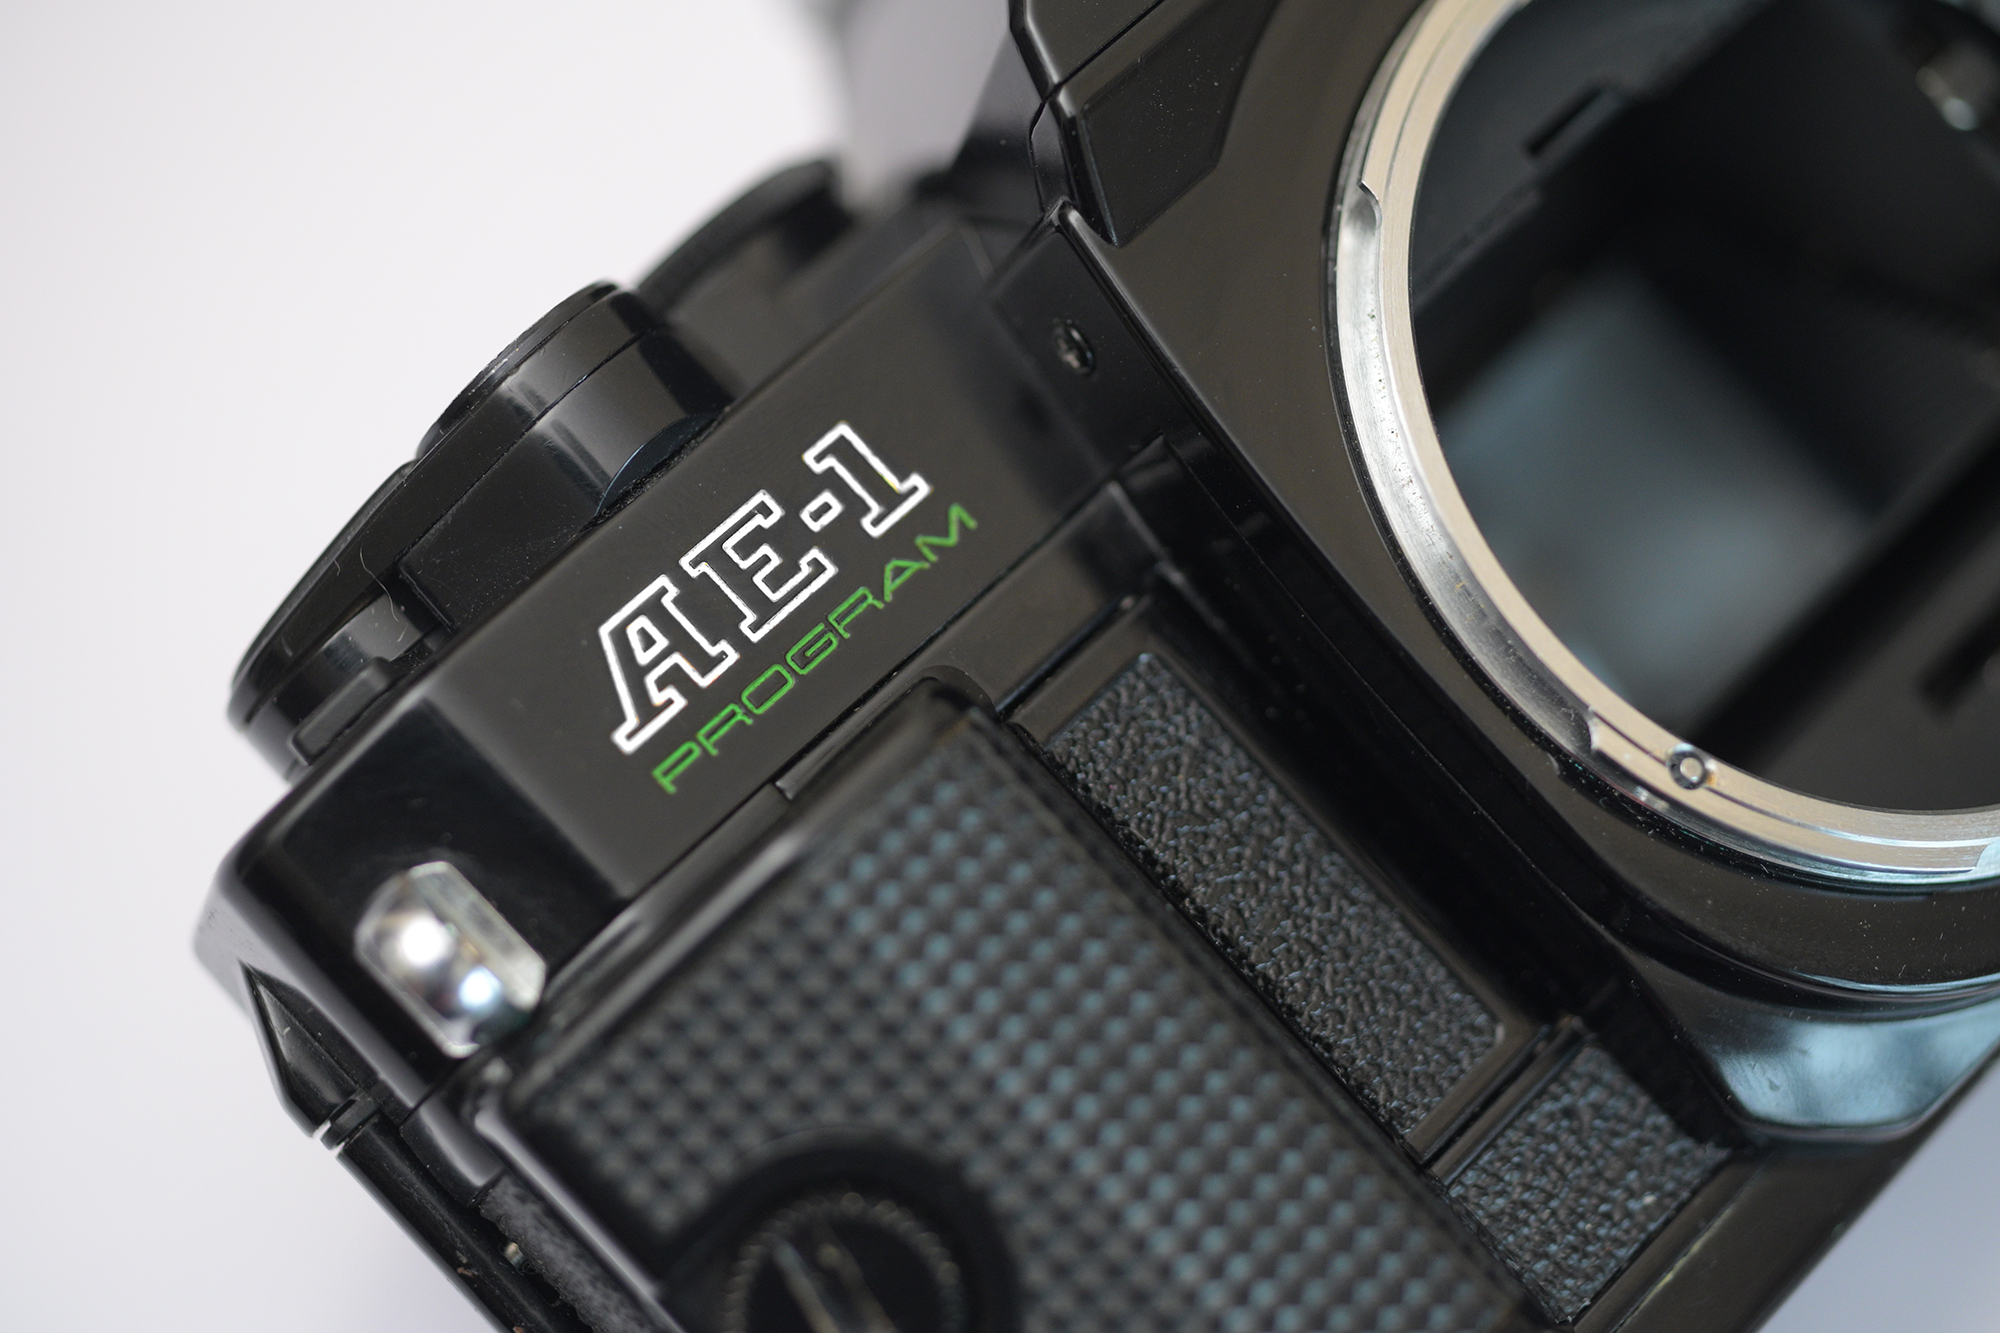
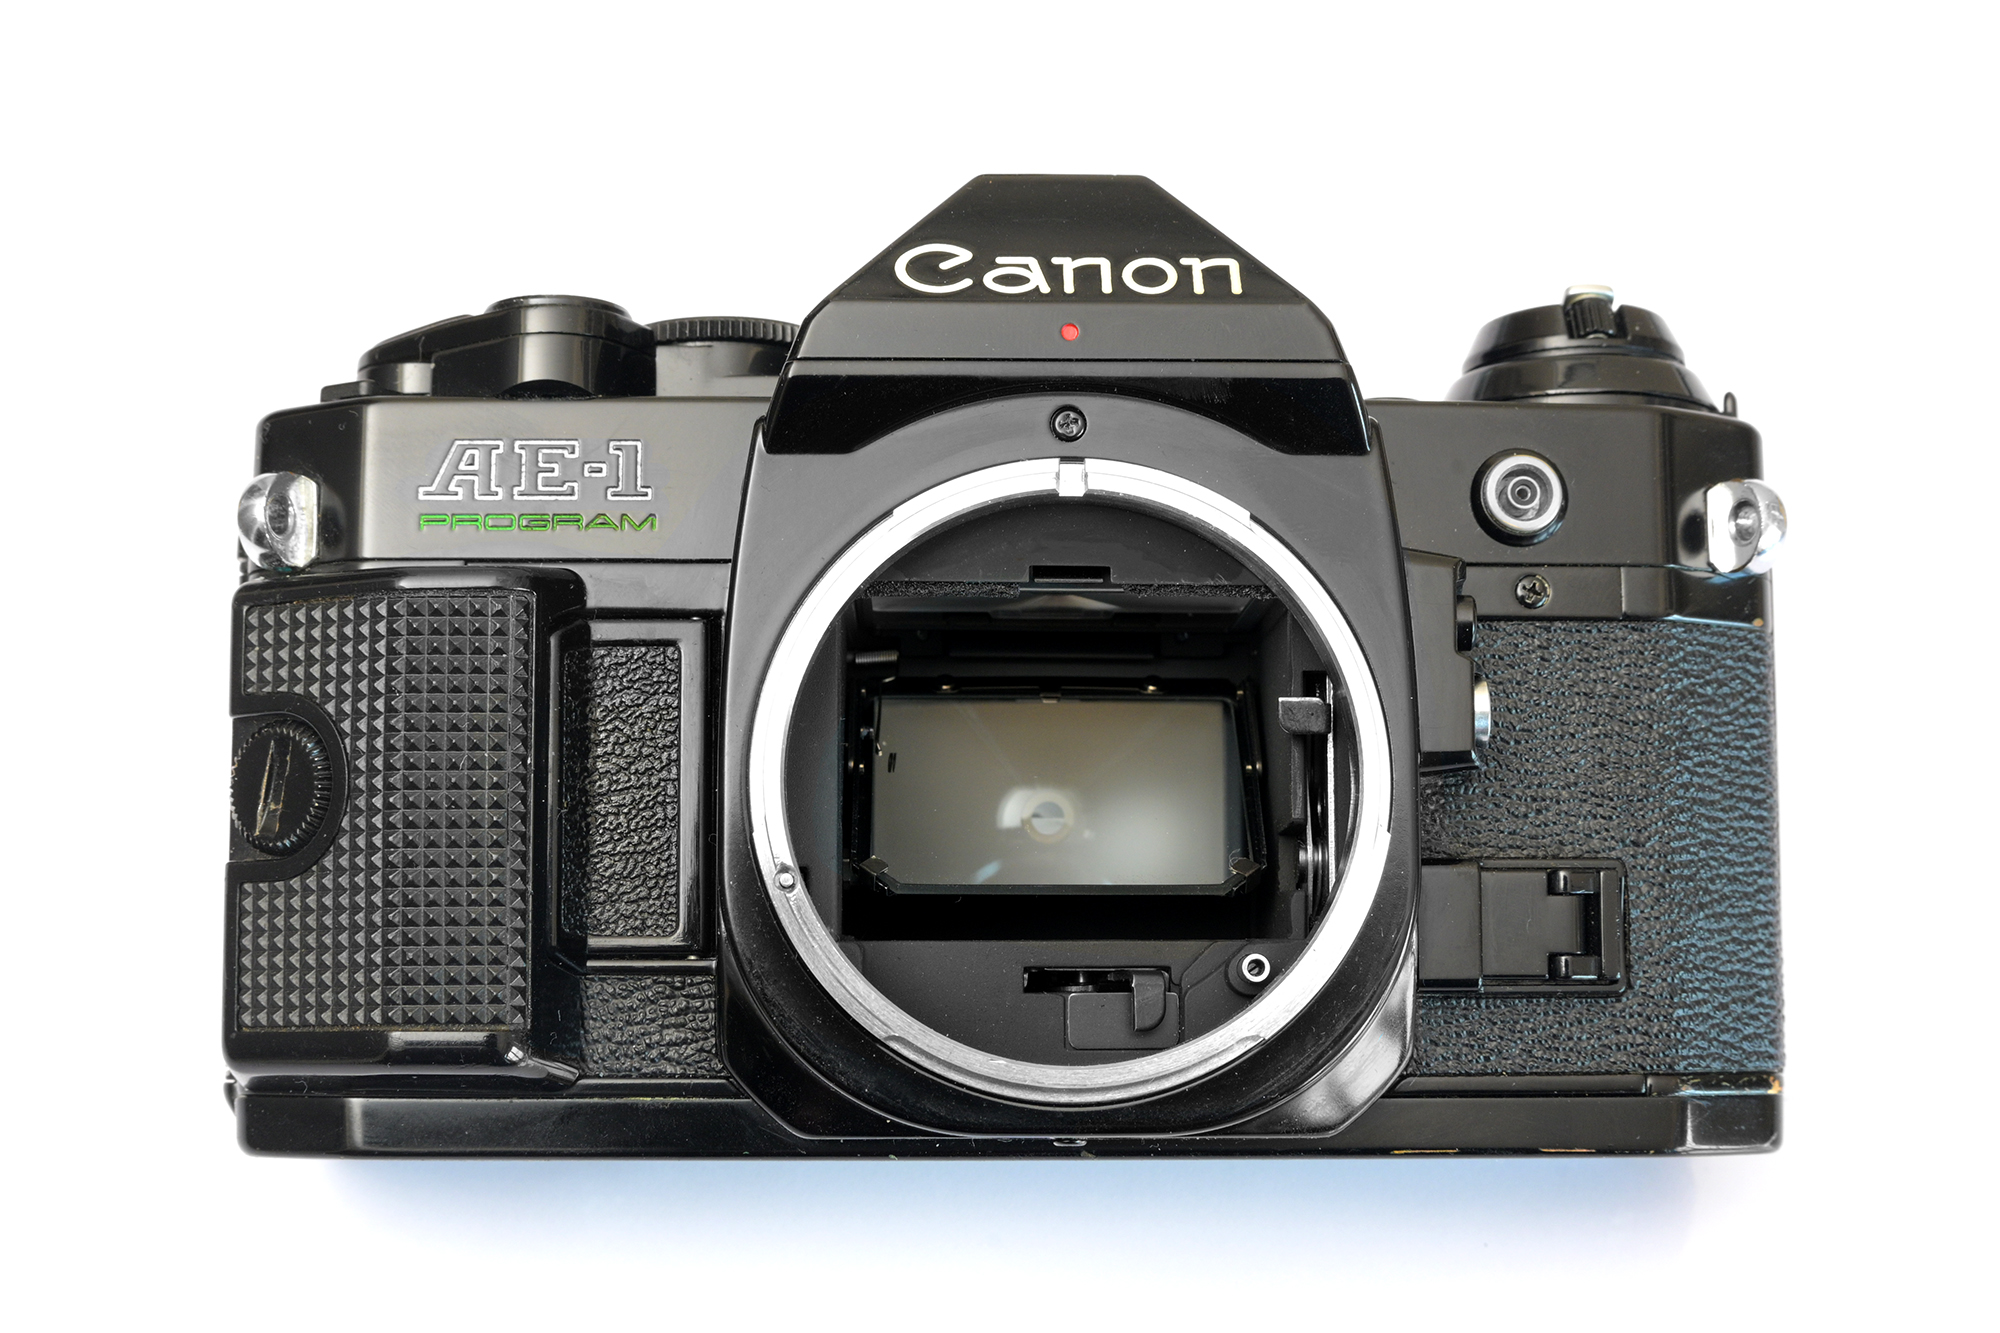
Canon AE-1 Program – A Timeless Classic!
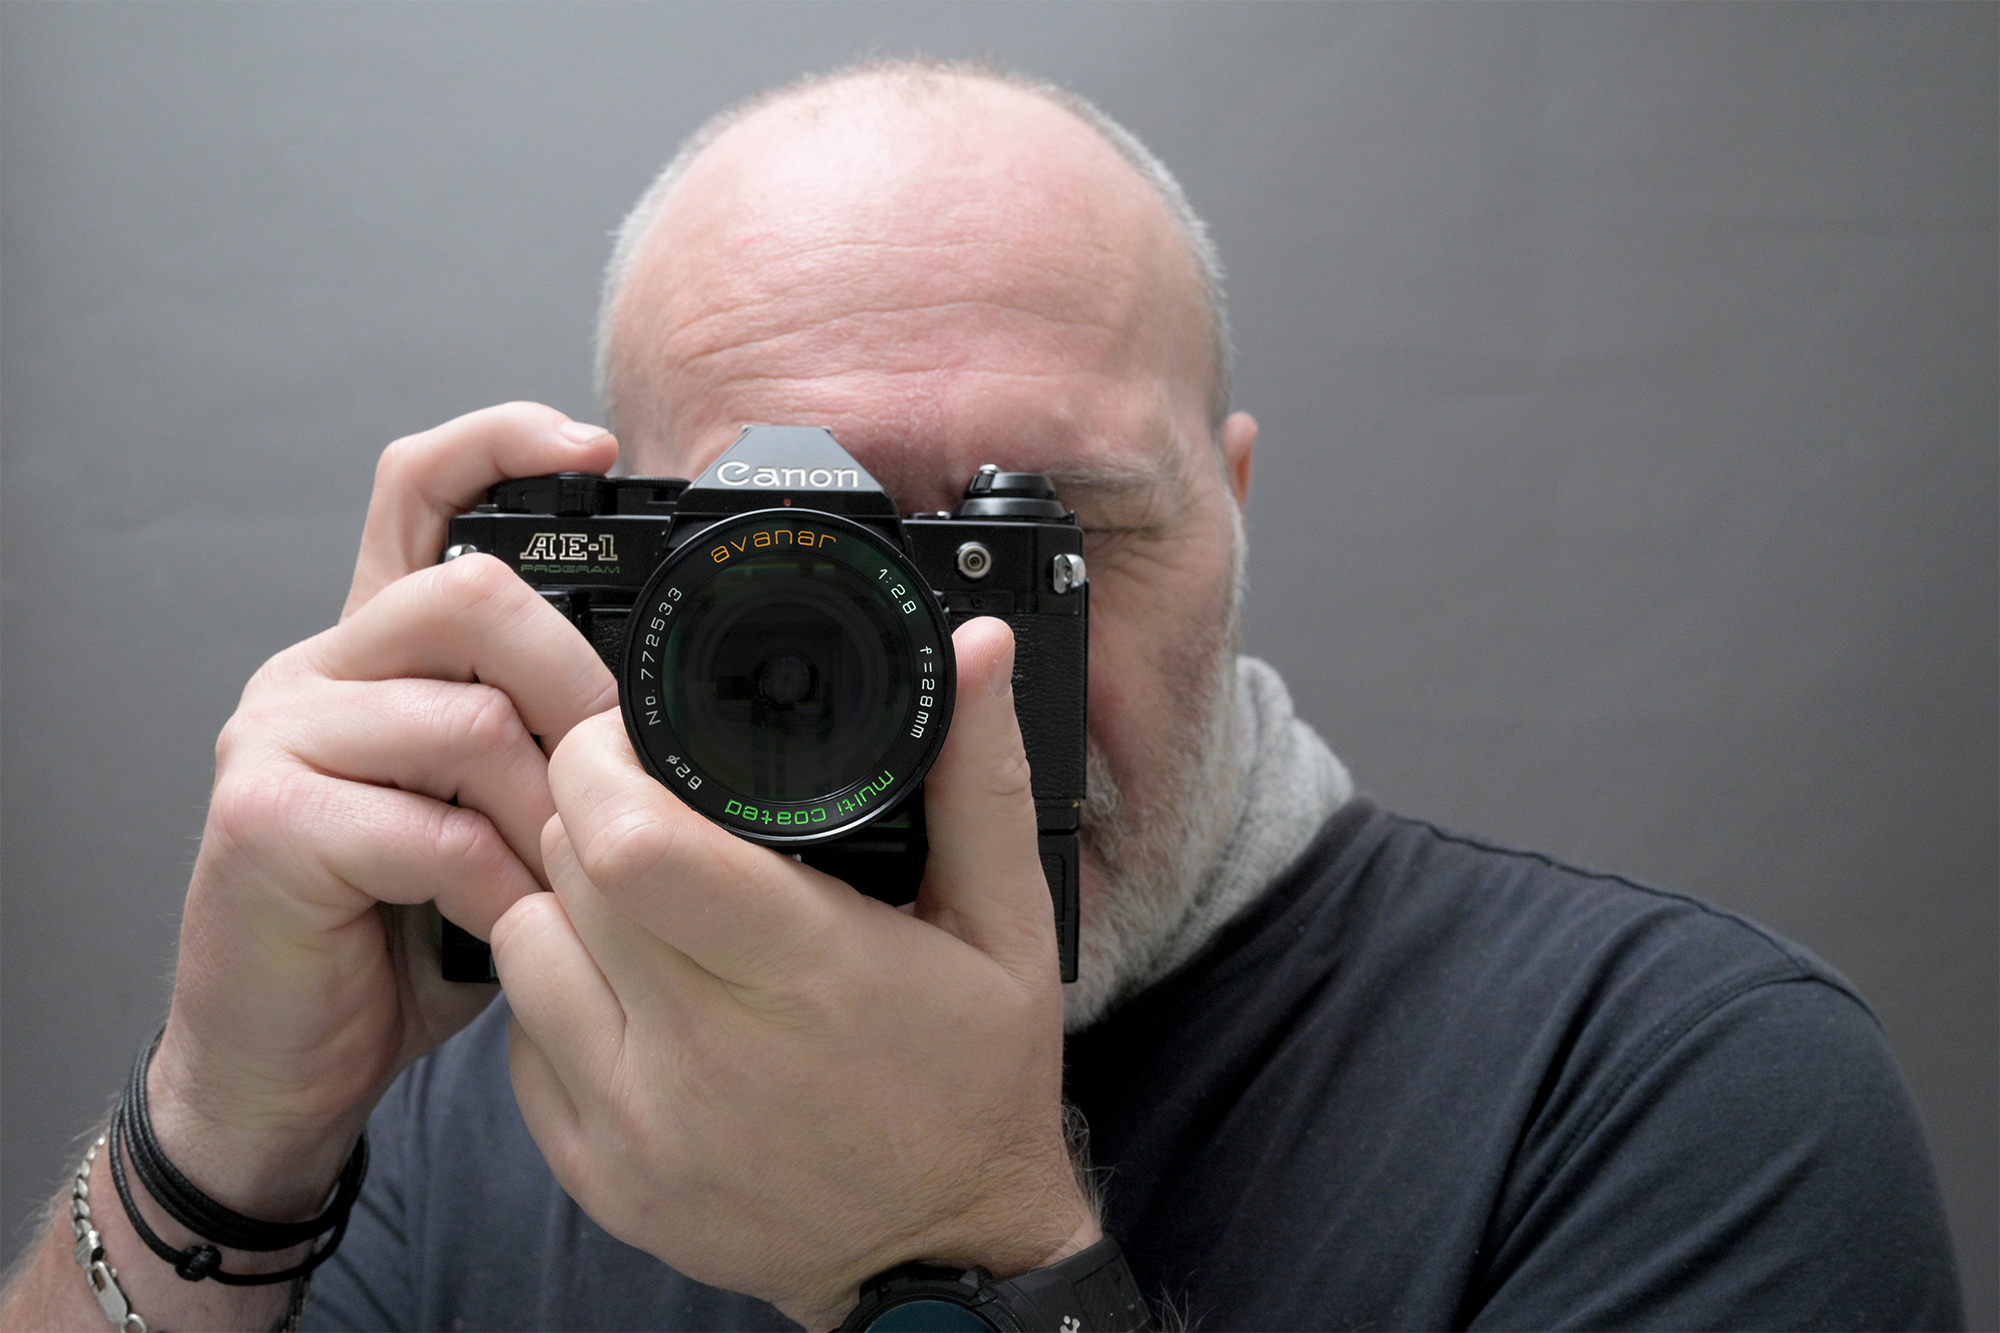
The Canon AE-1 Program: A Timeless Classic
The Canon AE-1 Program, released in 1981, revolutionized the world of 35mm film photography. Combining innovative features, ease of use, and remarkable affordability, this camera made high-quality photography accessible to a wider audience than ever before and became a runaway success, selling millions of units globally. Its enduring appeal lies in its unique blend of simplicity and functionality
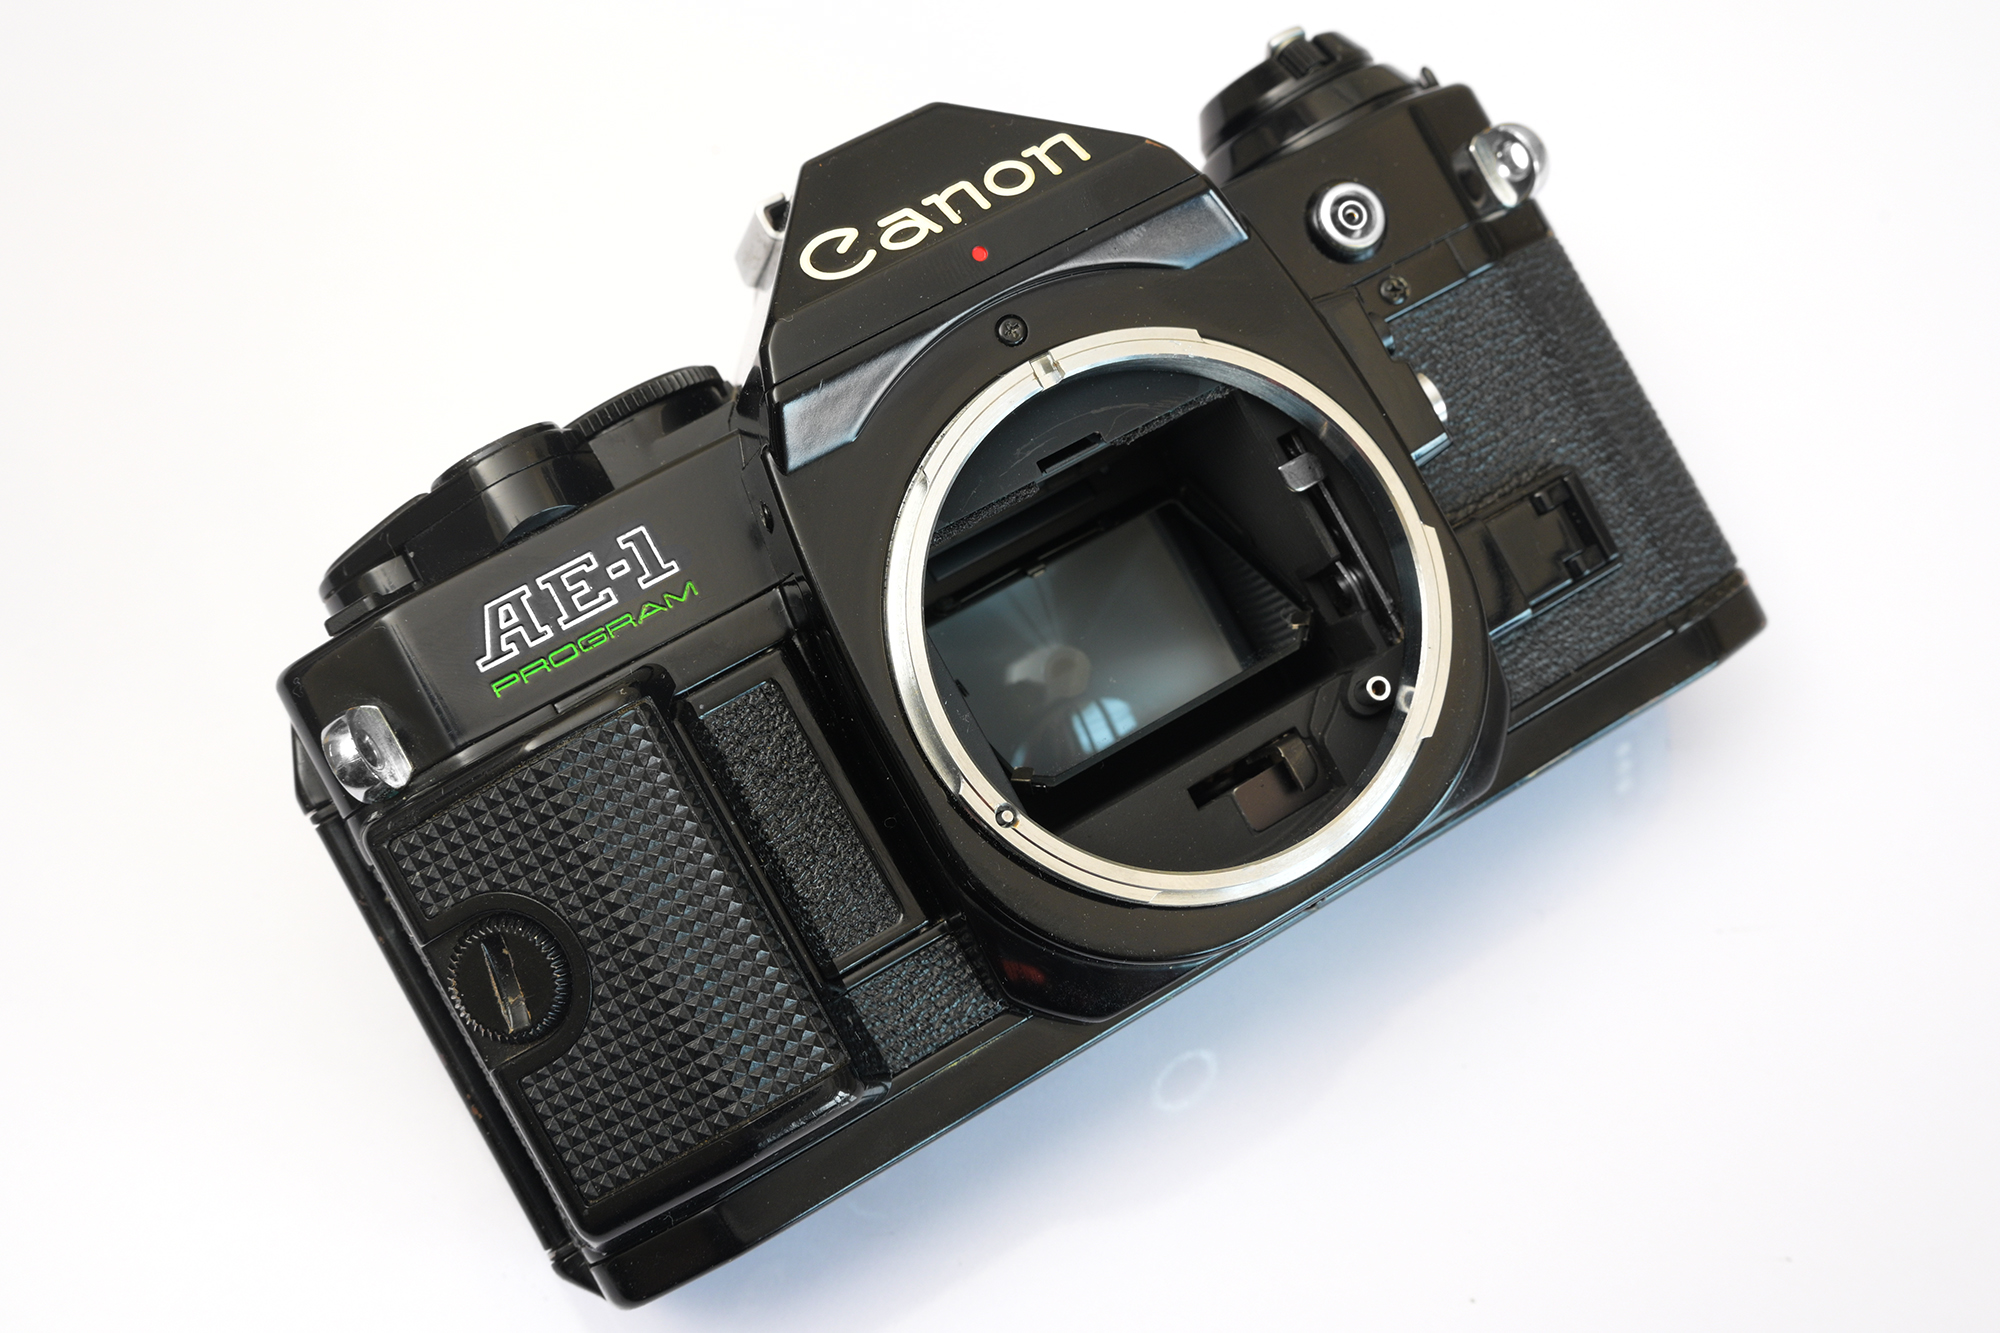
I’m lucky to have this one in my hands to play with. It’s not mine. I am looking over it and making sure it works before it is sold on. It was donated to a local charity, yet to be sold! Probably on ebay.
And so far so good! No leaks or shutter problems or mirror lock ups! However, the light meter appears to be slightly out. See my tests on my YouTube Channel
Canon designed it specifically with two groups in mind:
- Photography Enthusiasts: Beginners and hobbyists sought a high-quality camera that wouldn’t overwhelm them with complicated controls. The ease-of-use, Program mode, and clear feedback in the viewfinder made the AE-1 Program the ideal guide for people wanting to improve their photography skills.
- Experienced Shooters: Seasoned photographers also appreciated the AE-1 Program. Its shutter priority mode allowed full creative control over shutter speeds for specific effects. Moreover, it served as a lightweight and affordable backup body for those with more complex pro-level gear.
Using the Camera
Despite it being complex for the time it is very easy to use in most enthusiasts hands. Unless the battery runs out! Yup. It needs a battery to function. No battery and the camera won’t even fire.
But with a fully loaded (4LR44) Battery, available online, the camera comes to life and offers anyone using the camera a no nonsense photography experience.
The camera is comfortable to shoot, like many other cameras of similar design, and for extra comfort the camera allows the Canon Power Winder A to be fitted for a better grip and the added bonus of automatically advancing the camera.
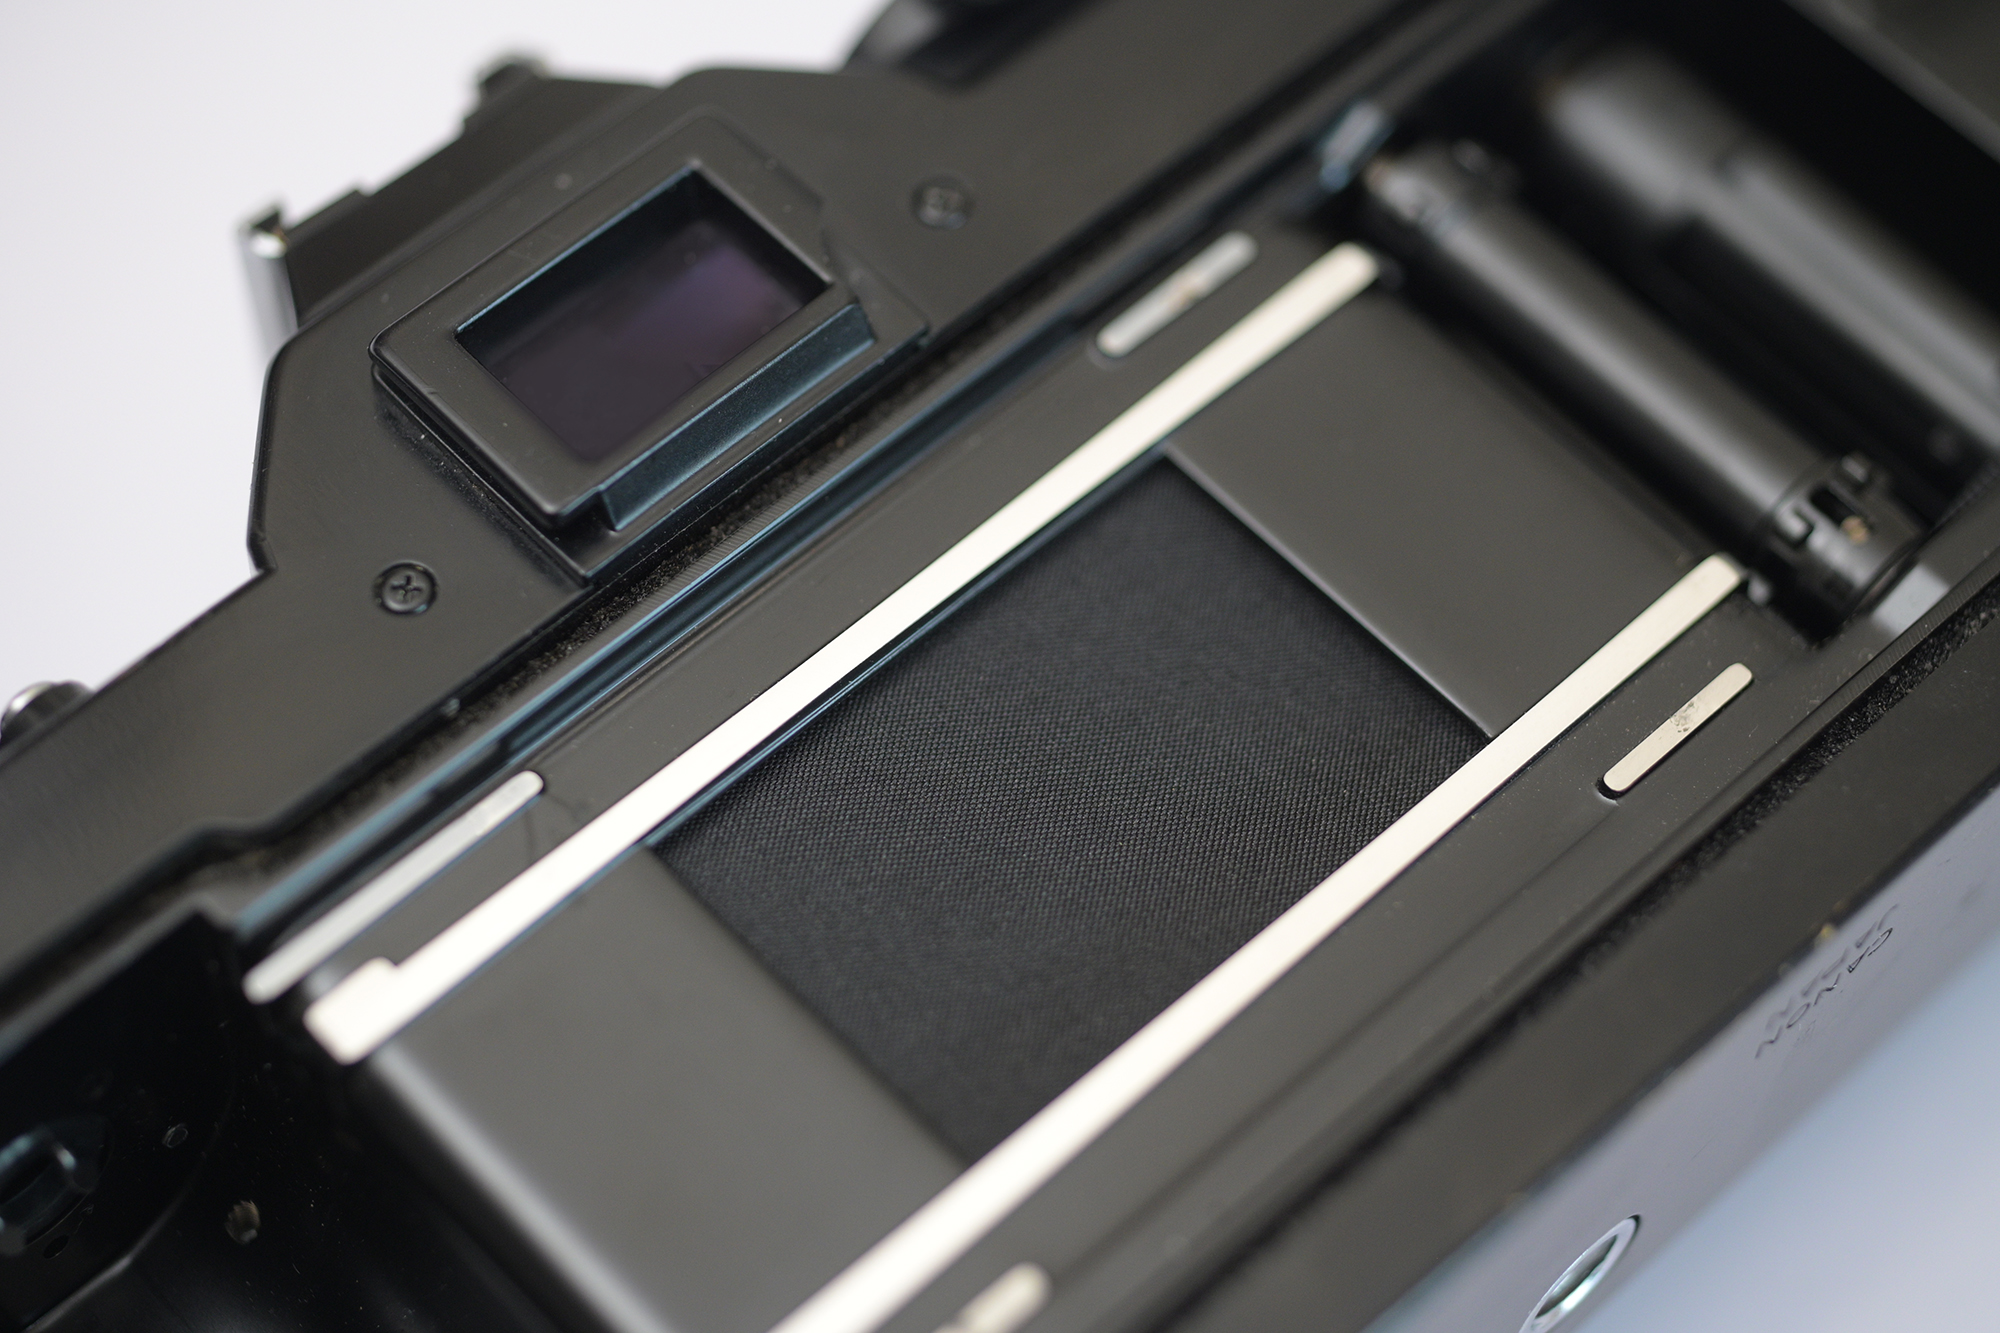
The speeds range from 2 Seconds all the way to 1/1000th and has Bulb Mode too for long exposure photography and has an electromagnet controlled cloth curtain shutter that limits top shutter speed to 1/1000 and a slow flash sync speed of 1/60 second. I’m not sure how this curtain holds up to those horrid sunlight burnt pinholes you see in other cloth shutters but with care should last a lifetime!
Shooting Modes (Program)
Fully Manual
You can use the camera in fully manual mode if you’re feeling confident meaning you control the Shutter Speed and the Aperture for your exposure.
Inside the viewfinder a little “M” is visible warning you that you are in DIY mode.
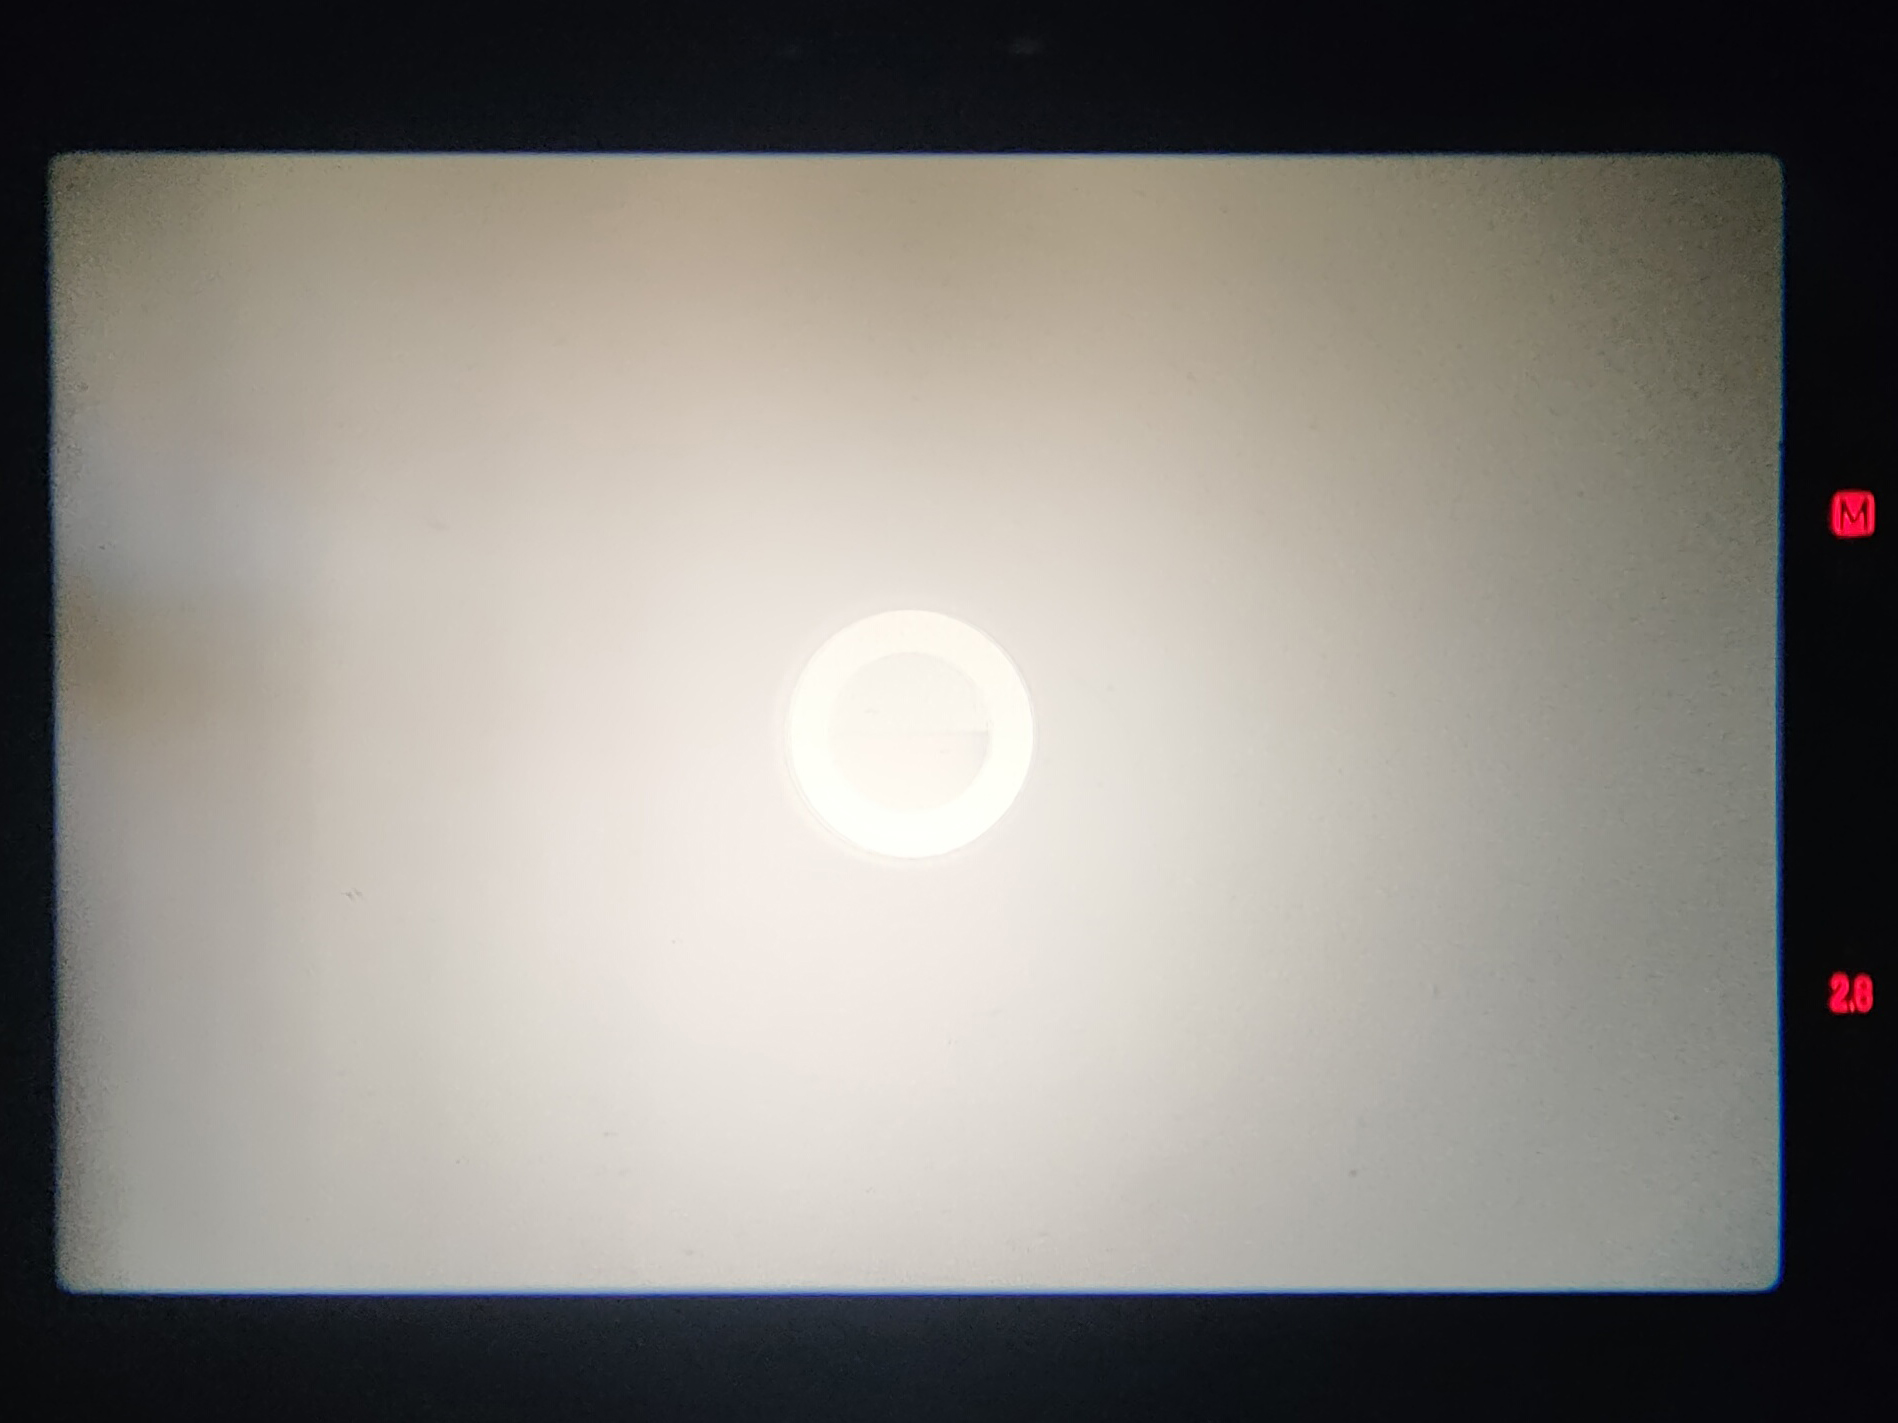
Also inside the viewfinder the camera will tell you the best aperture to use for the speed selected in that scene. So for example if you choose 1/125th shutter speed and you choose F11 on the aperture ring and inside the viewfinder it says F5.6 that means the camera is telling you the correct exposure. You can either adjust the aperture or shoot as you were. The camera won’t override your judgment in fully auto mode.
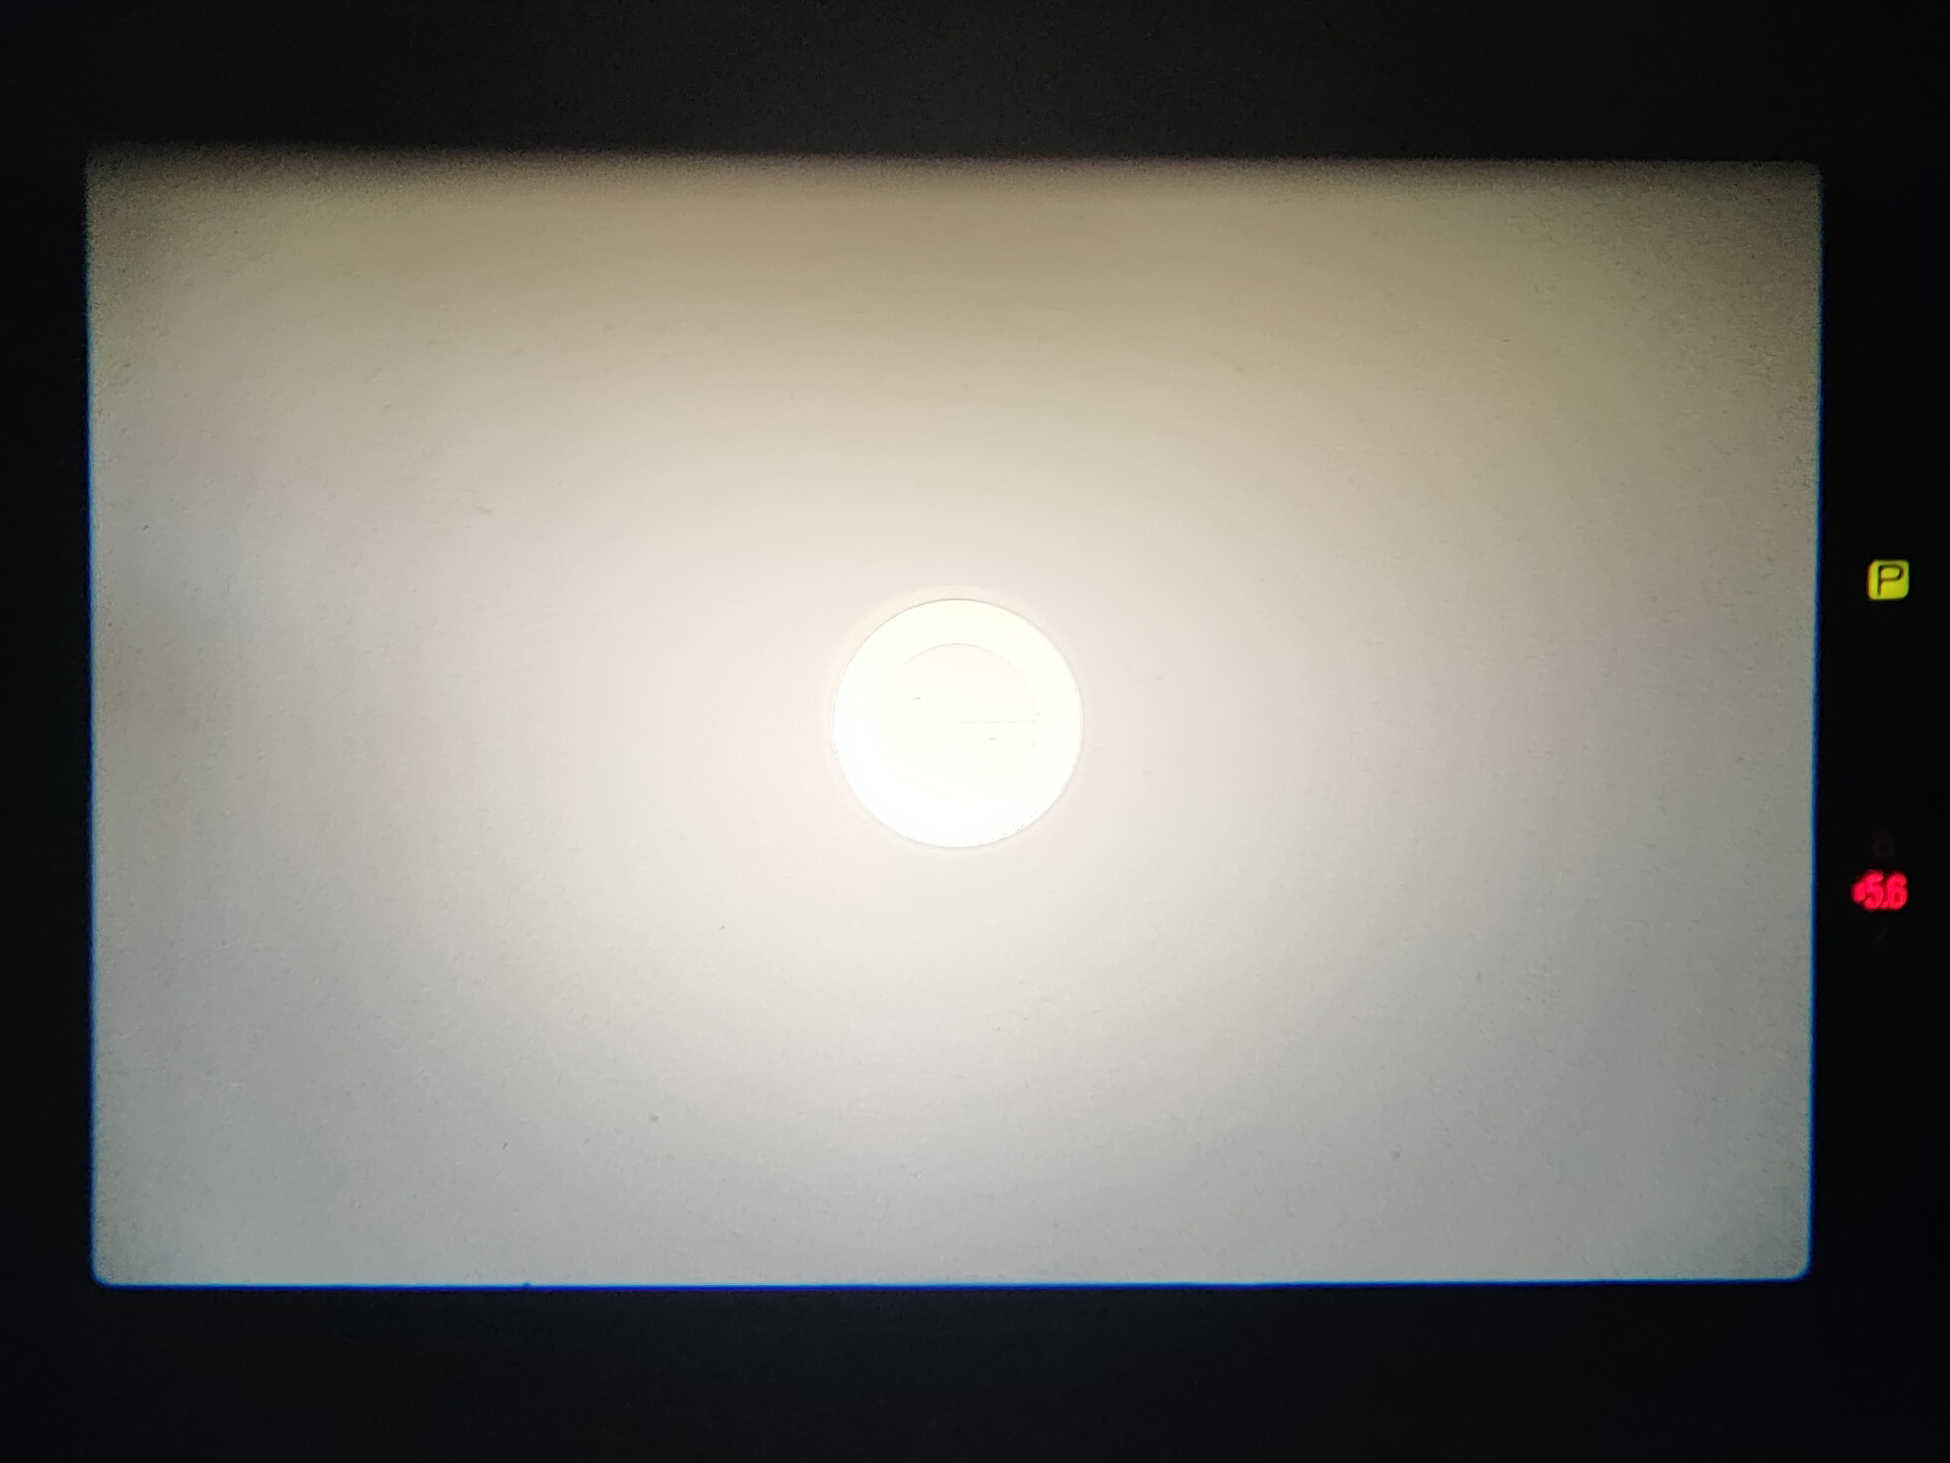
Program Mode
Or you can switch it into “Program” mode and choose the “A” Setting on the lens, (or indicator on other FD lenses), and the camera turns into a highly effective automatic exposure camera where it will select the best shutter speed and aperture for the scene you want to shoot.
A little “P” is seen in the viewfinder to show you are in Program Mode.
Shutter Priority
Or you can take it off program mode and select whichever Shutter Speed you want and the camera will decide the best Aperture for you. For this to work you need to set the aperture ring on the lens to “A” or which other indicator is on your lens.
There is NO Aperture Priority on this camera. Meaning that whatever you do in any of the Auto Functions the camera will always select the aperture for you.
What does the shutter speed do?
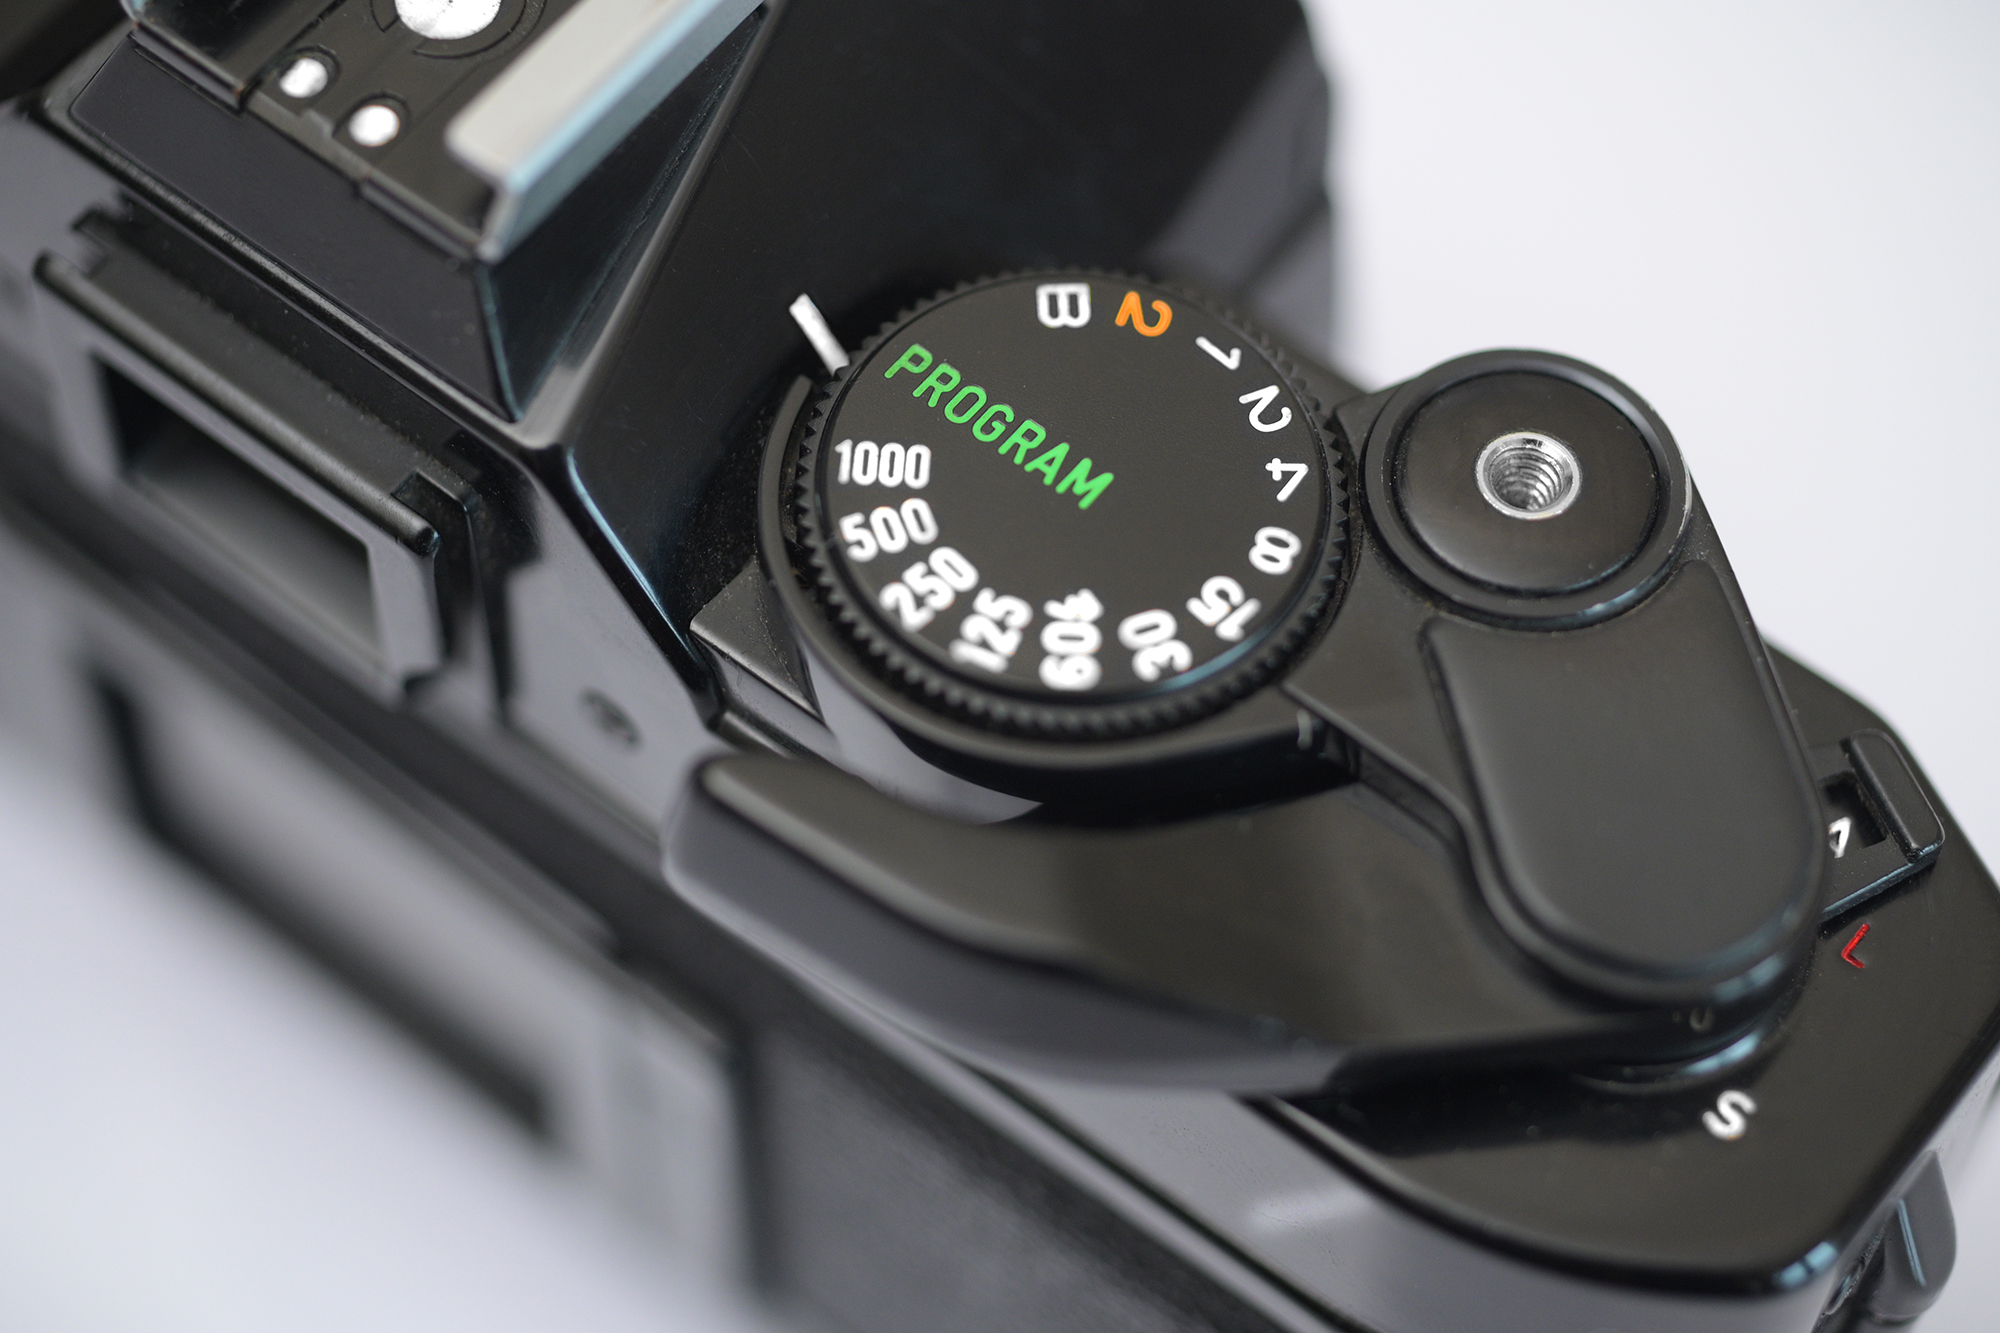
On the shutter speed dial there are numbers. They are to select the speed of the cameras shutter curtain opening and closing in fractions of a second. If you choose 1 Second (1). Then when you take a picture the cameras shutter curtain will remain open for 1 full second. Thats quite a long time in photography.
Imagine you are taking a photograph of a person walking their Dog. If the camera exposed them for a whole second all you would see would be a blurry mess. Because for that whole second the film was being exposed and anything moving in the scene, including your camera shake, and would imprint on the film as blurry or streaky.
That speed is perfect if you are using a tripod and want cars in motion. Your scene would be perfectly still and the cars would have this streaking effect.
If you choose 1000, which means 1 thousandth of a second, the cameras shutter curtain would open and close faster than your eye can blink. Very fast! Meaning whatever you take a photograph of it will literally be frozen in action.
Most of the time 1/250th is perfect for freezing people walking if you were doing street photography for example. Or a portrait 1/125th would be adequate where your subject isn’t moving.
The photograph below was taken at 1/125th of a second. You can see the person holding the child is slightly blurry. They moved toward the fencing pretty quick. Quicker than the people walking in the background. If that was taken at 1/250th they would have more likely have been sharp.

Once you start to drop below 1/125th to say 1/60, 1/30 and especially 1/15th if you have not got a steady hand then you’ll need a tripod to avoid blurry photographs from your hand shake.
And that is what this camera is all about. Shutter Speed Priority. You can be as creative as you like with the shutter speed and the camera will always correct the exposure by controlling the aperture for you. If the scene is too dark or too bright the camera will still let you take a shot but will give you warnings inside the viewfinder.
Exposure Warnings
If you are using the camera in Fully Manual or Shutter Priority mode the camera has warnings inside the viewfinder for overexposure and underexposure.
In Fully Manual mode and Shutter Priority mode, if your scene is too dark for the settings dialled in to the camera the largest aperture will flash inside the viewfinder. F2.8. f1.8, f1.4, f1 depending on your lens.
If your scene is too bright the smallest aperture will flash, F32.
Also it’s worth knowing that if you are in fully auto mode (Program) and the scene is not so bright and the camera needs to select a shutter speed less than 1/30th of a second a little “p” will flash inside the viewfinder to warn you there is a possible chance of camera shake.
Other than that, in program mode, you don’t have a clue what shutter speed the camera is set to. It only tells you the aperture. Which I think is a shame.
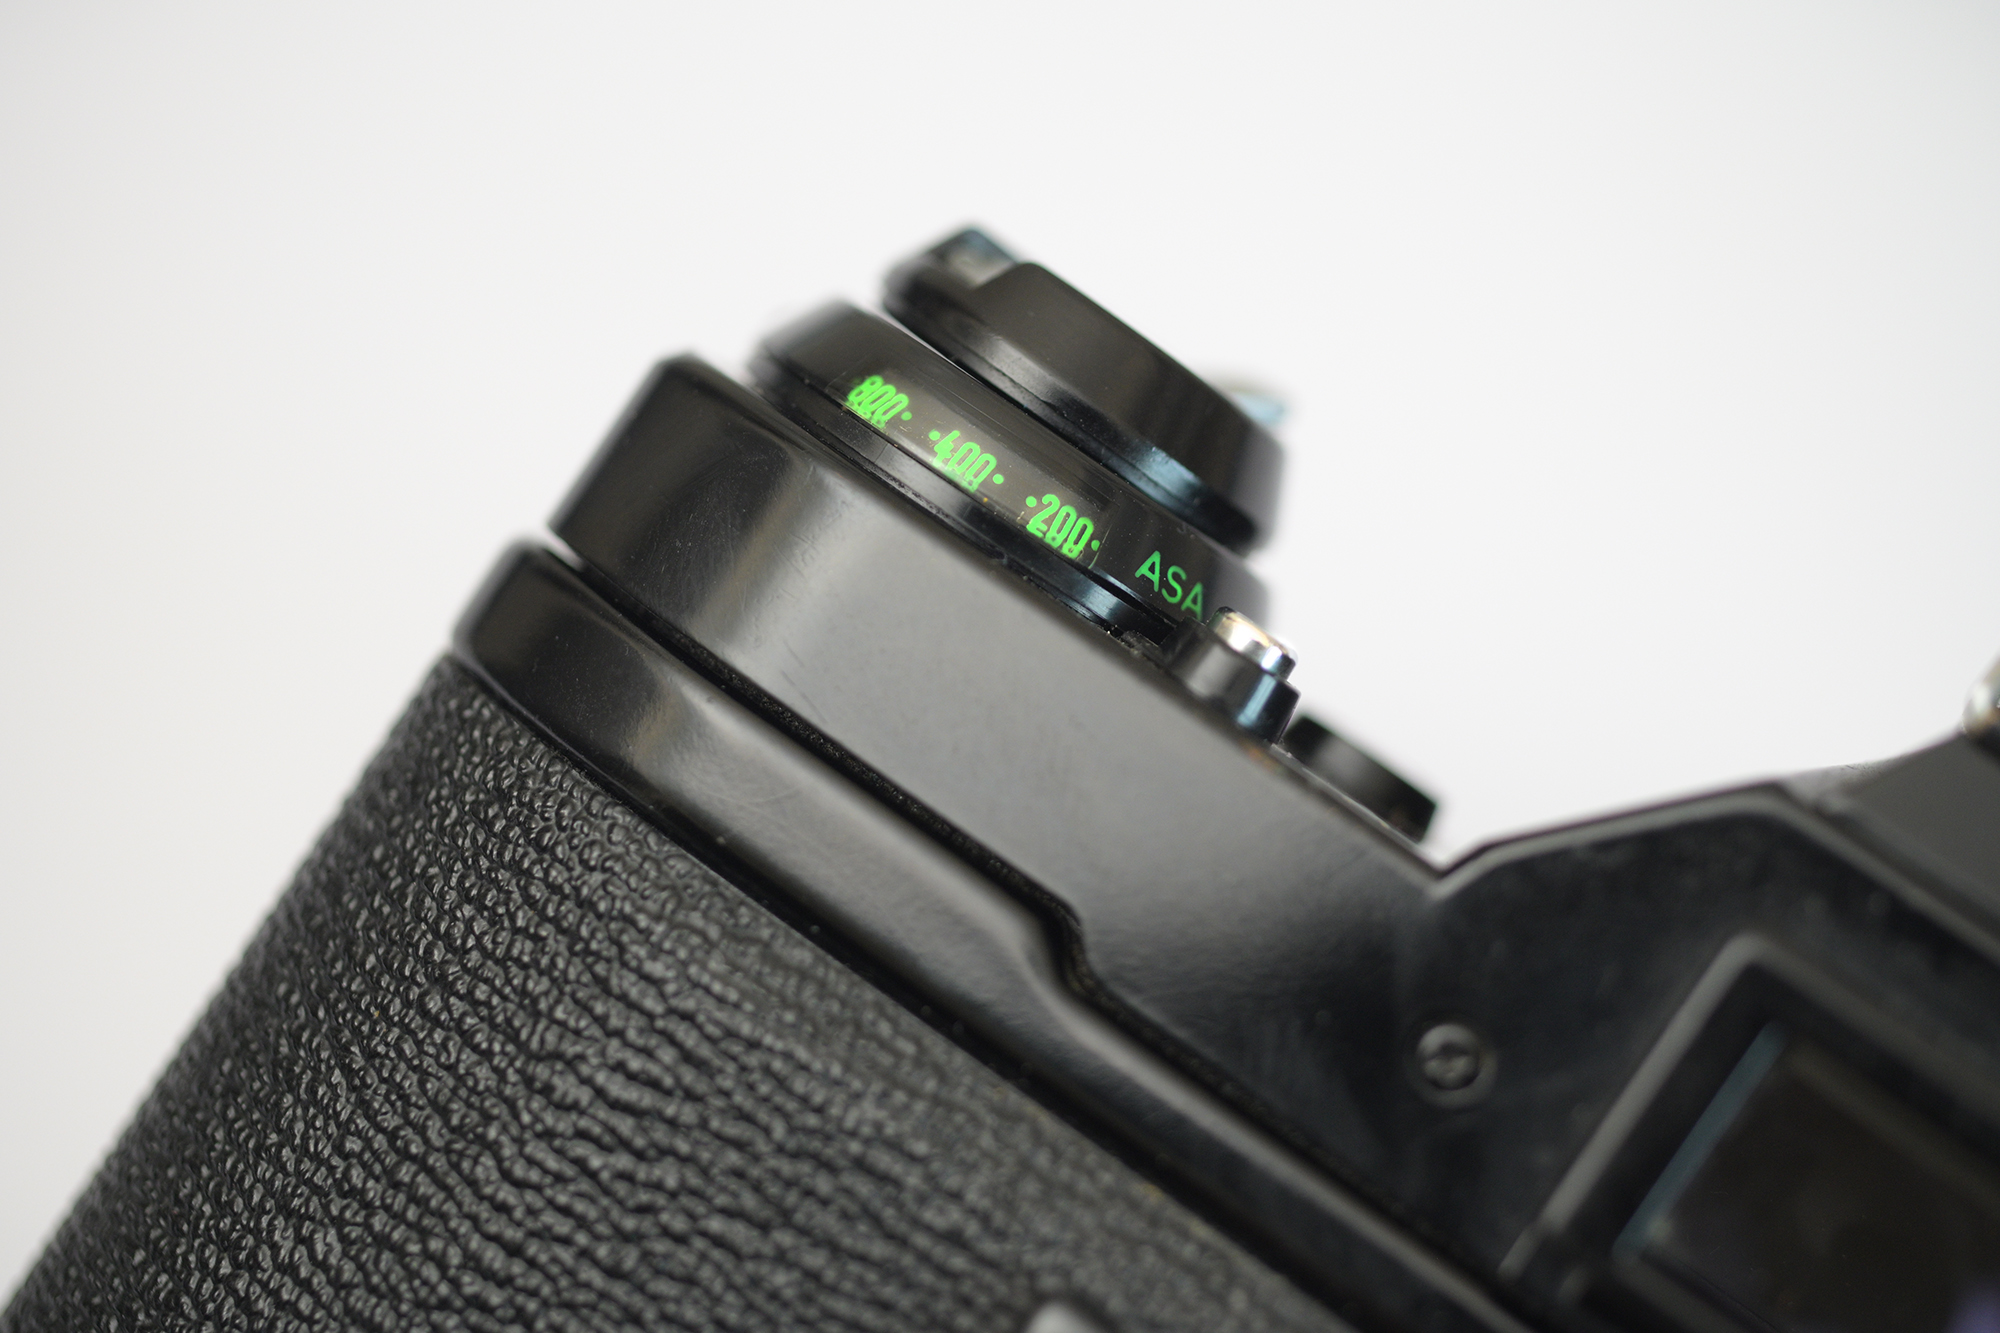
And with all this the ISO/ASA film selector ranges from 12-3200.
Viewfinder
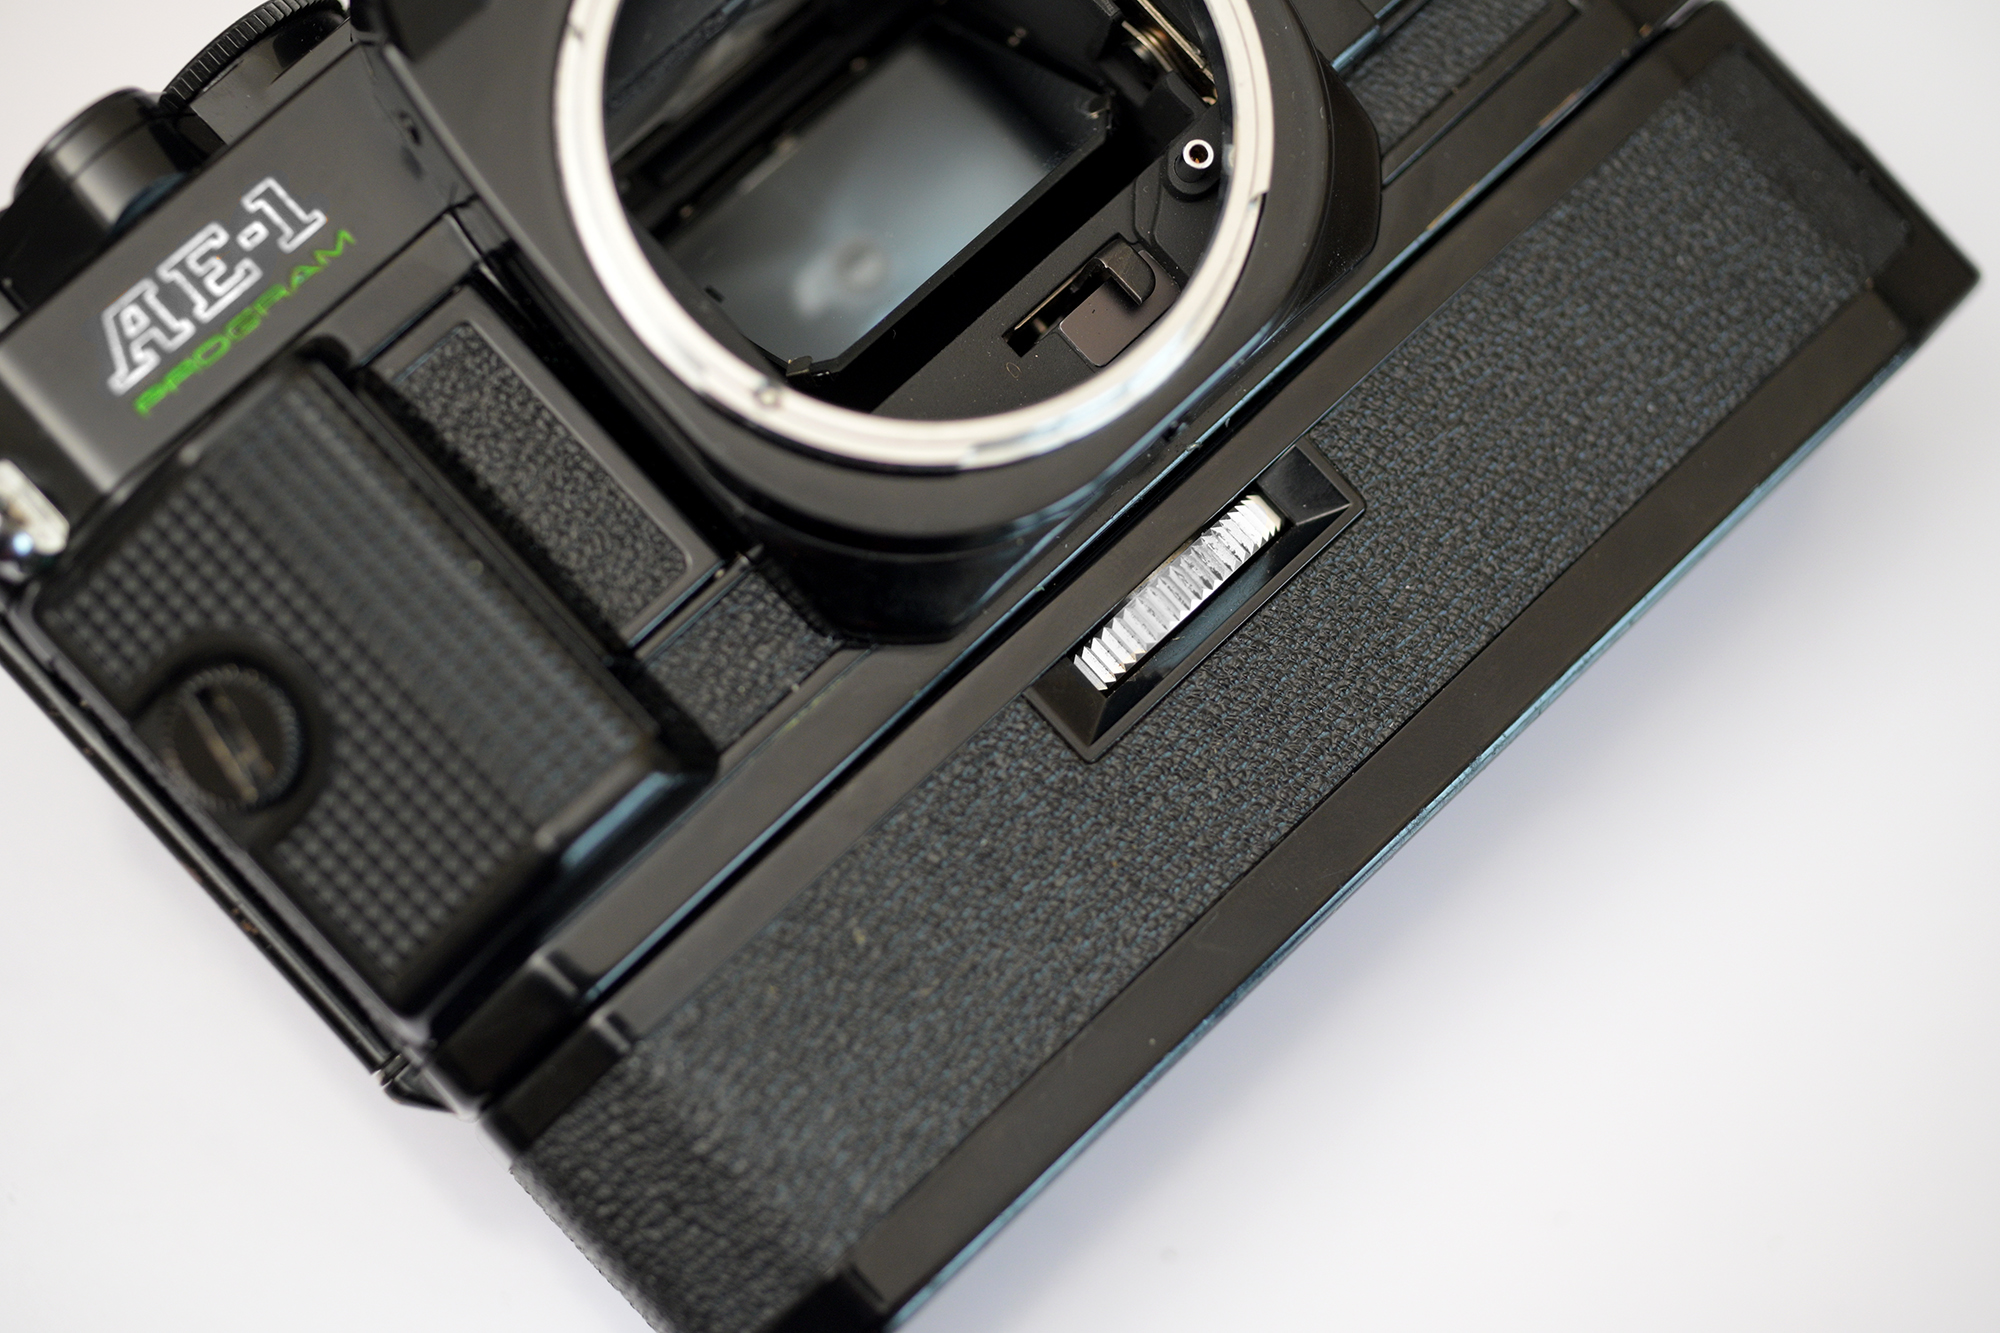
The AE-1 Program supports interchangeable focusing screens and there are eight different screens available including the standard screen which is on this camera with a Split Microprism rangefinder. Unlike the Canon A1 which also has interchangeable focus screens and had to be replaced by a specialist the AE-1 Program can easily be changed by the user.
Depth of Field Preview
The DOF preview button, which you can see next to the lens mount is a push and lock system meaning you can lock it in place and take your finger off.
And whilst we can see the front of the camera it’s worth mentioning it takes Canon FD Mount Lenses for which there are plenty out there to find. Unfortunately this camera came with no original Canon lenses.
Top Features
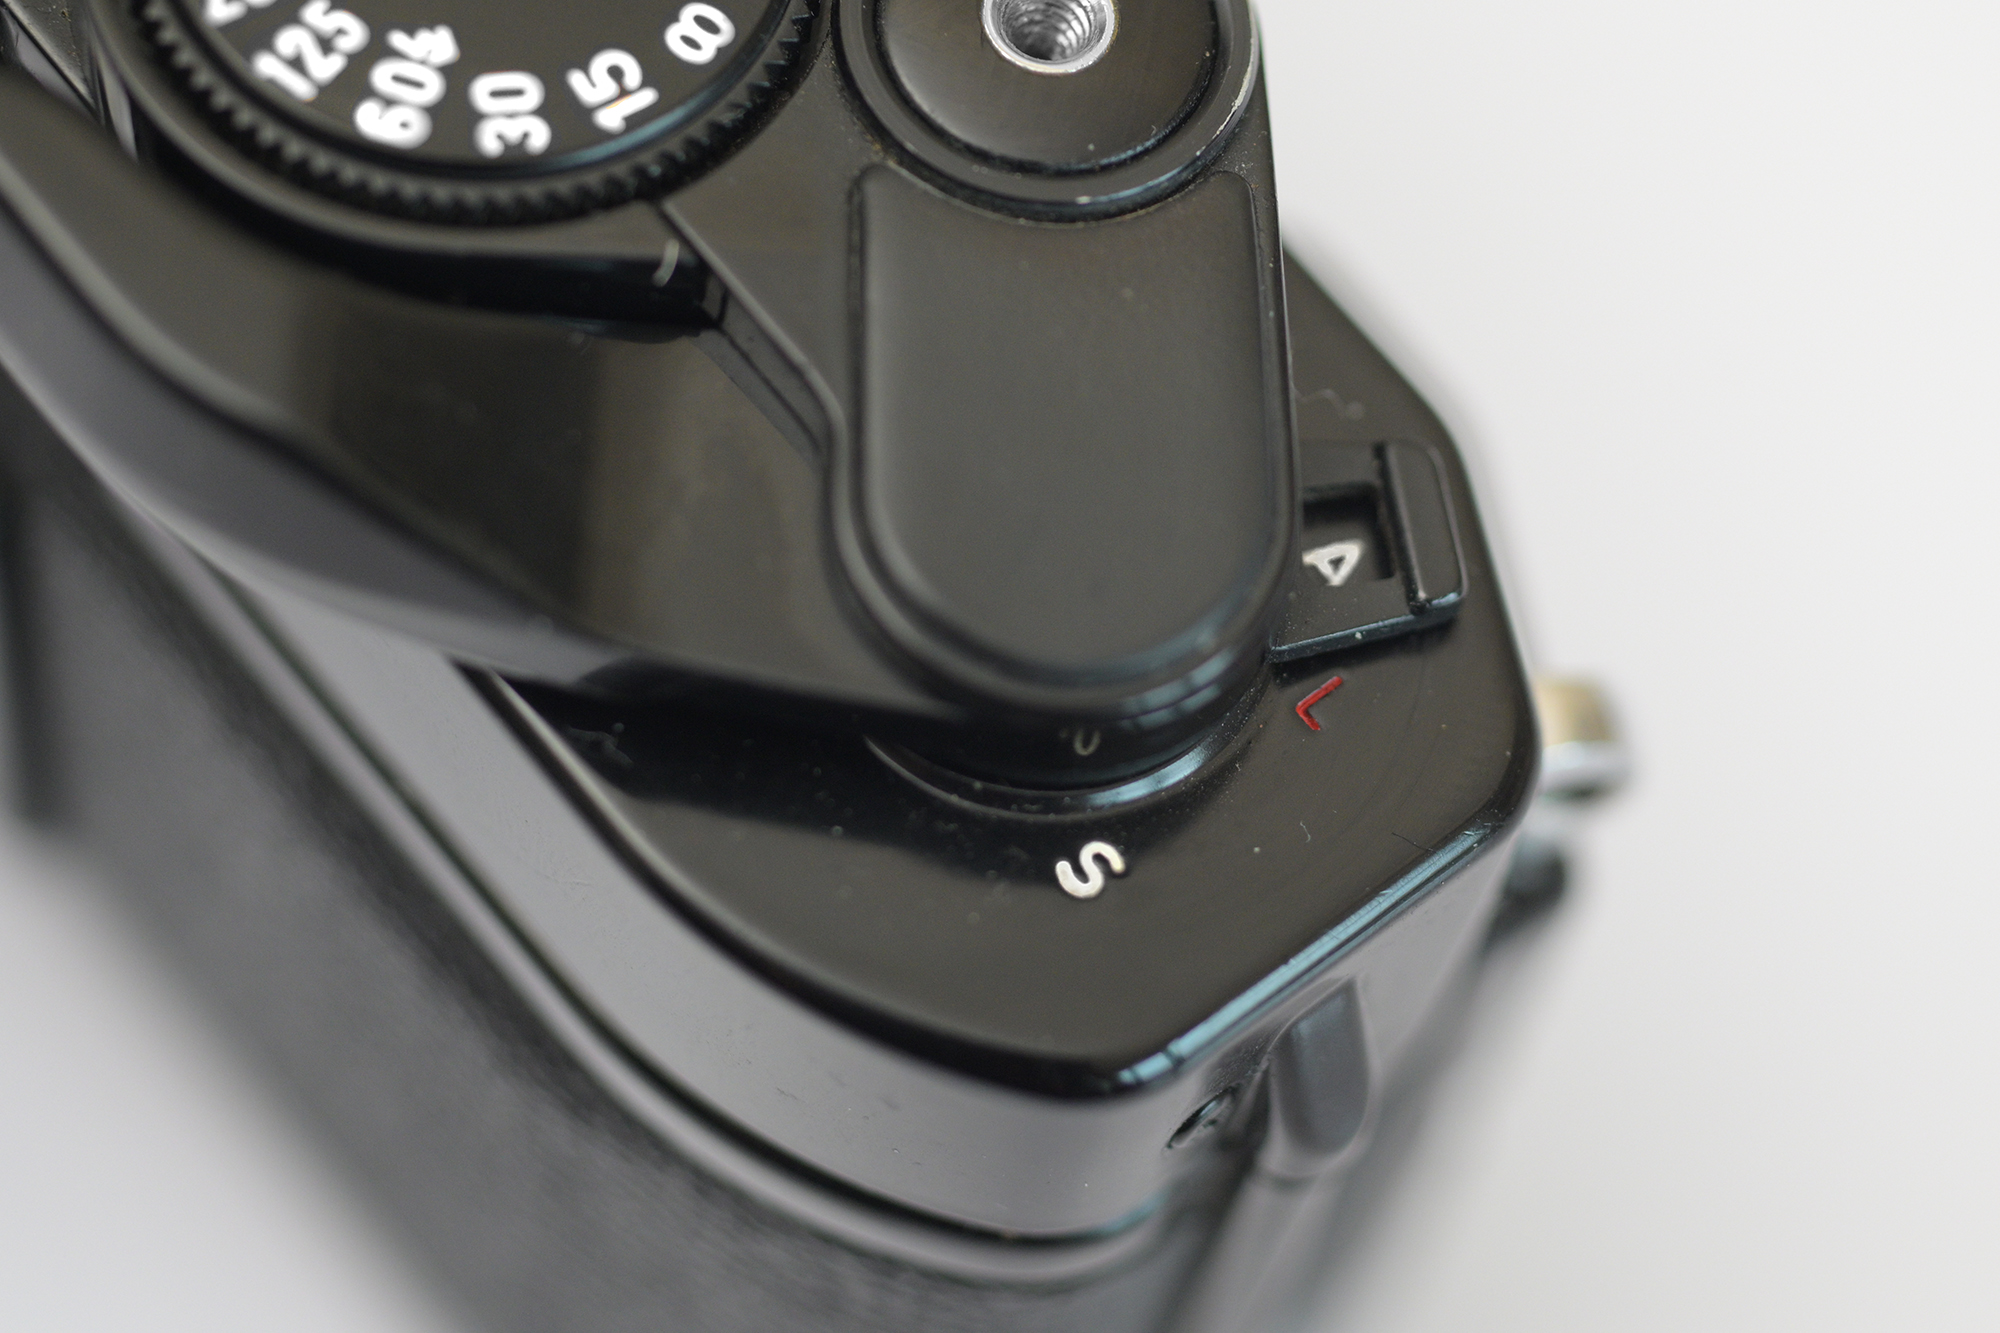
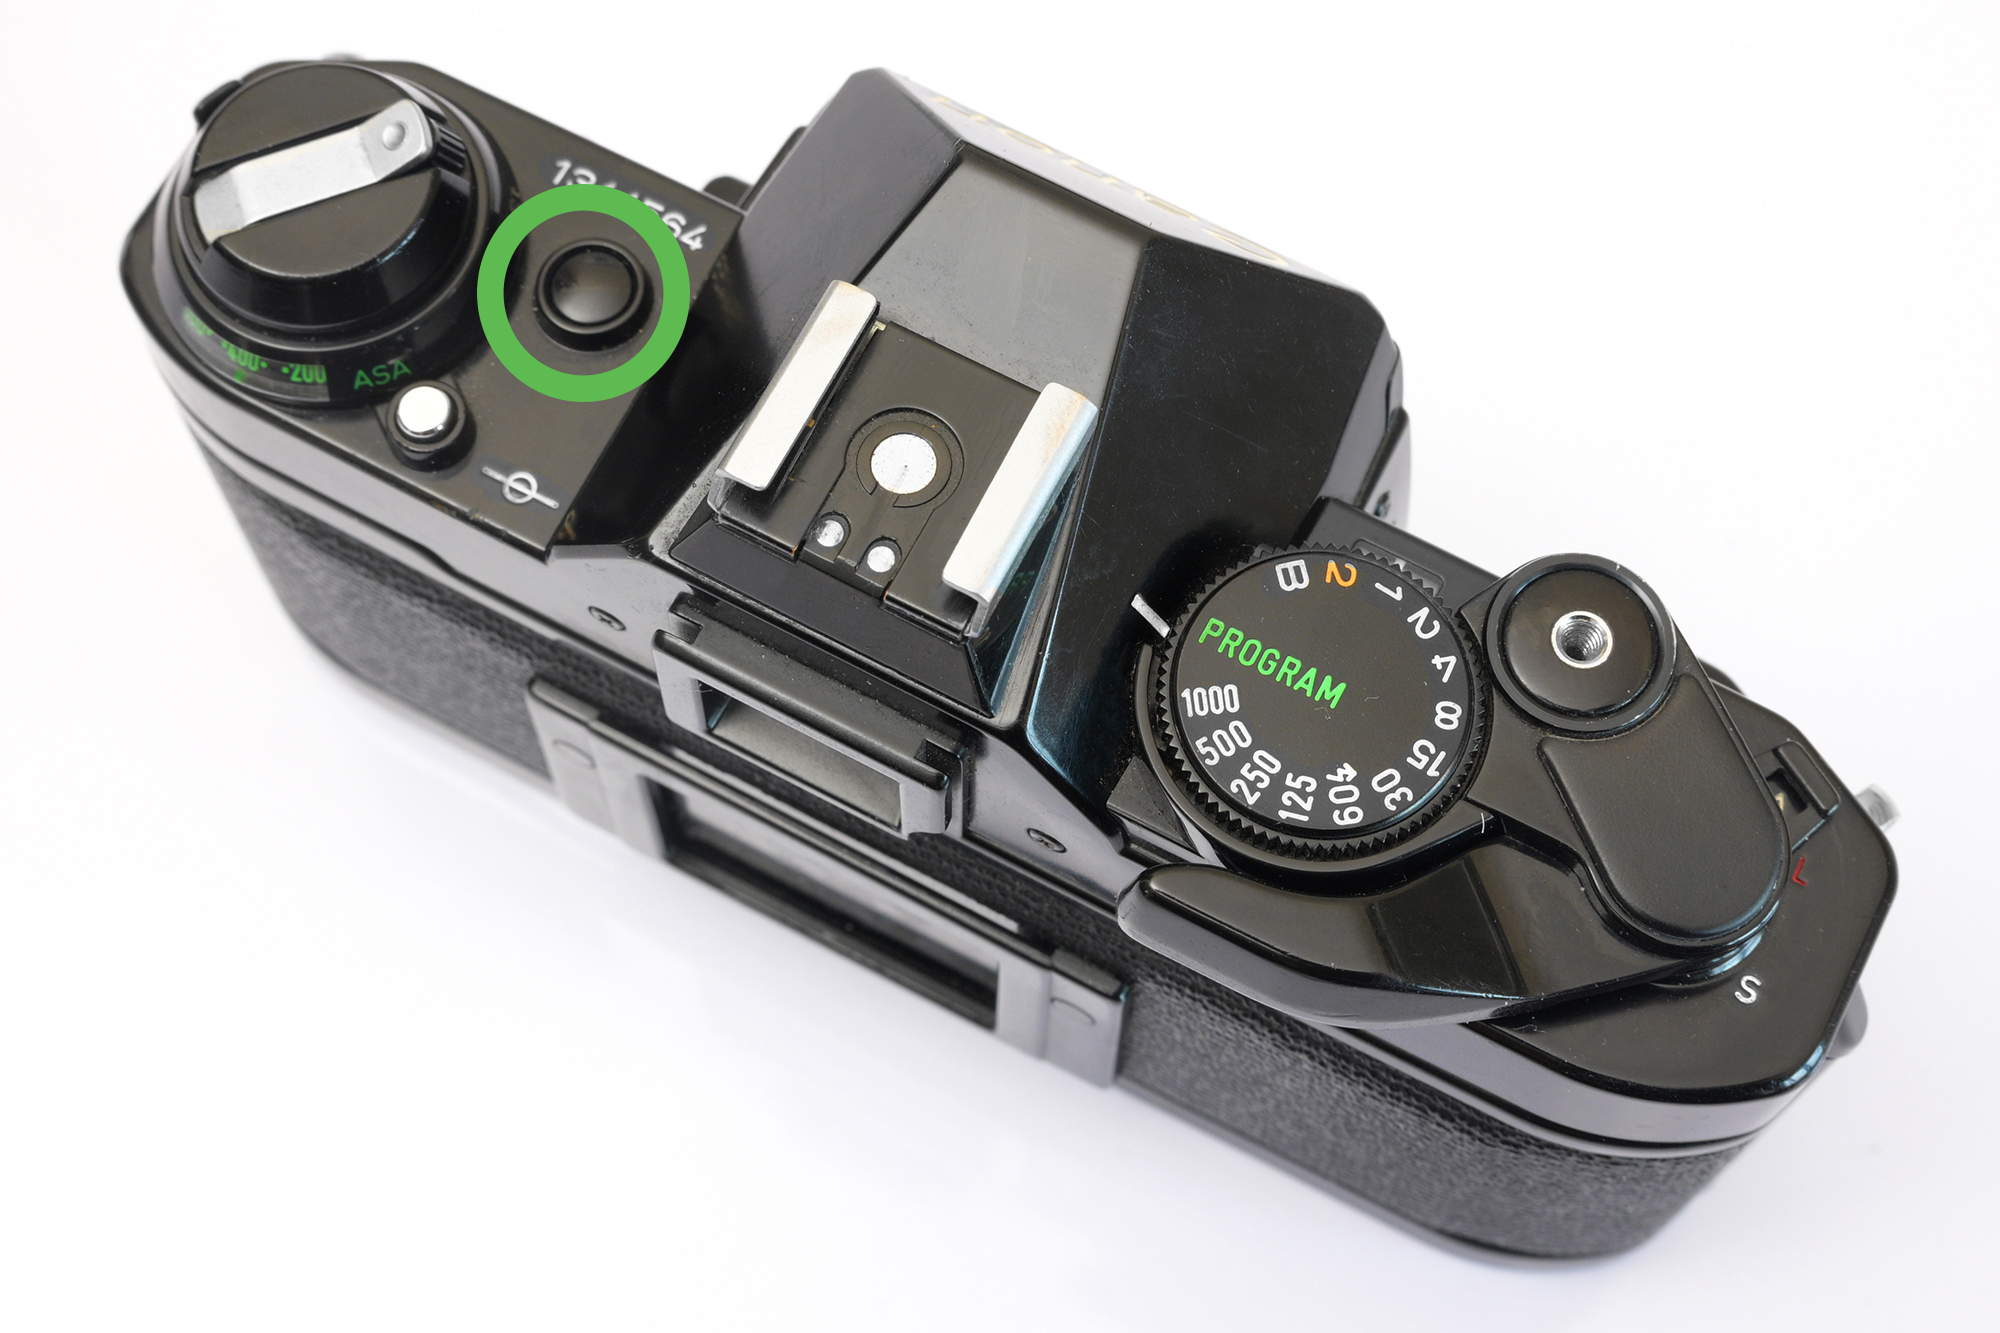
Next to the advance lever you will see three function. A, L and S.
A is pretty much unlock. L is Lock and S is the Self Timer. And the self timer is about 20 seconds. And the button shown below is for cancelling the self timer after it’s been started.
Overall Thoughts
This camera is a timeless classic and a well made camera and gives you a nice shooting experience without the hassle of trying to guess the metering or camera settings. Just point, focus and shoot!
Whilst the earlier model, the A1 offered Aperture Priority and Shutter Priority with digital style viewfinder I am finding it hard to understand why Canon took Aperture Priority away on this camera.
Despite its age and lack of Aperture Priority, the Canon AE-1 Program remains a highly sought-after camera, attracting both film photography veterans and a new generation of analog enthusiasts. The resurgence of interest in shooting film adds a dimension of authenticity and nostalgia that can’t be replicated digitally. If you come across a well-maintained AE-1 Program, don’t hesitate – snap it up and see why this camera left an enduring mark in photographic history!
Through its success, the AE-1 Program earned its place as one of the most iconic film cameras of all time. Its blend of features, aesthetic, and user-friendliness resonated across generations of photographers.
Which film format works best?
Film photography thrives on variety, and at the heart of that variety lies format. From the small 35mm to the expansive world of large format, each choice dictates the final look and feel of your image.
Starting out: 35mm
If you want to get into film photography and are looking for a camera that will suit your needs it’s important to recognise exactly what you want to use the camera for. What subject and the final delivery. Prints or just scans for instagram posts. The bigger the negative the more expensive your hobby will become. Yet better quality prints.
Below, 35mm, 6×9 and 4×5
If you enjoy the challenge of street and urban photography and only want to scan your negatives and share with the world on social media then a 35mm film camera would be perfect. SLR or Point and shoot.
If you are not looking for big blow up prints then you don’t need the quality larger formats have to offer. You will get 36 exposures per roll of 35mm film where you can shoot and practice to your hearts content. Even if you intend to print your work 35mm negatives look great 10×8 and even slightly bigger. Start getting into 20 inch prints and beyond and you may start seeing the truth of the film grain.
But let’s face it, a 10×8 or 16×12 inch print of a street or family moment is probably the biggest you will go to if you were to exhibit your work. And with street photography sometimes prints look great with some grain, contrast and grit anyway.
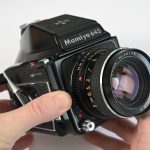
If you want to shoot mostly portraiture and scapes then maybe a medium format camera would suit you best. With a nice 645 medium format camera you will get 15 shots. Bigger negatives packed with more silver for a better quality photograph and cleaner print enlargements. The film cost for 120 and 35mm are pretty much the same. Would you shoot more than 15 shots for a portrait session on film? Maybe two at a push. Same with landscapes. If you have a scape plan in mind 15 shots on medium format is ample to decide on a favourite negative to print.
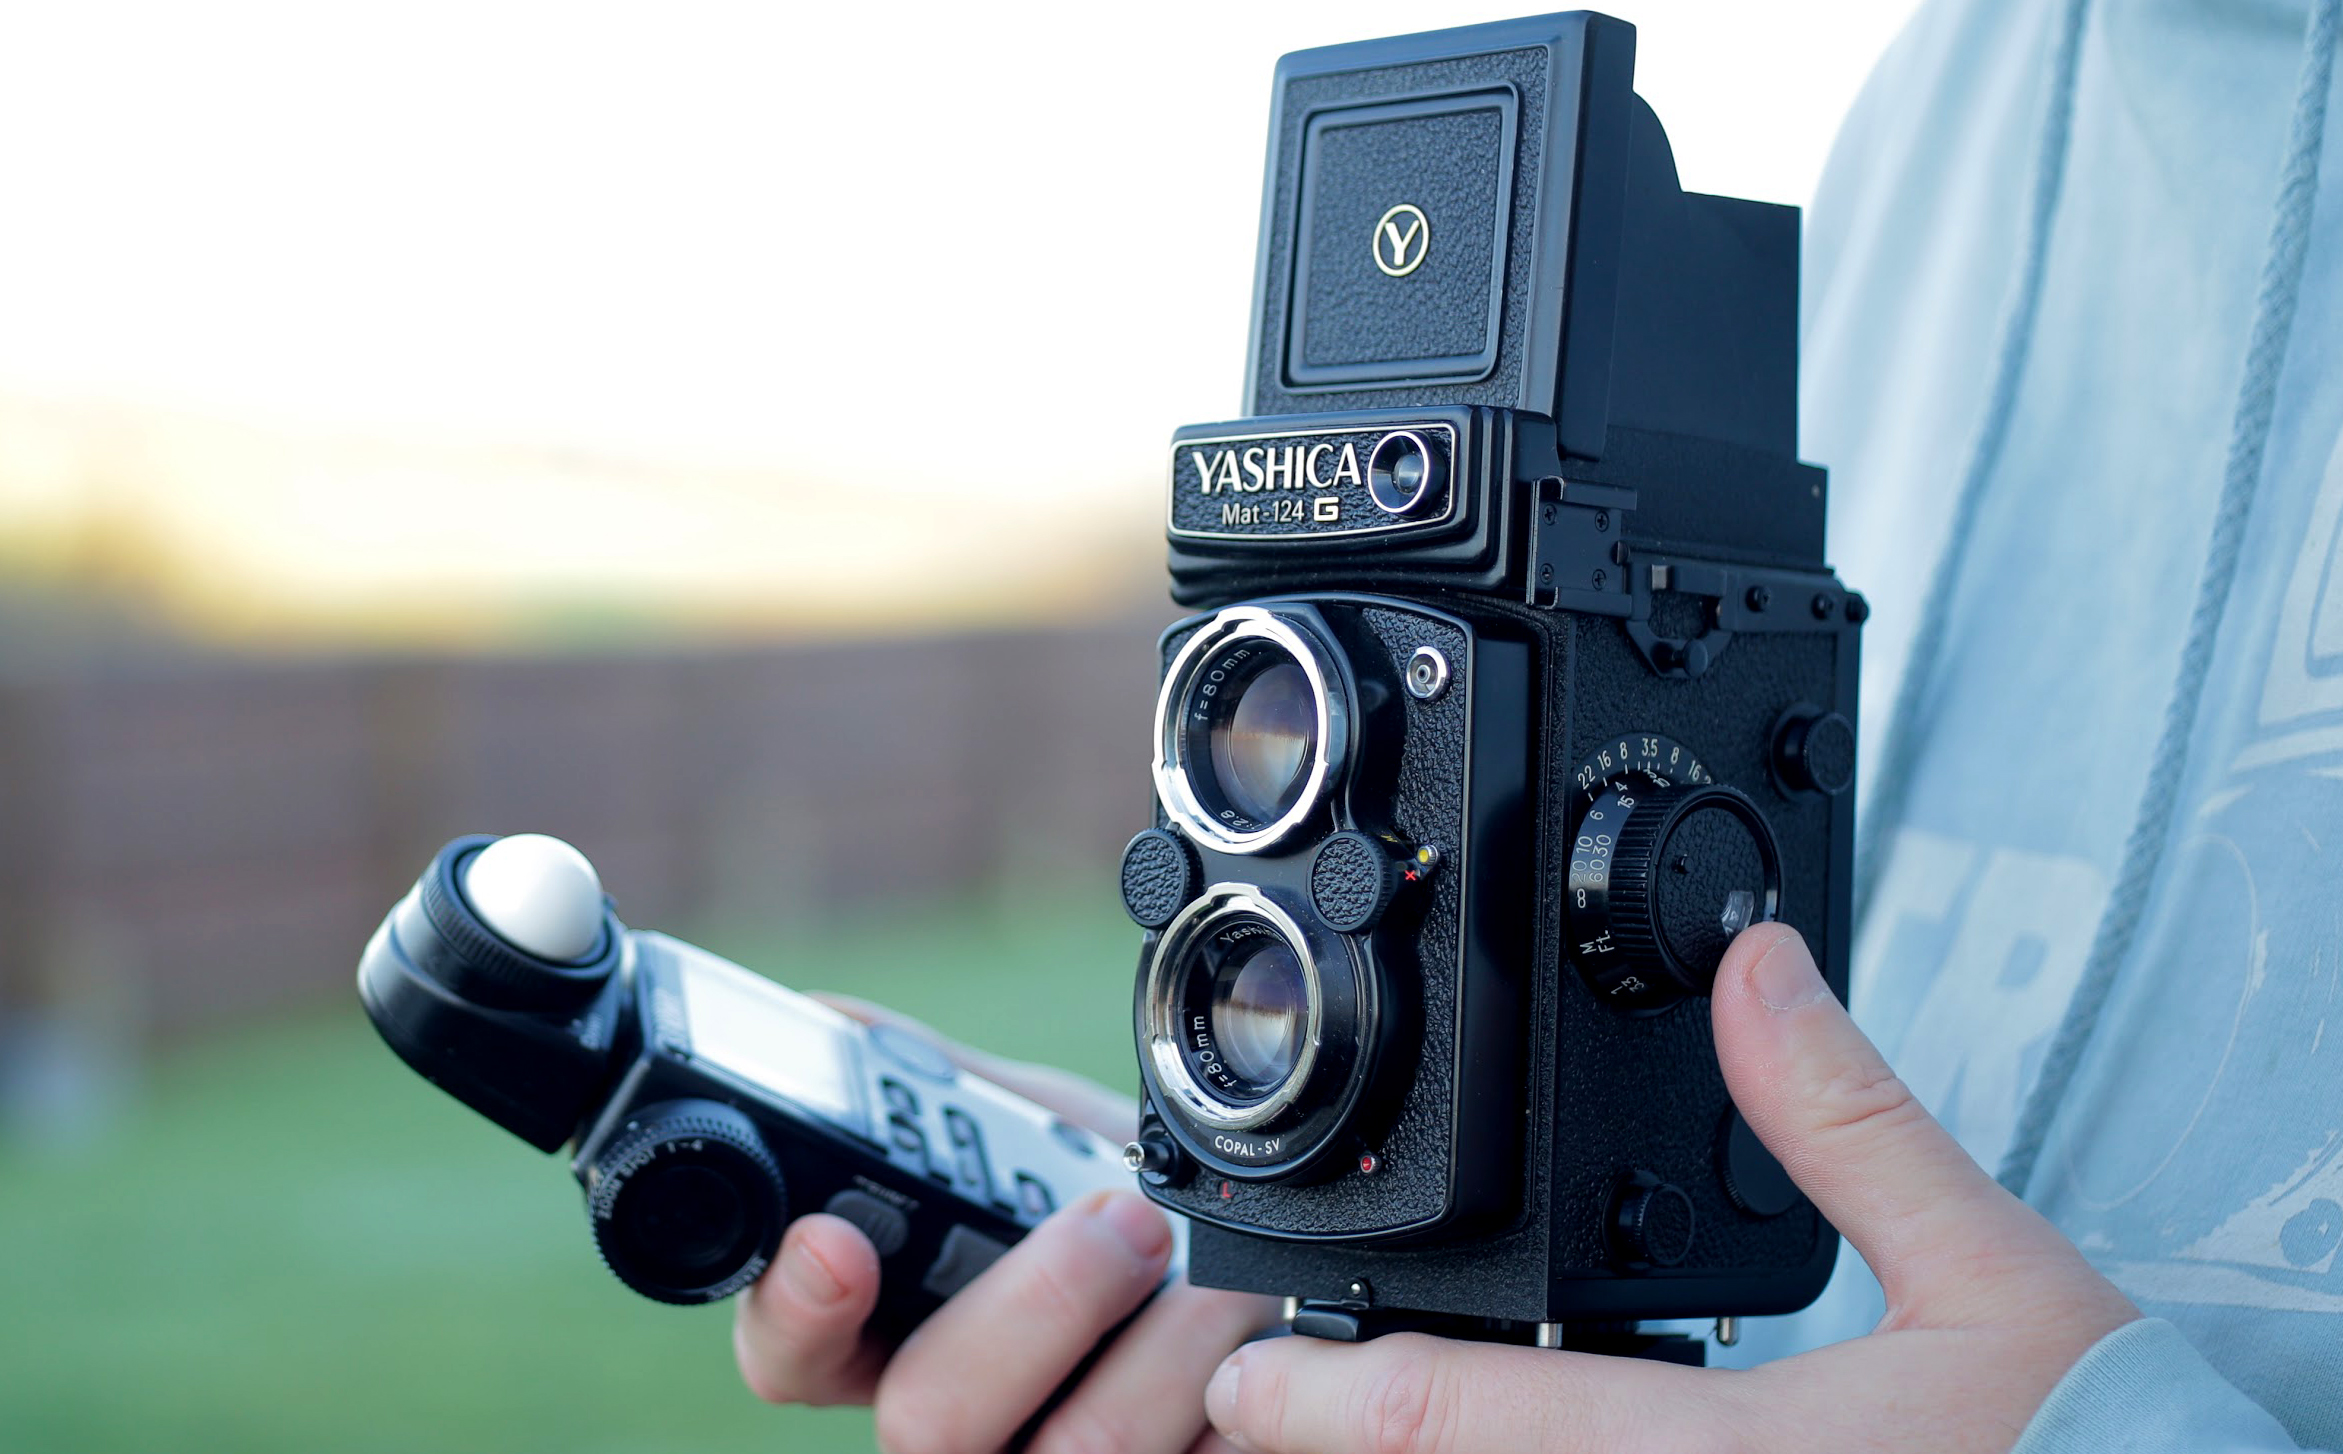
Portrait taken on the Yashica Mat124G medium format TLR camera.

Medium format will offer far more detail than 35mm especially if you intend to print. Especially 6×9.
Scape taken on the Mamiya RZ67 medium format camera. (645 Negative)
So it’s important to understand what it is you want to use the camera for mostly. If it’s for general all round photography and fun then I would say 35mm is the way forward. Plus. There are a ton of inexpensive 35mm cameras out there.
The three most popular formats are 35mm, medium format, and large format. Let’s explore their distinctive qualities and the impact they have on image quality.
35mm
The classic, versatile 35mm format reigns supreme for its convenience and portability. Nestled in compact cameras, it’s your companion for everyday shooting. But don’t underestimate its potential!
- Image Quality: Smaller frame size means smaller negatives, resulting in more visible grain when making print enlargements, especially in low-light situations. However, modern films and skilled development can push the boundaries, yielding impressive results.
- Strengths: Compactness, affordability, vast camera and film selection, perfect for street photography, travel, and everyday moments. Plenty of inexpensive 35mm cameras on the used market as well as lenses.
With 36 exposures (or 24) you get plenty of shots for your money and far more negatives to look for keepers from a single shoot.
Medium Format
For those seeking exquisite detail and smoother tones, medium format beckons. Imagine negatives several times larger than 35mm.
The common sizes are 645, 6×6, 6×7 and 6×9.
645 = 15 shots
6×6 = 12 shots
6×7 = 10 shots
6×9 = 8 shots (insane quality!)
And for medium format you don’t need to pay through the nose for a camera. There are plenty of inexpensive medium format folding cameras out there for sale from the 1950s, 60s and 70s that have wonderful lenses for awesome quality negatives. I have a few and they each deliver impressive quality in their own quirky way. If you want something more modern such as the Hasselblads and Mamiyas you can expect to pay a hefty price. And if looked after and CLA’d (Clean, Lubricate and Adjust) will last a lifetime.
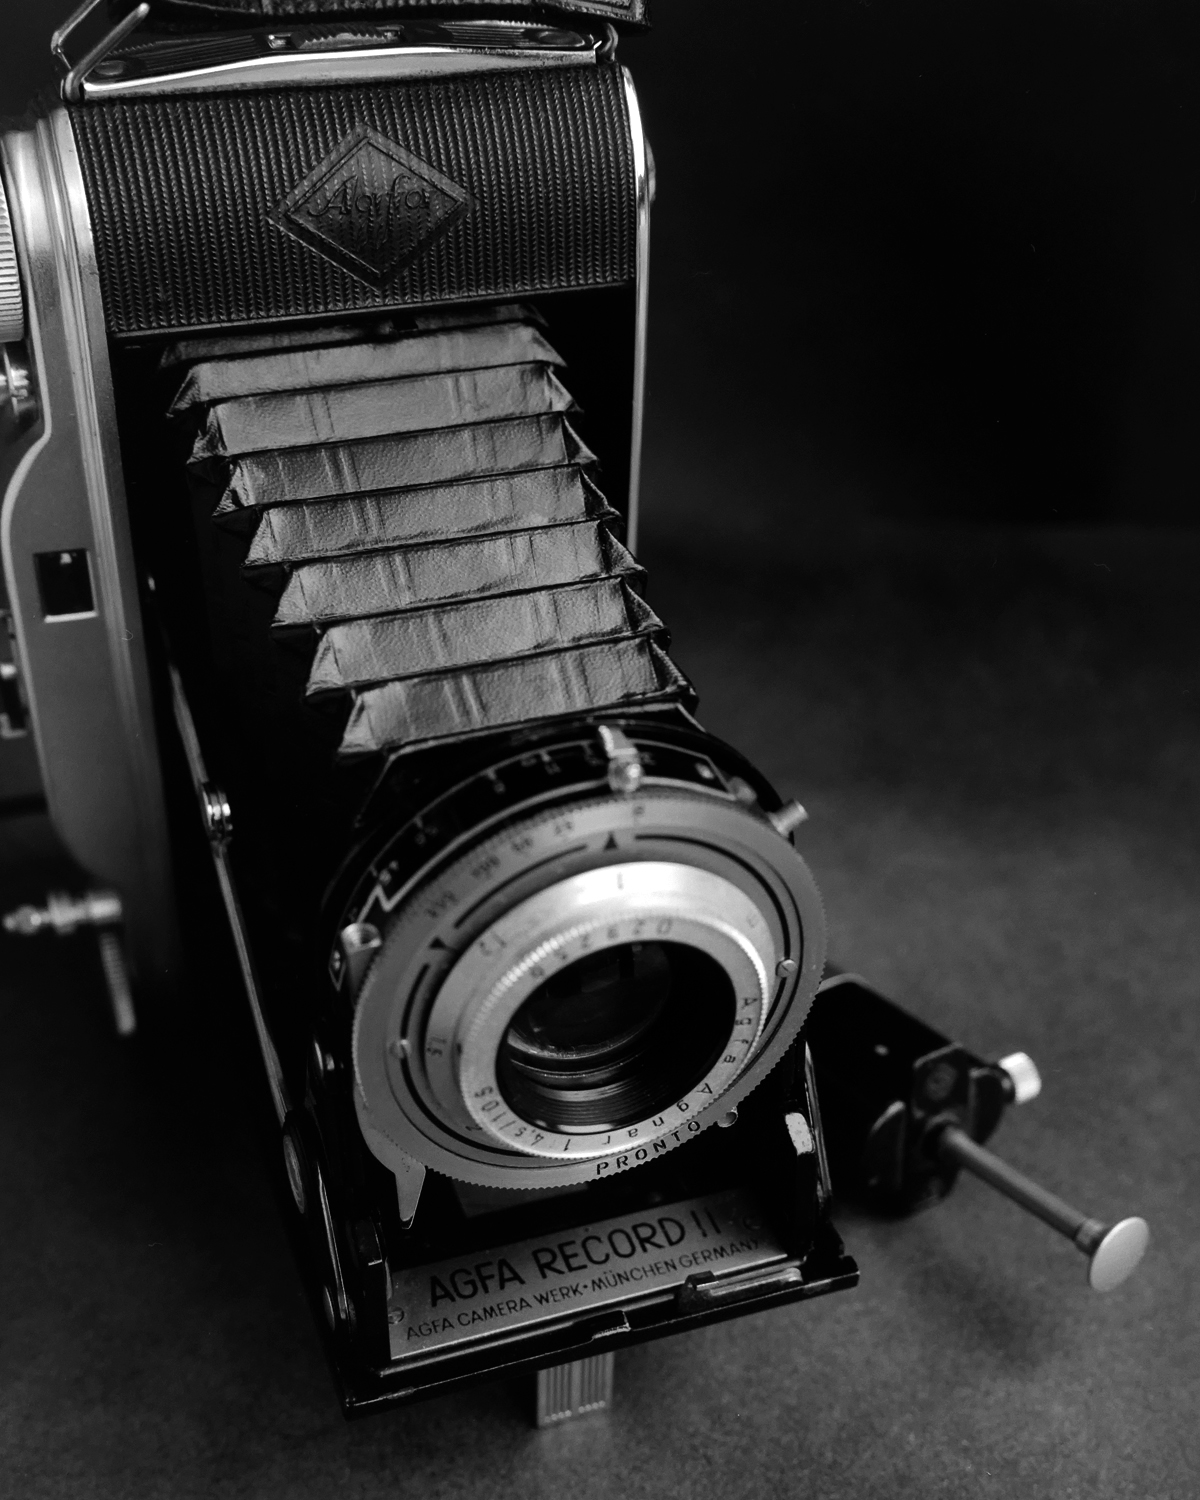
AGFA Record II 6×9 Medium Format Camera
- Image Quality: The larger negative translates to significantly less grain, capturing intricate details and offering wider dynamic range. Prints can be enlarged further without sacrificing quality.
- Strengths: Superb image quality, ideal for landscapes, portraits, and fine art photography. Offers a slower, more deliberate shooting experience.
When you have only 8 shots in your camera you do find yourself slowing down and taking the time to expose, frame and wait for the right moment. You want each negative to be a keeper. Also most of the older cameras don’t have a metering system which leads you to making your own decisions exposing for a scene. You don’t have the option to bracket your shots as much with only 8 shots in the camera and It certainly isn’t a lazy way of taking photographs and get it right across the entire roll of film leads to a self satisfaction to be proud of.
Large Format
The ultimate in image fidelity, large format involves individual sheet films, each meticulously loaded into the camera. Prepare for a shift in pace and mindset!
I use an Intrepid Large Format 4×5 camera and the quality of the negatives are mind blowing and I use it mostly for portraits and landscapes and usually shoot just four sheets of film at any one time.
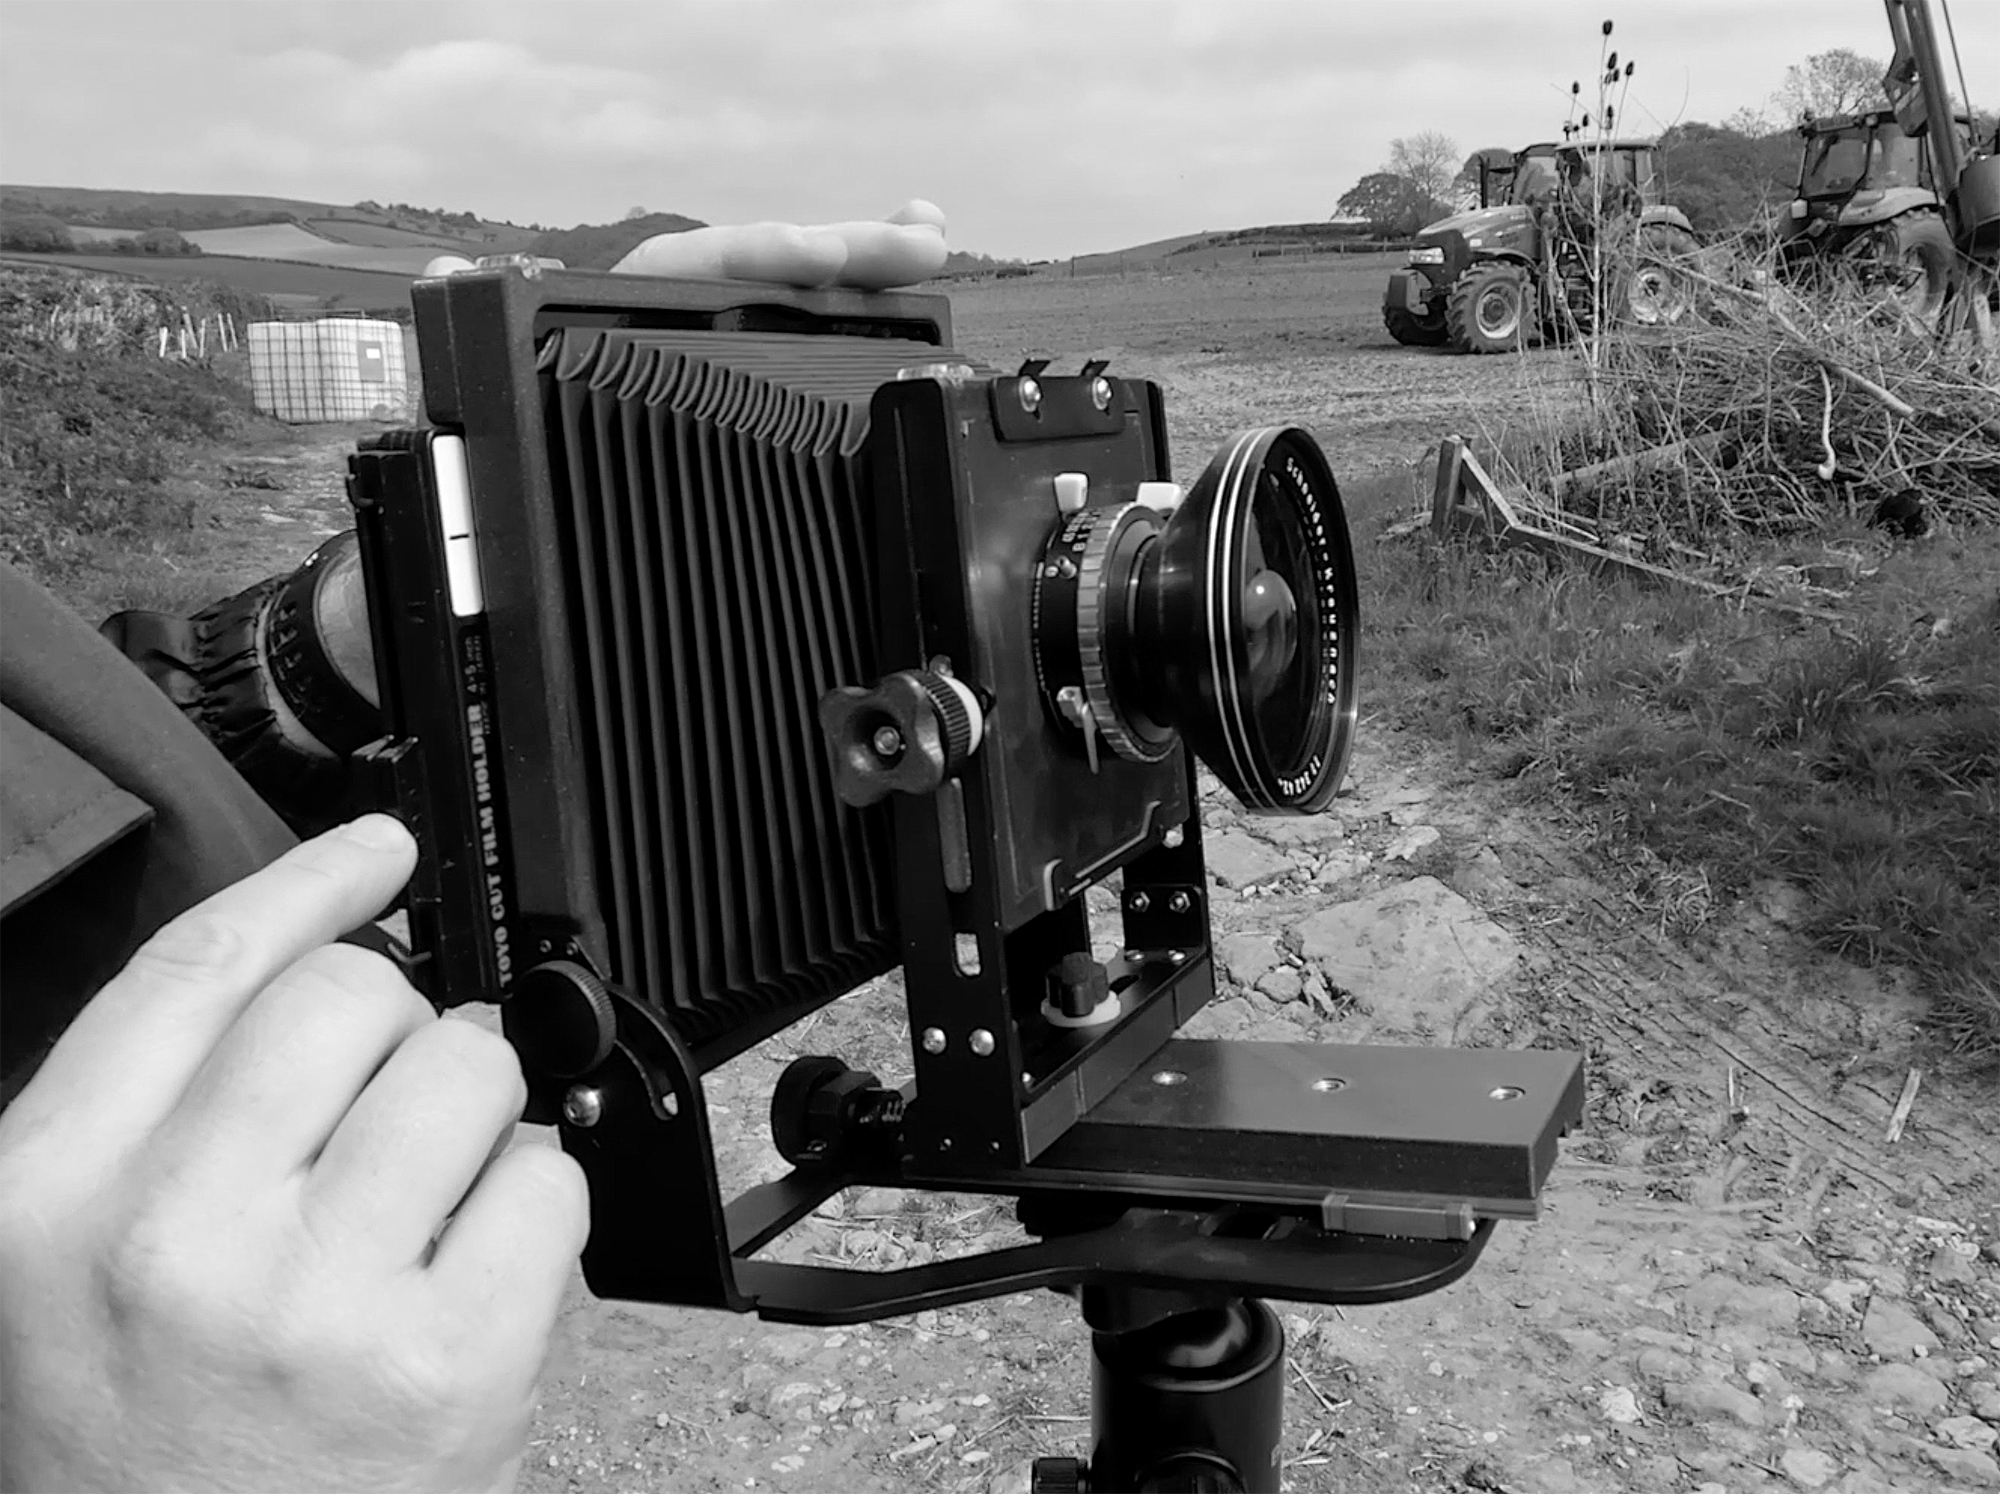
- Image Quality: Unmatched sharpness, minimal grain, and incredible tonal range. Large format excels in capturing vast landscapes and architectural details with breathtaking clarity.
- Strengths: Unparalleled image quality, ideal for professional work, fine art photography, and achieving museum-worthy prints. Demands meticulous technique and a much slower workflow.
So, Which Format is Right for You?
The choice boils down to your creative vision and priorities.
- 35mm: Ideal for portability, affordability, and capturing life on the go.
- Medium Format: Excellent balance between size, quality, and creative control.
- Large Format: For those seeking the absolute best image quality and a unique, deliberate shooting experience.
Remember, the format is just one aspect of the equation. Your camera, lens, film choice, and personal style all contribute to the final image. Experiment, explore, and discover the format that resonates with your creative voice!
Bonus Tip: Don’t be afraid to mix and match! Each format has its strengths, and you can leverage them to create a diverse portfolio showcasing various aesthetics.
I hope this blog has shed some light on the exciting world of film formats. Remember, the journey is just as important as the destination. So, grab your camera, choose your format, and start capturing the world in its unique beauty!
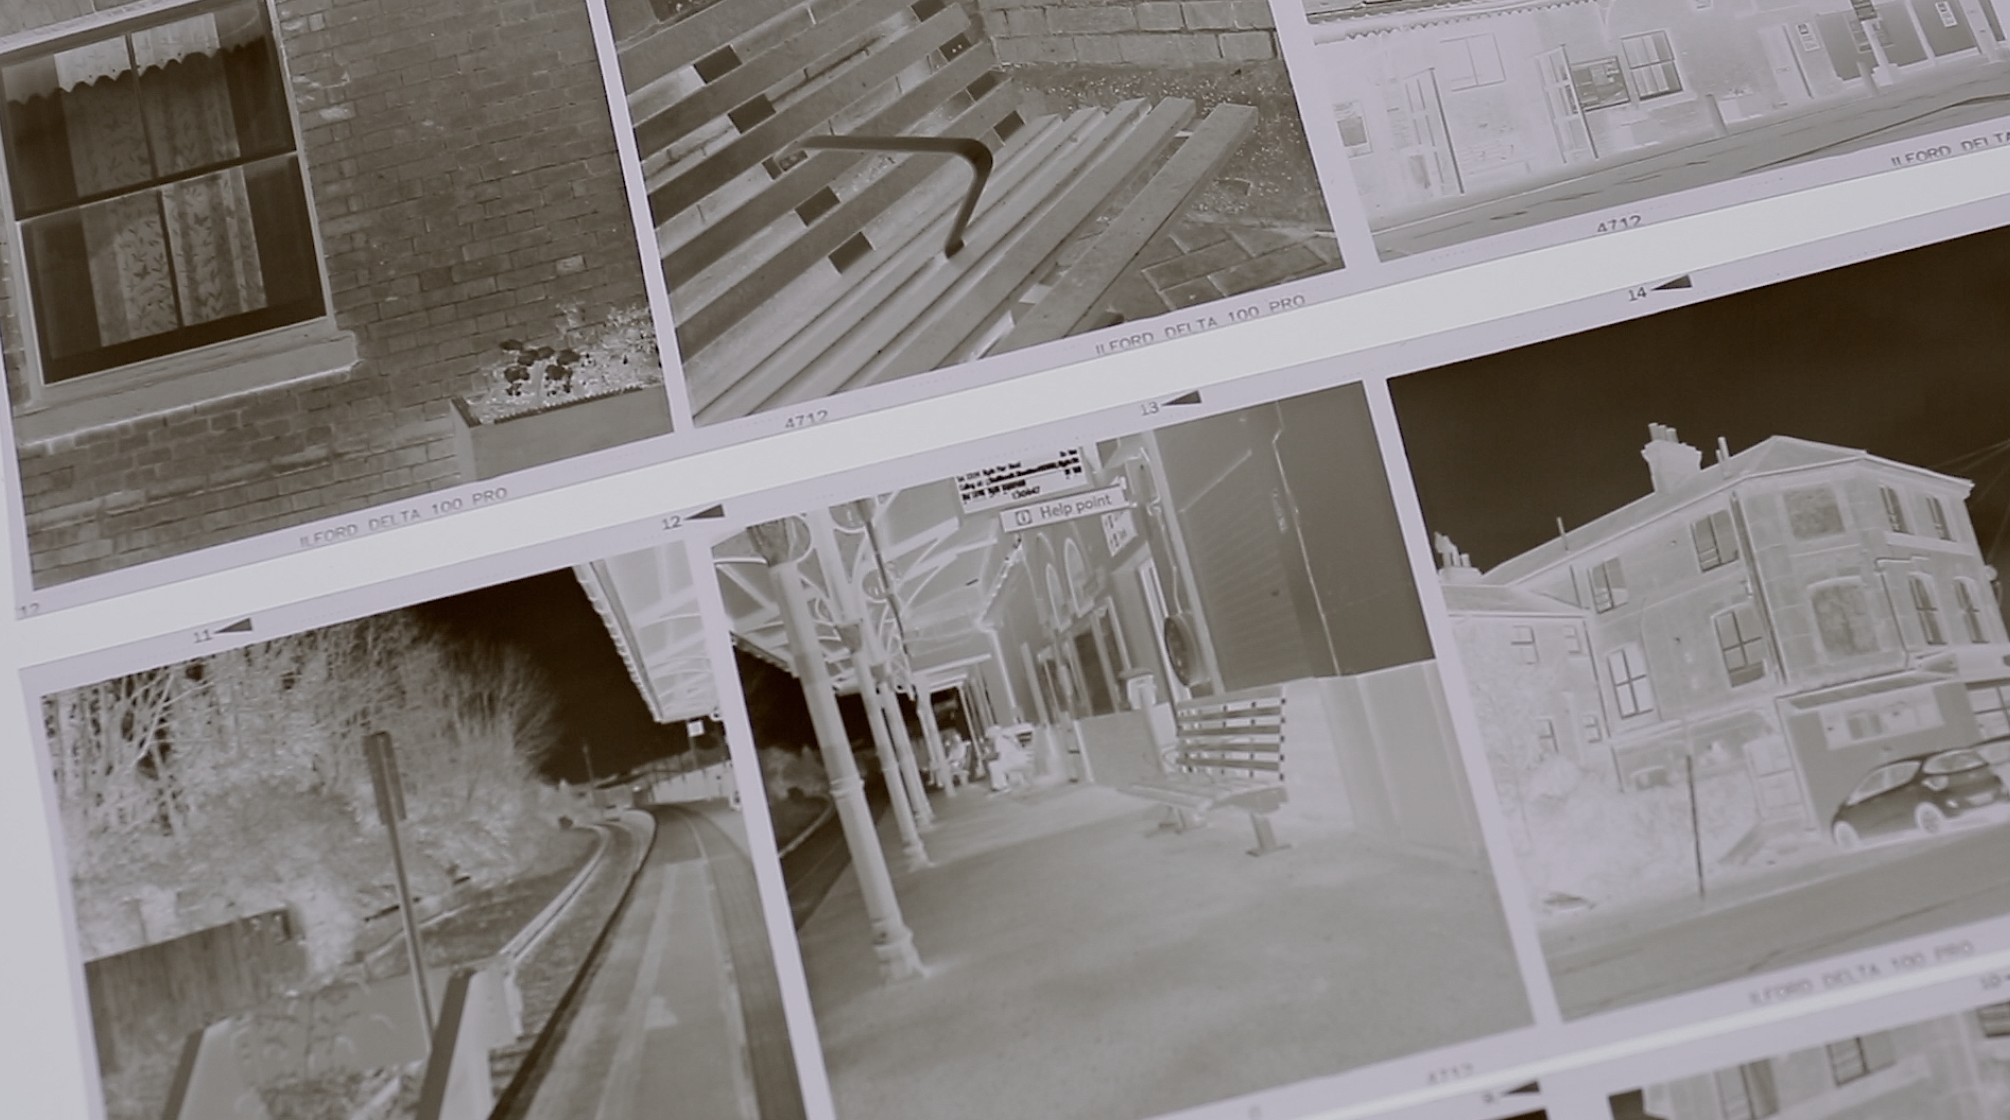
Fuji GW690 III 6×9 Medium Format Camera
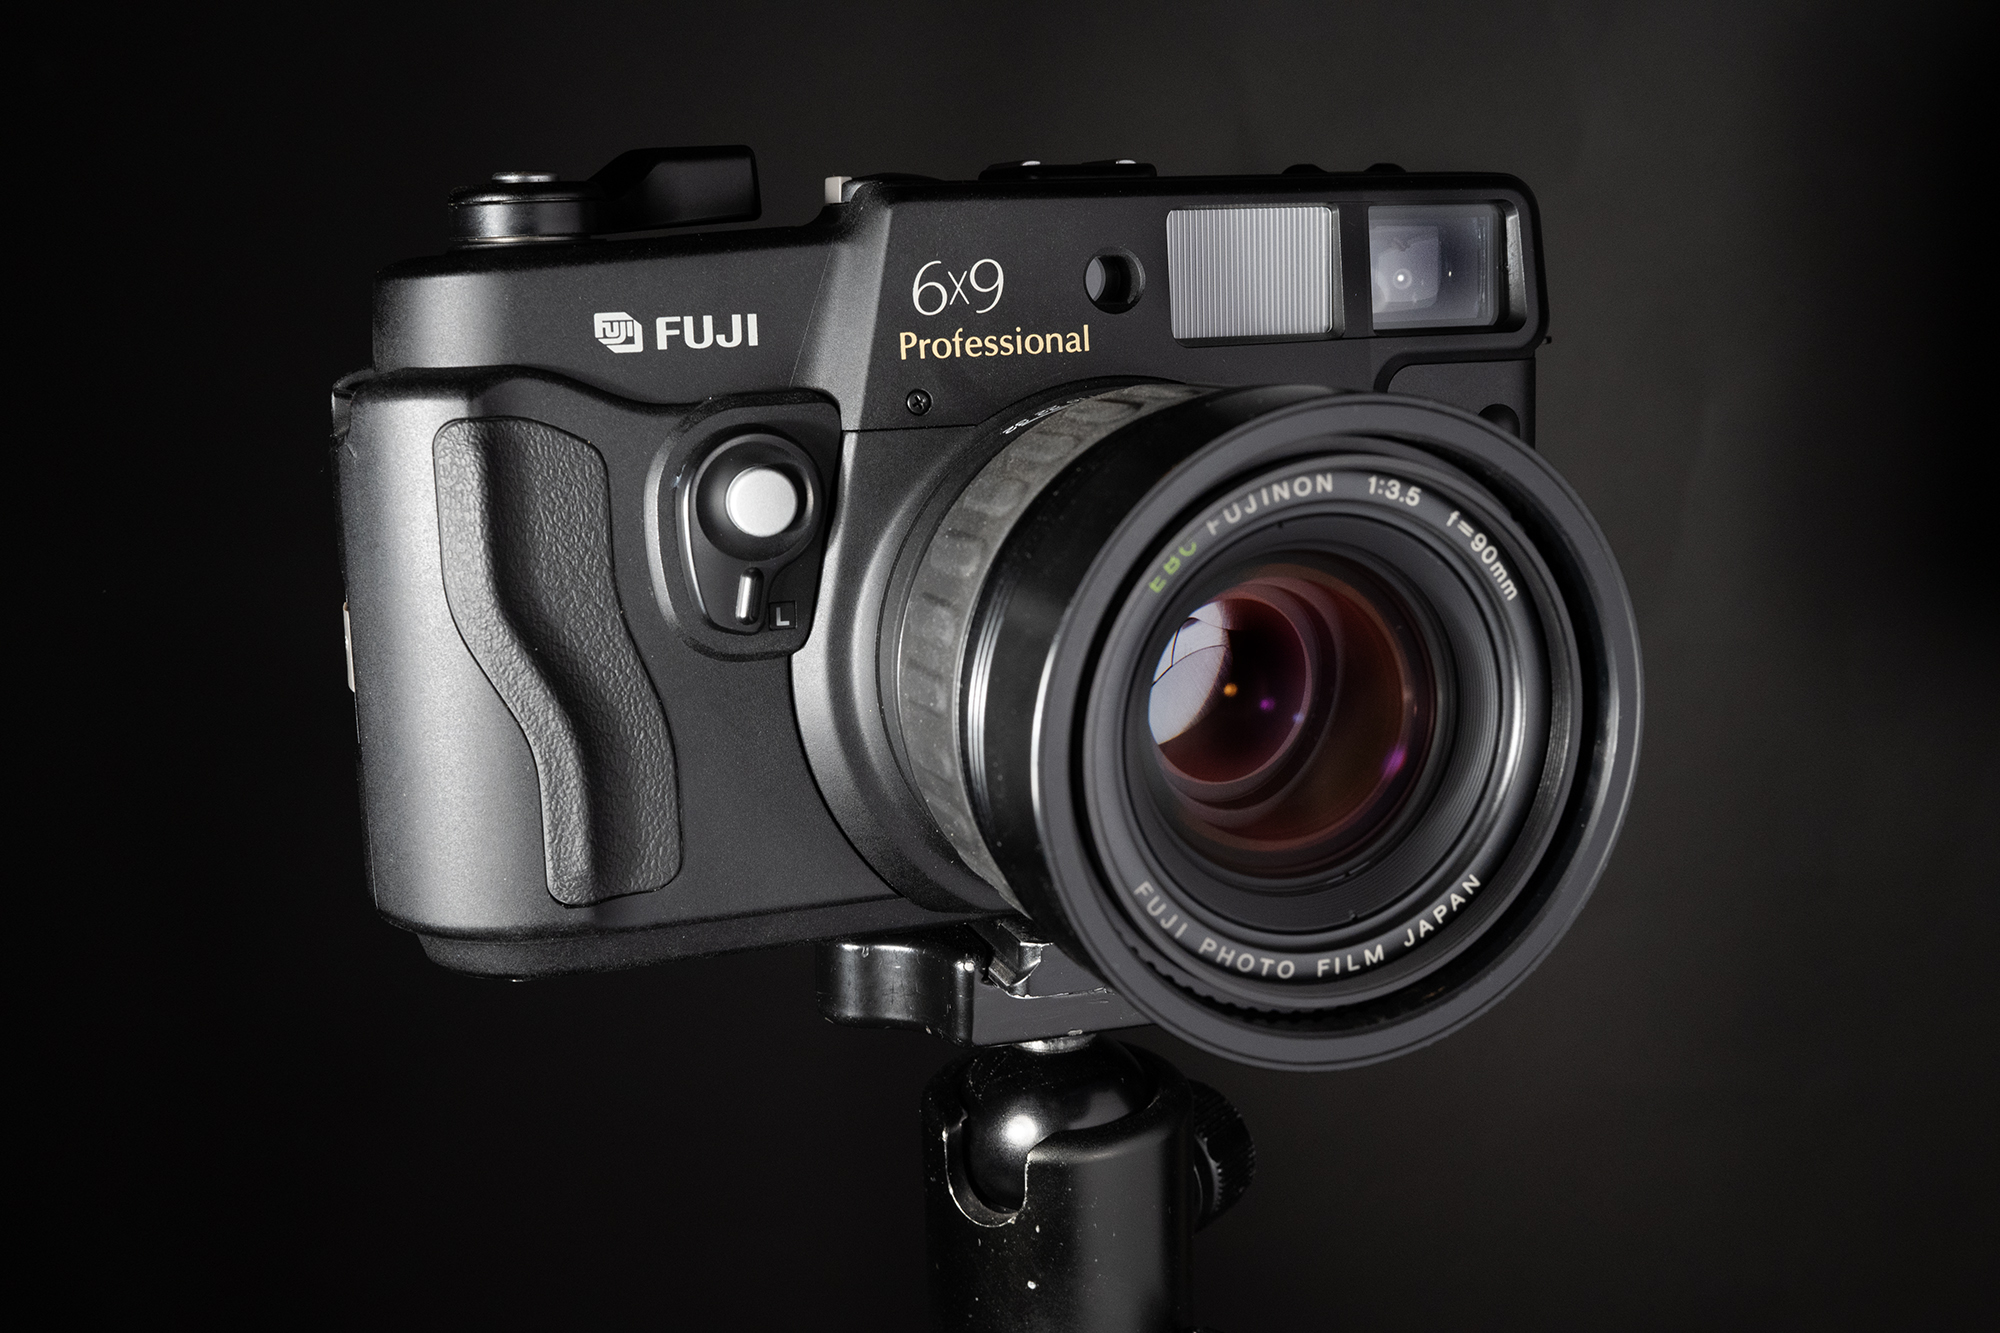
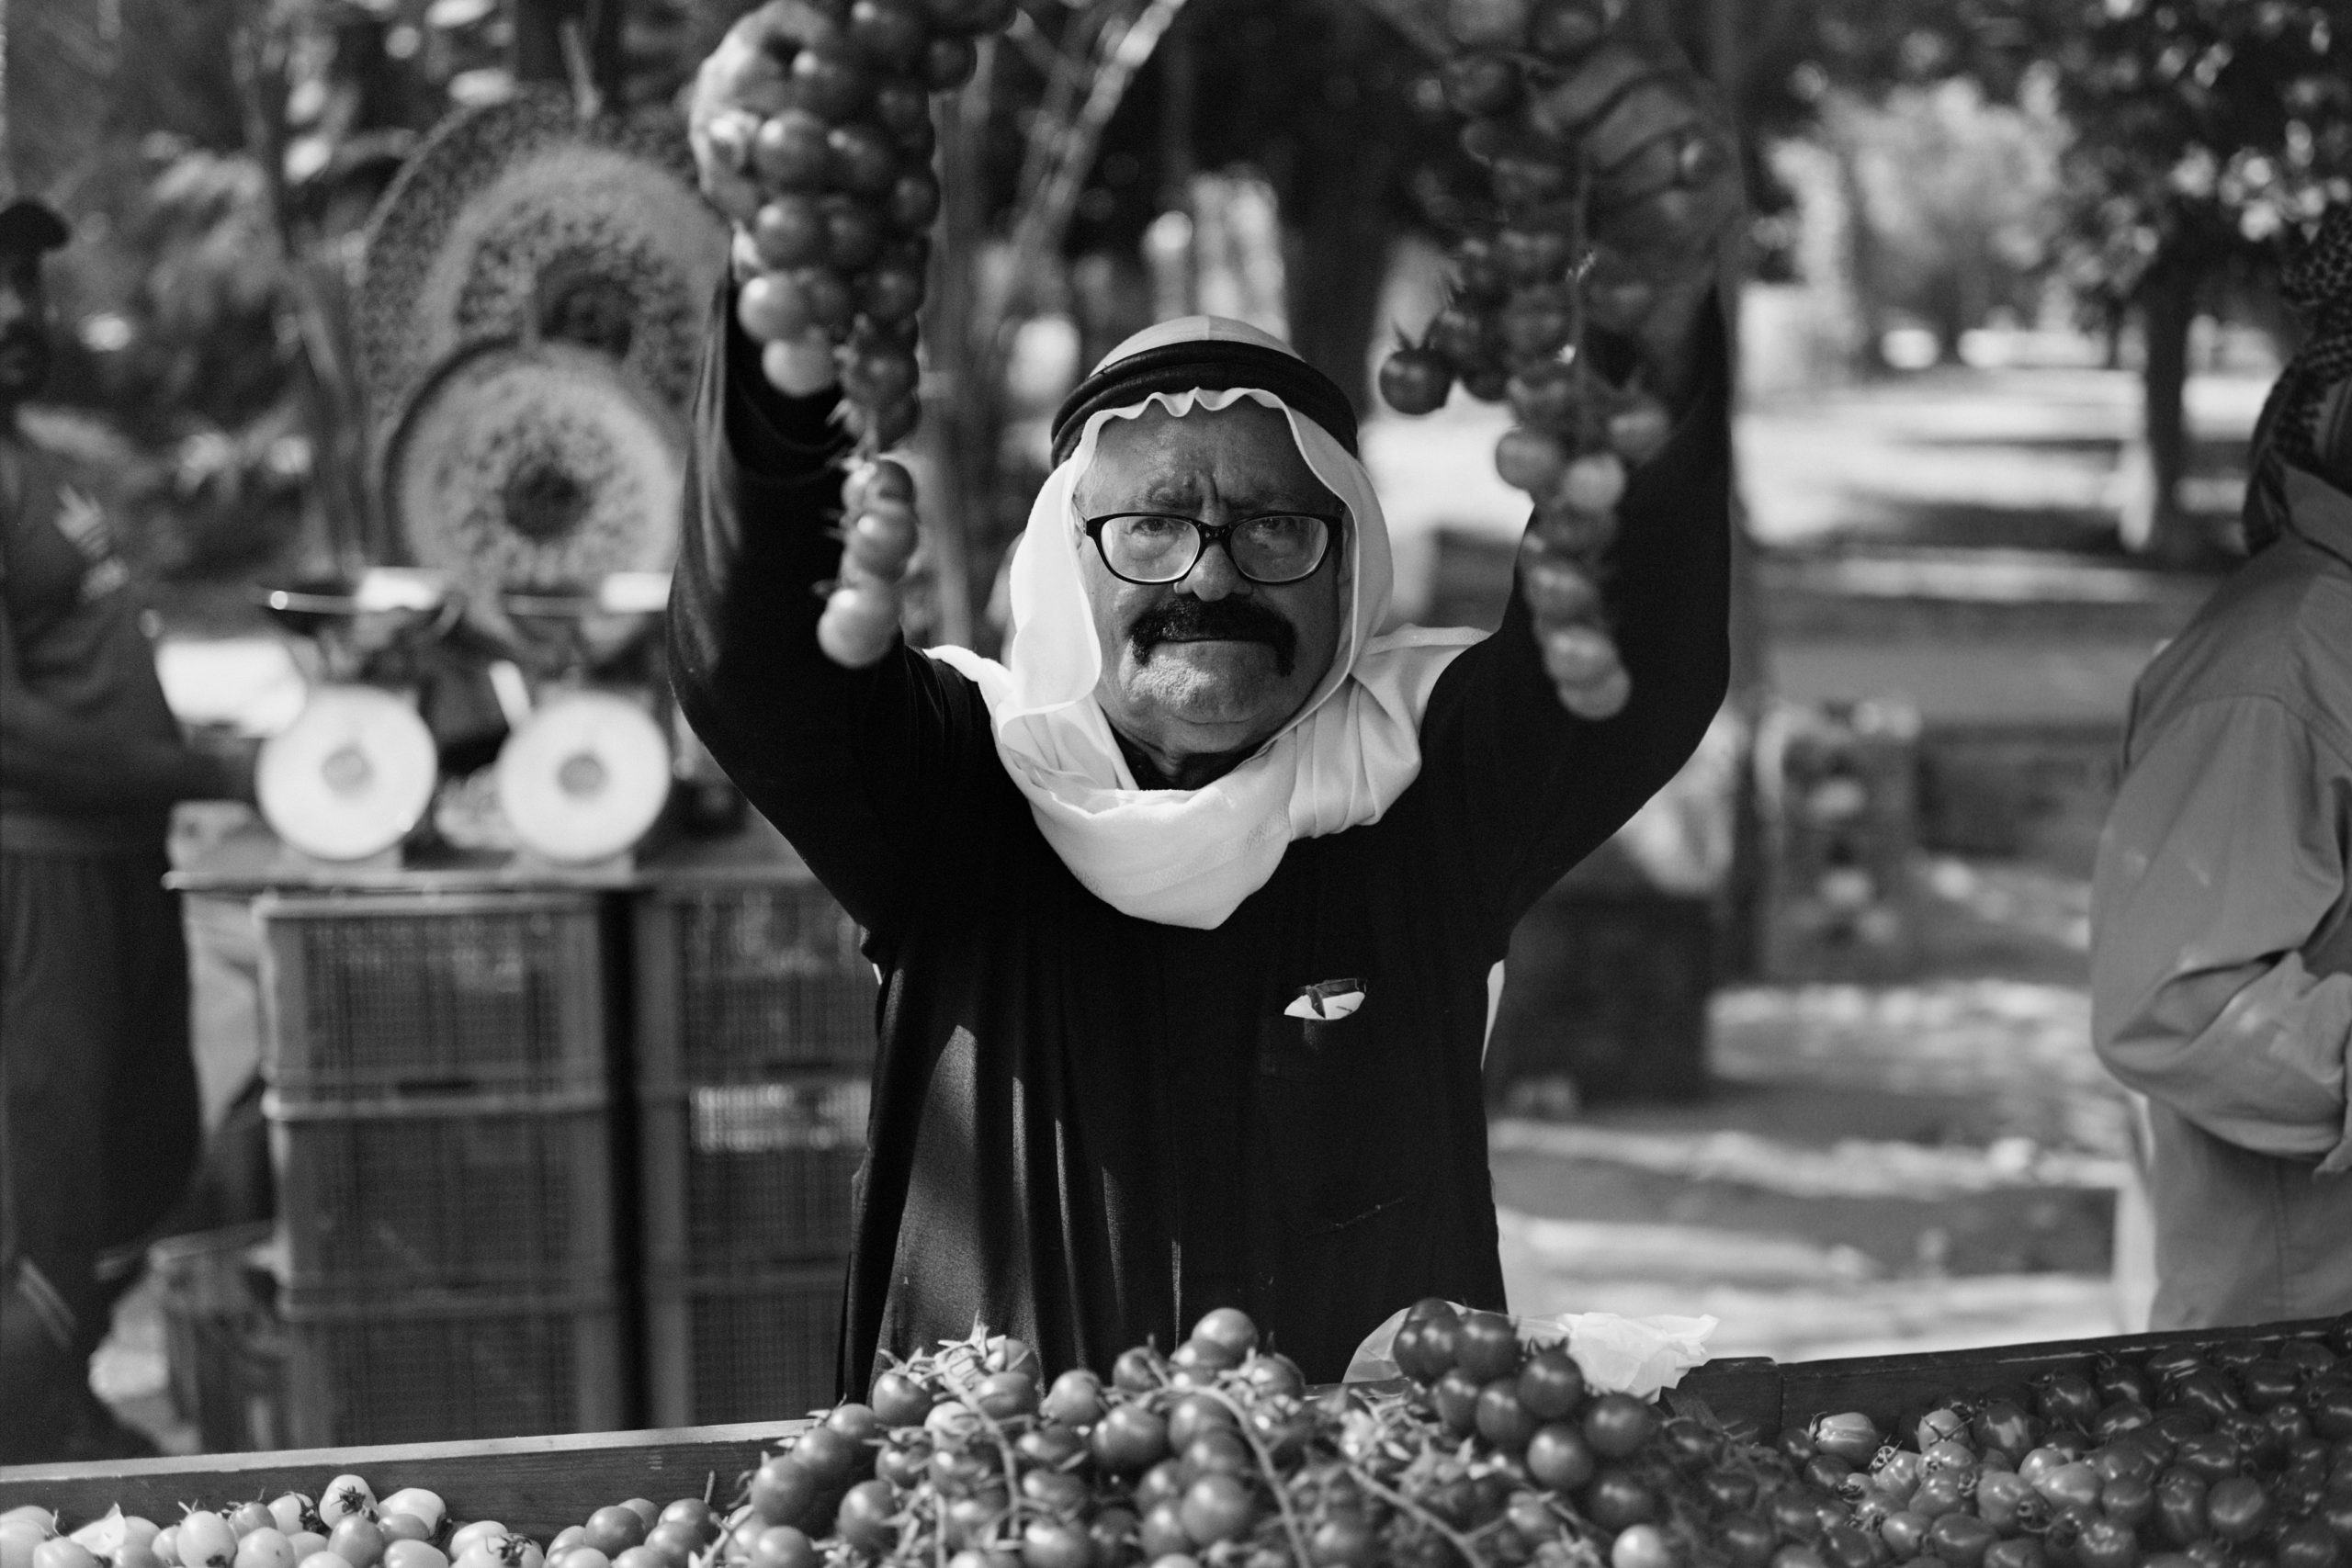
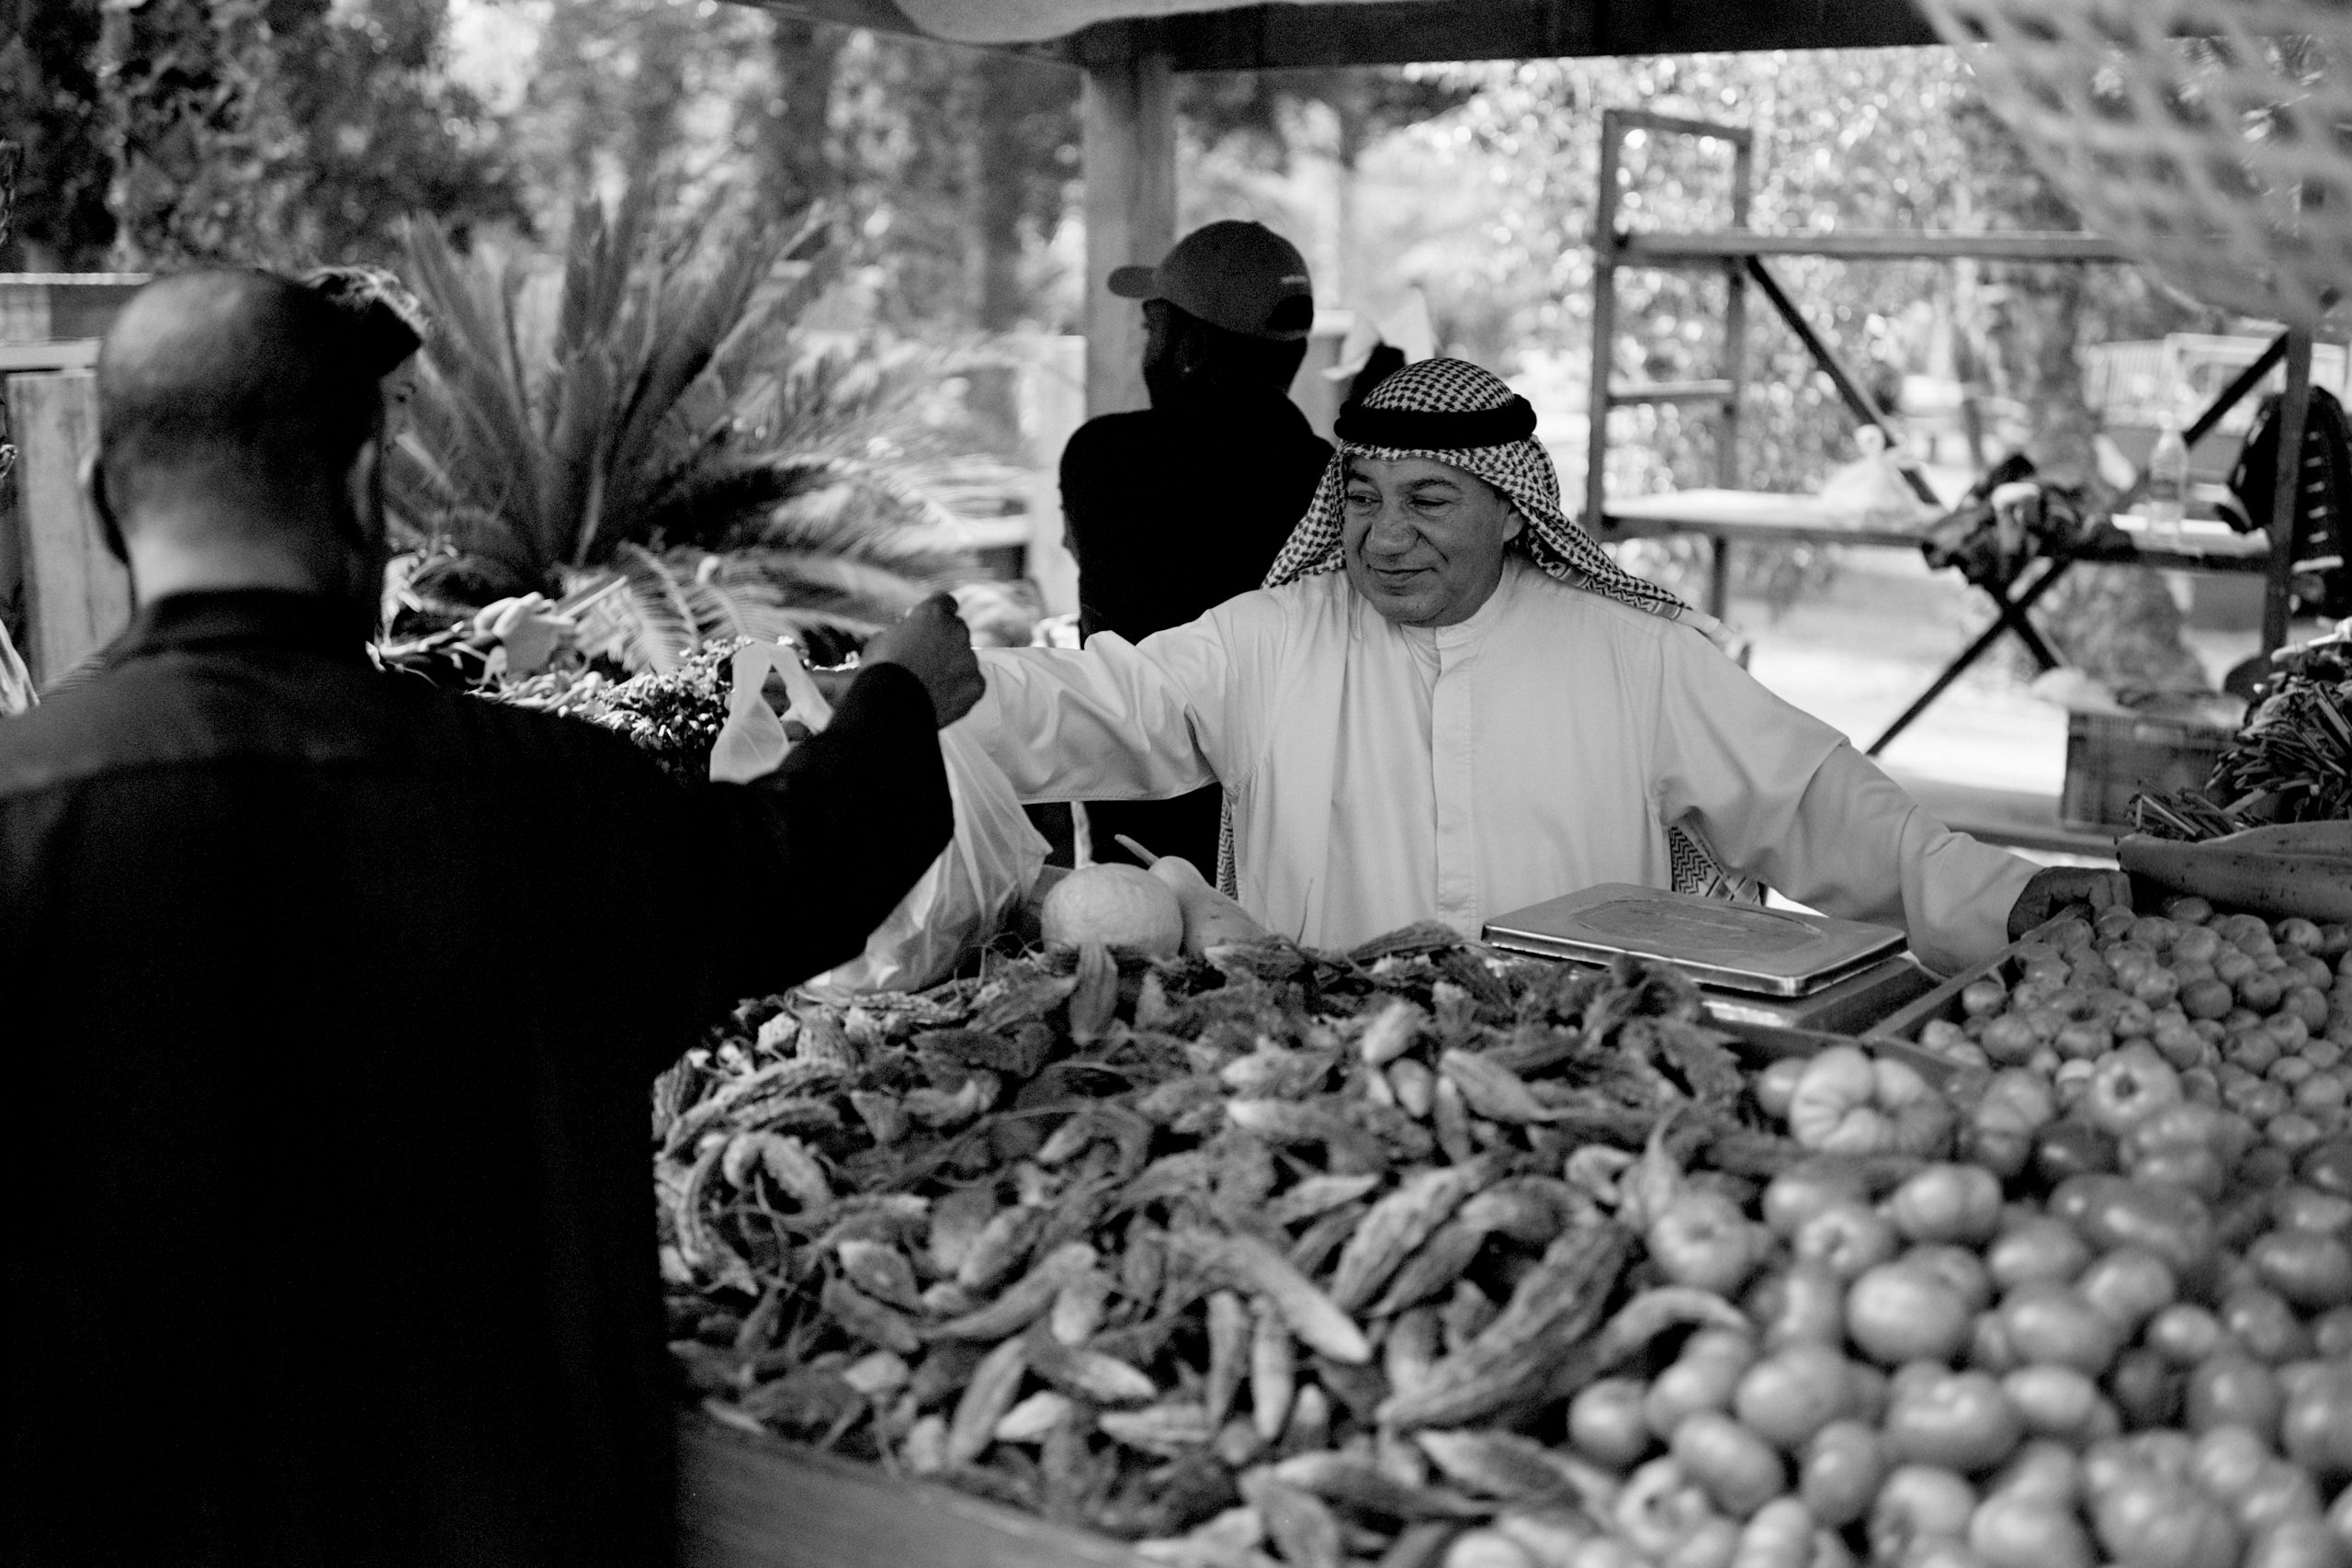
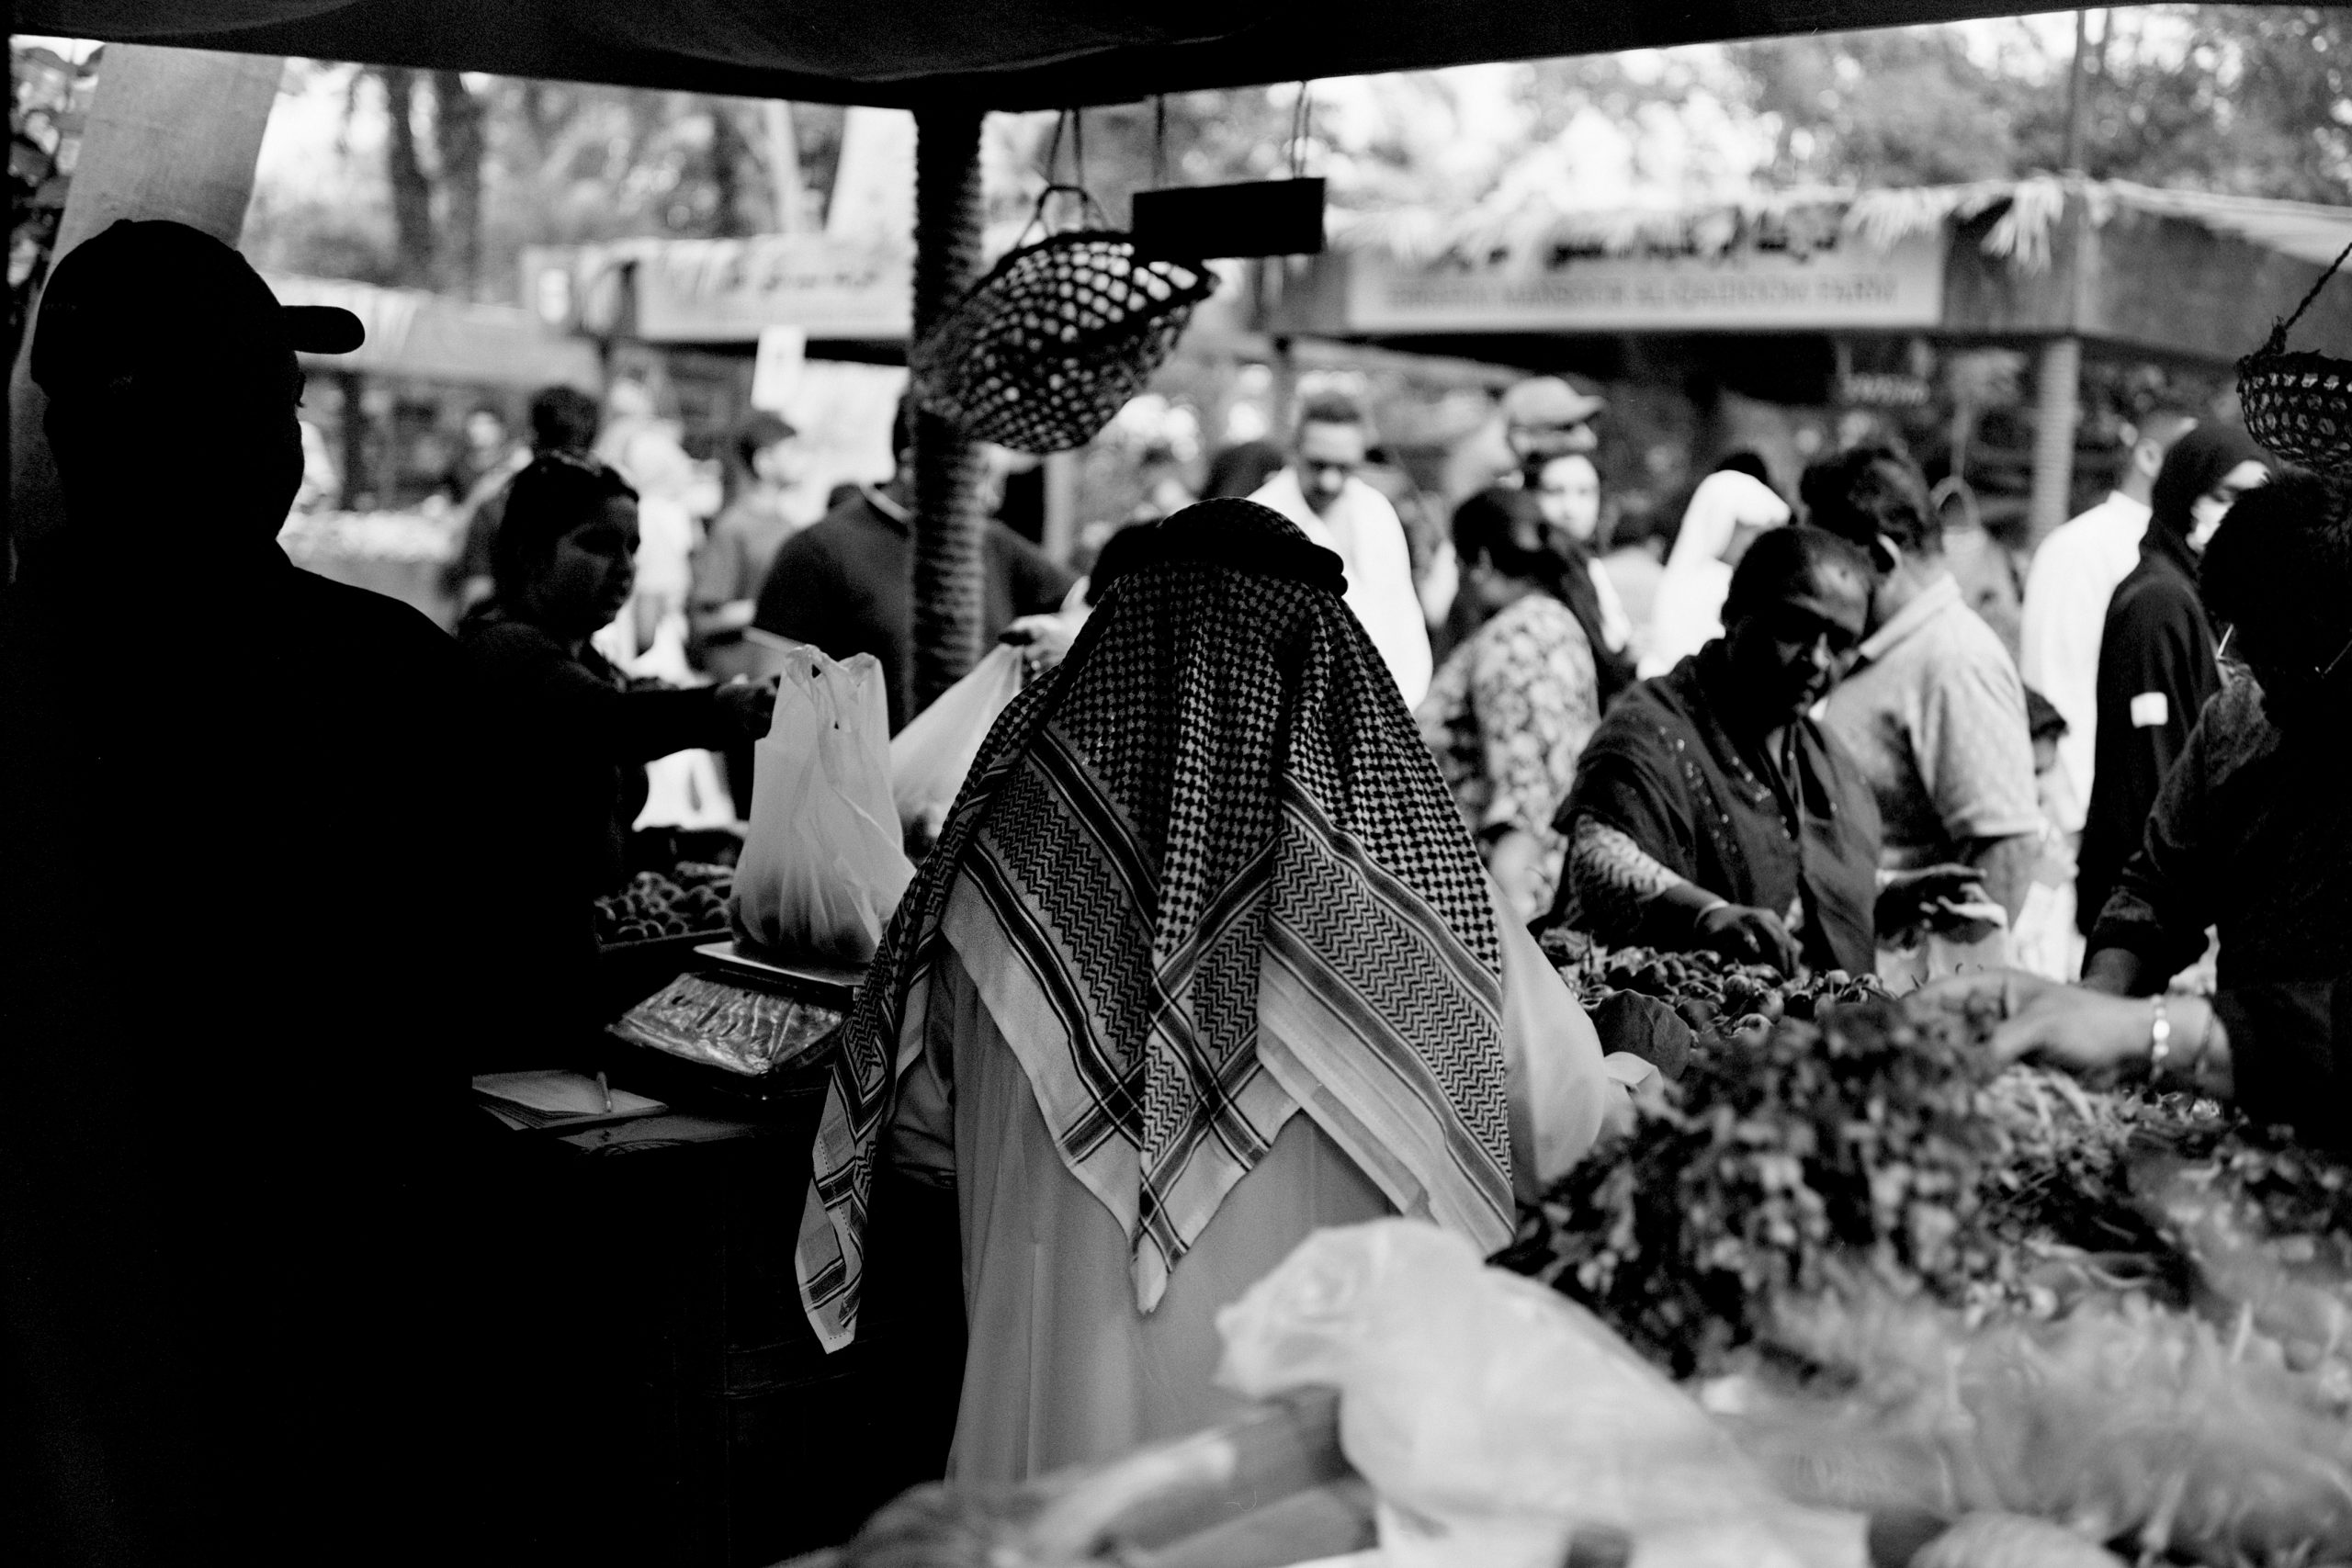
The Fuji GW690III, affectionately nicknamed the “Fuji Beast,” and also the “Texas Leica” may not be the flashiest camera on the block, but for dedicated film photographers seeking exceptional image quality and a unique shooting experience, it’s a legend.
My first experience: (See the video here)
I was in Bahrain recently and this “New to me” Camera, sourced from the Japan Camera Hunter, was hanging off my neck as I took to a Farmers Market to take photographs of the daily hustle. It looks heavy but weighs in at around 1500g and wasn’t uncomfortable at all to carry.
Two rolls of Ilford Delta 100 which I pushed to 400 and a roll of Ilford Ortho 80. Why did I push the film? I wanted a contrasty look and also be able to shoot faster shutter speeds and smaller apertures.
I didn’t have long to take my photographs as my Wife and Daughter also wanted some time with me, however, it didn’t take me long to bang out three rolls of 120! With only 8 shots per roll I found myself done in no time eagerly awaiting to see the fruits in development. What a camera!

Above: Nikon Zf just to show the colours of the Market. Below: Ilford Delta 100 (400)
The Power of 6x9cm:
Unlike most 35mm film cameras, the GW690III captures images on much larger 6x9cm negatives. This translates to exceptional image quality with incredible detail, dynamic range, and grain characteristics. However, be prepared for larger film costs and special scanning needs. I scanned these at home using a DSLR. So much detail comes from these negatives. Especially in the darkroom making prints.
Okay, so we only get 8 shots per 120 film. It certainly makes you think more and wait longer for a shot. With this in mind you find yourself slowing down, taking time and opens your creative mind. If I get 8 good shots from a roll of 36 in a 35mm camera I’d be happy!
Rangefinder:
Using the GW690III’s rangefinder is an exercise in mindfulness. You become one with the camera, the rhythm of your fingers adjusting focus, your eye a laser locked on the scene. It’s a deliberate dance, a far cry from the autofocus point-and-shoot we’re accustomed to.
It offers more than just basic focusing. The superimposed frame lines let you compose directly in the viewfinder, aiding in precise framing decisions. Additionally, the parallax correction markings compensate for minor shifts in perspective when focusing close-up, ensuring your subject remains precisely where you envision it.

A Legacy of Excellence:
Released in 1992, the GW690 III wasn’t the first in its line, but it refined the concept. Its predecessors, the GW690 and GW690II, laid the groundwork, but the III brought portability, image quality, and user-friendliness to a new level. Designed by Hiroshi Ohtake, mastermind behind the Leica M6, the GW690III boasted a sleek rangefinder design reminiscent of its Leica cousin, but on steroids.
Below: Behind the scenes of the market. Two little children sitting on their father’s boxes. Ortho 80.

Built for Deliberate Photography:
This camera isn’t for point-and-shooters. It’s a manual beast, demanding you to slow down, think, and compose each shot carefully. With no autofocus, no fancy metering modes, and a viewfinder that takes getting used to, it forces you to become one with the camera and the scene. Its charm lies in this deliberate process, making each capture a conscious decision.

The “Beastly” Heart: The 90mm f/3.5 EBC Fujinon Lens:
One of the camera’s true highlights is the incredible 90mm f/3.5 EBC Fujinon lens. This sharp, contrasty beauty renders scenes with stunning detail and a unique signature bokeh. From landscapes to portraits, its versatility shines, making it a true all-rounder. EBC stand for Electron Beam Coating. Sounds impressive anyway!
Below: The results of pushing Delta 100 2 stops. Contrast crazy! 510 Pyro Developer.
A Quirky Charmer:
The GW690III isn’t without its quirks. Its bulky size and weight might not be for everyone, the viewfinder takes some practice to master, and the lack of automation requires film photography know-how. But for those who embrace its uniqueness, it becomes an extension of their creative vision.
Is the Fuji GW690III Right for You?
If you’re a seasoned film photographer who thrives on slow, deliberate shooting, appreciates exceptional image quality, and enjoys the challenge of a manual camera, the GW690III could be your dream companion. However, if you crave automation, portability, or affordability, it might not be the perfect fit.
The Final Verdict:
The Fuji GW690III isn’t just a camera; it’s an experience. It’s a testament to the beauty of slow photography, rewarding those who invest time and effort with unparalleled image quality and a unique creative journey. So, if you’re ready to embrace the deliberate path, the “Beast” might just be waiting to unleash its magic on your film.
Zeiss Ikon Nettar Woodland
Hey camera connoisseurs and vintage enthusiasts! Today, I dive into the world of a true photographic icon: the Zeiss Ikon Nettar. This little folding beauty isn’t just a relic of the past, it’s a gateway to a simpler, more deliberate approach to photography.
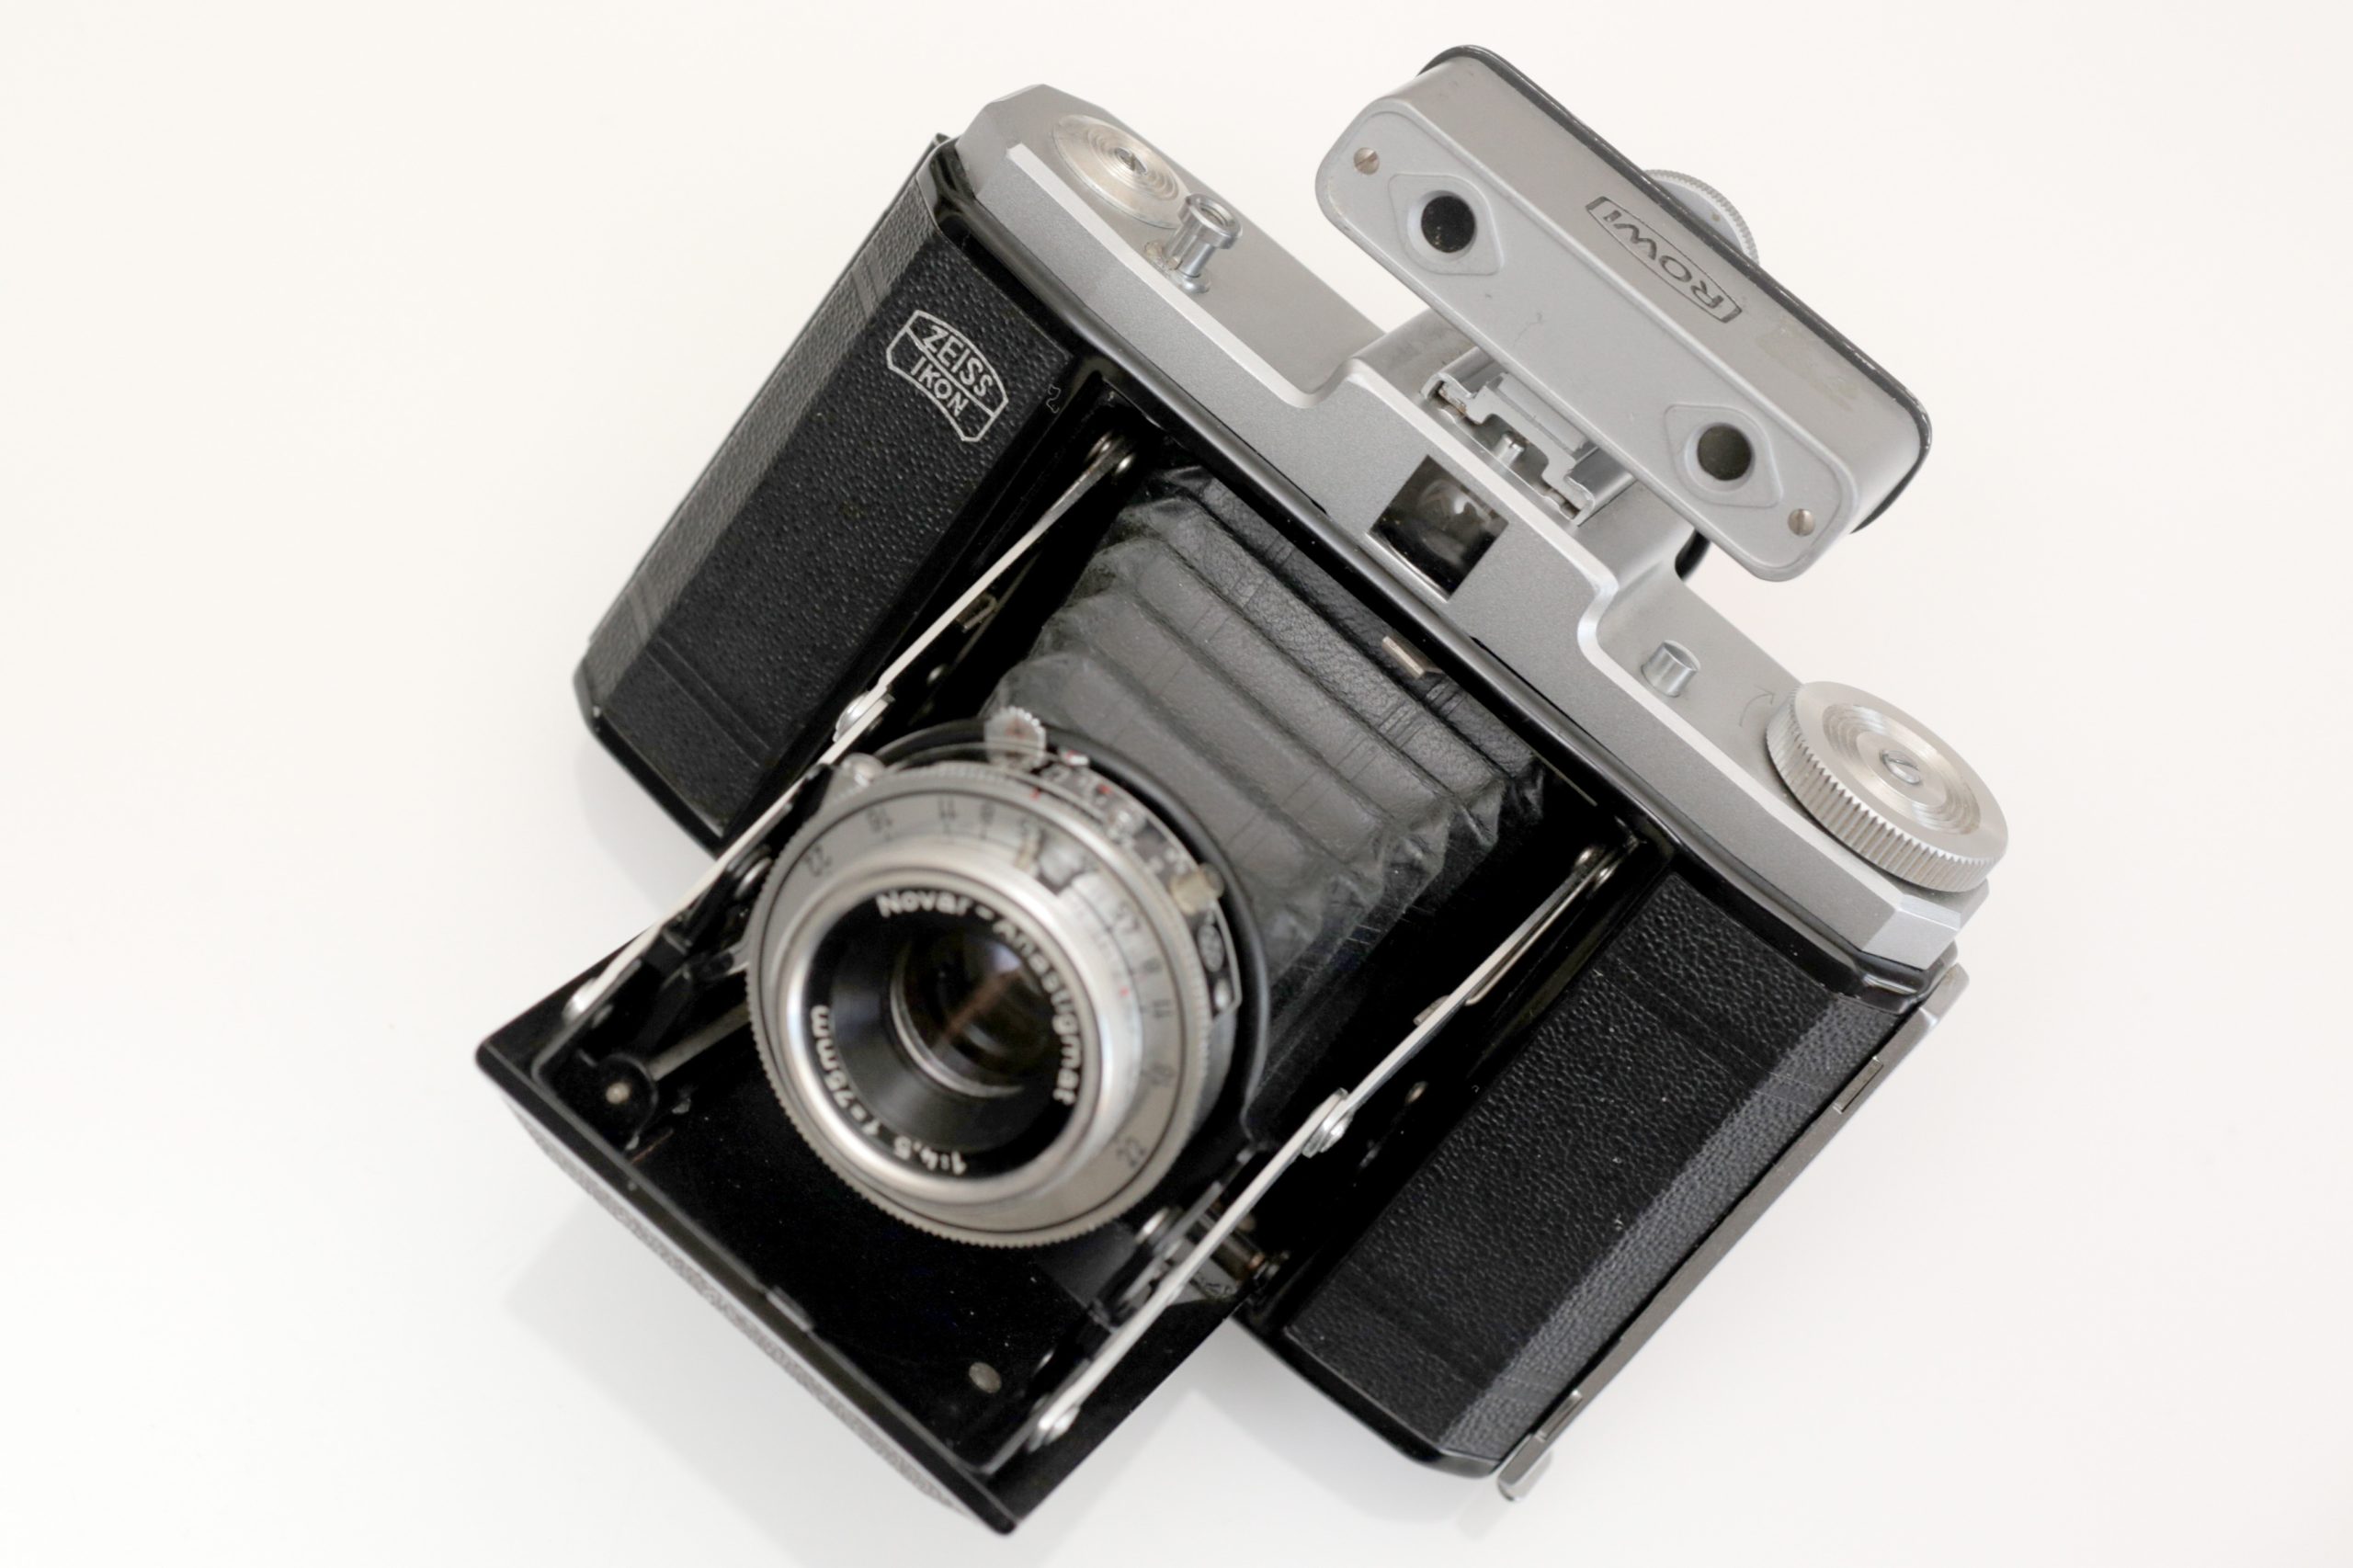
Back in the 1930s, Zeiss Ikon had a vision: make photography accessible. Enter the Nettar, a folding masterpiece engineered for the everyday snapshotter. No fancy rangefinders, no light meters, just clean lines, a satisfying click, and the legendary Novar lens. These cameras weren’t about technical acrobatics, they were about capturing life’s moments with intention and a touch of nostalgia.
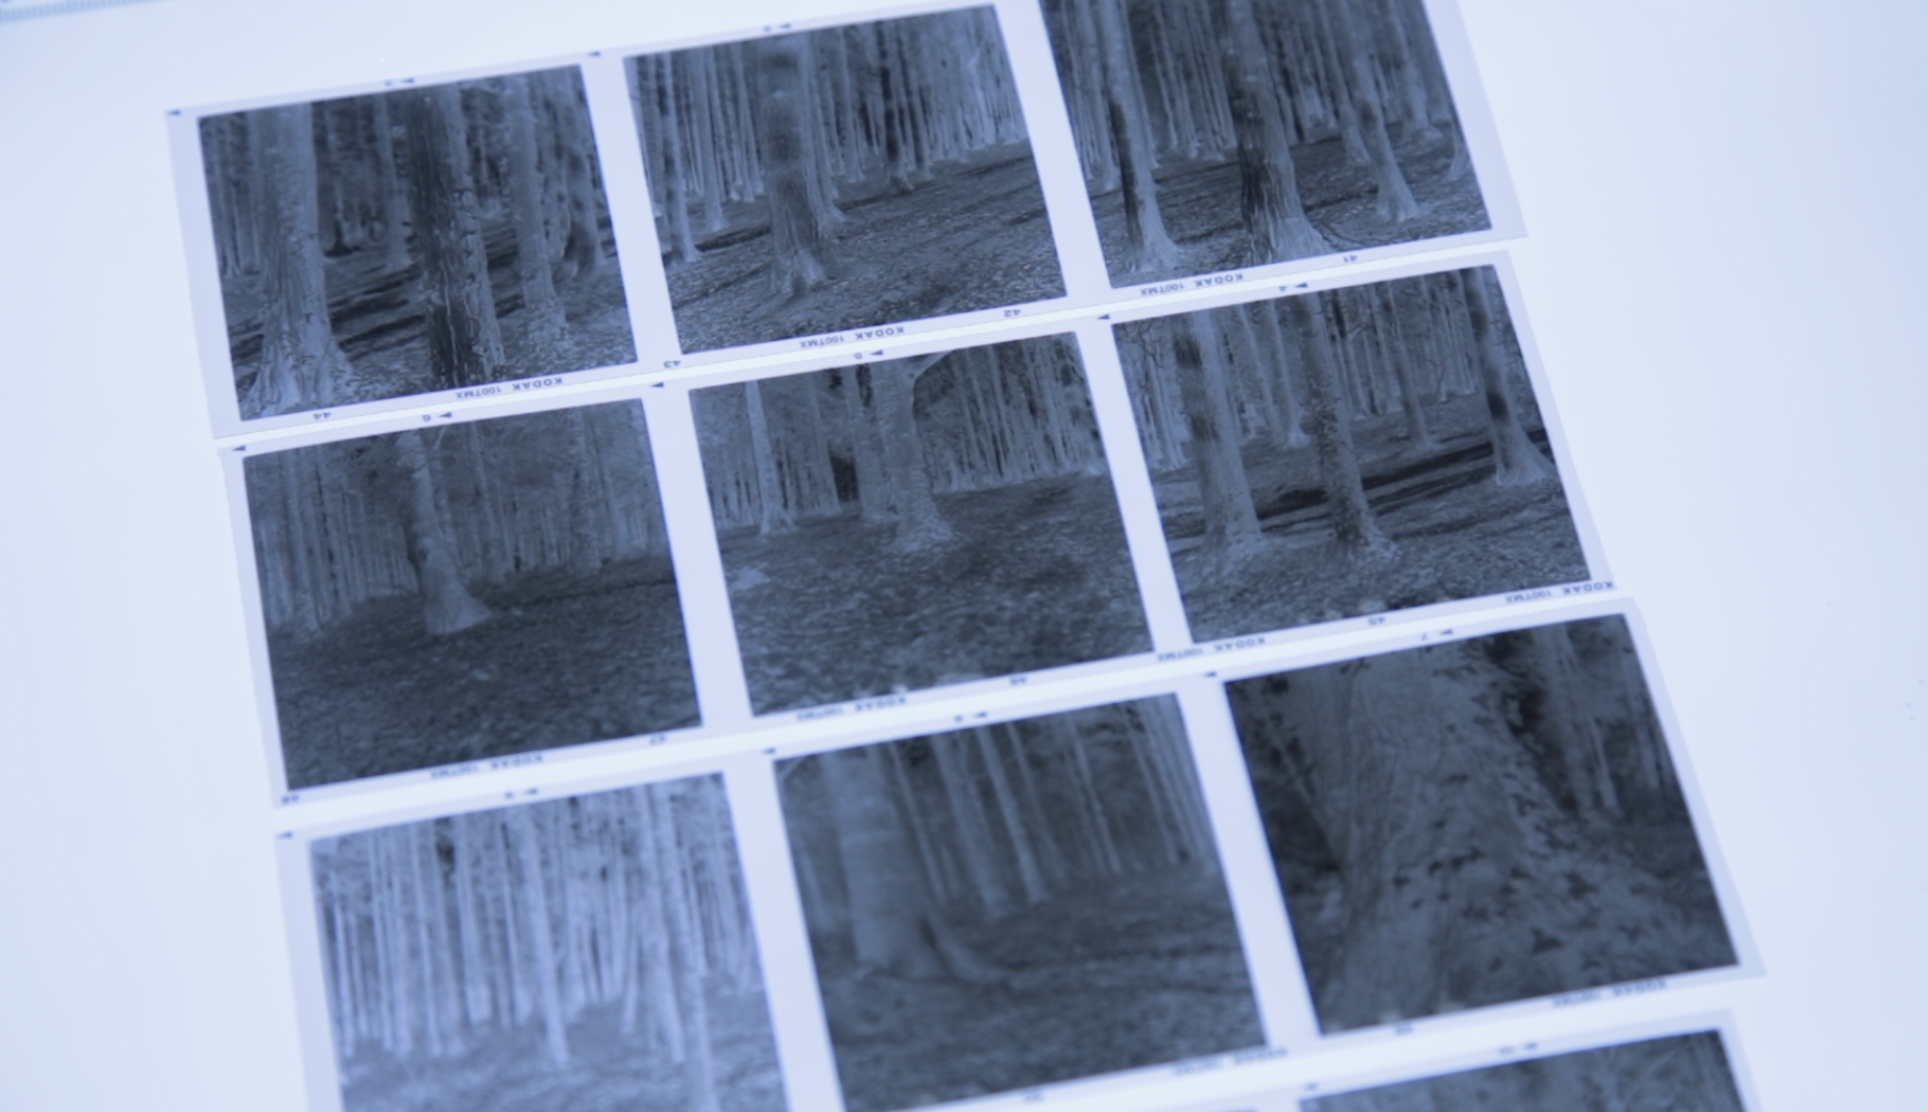
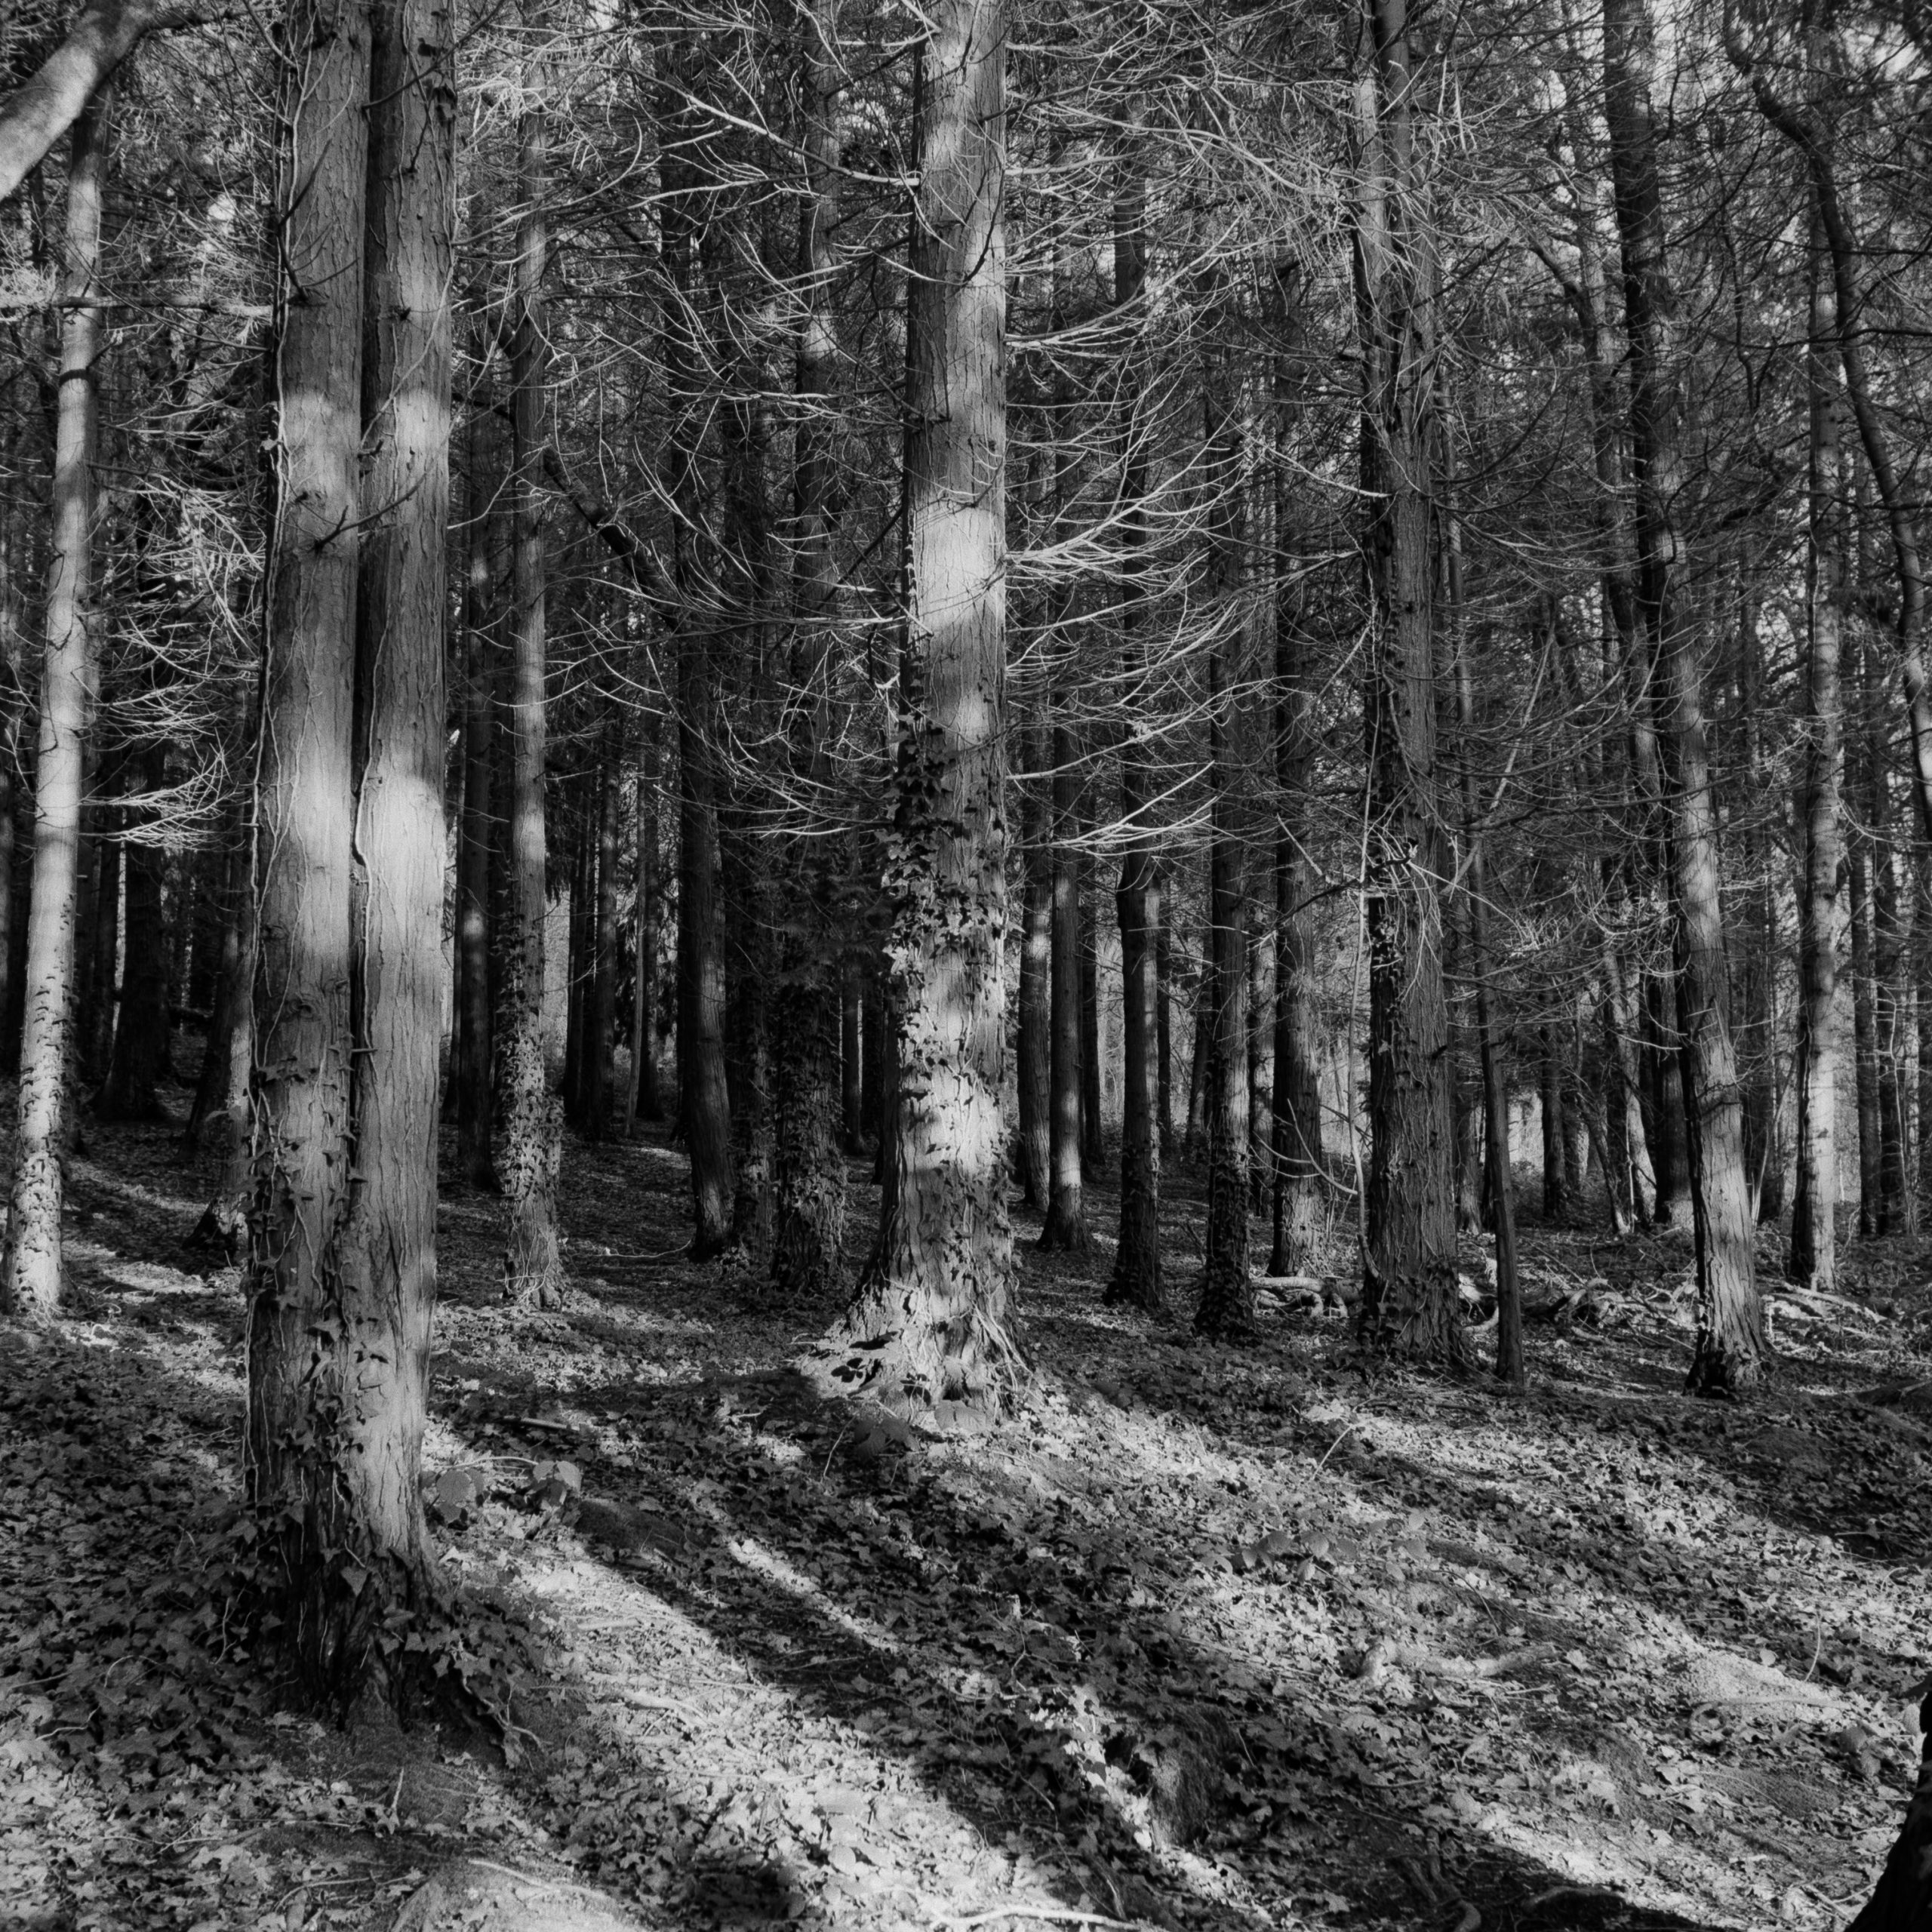
I took this beauty into the woods recently with a challenge! I shot a roll of Kodak TMAX 100 and was left with speeds slower than are on the camera itself and after metering the low lit woodland all I could do was to put the camera into Bulb Mode and guesstimate and count my exposure times. Most of which were around 1/15th of a second!
I made a vlog on the experience and here is the video, and also below are the negatives and scanned images as well as a couple of prints I made in the darkroom!
As expected my negatives were over exposed, but not ruined! This film has bags of latitude and I knew I would easily be able to get a print from them in the darkroom. They were developed in 510 Pyro.
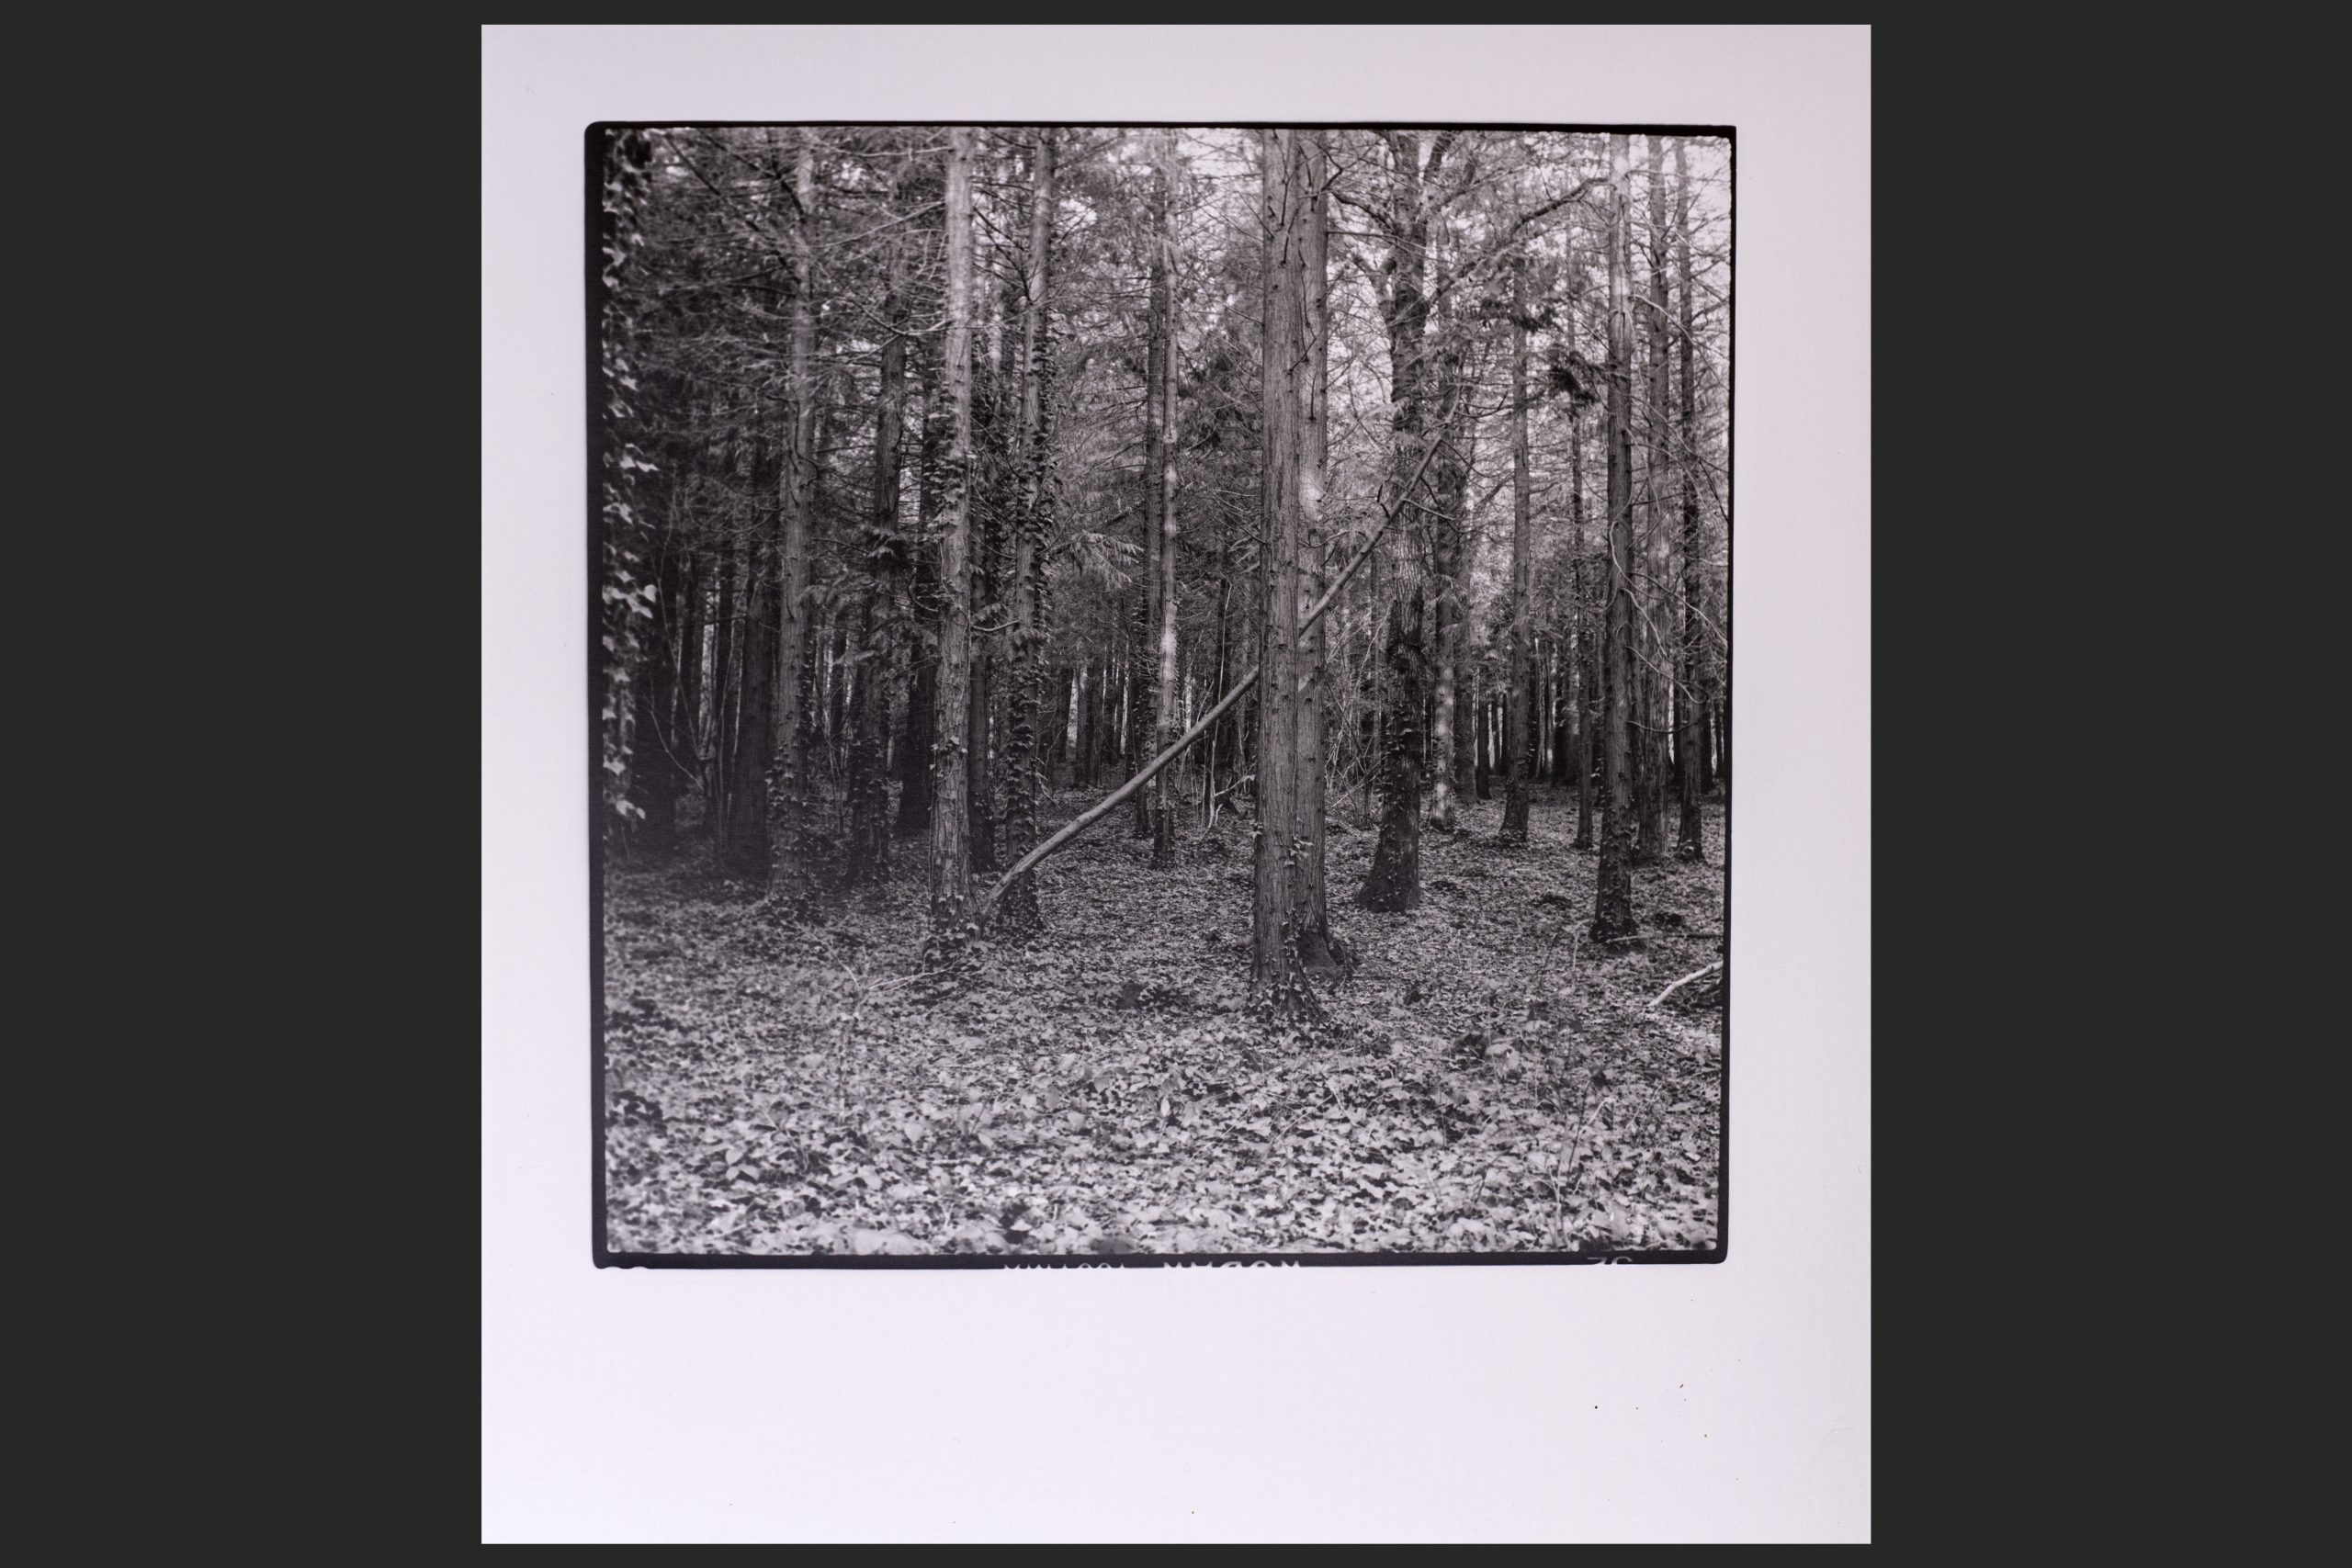
8×8 Print on Kentmere VC Select Paper. Turned out nice after a bit of split grading.
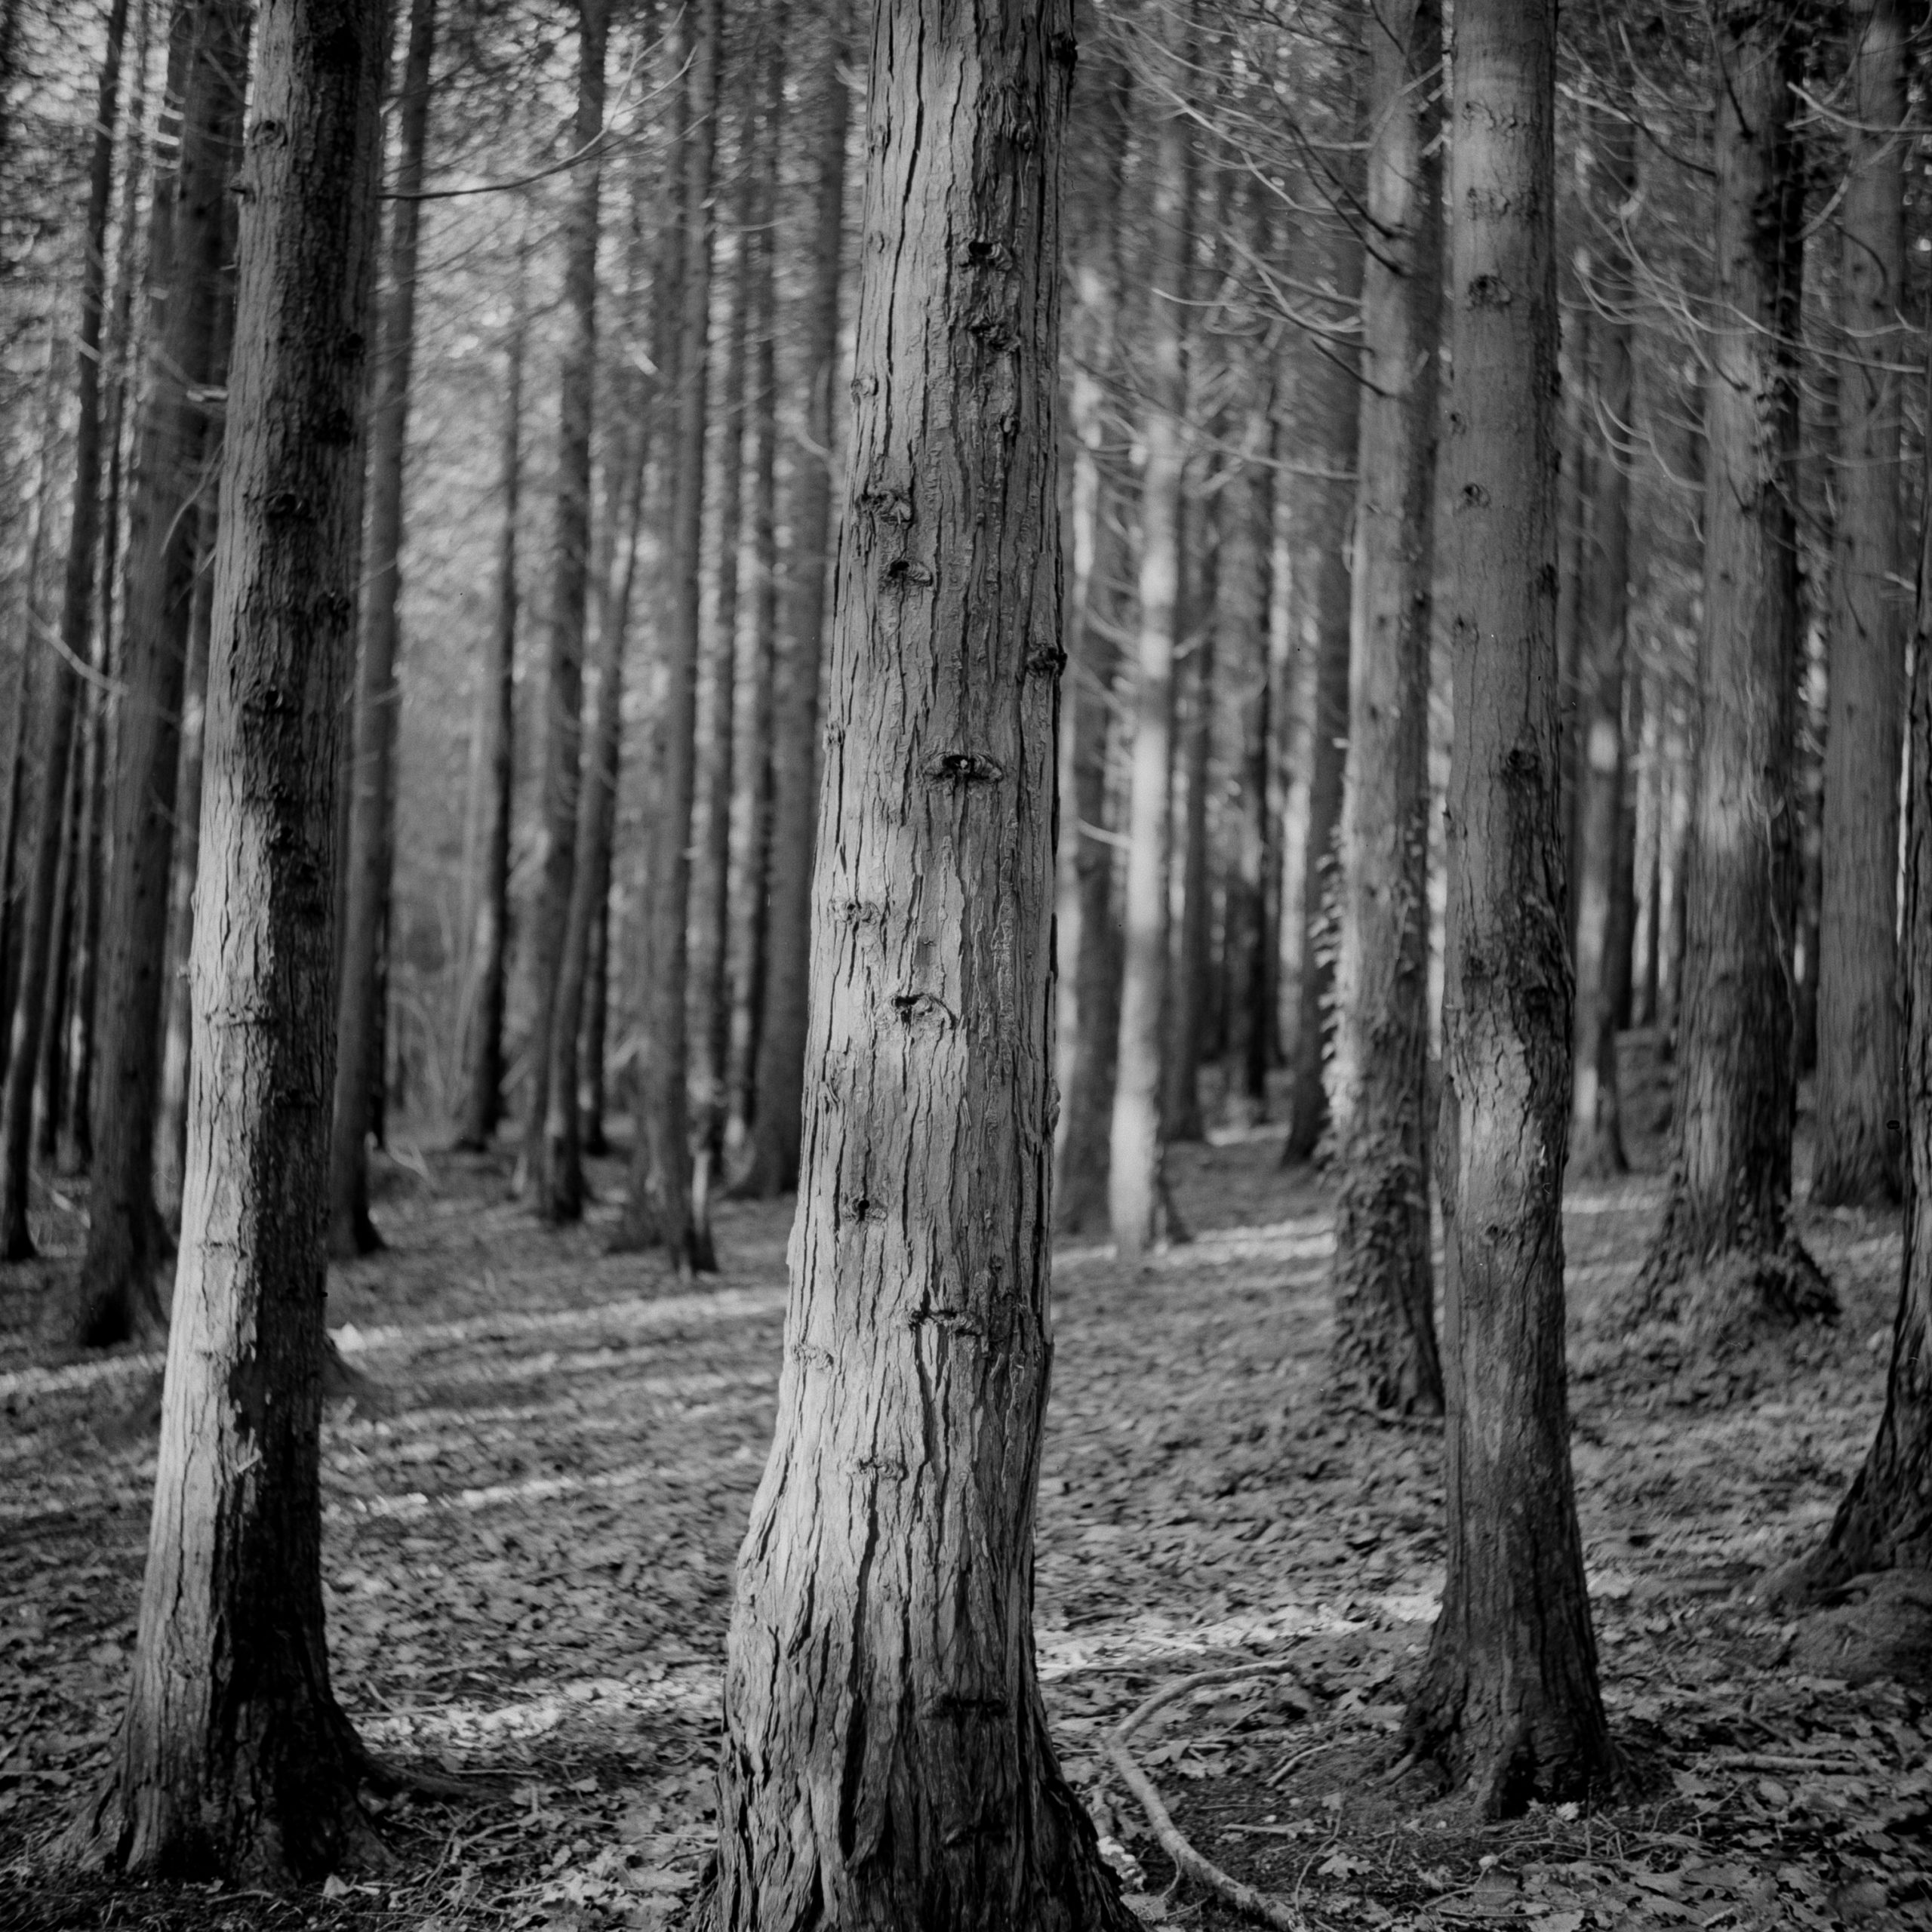
And here are the scanned images.


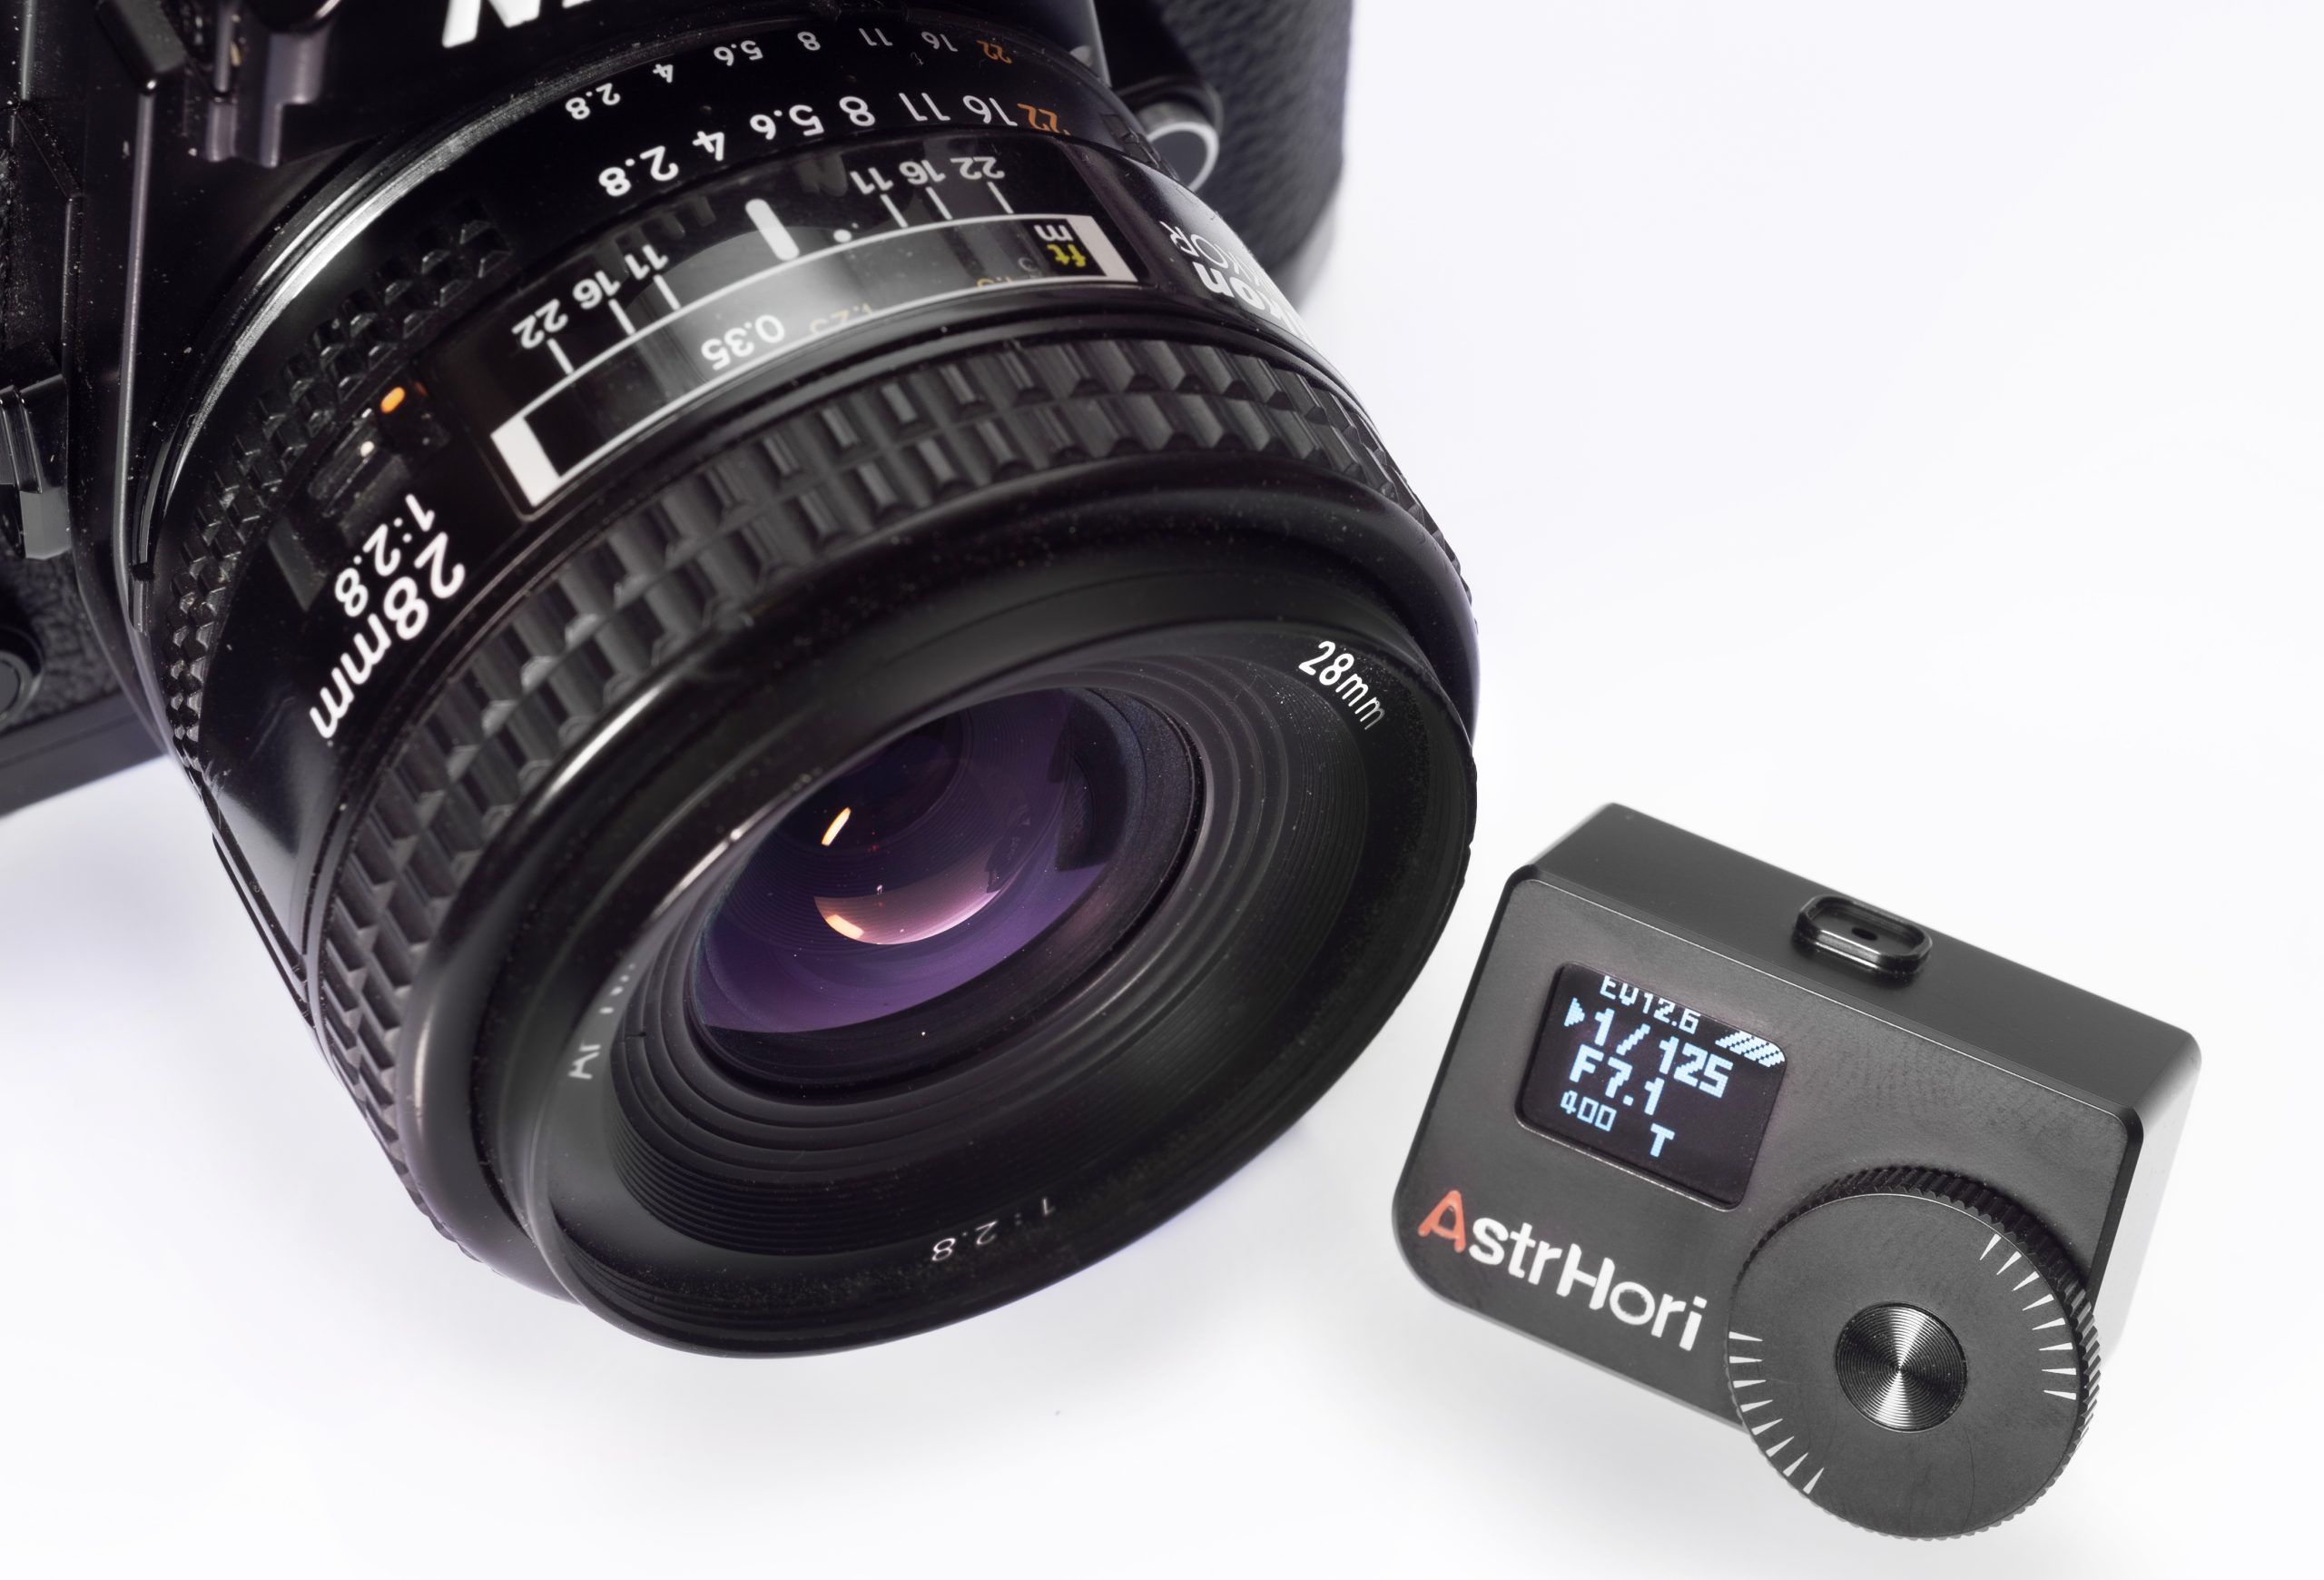
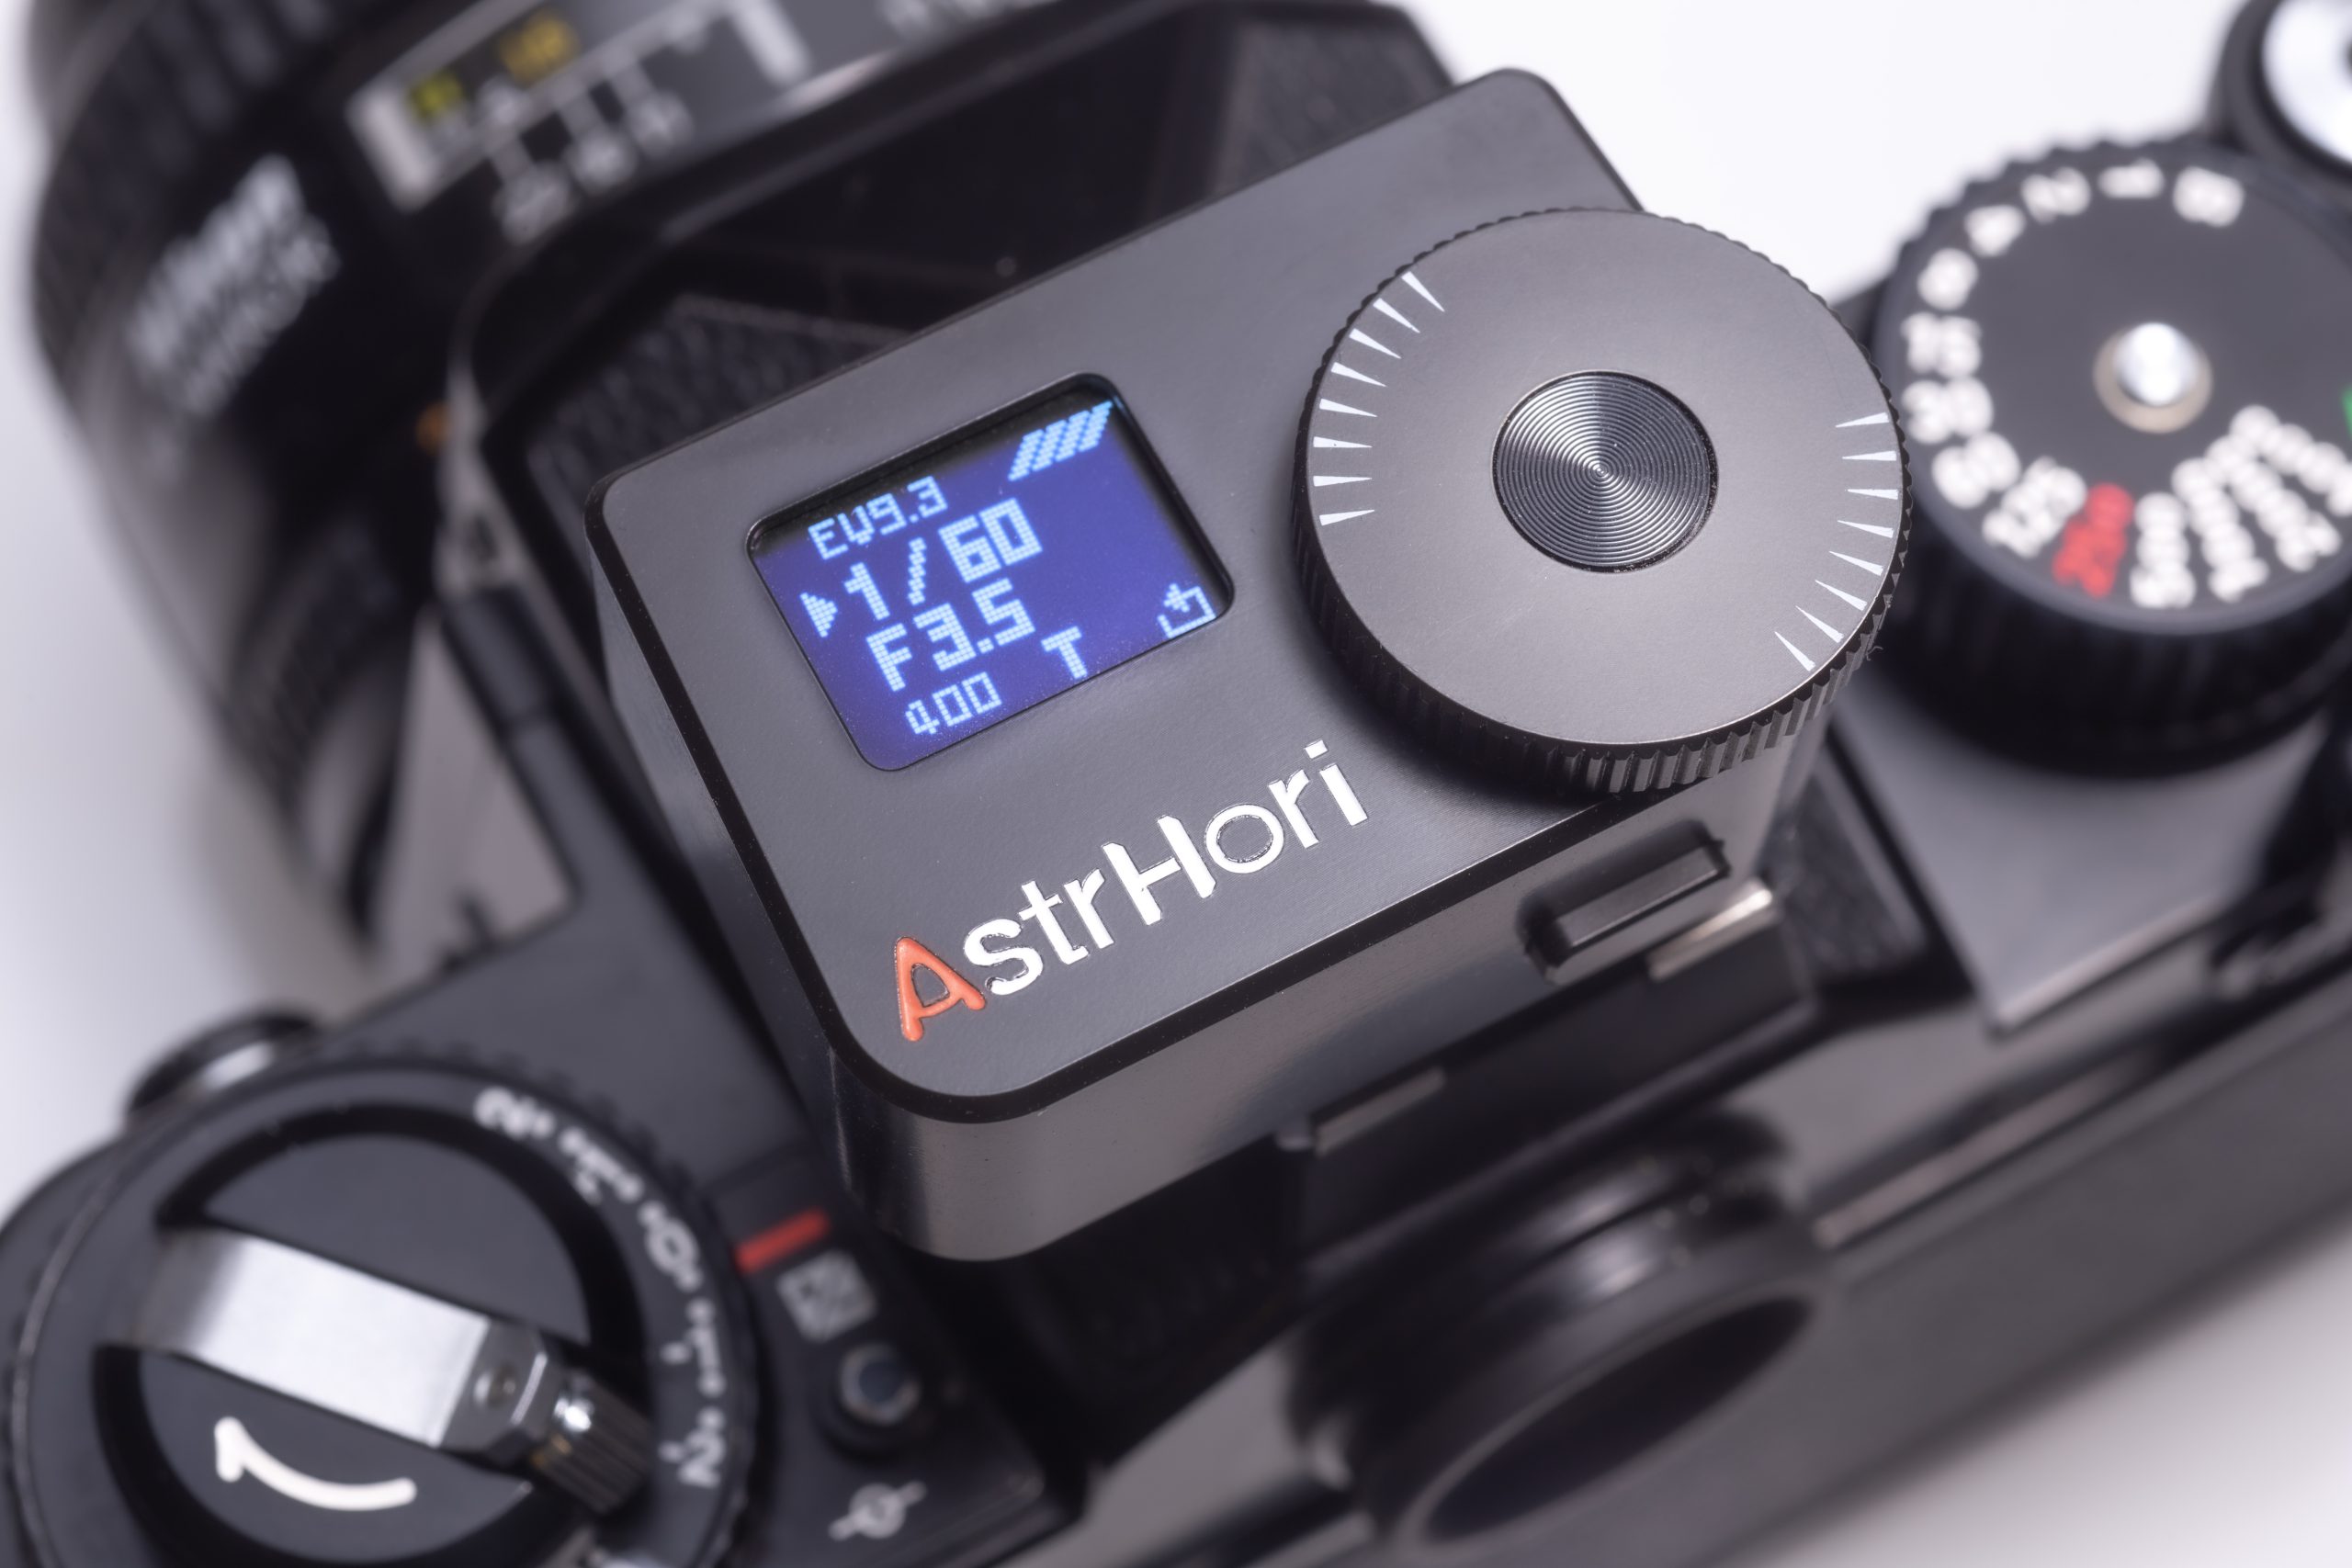
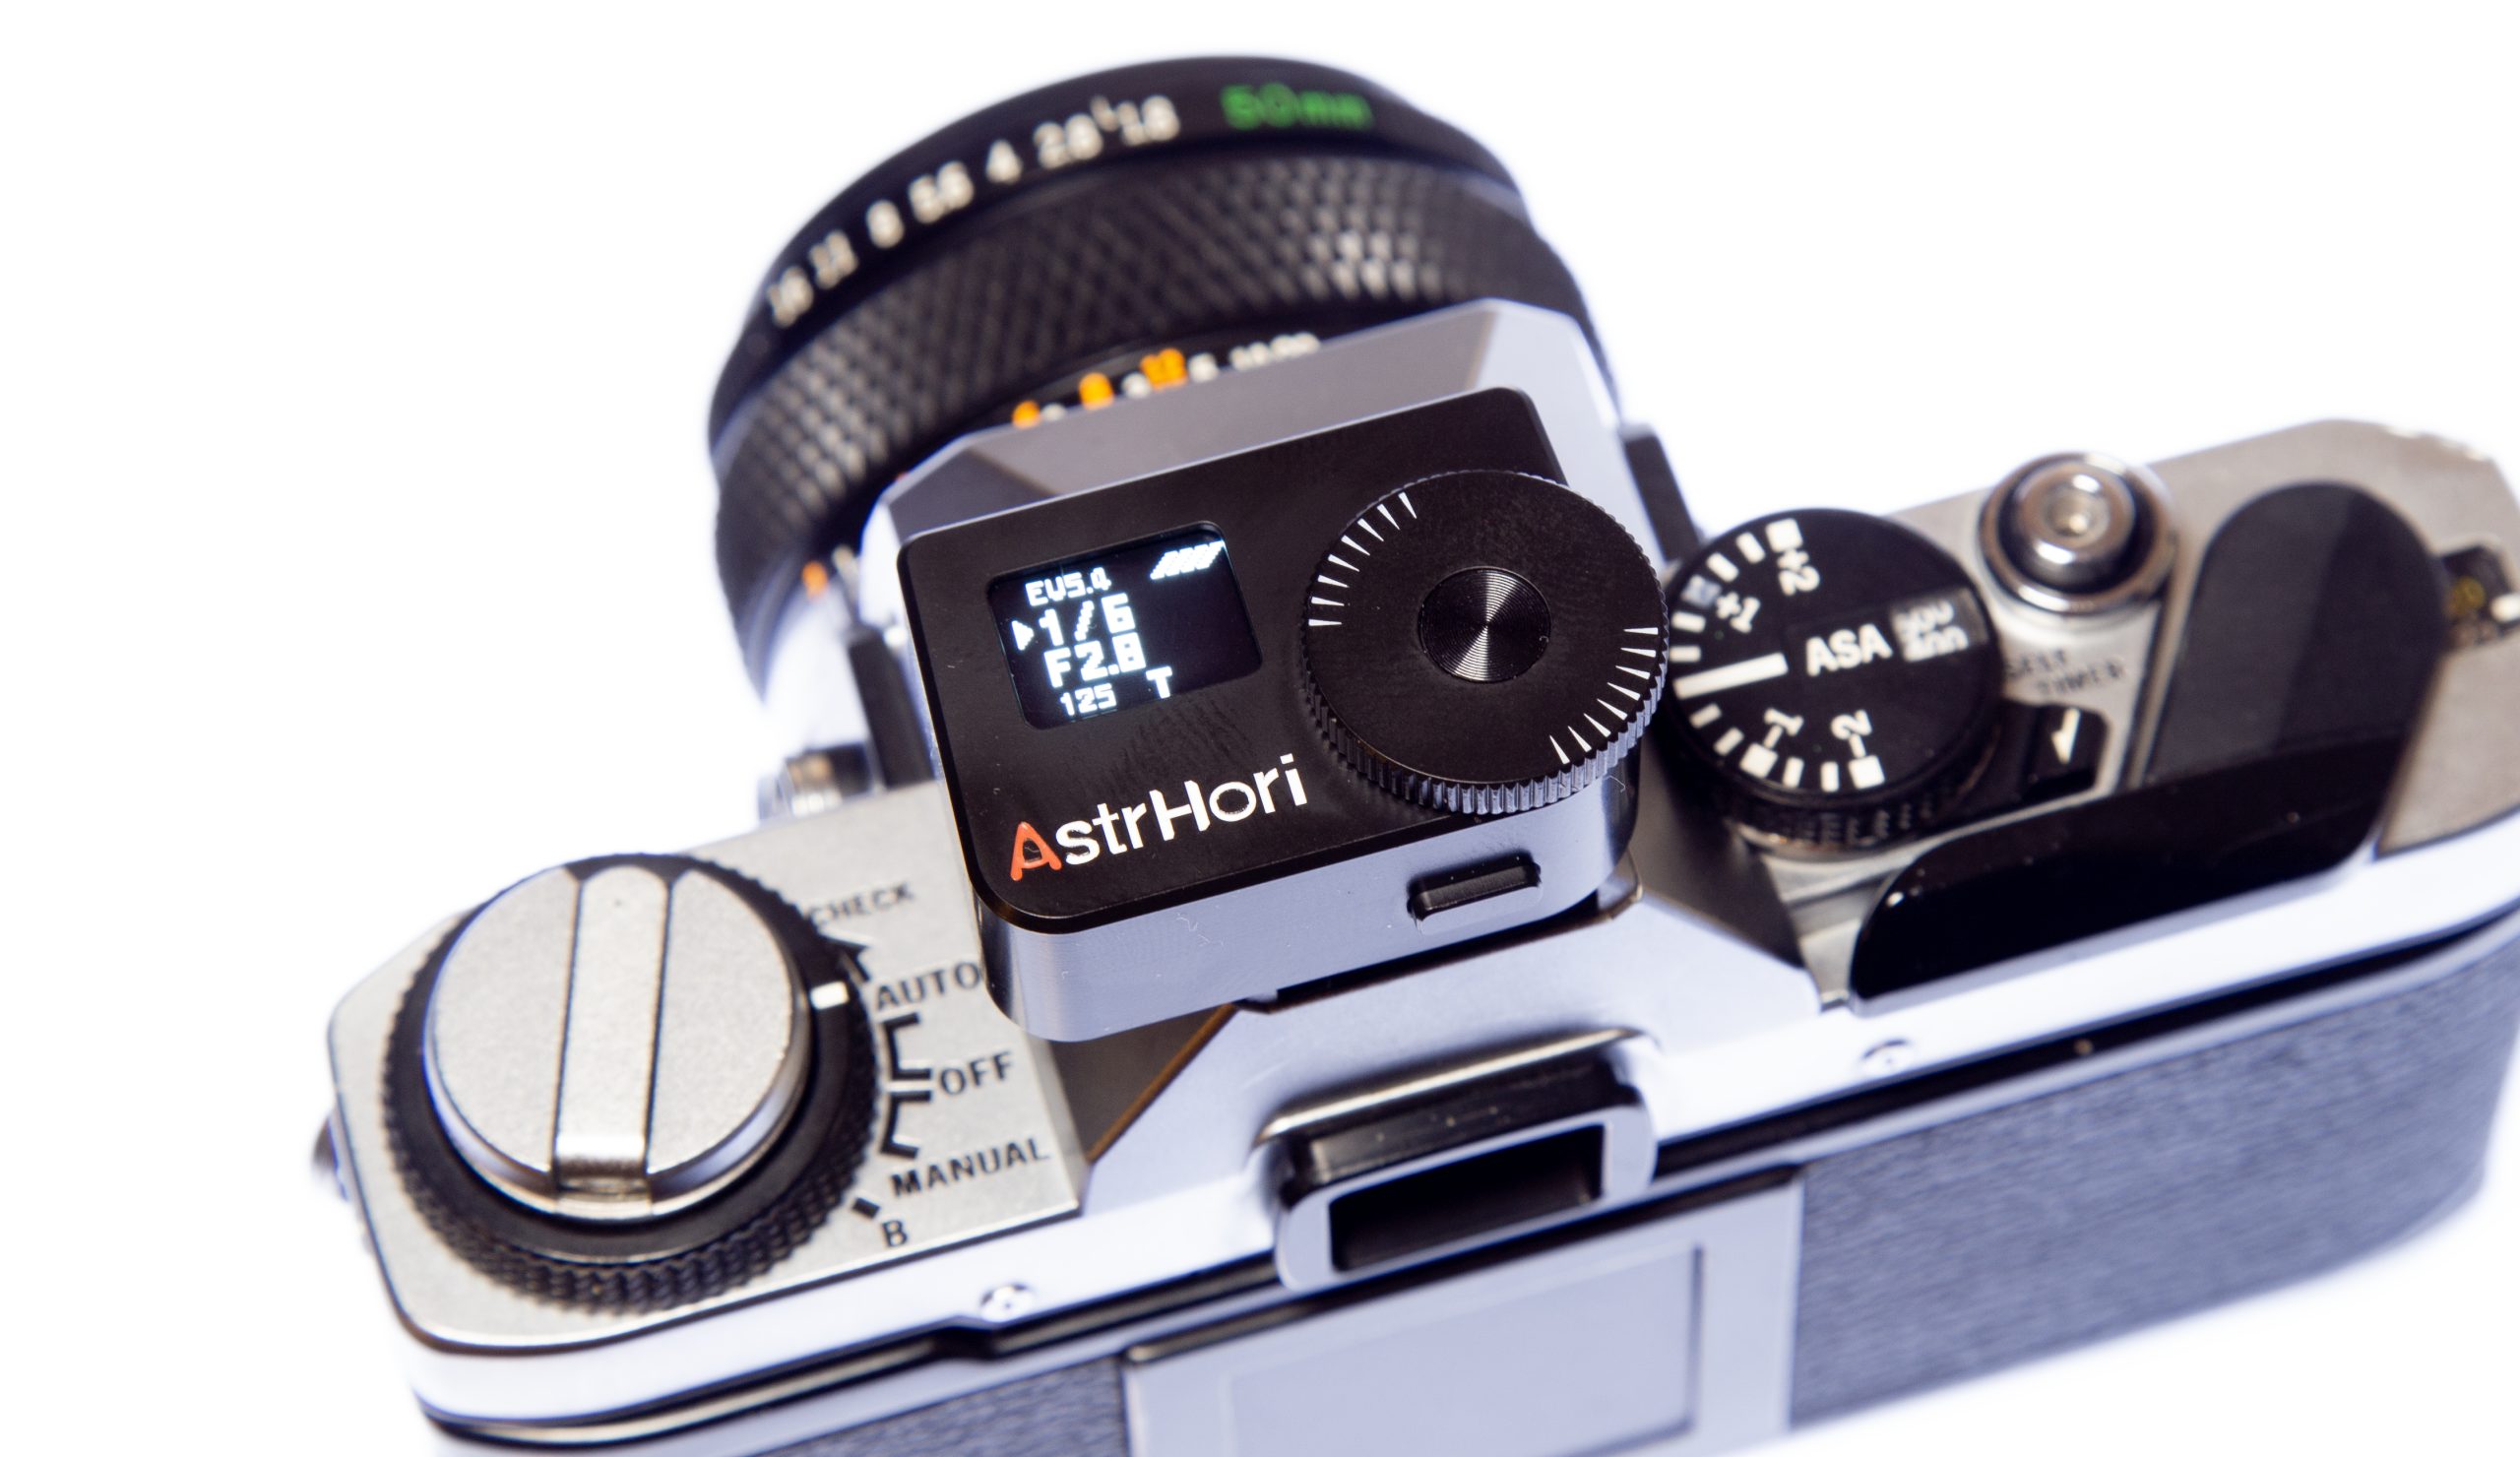
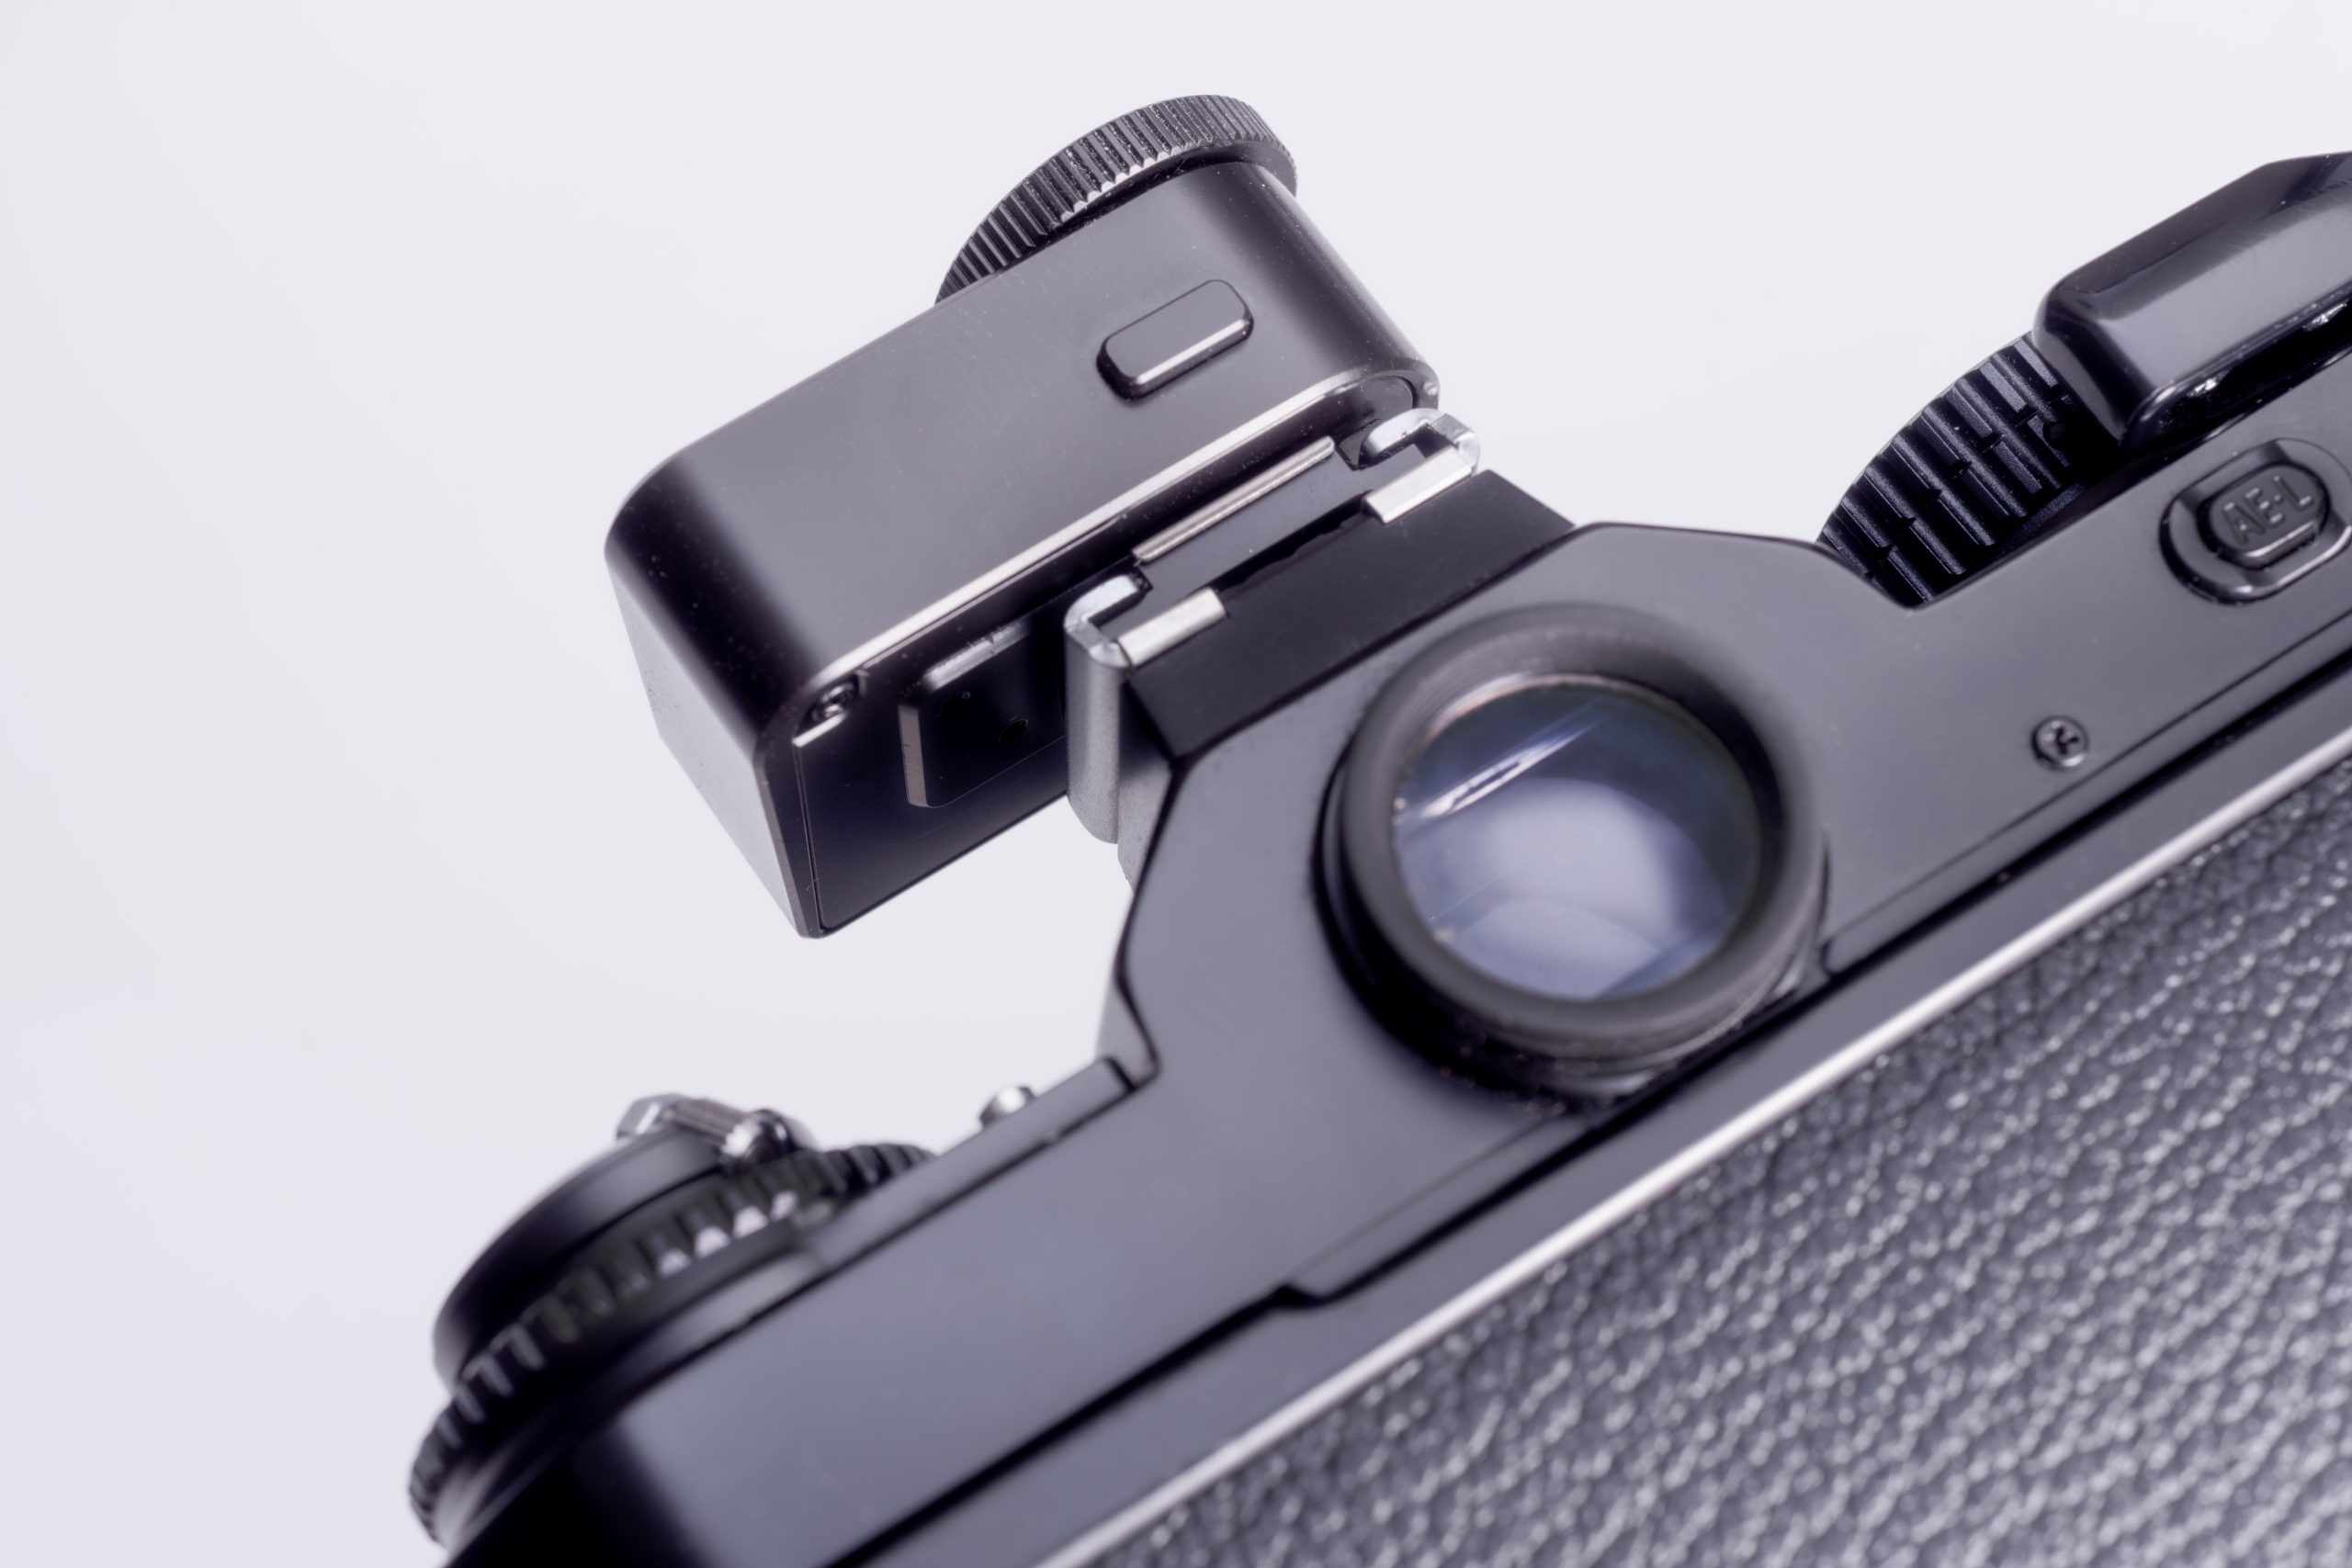
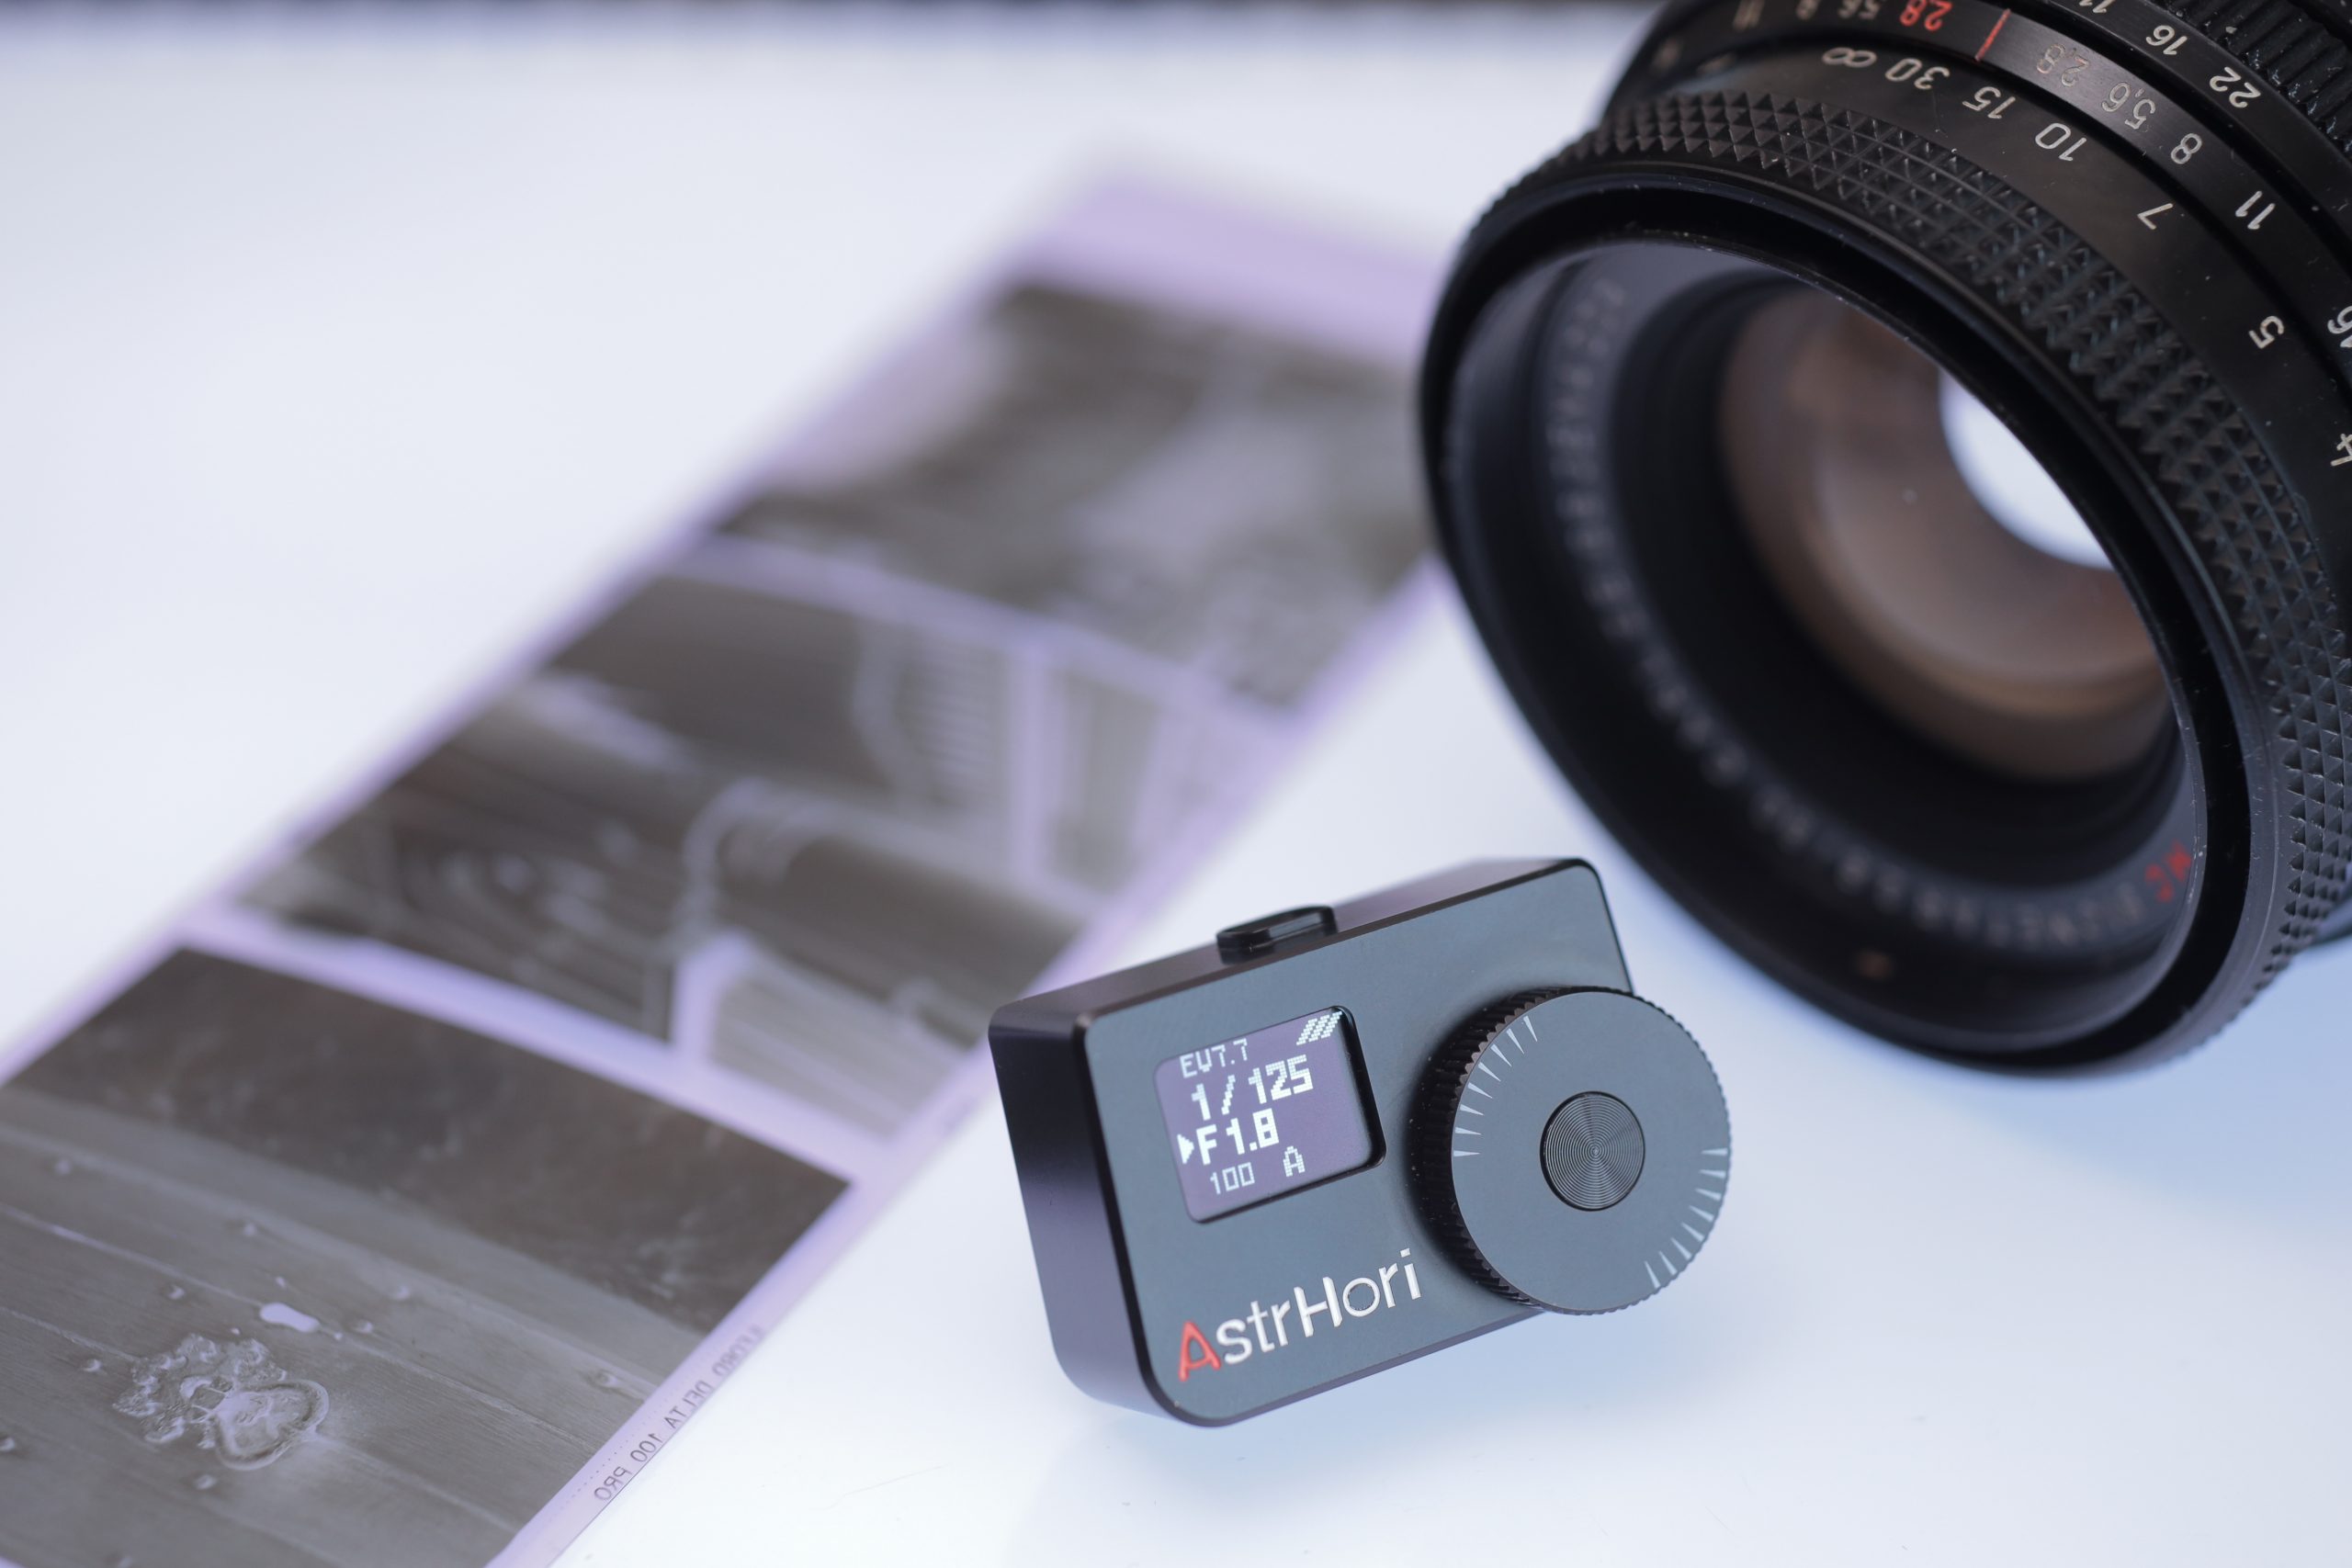
Astrhori AH-M1 a Tiny Light Meter
Surely this won’t be accurate?
I never thought I would see the day when I would use one of these tiny light meters!
I have seen them becoming popular over the past few years but always thought they were just a fancy gadget made in China that would appeal to film shooters that were either in need of an alternative inexpensive light meter or just love having these fancy gadgets in their bag.
We all love a gadget, right!
Check out the price of these light meters
I use a Sekonic Zoom Master L508 light meter for most of my work. It is a lump to carry around for your everyday style of Street/Urban Photography but for my Medium/Large format Scapes, Portraits and Still Life it has proved to be a must have in my bag. Most of my Street/Urban I shoot 35mm and most of my 35mm cameras have excellent built in meters. But, I do have a few that I use now and again that don’t have a meter inside. With those cameras I either meter by sight and wing it (400 Speed Film and F8 don’t be late) or use a phone app for a quick guide. I don’t take the Sekonic with me.
My friend, Nick, came to see me from the States and we went for a photo walk together and out of his bag he pulls out this tiny little light meter. I had never seen one in person before. I put it in my hands, had a fiddle with it and gave it back. Expecting my friend to put the meter onto his cameras shoe he measured the light by using it in his hand, pointing it at the scene and then put it in his pocket and cracked on taking pictures. I spoke no more of the subject. I was thinking it was no more useful than a phone app. Thats not to say phone apps are no good. I use one occasionally. But just as a rough guide.
A few weeks later a company, Pergear, in China asked if I would like to review a Light Meter. And it was only the exactly same one as my friends! The Astrhori AH-M1.
Whats the chances of that! So I accepted.
I only accept products that I think would benefit the Film, Photography and Video Making Communities so I was excited to see if I was right about this little tiny gadget. I was wrong! And it works very well and is very accurate! Certainly a better offer than the office desk I was asked to review. Or the latest gaming app. Not to mention the latest sun glasses! As a YouTuber you do get some strange requests.
Functions
Using the function button you can change the ISO, metering mode (Aperture or Shutter Priority), Lock the exposure and also use continuous metering or single metering. Continuous meaning the meter changes value automatically as you point it to different light sources, single meaning you have to point the meter at your subject and press the function button for a reading.
To access the functions you use the one function button in various sequences which sounds a faff but it’s really quite simple.
It also shows an EV reading and Exposure Compensation. The exposure compensation is what you would use to calibrate the meter.
The shutter speeds go from 30 seconds all the way to 1/8000 of a second. The ISO goes from ISO 5 to 6400 and the Aperture goes from F1 to F32.
There is also a battery level indicator.
Build Quality
It feels quality! A solid metal case, could be brass. The photo on the Pergear website shows the bracing effect.
It has one function button, a jog wheel, a USB C for recharging the internal battery, which I have seen lasting all day long! And, of course, a pinhole light sensor. It also has a cold shoe for mounting to your camera that can be adjusted to shift left or right so the meter doesn’t cover your cameras shutter speed dial. Although, you have to unscrew the cold shoe using the Allen Key provided which is a bit fiddly.
On my one the USB connector is a bit wonky and the OLED display is probably half a mm off centre but it doesn’t affect its performance. Just if you are OCD like I am! And the OLED is very bright which is easily visible in daylight.
The display is also not protected by any glass or plastic so be careful if you are out in the rain! I can see water droplets easily seeping into the unit via the USB or Display.
If I could make any changes to the unit it would be to put the display on the back where the function button is. It would change the design a bit in size maybe but it would be easier to see as you are taking photos but no big deal! Also, a small loop fixed to the unit so you could attach a lanyard to put around your neck as it is so small I kept misplacing it.
What would I use it for?
It certainly wouldn’t replace my Sekonic. And I wouldn’t use it for my cameras that have good working internal meters. But, I do have cameras where the meters are either not that accurate and some without a meter at all. It would be especially handy when I take my folding cameras out for some Street/Urban Photography.
I’m not sure though if I would use it on camera or just put it in my pocket as my friend did.
How did I test it?
I used my Leica Q2 Monochrome. That camera has an outstandingly accurate light meter inside so I fixed the Meter to the cameras hot shoe and compared the exposure readings on various subjects, indoors and out doors. The Astrhori was reading about 1 stop over exposed compared to the Leica’s meter so I changed the Exposure Compensation on the Astrhori to -1 and BINGO. Every where I pointed the meter indoors I was getting the exact same reading on the Lieca. It was hit and miss a few times but only by one third here and there.
I then used my Sekonic in incident mode using the Lumisphere and again the Astrhori hit the spot. Give or take a smidge.
Being a reflective meter, meaning it reads light that is reflecting off a subject the same as your cameras internal meter, it will be touch and go with bright scenes such as scapes and sky. I will more than likely read the sky and then read the ground where there is detail and go in between.
I am not sure of the angle of metering but I have heard it is 30%. But from my tests if you point the meter to your subject at a reasonably close distance the reading returns an accurate exposure. It is sensative, meaning, if you are outside and point the meter a bit up towards the sky the readings change, as expected. Which is good.
FILM ILFORD DELTA 100
I went out with a Pentacon Six and a roll of Ilford Delta 100 to test the light meter on film and also made a vlog showing the tests, and the meter worked well! Here are some photographs I shot using the meter after developing in 510 PYRO.

Going Forward
I will definitely be using this light meter occasionally on camera but will more than likely put it in my pocket or bag every time I go out taking pictures. It is so small it would be a crime not to carry it about. You never know!
As I said it won’t replace my Sekonic for an accurate reading but for certain cameras and subjects it will be ideal and I am so pleased I got this product to test. I now know they work very well.
Harman Phoenix 200 Film
A NEW Colour Film!
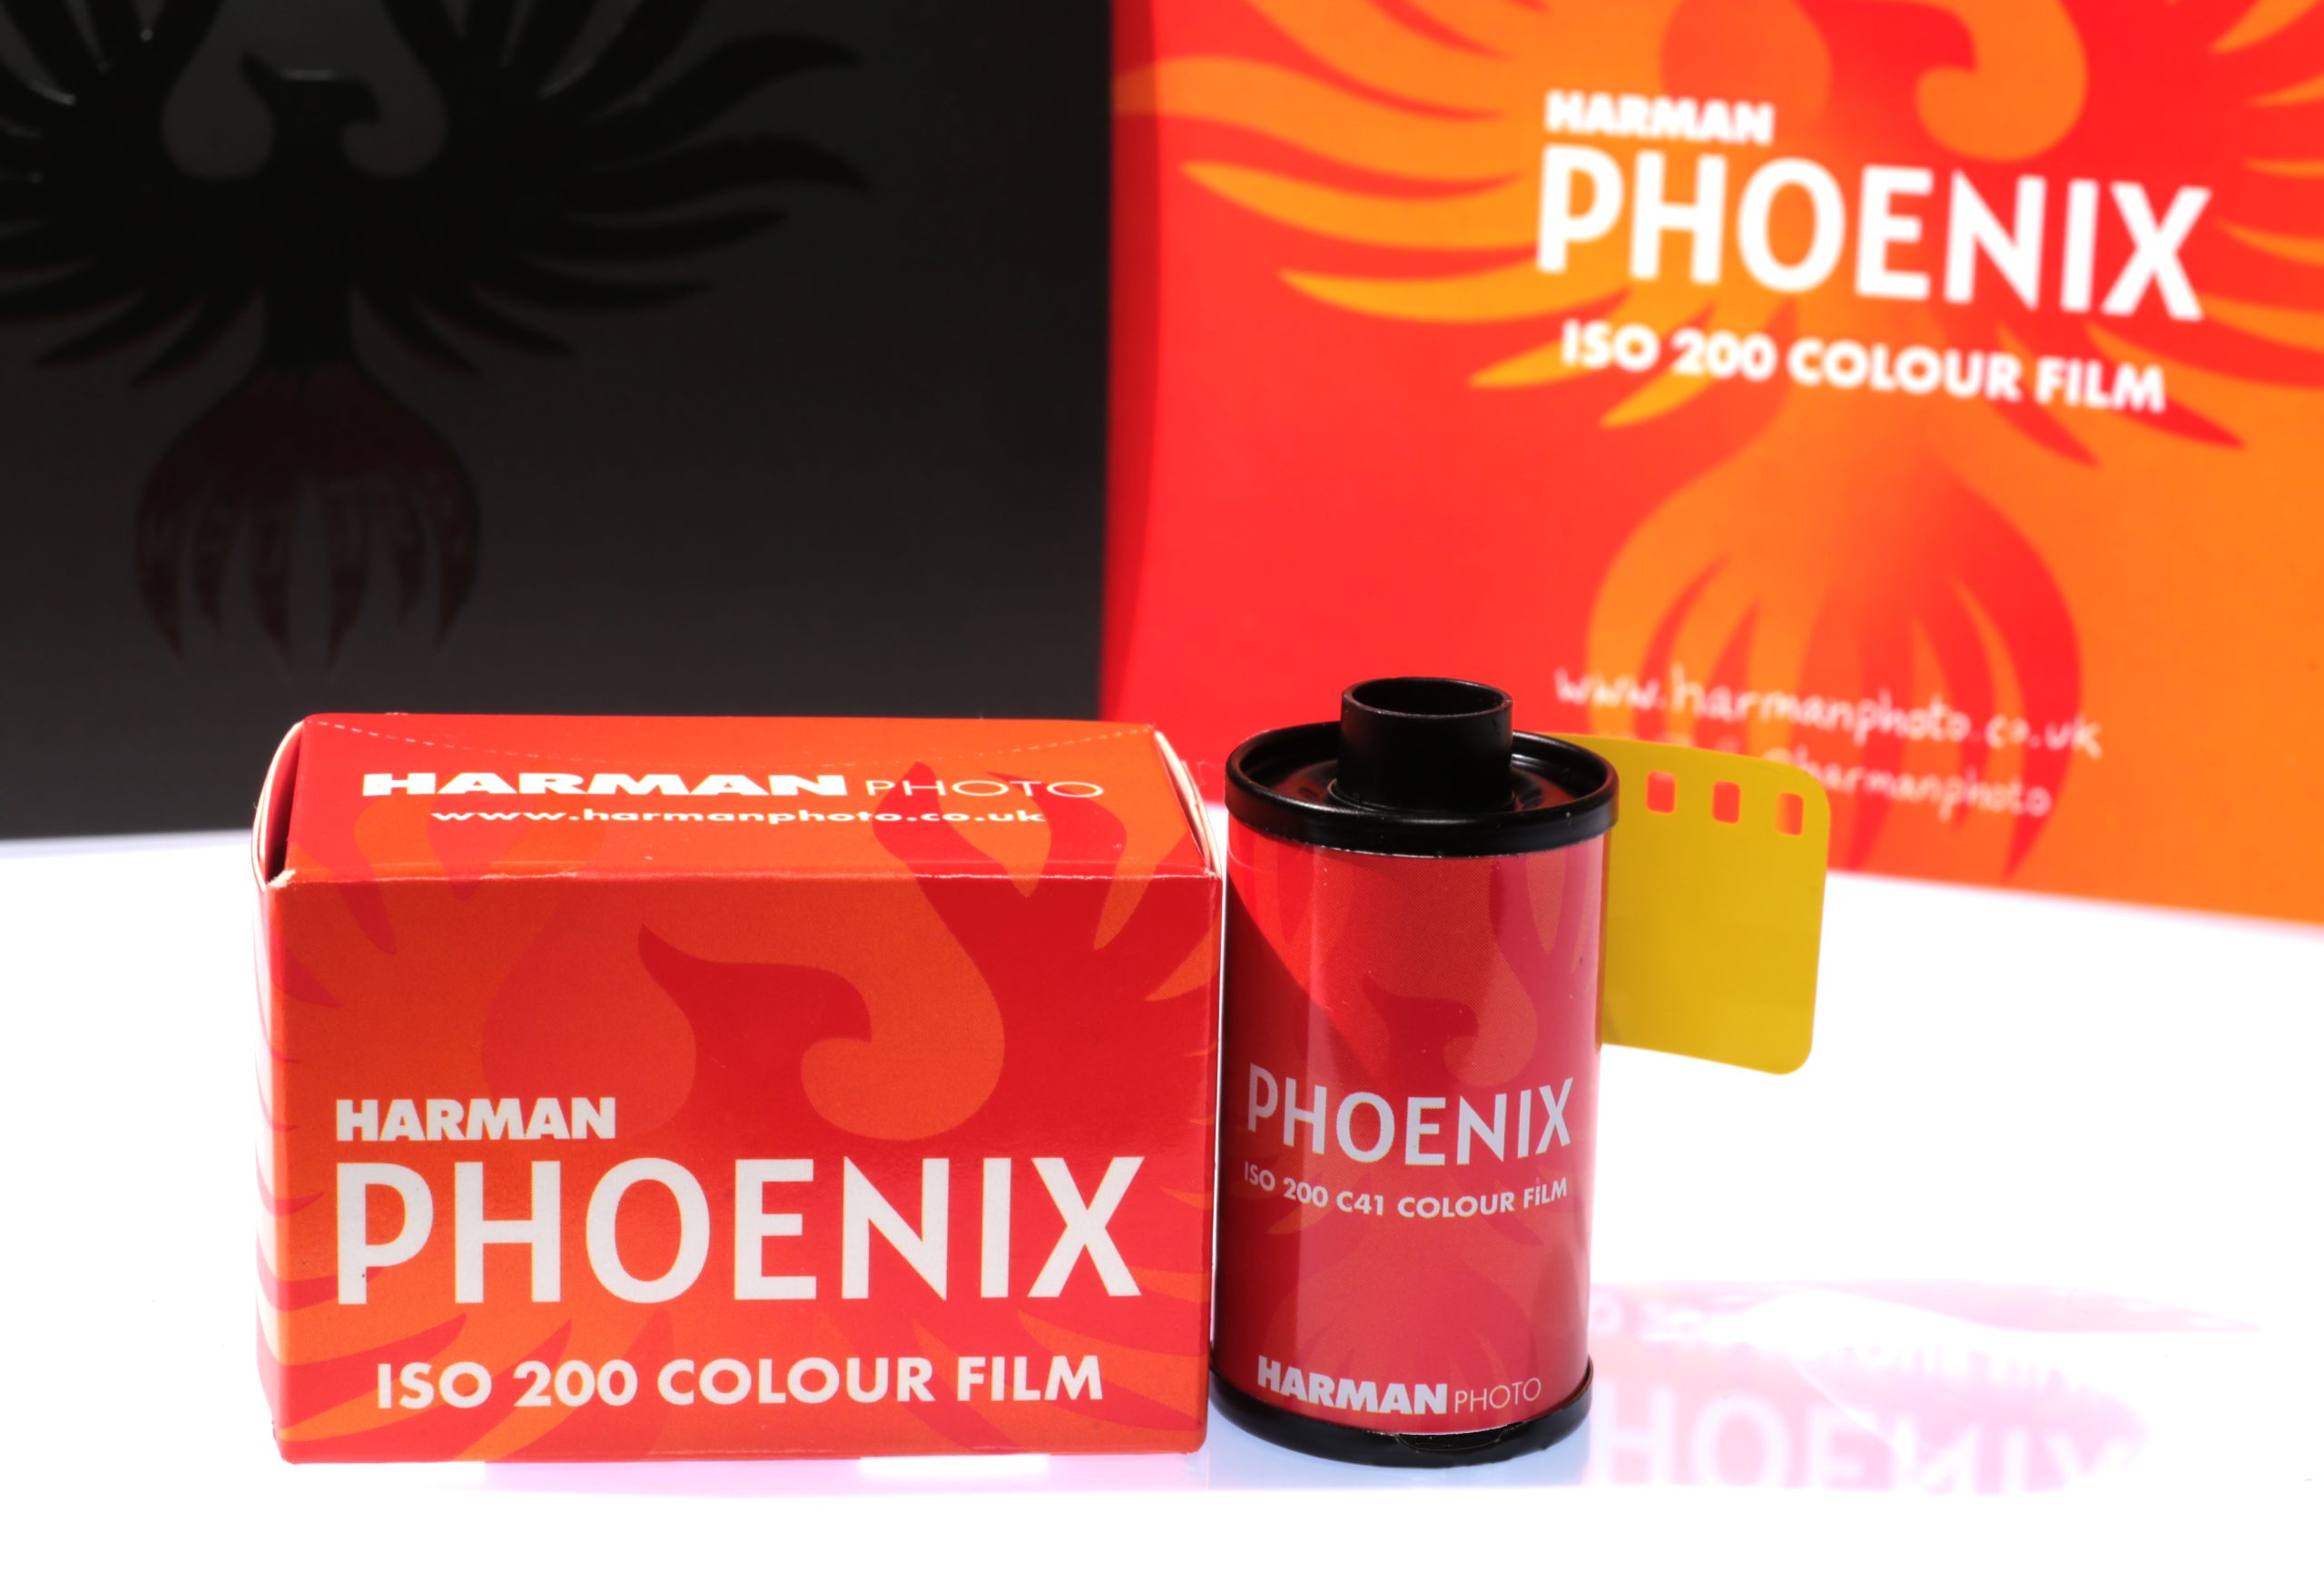
Harman Technologies have been busy since late 2022 making their own branded colour film and were very excited to, after a very good and teasing coming soon campaign, release the film to the public on the 1st of December 2023. And I was one of the lucky few to receive a few rolls of the film to try out!
You can see my Video Review here.

Me and Colour Film
Most of you know I am a Black and White Film shooter, that dabbles here and there with colour film. And when I do I just go off and shoot anything I see that I see would look nice in colour. Get back to my darkroom, develop the film myself and the buck stops there! I don’t have a colour head in my darkroom to make colour prints. Well, I do have the Intrepid Enlarger if I want to set it up but then I have to have the chemicals and paper also and for the amount of colour I shoot I am just happy to shoot and scan. But, I do enjoy seeing the results after shooting, developing and scanning, so I was excited to see what this new Harman Phoenix 200 can do. And I liked it!
My go to for anything colour is usually digital. I photographed a Ford dealership a while back for the company website and I shot Digital and Film. Kodak Portra 160. After pulling the film out of Photoshop I literally couldn’t tell the difference between the film and digital shots. Not much fun in that. But with Phoenix 200 I could not match with digital without the use of some funky Photoshop Filters.
Phoenix 200
Hold the negative thoughts for now. Harman say this is an “Experimental” Film, for us and for them. It is their first attempt at creating a brand new colour film at their plant in Mobberly, UK. I can’t imagine the amount of sleepless nights their tech boffins had making a colour film from scratch. Let alone all the testing, boardroom meetings, financing and everything else that goes on behind the scenes bringing a new product to the market. Especially the Film community. It is relentless! After all, if we are going to spend money we want quality, right?
My first attempt
I loaded the film into a Nikon F6 with a Zeiss Milvus 50mm f1.4 lens. My car was having a new windscreen fitted so I had time to walk around this industrial estate taking photos. The lighting conditions was Light overcast and looking for colour on a cold winters day was limiting.
I developed the film in Cinestills C41 Kit in a rotary processor keeping all the temperatures up to standard. I then scanned using my DSLR andput the imaged into a NEW software from Filmomat called “Smart Convert”. I just pressed the Auto Button and the software did it all for me. Lazy, I know! But I got good results.


Wow. I was amazed… I had pictures!
Were they the best colour pictures I’ve seen? No. But then to be honest, I’m not one for being a colour film connoisseur. I’m just looking to make sure my colours look right and I have sharpness and detail. And there is plenty of that.
Grain? It’s there. Surprisingly strong for a 200 film but it’s nice. It tells you are shooting film, enjoy it ad embrace the grain. Unless you don’t like grain. But that is part of its character.
Harman say the film is contrasty and quirky. And it is.
Next Roll
I wanted to see how this film performed at night. Something I rarely do is night photography so I went to places where there would be lots of light, and not living in a City I am left with petrol stations and fast food places.
I changed cameras to a Nikon FM3A with a 28mm Lens and a tripod and cable release.

Well that was interesting!
Harman do say this film gives halation in the highlights. Very bloomy!
These were around 2 second exposures at f11.
The next day my car was in for its annual MOT, where I had a couple of hours to walk around and shoot the rest of the roll. This should have been easy but I was overthinking for colour, and being winter, there was not a lot of colour about.

Above, 180mm Lens

I gave up outside and decided to shoot the rest of the roll indoors on various subjects which was interesting as I am now looking for colour as apposed to shades of grey.
Contrasty eh!

Portrait of my Daughter, Jess. Her face is pale but maybe that was due to the silver reflector I used for some bounce. The reds are so vibrant and her blue eyes.
Final thought
I liken film to food. Whats nice to some isn’t to others. These are the photos I took and developed at home. Do I like them? I don’t think I would risk shooting a wedding on this film, however, it is, as Harman say, quirky! Nice visible grain, vibrant, contrasty and appears sharp too!
If you put it against digital you will see the difference. And as I said about shooting Kodak Portra 160 at the Ford dealership, I can see its film! Big time! And I guess thats why we enjoy shooting film over digital. For the look. Some will like the look of Phoenix 200 and some will not. Thats choice.
As film photographers we all have a fantastic choice out there to choose from when deciding how we want our prints to look. Films, developers, toners, papers. It’s all there to show a different look and feel to our photographs without looking for a quirky filter to make our digital photos stand out.
Take a project for example. Whatever it may be. Shooting an entire project on this film wouldn’t be a bad idea at all. A gallery displaying your selected prints of fruit, portraits, boot laces or whatever. They would all have that similar unique look. Spectators would admire the collection if the subject, lighting and photography was good and maybe some would get curious as to what film was used. Some would know nothing of film and enjoy the art of your work.
I would love to shoot this film in the summer possibly at a car show and as an added bonus would love to make prints from it.
Above all I think this film is exciting news for the film community that manufacturers such as Harman have that confidence in the community to invest in making a brand new colour film when they are already ticking along nicely with their black and white products. And let’s face it, we thought film was on its way out a decade ago.
So well done to Harman for bringing this film onto the shelves. No doubt they will receive much feedback and listen to the community and make tweaks if necessary. And if all goes well look to manufacturing other colour films for the future in 35mm and 120 formats.
Street Candy ATM 400
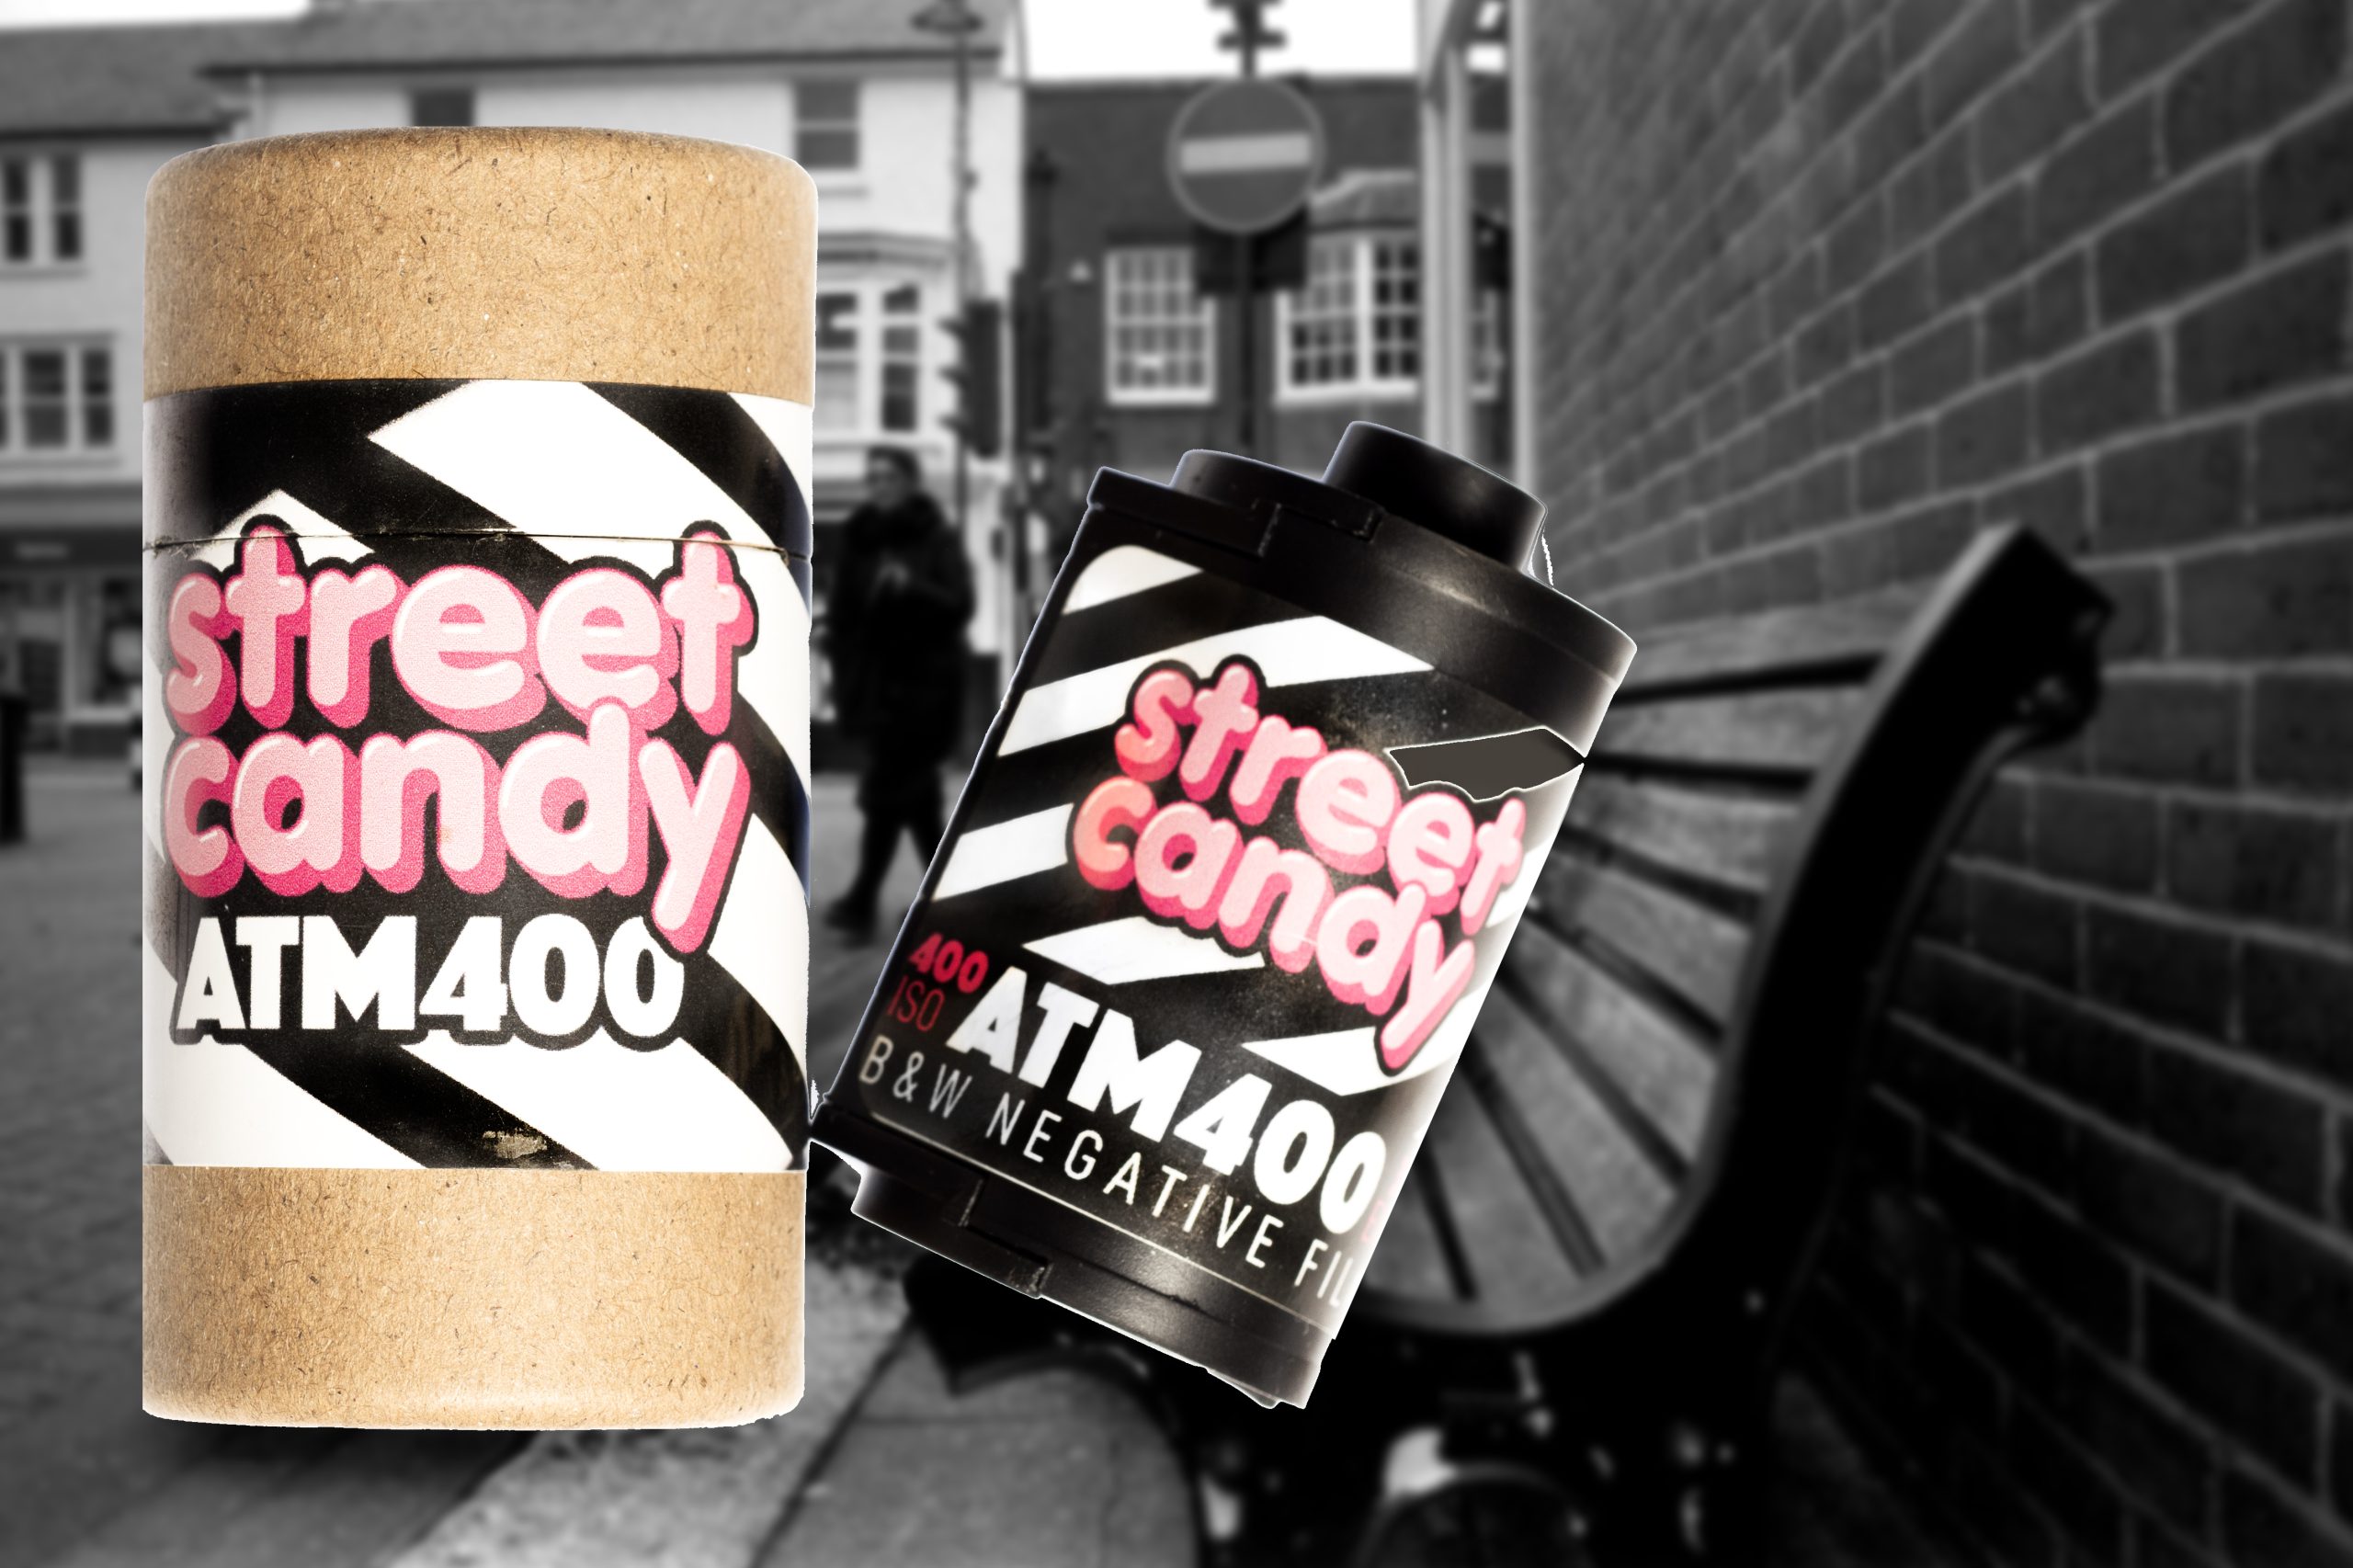
With so many funky Black & White films on the market today it’s almost too tempting to grab a roll and see what the fuss is all about.
With only a few factories actually making film today you sometimes wonder if the films you are buying are a repackaged film that already exits in an otherwise boring jacket or one of the funky surveillance films, X-Ray films or CCTV films that were used before everything went digital that are being snapped up by the 1000ft roll and spooled into 35mm cassettes for us to play with.
Street Candy ATM 400 is exactly that. And Street Candy make no hype about it not being so. They state on their website that their ATM 400 Film IS a film that was used back in the day at ATM Cash Machines.
And they sent me a couple of rolls to play with! As well as some of their cool branded stickers and badges. And also a couple of rolls of their MTN 100 Film.

I must admit I don’t shoot these kind of films often and usually stick to the usual suspects Ilford, Kodak etc. But when they do land on my lap I am always eager to try them out.
So, I had two rolls. And the first roll I went out with a Leica MP and a 50mm Lens on a bright (intermittently) sunny day.
Here are some of the photographs I took which I developed in 510 PYRO for 8 minutes with regular inversions. I shot the film with metering at 400.
Roll One
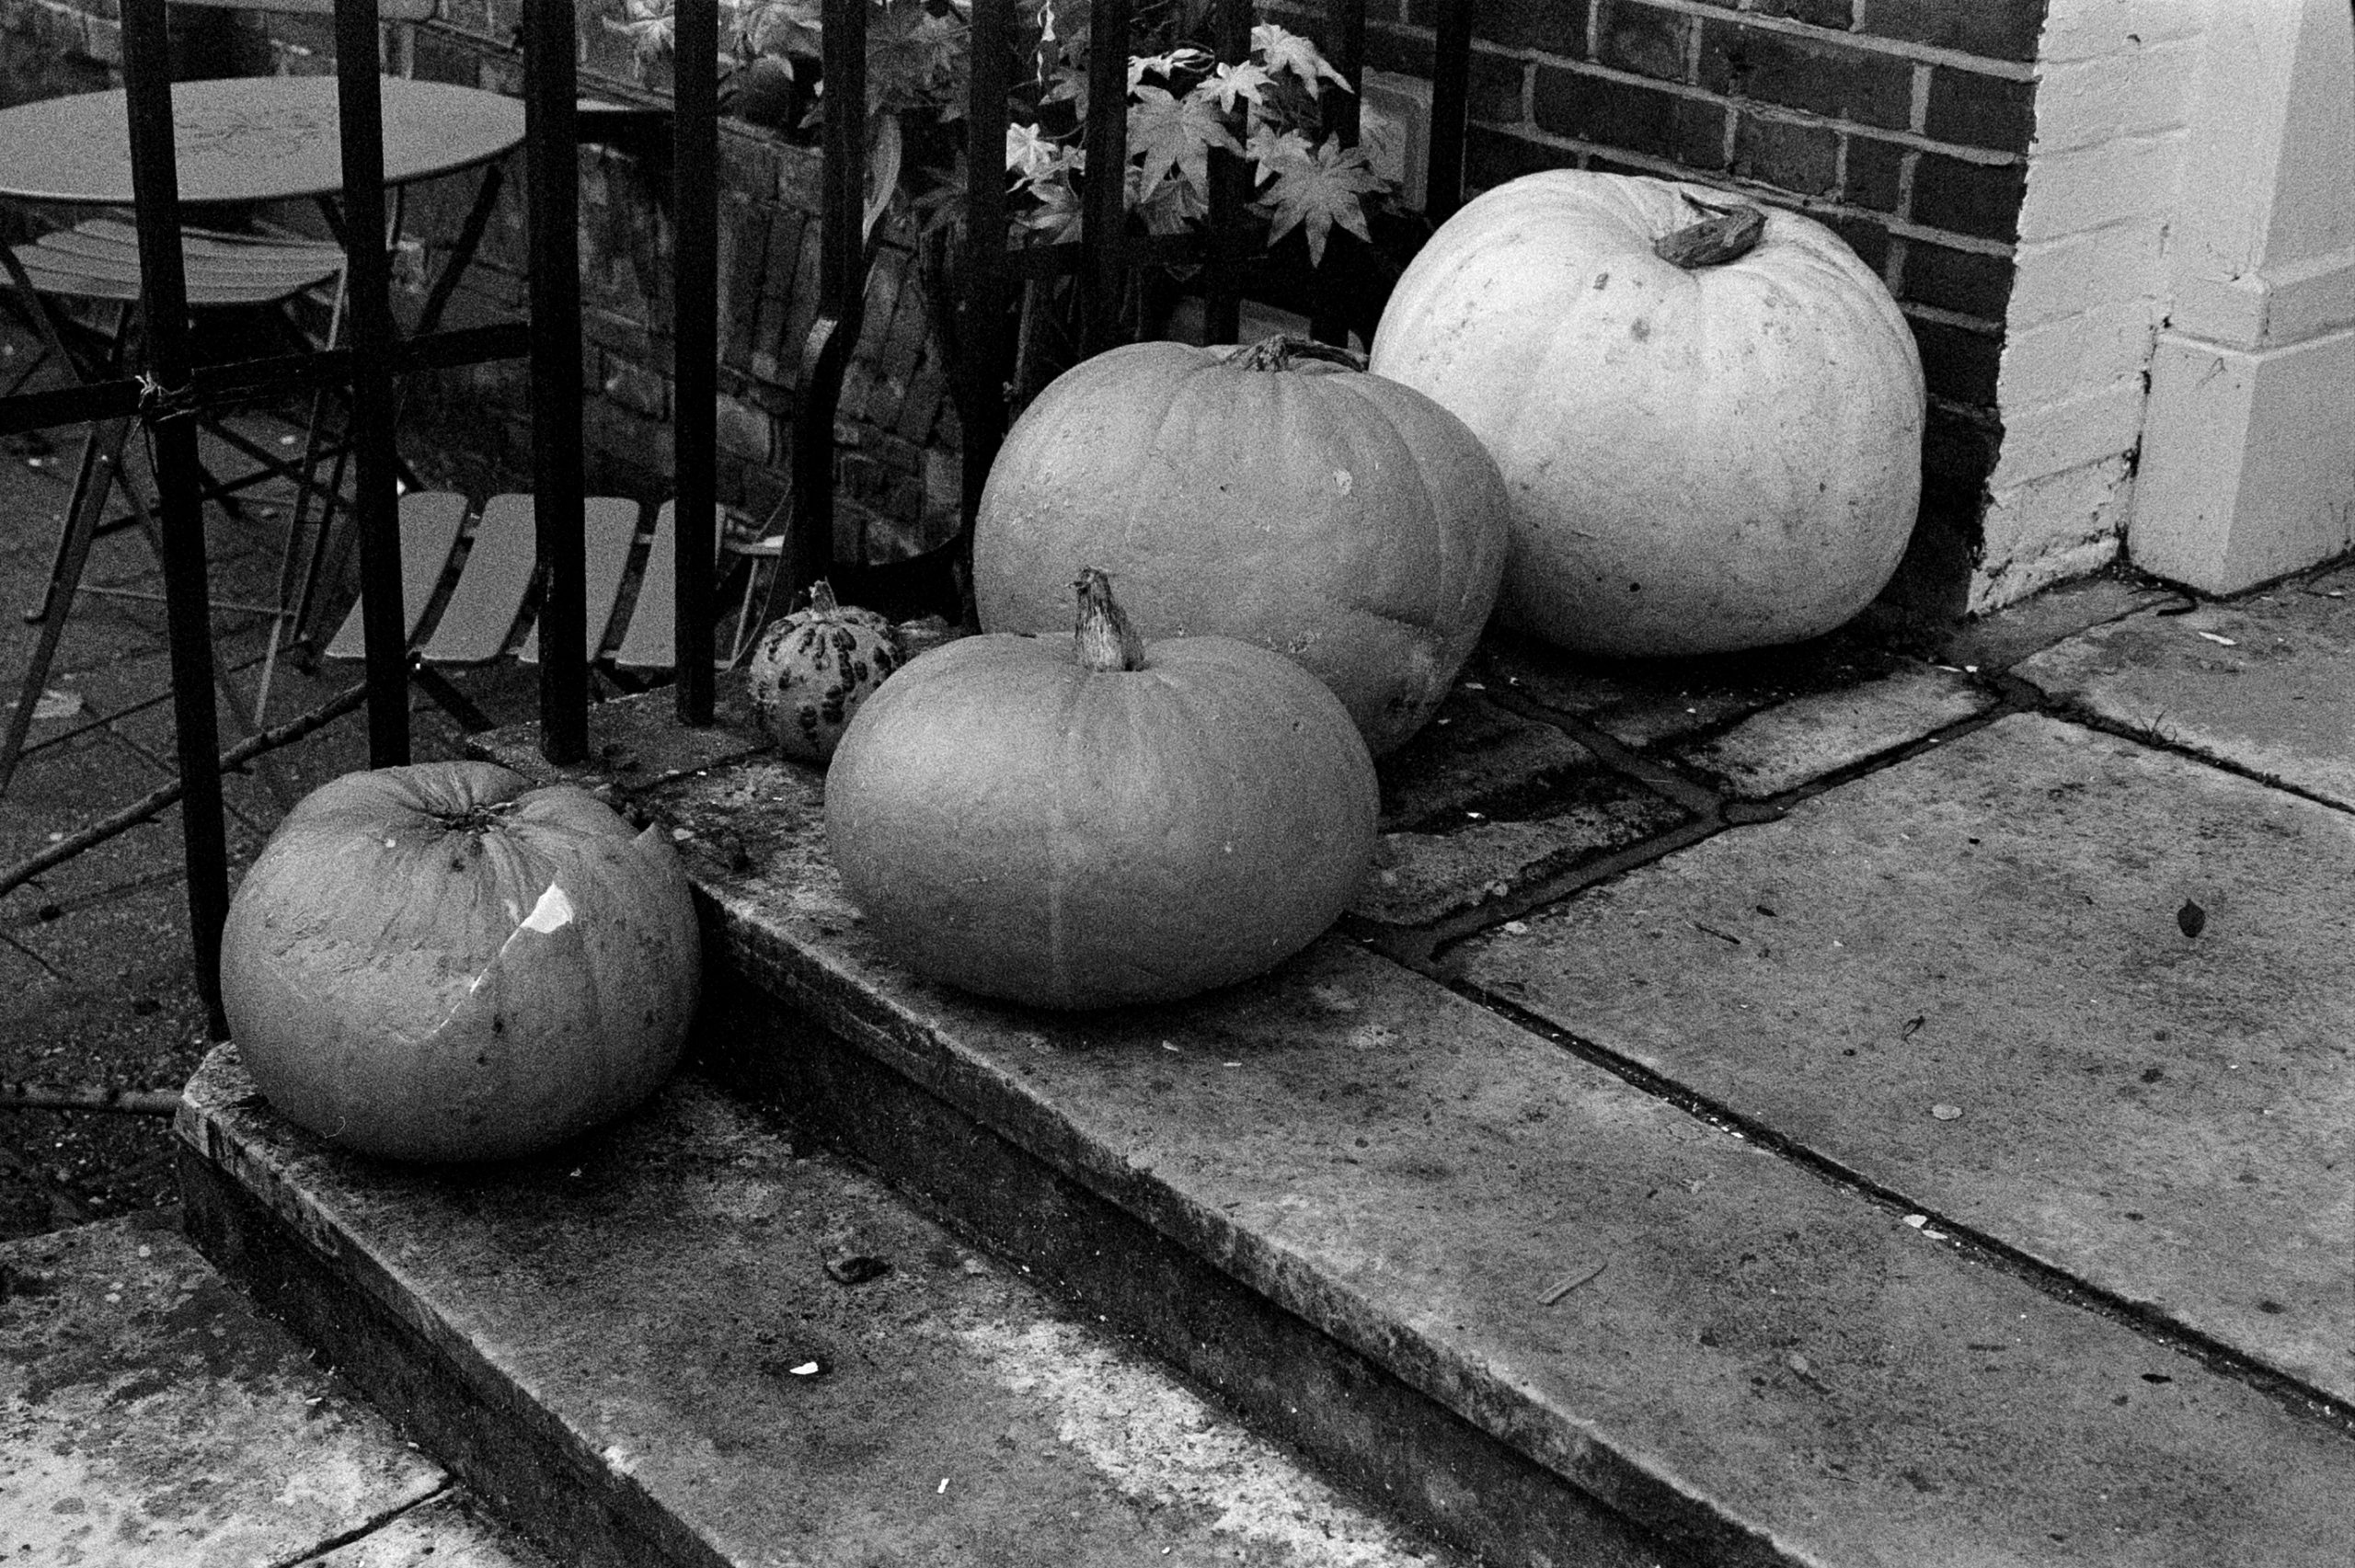
Pumpkins. This was taken when the light was low and overcast. As you can see the film has nice contrast in this type of lighting.
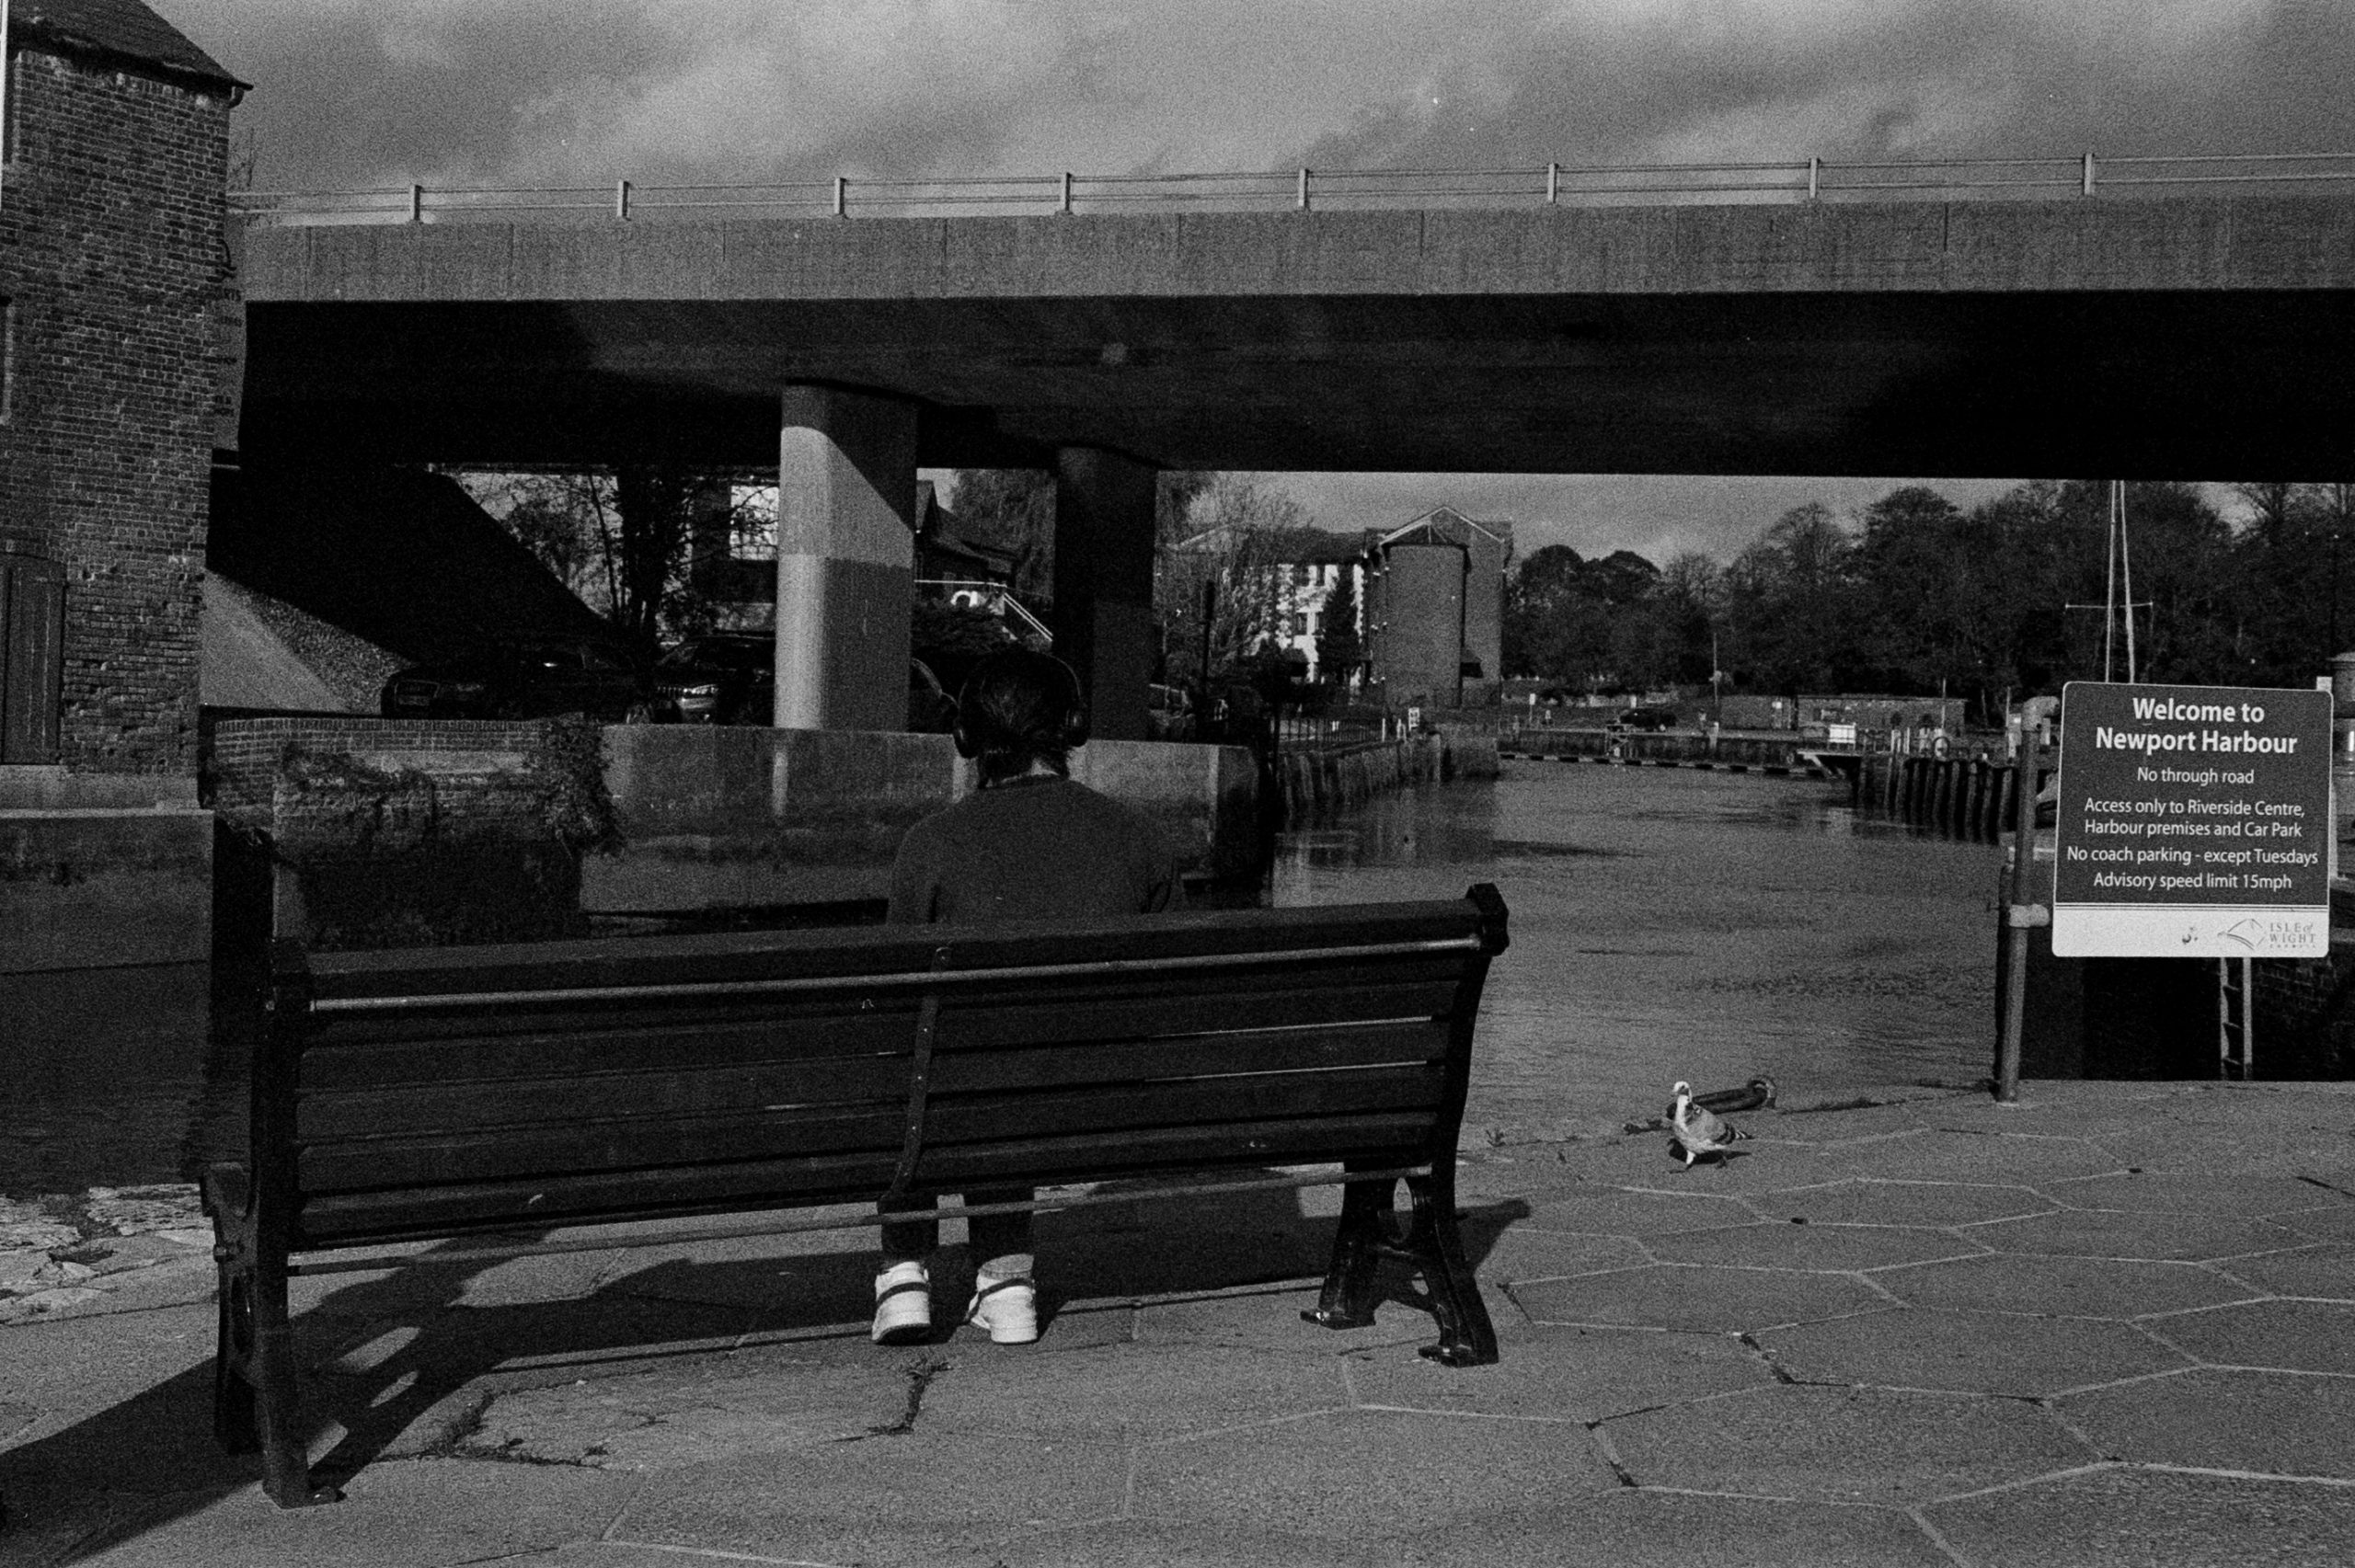
Lady on Bench. This was taken when the sun was out and bright. It appears the film needed more exposure.
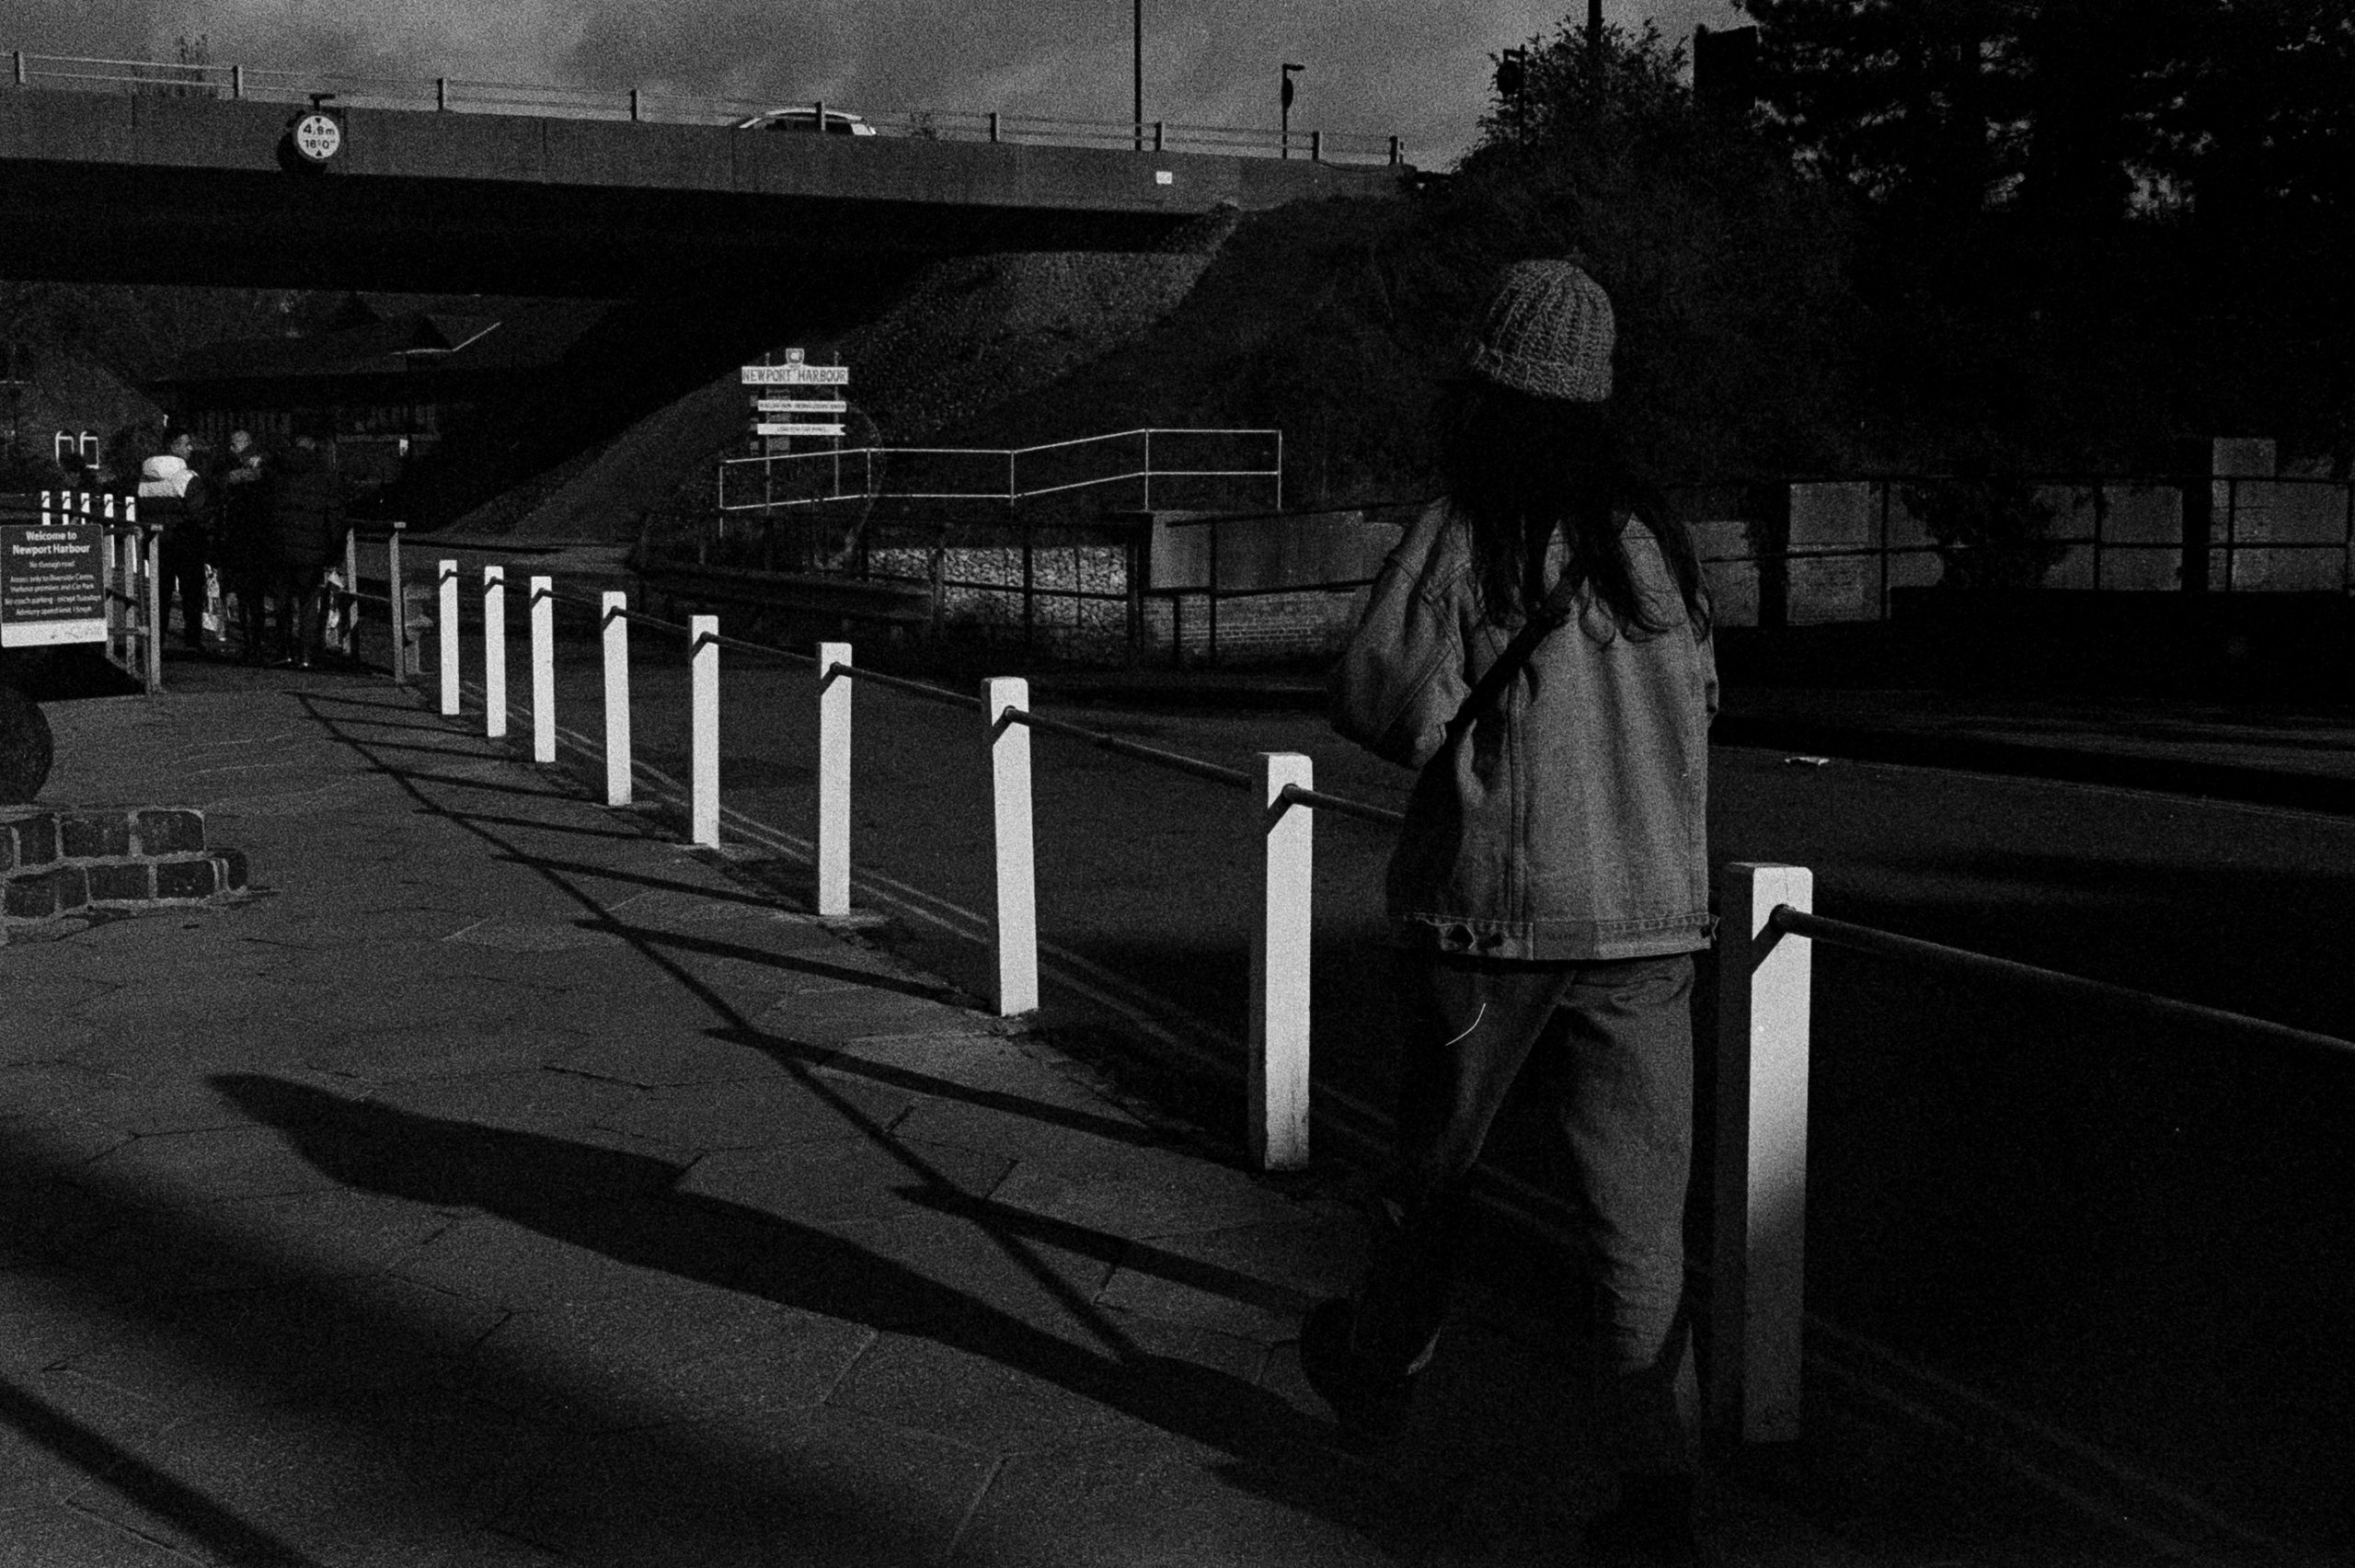
Lady Walking. Again, bright sunlight and the cameras meter has taken into account the white posts and knocked the exposure down resulting in a high contrast looking photo.
Scooter. This photo was taken later in the day when it cast over. Much more detail in the photograph similar to the pumpkins. I actually printed this photograph and it printed well with a grade 5 filter.
And another when it was light overcast.

And another in bright sunlight looking at this old building.
The Negatives
And after developing the film in 510 PYRO they appeared to be thin! Maybe a bit longer than the 8 minutes I developed for would have helped but in saying that, my bright highlights would have been super bright with longer development.
Grain & Contrast
If you like contrast and grain this film will certainly guarantee that on a bright day. It reminds me of JCH Street Pan 400 Film which is also a surveillance film.
So with these photographs looking very punchy I decided to shoot the next roll of ATM 400. This time I metered for 200 and developed in Kodak D23 developer. And I used a different camera, A Chinon CE-5 with a 28mm lens.
I was much more pleased with the results from this combo.
Roll 2
This day was a light overcast day, which I feel suits this film for better tonality and still leaving a rich contrast.


My Thoughts
So did I like this film?…
Yes I did, but I would need to shoot many rolls to settle down with a developer and situation (project) combo. I liked the Kodak D23 results metered at 200 far more than the 510 PYRO and 400 metering.
And the film certainly does have a unique look with its harsh but not ugly grain and its undeniable contrast and bright highlights (in bright sunlight). But it is a CCTV film and I would imagine they didn’t make these films as high quality as general photographic films. They probably contain less silver on the emulsion than conventional films but as long as it could show a face at an ATM machine or a number plate on a speed camera then that was its job done.
Would I buy and shoot this film?...
I have to say I would, however, not for my every day photography. It would have to be on a project where I wanted this type of look for my prints with contrast and grain expectations. I can definitely see it belongs on the street, or even for certain strong portraiture work.
Above all Street Candy is a family run business in France. And I have always said that these fun and funky films make the film community a bit more exciting for newcomers. As long as the price isn’t off the scale, especially the rebrands. And ATM at £10 a roll at the time of writing this post isn’t bad at all!
So well done to Street Candy for continuing to find these emulsions and putting them into film cassettes for us to enjoy.